
Online Reputation Dashboards
What's on this page
Qtip: If you are a customer interested in Online Reputation Management, reach out to your Account Executive.
About Dashboards for Reputation Management Projects
You can bring the social data from your Online Reputation Management project into a CX dashboard project to create a report of your customers’ reviews.
Qtip: If Reputation Management data is included on the dashboard but the project hasn’t been shared with a user, they will only see the reviews, and won’t be able to reply on online reviews widgets.
Qtip: If there are changes you’d like to make to your dashboard that aren’t covered here, check out our introduction to CX Dashboards. We’ll take you through the basics of project creation, dashboard design, and user administration.
Using Reputation Data in a New CX Dashboard
If you have access to CX Dashboards, you can load your Reputation Management data into an existing dashboard project, or into an all new dashboard project.
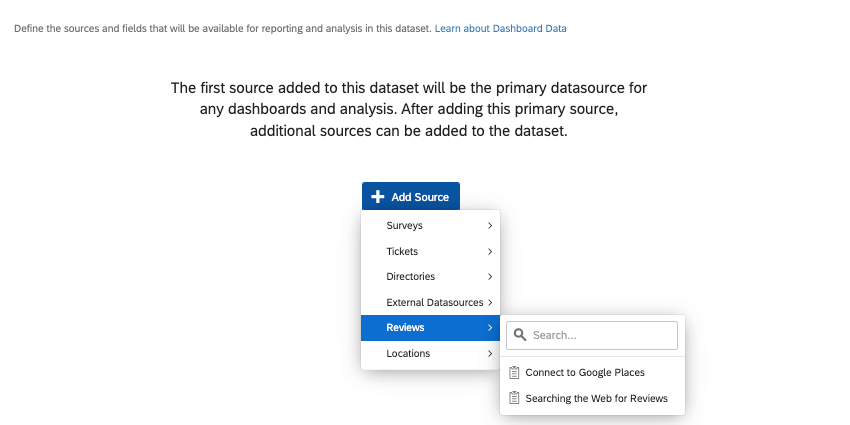

You can now edit your dashboard as needed.
Using Reputation Management Data in an Existing CX Dashboard
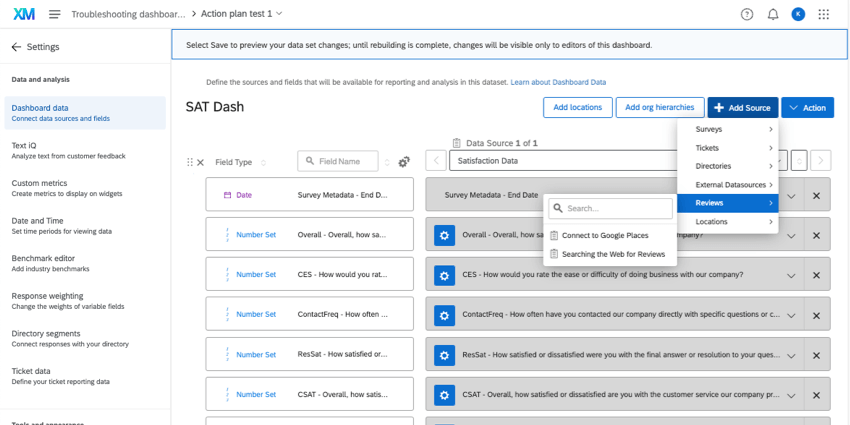
Attention: See a list of reputation management fields in the next section.
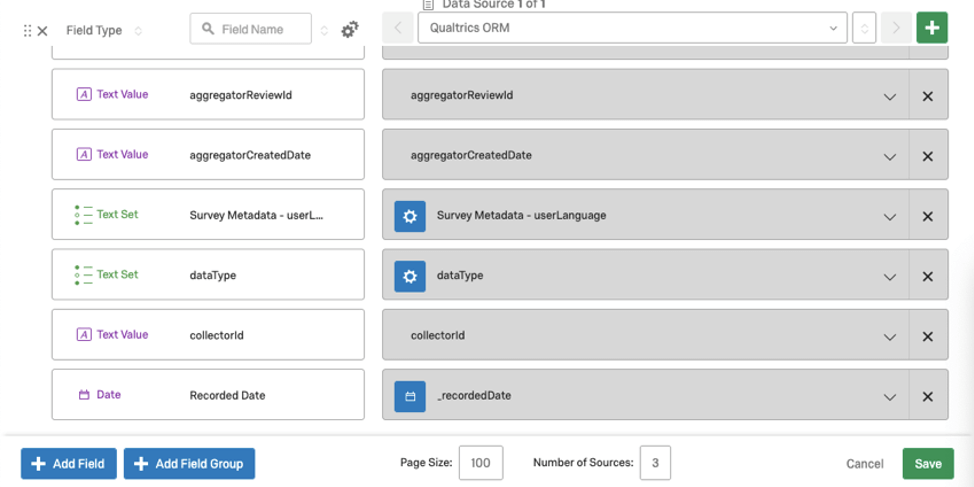
Dashboard Fields for Reputation Management
This is a list of fields available in reputation management projects. To add them to your dashboard, see our guide to adding new fields and setting field types.
Fields Required for Online Reviews
Qtip: The Online Reviews widget does not support grouped fields from the data mapper.
If you’re using an Online Reviews widget in your dashboard, then these fields are required.
| Field Name | Field Type | Definition |
|---|---|---|
| id | Text value | A unique identifier assigned to each individual review. |
| content | Open text | The actual text or body of the review. |
| rating | Number set | The numerical score given by the reviewer (e.g., 1-5 stars). |
| reviewProfileSource | Text set | The name of the platform where the review originated (e.g., Google, Yelp). |
| authorName | Text value | The name or username of the person who write the review. |
| url | Text value | The URL of the page where the review was posted. |
| replyState | Text set | Indicates whether the review has been responded to (e.g., Replied, Unreplied). |
| subjectId | Text set | A unique ID for the entity being reviewed (e.g., a specific store or hotel). |
| subjectName | Text set | The display name of the entity being reviewed. |
| createdDate | Date | Date the review was posted on the source website. |
| updatedDate | Date | Date the review was last updated on the source website. If never updated, this matches createdDate. |
| _creationDate | Date | Date the review was ingested into Qualtrics. Retains the original timestamp if re-ingested within 30 days of unarchiving. |
| _updatedDate | Date | Date the review was re-ingested into the Qualtrics platform, indicating a deduplicated existing review. |
| _recordedDate | Date | A consolidated field reflecting either creationDate or updatedDate. Always updates upon ingestion or re-ingestion of the review. |
Fields Required for Direct Replies
The following fields need to be mapped if you want to be able to reply to reviews directly on the widget.
| Field Name | Field Type |
|---|---|
| projectId | Text value |
| collectorId | Text value |
Online Reputation Management Template
Qtip: This is only available if your social data collector is set to Facebook or Google.
After you have the data source loaded into a new or existing dashboard, you can use this data in your dashboard to build customized reports and widgets. However, we also have a premade template you can use, to make it easier to report on these fields.
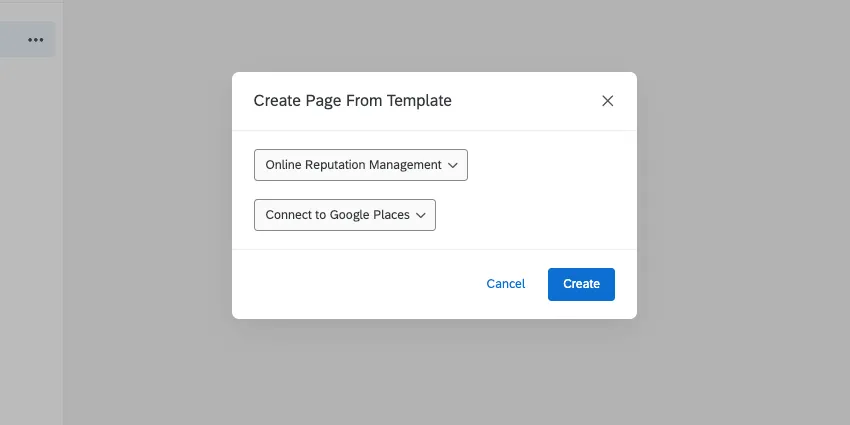
Create a page from a template, then select the Online Reputation Management option. Make sure you select your reputation management data as the data source.
Qtip: Page templates cannot be added to the dashboard included by default in the reputation management project. This template is meant to mimic the widgets, filters, and formatting of the default dashboard included in the reputation management project.
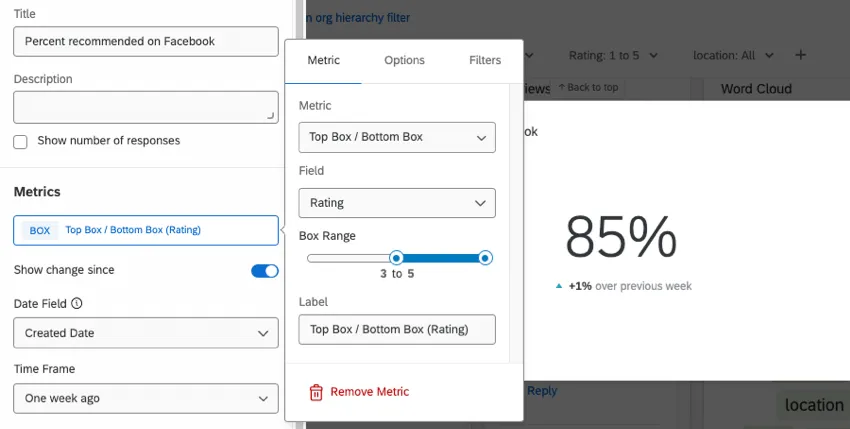
Qtip: Facebook is on a Recommend / Not Recommend scale rather than a five star scale. We recommend using the top two box metric (setting the top values as four and five) to calculate the number or percentage of recommendations. See an image of a number chart with this configuration below.
Qtip: Google has a five star scale. The star rating widget is a great option for reporting on Google data.
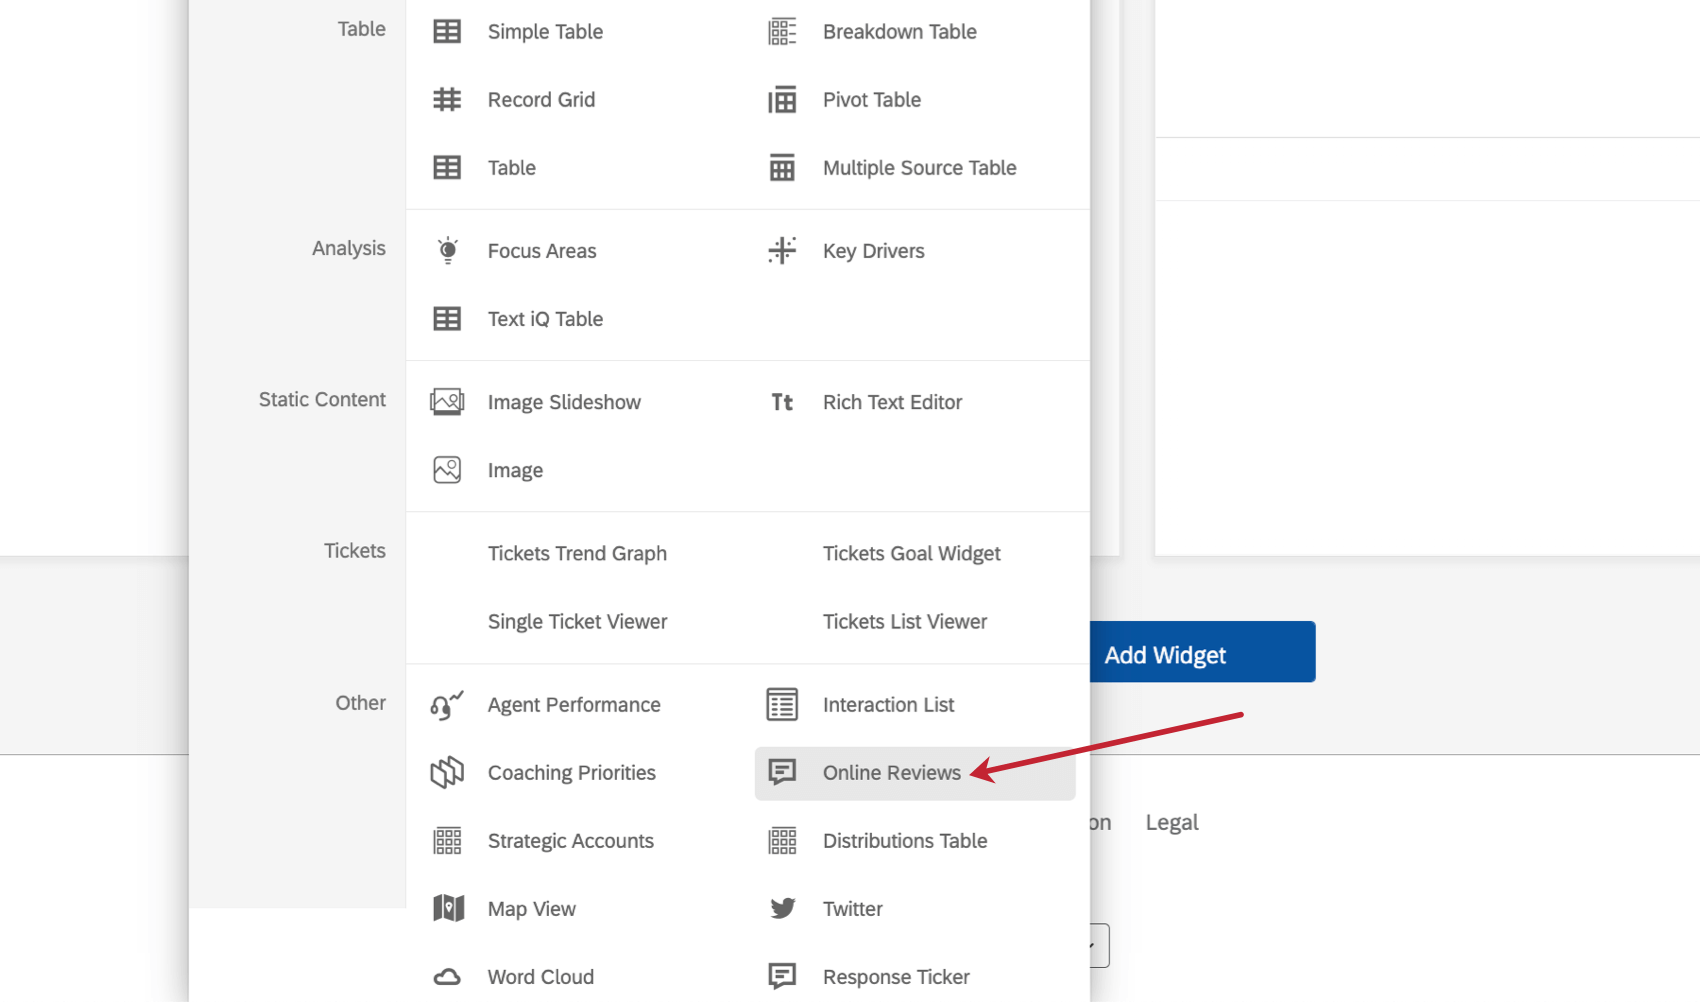
Online Reviews Widget for Facebook and Google Dashboards
You can give your dashboard users the ability to respond directly to Facebook or Google reviews from right inside the dashboard. This allows your teammates to manage responses to reviews without you having to give them access to the Facebook or Google account where your business pages live.
Qtip: This option is only available If the app connected to your online reputation management project is Facebook or Google.
Since both Facebook and Google can be added as an app to the same ORM project, they can both appear in the same social reply widget.
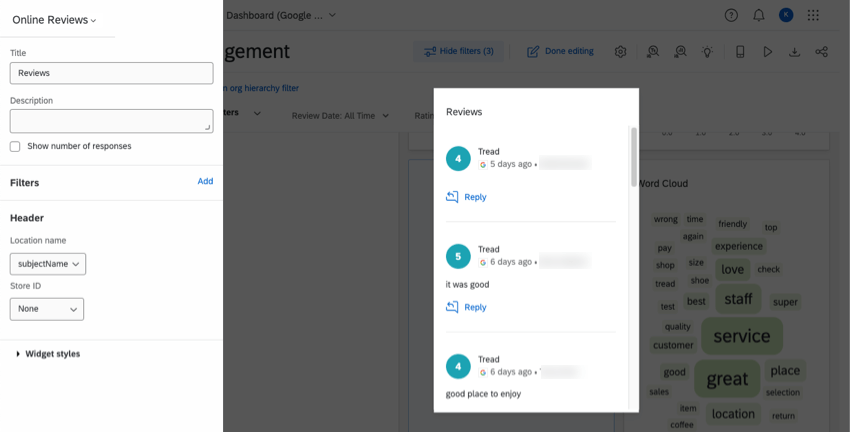
Setting Up the Widget
Qtip: Depending on where you’re adding the data, see the steps for setting up data in new dashboards and in existing dashboards.
Qtip: The Facebook / Google app must remain connected to the online reputation management project for this functionality to work. If you disconnect the Facebook / Google account from the project, this widget will no longer work.
Filtering the Widget
As with many other widgets, you can add a filter to the online reviews widget. The online reputation management data includes some fields that we highly recommend you trying using to filter the widget.
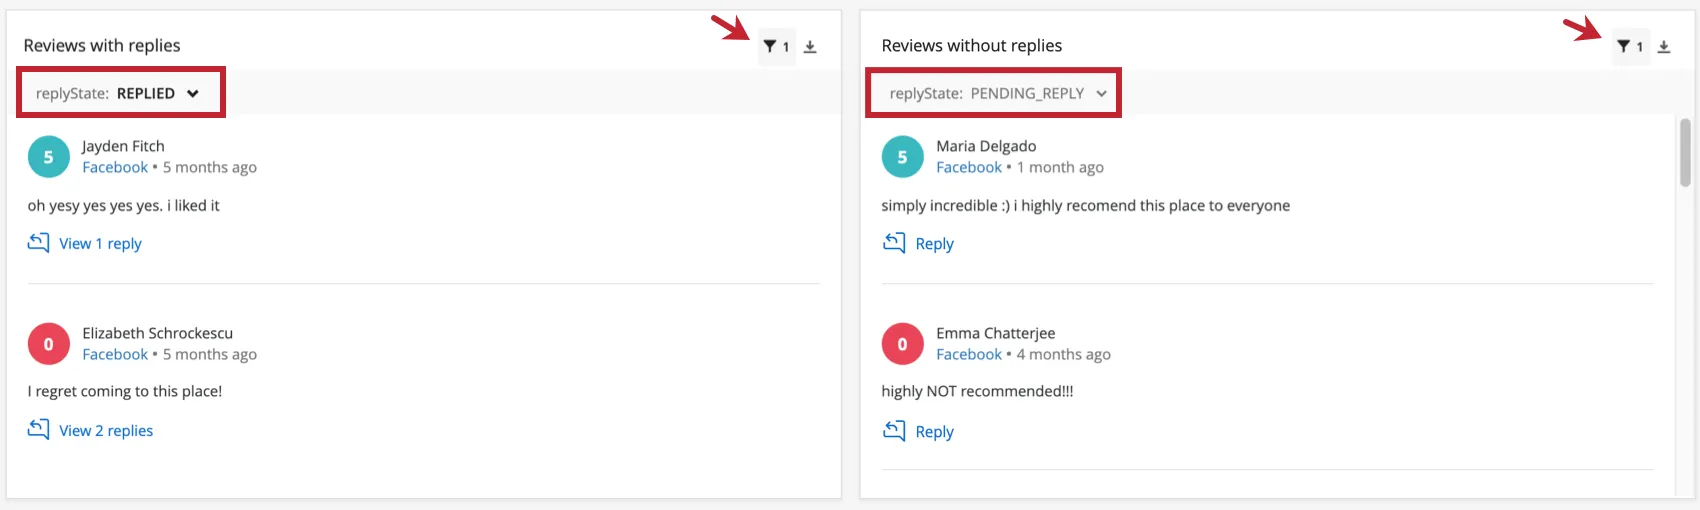
For example, you could add a “replyState” filter to your widget. This way you can filter by whether the reviews already have replies or not. The values for this field are as follows:
- PENDING_REPLY: The reviews that’ll be included in the widget have no replies, or only have replies from outside your org (for example, the original poster replied to their own comment).
- REPLIED: The comment already received a reply from your page.
Giving Users the Ability to Reply to Social Reviews
Only users with the right permissions will be able to use the online reviews widget to reply to Facebook reviews. To grant a user this permission, make sure to do the following:
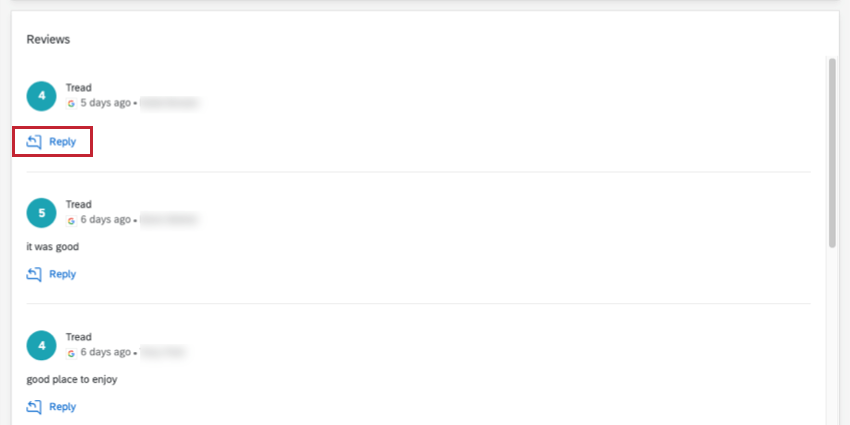
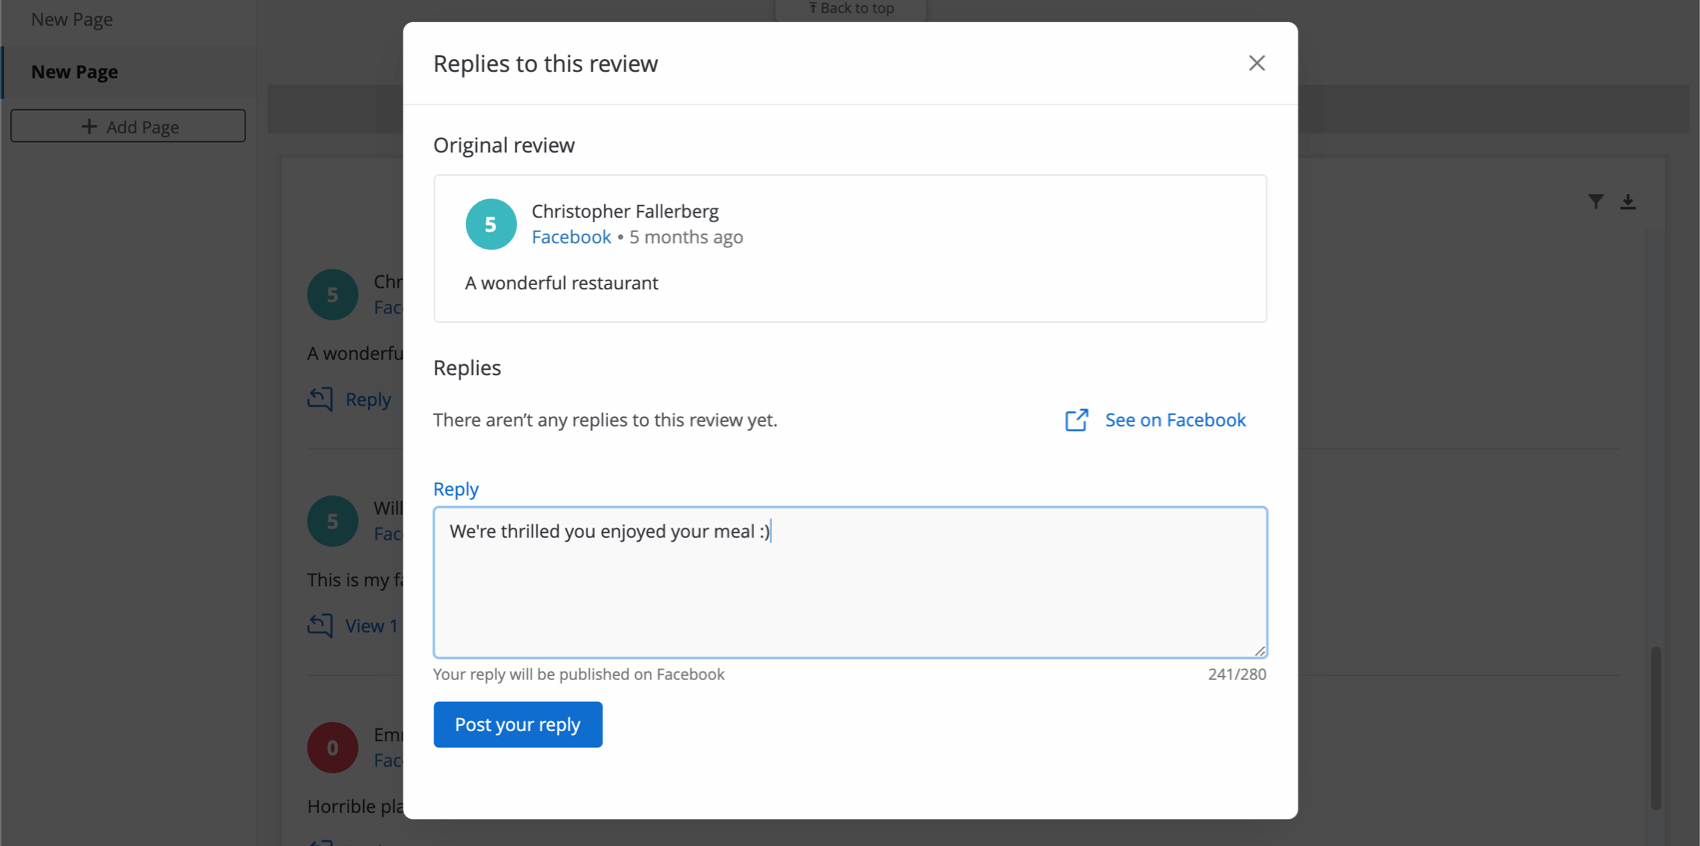
Using the Widget to Reply to Reviews
Qtip: Once a review has at least one reply, you can’t add any more from the widget. Use the See on Facebook / See on Google link to easily reply from the website itself.
Qtip: Clicking See on [Site name] will take you to the reply on Facebook or Google, depending on where it’s from. If the user wasn’t already logged into the site, they will have to login to an account after clicking this button. If the business’s page is private or locked, users won’t be able to see the page unless they log into an account that has access to it.
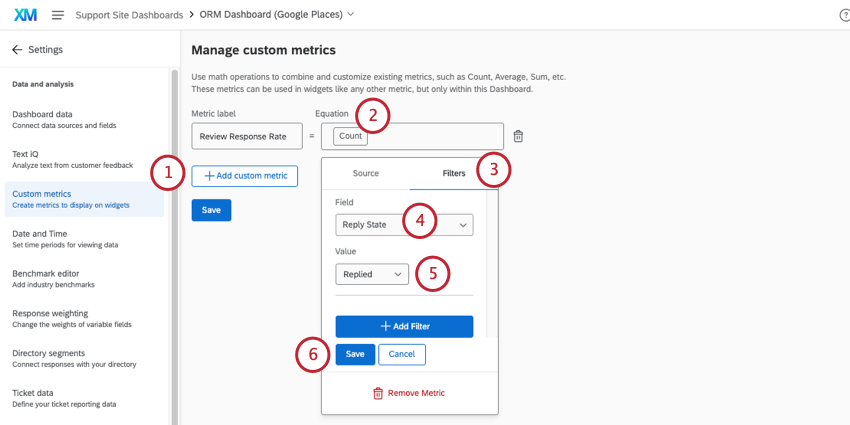
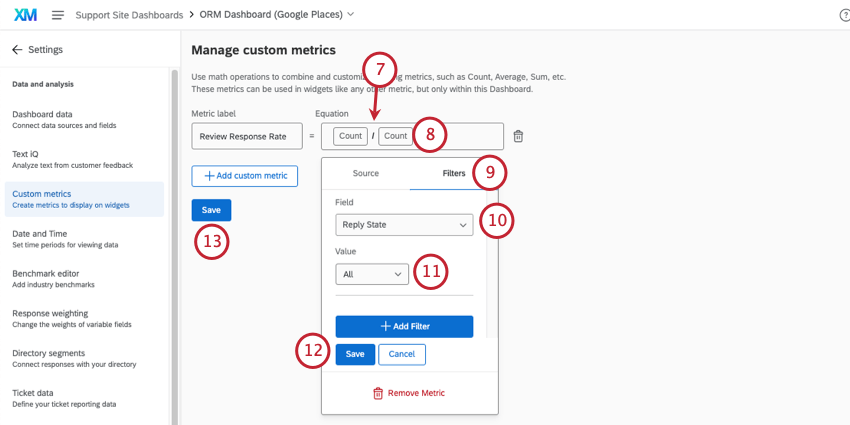
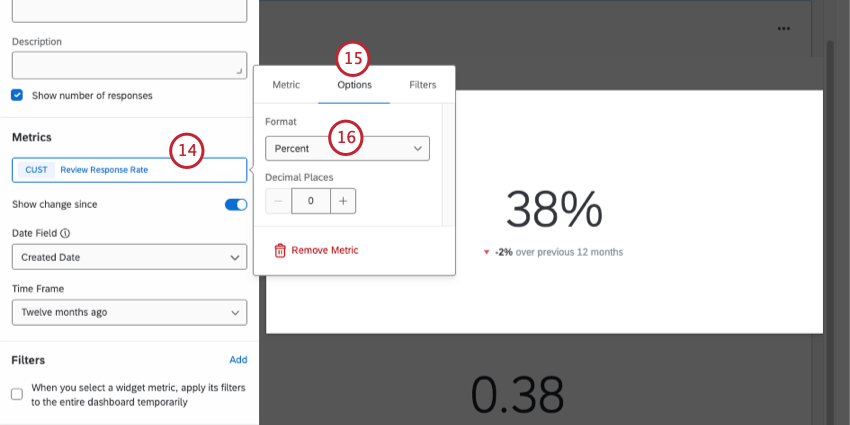
Calculating the Review Response Rate
You may want to track your team’s rate of response to online reviews. In this section, we’ll tell you how to calculate the percent of reviews with responses so you can report on this in your dashboard.
Qtip: For give direct replies from the online reviews widget, you need to have all of these fields mapped.
Reporting on Location Data
Qualtrics gives you a lot of different ways to compile location-based feedback. As you use your reputation management projects, you may want to combine their data, or pull in surveys with other helpful information so you can build a fuller and more comprehensive dashboard view of your data.
To learn more about how to get location data in your dashboard with your online reviews, see Using Location Data in Dashboards.
That's great! Thank you for your feedback!
Thank you for your feedback!