
Exporting Data (Designer)
What's on this page
About Exporting Data from Designer
You can export your data to CSV format from Designer to use in your own reporting or in third-party applications.
Attention: XM Discover does not export Twitter records in order to comply with Twitter’s content redistribution policy.
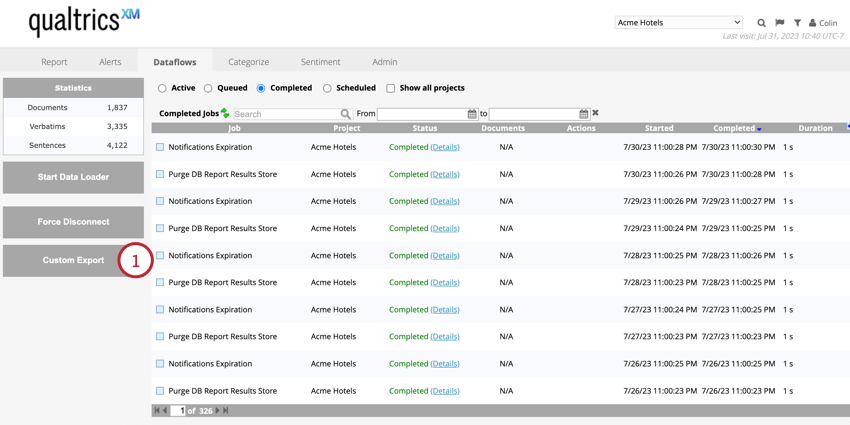
Setting up a Data Export
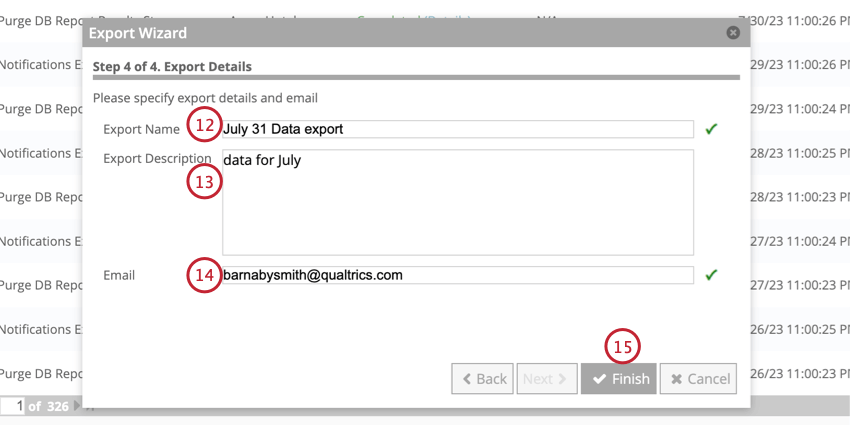
Follow the instructions in this section to set up a data export in Discover. After your export is set up, you can manually download your data or set up a recurring export schedule.
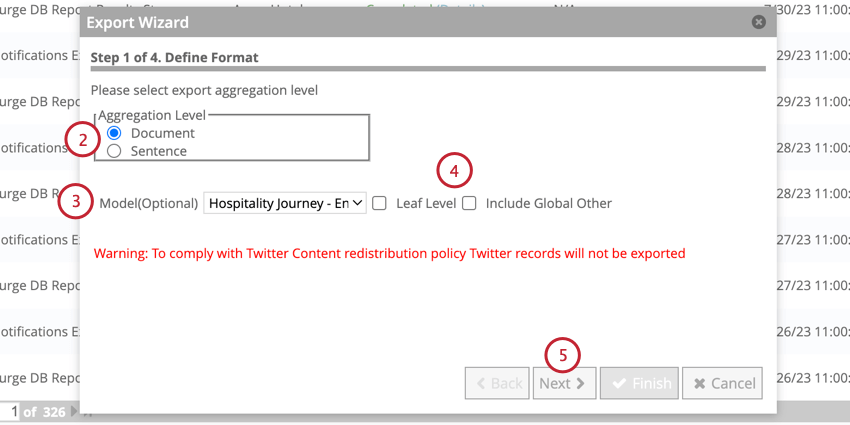
- Leaf Level: Aggregate data by leaf categories only. Category groups will be excluded.
- Include Global Other: Aggregate uncategorized data provided it meets the root-level node criteria. Qtip: Classification data is not available for document-level aggregation. However, choosing a category model affects what documents are included in the export. See Data Export Aggregation Levels for more information.

Data Export Aggregation Levels
When you export data, you can aggregate data on different levels, either at the document level or the sentence level. Keep reading for more information included in each aggregation level and how the different export options affect the data included in the exports.
Document Level Aggregation
When data is aggregated at the document level, the following columns are included in your data export:
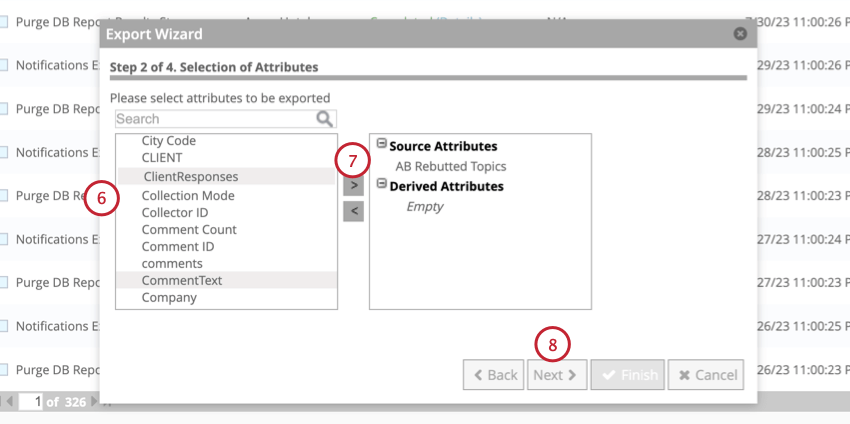
- Document_ID: The ID of the document
- Attributes: Any attributes selected for export Qtip: If you select a category model for export, empty columns for Category_Name and Category_Path will be included in your export file.
Sentiment and classification data is not available for document level aggregation. However, choosing a category model in your export affects what documents are included in the export:
- If a category model is selected and Include Global Other is disabled, the export is limited to documents that contain at least one sentence categorized into the model.
- If a category model is selected and Include Global Other is enabled, then the export also includes documents that do not contain any categorized sentences provided they meet the criteria specified in the model’s root level node.
Sentence Level Aggregation
When data is aggregated at the sentence level, the following columns are included in your data export:
- Document_ID: The ID of the document that contains the sentence.
- Verbatim_ID: The ID of the verbatim that contains the sentence.
- Sentence_ID: The ID of the sentence.
- Verbatim_Type: The sentence’s verbatim type.
- Sentiment_Score: The sentence’s sentiment score.
- Category_Name: The topic the sentence is classified into.
- Category_Path: The full path to the sentence’s tagged topic in the category model. Qtip: Category_Name and Category_Path columns for entries exported due to “Include Global Other” will be empty.
- Attributes: Any attributes selected for aggregation.
Manually Downloading Data Exports
After you’ve created your data export, you can download the data included in the export.
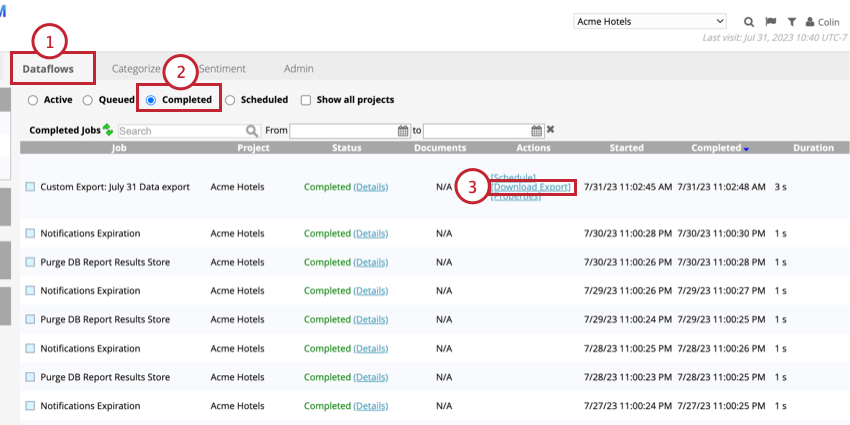
The file will download to your computer for you to open in a spreadsheet editor.
Recurring Data Exports
You can set up recurring data exports that run on a daily, weekly, or periodic basis.
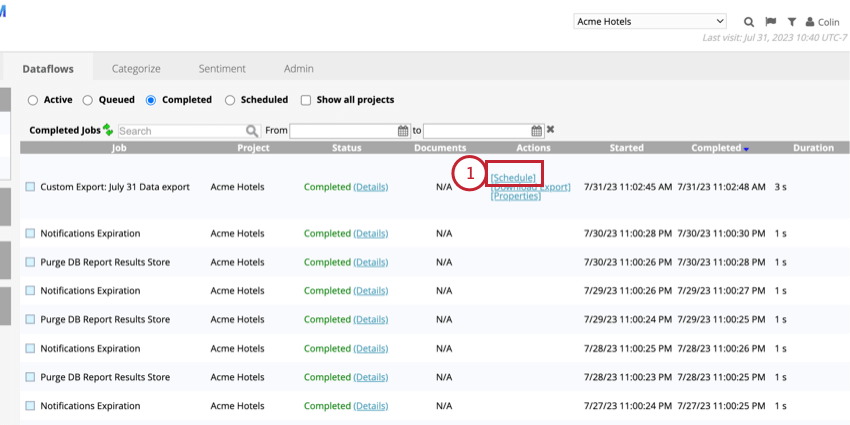
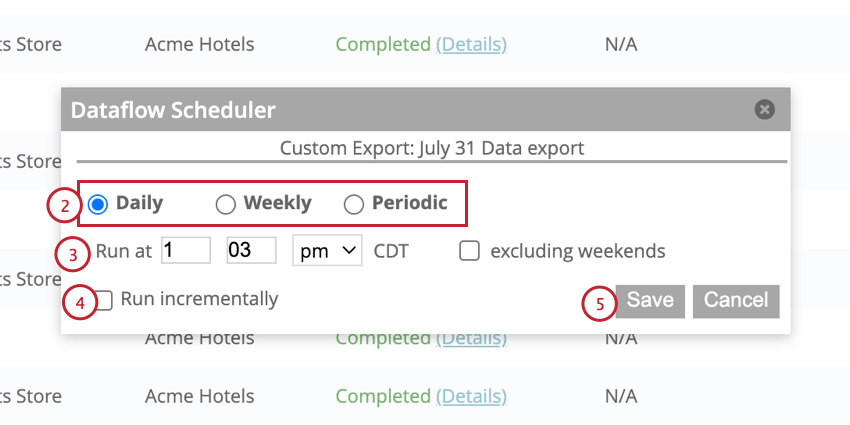
- Daily: Export data each day.
- Weekly: Export data once a week.
- Periodic: Export data hourly or after a certain number of minutes.
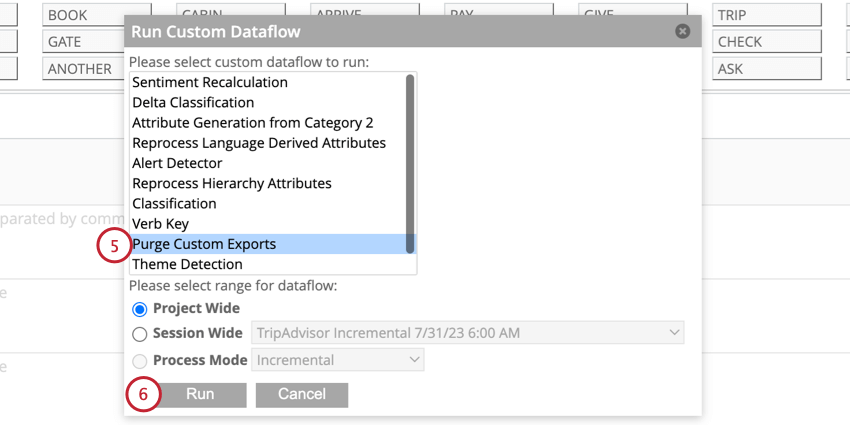
Purging Data Exports
You can purge, or delete, all exports within a project.
That's great! Thank you for your feedback!
Thank you for your feedback!