
Ticket Follow-Up Page
What's on this page
About the Ticket Follow-Up Page
After ticket programs are all set up and new tickets are being created, it’s time to follow up with your respondents! The follow-up page provides a table of your tickets including ticket details, metrics, and the ability to search and filter. All ticket actions begin on the follow-up page.
Navigating to the Follow-Up Page
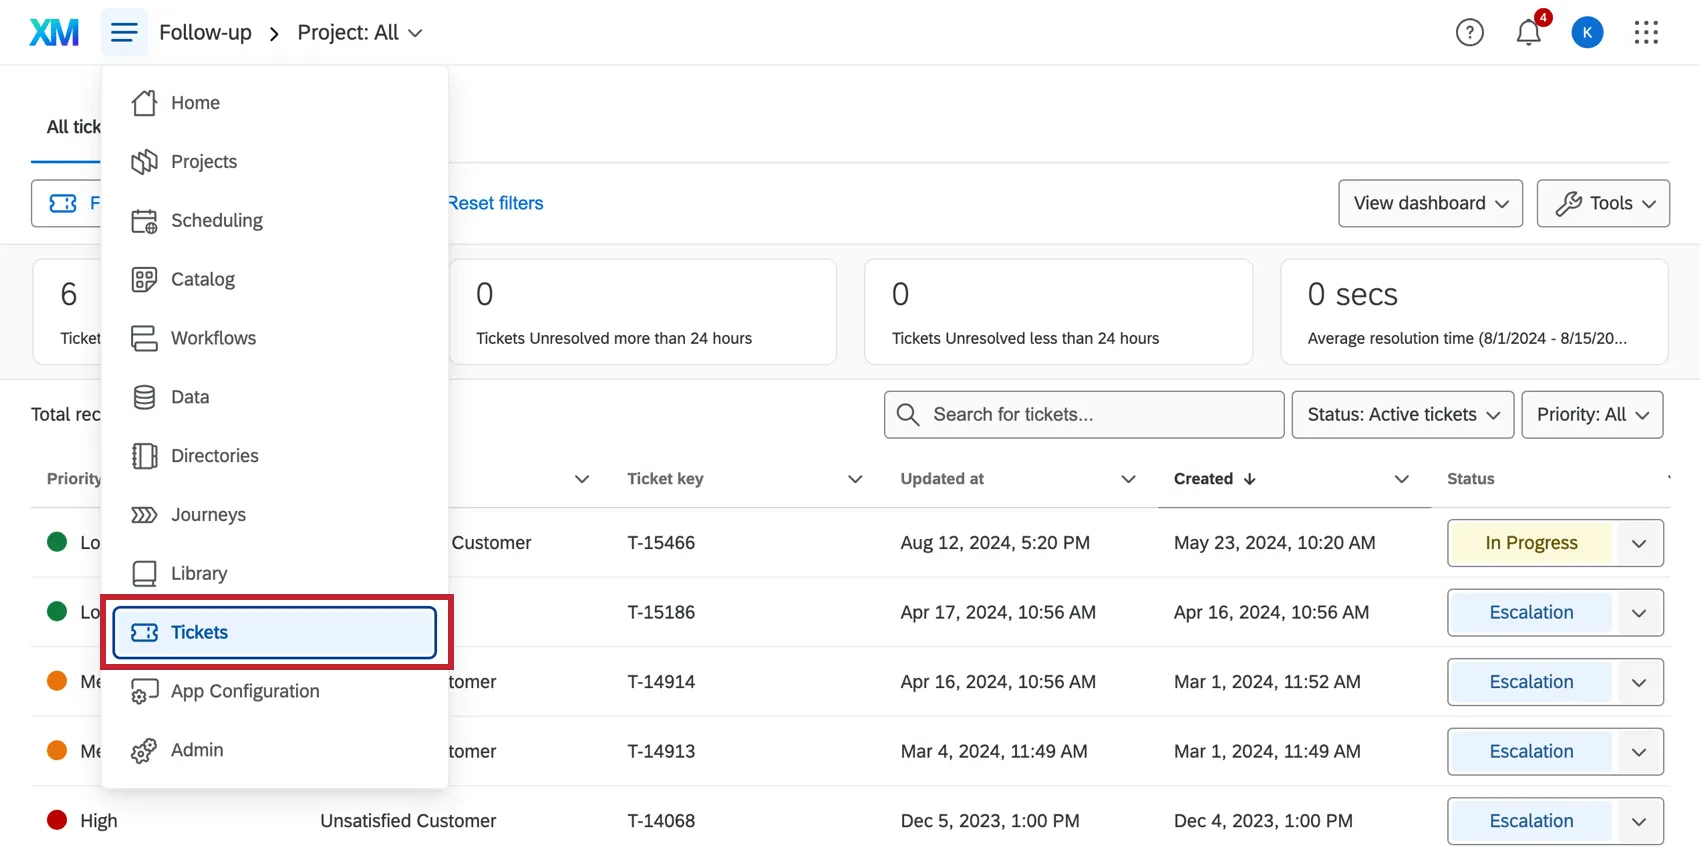
To visit the follow-up page, select Tickets from the navigation menu.
Ticket Metrics
On the top of the follow-up page, you will see a header with a series of metrics.
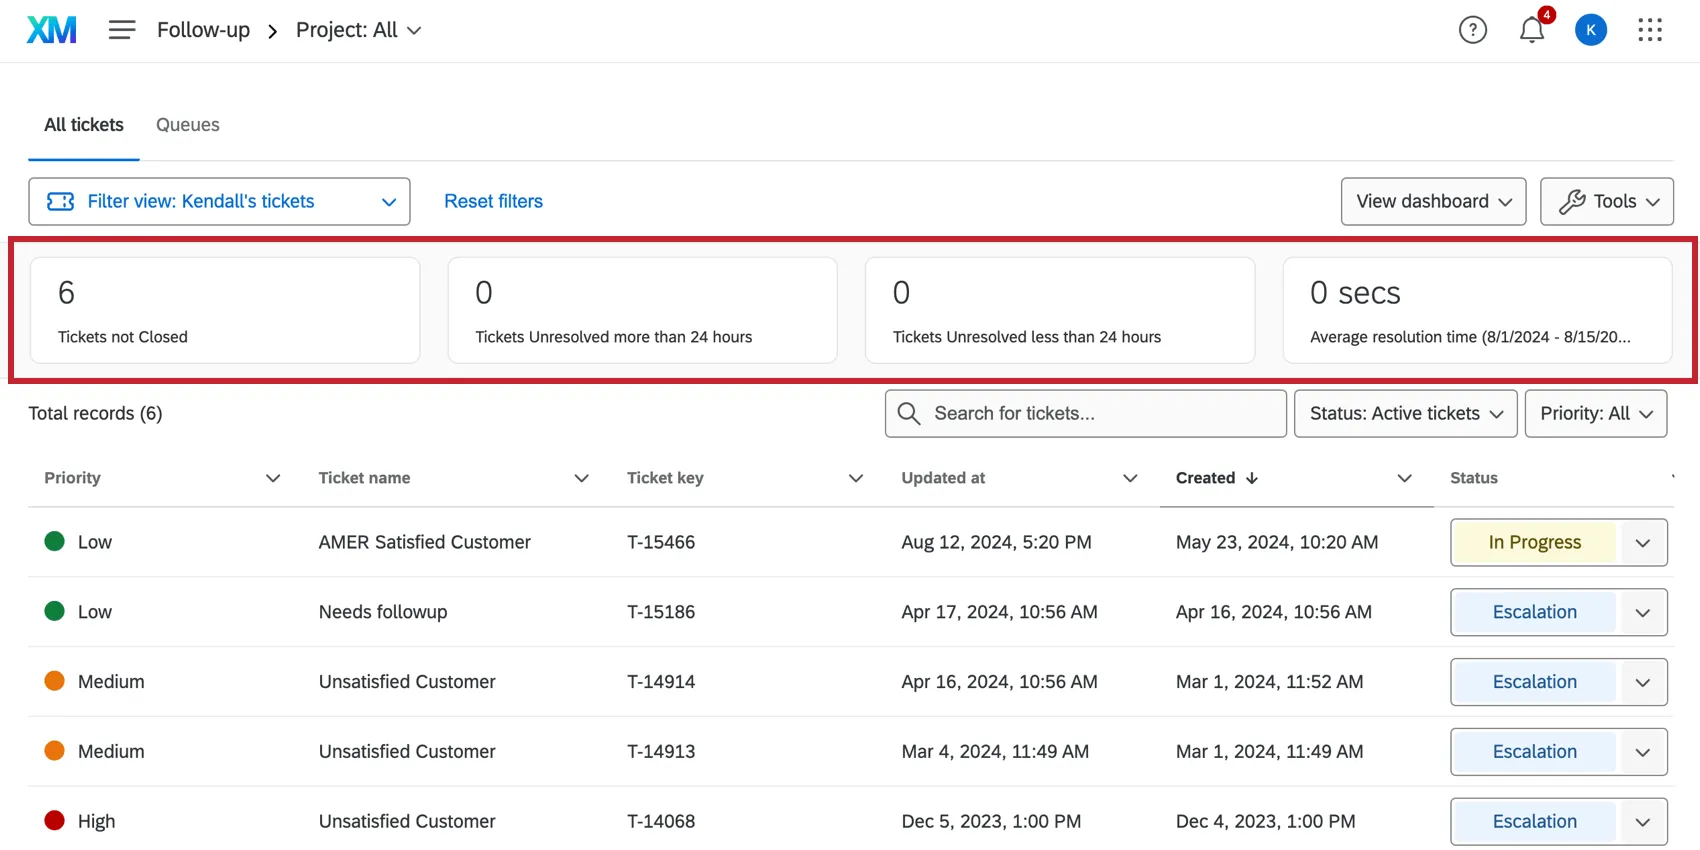
- Tickets not Closed: Tickets that have been marked as a status other than “Closed”.
- Tickets Open more than 24 hours: Tickets that have been marked as a status other than “Closed” for more than 24 hours.
- Tickets Open less than 24 hours: Tickets that have been marked as a status other than “Closed” for less than 24 hours.
Average resolution time: The average time it takes to resolve a ticket.

Qtip: Average resolution time only takes into account tickets closed within the past two weeks, not all closed tickets.
Attention: All of the above metrics include tickets assigned to those selected in the filter. If you have filtered for your team, the entire team’s metrics will be displayed.
Qtip: Click one of the metric cards in order to filter for tickets in that metric. For more information, see Filtering the follow-up page.
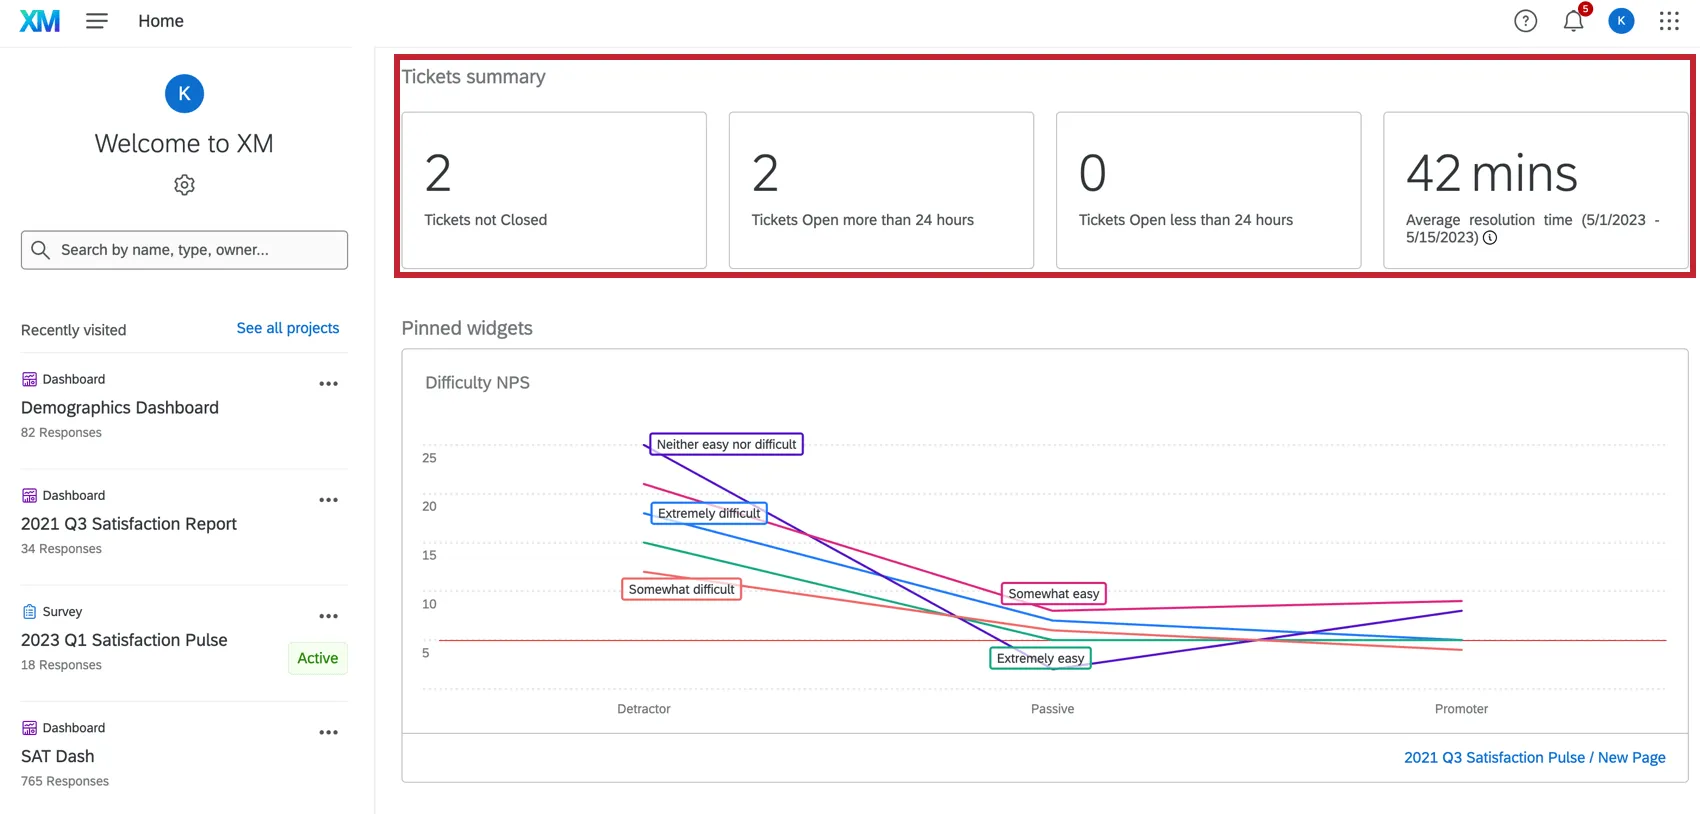
Homepage Metrics
To add ticket metrics to the homepage, see the Homepage Basic Overview page.
Filtering the Follow-Up Page
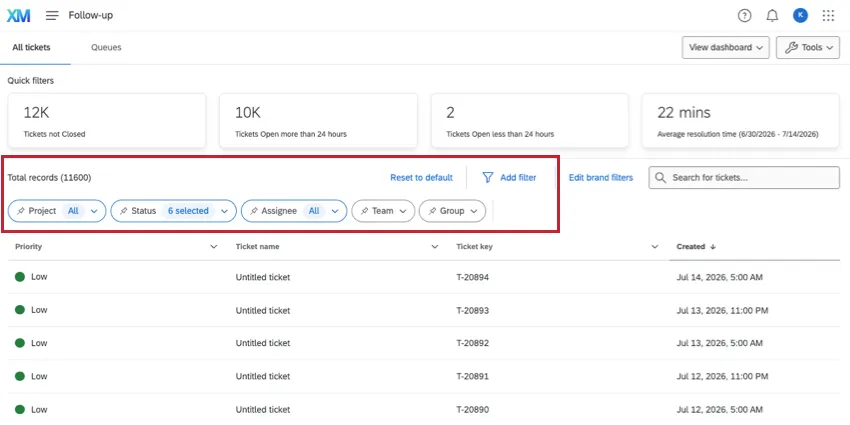
You can filter the tickets that appear on your follow-up page.
Qtip: If you leave the follow-up page, the filters applied to that page will save and be automatically enabled when you return. If you can’t find the ticket that you’re looking for, check the filters to make sure you’re searching in the right place. Filters can be reverted back to the default if local browser storage is altered.
Base filters include:
- Project: Use the Project filter to limit tickets by the project they’re connected to. In other words, this is the survey in the event of the ticket workflow. You can use this filter to narrow down by projects you specifically have access to. Admins can also search all projects in the organization.
- Status: Available statuses vary based on the statuses that have been set up for your organization. The default statuses are Active, Open, In Progress, and Closed, but additional statuses can be added in the Custom Ticket Status editor.
- Assignee: Filter by the specific user assigned to the ticket. Admins can filter by any user. Standard ticket users can only filter for “Me” and “All.”
- Team: You can use this filter to narrow down by ticket teams you specifically belong to. Admins can also search all teams. The Team filter only appears if ticket teams have been set up for your organization.
Group: You can use this filter to narrow down by groups you specifically belong to. Admins can also search all groups. The Group filter only appears if ticket groups have been set up for your organization.
Qtip: Brand Administrators will be able to filter from all projects, groups, and teams on the brand. Standard ticket users can only select ones they have access to.
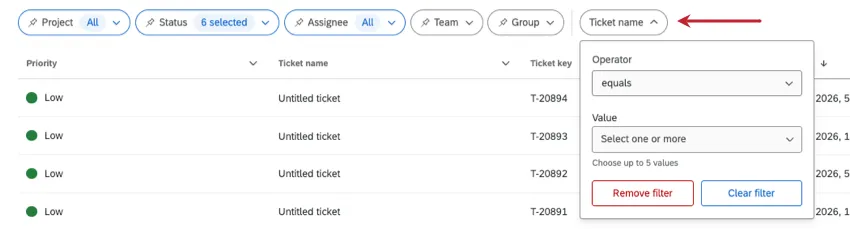
Click Add filter to select from the following additional filters:
Ticket data: Select a ticket data field to filter by.
Qtip: Ticket data filters are pulled from all data existing on all tickets in your organization. The ticket data available are not connected to ticket reporting datasets.
Qtip: Admins can choose to hide ticket data as an option in filters.
Ticket name: Search by the name of a ticket. You can type out exact names, search phrases within a ticket name, or search content that shouldn’t be in the name.
Main reason: Filter by the main reason for the ticket, also called the root cause.
Priority: Filter by the ticket priority, such as low, medium, or high.
Project type: Filter by the type of project that generated the ticket. Your options are:
- Survey
- Data projects (imported data projects)
- Online Reviews (reputation management)
- Global (standalone workflows)
Created date: Filter by the date the ticket was first created.
First updated date: Filter by the date the ticket was first updated.
Last updated date: Filter by the date the ticket was last updated.
Closed date: This is the date a ticket was changed to the default “Closed” status. Your administrator may have named this something similar, like “Resolved” or “Completed.”
Has attachment: Filter by whether (true) or not (false) the ticket has an attachment uploaded to it.
Has sub-ticket: Filter to only view tickets with sub-tickets (true) or without sub-tickets (false).
Is sub-ticket: Filter to only view sub-tickets (true) or regular tickets (false).
Has follow-up survey response: Filter by whether the ticket feedback survey has been filled out (true) or not (false).
Qtip: Click Reset to default to change your ticket filters back to the default setup.
Qtip: If you’re a Ticket Admin, you can change what happens when users across your organization reset to default, using brand filters.
Edit Default Brand Filters
Attention: This feature is only available to Brand Administrators, CX Administrators, or users with Qualtrics Ticket Admin permission enabled.
Ticket Admins can configure a standard set of default filters that are applied across the brand (Qualtrics organization). These defaults are shown to new users during their first session and serve as the baseline when existing users click Reset to default.
Open the ticket Follow-up page.
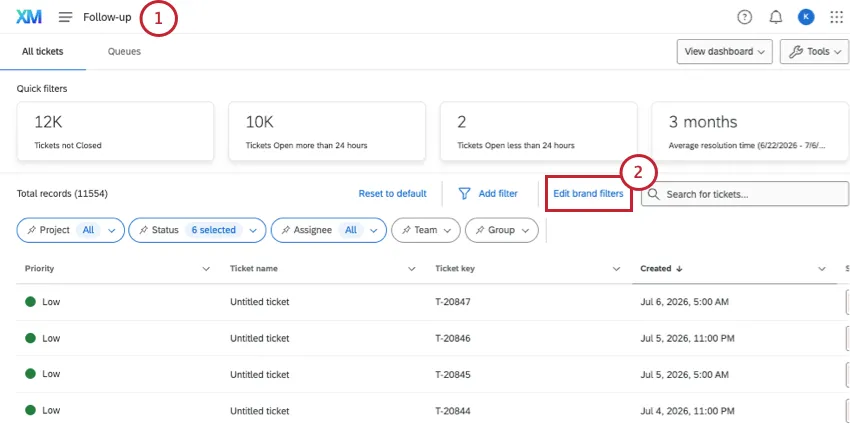
Click Edit brand filters.
Set up your filters. See Filtering the Follow-Up Page for a list of filter criteria.
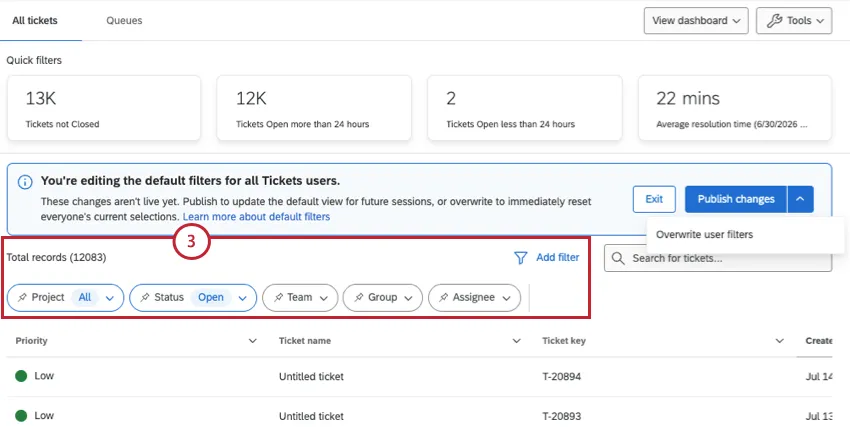
Qtip: So long as you see a blue banner that says, “You're editing the default filters for all Tickets users,” you’re setting brand default filters.
Pin individual filters, making these filters always available.
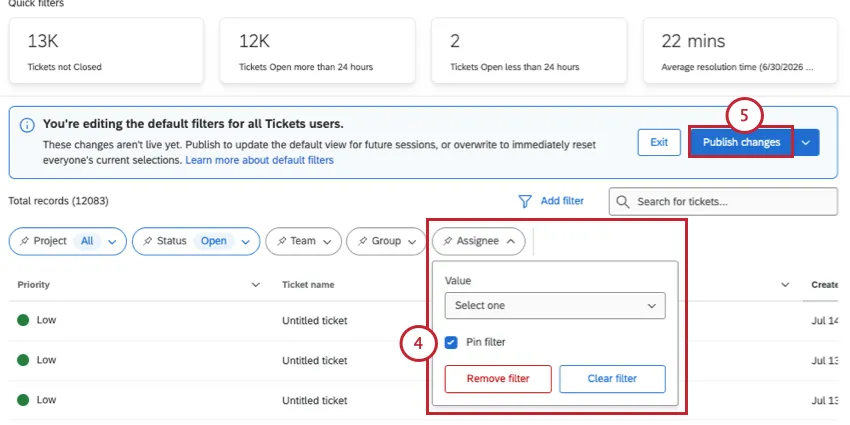
Example: Pin Assignee to make sure it is always visible, even if there's not a specific assignee selected.
To set a new default, click Publish changes.
Qtip: Publishing updates the default filters for your brand. New users will see these filters during their first session, and existing users will see them the next time they click Reset to default. You can edit these defaults again at any time.
To apply the new default filters to all existing users on their next page refresh, click the arrow, then select Overwrite for all user filters.
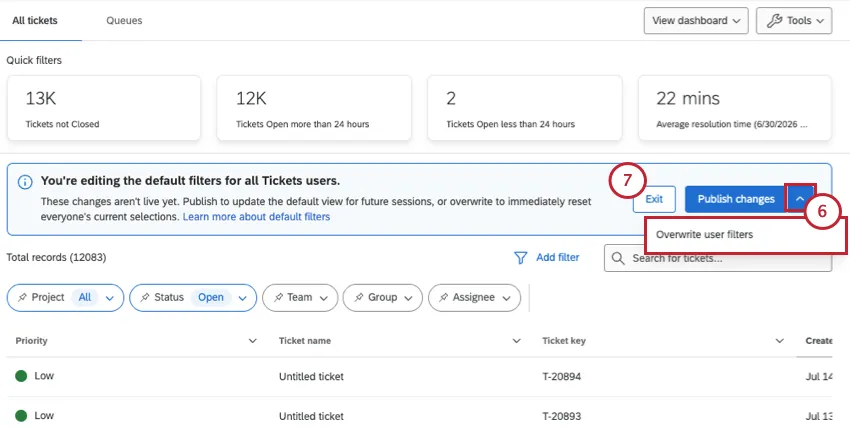
Warning: Overwriting all user filters replaces the current filter selections for all users across the brand on their next page load or refresh. This action cannot be undone.
To discard changes, click Exit.
Following Up on Tickets
There are many ways you can manage your tickets in the follow-up stage, including contacting the respondent from the ticket, changing the status of the ticket, and more. For more information on using tickets, see Following Up On Tickets.
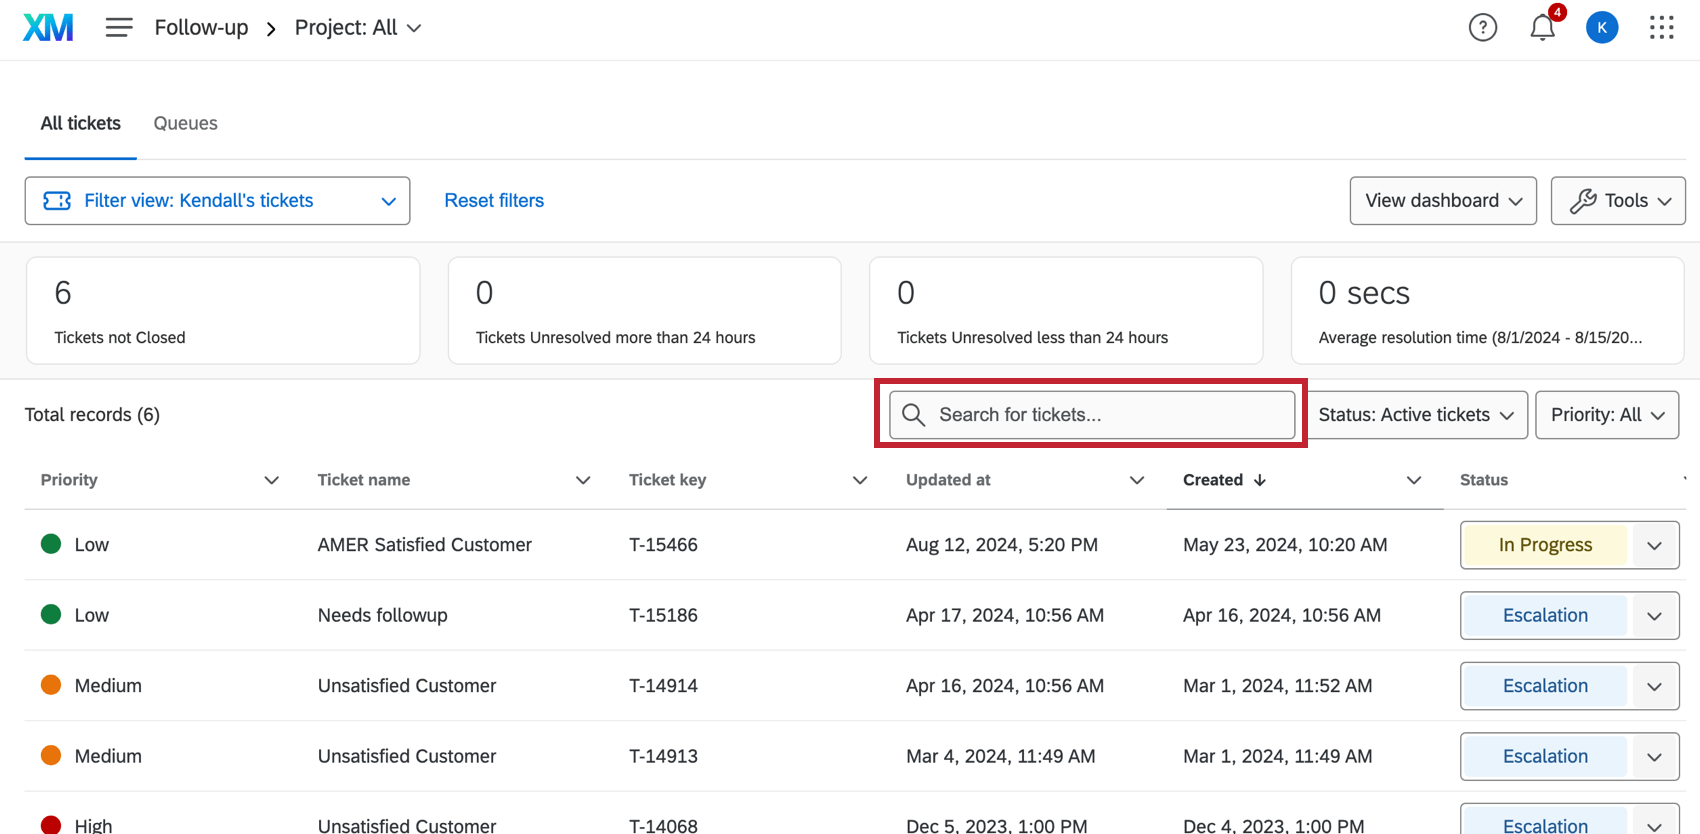
Searching for Tickets
To search for a certain ticket, type key terms into the search bar. The search bar picks up on all ticket content, meaning you can type anything from the owner’s name to the ticket ID.
Queues
Ticket queues split tickets up into different buckets that can be assigned to different groups, teams, or specialties. What’s available in the Queues tab will depend on what your administrator set up. For more details, see ticket queues.
That's great! Thank you for your feedback!
Thank you for your feedback!