
Defining Custom Date Ranges (Studio)
What's on this page
About Defining Custom Date Ranges
You can define and save custom date ranges as filters for your widgets and dashboards.
You can choose static dates or dynamically applied start and end dates. Custom dates work with standard and custom calendars, as long as they include days, weeks, and months.
Qtip: Widgets can only show up to 53 data points. For large date ranges, the 53 data points are counted starting at the end of the date range. This may cause some data points to be empty toward the beginning of the date range.
Types of Custom Date Ranges
When creating a date range filter, you can choose one the following date range types:
EXACT DATE
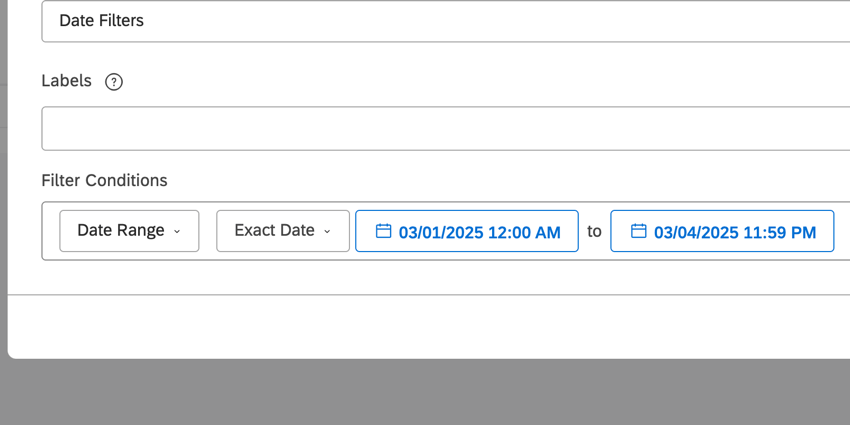
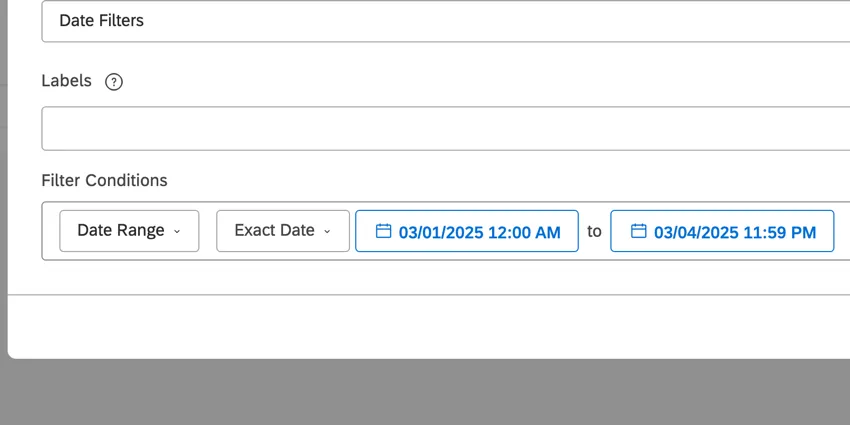
Exact Date lets you define a fixed time range between two dates. This is a static filter.
Example: Here, we are filtering from September 1, 2017 at 12:00 AM to September 5, 2017 at 11:59 PM.
FIRST DAY
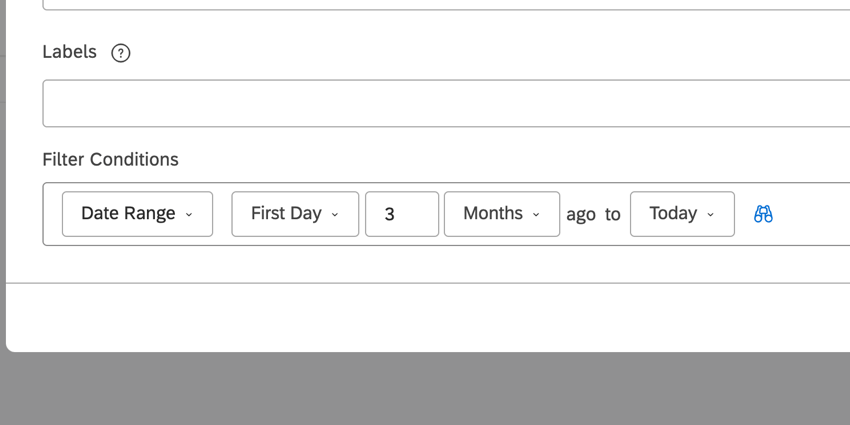
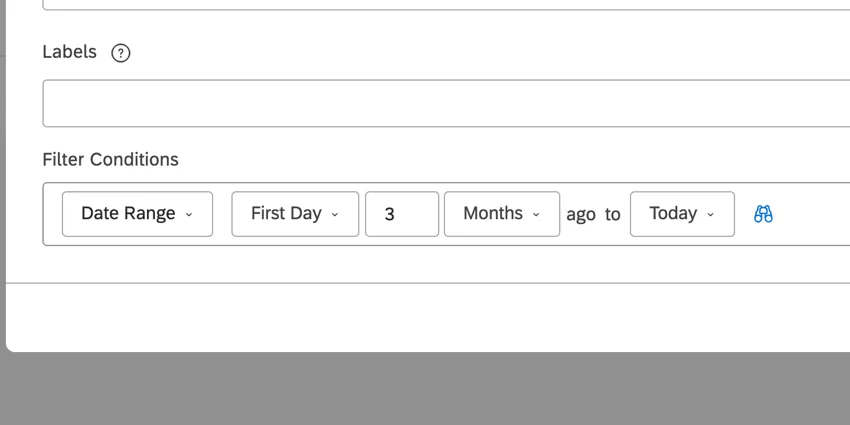
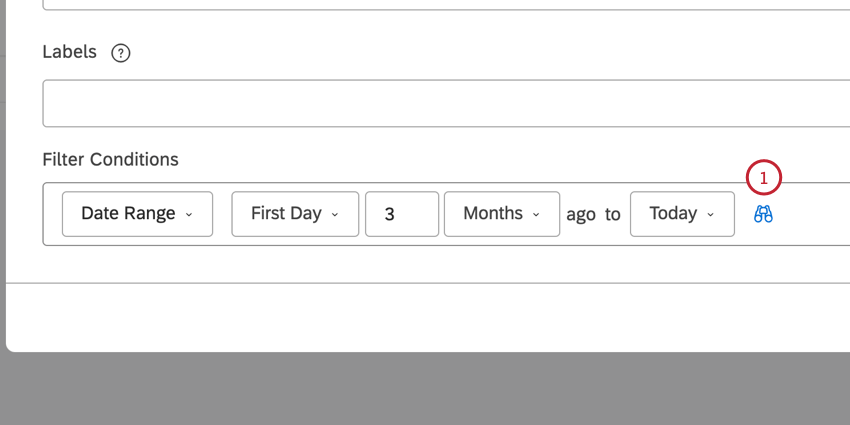
First Day lets you define a dynamic date range that starts on the first day of the period you select.
Example: Here, we are filtering for a period that starts on the first day of the month, 3 months ago.
This is a daily moving filter, meaning that once a day at 12:00 AM its start and end date will simultaneously shift one day forward.
Qtip: First day filters can only be created on the Filters page for use in widgets and dashboards. They cannot be created from scratch right inside a widget or dashboard.
CURRENT DAY
Current Day lets you define a dynamic date range that uses the current day’s relative place in the time period you select.
Example: Here, we are filtering for the current day, 1 year ago.
A relative place in time is calculated using the following logic:
Example: If today is March 31 (non-leap year), then the current day 1 month ago would be March 3. We take March 31, count how many days have passed since the beginning of the month (31), and then add that number of days to the beginning of the previous month (February).
Current Day is a daily moving filter, meaning that once a day at 12:00 AM, its start and end date will simultaneously shift one day forward.
Qtip: Current day filters can only be created on the Filters page for use in widgets and dashboards. They cannot be created from scratch right inside a widget or dashboard.
Defining a Custom Date Range
- First Day
- Current Day
- Exact Date
Your next steps vary based on what you chose.
Qtip: Studio saves all date range filters to the Date Filters folder.
First Day & Current Day
Select the number of periods and the time unit to count backwards from.
Example: The current day 1 quarter ago.
Then, select an end date. You can choose from the following:
- Today: End a dynamic date range at 11:59 PM on the day this filter is applied.
- Last Day: End a dynamic date range at 11:59 PM on the last day of whatever period you select next. Example: From the current day 1 quarter ago to the last day 2 months ago.

- Current Day: End a dynamic date range at 11:59 PM using the current day’s relative place in whatever period you select next. Example: From current day 1 quarter ago to current day 3 quarters ago.
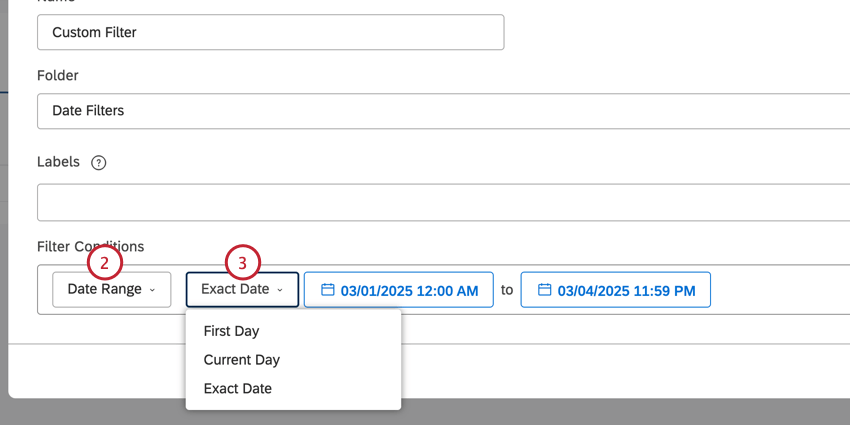
Exact Date
If you chose Exact Date, you will select a start and end date from the calendars. You can quickly navigate months and years from the dropdown, and set the exact time of day.
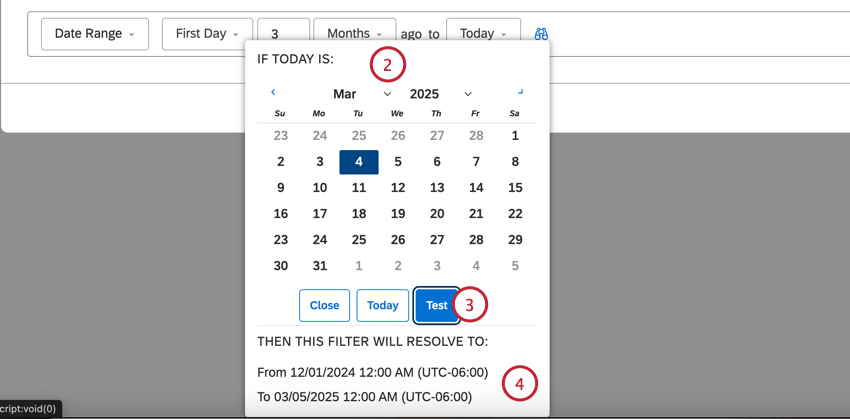
Previewing a Dynamic Date Range
After defining a dynamic date range, you can preview the exact period of data it will show you on any day.
Understanding Automatic Shifts in Zero Time Unit Filters
Consider the following date filter:
Example: First Day 0 Years Ago to Last Day 1 Months Ago.
You can think of this filter as “all completed months this year.” If you used this filter to look at data on May 16, 2023, you’d see data from January 1, 2023 to April 30, 2023. (You would not see May’s data because May hasn’t completed yet.)
However, let’s say you viewed this filter January 16, 2023. This filter would shift to “all completed months last year.”
There is a special case when a start date defined as “0 [time units] ago” is automatically shifted to “1 [time unit] ago.” (The time unit could be weeks, months, quarters, or years.) The shift occurs when ALL of the following conditions are true:
- The end date is defined by the “last day 1 [time unit] ago” condition. Example: All completed months, or Last Day 1 Months Ago.
- The end date’s time unit is shorter than the start date’s. Example: End date defined on months, which are shorter than start date’s year time unit.
- The current date falls within the first end date’s time unit of the start date’s time unit. Example: All dates in January fall within the first month of the year.
Consider our example from earlier:
Example: First Day 0 Years Ago to Last Day 1 Months Ago.
Depending on the date you view this filter, these are the date ranges you’d see data for:
- If the current date is January 31, 2019, the time period is from January 1, 2018 to December 31, 2018.
- If the current date is February 1, 2019, the time period is from February 1, 2019 to January 31, 2019.
- If the current date is March 1, 2019, the time period is from January 1, 2019 to February 28, 2019.
That's great! Thank you for your feedback!
Thank you for your feedback!