
Load to SDS Task
What's on this page
About the Load to SDS Task
Because supplemental data sources (SDS) can store lots of information for use across many projects, it’s important to keep them updated with accurate information. You can make sure your SDS is automatically updated on a regular basis using a Load to SDS task. All you have to do is choose the update schedule and a data source, then connect your SDS.
The Load SDS task completely replaces the data in your SDS. This means your new data will replace all of the rows that currently exist in your SDS.
Attention: This task can only run once per 12 hours.
Qtip: This task only works with supplemental data sources saved in your library.
Qtip: For information on general limits that apply to ETL workflows, see Workflow Limits. For any task-specific limits, refer to the information on this page.
Before You Create a Workflow
Qtip: This task cannot be used if your brand is data isolated since SDS are not supported for data isolation.
Creating a Supplemental Data Source
Make sure you’ve created your supplemental data source before you create your workflow. You can use any SDS currently saved in your library.
Secondly, the columns of data in your SDS must match the columns of data in your source (extractor). The fields don’t need to have the exact same names, but the purpose of each field does need to match. You cannot have fields in your SDS that don’t exist in the extraction source.
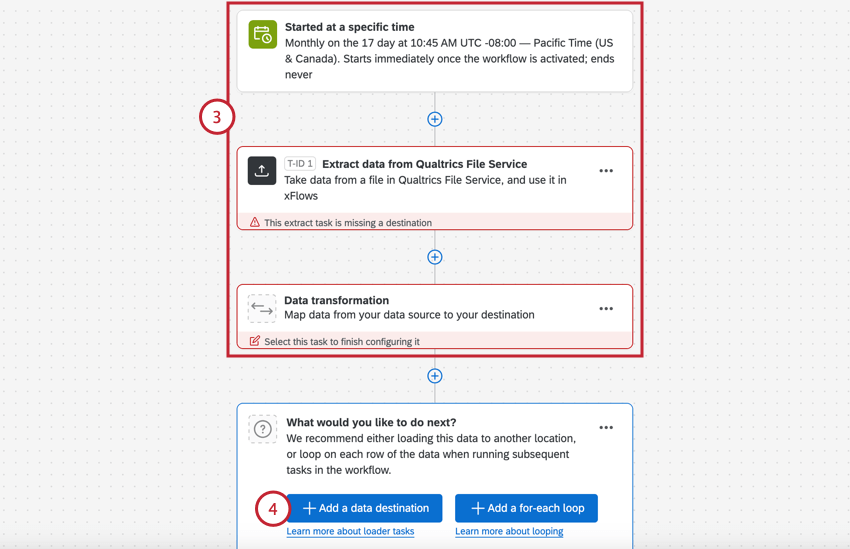
Setting Up an Extractor Task
It’s also important to think about where your data is coming from. (Or where your data is being extracted from.) Is your data saved in another Qualtrics project? Is it on your organization’s servers, and can it be moved using SFTP? You can see a list of all of the data locations Qualtrics supports under Available Extractor Tasks.
We do not recommend extracting data from a survey. This task pulls individual rows of updates instead of full files.
Attention: The maximum file size you can add to your SDS is 10MB and 100,000 rows.
Attention: The Load to SDS task can only process 1 file at a time. However, some extractors can pull multiple files; for example, Extract from SFTP could find two files matching the specified file name prefix. In this example, the second file would overwrite the first.
Qtip: Need to reduce the size of your extracted data? Try transforming the data.
Creating a Load to SDS Task
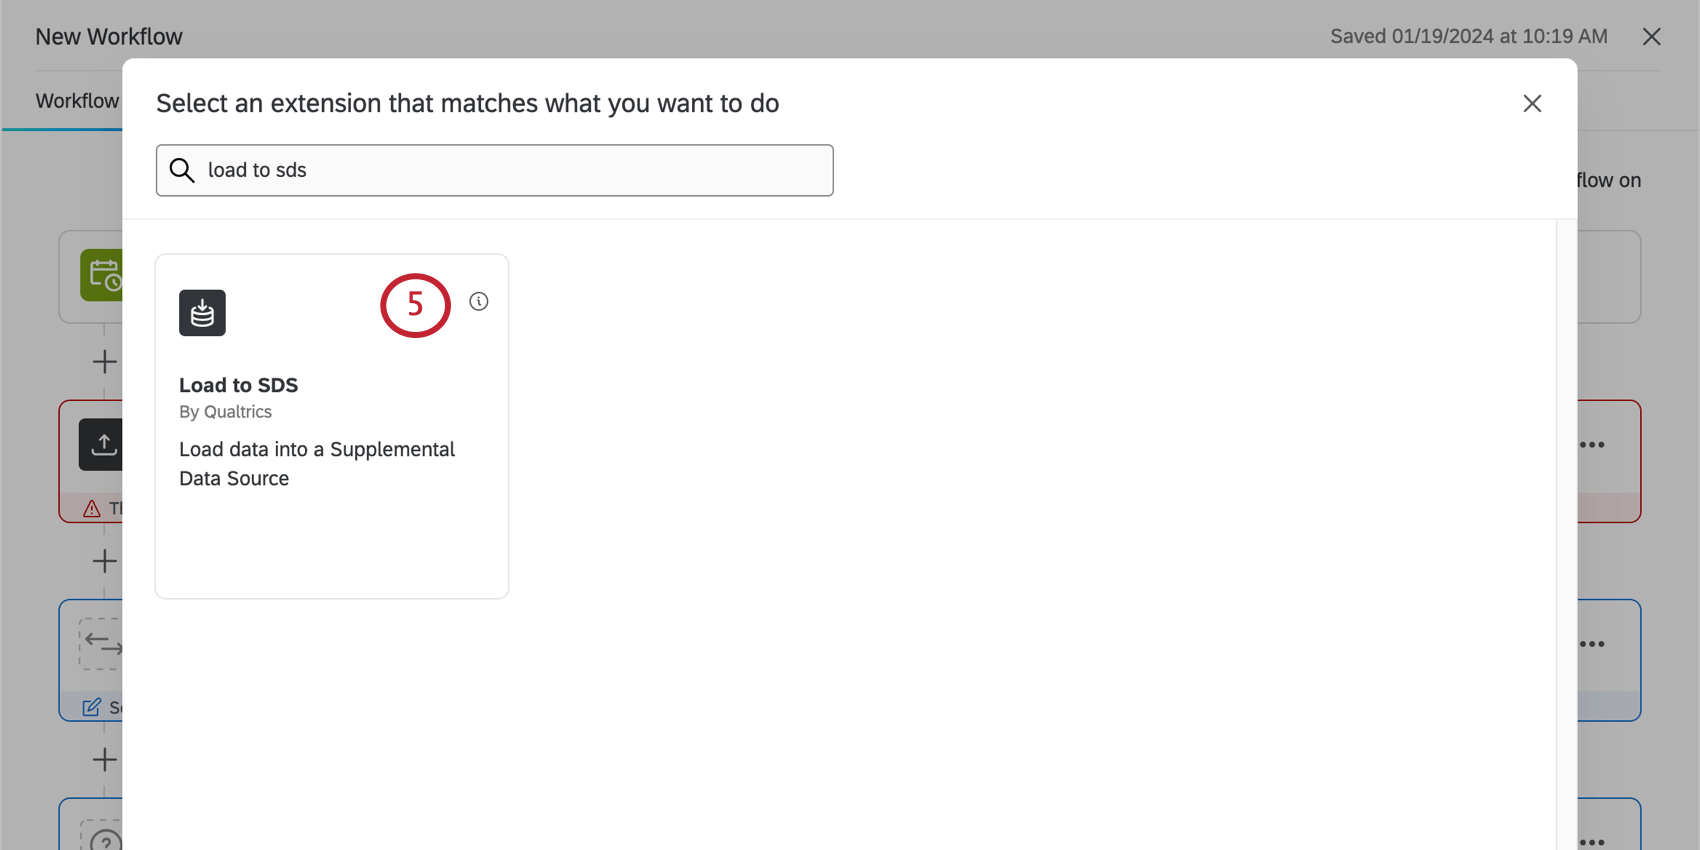
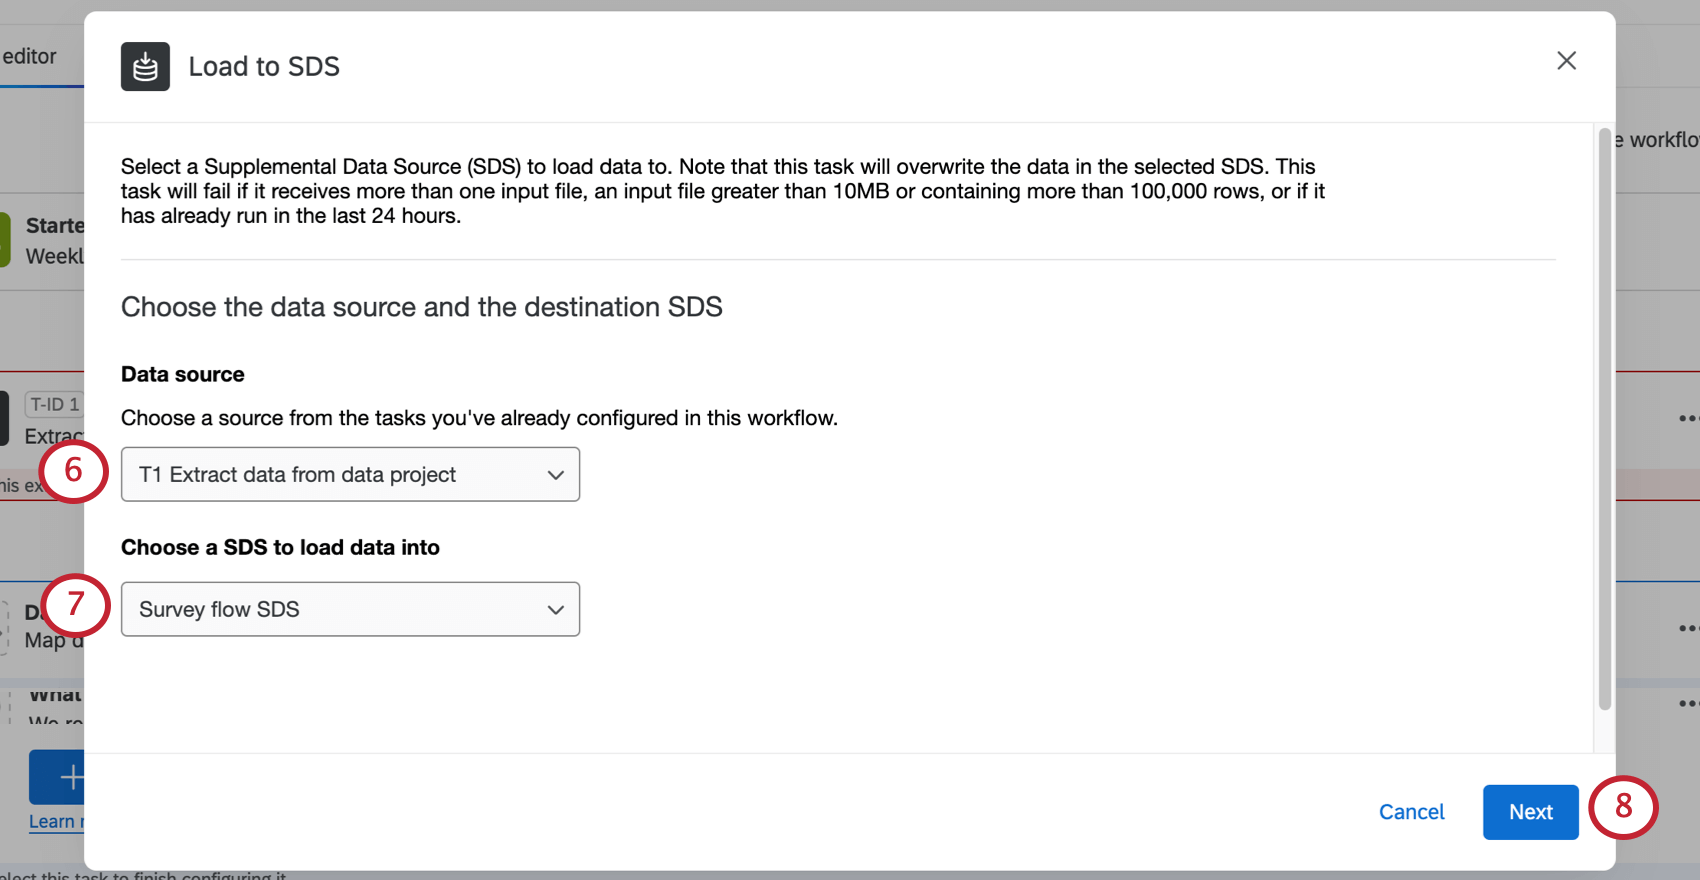
Qtip: You need the “Manage Supplemental Data” library permission enabled on the library where your target supplemental data source is located. If this permission isn’t enabled you won’t be able to load data to that supplemental data source using this task.
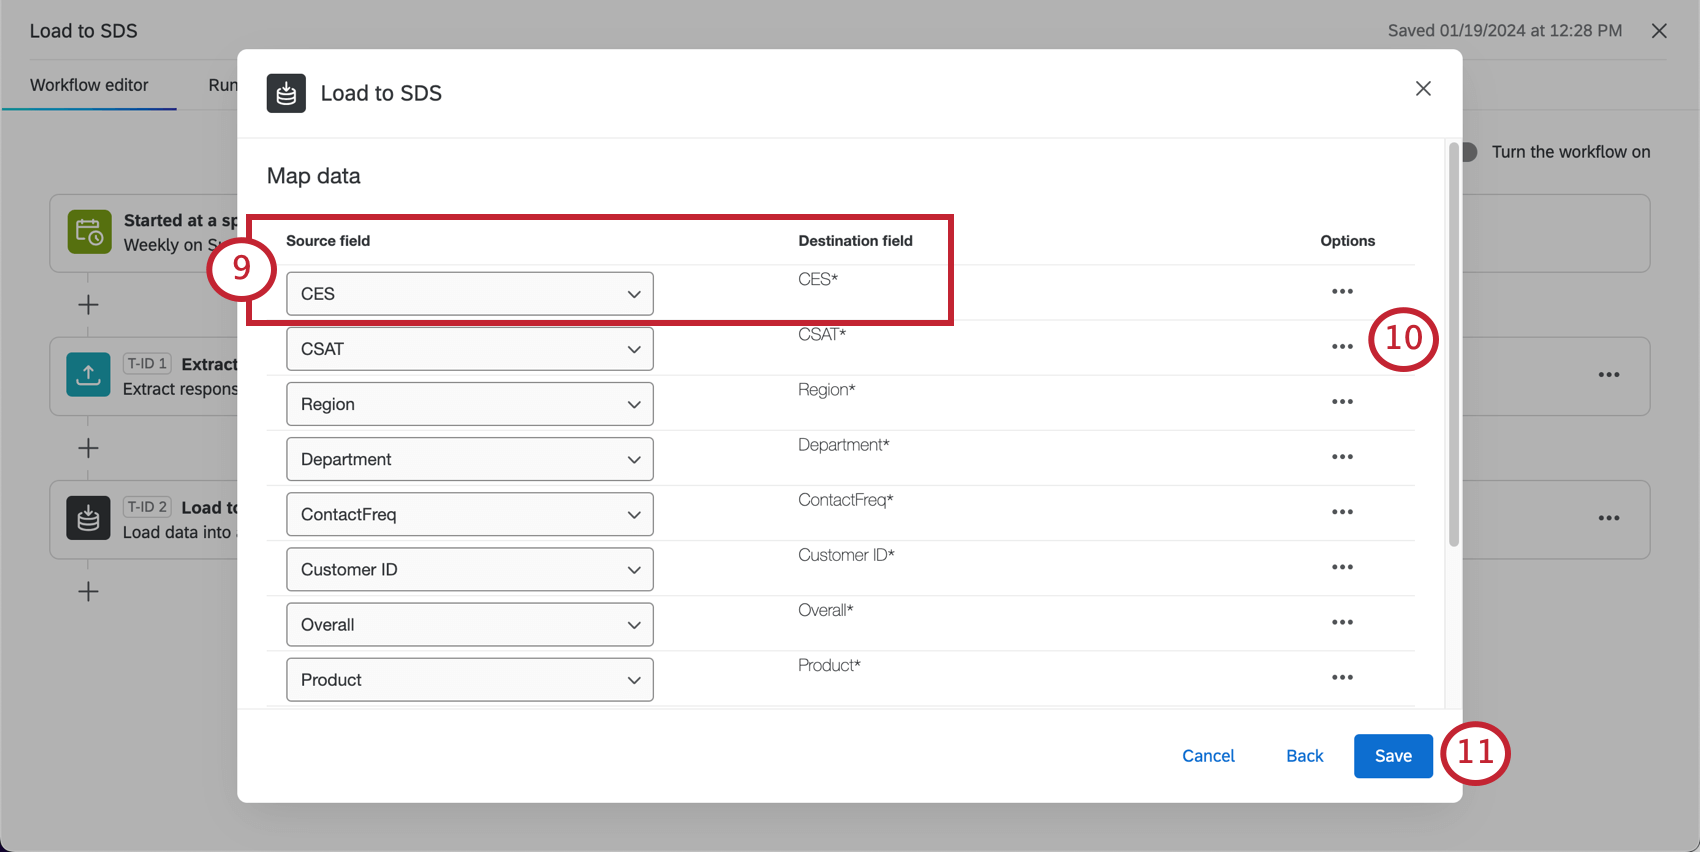
Qtip: You have to map every field in the SDS to a source field. Not every source field needs to be mapped. You cannot add new fields to the SDS this way; see Overriding Supplemental Data.
Qtip: Your workflow won’t run on the schedule you chose until you toggle the workflow On.
Attention: This task will fail if the incoming file is empty.
That's great! Thank you for your feedback!
Thank you for your feedback!