
Searching the Web for Reviews
What's on this page
About Searching the Web for Reviews
Qualtrics can search the web for reviews of your company and pull them together into one project. You don’t even need login credentials for any of these review sites to do this!
To pull online reviews into one project, you’ll take the following steps:
From there, you can create a dashboard with location data mapped to it.
Qtip: Reviews for each business location are pulled into Qualtrics every 24 hours. Only the data that exists at that time is pulled into Qualtrics (including date, review content, and reply information). Once a review is pulled into Qualtrics, that information is not updated again.
Attention: While our algorithm is constantly improving, it is not perfect. If a review profile exists, but we didn’t find it, please complete the feedback form in the product. You can also follow the steps here to add missing review profiles.

Qtip: This feature has a few prerequisite settings to consider before it can be enabled. Reach out to your Technical Success Manager if you’re interested in getting this feature.
Step 1: Specify Your Business Locations
Qtip: If you previously created a location directory, such as for a location selector question, you don’t need to complete this step, so long as you have the fields listed below saved in your directory.
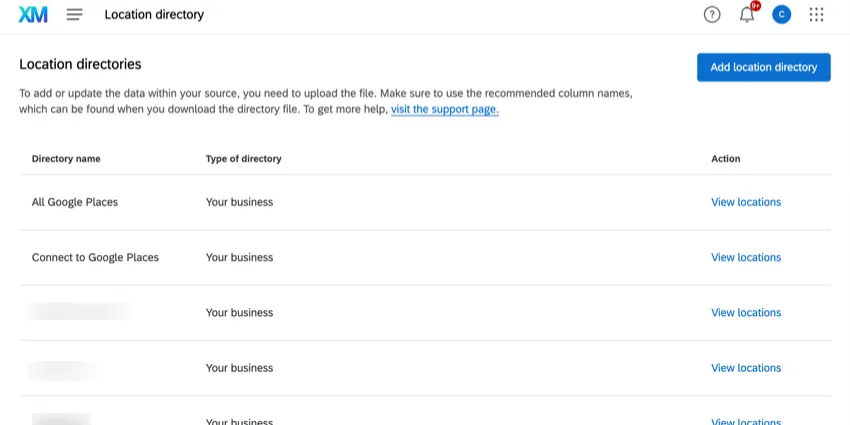
Before you start pulling reviews, Qualtrics needs to know the locations of your organization that you’d like to report on. You’ll need access to the location directory feature. If you can’t access this page, make sure a Brand Administrator has activated the Manage Location Data permission for you.
Once you can access the directory, see detailed steps on how to create and upload a file of your locations.
For each location, you must include the following fields:
Unique ID for each location (e.g., Store ID or Google Place ID)

Warning: You must leave Location IDs blank to upload a new location. Upload existing location IDs to make updates to existing locations.
Location Name
Attention: These should be professional, branded, customer-facing names. These should ideally match what appears in Google Maps. Do not use internal names.
- City
- State
- Postal Code
- Country
The more these fields match what appears on review sites, the more likely Qualtrics is to find them. If you need to edit your locations later, see Editing Locations.
Qtip: You can include any other supported fields that you want to use in dashboards (e.g., Region, District, Google Maps URL).
Qtip: If you use the optional field “LocationStatus,” locations with a status of “Closed” will stop loading new reviews to your Search the Web project. (Reviews that already were ingested to your project will not be removed.)
Once you’ve uploaded your location directory, move onto the next step.
Step 2: Create a Reputation Management Project
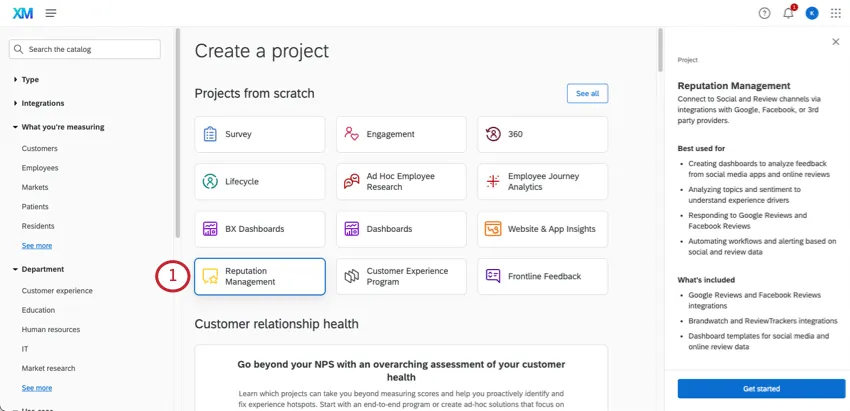
If you haven’t already, go to the catalog and create a Reputation Management project.
Select Your business reviews.

Click Next.
Select Search the web.
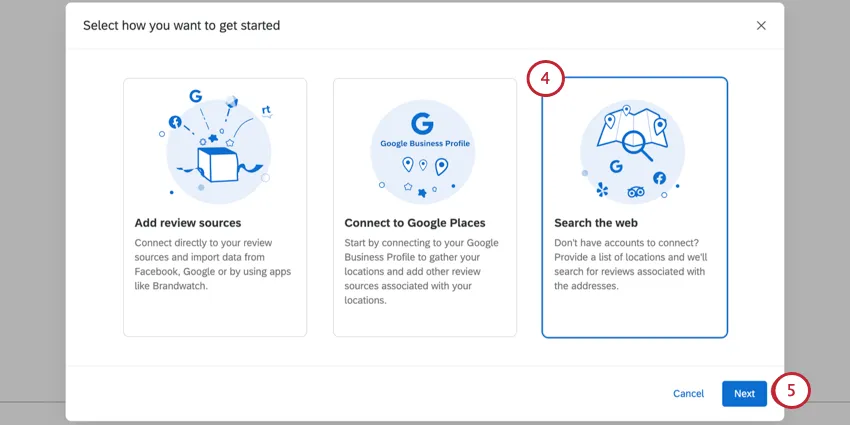
Qtip: Search the web projects do not update reviews or replies. They only show what is available at the time of ingestion.
Click Next.
Select the Location directory you created in the previous step.
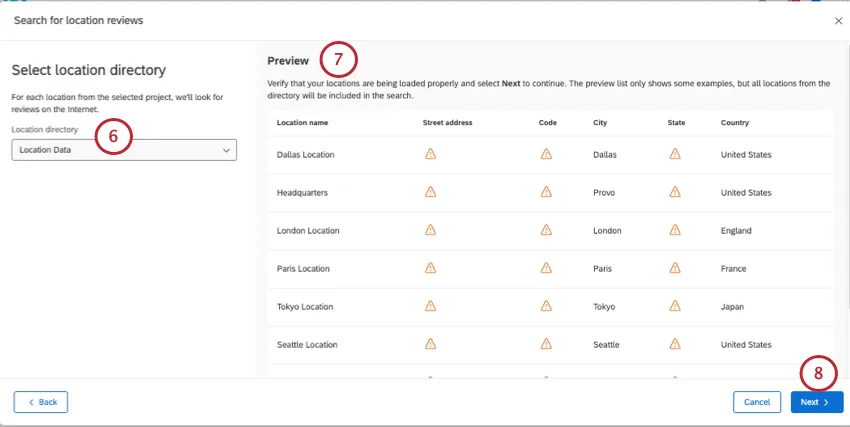
Double-check to make sure the location data that appears to the right looks correct.
Click Next.
Decide whether you want to include author's names when you ingest reviews.
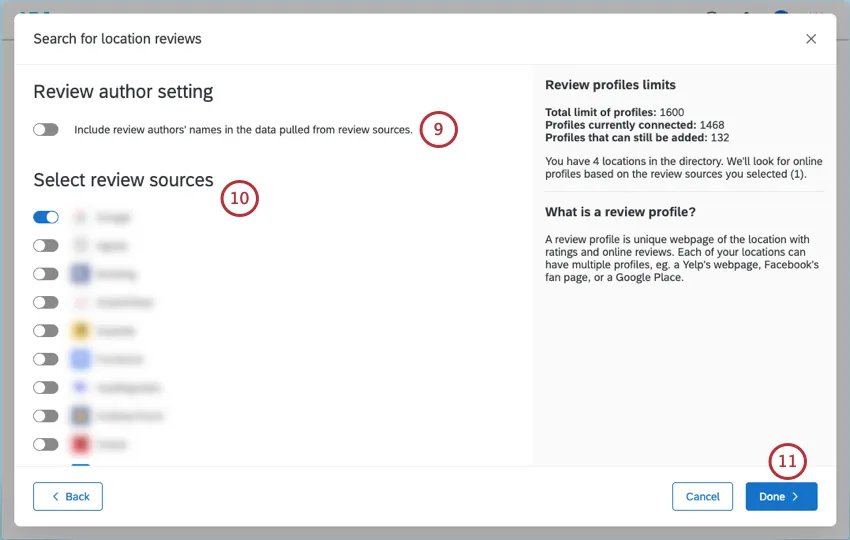
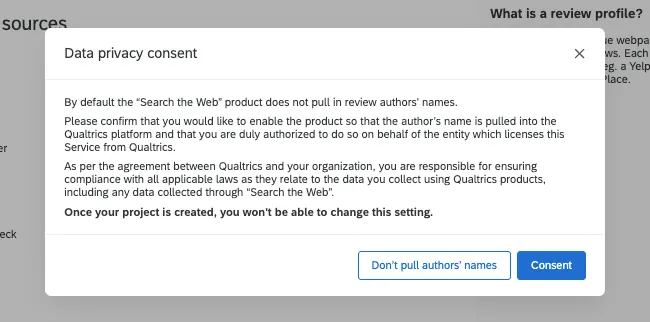
Qtip: If you enable this setting, a message will appear warning you that author names are not pulled into "Search the Web" reputation management projects by default. You will need to confirm that you are authorized on behalf of the entity which licenses this service from Qualtrics to pull in author names. As per the agreement between Qualtrics and your organization, you are responsible for ensuring compliance with all applicable laws as they relate to the data you collect using Qualtrics products, including any data collected trough "Search the Web." Once you complete these steps and create your project, you will not be able to change this setting.
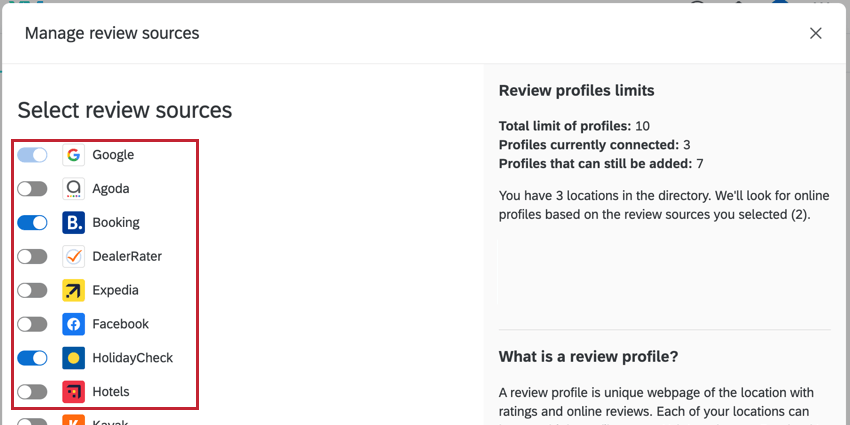
Select the websites you’d like to pull reviews from for each of your locations.
Qtip: Once you select your review sources and proceed, the full history of review data from the sources will be ingested into Qualtrics.
Click Done to proceed.
Attention: It may take up to a day for data to load in Qualtrics. A banner will appear to let you know you’re seeing only partial data. You can leave the page while data loads, but you’ll need to return to the page later to see when it’s done.
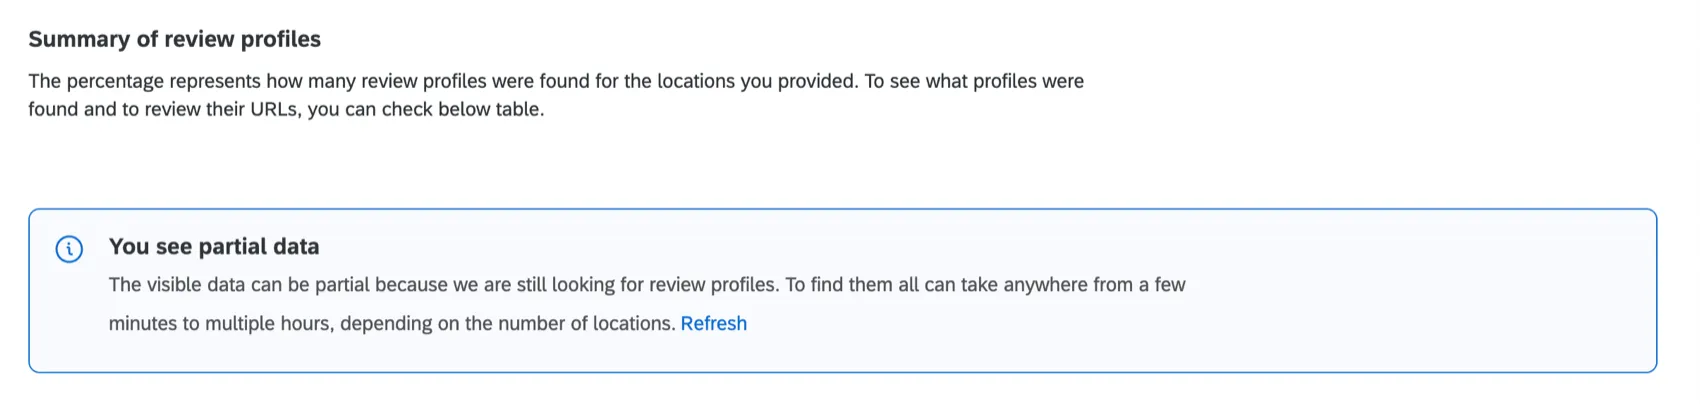
When your data is ready, you’ll see a summary of the locations Qualtrics found.
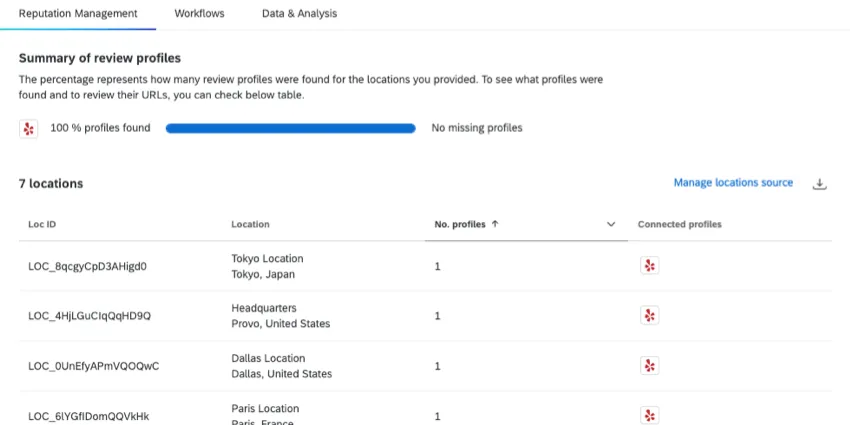
Step 3: Double-Check Locations
While our algorithm for searching the web is constantly improving, it is subject to information available online, and is not perfect. This section covers how to correct the business profiles pulled in.
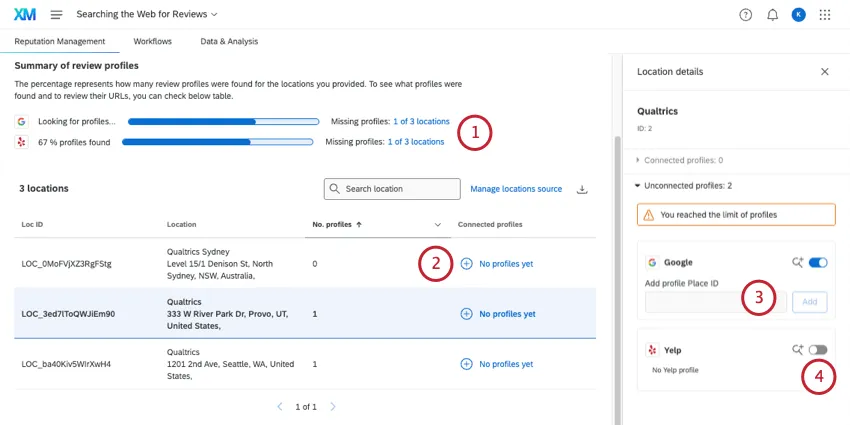
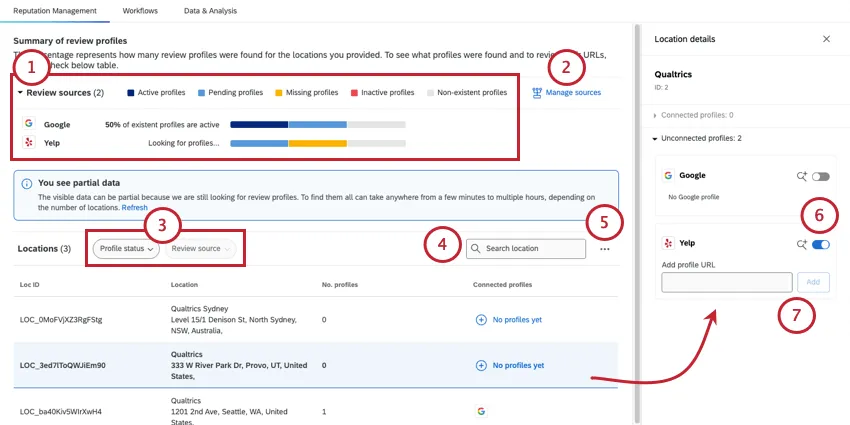
For each review source you chose (e.g., Google, TripAdvisor), you’ll see the number of profiles missing. Click the number of missing profiles to filter the table.
Qtip: Click See all X locations to remove the filter.
Click the row of the location that’s missing profiles.
Find the URLs for those review profiles and paste them beneath the matching website. Then click Add.
Qtip: For Google, only a Google Place ID is accepted, not a URL.
Qtip: Bulk URL uploading is not available.
If there isn’t a review profile for that location on a given website, you can disable it by clicking the switch.
Example: Here, we’ve removed Yelp for our Provo location.
Now you’re ready to build dashboards and workflows!
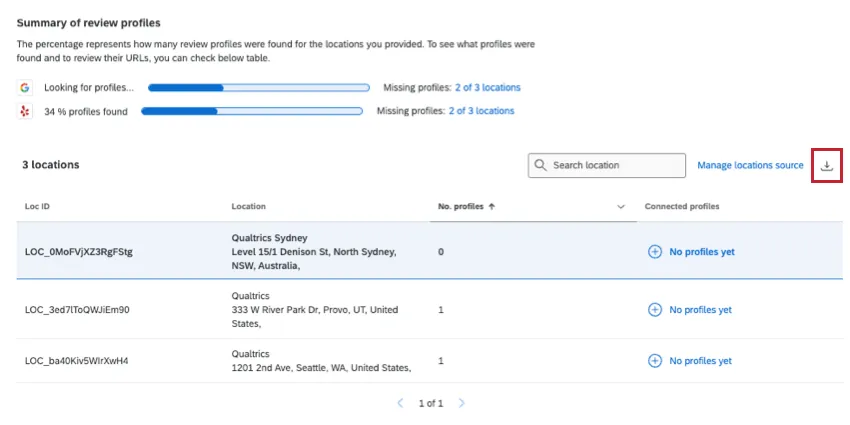
Exporting Locations

You can export the list of locations added to Qualtrics as a CSV file. This file will include all of the location fields and links to each profile found.
If you’ve filtered your profiles (e.g., clicked to view missing profiles), only those profiles will be included in the download.
To download this file, click the export icon on the right.
Managing Profiles
You can find all of your profiles on the Reputation Management tab. In addition to the functions described earlier, you can perform a few different actions to manage your profiles.

- Manage Location Directory: Open your connected location directory so you can make edits. See Location Data Management for a guide to your directory.
- Download CSV location data file: Export a CSV of the project’s location data.
Qtip: Bulk URL uploading is not available.
Troubleshooting Search the Web Projects
The following is a list of limits and troubleshooting best practices for Search the Web for Reviews reputation management projects. The following also applies to Competitive Reviews.
- When connecting profiles during project creation, you’ll only see up to 10 locations in the preview.
- Missing fields will be marked with a warning icon. Check if there are warning icons for the fields Country, Location Name, and City. Without those fields, no information will be gathered for those locations.
- Keep in mind the limits shown when you choose the sites to pull reviews from. If you would like to increase your account limits or if you see a warning that you do not have enough profiles, reach out to yourAccount Executive.
- The limit for Competitor Review Profiles is separate from the one for Brand Review Profiles. Setting up a Competitor Reviews project will not consume profile limits for your company’s locations, and vice versa.
Qtip: Are you interested in a list of review sources we support? Reach out to your Technical Success Manager.
FAQs
Can I add new locations to my Reputation Management project after it’s created?
Can I add new locations to my Reputation Management project after it’s created?
If you are Adding reviews from sources or from Google places, then no, you cannot add new locations after the project is corrected. Make sure you have a full list of locations you want to use before you create your project.
How do I reach the location directory?
How do I reach the location directory?
We also link to the location directory in the platform when you create a location selector question and when you create a reputation management project based on searching the web.
Can I use my location data in dashboard reporting?
Can I use my location data in dashboard reporting?
How do I edit my locations?
How do I edit my locations?
How are aggregated review dates calculated?
How are aggregated review dates calculated?
Are review scores normalized for sites with different rating scales?
Are review scores normalized for sites with different rating scales?
That's great! Thank you for your feedback!
Thank you for your feedback!