
Unique Identifiers (EX & 360)
What's on this page
Qtip: This page describes functionality available to all Employee Experience projects, including 360, Engagement, Lifecycle, Pulse, and Ad Hoc Employee Research projects.
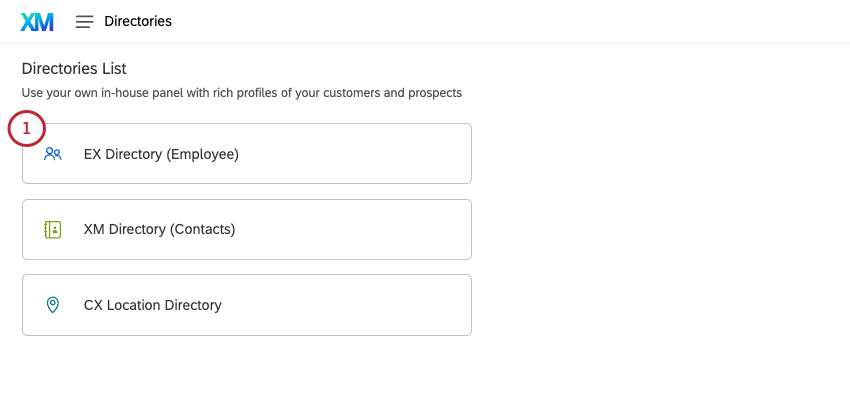
About Unique Identifiers
Email addresses can change for many different reasons, so they’re not always a reliable way for Qualtrics to identify participants. Thankfully, there is a Unique Identifier column when you add participants, which allows you to specify participants by whatever identifier your company prefers. You can use anything from numeric IDs to usernames, and in the event you need to change participants’ unique IDs, it’s an easy process.
Attention: Unique identifiers are case-sensitive.
Qtip: When uploading participants with unique identifiers enabled, you can add participants with the same email address as long as you include another column titled UserName with different values for these participants. Without the UserName column, the upload will fail due to duplicate entries.
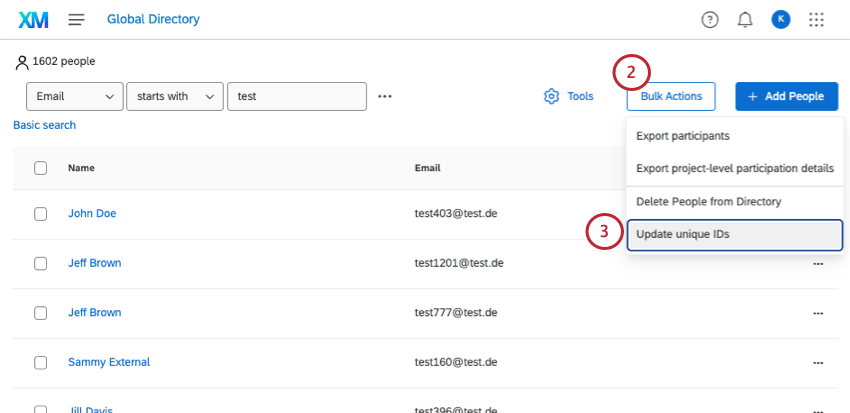
Updating Every Employees’ Unique Identifiers
Qtip: This tool cannot be used to consolidate duplicate participants.
You can update every employee’s unique identifier by selecting a metadata field to use as the unique ID. This will copy the value for the selected metadata field, and use it as the participants’ unique ID. We recommend you use the EmployeeID field for your unique IDs, since those are usually unique and static for an employee’s time at a company.
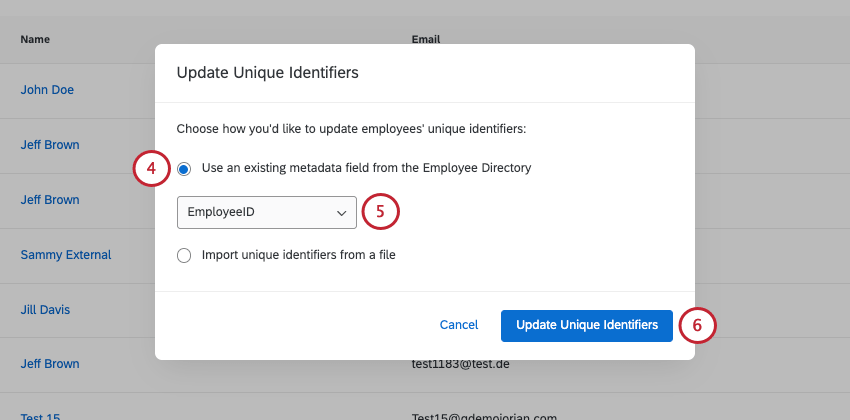
Your employees will have their unique IDs updated to have the same value as the metadata field you selected. This is a one time update, meaning if you change the value for the employee’s metadata field later, their unique ID will not change.
If your selected field contains duplicate or empty values, then the update will fail and no employees will be updated. See the following section for troubleshooting and fixing these issues.
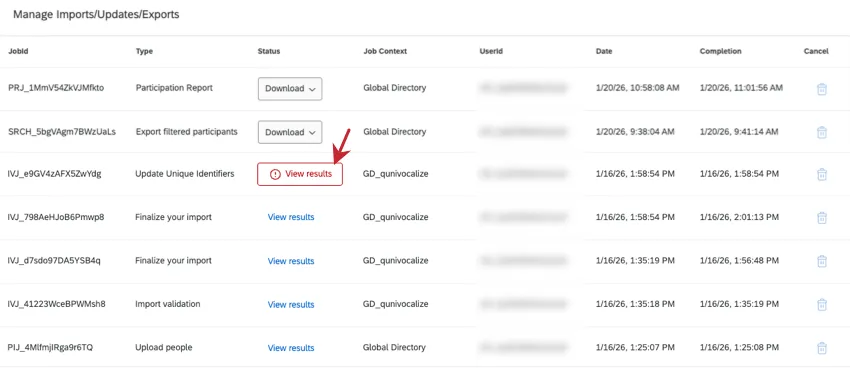
Troubleshooting UniqueID Updates
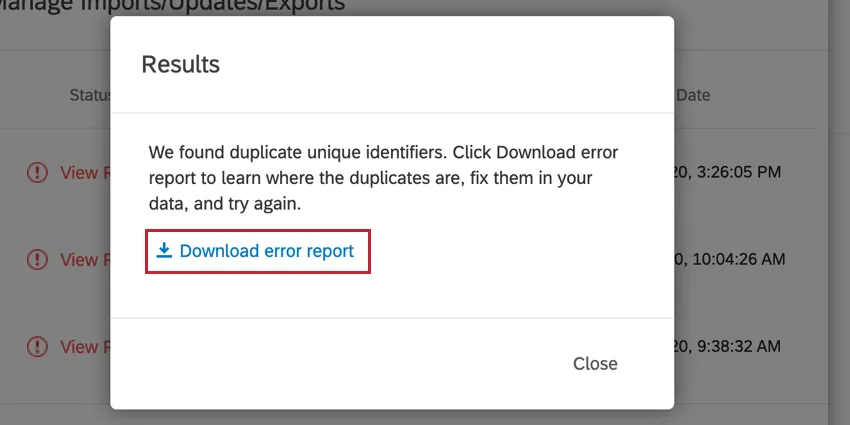
After updating your unique IDs, a window will appear where you can track the update’s progress. If the update fails, it will be listed in red. Click the View Results on the update to learn more about why it failed.
You can then download a report containing a list of every participant that failed by clicking Download error report. This will download a CSV file that you can open in a spreadsheet editor.
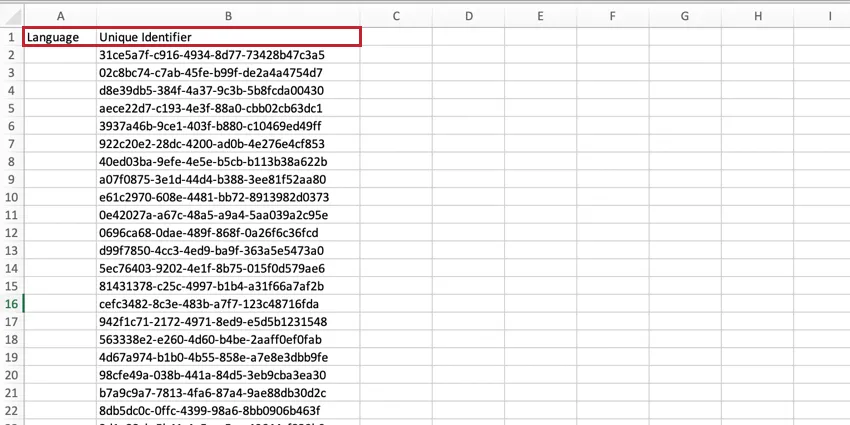
The error report will contain two columns. The first column contains the metadata field you selected along with the participant’s value for the field. The second column contains the current unique ID of the participant that failed. You can use this file to identify which employees need to have their metadata changed before their unique IDs can be updated.
Example: In this example, we can see the update failed because the selected metadata field was empty for our employees.
To update metadata values, you have two options:
Update metadata values in bulk by importing a participant list with updated metadata values.

Qtip: The error report that we provide is perfect for updating values in bulk, since it contains the unique identifiers of the participants to be updated and the metadata field to update. Simply update the metadata values and import the file into your directory.
- Manually update the metadata value for any participants that have an error.
Updating Multiple Employees’ Unique Identifiers
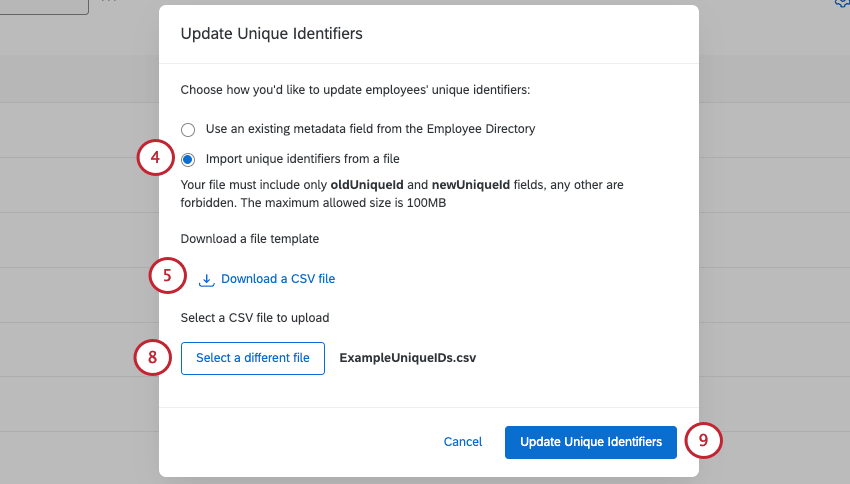
This workflow will help you change your unique identifiers for many or all of the employees in your directory.
Qtip: If you are having trouble uploading your CSV, see the CSV/TSV Upload Issues page.
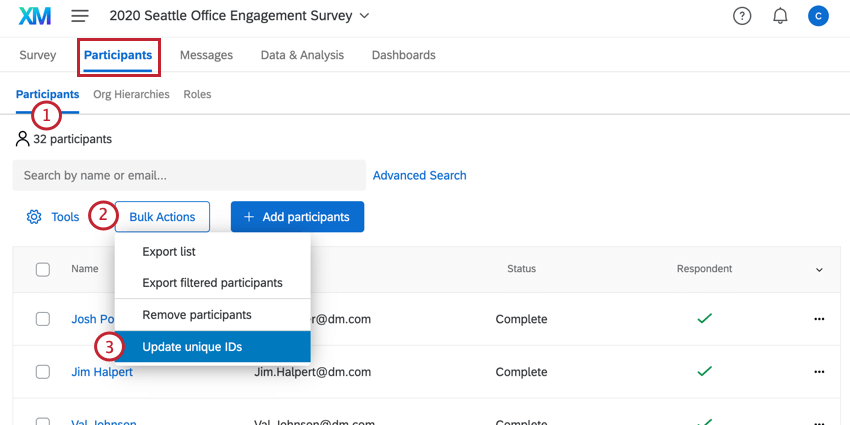
Updating Unique Identifiers Within a Project
You can update unique identifiers within a project. Any unique identifiers you change in a project will be applied to the participant at the directory level.
Qtip: In a 360 project, you’ll want to go to the Feedback recipients section of the Participants tab.
Qtip: For 360 projects, you’ll click Tools instead.
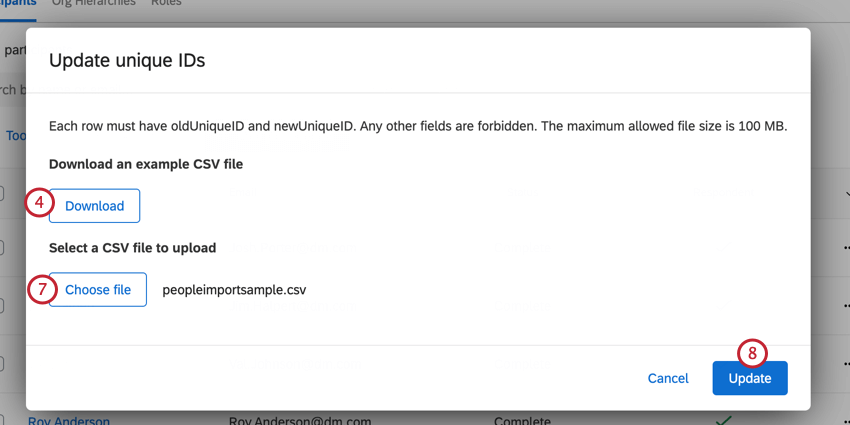
Qtip: The maximum allowed file size if 100 MB. If your file is larger than 100MB, then break your file into smaller batches.
Qtip: If you are having trouble uploading your CSV, see the CSV/TSV Upload Issues page.
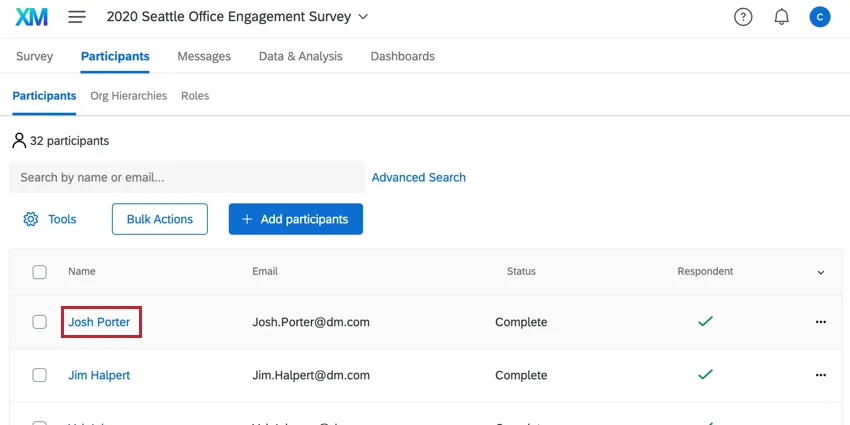
Updating One Participant’s Unique Identifier
If you only need to update one participant’s unique identifier, you can do this by finding them in the Participants section of the Participants tab, and then clicking their name.
On the left, click into the Unique Identifier’s value and change it as desired.

Enter whatever identifier your company prefers to use in this column.
Important Unique Identifier Guidelines
The limits and guidelines described here apply to both importing and manually adding unique identifiers. These limits and guidelines apply to all relevant project types, including Engagement, Lifecycle, Ad Hoc Employee Research, and 360.
Qtip: If you upload more than one person with the same unique identifier, only the first person with that unique identifier in the list will be added. If you add someone with the same unique identifier as an existing participant, that participant’s information will be updated. These updates will not transfer to responses unless you have Update metadata selected or update metadata after the fact.
Attention: You cannot leave the UniqueIdentifier field blank! Qualtrics is no longer automatically generating unique identifiers.
Unique Identifiers can be made of letters, numbers, and/or the at symbol ( @ ), periods ( . ), and underscores ( _ ).
Unique identifiers cannot use curly brackets ( { and } ).
The maximum is 100 characters for the Latin alphabet.
If you are importing a file, you have a limit of 200 columns and 5000 rows in your import file.
Importing Participants
Engagement, Lifecycle, and Ad Hoc Employee Research Participants
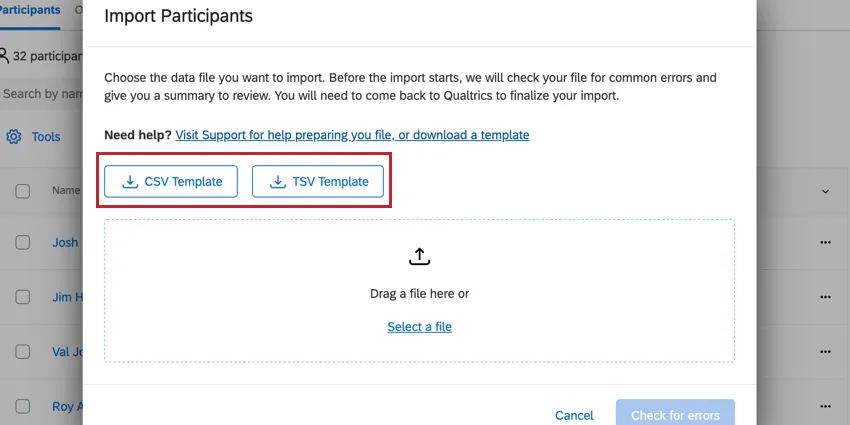
When importing participants (EX), download the CSV Template or TSV Template. This will contain a UniqueIdentifier column. Do not modify this column name to UniqueID, or it will not be recognized.
Enter whatever identifier your company prefers to use in this column.
360 Feedback Recipients (Subjects)
When importing feedback givers (360), download the example CSV or TSV. These files contain a UniqueIdentifier column. Do not modify this column name to UniqueID, or it will not be recognized.
Enter whatever identifier your company prefers to use in this column.
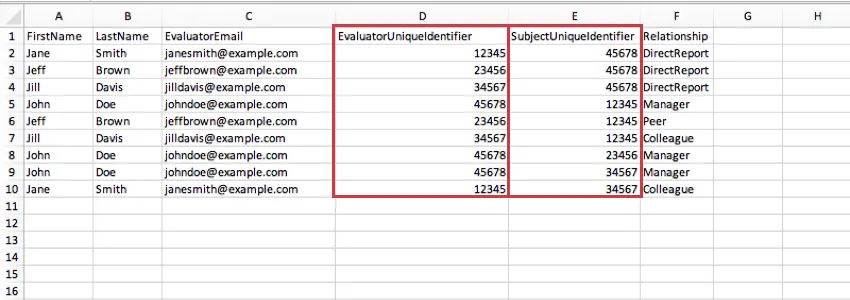
360 Feedback Givers (Evaluators)
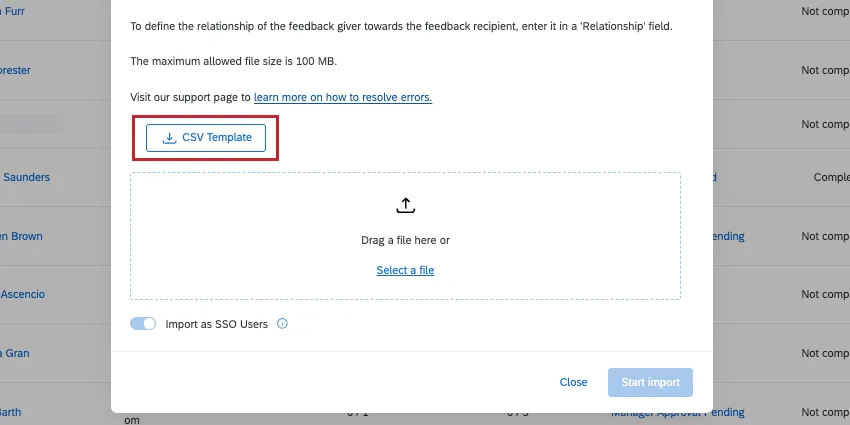
When importing feedback givers (360), you will be asked to add the unique identifier for the feedback giver and the person they are evaluating. Download the example CSV for the columns you should use.

Enter the feedback giver’s unique identifier in the EvaluatorUniqueIdentifier column, and the feedback recipient’s unique identifier in the SubjectUniqueIdentifier column.
Manually Uploading Participants
Engagement, Lifecycle, and Ad Hoc Employee Research Participants
When manually adding participants (EX), you can add unique IDs in the Unique identifier field.
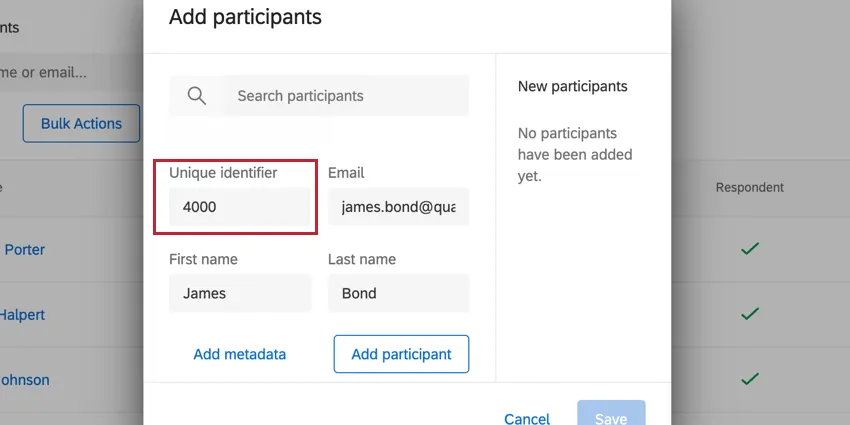
Enter whatever identifier your company prefers to use in this field.
360 Feedback Recipients (Subjects)
When manually adding feedback recipients (360), you can add unique identifiers in the Unique identifier field.

Enter whatever identifier your company prefers to use in this column.
360 Feedback Givers (Evaluators)
When manually adding feedback givers (360), you will be asked to add the unique identifier for the feedback giver and the feedback recipient they are assessing.
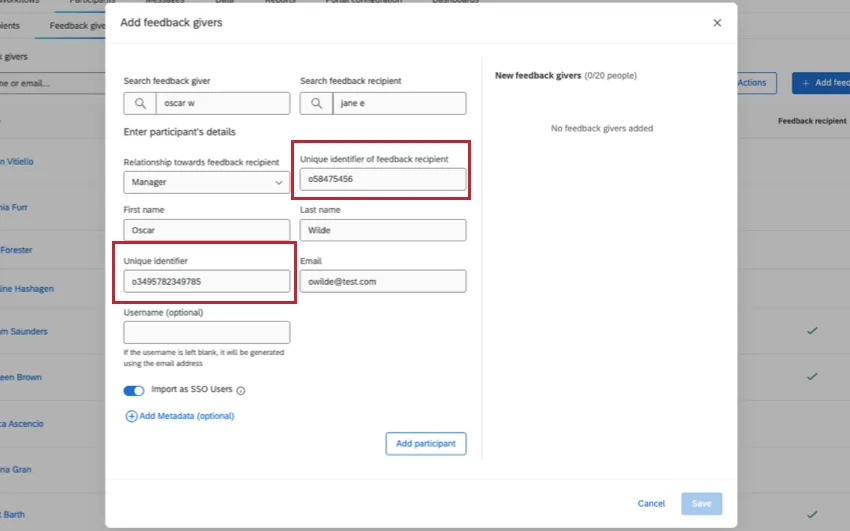
Enter the feedback giver’s (evaluator’s) in the Unique Identifier field, and enter the feedback recipient’s (subject’s) unique identifier in the field named Unique Identifier of feedback recipient.
FAQs
When I create participants, are there any metadata limits I should consider?
When I create participants, are there any metadata limits I should consider?
Are changes to members of my employee directory reflected in my project’s participants?
Are changes to members of my employee directory reflected in my project’s participants?
If you update someone’s unique identifier, first name, last name, or login information, this information will always be reflected in any projects that person is a participant in.
That's great! Thank you for your feedback!
Thank you for your feedback!