
Integrating with Zapier
What's on this page
Qtip: If you’re interested in purchasing this integration, check it out on the XM Marketplace!
About Integrating with Zapier
Like many developers, Qualtrics has an app available for making “zaps” in Zapier. Zapier is a powerful software that allows you to connect to thousands of other apps, including Google sheets, Facebook, Quickbook, MailChimp, and more. Think of Zapier as a middle-man between Qualtrics and all the incredible software Zapier can connect with.
Example: You import a new contact into Amazon S3. You set up a zap so that when this happens, the contact is also automatically imported into Qualtrics. You make sure contacts are uploaded to a list that’s regularly distributing feedback surveys, ensuring your customers are always in the loop, even across platforms.
Qtip: Because this app is located inside Zapier, not Qualtrics itself, this page is filled with links to Zapier’s support documents. If you need additional help with functions that happen on Zapier, contact Zapier’s support team. If you need help with Qualtrics-specific functions, such as survey creation, search our Support Site, or contact the Qualtrics Support Team.
Connecting Zapier and Qualtrics
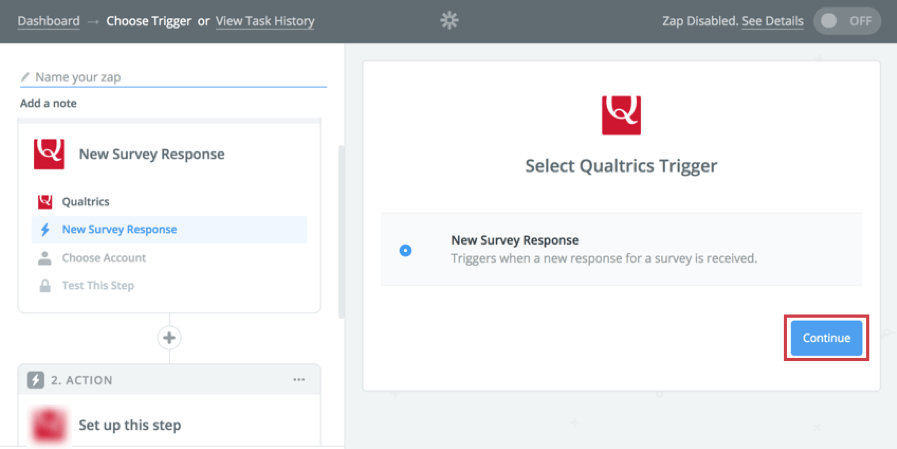
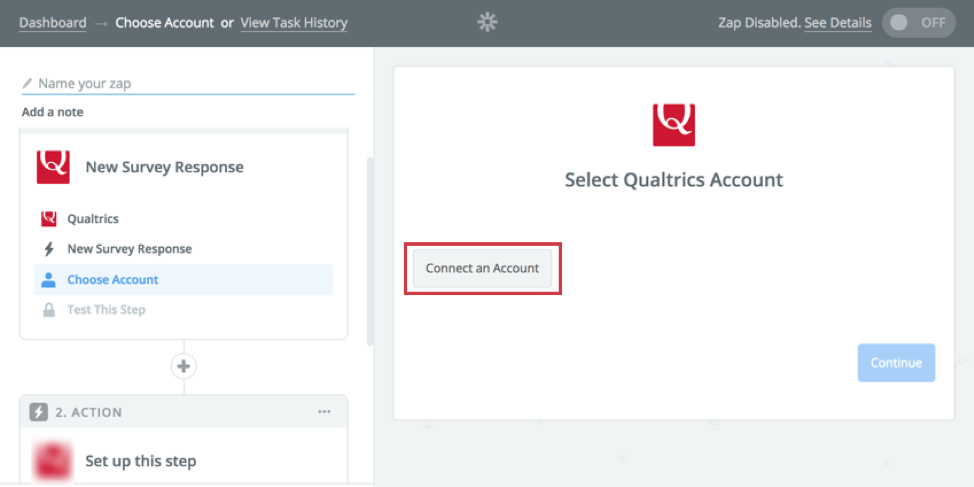
If you have purchased access to the Zapier integration, you can connect to Qualtrics via the Qualtrics app in Zapier.
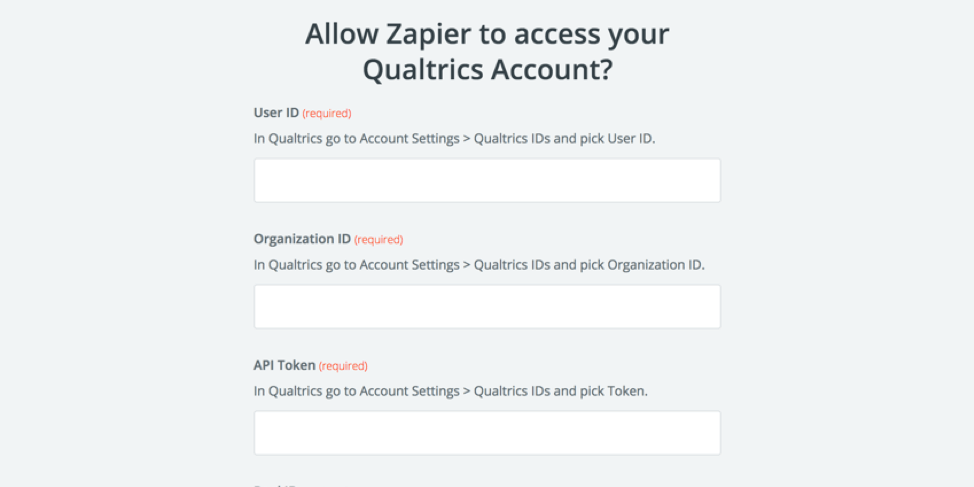
Warning: If you already have an API token in your Qualtrics account, be careful that you do not generate a new one!
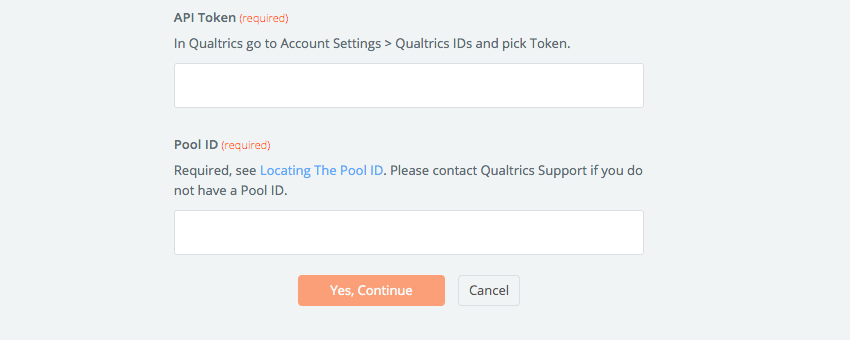
Qtip: You cannot connect your Qualtrics account to Zapier unless you have XM Directory or the new contacts. You will know if you have one of these features because you will be able to retrieve the Pool ID from the URL. If you are unable to add your account to Zapier, please contact your Brand Administrator to ensure you have the proper XM Directory account permissions and XM directory role permissions.
Types of Triggers
There is currently one Qualtrics event that can act as a trigger in Zapier: the submission of a survey response.
If you are curious about survey-building, check out these support pages:
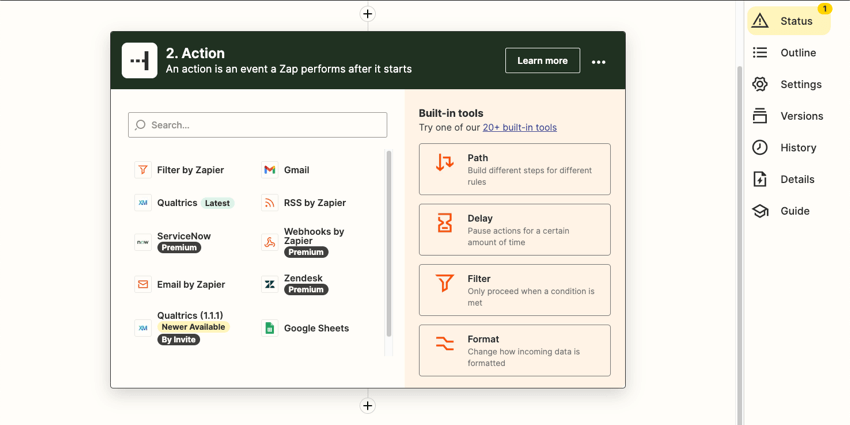
Types of Actions
Zapier can currently complete three kinds of actions through the Qualtrics app:
Click on the name of an action above to learn how the feature works in Qualtrics, independent of Zapier.
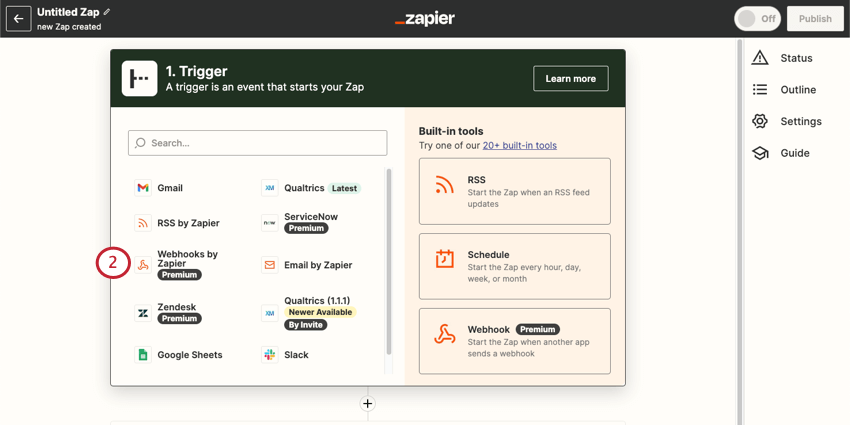
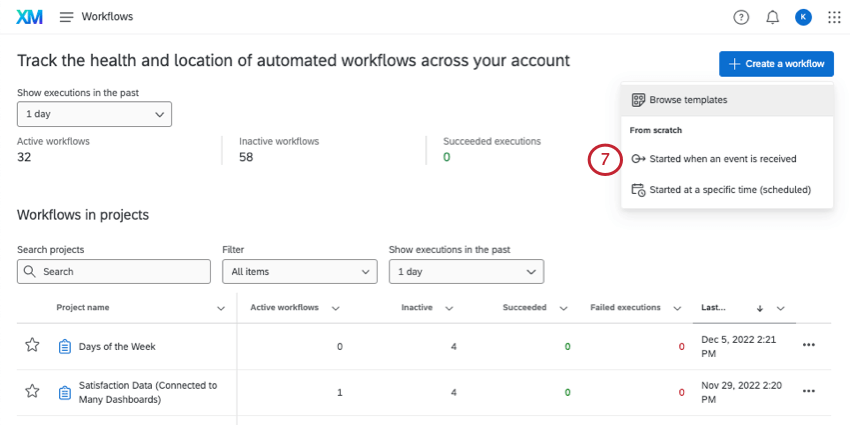
Connecting Through Webhooks
Another way to connect Qualtrics and Zapier is to set up a webhook connection. There are a few reasons you may want to try this method instead, including:
- You want to customize what data gets sent to Zapier.
- You have a large number of workflows for the same survey.
Qtip: Zapier webhooks are especially recommended if you see timeout errors in your project’s workflows.
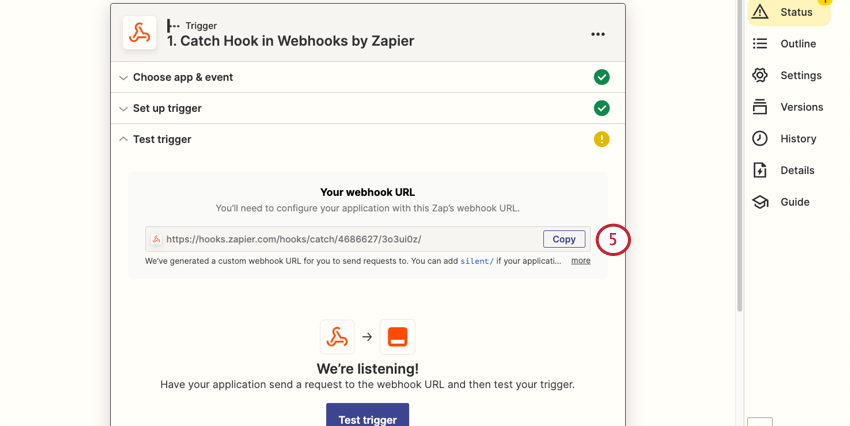
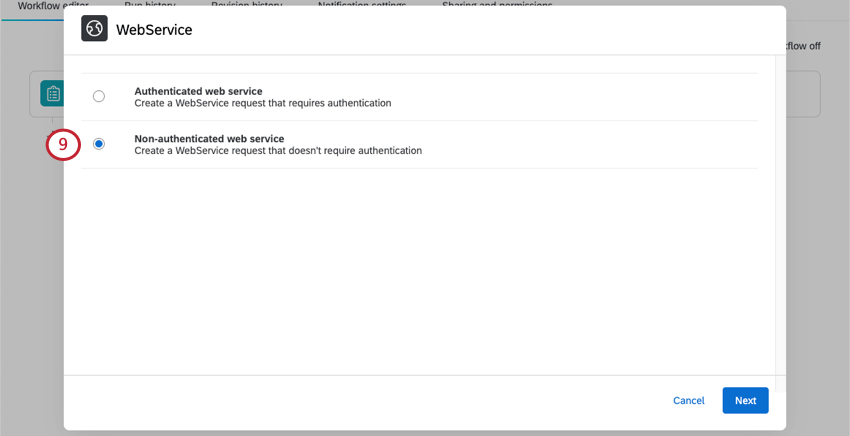
If you’d like to try connecting with webhooks, follow the steps below.
Qtip: For more, see Zapier’s documentation on webhook triggers.
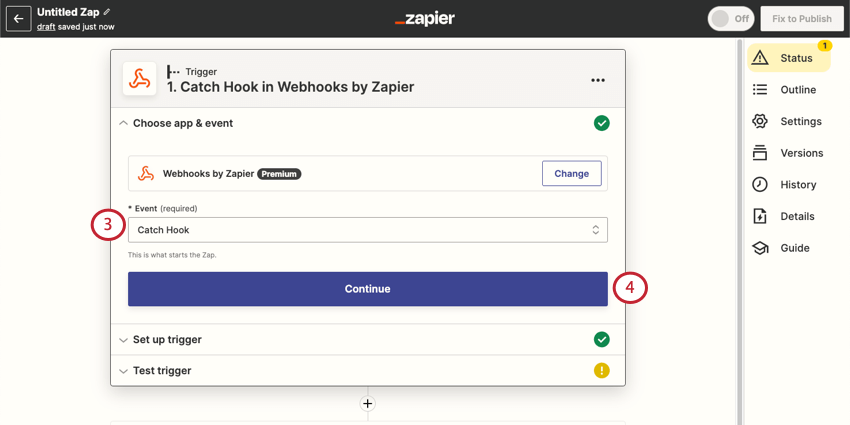
Qtip: We recommend using a survey response event. That means the zap will be triggered whenever a response is submitted to a chosen survey.

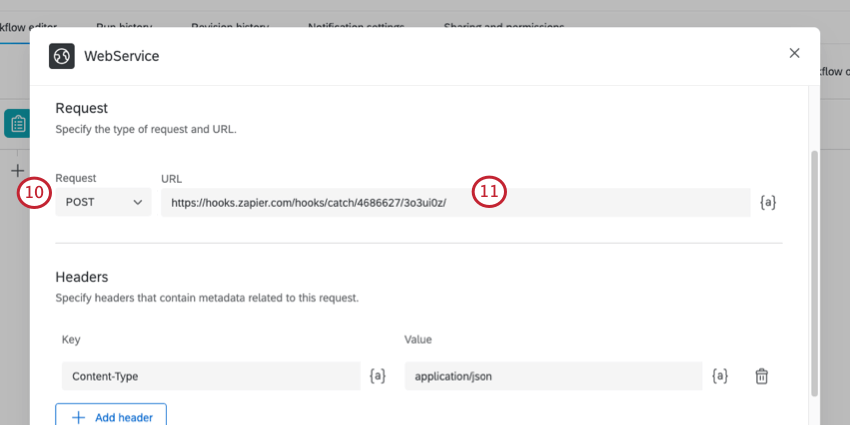
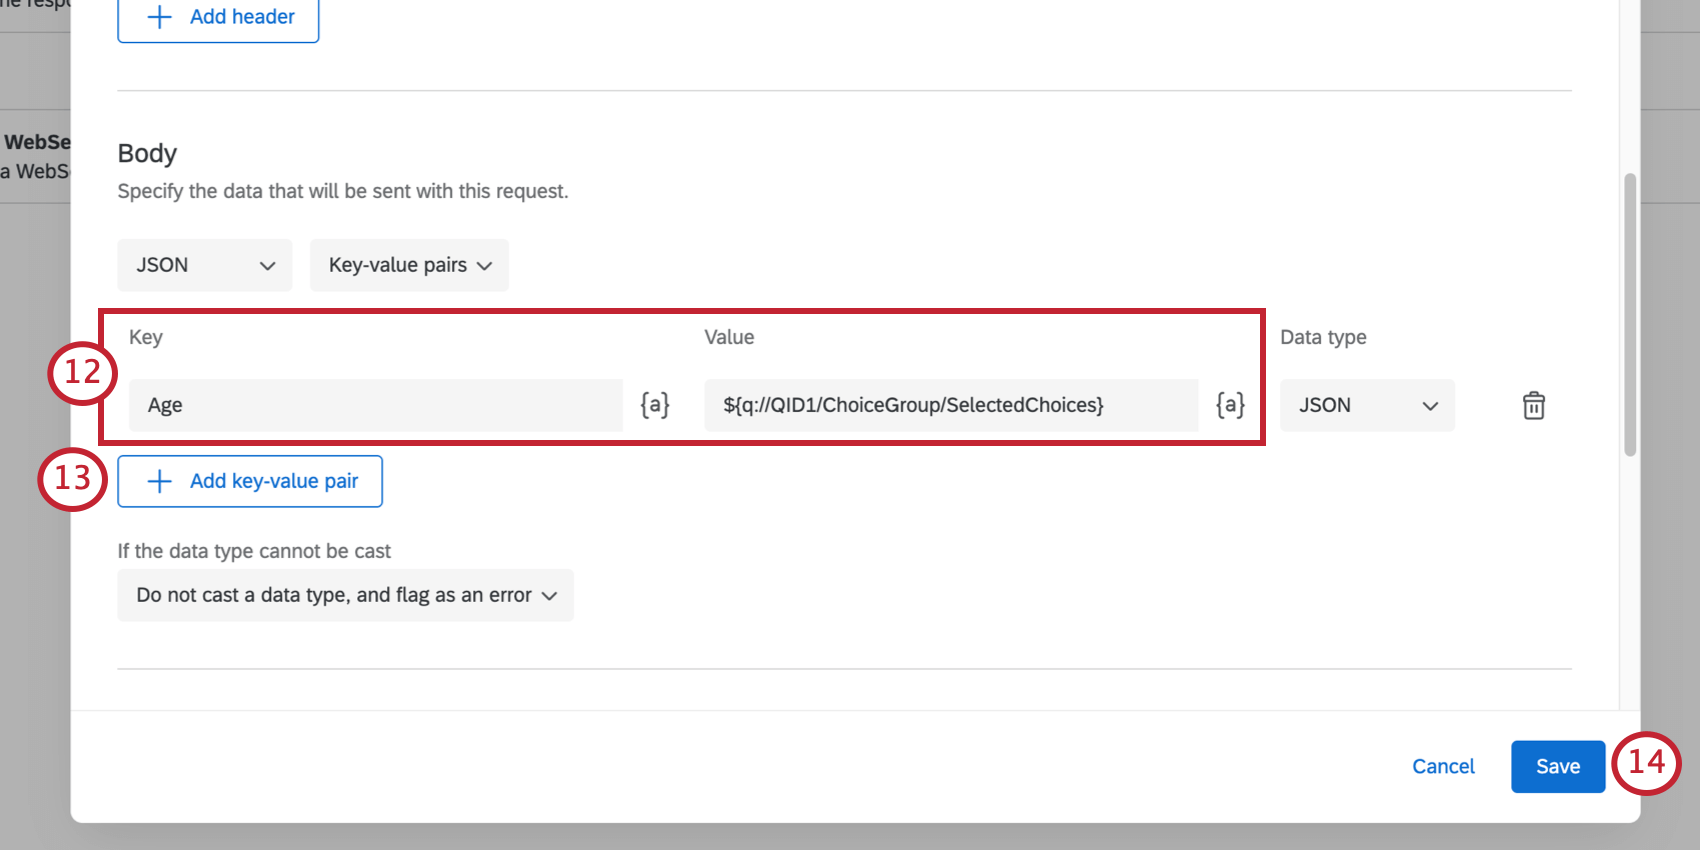
Example: You want to pass over a respondent’s age. You set the key to “Age.” In
Question 1 of your survey you ask for the respondent’s age, so you set the value to the piped text for Question 1.
Qtip: Read more on Setting Up a Web Service Task and Piped Text.
If you need additional help with Zapier functionality, contact Zapier’s support team. If you need help with Qualtrics-specific functions, such as survey creation, search our Support Site, or contact the Qualtrics Support Team.
That's great! Thank you for your feedback!
Thank you for your feedback!