
Adding an SSO Connection for an Organization
What's on this page
About Adding a Connection
This page will go over how to connect your Qualtrics organization to SAML or OAuth 2.0 SSO. To get started, go to the Authentication tab of your Organization Settings, and select Add a connection.
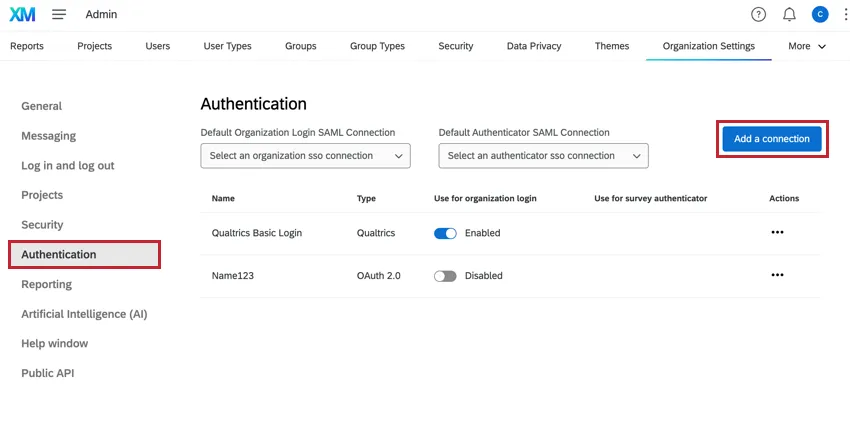
Only Brand Administrators can complete these steps.
Qtip: The only protocols available through this self-serve portal are SAML and OAuth 2.0. If you are interested in pursuing implementation for other SSO protocols, please reach out to your Account Executive.
General Information
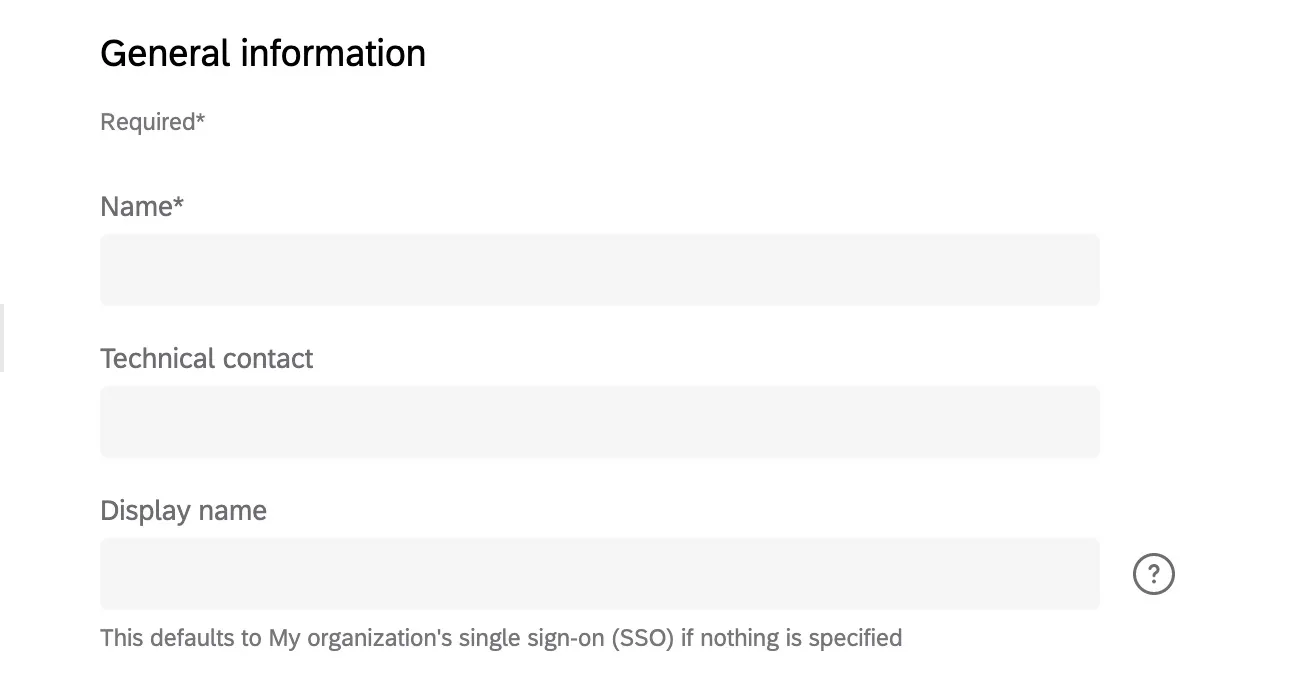
Name: Name the connection. This is a required field.

Qtip: This name appears on your Organization Setting’s SSO tab so you can distinguish different connections you’ve added. This will not appear on your login page.
- Technical Contact: Add the email address of a technical contact which will likely be someone from your IT team. This is the person Qualtrics can contact if there are technical questions or updates related to this SSO connection. This field is optional but strongly recommended.
Display Name: The display name is what will be displayed on your organization’s login page when users are asked to select an SSO connection. Display names can be up to 120 characters long. See more about this under Enabling and Disabling SSO Connections.
Qtip: This can only be applied to SSO connections. The display name cannot be changed for the default Qualtrics login.
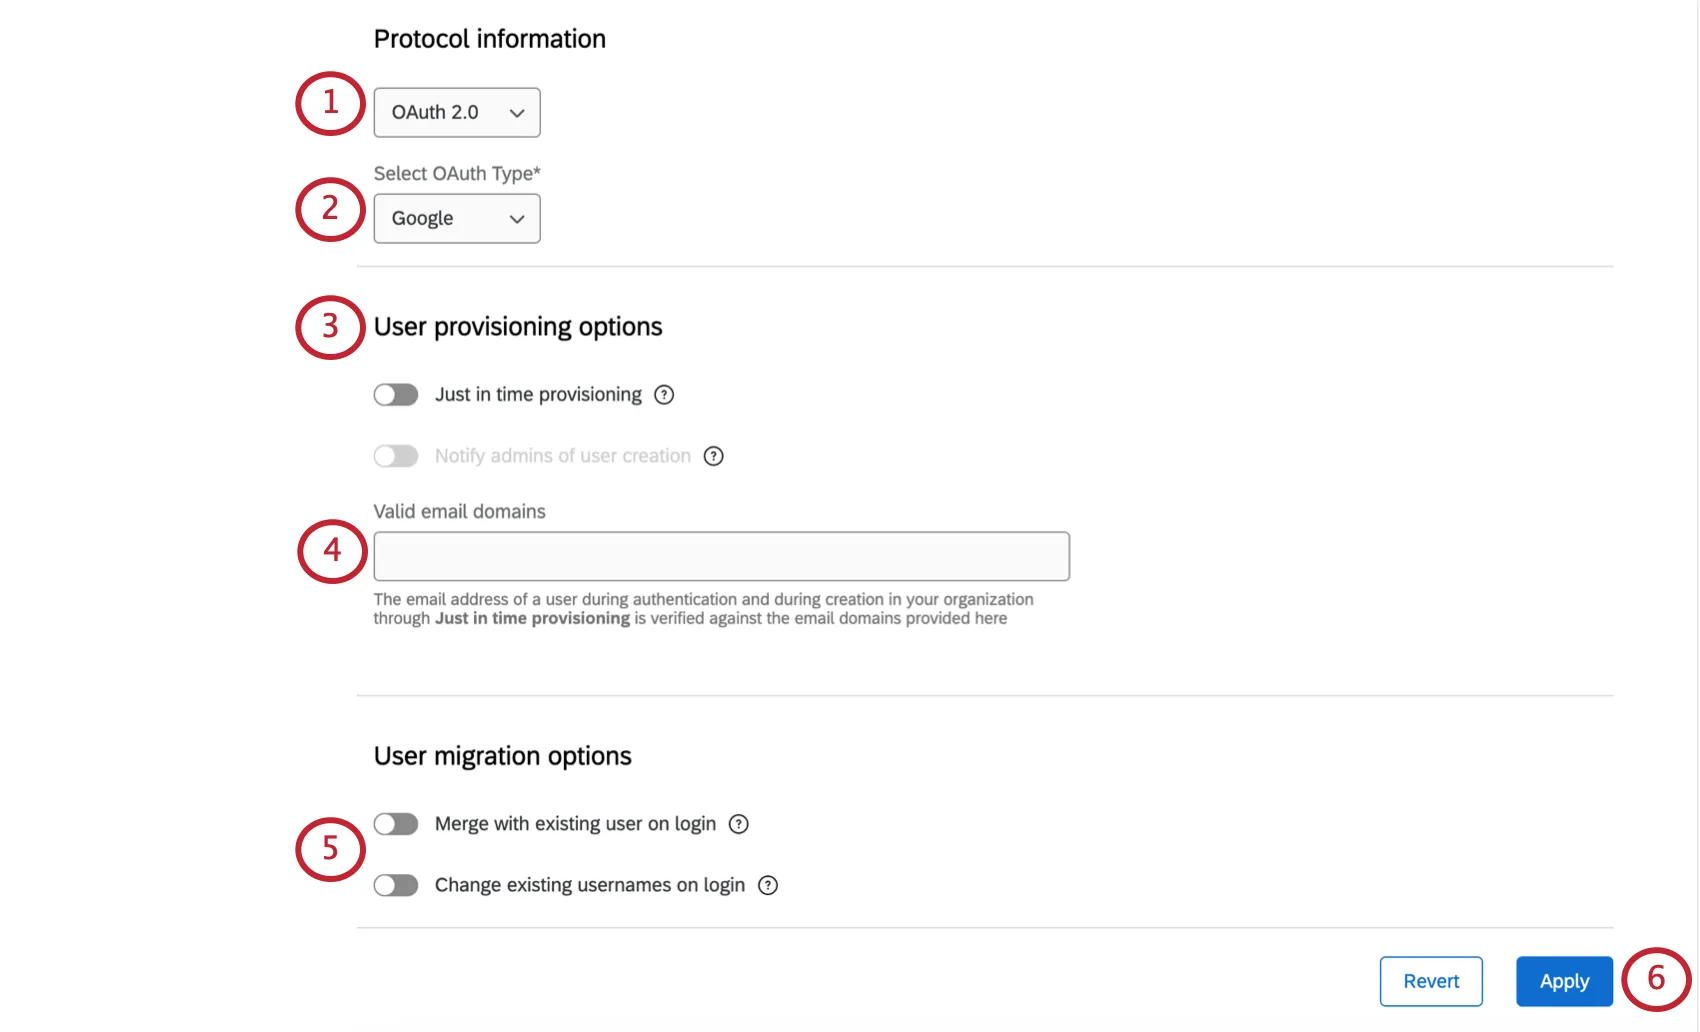
Setting Up a Google Connection
One type of OAuth 2.0 that you can add is a Google connection. Connecting your organization to Google SSO will allow your users to sign up or log in using their Google accounts.
Attention: You cannot pass user attributes from the default Google setup described in this section. This means you cannot use this Google setup for automatic dashboard enrollment. To pass user attributes, set up a custom OAuth 2.0 connection to Google.
Example: Barnaby works at Tread, where all employees have a custom employee email, e.g., barnabys@treadmade.org. His valid email domains would be treadmade.org
Qtip: This field is empty by default, so make sure to either an add asterisk (*) or your company’s Gmail domains. Separate multiple domains with commas.
Setting Up an OAuth 2.0 Connection
Once you set your Protocol Information to OAuth 2.0, several fields will appear. All of these fields are required to configure your OAuth 2.0 connection, except the name.
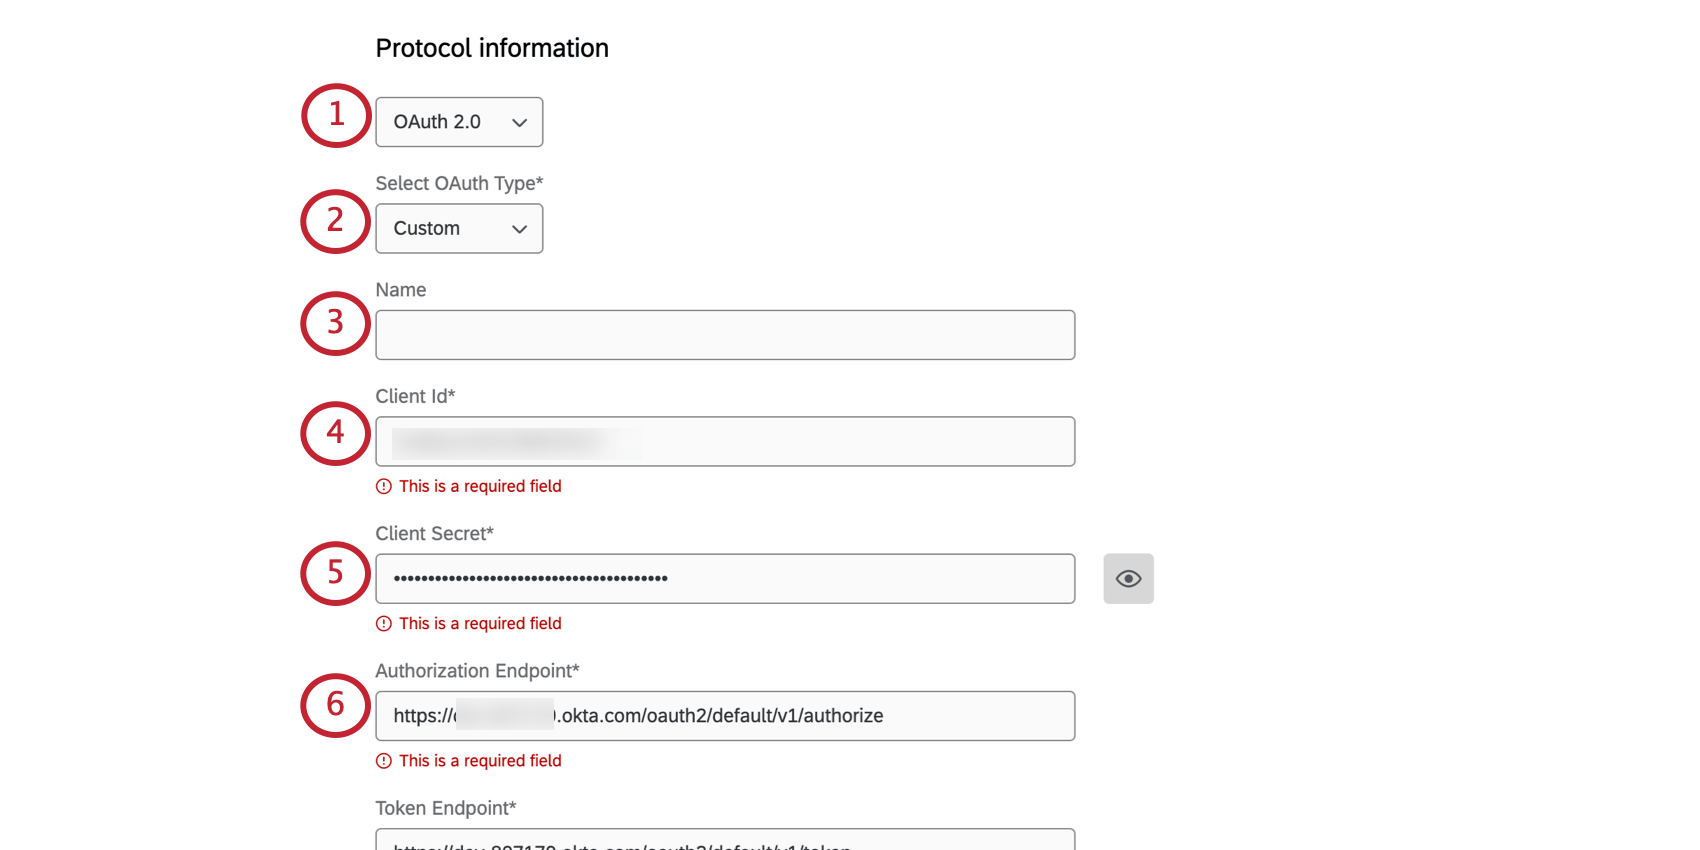
Qtip: Client IDs identify and authenticate the client (in this case, Qualtrics). The Client ID can be acquired from the authorization server (i.e., your OAuth provider).
Qtip: The client secret identifies and authenticates the client. It is acquired from the authorization server.
Qtip: Click the eye icon to show the client secret.
Qtip: An authorization endpoint handles the authentication and consent of the user. After the user authenticates and consents to the access of their resources, an authorization code is sent back to the client.
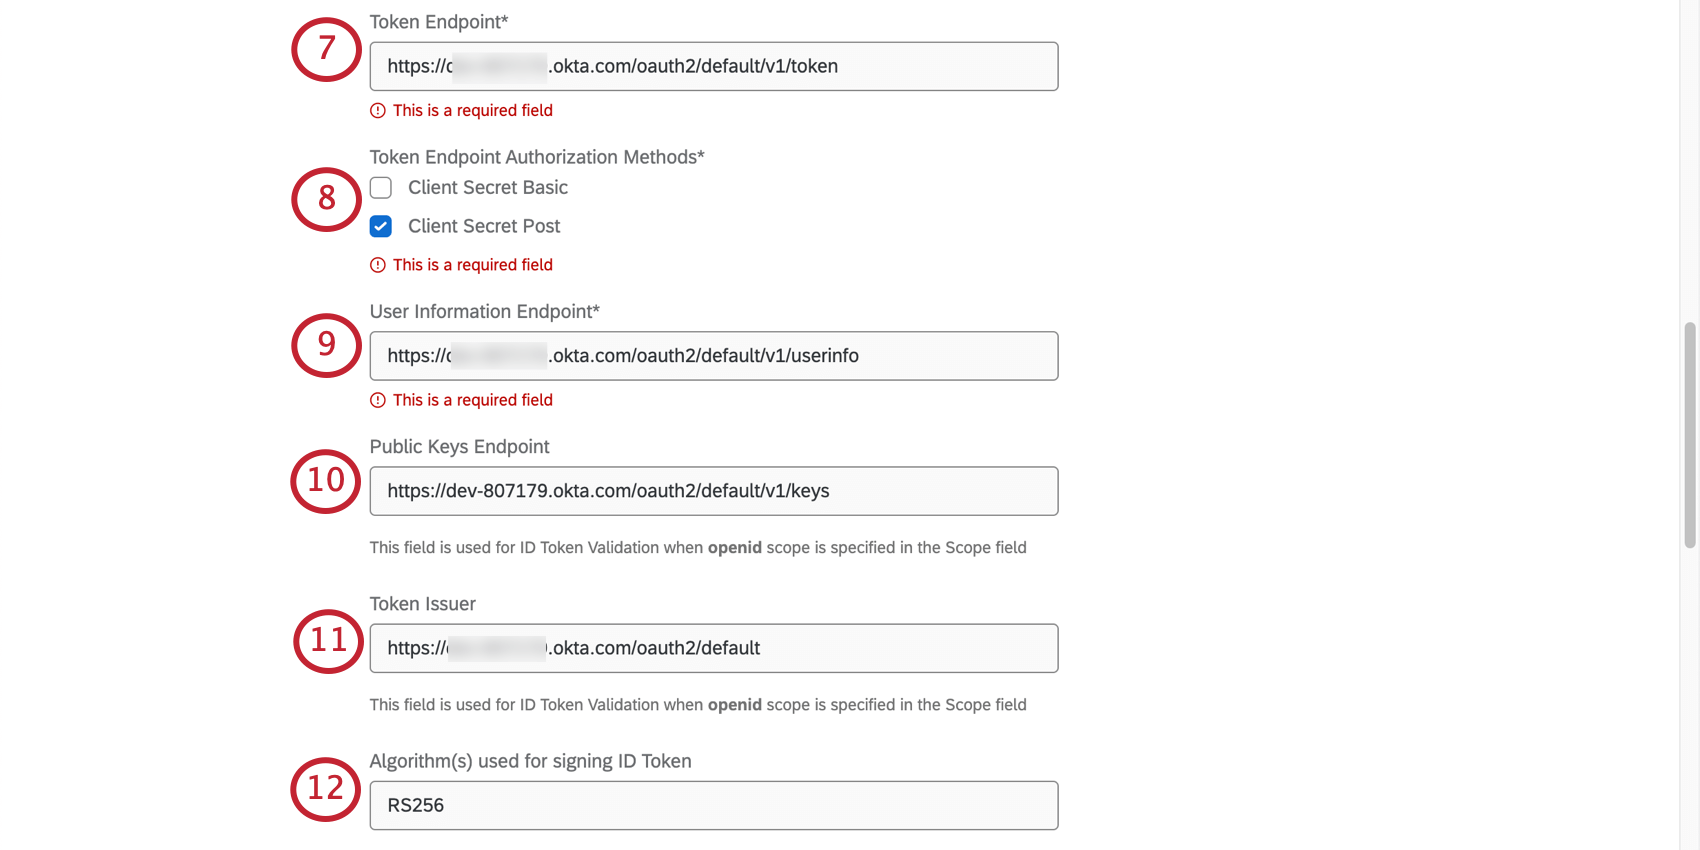
Qtip: The token endpoint is an endpoint in the authorization server that handles the exchange of authorization codes for access tokens.
- Client Secret Basic: The client secret is encoded in the authorization header.
- Client Secret Post: The client secret is included in the request body as a form parameter.
Qtip: The user information endpoint in the resource server accepts and validates an access token from the client and returns user information back to the client.
Qtip: This public keys endpoint is used during id token validation. The client (Qualtrics) goes to this endpoint to retrieve the public keys and to try to match the key id found in the id token to one of the public keys. This field is not necessary if the id token is signed with a MAC based algorithm (e.g., HMAC256, HMAC512).
Qtip: The Token Issuer field is used during id token validation.
Qtip: This field is used for ID Token Validation when openid scope is specified in the Scope field (Step 14). You can add multiple algorithms that can be used for signing the id token. The default is RS256. You do not need to add algorithms if the id token is signed with a MAC based algorithm.

- Header: The access token is included in the authorization header.
- Body: The access token is included in the response body as a form parameter.
- Query: The access token is included in the response body as a query parameter.
Qtip: The scope is used to specify which resources are requested from the user information endpoint (i.e., the list of resources that the resource owner is sending to the client). Example scopes include openid, email, and profile.
Qtip: You and your IT team must configure your identity provider on your end. Qualtrics representatives cannot perform this step for you.

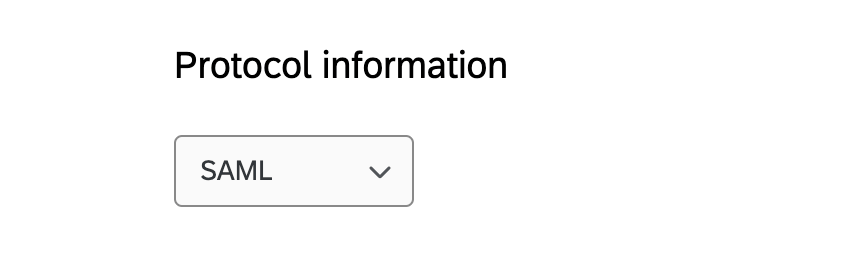
Setting Up a SAML Connection
Uploading Identity Provider Settings (SAML)
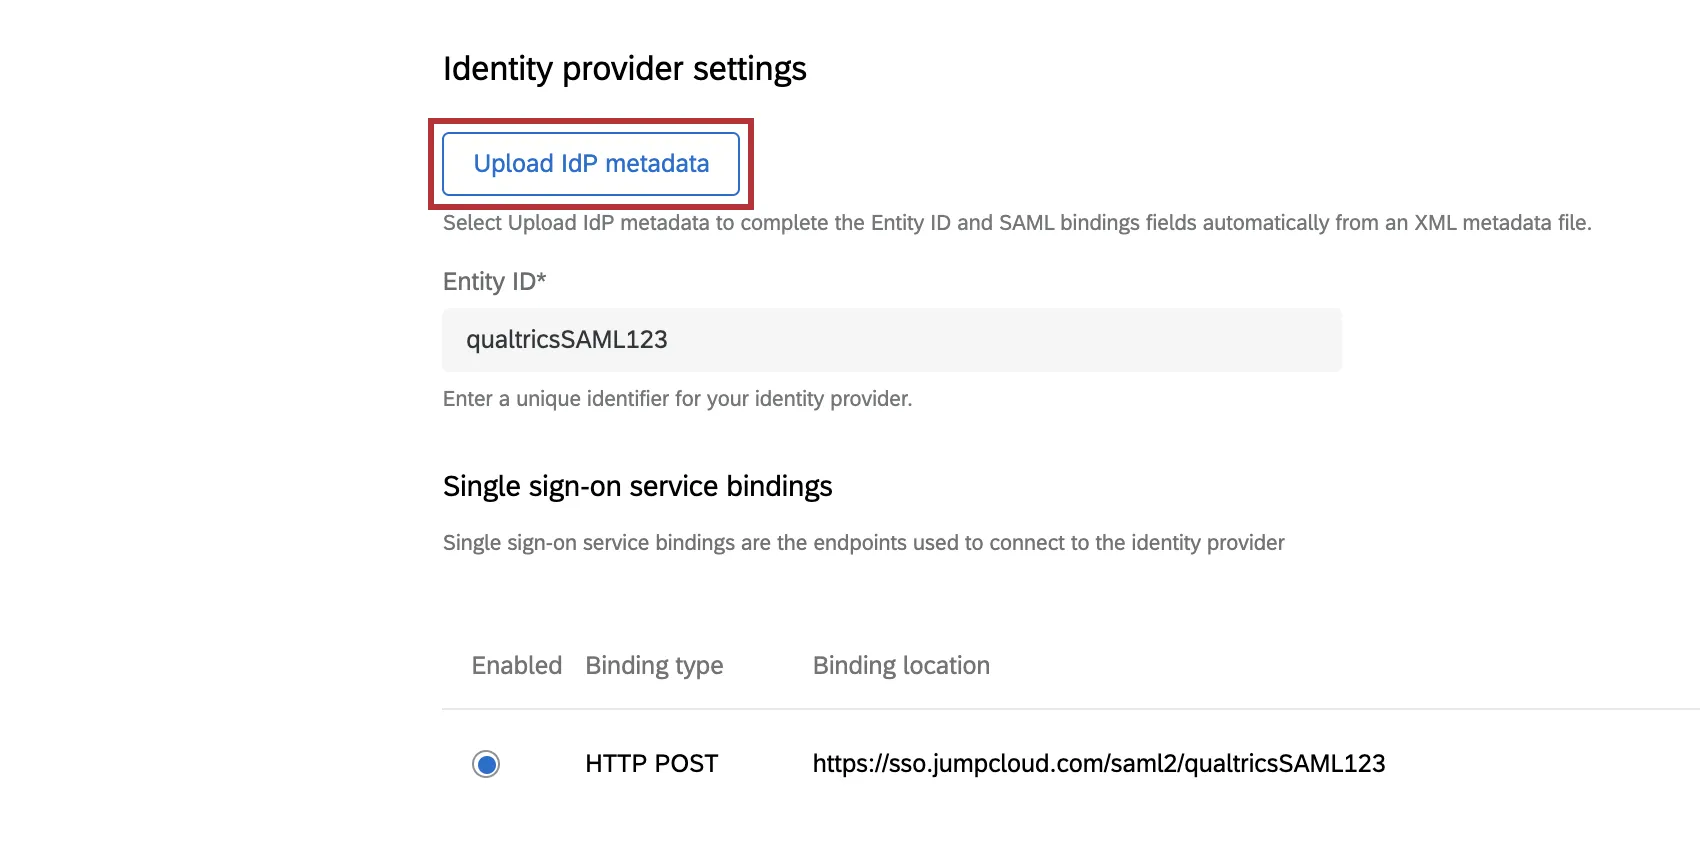
If you have your IdP metadata information available in XML format, click Upload IdP metadata and paste it into the window that opens. This will fill the fields in the following steps (Entity ID, Single sign-on service bindings, Certificates) with the information you provide.
Qtip: Your IdP metadata will most likely be an .xml file that begins and ends with the <EntityDescriptor tags.
Qtip: For more information on IdP metadata, see this website. Please note that we do not own this PDF or the information within.
Entity ID
The Entity ID is the unique identifier for your Identity Provider, and can be found in your IdP metadata. This field will auto-fill from your metadata upload or you can add it manually.

Single Sign-On Service Bindings
Single sign-on service bindings are endpoints used to connect to the Identity Provider, and can be found in your IdP metadata.
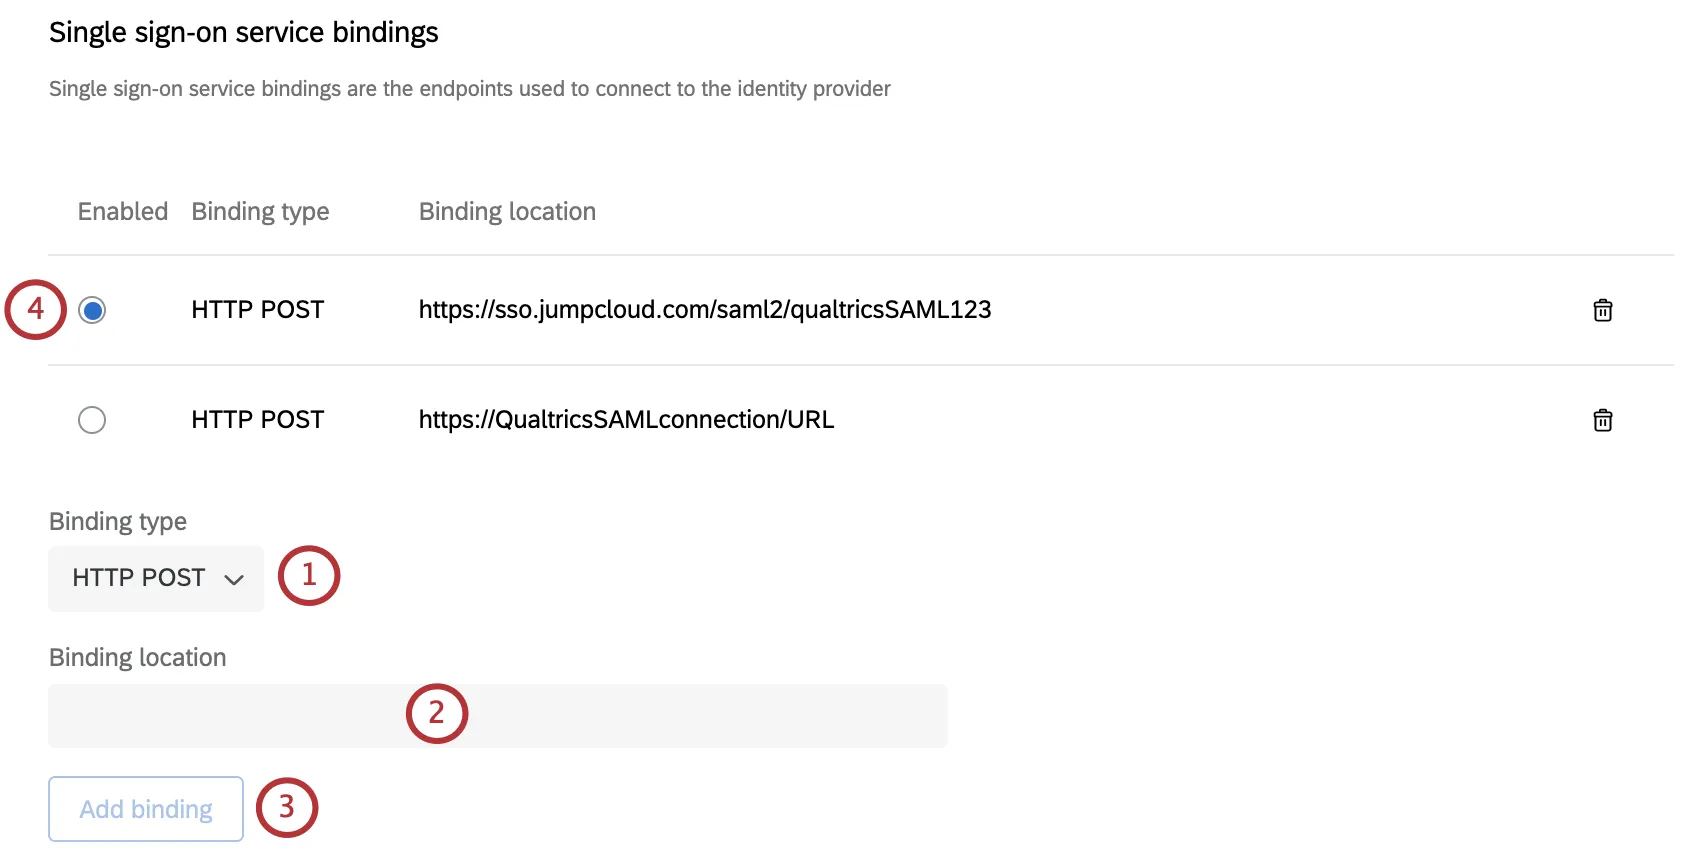
To add a new binding manually,
Qtip: If HTTP POST is enabled, the SAML request will be signed.
You can delete bindings by using the trashcan icon to the right of a binding.
Certificates
The certificate is the key used to authenticate the SAML connection. Qualtrics requires a signing certificate for SP Initiated logins, which can be found in your IdP metadata. If you plan on using IdP Initiated logins only, a signing certificate is not required.
Warning: It is strongly recommended that you support SP initiated origins and upload a signing certificate. If you choose to support only IdP Initiated logins, you may experience issues logging into the Customer Success Hub, Qualtrics Learn, and mobile applications via SSO. The built-in test feature will also not work.
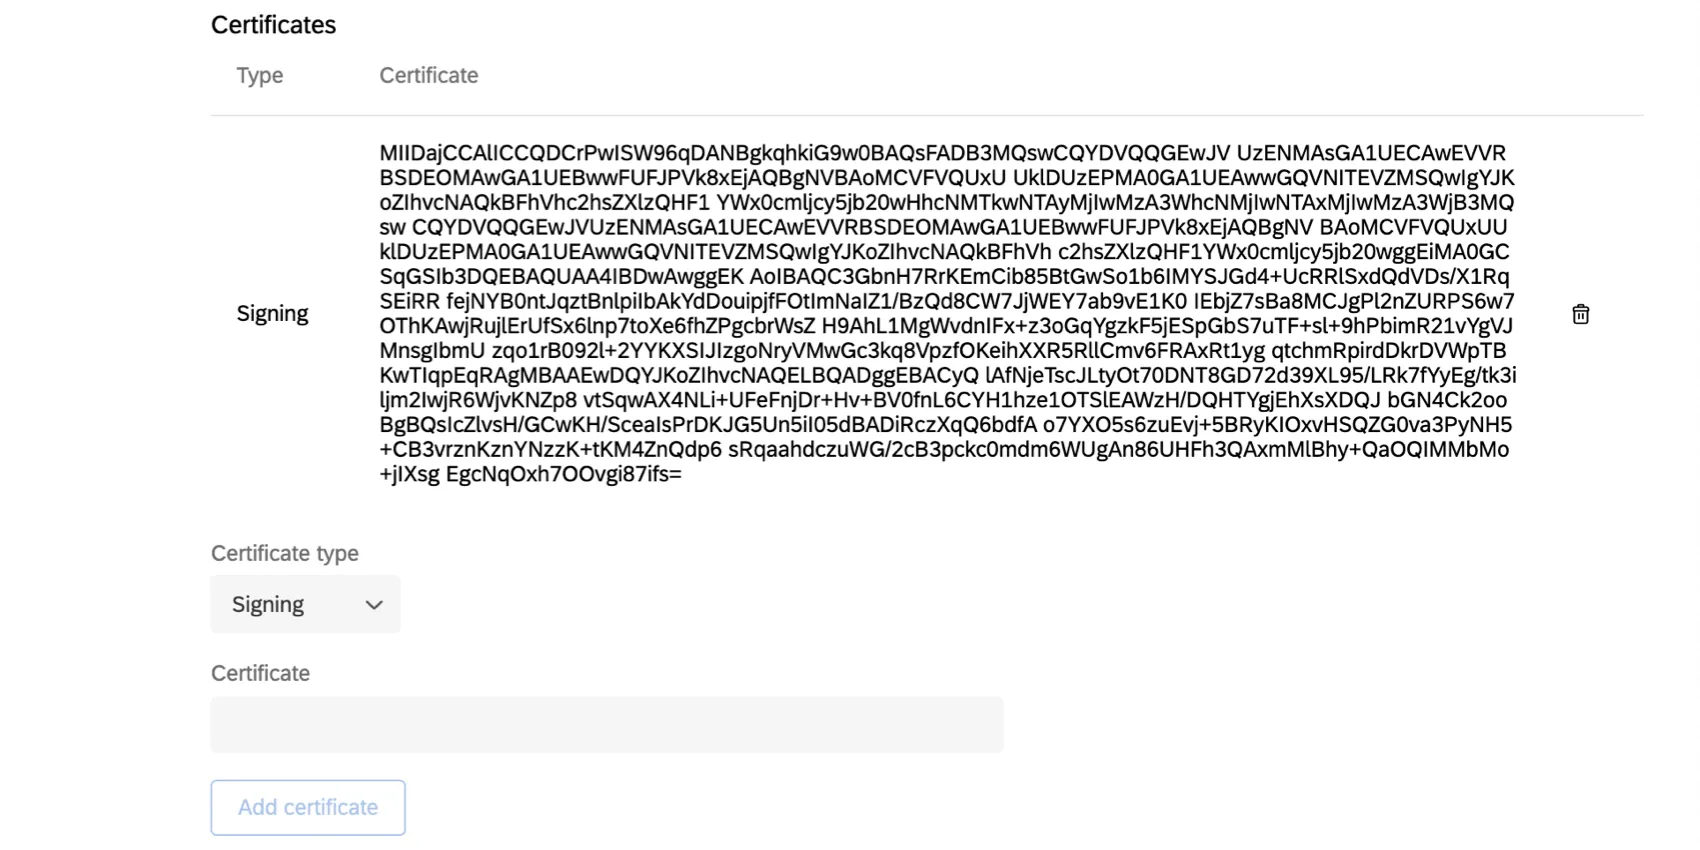
To add a new certificate,
You can add multiple signing certificates.
You can delete certificates by using the trashcan icon to the right of a certificate.
Warning: Certificates expire every so often, so you’ll want to contact your IT team to make sure that the certificates used for Qualtrics logins are updated. You can work with your IT team to add a new certificate before the old certificate expires, and test the connection to ensure that the update goes through successfully.
Additional Options (SAML)
The following settings are all optional. Read carefully what each one does before enabling or disabling these.
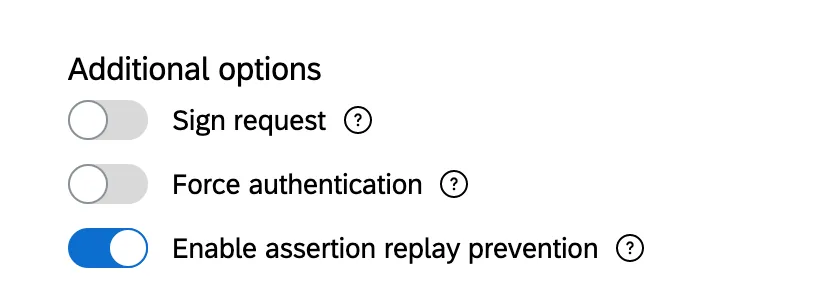
- Sign Request: If you have a binding that is an AuthN Request and need us to sign it, enable this setting. To guarantee that the request came from Qualtrics and not someone who might’ve intercepted the message, we’ll sign the request sent to the identity provider.
- Force Authentication: When enabled, Qualtrics will have your IdP force users to authenticate even if there is an active session. Only works if your IdP supports this kind of setting.
- Enable assertion replay prevention: When enabled, Qualtrics won’t reuse an assertion we’ve already seen, which is 1 way to prevent SAML replay attacks. We recommend that you enable this option.
Service Provider Settings (SAML)
After setting your protocol information to SAML, you’ll be required to enter your Identity Provider settings, and will be able to download our Service Provider metadata by clicking Download service provider metadata. This is only available after you’ve saved your connection settings for the first time.
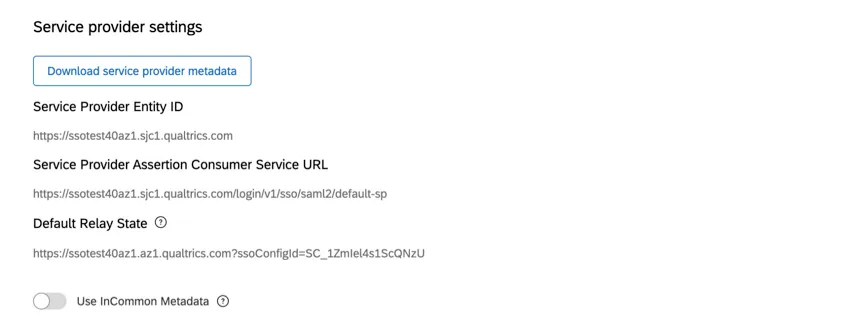
Qtip: If your identity provider requires you to fill in the service provider connection information first, you’ll be able to see our Entity ID and Assertion Consumer URL prior to being able to download the full metadata file.
Qtip: If you will use InCommon to retrieve our metadata, enable the Use InCommon Metadata toggle. Please note that this will change the Service Provider Entity ID and ACS URL to match the values used in InCommon. If you have already configured your identity provider, you will need to update the settings there as well.
When configuring the Service Provider (SP) metadata in your IdP portal, feel free to look at our guide to common Identity Providers. If you plan on using IdP Initiated logins, please apply the Default Relay State to your IdP configuration.
User Attribute Fields (Both)
In this section, you’ll enter in the names of the attributes you plan on sending in the SSO exchange. The only required field is email address, but we strongly recommend including a first name, last name, and username field in order to complete the user profile in Qualtrics. The User Type, Division, and Group fields are optional fields that can be used for role mapping.
For a SAML response, all attribute names are case sensitive and must be spelled exactly as they appear in the Attribute Statement section of your SAML response. Qualtrics cannot authenticate off of the “NameID” field in your SAML response.
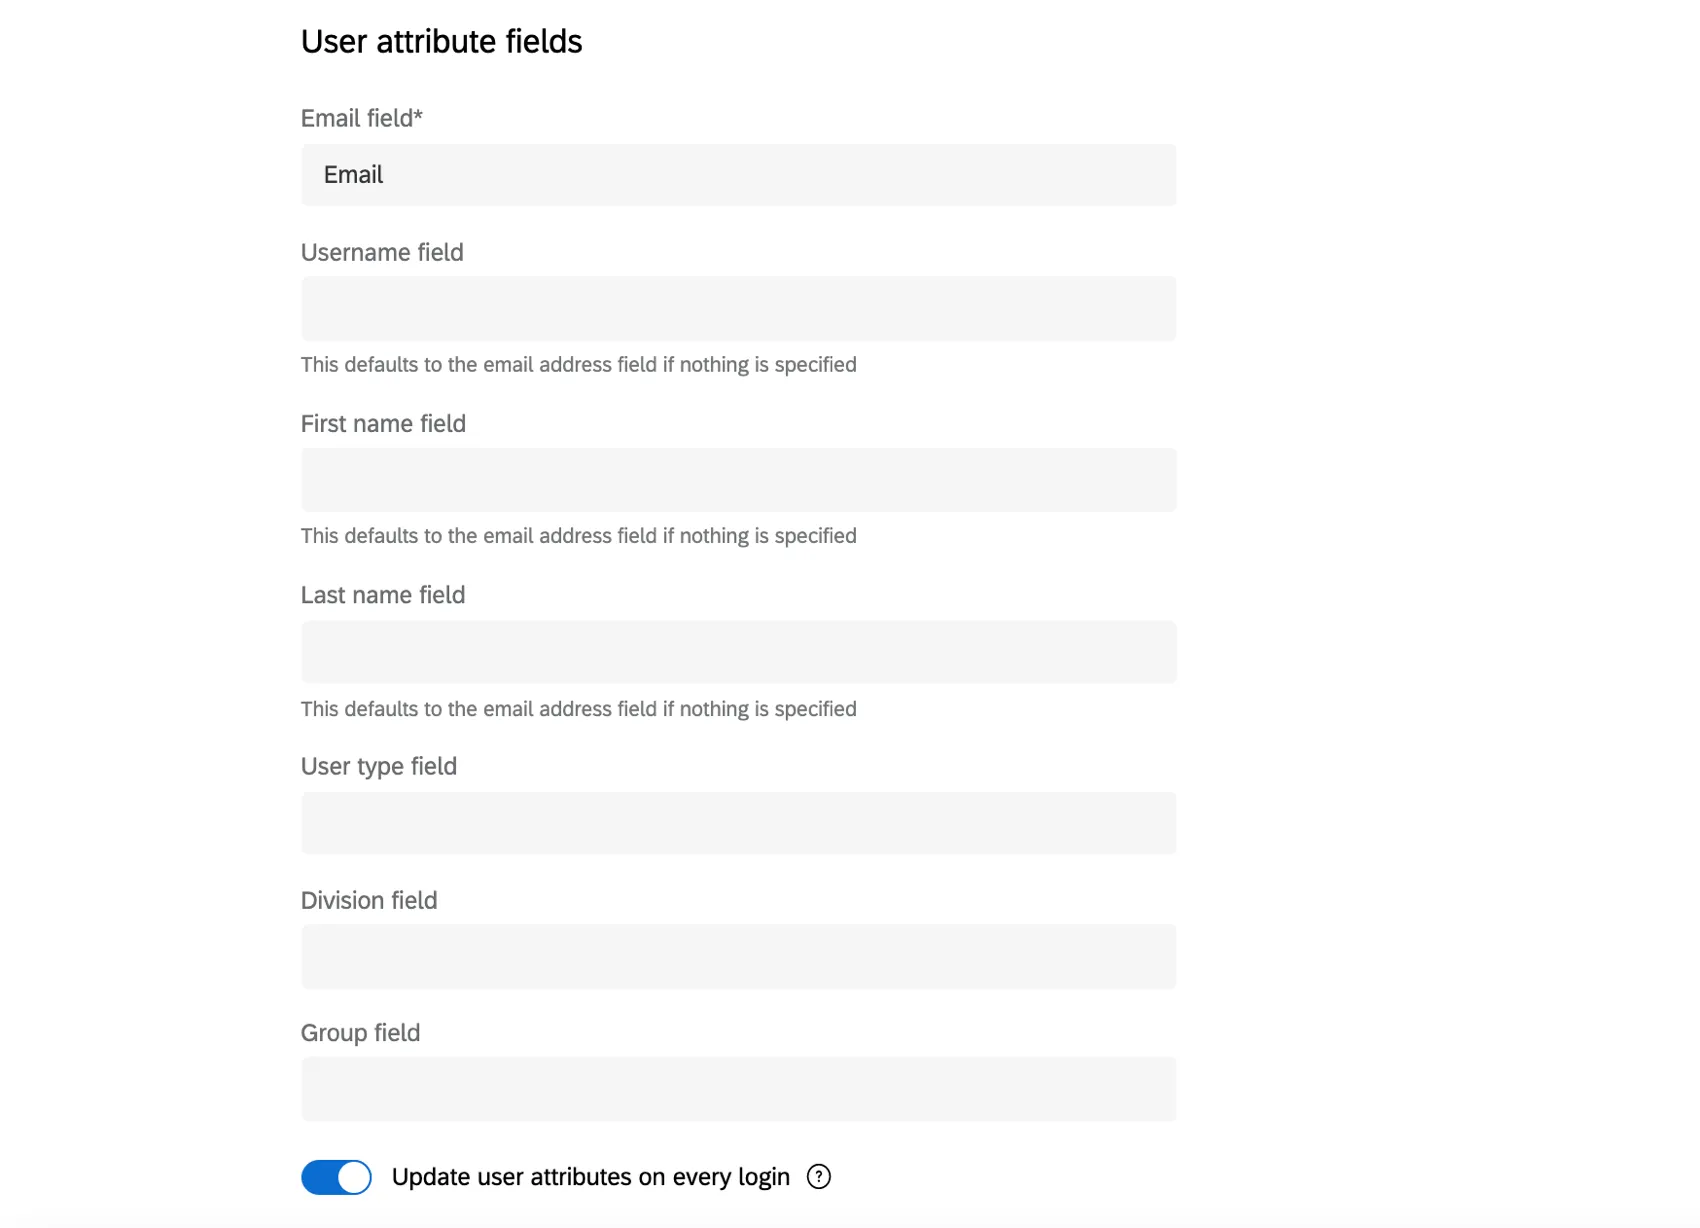
- Email field: The name of the field containing users’ emails. This field is required.
Username field: The field that carries the usernames, if you want these to be distinct from email addresses. This field is optional and will default to the email field if nothing is provided.

Attention: If you’re using Just In Time provisioning and would like to change the attribute mapped to the username field, please contact the Qualtrics Support SSO team. Changing this attribute value after it has been configured can potentially affect SSO logins.
Warning: If multiple SSO connections are enabled, there is a possibility of duplicate usernames across SSO providers. In such a situation, Qualtrics will consider them as the same user and will grant access to the account mapped to the said username. To avoid this situation, please use a unique, unchanging field across all SSO providers.
Qtip: Best practice is to use a unique, unchanging field for username. This can be an email address or a unique identifier such as an employee ID.
- First name field: Users’ first names. Defaults to the email if nothing is provided.
- Last name field: Users’ last names. Defaults to the email if nothing is provided.
User type field: You may want users to be assigned to a certain user type as soon as they log into Qualtrics for the first time. See Assigning User Permissions for more information.
Qtip: If nothing is defined, all users will default to your brand’s default user type.
- Division field: You may want users to be assigned to a certain division as soon as they log into Qualtrics for the first time. See Assigning User Permissions for more information.
- Group field: You may want users to be assigned to a certain group as soon as they log into Qualtrics for the first time. If this field is left blank, users will not be assigned to groups. See Assigning User Permissions for more information.
- Enable Update user attributes on every login toggle if you’d like your user’s attributes to be updated each time they login. Qualtrics will update their user attributes to the value provided by the identity provider upon login.
After entering in these attribute names, you can configure the rest of the mapping in the next section, Mapping Options.
Qtip: The attribute name can even appear as a URL. This occurs commonly with ADFS and Azure IdPs and can look like this:
http://schemas.xmlsoap.org/ws/2005/05/identity/claims/emailaddressPlease make sure to check the SAML Response to confirm how the attribute is listed.
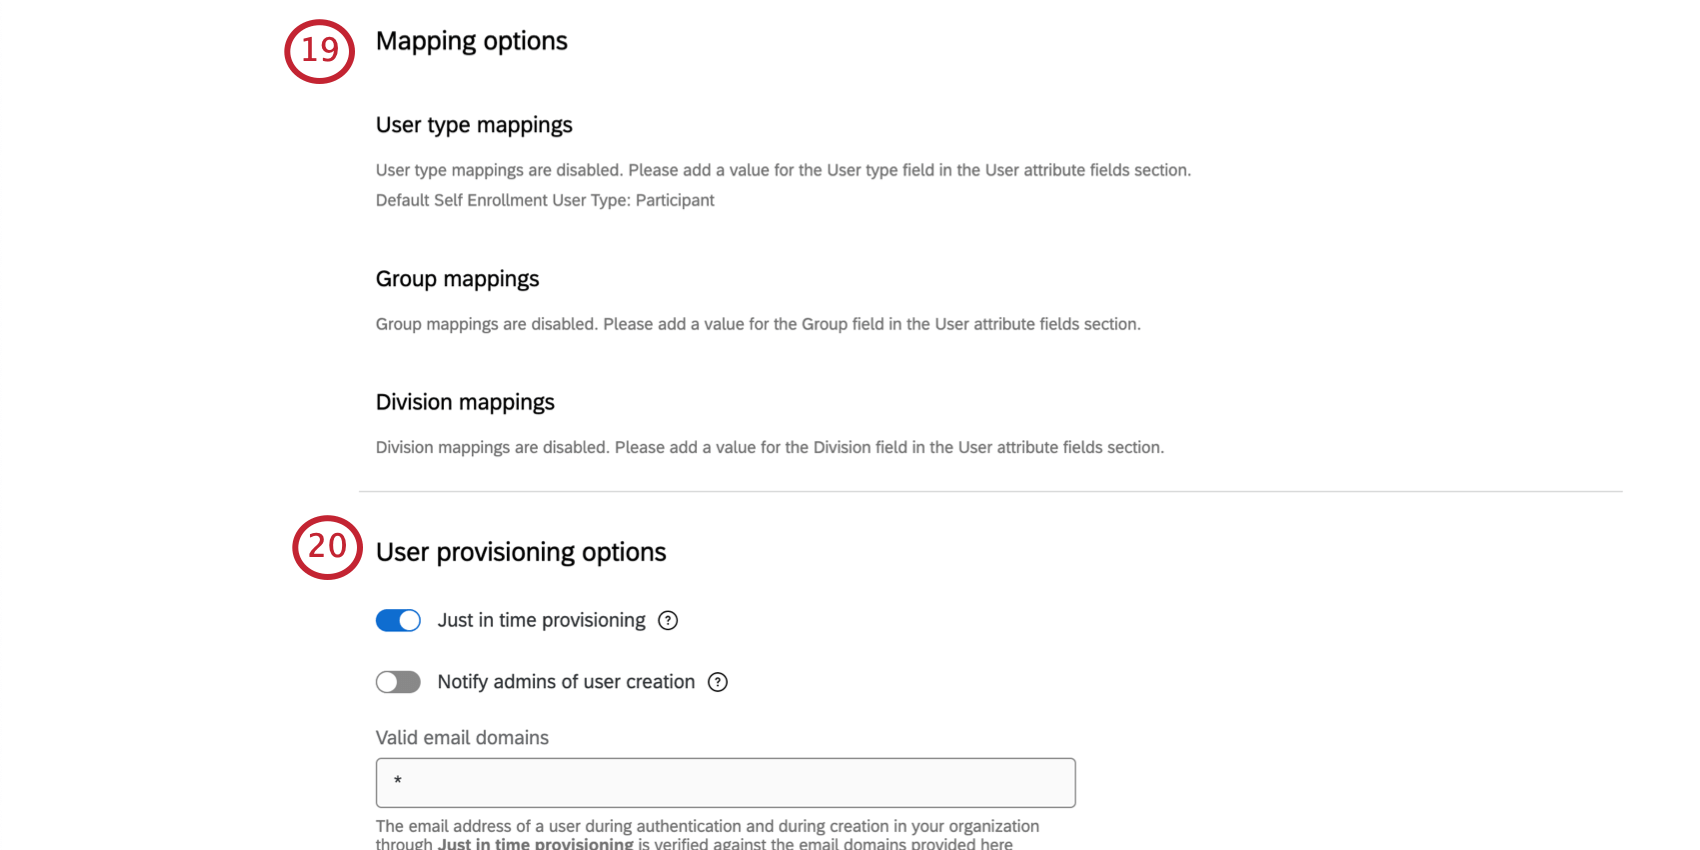
Mapping Options (Both)
If you’ve chosen to set user types, groups, or divisions, then you will need to map the attribute values with the existing fields in Qualtrics. You’ll specify what values correspond to what user types, groups, or divisions in Qualtrics.
Qtip: For a deeper dive, see Assigning User Permissions in our SSO documentation.
Under Identity provider’s value, enter the value as it is configured in your identity provider. Under Qualtrics value, select the corresponding type, group, or division. Then click Add mapping. You will need to complete these steps for every value your identity provider has defined.
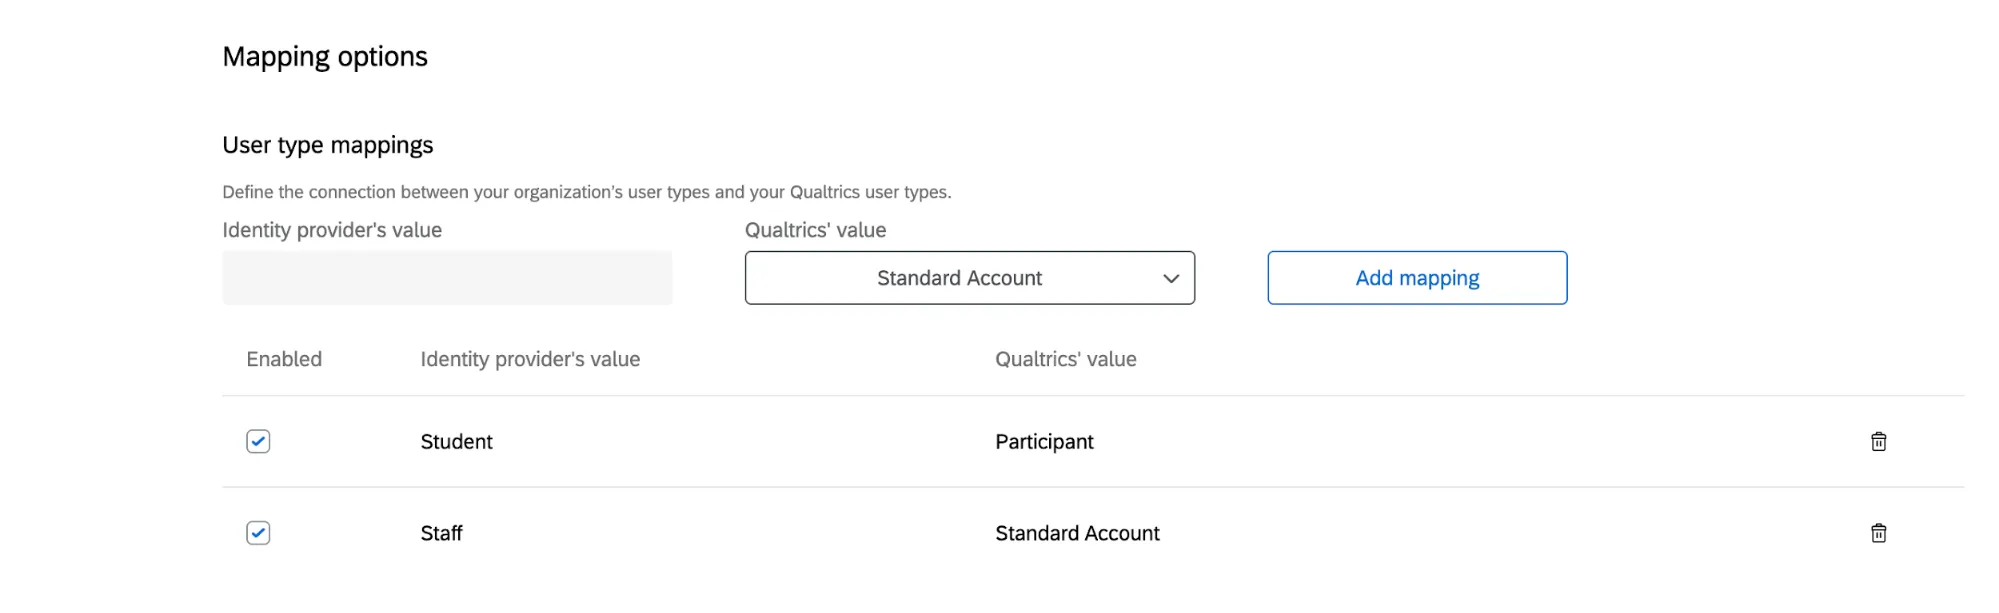
Example: My IdP has an attribute, “Role,” which identifies whether a user is Staff or Student at my university. “Role” passes a value of “Student” when the Qualtrics User Type should be set to Participant. “Role” passes a value of “Staff” when the Qualtrics User Type should be set to Standard Account.
To restrict access to the platform to only the mapped user types, you can enable User type validation. This means that each time a user tries to log into Qualtrics via SSO, the system will require them to have a user type that matches 1 of the mappings you’ve created. This is useful if the value associated with the user type field changes in the identity provider, and allows admins to quickly modify user permissions.
Similar mappings can be made for groups and divisions, so long as you have defined those fields under User attribute fields.
Qtip: For a deeper dive, see Restricting User Access in our SSO documentation.
If you choose not to map user types, divisions, or groups, all users will be assigned the default self-enrollment user type selected in your Admin tab under User Types.
User Provisioning Options (Both)
- Just In Time provisioning: If a user doesn’t exist in Qualtrics and successfully logs in via SSO with an approved email domain, create a new user.
- Notify admins of user creation: Notify specific administrators when a user is created in their Qualtrics brand. You can specify who gets this notification under Self Enrollment Email Notification.
Valid email domains: Enter the email domains that can be used to enroll in a Qualtrics account under your license. This will default to an asterisk ( * ), denoting that any domains can be used to enroll. Separate multiple domains with commas.
Qtip: This list impacts SSO enrollment and subsequent authentication in the product.
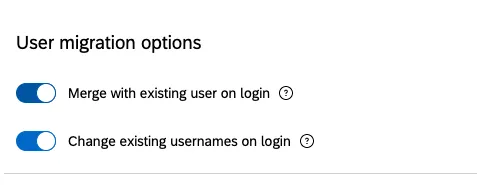
User Migration Options (Both)
Once you’ve tested and enabled your new SSO connection, you may need to update the usernames of any existing users on your license. When users login through SSO, Qualtrics will check to see if they have an existing account using the attribute you’ve specified as the Username field. In order to ensure that the SSO login matches the appropriate existing user account, the user’s username as listed in the Admin tab needs to be in the following format.
Value_of_Username_field_attribute#brandID
Example: The brand ID for my Qualtrics license is “testbrand” and the Username field that I’ve specified is “Employee ID”. My “Employee ID” is “123456” so my username in Qualtrics must be “123456#testbrand”.
Qtip: The #brandID does not need to be sent in the SAML assertion. This will only appear within the Qualtrics application.
You can update the usernames to this format using any of the five following methods:
Method 1: Adding #BrandID To Existing Usernames
If you only need to add the #brandID to the end of the existing users’ usernames, you can enable the Change existing username on login option. When the user logs in via SSO for the first time, the #brandID will be automatically appended to the end of their username.
Qtip: It is strongly recommended that you enable this option.
Method 2: Just-In-Time Provisioning
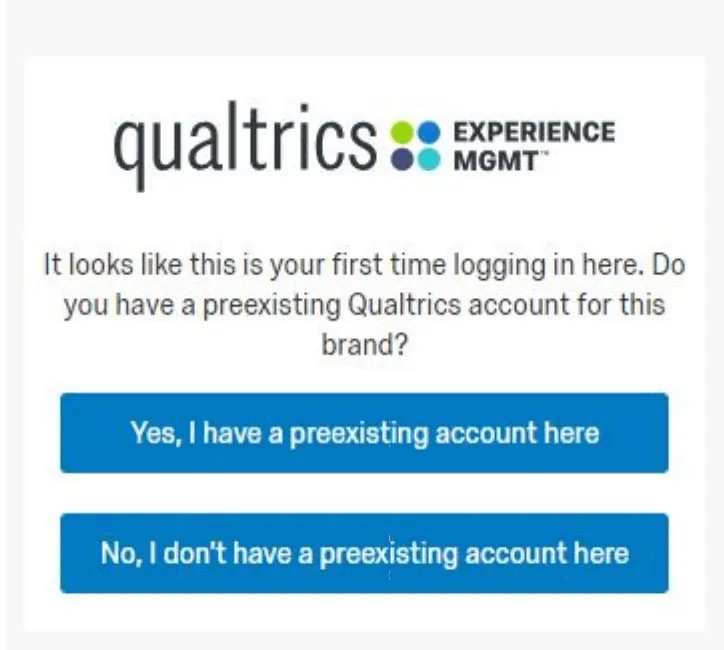
If you have Just-In-Time provisioning enabled under User Provisioning Options, you can select Merge with existing user on login option. If the following are true, the user will be prompted with the following screen:
- There is not already an account within the brand that has a username matching the SSO username value for the user.
- The user logs in for the first time after SSO has been enabled for the brand.
Warning: This method requires user input, which may result in user error.
Method 3: Small Number of Users
If you have a small amount of existing users, you can update the usernames manually in your Admin page.
Method 4: Large Number of Users
If you have a large amount of existing users and you have API enabled for your license, you can use our public API to update usernames.
Method 5: Employee Experience License
If you are using the Employee Experience platform, you can update usernames via the file upload feature.
Warning: If you do not update the existing users’ usernames, duplicate accounts may be created and/or users may lose access to the platform.
Dashboard Attributes (Both)
If your license includes CX Dashboards or any of our Employee Experience products, you may pass additional attributes than those defined in the “User Attributes” section. For CX Dashboards, these additional attributes can be used to automatically assign roles to users upon SSO authentication. For our Employee Experience products, you’ll only be able to capture 1 additional attribute called Unique ID. This field is required for all participants and can be assigned through SSO authentication or through the file upload feature.
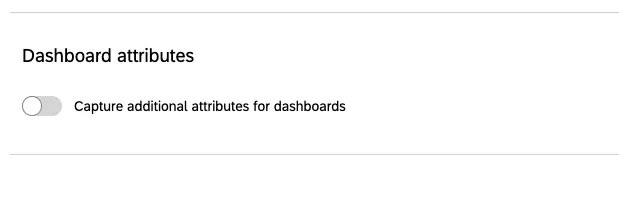
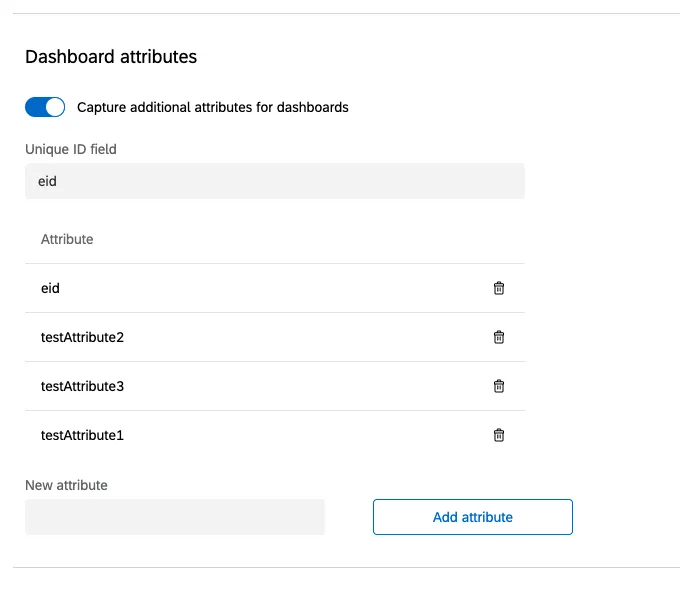
In order to add additional attributes, enable Capture additional attributes for dashboards.
Once this option is enabled, you’ll enter in the attribute names you’d like to capture exactly as they appear in the “Attribute Statement” section of your SAML response.
Attention: Each dashboard attribute cannot be longer than 1000 characters. Multi-value attributes are parsed as a single string with the “::” delimiter. This delimiter is included in the number of characters and counts towards the limit.
Applying and Reverting Changes (Both)
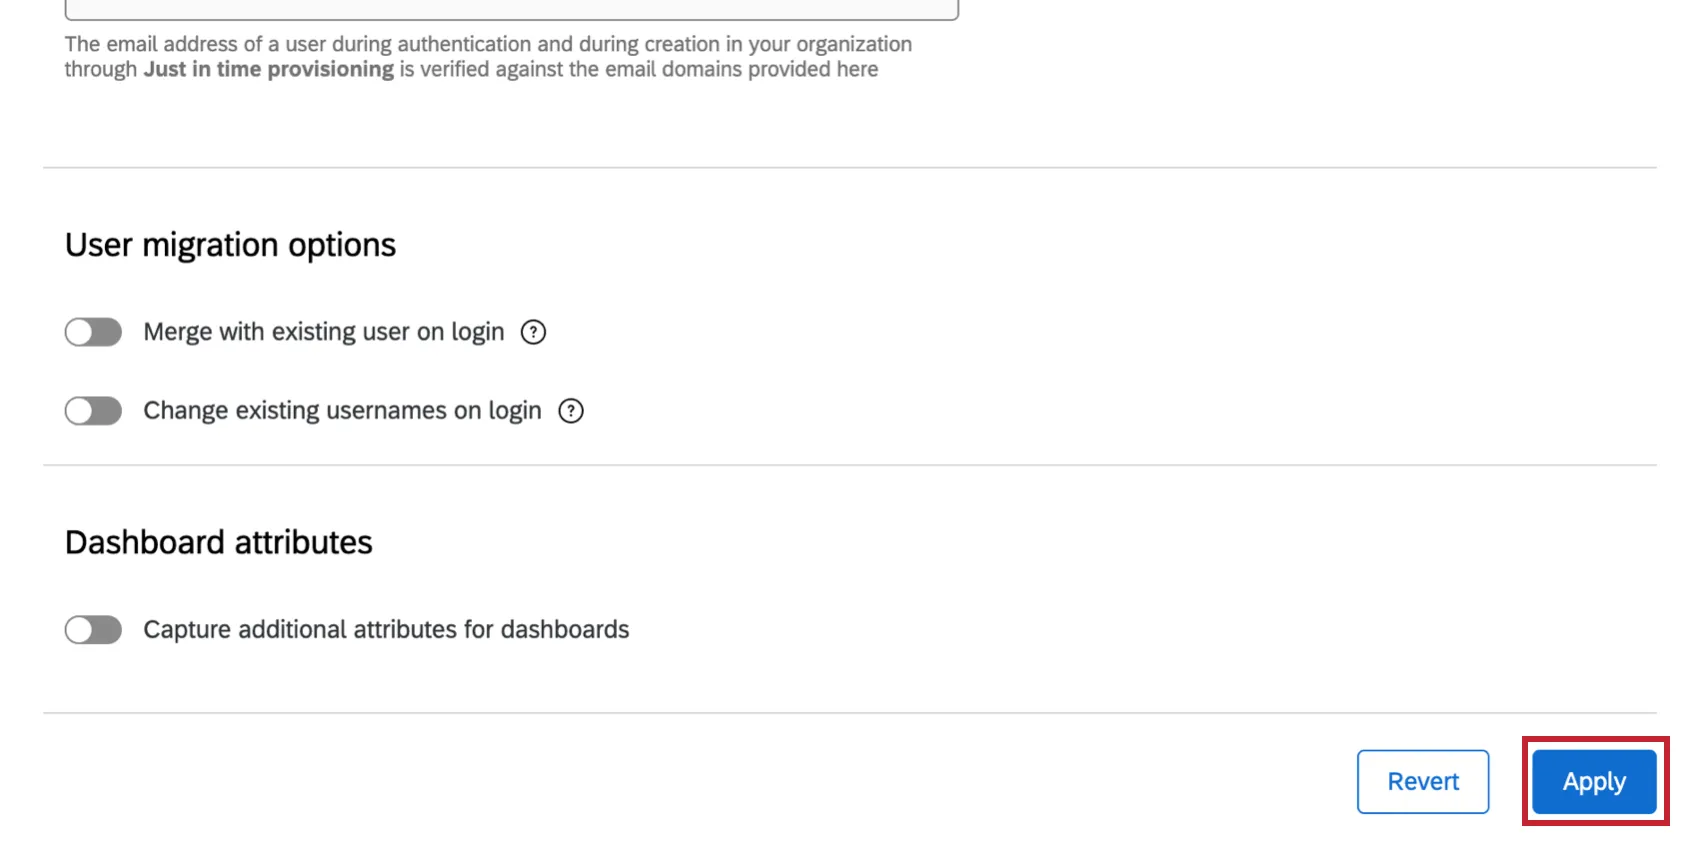
To save your changes, click Apply.
Qtip: This button may be grayed out if there are any errors with the fields you filled out. You will have to resolve these issues before you can apply changes.
If you want to revert the changes made on the screen to the last saved version instead of applying them, click Revert.
Troubleshooting
For help setting up connections, we have many SSO support resources your IT team can use.
- Troubleshooting Error Codes: A guide to specific error codes that appear in Qualtrics as you configure your SSO connection.
- General SSO Connection Troubleshooting: More general steps you can take to solve why a connection isn't working as expected.
- SSO Technical Requirements: Learn about technical requirements that must be met.
- Configuring SAML as an Identity Provider: System-specific instructions on how to configure SAML as an Identity Provider.
- Generating a HAR File: Generating a HAR file can give you and supporting teams more context on the issue you're experiencing and how to resolve it.
That's great! Thank you for your feedback!
Thank you for your feedback!