
Category Models Basic Overview (Designer)
What's on this page
About Category Models
Category models organize and group categories into a hierarchy. Category models are built using categories that contain rules determining what data is included.
Creating & Editing Category Models
Category models are created and built in the Categorize tab. On the following pages, you’ll learn the necessary steps required to create a category model.
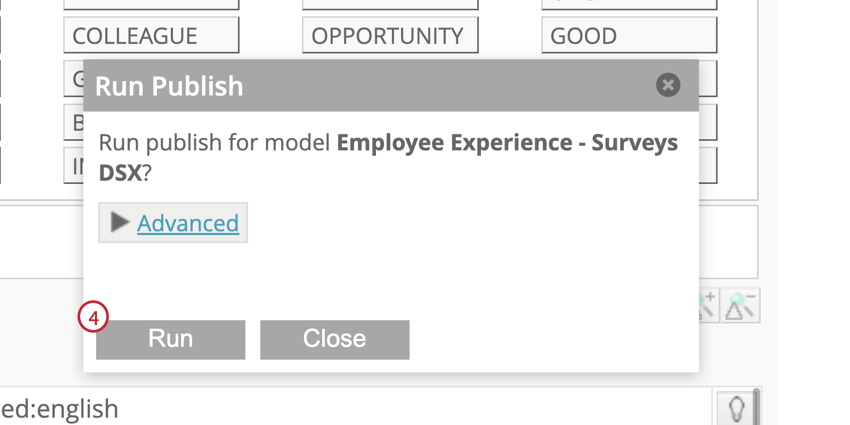
Publishing Category Models
Changes to category models will not be run in classifications until they have been published. Category models are automatically published when a project-wide classification is run and when incremental uploads are categorized in new category models.
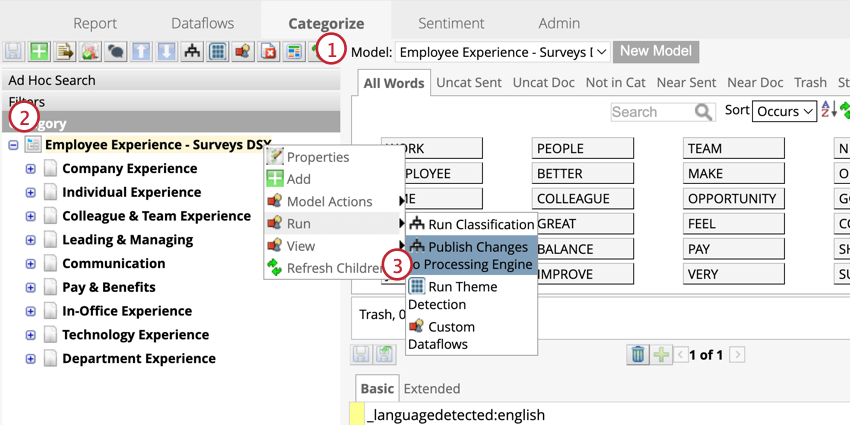
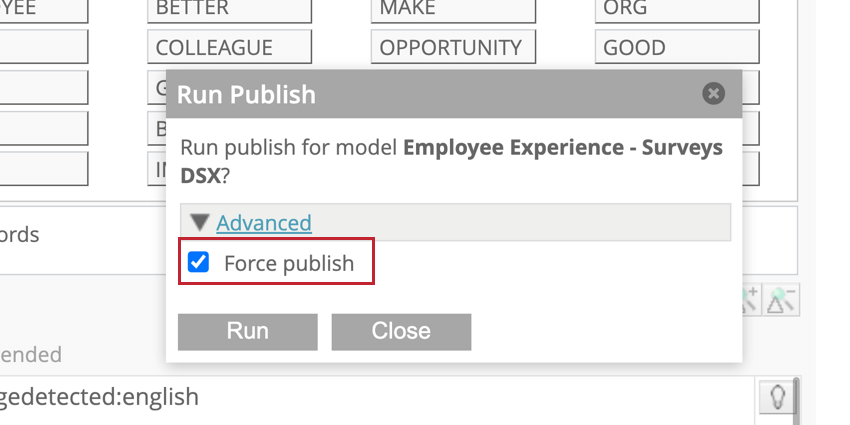
Qtip: Only the rules that have been updated after the last publishing will be run in the classification. To regenerate all category rules from scratch, click Advanced and select Force publish. This is a useful option if you think some rule is classifying incorrectly.

Attention: Any changes to the category model must be published in order to be included in the project’s incremental classification.
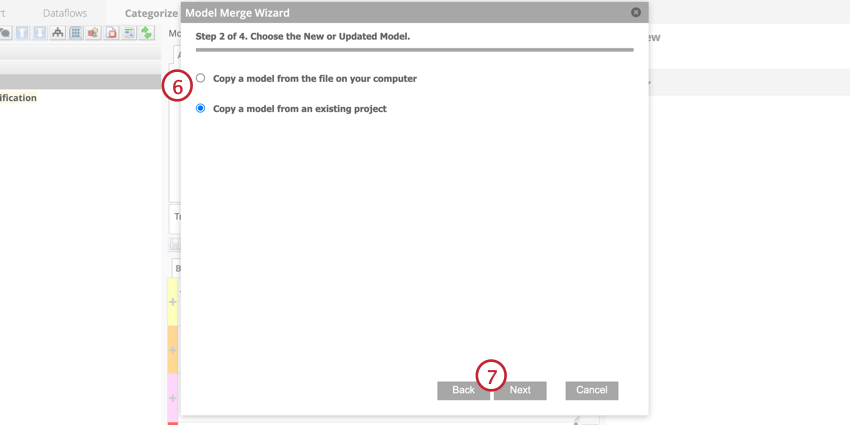
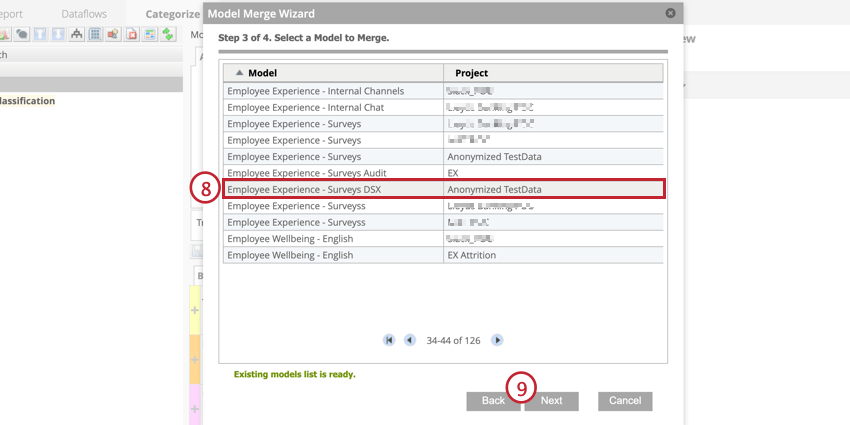
Merging Category Models
Merging two category models will synchronize their rules, category references, and node descriptions. This is useful if you have two similar versions of a category model and want to move changes from one model to the other. Model-specific user permissions will not be changed by merging category models.
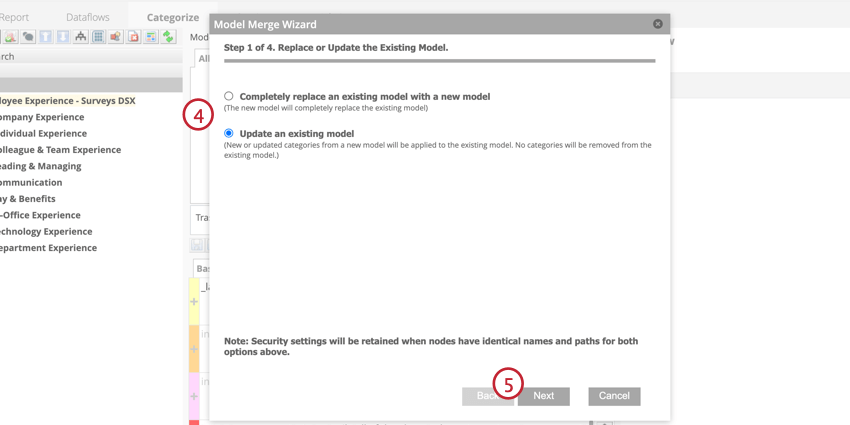
Qtip: If you replace the model, categories that are not present in the source model will be deleted from this model. If you update the model, the rules for categories in both models will update to match the source model, any categories present in the source model will be added to this model, and categories that are not in the source model will not be deleted.
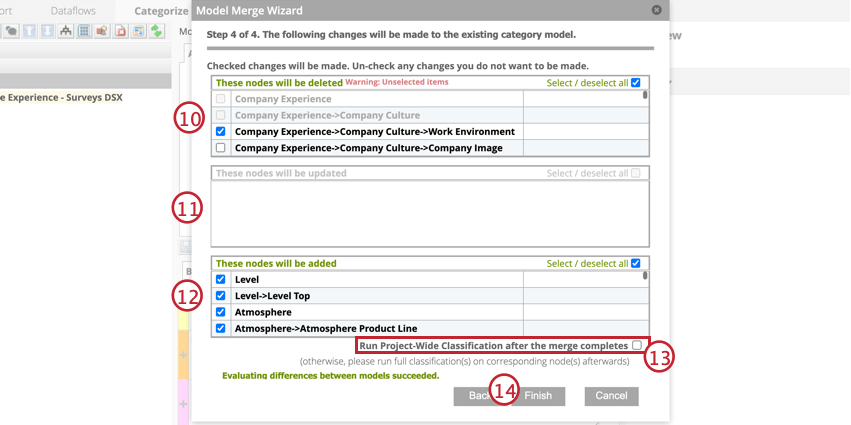
While setting up the merge, you may get a warning message about how it will affect nodes.
- Following Alerts and/or Rubrics will be disabled: Indicates that merging this node will disable a corresponding intelligent scoring rubric or verbatim alert. Click the error message to view which items will be disabled.
- The category is referenced by ( # ) categories: Indicates that merging this node will affect the references to other categories. Click the error message to view which categories reference this node.
Qtip: Adding a comment that describes changes made in the merge can help keep track of updates over time.
Qtip: Merging models updates the history report for each model. The models’ properties, exclusions, and locked nodes are not updated.
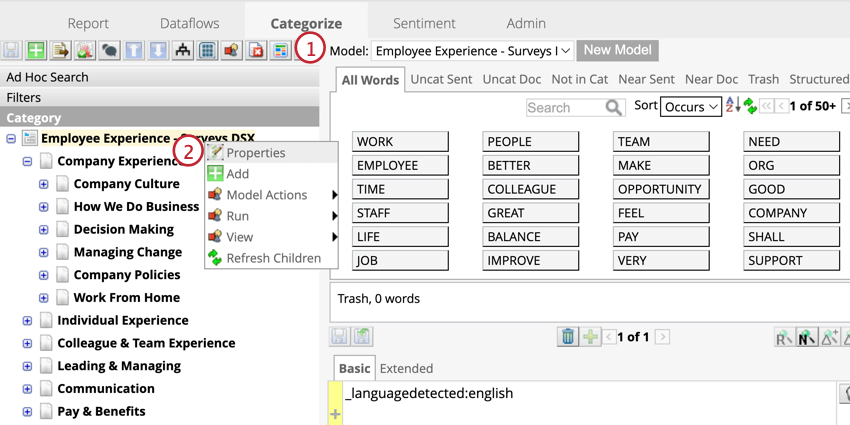
Category Model Properties
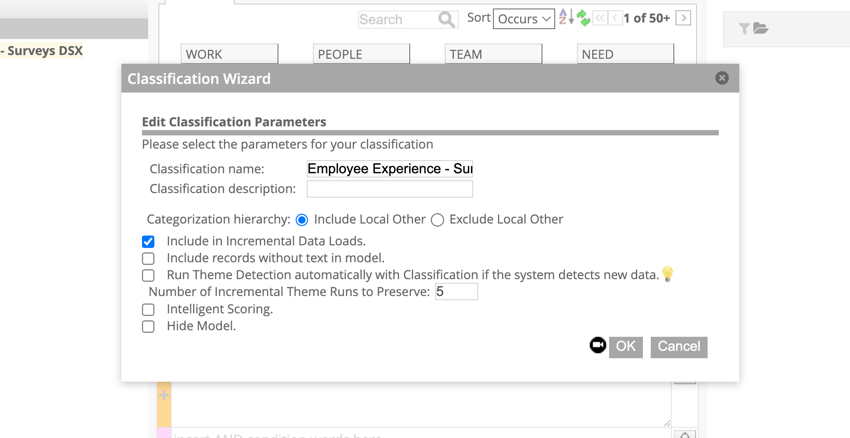
Use the properties menu to edit the parameters of your category model. To view the properties menu, right-click the root node and select Properties.
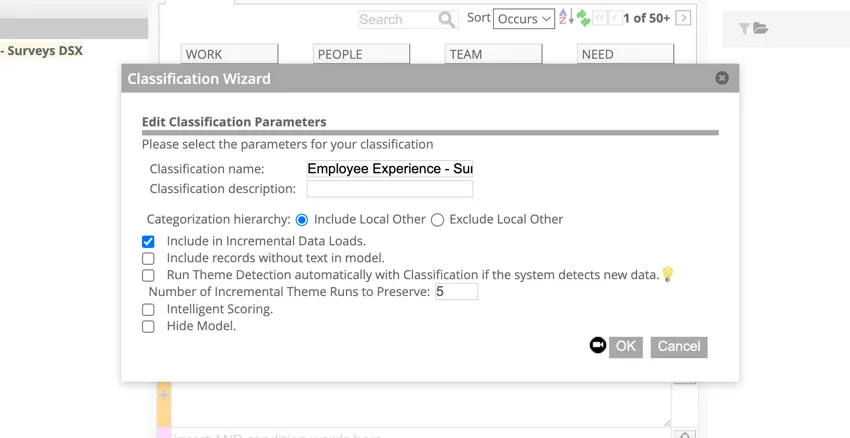
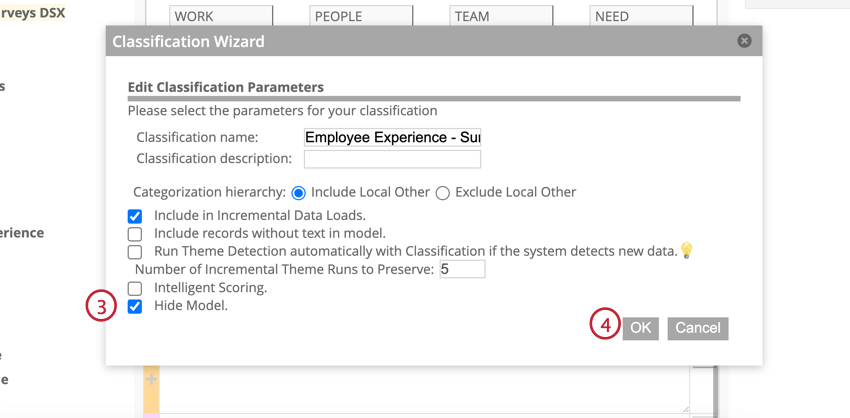
- Classification name: Name of your category model.
- Classification description: Information about your category model.
- Categorization hierarchy: Determines whether sentences from the Local Other bucket should be treated as the parent node. Include Local Other is selected by default and means that sentences from the Local Other bucket will be treated as classified to the parent node. Select Exclude Local Other if you do not want sentences classified to the parent node. See Uncategorized Data for more information. Qtip: Include local other is the only option available for category models used as intelligent scoring models.

- Include in Incremental Data loads: When this is selected, the category model will be run each time an incremental upload is performed. See Classifying Incremental Uploads for more information.
- Include records without text in model: Select this option to include records with empty verbatim into this category model.
- Run Theme Detection automatically with Classification if the system detects new data: When this is selected, if the system detects that new documents have been loaded, Theme Detection will be run on all Global Other and Local Other buckets every time the model runs.
- Intelligent Scoring: Use the category model for Intelligent Scoring.
- Hide Model: Hide the category model from the Report tab.
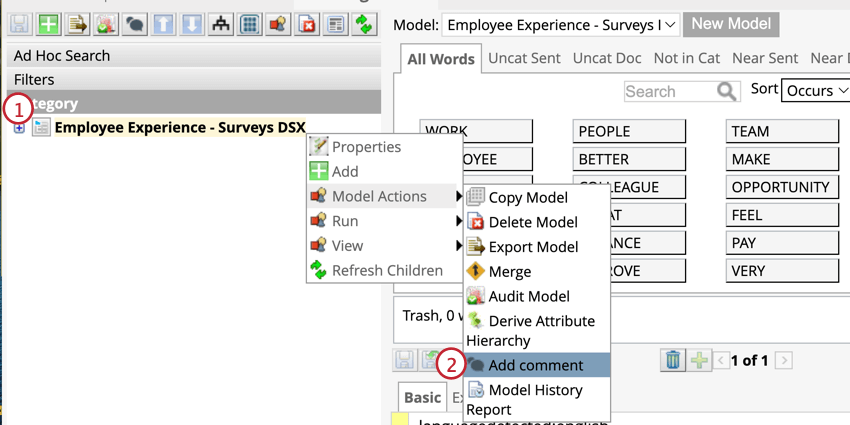
Commenting on Category Models
Commenting on category models can help keep track of changes to a model overtime. You can use comments to provide feedback or give other editors relevant information.
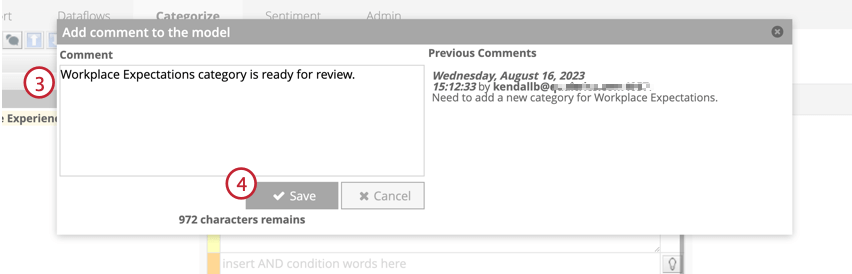
Qtip: Comments must be less than 1024 characters.
Qtip: Comments will be visible on the Model History Report.
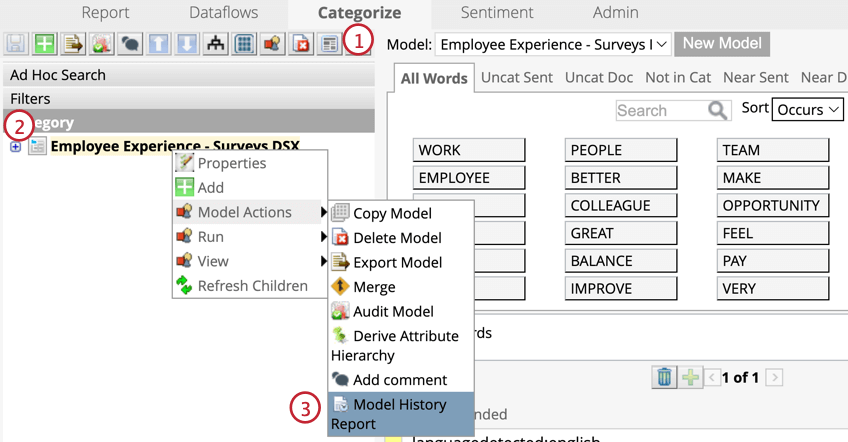
Category Model History Report
The Model History Report is a CSV file with a list of all the actions, such as editing a category or leaving a comment, performed on a category model.
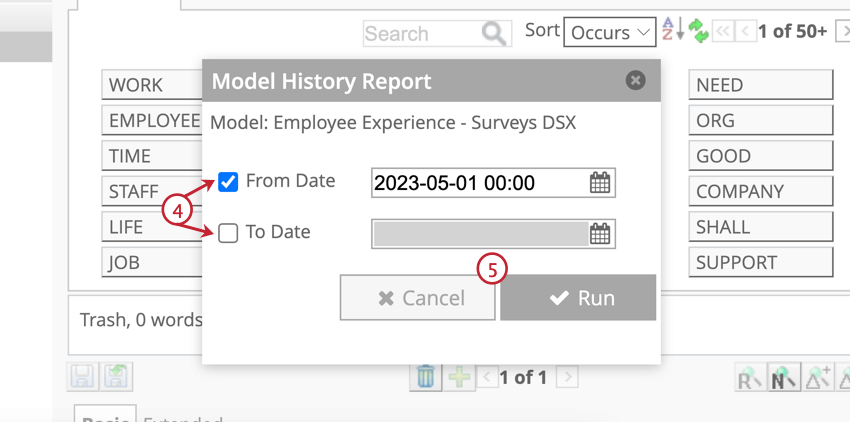
The Model History Report is sorted in reverse chronological order, with the most current action at the top. This report provides the following columns of information:
- Model: The name of the category model.
- Node: The name of the topic.
- User: The name of the user who performed an action.
- Action: The action that was performed.
Qtip: The following actions can be outlined in the Model History Report:
- Add: Adding or pasting a topic.
- Comment: Adding a comment to a model.
- Copy: Copying a topic.
- Delete: Deleting a topic.
- Update: Updating topic’s rules.
- Timestamp: The time of the action, in the time zone of the server.
- Comment: The text of the comment.
- Rules: Topic rules after the action was performed.
Running Classifications
Classification is the process of assigning sentences to categories in a category model. This process uses category rules to find sentences where the words outlined in the rule occur. For more information, visit the Classifications (Designer) page.
Hiding Category Models
When a category model is hidden, it does not show up in the report settings of the Report tab. Hiding models is useful if you want to prevent unfinished or unapproved models from being used in reports.
Attention: Models will still be visible in reports created before the model was hidden. Models will always be visible in the Categorize tab.
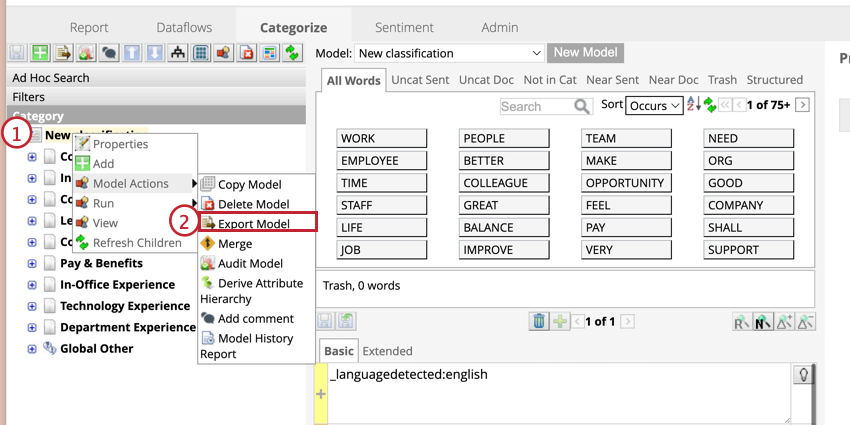
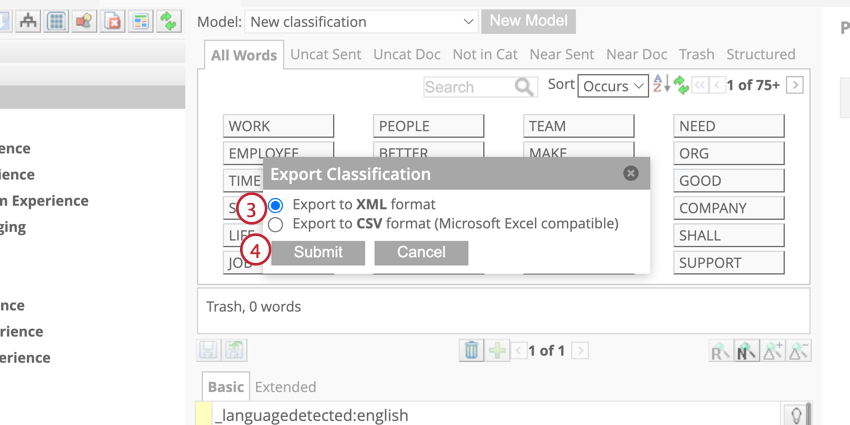
Exporting Category Models
Deleting Category Models
If you want to delete a category model from your project, keep the following in mind:
- Once a model is deleted, it will no longer be available for use. All mappings and attributes mapped to the model will also be deleted.
- The model will be automatically removed from all widgets using it.
- Remove references to verbatim alerts before deleting your category model.
- Delete referencing scorecards before deleting your category model.
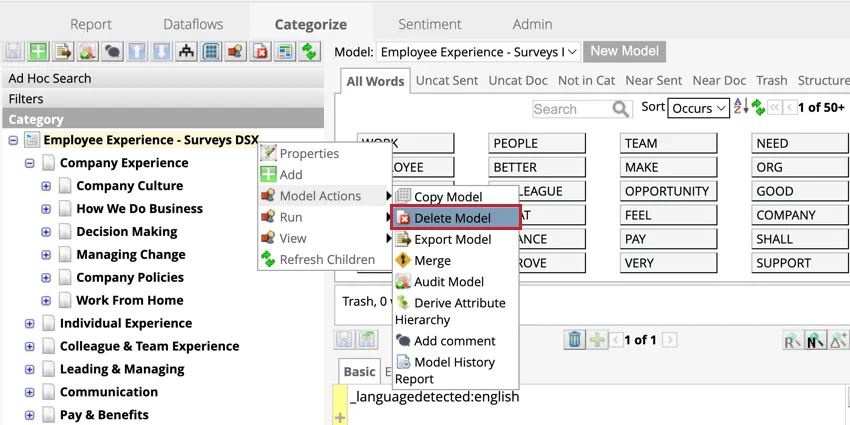
To delete a category model, right-click the root node and hover over Model Actions then click Delete Model.
That's great! Thank you for your feedback!
Thank you for your feedback!