
Library Supplemental Data Sources
What's on this page
About Library Supplemental Data Sources
Supplemental data sources can be created and stored in the library so you can use them across the platform. When you need to make edits, you’ll just make them at the original source instead of having to edit every individual survey where the SDS is being used.
You can also share an SDS in the library the same way you would share anything else in the library. See Personal, Group, and Organization Libraries for more details on sharing library resources.
Qtip: To create supplemental data sources in the library, you need the Manage Supplemental Data library permission. If you want to use supplemental data sources in your autocompletes and survey flows, you need the Use Supplemental Data library permission.
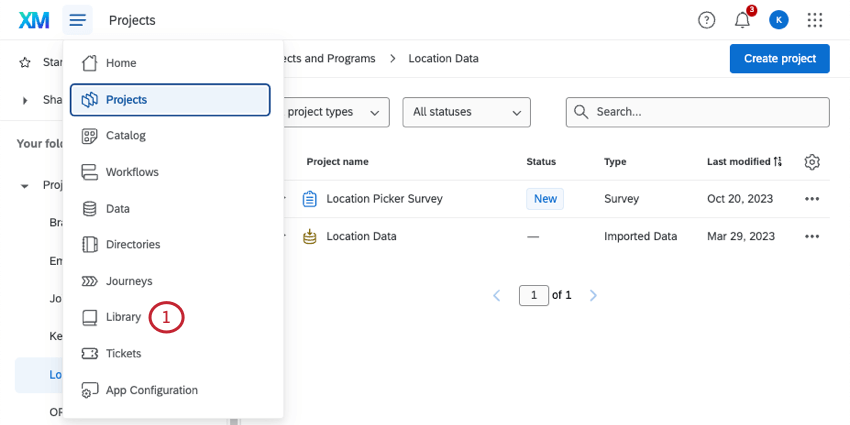
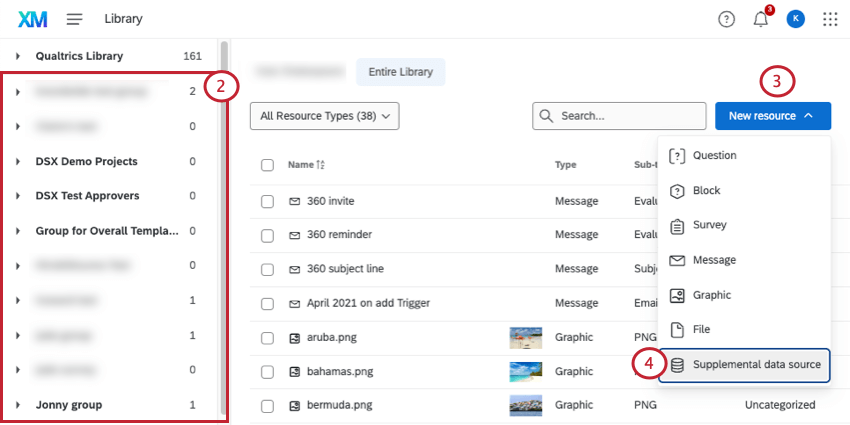
Creating a Supplemental Data Source in the Library
Qtip: You can also create an SDS right in the survey flow.
Qtip: If you’re not planning to share the SDS with collaborators, you’ll be in the library named after you. For guidance on library sharing, see Groups.
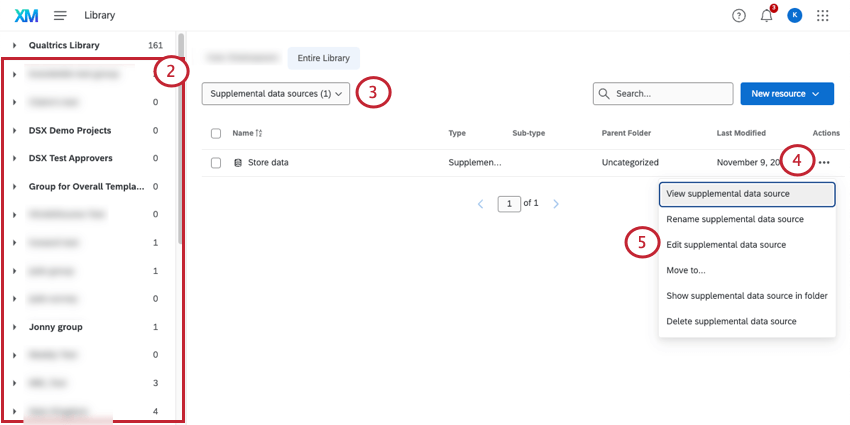
Managing Supplemental Data Sources in the Library
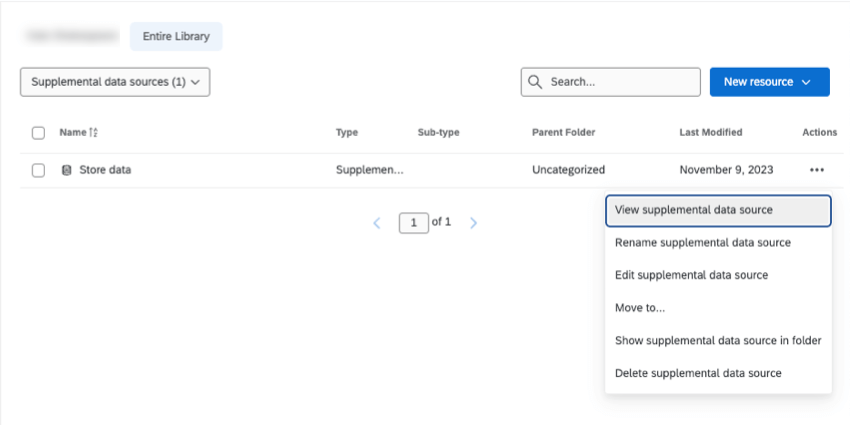
You can filter results by Supplemental data sources in the upper-left.

Click the 3 dot menu to see the following options:
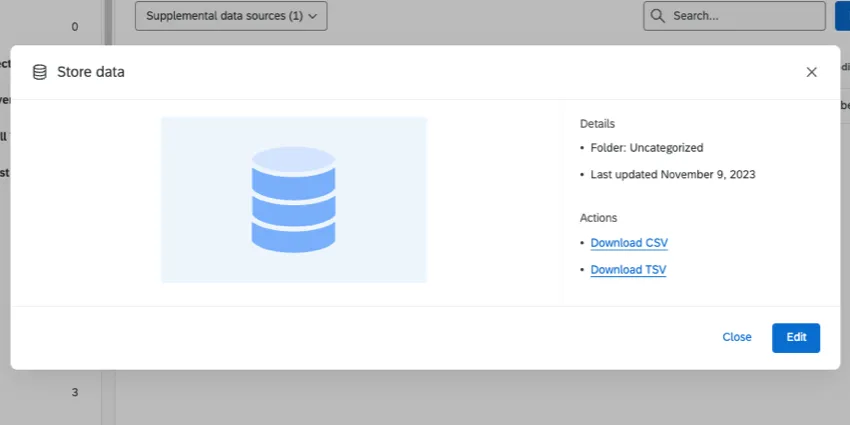
- View supplemental data source: Opens a new window where you can download a CSV or TSV of your SDS data or click Edit to change it.
- Rename supplemental data source: Rename your SDS.
- Edit supplemental data source: Open a new window where you can add more search fields, if you haven’t already reached the 5 field maximum. To protect your data, you cannot remove existing search fields. If you want to override your data, see Overriding Supplemental Data.
- Move to: Move the SDS to another library or library folder. Qtip: You cannot use this option to move the SDS to a shared group library. If you need to move an SDS to a group library, we recommend opening the group library, then creating a new SDS from scratch. Make sure to also edit your survey flow or autocomplete so that it references the new shared library SDS instead.

- Show supplemental data source in folder: Move to the folder the content is located in. This option only appears if you are currently viewing the Entire Library, not a specific folder.
- Delete supplemental data source: Permanently delete the SDS.

Warning: Once an SDS is deleted, it cannot be retrieved. Before you delete an SDS, keep in mind the impact on any surveys where you’re using it!
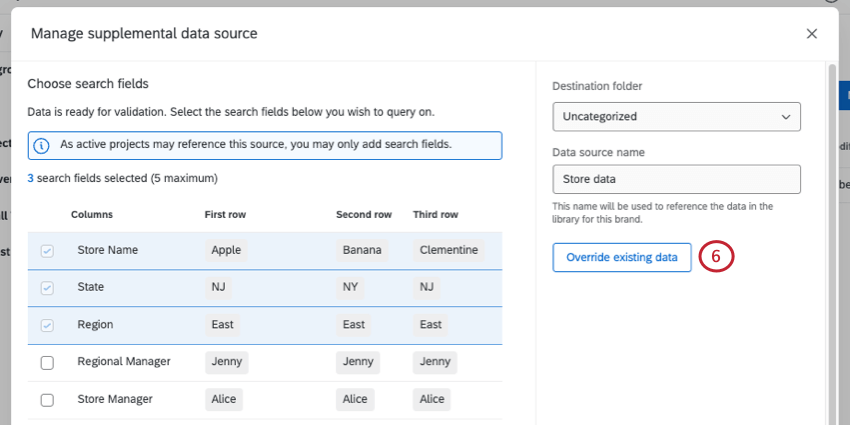
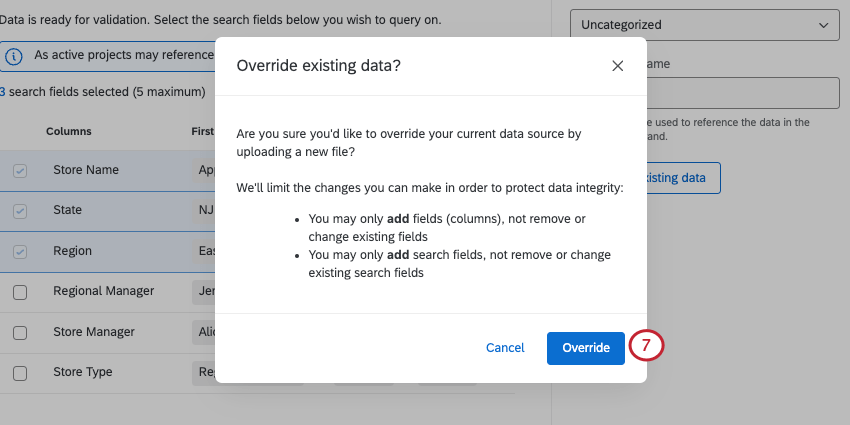
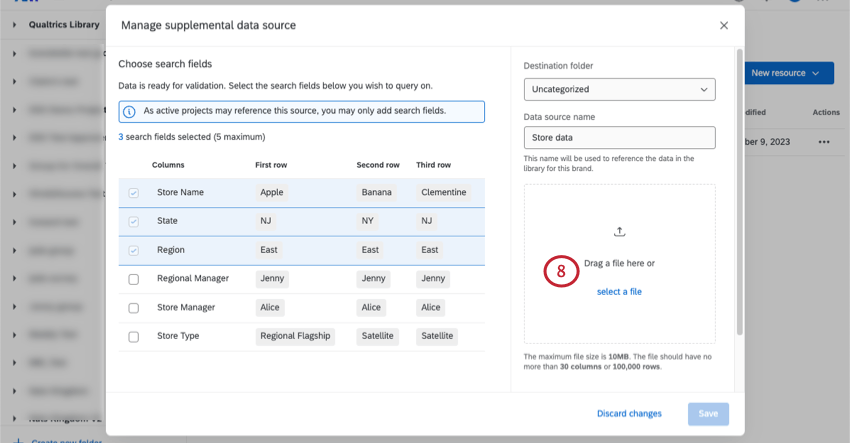
Overriding Supplemental Data
To protect any setups you may have connected to this source, you can only:
- Add fields (columns)
- Add new rows
- Update existing rows
- Add search fields
You cannot:
- Remove columns
- Change existing fields
- Remove search fields
- Change existing search fields
If you want to override your supplemental data, follow these steps.
That's great! Thank you for your feedback!
Thank you for your feedback!