
Update XM Directory Contacts Task
Suite
Customer Experience
Strategy & Research
Product
Qualtrics
What's on this page
About the Update XM Directory Contacts Task
This task allows you to create or update a contact in XM Directory when a workflow is initiated, including updating transaction details and subscription status. This task is useful when you want to quickly load individual contact information into XM Directory. If you are interested in bulk uploads, use one of the available data loader tasks.
Example: Automatically add a contact to XM Directory and opt them in to your mailing lists after they shop at your online store for the first time.
Setting Up an Update XM Directory Contacts Task
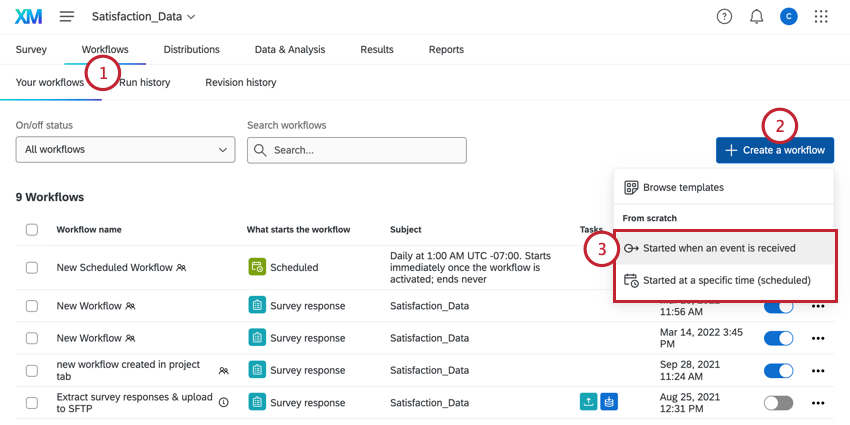
Click Create a workflow.
Choose if you want the workflow to be triggered by an event or run on a schedule. (See a comparison.)
Qtip: The survey response creation event is the most common.
Click the plus sign ( + ) and then Add a condition to set up conditions for your workflow.
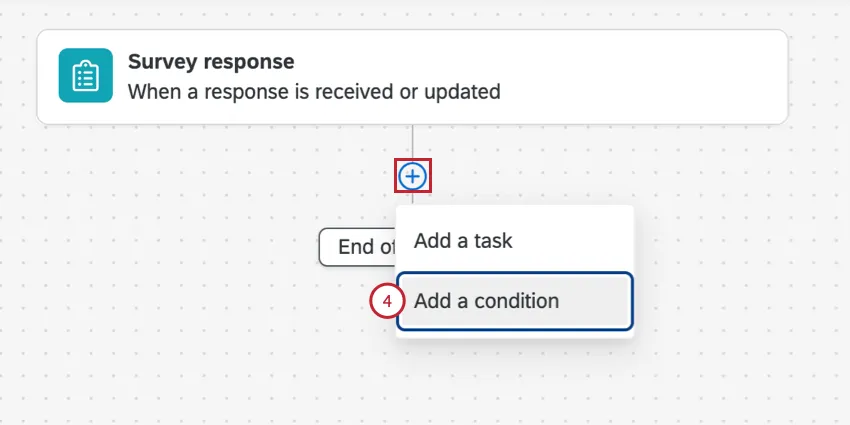
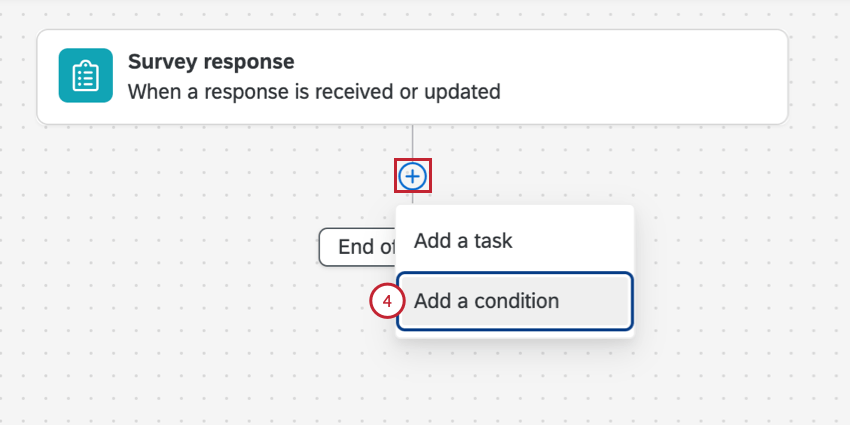
Example: We only want to create a notification when someone gives us a very low CSAT rating, so we set the condition to only fire if Extremely Unsatisfied is selected in the CSAT question.
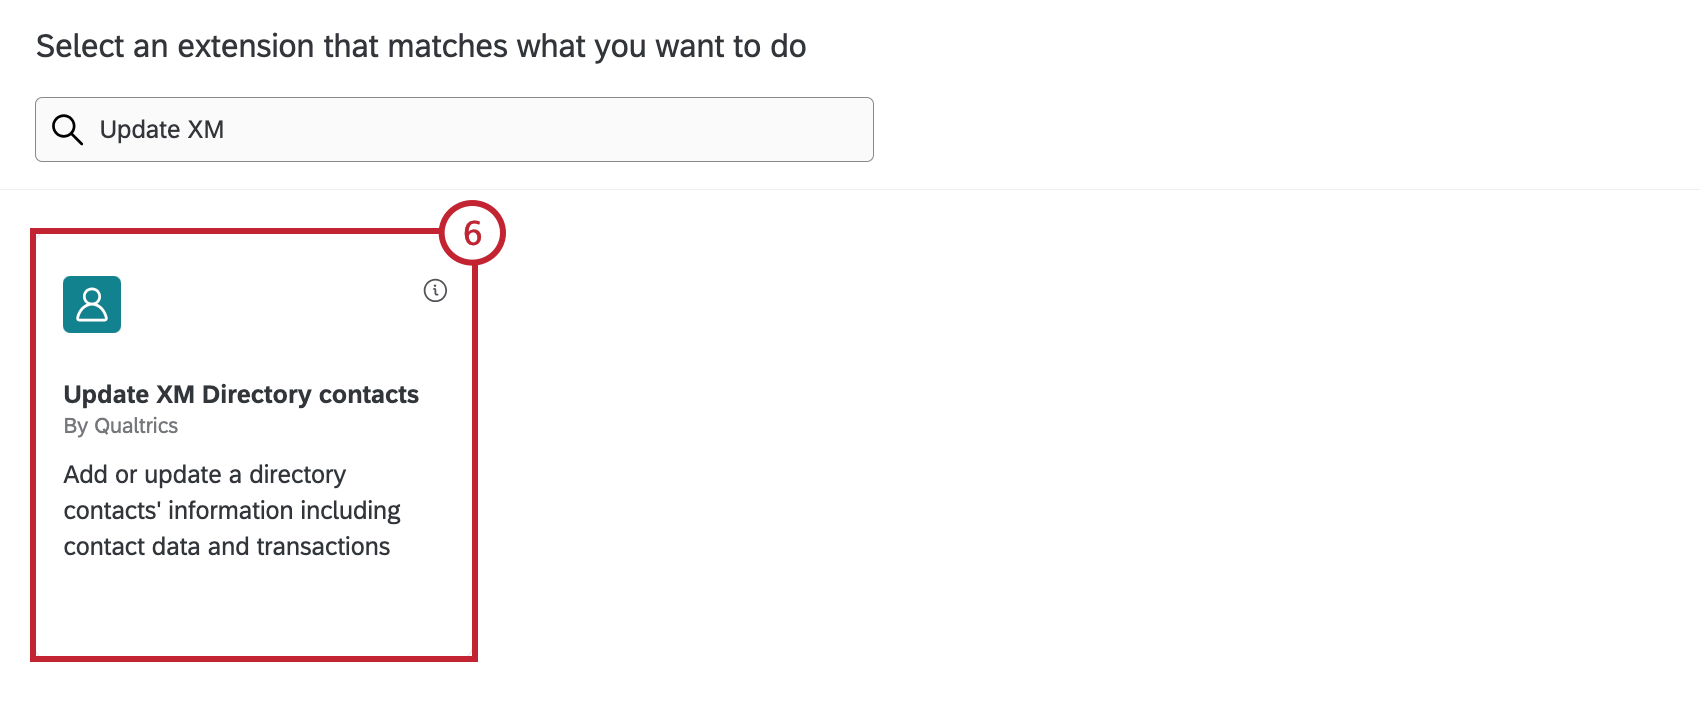
Click the plus sign ( + ) and then Add a task.
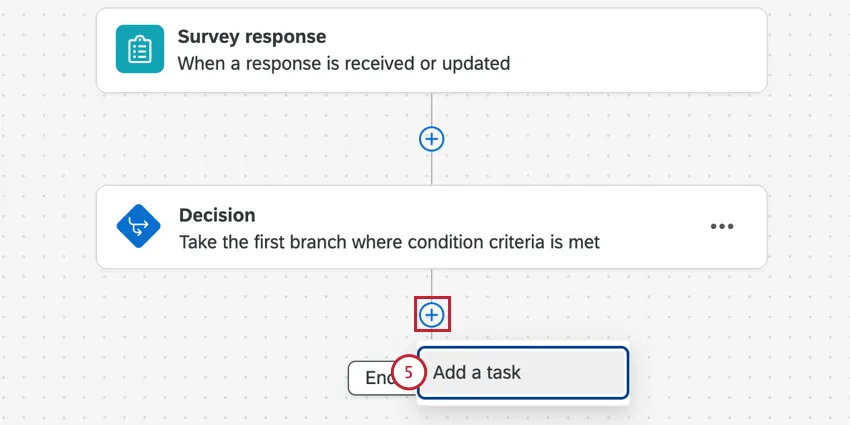

Select Update XM Directory contacts.

Select the directory to import contacts to.
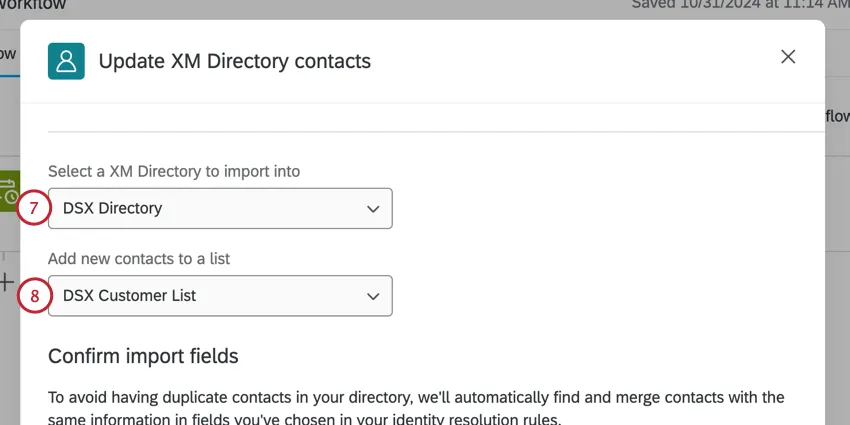

Qtip: You may only have 1 directory in your account. See Creating & Managing Multiple Directories for more information.
Choose the mailing list you’d like to save contacts to.
Review the fields that have been selected for merging newly added contacts. See Merging Newly Added Contacts for more information. If these fields are not found, or if there are no duplicates found, the contact will be added as a new contact.

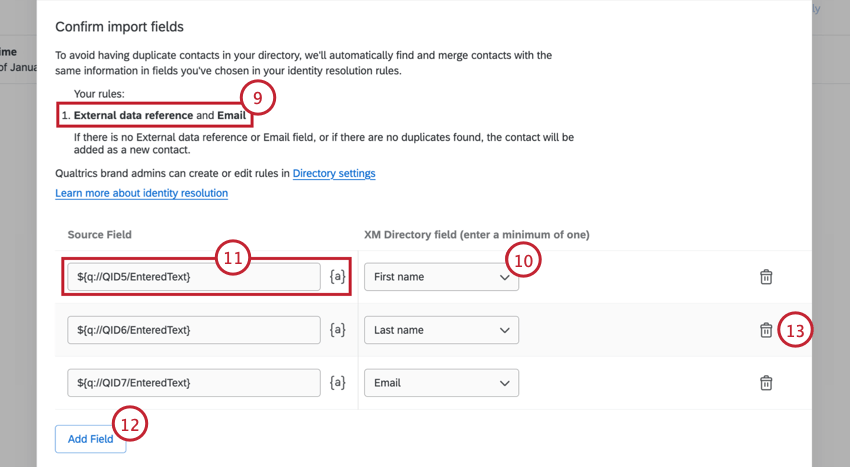
Qtip: You need the Manage Directory permission to modify the fields selected for merging new contacts.
Use the dropdown to select a field from the XM Directory field column on the right for inclusion in your new contact.
Enter a value in the Source Field column. You can also click the {a} icon to insert piped text as your field value. Piped text is great for when the value may be dynamic based on survey responses.
Qtip: See Survey Response Event for more information on triggering tasks when new survey responses are collected or existing responses are updated.
Select Add Field to add additional fields to your contact.
Click the trash icon to remove fields.
Once you’ve finished mapping all of your import fields, click Next.
If you want to map transaction data to your contact, click the Transaction data checkbox.
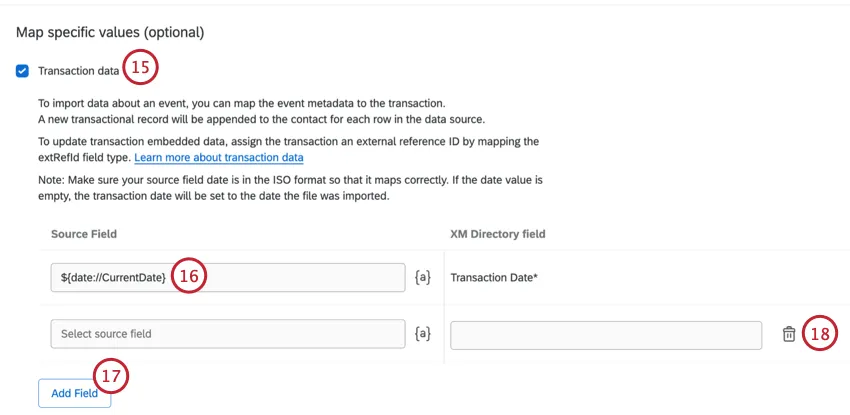
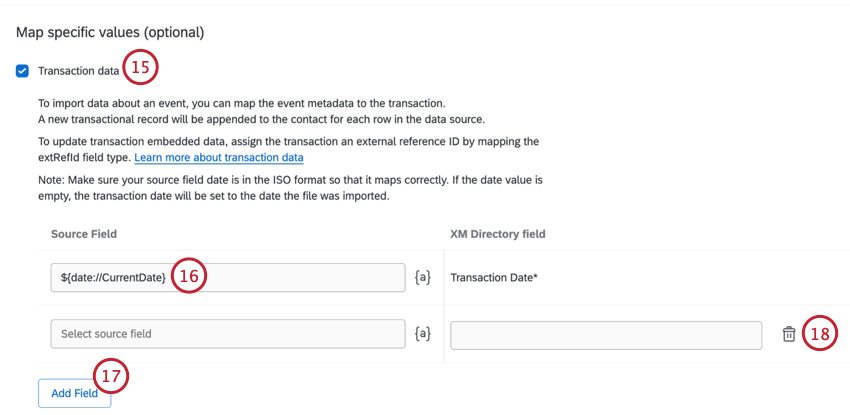
Transaction Date is a required field if you are adding transaction data to your contact. If desired, you can enter a static value for the source field. You can also click the {a} icon to insert piped text as your field value.
Qtip: The options you see in the piped text menu are dependent on the workflow trigger; manually typing other piped text may result in empty data fields. In the example above, the “Current Date” piped text field is available because the workflow is triggered by a survey response.
To add additional transaction fields, select Add Field.
Click the trash icon to remove fields.
If you want to map a subscription status to your contact, click the Subscription status checkbox.
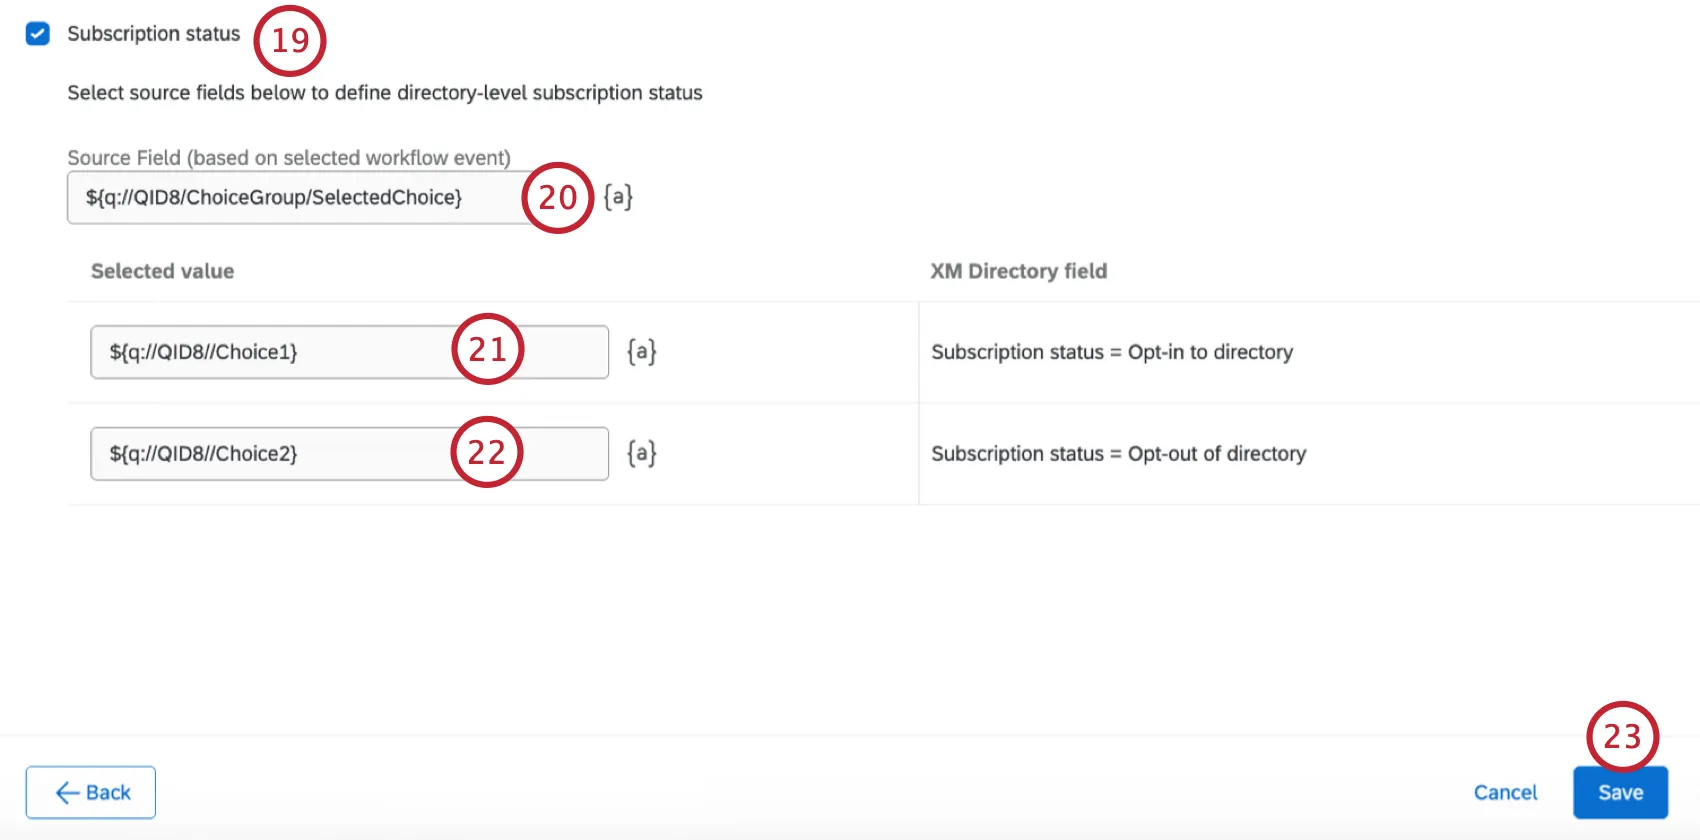

Enter the source field that will be used to define the directory-level subscription status.
Example: You can create a multiple choice question in your survey asking people if they would like to receive emails from your organization, with a Yes option and a No option.
Enter the value that will be used to opt a contact into the directory. If a contact has this value, they will automatically have a status of opted-in.
Enter the value that will be used to opt a contact out of the directory. If a contact has this value, they will automatically have a status of opted-out.
Click Save.
That's great! Thank you for your feedback!
Thank you for your feedback!