
Sharing Dashboards & Books (Studio)
What's on this page
About Sharing Dashboards and Books
Sharing your dashboard or book lets you to collaborate on reports with other people. You can share with individual users, groups, or even someone who has not registered in Studio yet. When sharing, you can decide whether your collaborator can edit or just view the dashboard or book.
There are several ways to start sharing:
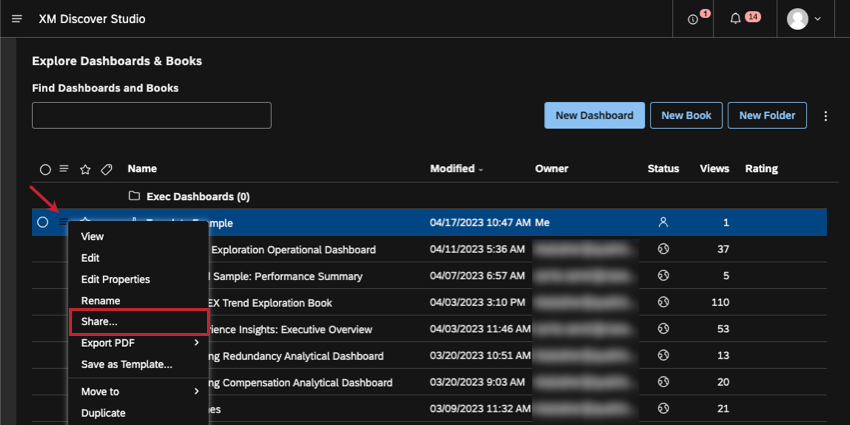
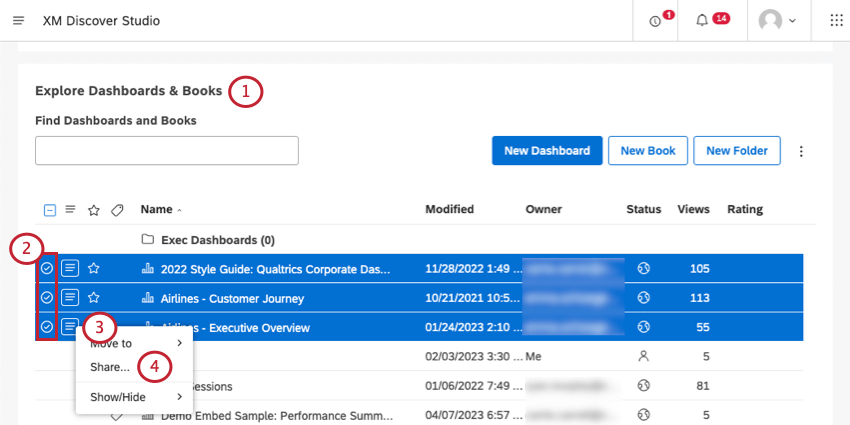
- When on the Studio homepage, scroll down to Explore Dashboards & Books. Click the menu next to your dashboard or book, then select Share.
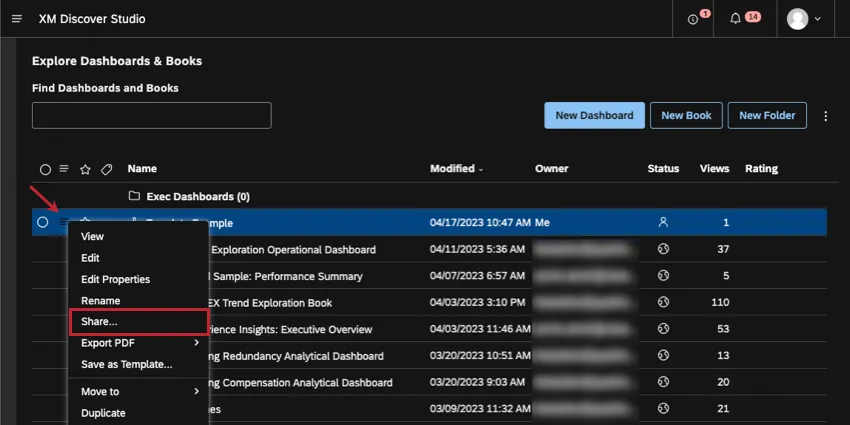 Qtip: To share several dashboards or books at once, select them using the check boxes on the left. Multiple selections share the same actions menu. See Sharing Multiple Dashboards or Books at a Time below.
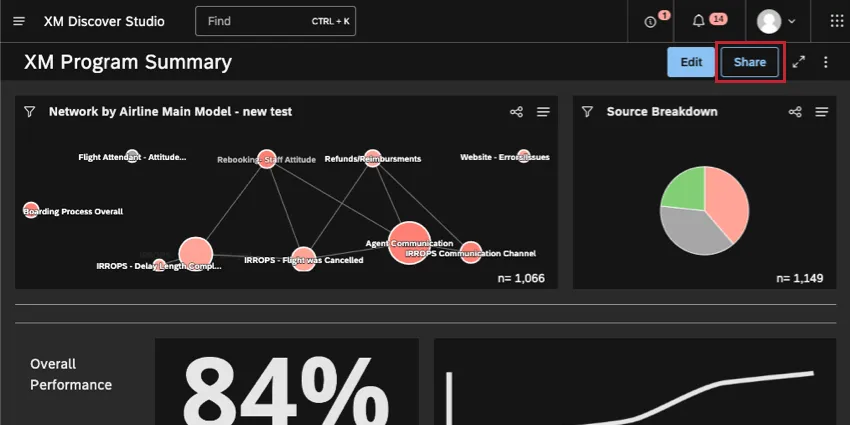
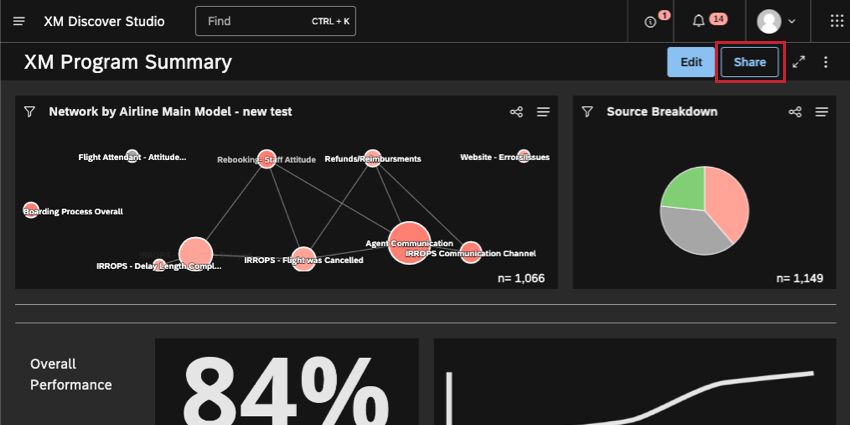
- When a dashboard or book is open, click the Share button in the header.
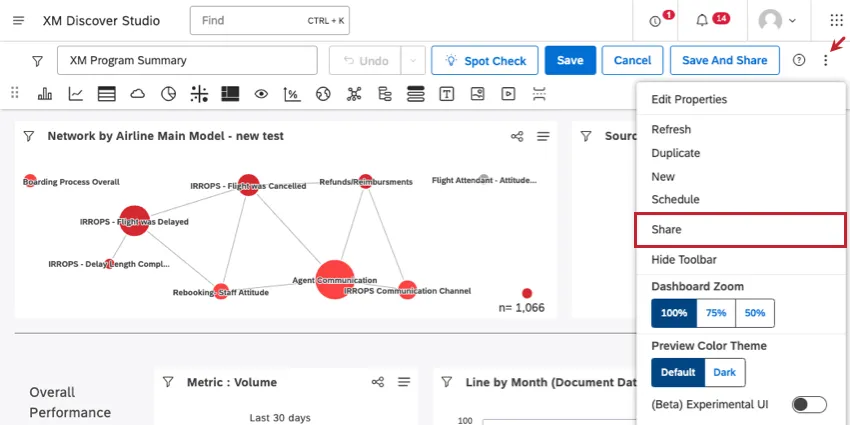
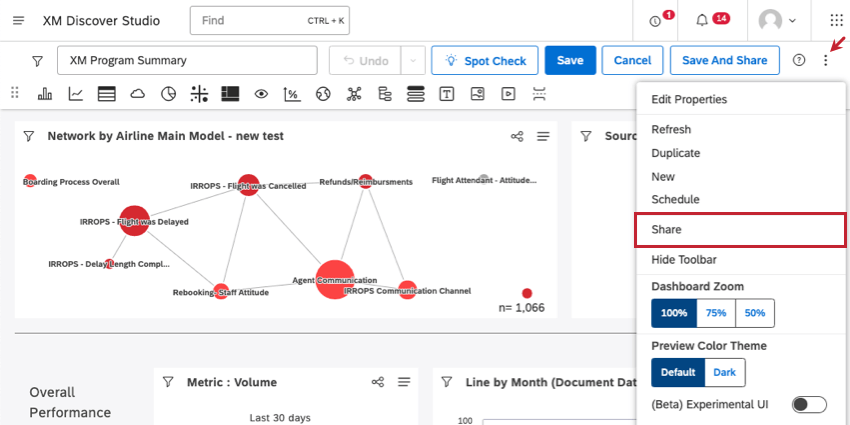
- When a dashboard or book is open, open the options menu and select Share.
A new window will open where you can decide who to share your dashboard or book with.
Sharing a Dashboard or Book
Qtip: A Share Edit or Share View permission is required to share dashboards and books.
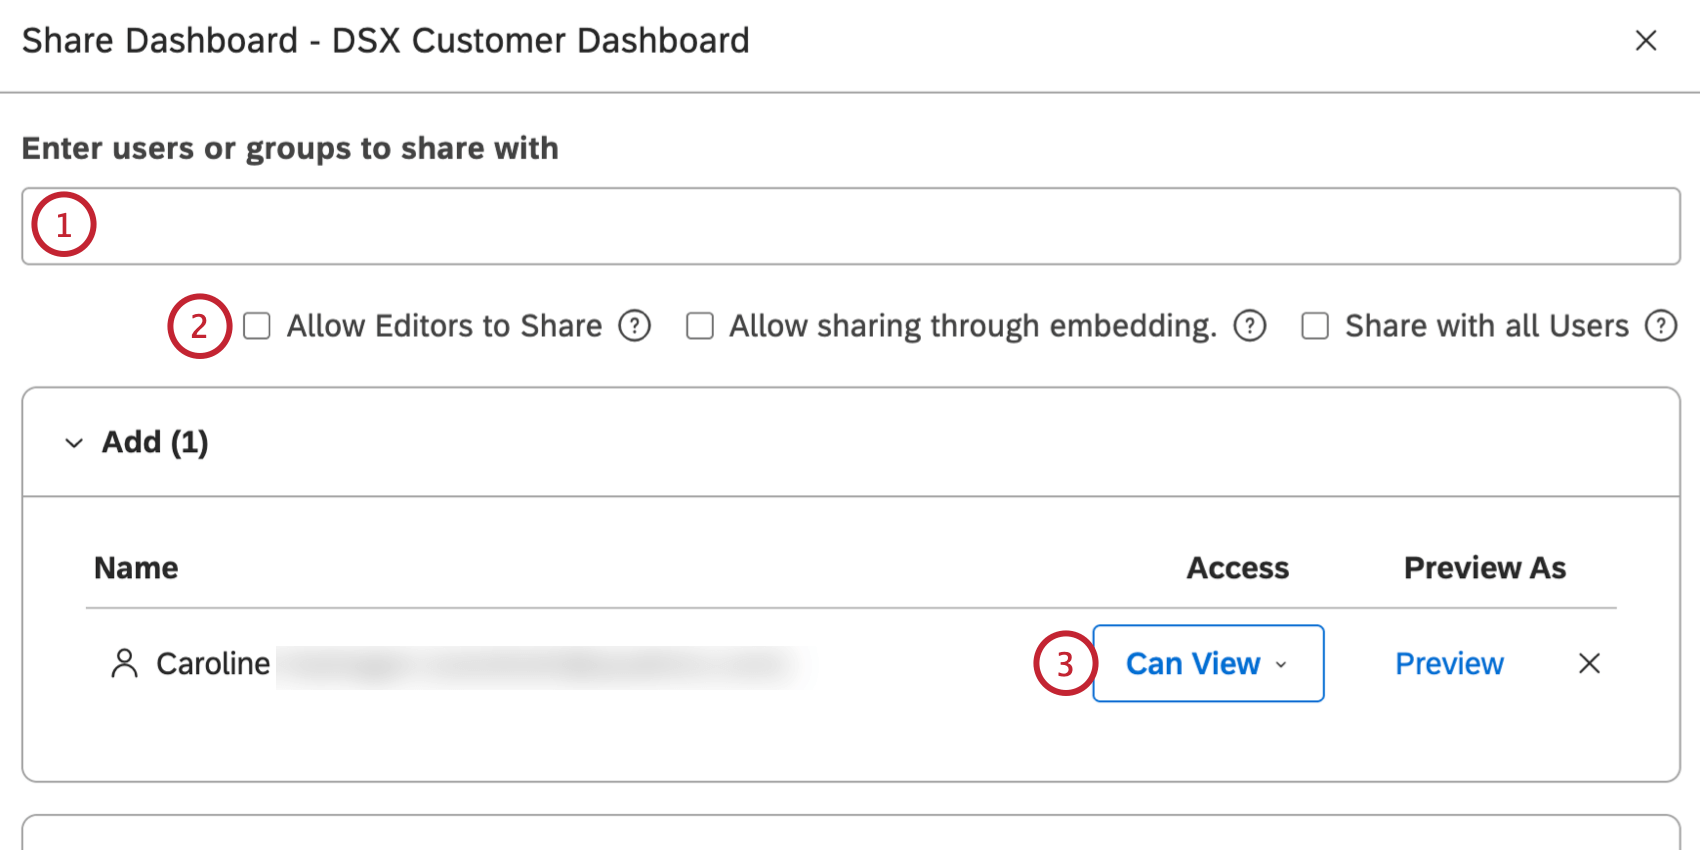
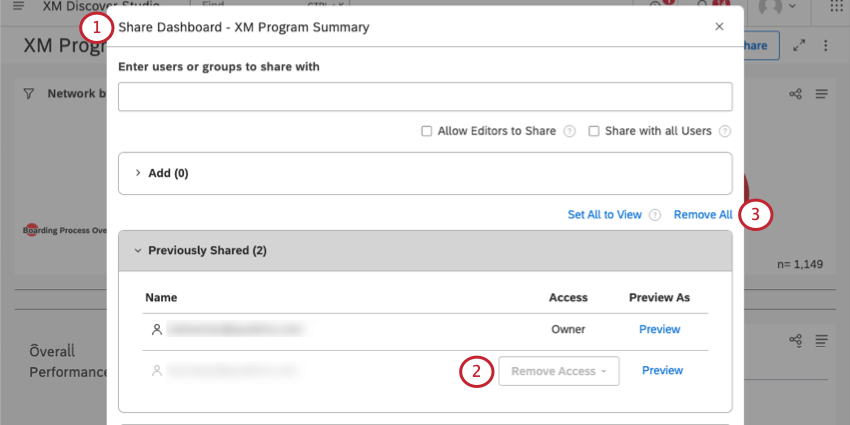
- Studio users: Type the user’s first name, last name, or email, then click it.
- All Studio Users: You can distribute organization-wide dashboards and books to every Studio user in your Master Account by selecting Share with all Users. This setting will make it available to every user, including new users who register after the dashboard is created. You can still add specific users and groups when you use this option. Qtip: This action requires a Share To All permission.
- Studio groups: Type the group’s name, then click it. When you share a dashboard or a book with a group, all members of that group will have access. It does not matter when a user joins the group—users who join the group after you have shared will still get access. However, as soon as any user leaves the group, your dashboard or book will no longer be accessible to that user.
- Unregistered users: Type the email address of a person you want to share your dashboard or book with. Then press Enter. When you finish sharing, this person will be invited to create a Studio account.
- Allow Editors to Share: When enabled, users that can edit the dashboard will also be able to share it with additional users and groups.
- Allow sharing through embedding: When enabled, users that can share the dashboard will also be able to embed it in a Qualtrics dashboard in their linked Qualtrics account. All Discover users who can view the Qualtrics dashboard will be able to view the embedded Discover dashboard.
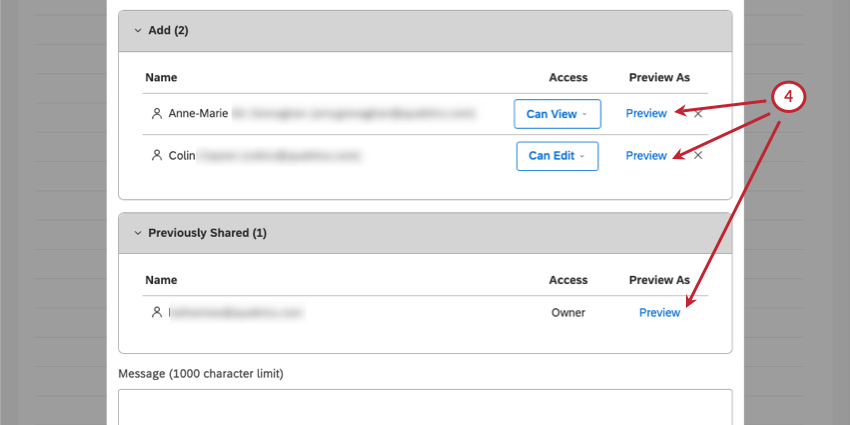
- Can View: Allows users to view, refresh, and export your dashboard or book, but not make any changes to it.
- Can Edit: Allows users to make some changes to your dashboard or book, but not as much as the owner. For more information, see Owners vs. Editors vs. Viewers. Qtip: Can Edit won’t be available when sharing a dashboard or book with all Studio users or unregistered users.
Qtip: This feature is optional. It is most useful for personalized dashboards or books, and if your position in the organization hierarchy is equal to or higher than the user you’re sharing with.
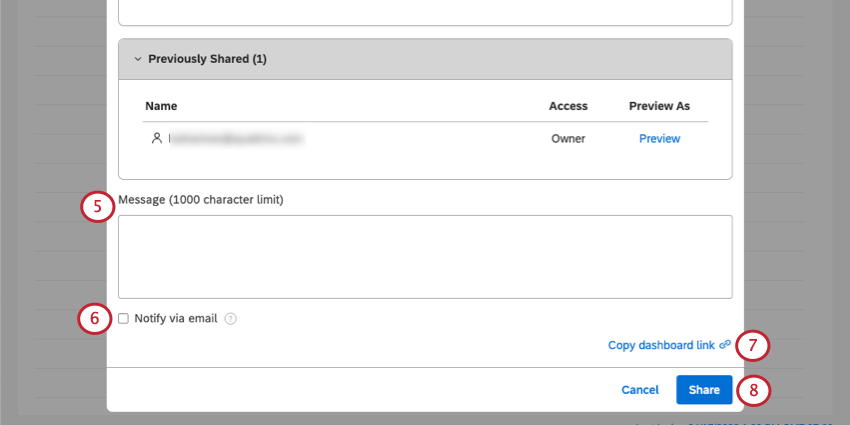
Qtip: If you’re sharing with all users, not everyone will receive an email notification. Only users and groups in the Add section will be emailed.
Qtip: You can paste this link into the Message field.
Qtip: If your Studio dashboard has been embedded in a Qualtrics dashboard, then you will see an extra section called “Already shared via Qualtrics embedding” that lists where the Studio dashboard is embedded. You can click Go to dashboard to be brought to the dashboard in Qualtrics.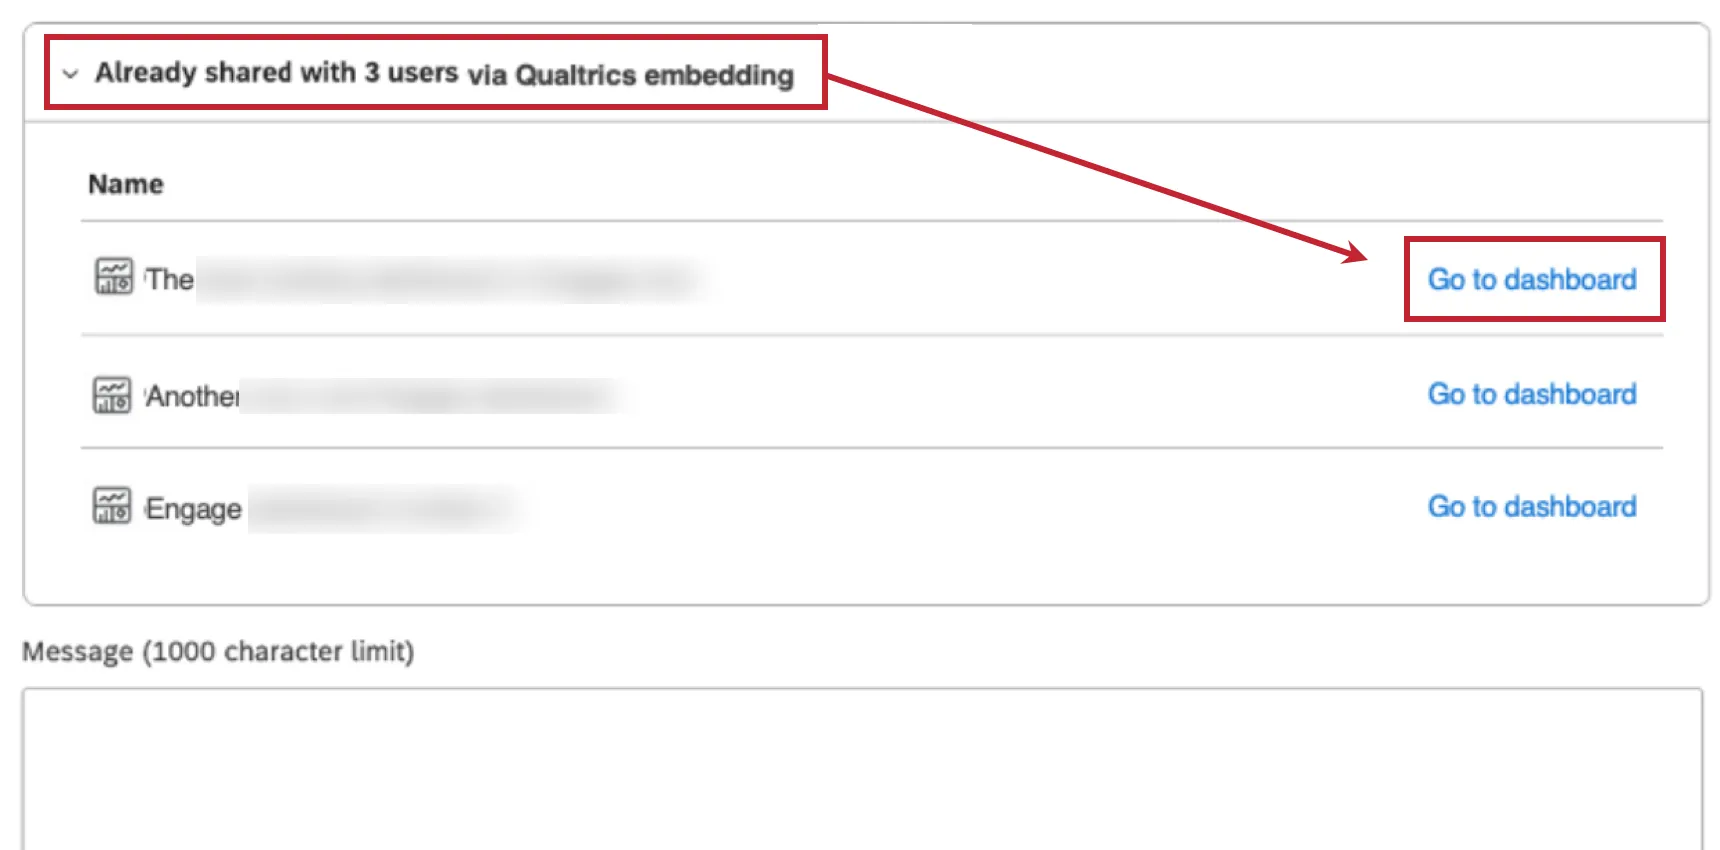

Owners vs. Editors vs. Viewers
The following table provides an overview of what each kind of user can do in the dashboard you’ve shared.
Qtip: When sharing a book, Can View and Can Edit permissions only apply to the book, not the individual dashboards included in it.
| Permission | Owner | Can Edit | Can View |
|---|---|---|---|
| Can view a dashboard | Yes | Yes | Yes |
| Can refresh dashboard reports | Yes | Yes | Yes |
| Can export dashboard reports | Yes | Yes | Yes |
| Can edit dashboard properties (except ownership) | Yes | Yes | No |
| Can edit dashboard widgets | Yes | Yes | No |
| Can publish to or from this dashboard | Yes | Yes | No |
| Can share a dashboard | Yes | No (unless Allow Editors to Share is enabled) | No |
| Can add a dashboard to books | Yes | No (unless Allow Editors to Share is enabled) | No |
| Can change dashboard owner | Yes | No | No |
| Can delete a dashboard | Yes | No | No |
| Can schedule a dashboard | Yes | Yes | No |
| Can access dashboard versions | Yes | No | No |
Dashboard Sharing vs. Book Sharing
You can share a dashboard individually or as part of a book. Dashboard sharing and book sharing work independently. A user may not have access to an individual dashboard, and still be able to view it as part of a shared book.
Qtip: Recipients of a book can view all dashboards added to the book only as tabs in that book. In other words, if you add 10 dashboards to a book, you don’t have to share each of them individually; instead, you only need to share 1 book. If a recipient happens to independently have direct access to one of the dashboards in the book, they can continue to do whatever they have permissions to do in that dashboard directly.
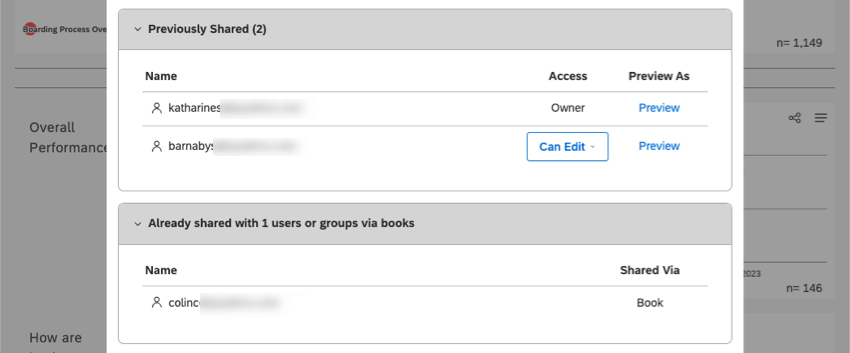
You can see all users who have access to your dashboard in the Share Dashboard window. They are organized into these lists:

- Previously Shared. Individual users and groups with the dashboard has been shared with. You can modify their level of access (Can View or Can Edit) and remove them from this list entirely.
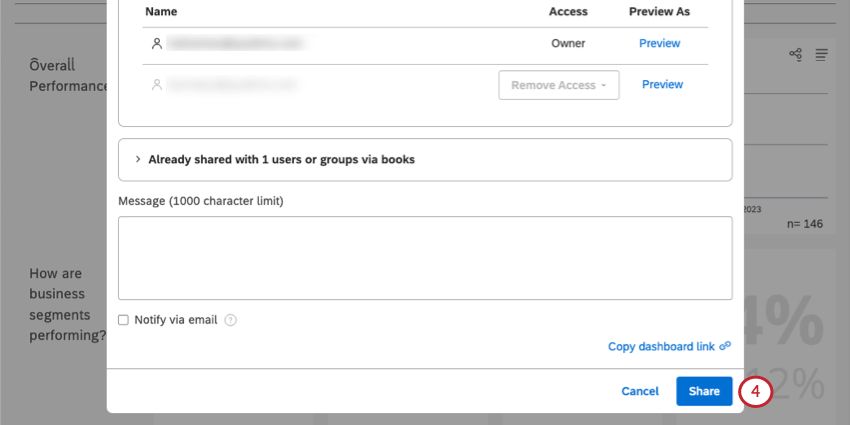
- Already shared with x users or groups via books: (Where x is the number of users and groups.) Users and groups with whom the dashboard is shared as part of the book. Book sharing only grants viewer-level access. To remove users from this list, you need to switch to book sharing.
Sharing Multiple Dashboards or Books at a Time
You can share several dashboards and / or books at once.
Attention: Bulk sharing overwrites any existing sharing permissions a user may have for this dashboard.

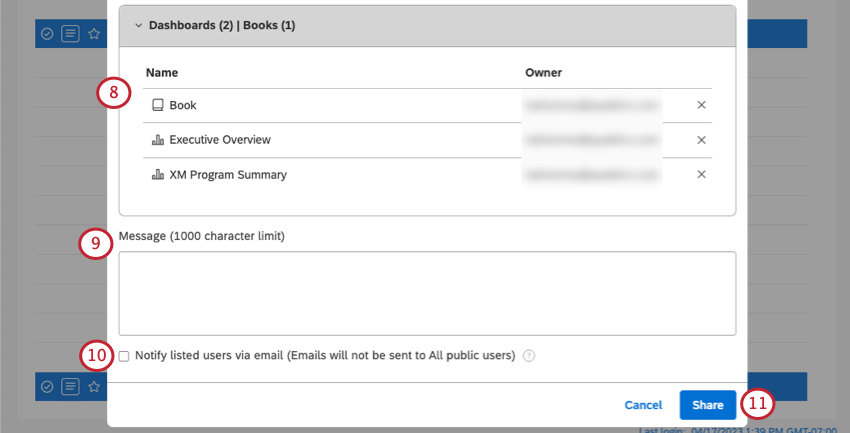
Qtip: If you’re sharing with all users, not everyone will receive an email notification. Only individual users and groups in the Update section will be emailed.
Qtip: If you don’t have permission to share selected items, Studio will tell you.
Stop Sharing a Dashboard or Book
Qtip: When a dashboard or book is shared with a group, removing a user from that group will also make your dashboard or book inaccessible to that user.
Qtip: To remove people’s access to multiple dashboards or books, use bulk sharing with the Remove Access option.
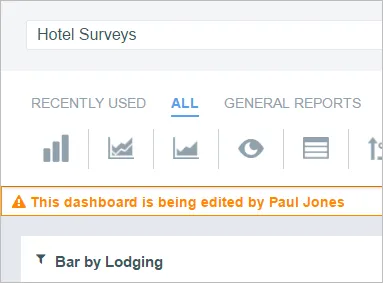
Editing the Dashboard With Other Users
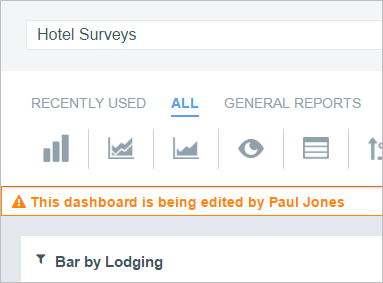
When you edit a dashboard that is already being edited by someone else, a message will appear, letting each of the users know who else is editing the dashboard.
When several users are editing the same dashboard at the same time, the last save will overwrite all previous changes.
Qtip: Make sure to talk to your colleagues to coordinate and avoid overwriting each other’s changes. If you want to coordinate right inside the dashboard, try commenting.
FAQs
Is there a limit to how many users I can notify via email when sharing a dashboard?
Is there a limit to how many users I can notify via email when sharing a dashboard?
How do I request access to a Studio dashboard if I have the dashboard link?
How do I request access to a Studio dashboard if I have the dashboard link?
That's great! Thank you for your feedback!
Thank you for your feedback!