
Vanity URLs
What's on this page
Attention: To have access to vanity URLs / domains within Qualtrics, you must be a Brand Administrator for your organization.
About Vanity URLs
There may be times when, although you are using the Qualtrics technology, you want to use as much of your own branding as possible on your surveys. This includes hosting the surveys, dashboards, and user accounts on a custom web address, otherwise known as a Vanity URL.
Example: research.brandinc.org/jfe/form/SV_1234567890
As a Brand Administrator, you can create and manage your vanity domain from the Organization Settings tab. You’ll be able to add new vanity domains, monitor their provisioning status, and even delete them.
Qtip: At this time, new vanity URLs are not available for FedRAMP brands.
Choosing a URL Strategy
At Qualtrics, there are 2 ways to brand the URL of your surveys: a Branded URL or a Vanity URL.
Branded URLs are when a subdomain appears before qualtrics.com, and do not require that you purchase a domain. For example, brandinc.datacenter.qualtrics.com/jfe/form/SV_1234567890. Your Branded URL is created from your Brand ID, which is set up when you purchase your Qualtrics license. Because of this, Branded URLs cannot be modified.
Vanity URLs are when the domain itself is modified, such as using research.brandinc.org/jfe/form/SV_1234567890. This allows you to choose your own branding across multiple touchpoints, including survey links, dashboard invites, and more.
The below table outlines the 3 available URL options:
| Branded URL (Default) | Vanity Domain: Standard | Vanity Domain: Bring Your Own Certificate | |
|---|---|---|---|
| URL Format | brandid.qualtrics.com | subdomain.brand.com | subdomain.brand.com |
| Example URL | treadmade.qualtrics.com | feedback.treadmade.com | feedback.treadmade.com |
| Decision Timing | Must be determined in advance of brand creation | Can be added anytime after brand is created | Can be added anytime after brand is created |
| Requires IT Team? | No | Yes | Yes |
| Requires Services Contract? | No | No | Yes |
Acquiring a Subdomain
The subdomain is the website you want to use for your vanity URL. You can only use a subdomain that you own. You are responsible for finding and purchasing a domain before you set it as your vanity URL. This means that Qualtrics does not participate in this step of the process.
So long as you own a domain and can add a DNS record to it, you are allowed to use it for your Qualtrics brand. You must also be able to create subdomains, as Qualtrics will use the subdomain for your vanity URL.
Qtip: Subdomains do not need to contain your brand name. This is useful if you would like to collect feedback without exposing your brand.
Example: For example, let’s say your company’s website is brandinc.org, and therefore your Qualtrics branded URL is brandinc.qualtrics.com/jfe/form/SV_1234567890. You can purchase the subdomain surveys.research.org and use this subdomain as your vanity URL. After implementing the vanity URL, your survey URLs would be surveys.research.org/jfe/form/SV_1234567890.
Attention: Establishing a vanity URL will not impact existing SSO configurations. The vanity URL will still function as intended on surveys, and users can still access the prior SSO-configured login URL. If SSO users navigate to the new vanity URL, they will be taken to your brand’s authentication page.
Subdomains
For your vanity URL, Qualtrics requires use of a subdomain. For example, rather than just brandinc.org, use surveys.brandinc.org.
If you have any questions, a Brand Administrator can reach out to our Technical Support Team.
Subdomain Redirects
If your survey URL contains a subdomain that you do not own (i.e., it is not your default branded URL or a purchased vanity URL), and your brand has the setting Restrict surveys to domain disabled, then the survey link will automatically redirect to your branded survey URL. If Restrict surveys to domain is enabled, no redirect will happen, and the survey will not load.
When a respondent clicks one of these links, they will see a redirect page letting them know that they are being redirected to the correct link. You can avoid this by using your brand’s default link or one of the generic subdomains below.If you’d like to hide your brand name from your survey URL, you can replace your branded subdomain with one of the following generic Qualtrics subdomains instead. These subdomains can be used without triggering a redirect:
- research.qualtrics.com
- s.qualtrics.com
- survey.qualtrics.com
- surveys.qualtrics.com
- your datacenter.qualtrics.com
Example: For example, if your survey URL is https://brand123.qualtrics.com/jfe/form/SV_abc123def456, then you can change it to https://survey.qualtrics.com/jfe/form/SV_abc123def456 to hide your brand’s name from the URL.
Implementing a Standard Vanity URL
Once you own a subdomain, you can configure your vanity domain within Qualtrics.
Attention: In order to configure your vanity domain within Qualtrics, If you have any questions, a Brand Administrator can reach out to our Technical Support Team to ensure access has been enabled for the brand.
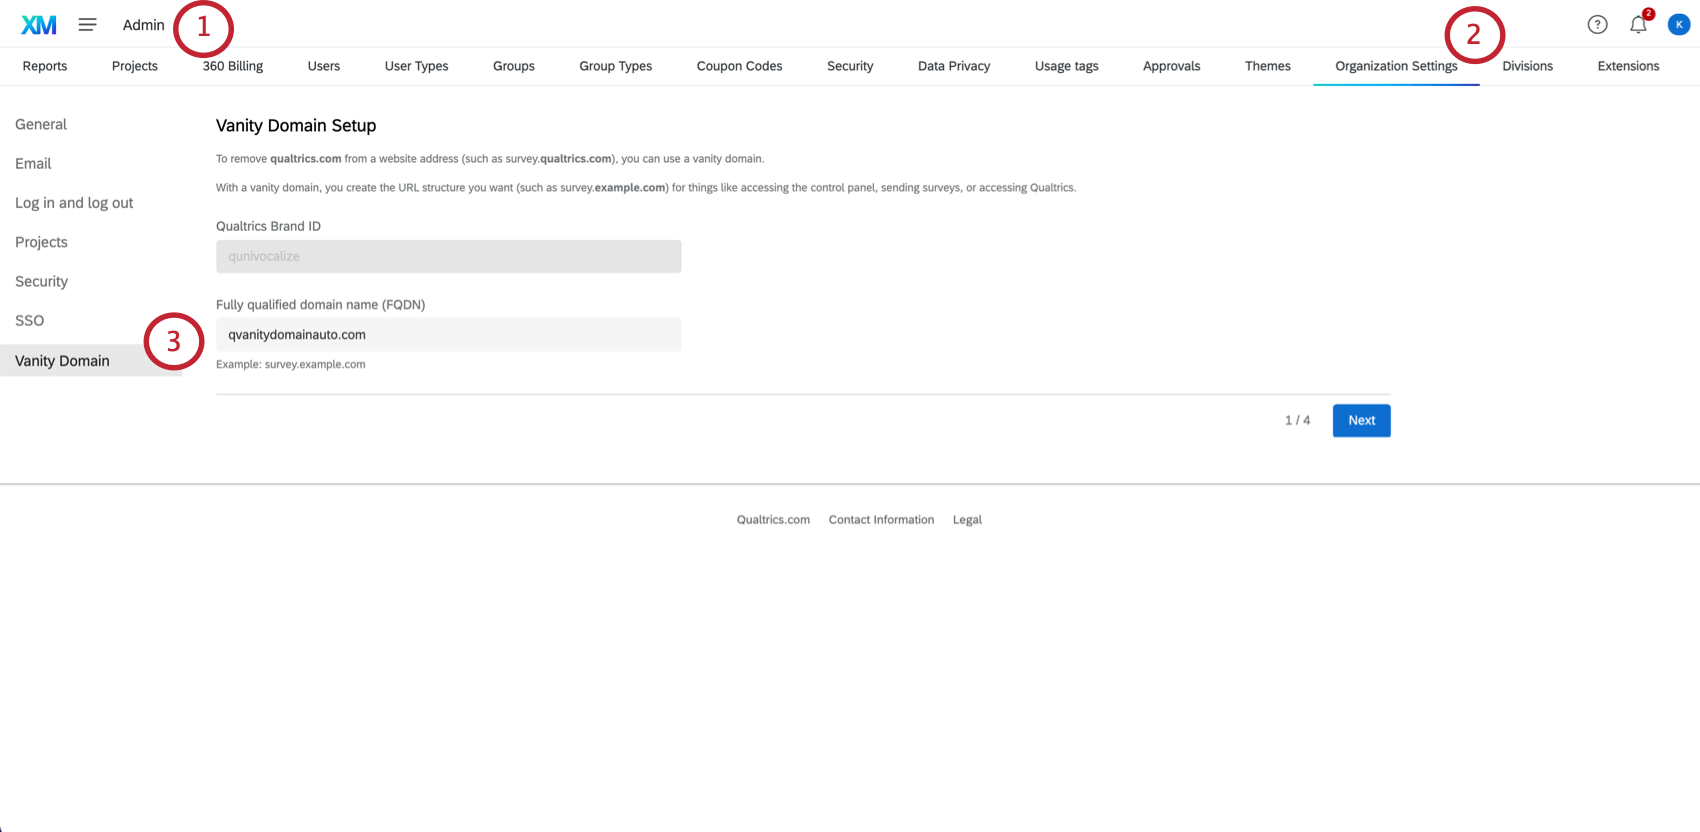
Qtip: If you haven’t created any vanity domains before, you’ll see a form where you can enter new vanity domain information.
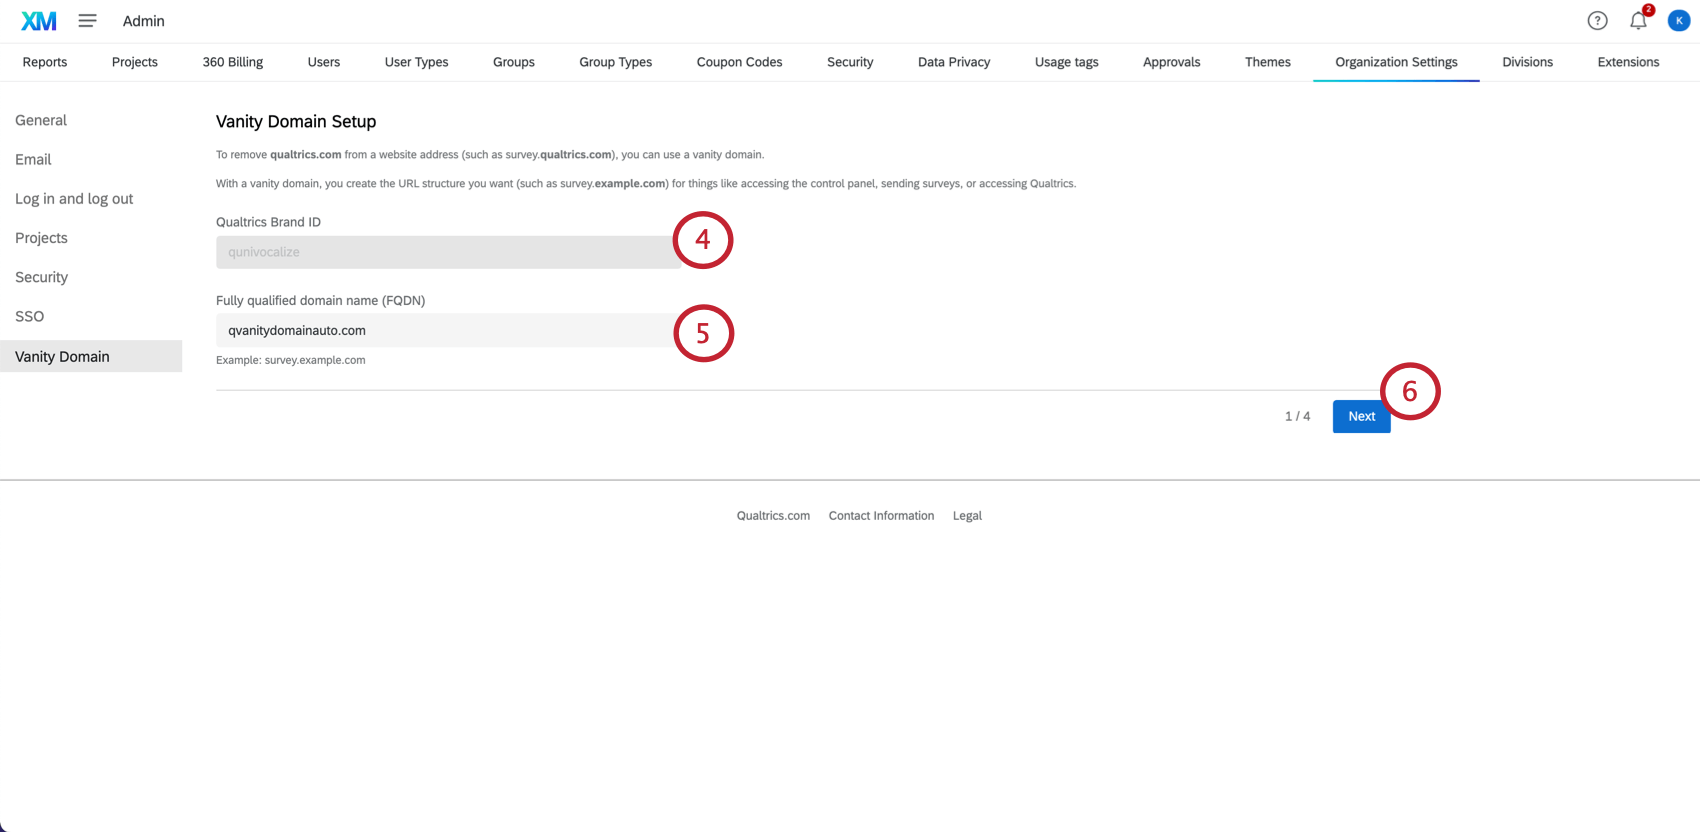
Attention: This field is here to let you know what brand you’re currently working in. It is purely informational, which is why this particular field is not editable.
Attention: When entering your subdomain name, make sure to exclude “http” and “https” from the URL.
Attention: You must own the subdomain that you enter here. If you need any help registering a subdomain, please contact your IT team. Qualtrics will ask you to prove that you own this subdomain later in the process. Please note that Qualtrics is not responsible for purchasing a domain name for your organization.
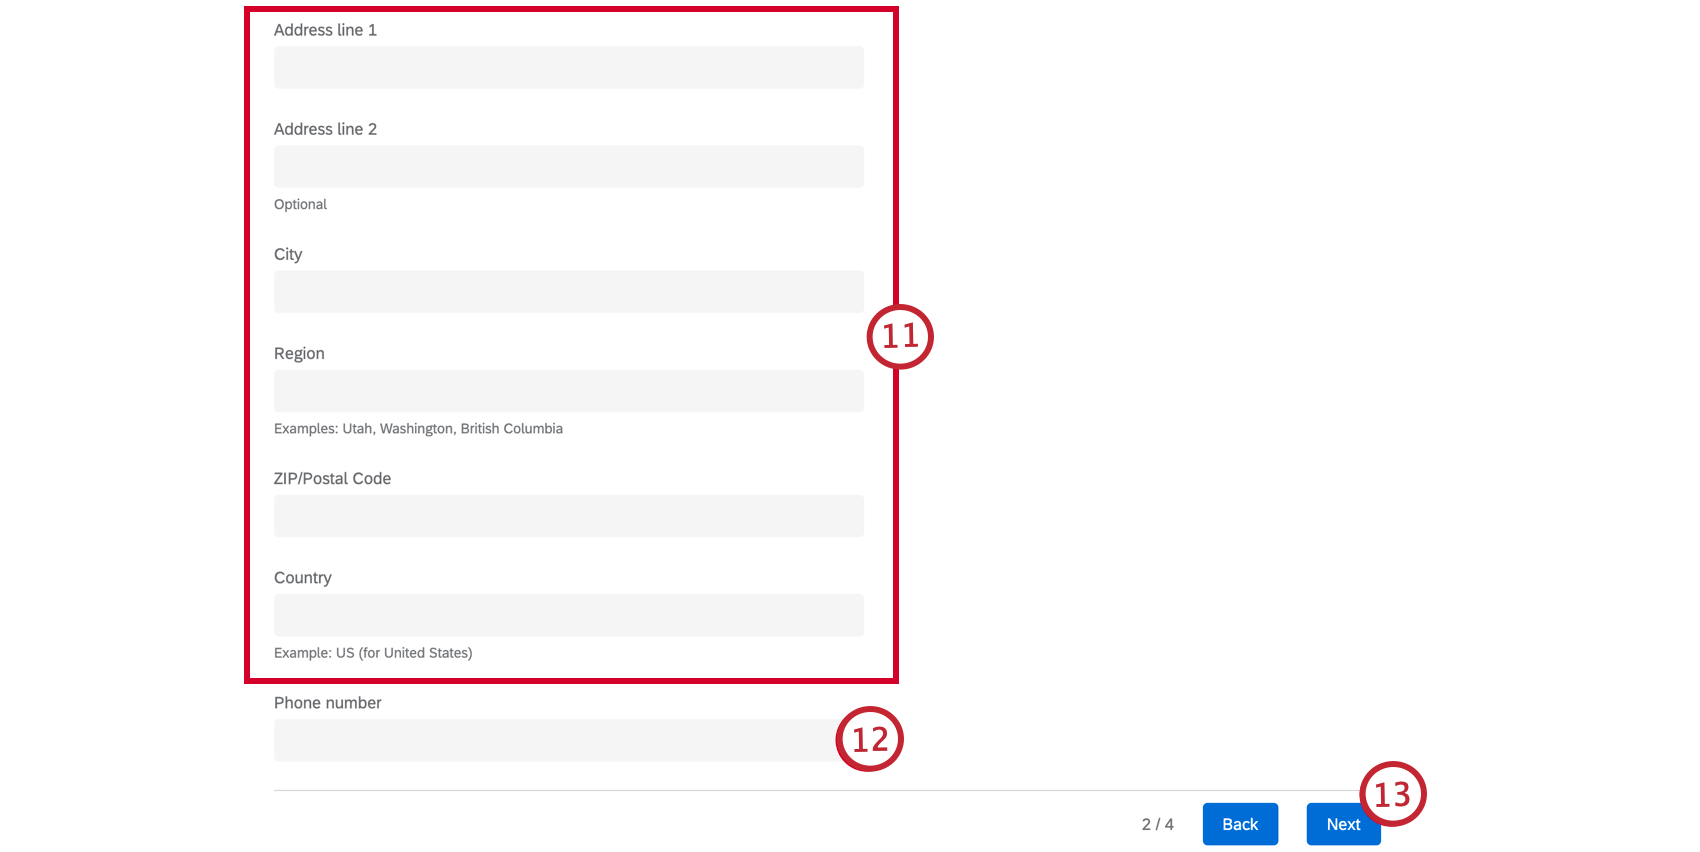
Qtip: Refer to ISO 3166-1 alpha-2 for assistance in finding and formatting the country field. For example, the ISO 3166-1 alpha-2 country code used for the United Kingdom is “GB.” The region field must be formatted as the full name for the region. For example, “Utah” would be accepted, but the abbreviation “UT” would not.
Qtip: You will need to format the phone number numerically. Please do not include any special characters in the phone number, such as “+” or “–”.
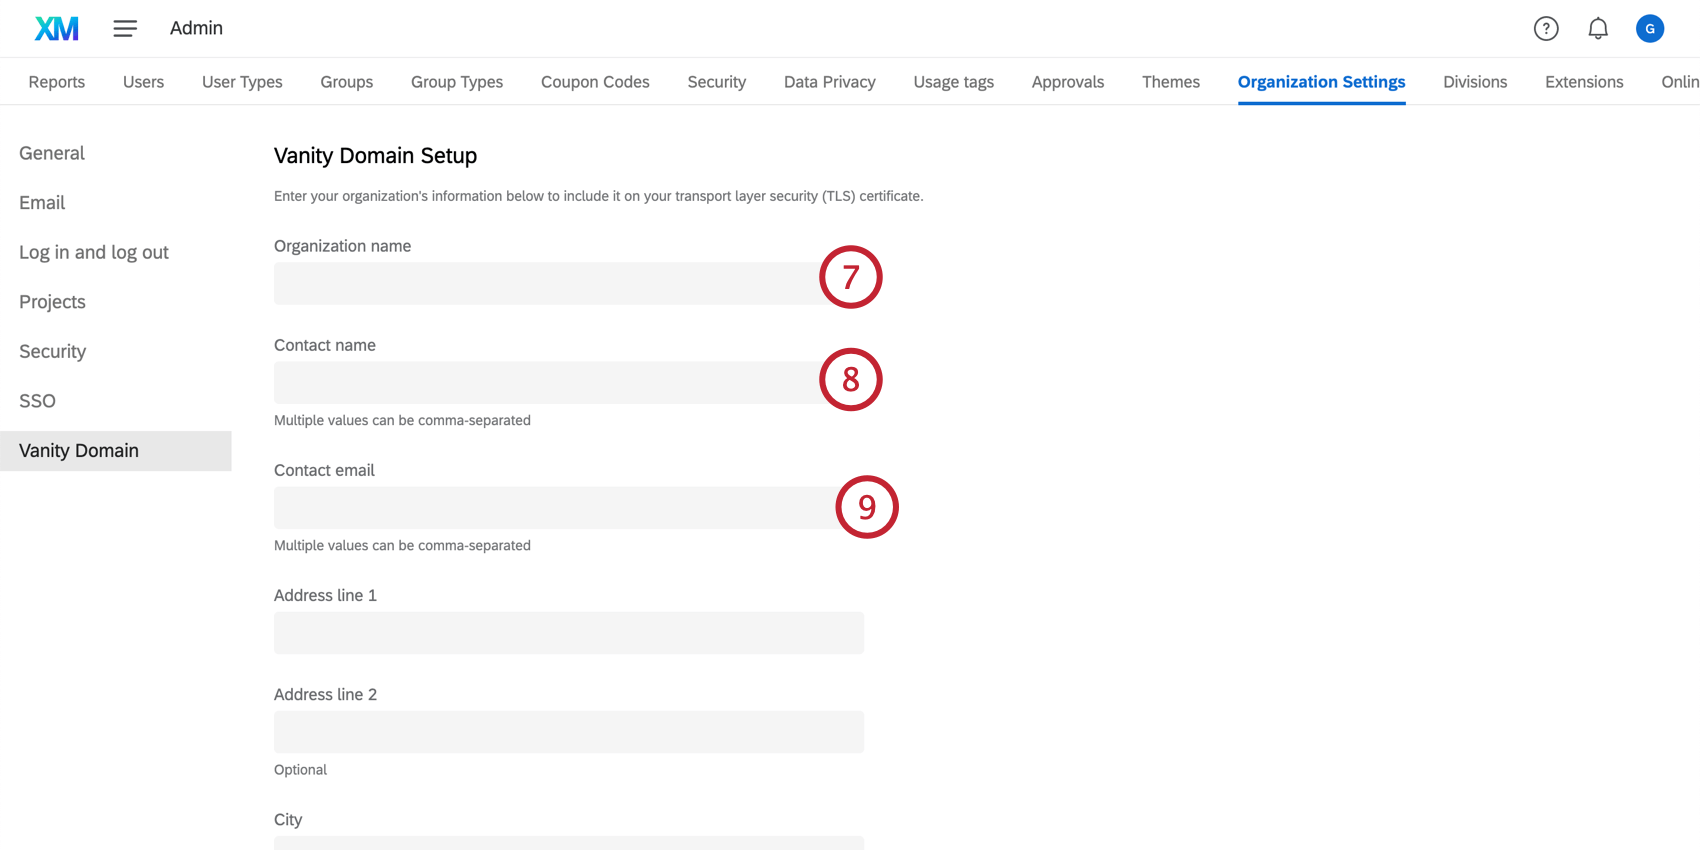
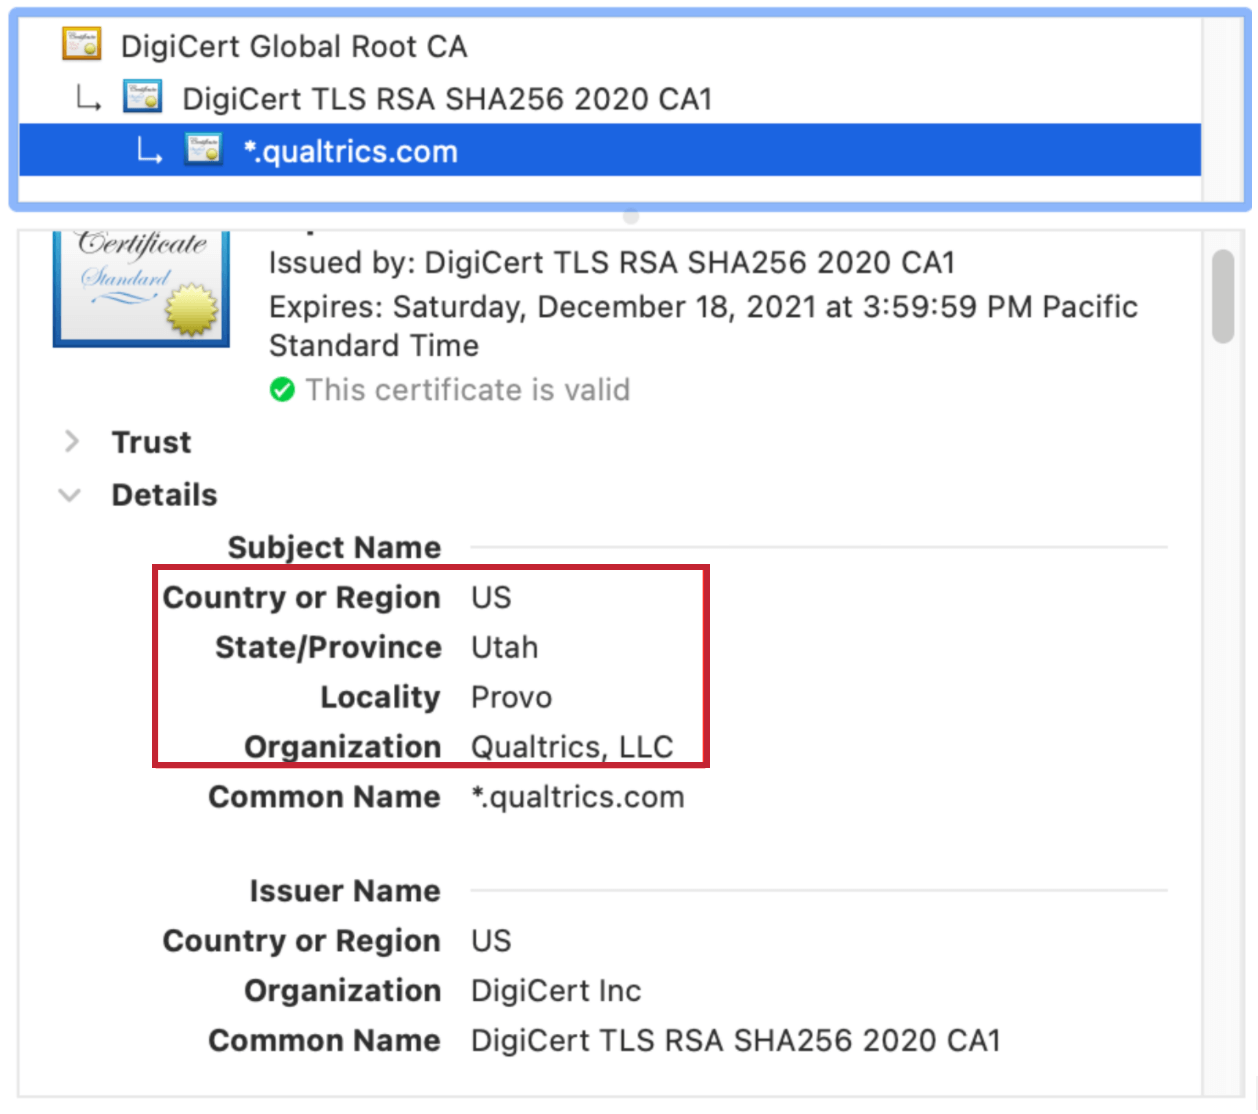
Qtip: The information you enter here will be shown in the details section of the future TLS certificate. For example, your certificate might look similar to this:

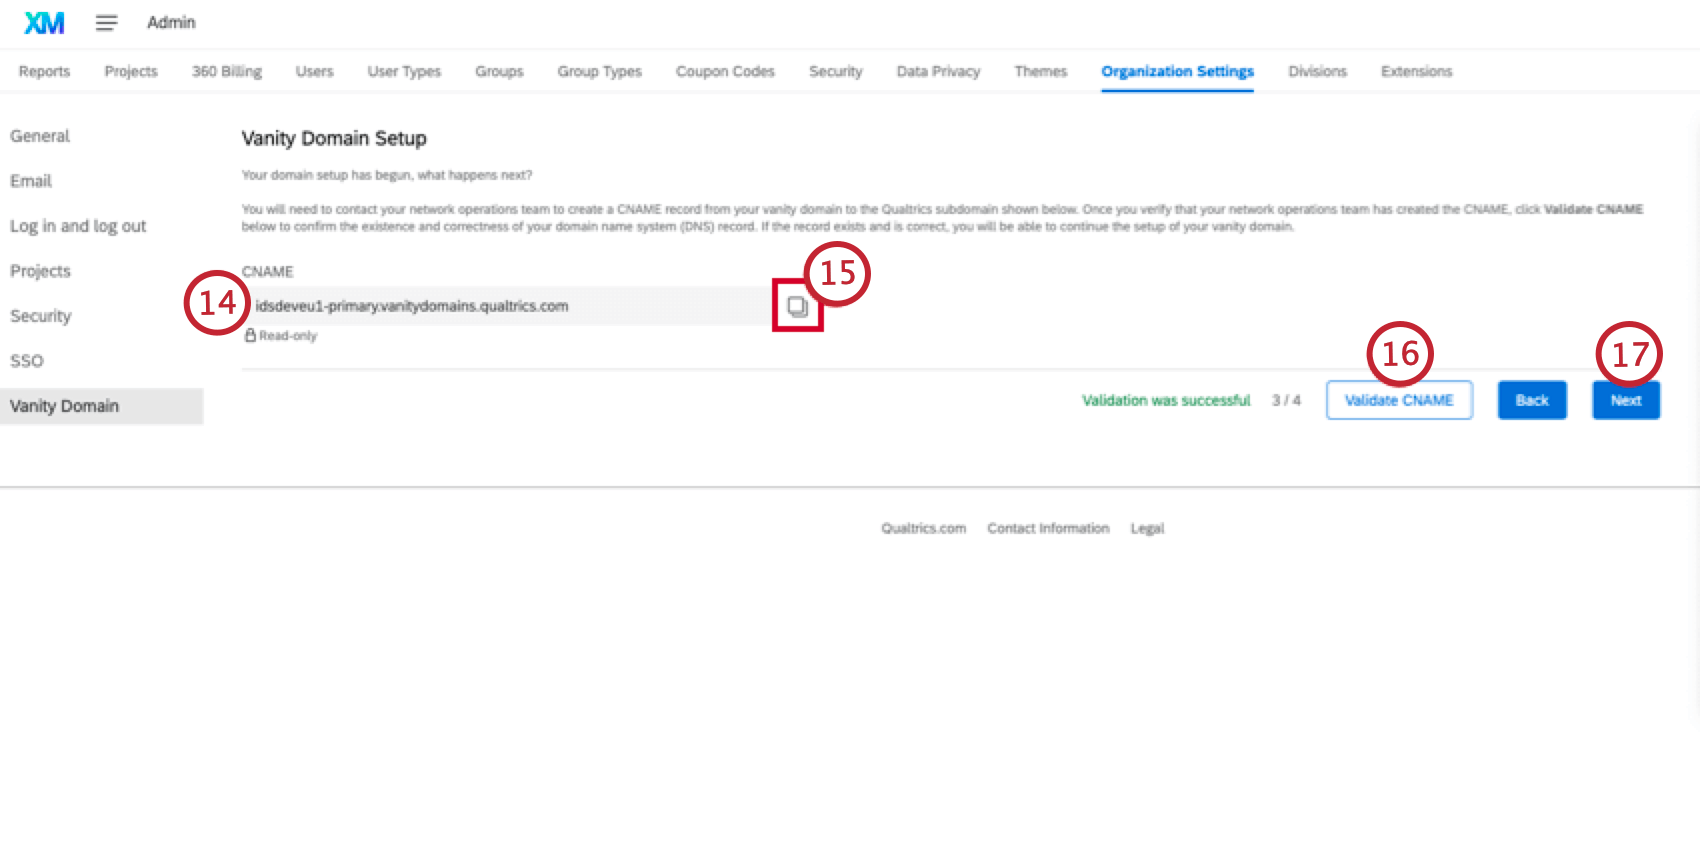
Qtip: By adding the given CNAME record, you will prove that you actually own the vanity domain name. Qualtrics uses a DIG tool to assist the validation. Please reach out to your IT team to help get this public DNS record created.
Qtip: You are safe to leave and close the browser during the time period when you work on the CNAME validation. Next time you come back, all the information you previously submitted will be automatically retrieved so you will not need to re-type any of it.
Qtip: If the CNAME validation does not pass, you will receive an error message.

Qtip: If your vanity domain or any of its parent domains have existing CAA DNS record entries, add ‘letsencrypt.org‘ to their corresponding CAA list.
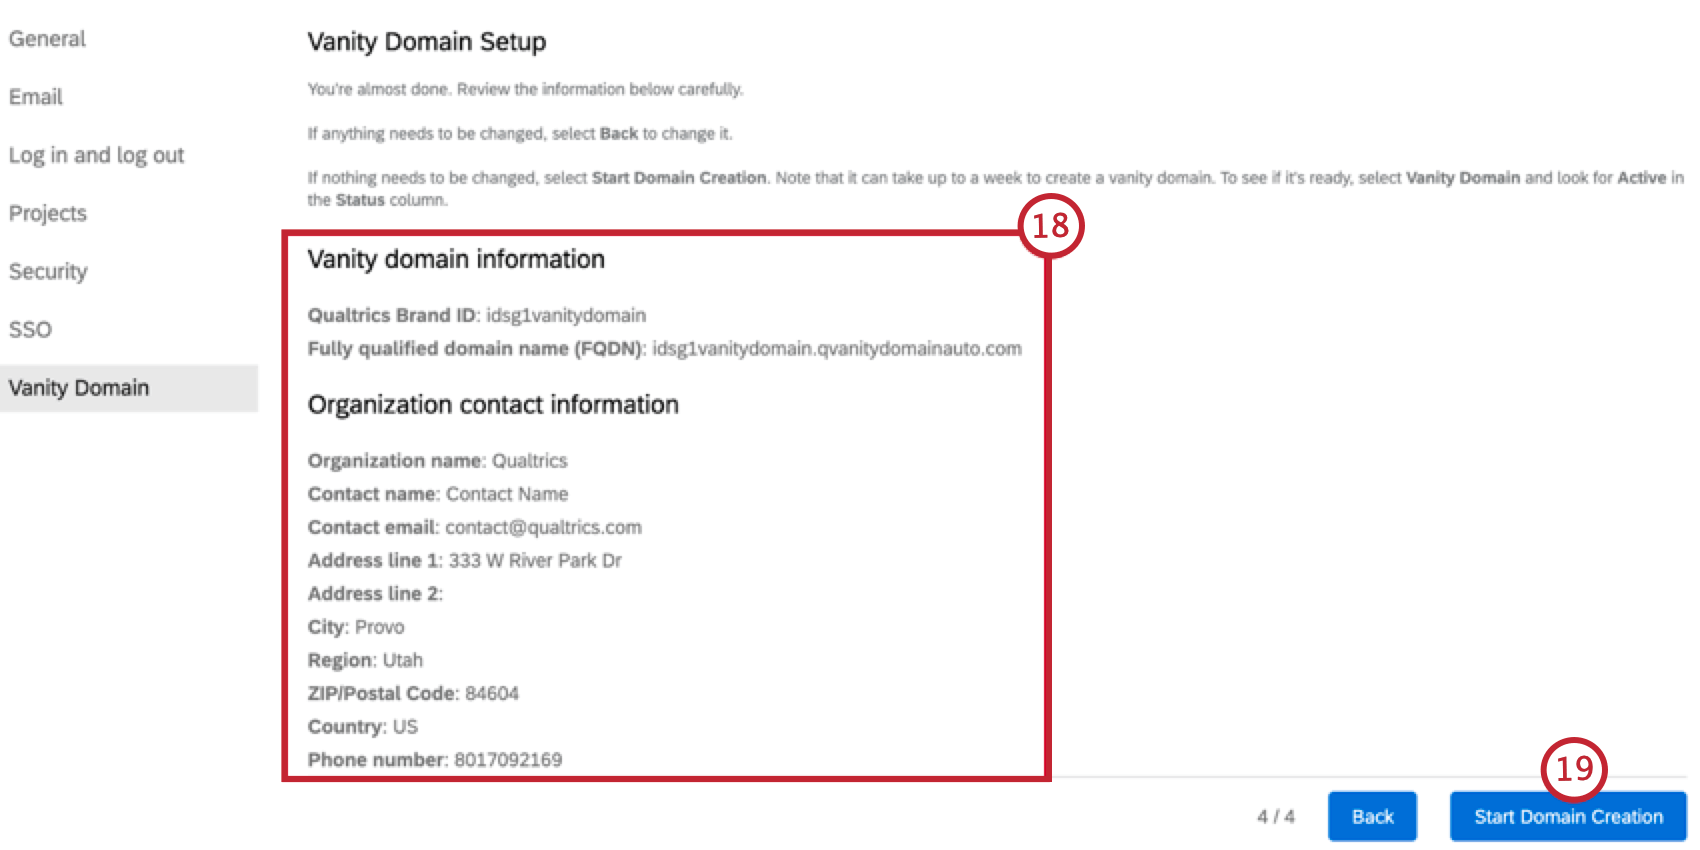
Qtip: If you wish to change any fields, click Back.
Qtip: Domain creation can take up to 7 business days. Because of that, this step exists to ensure that you have entered your domain correctly, and that you are certain you would like to continue.
Qtip: Old survey links will continue to work after adding a vanity URL. However, if your brand changes an existing vanity URL and replaces the base URL, old survey links with the old vanity URL will not function.
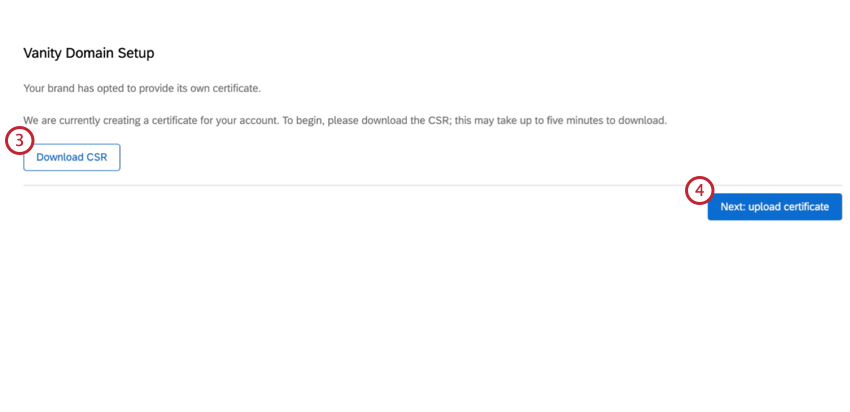
Implementing a Vanity URL with Your Own Certificate
In most cases when using a Vanity URL, Qualtrics will manage the vanity domain certificate on behalf of organizations. However, in some industries, strict compliance standards may require an organization to implement additional security protocols surrounding their domain certificate management.
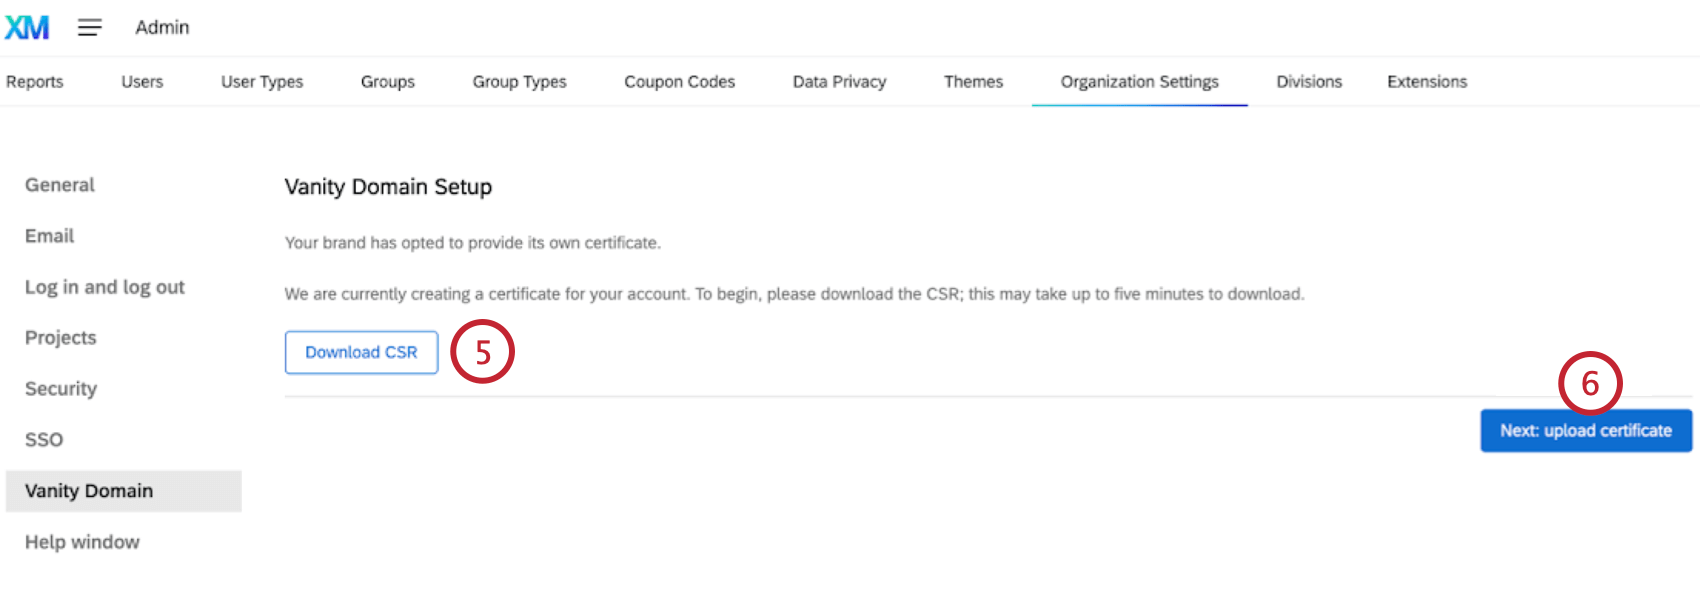
Setting up a Vanity URL with your own certificate allows you to provide your own signed certificate to adhere to your desired level of compliance. The initial implementation steps are the same as setting up a standard Vanity URL, with some additional steps required.
Attention: This feature is an add-on and is not included with all licenses. To get started, a Brand Administrator can reach out to our Technical Support Team.
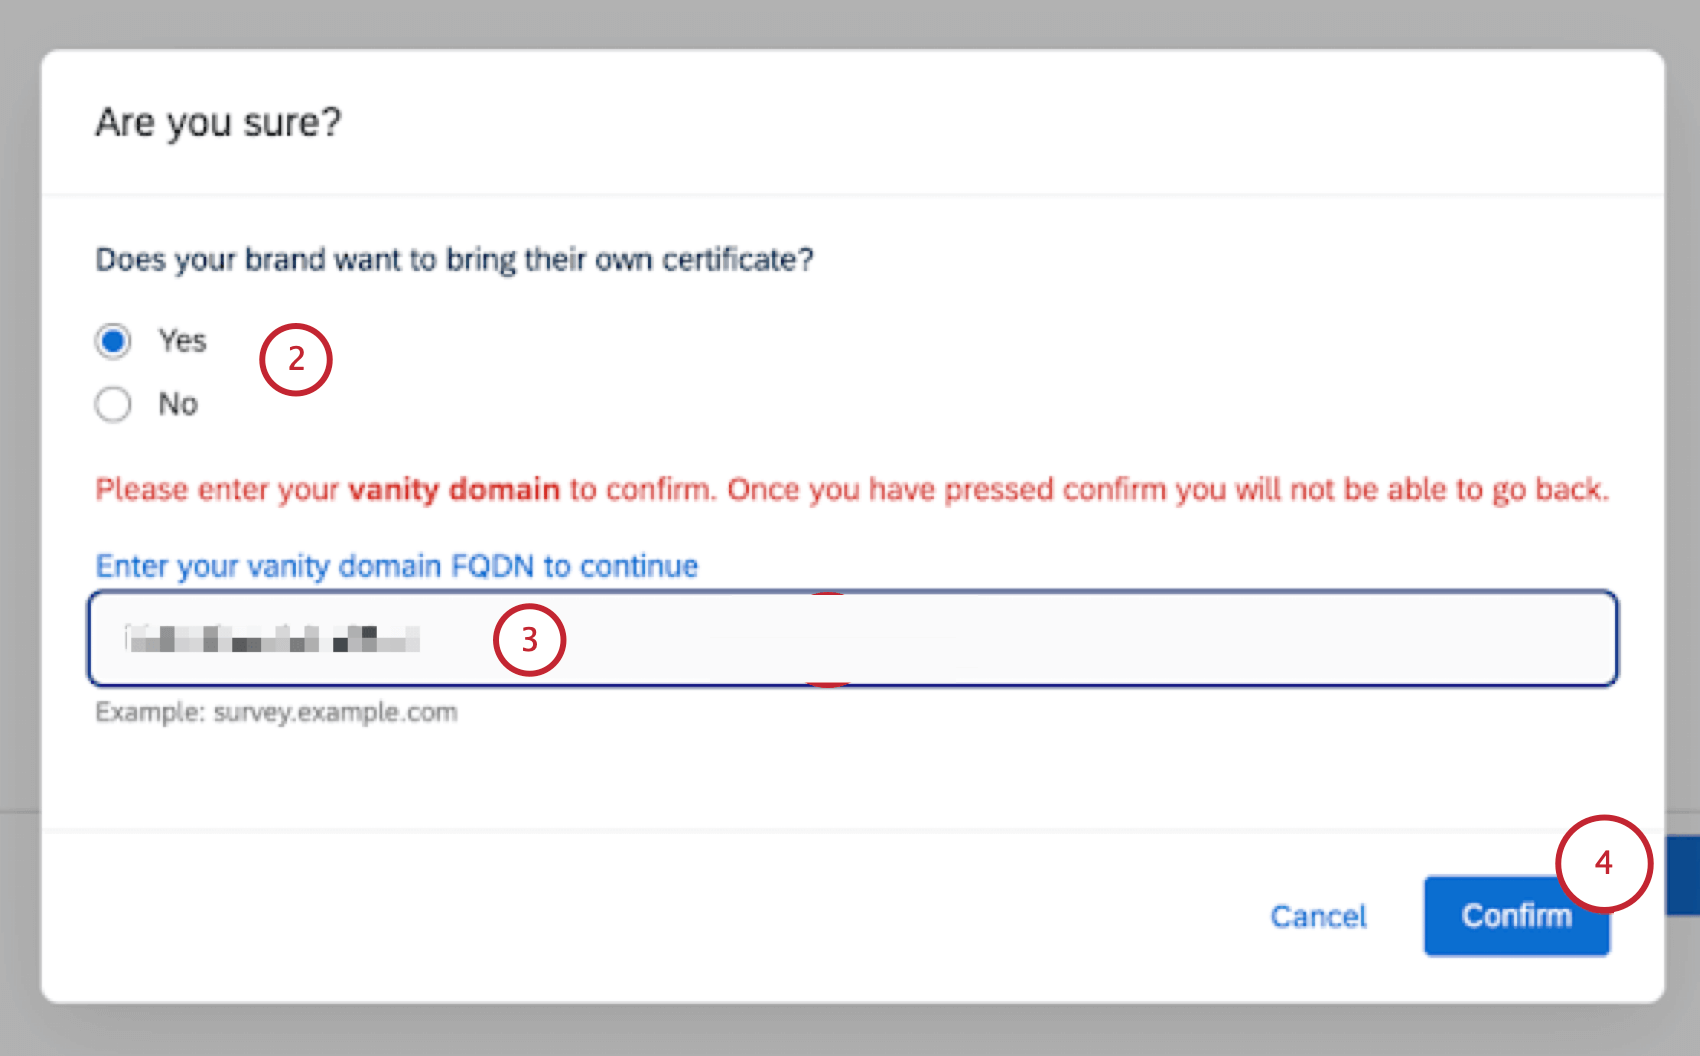
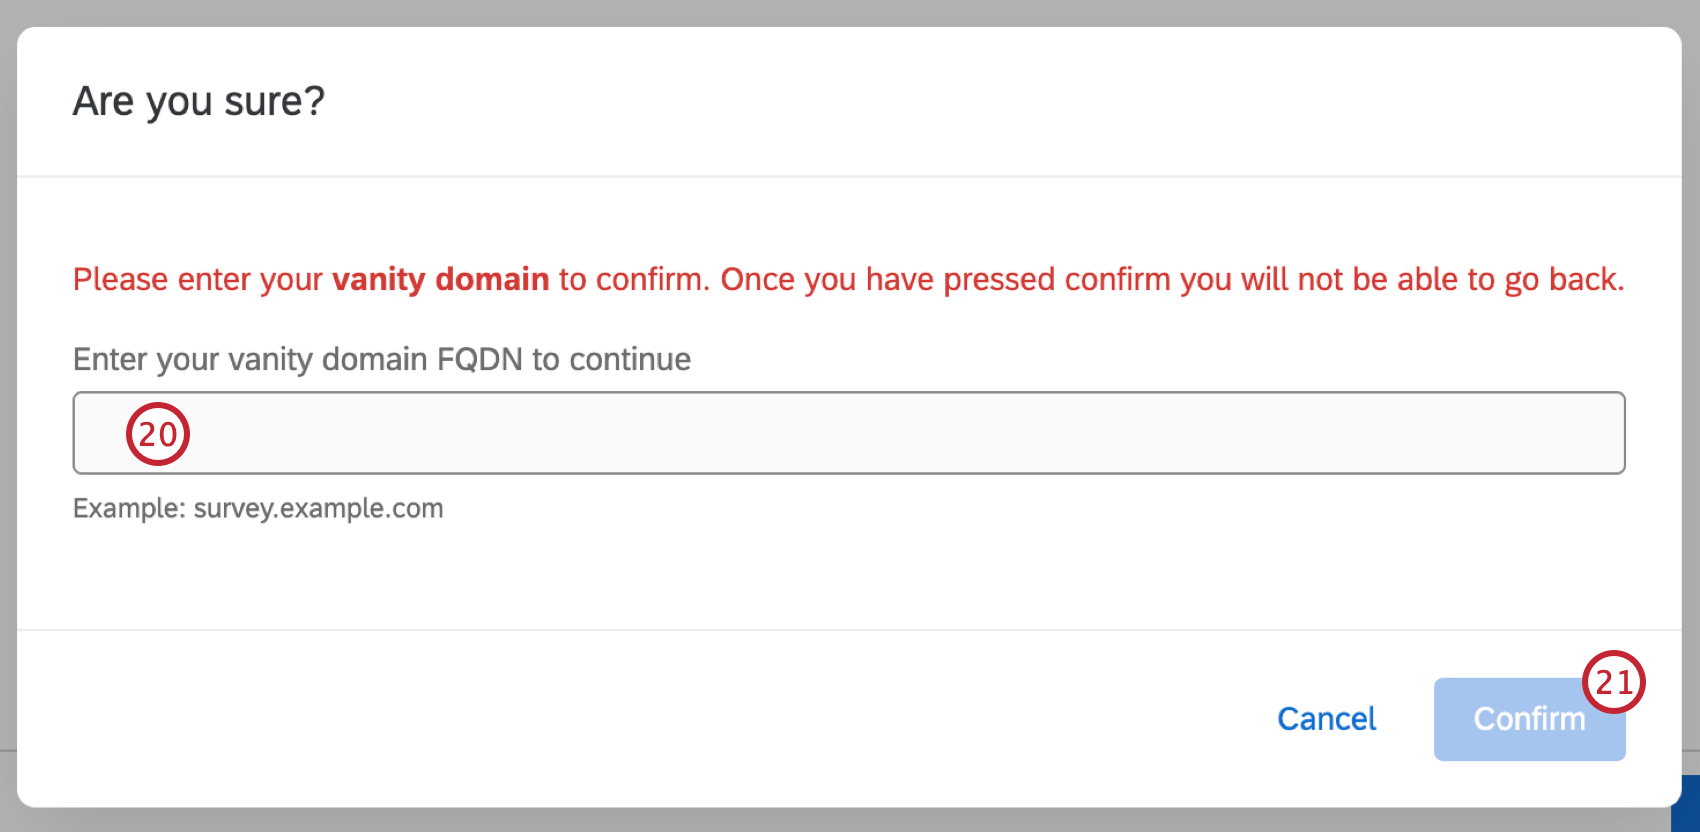
Qtip: Domain creation can take up to 7 business days. Because of that, this step exists to ensure that you have entered your domain correctly, and that you are certain you would like to continue.
Attention: Once you have clicked Confirm you will not be able to go back.
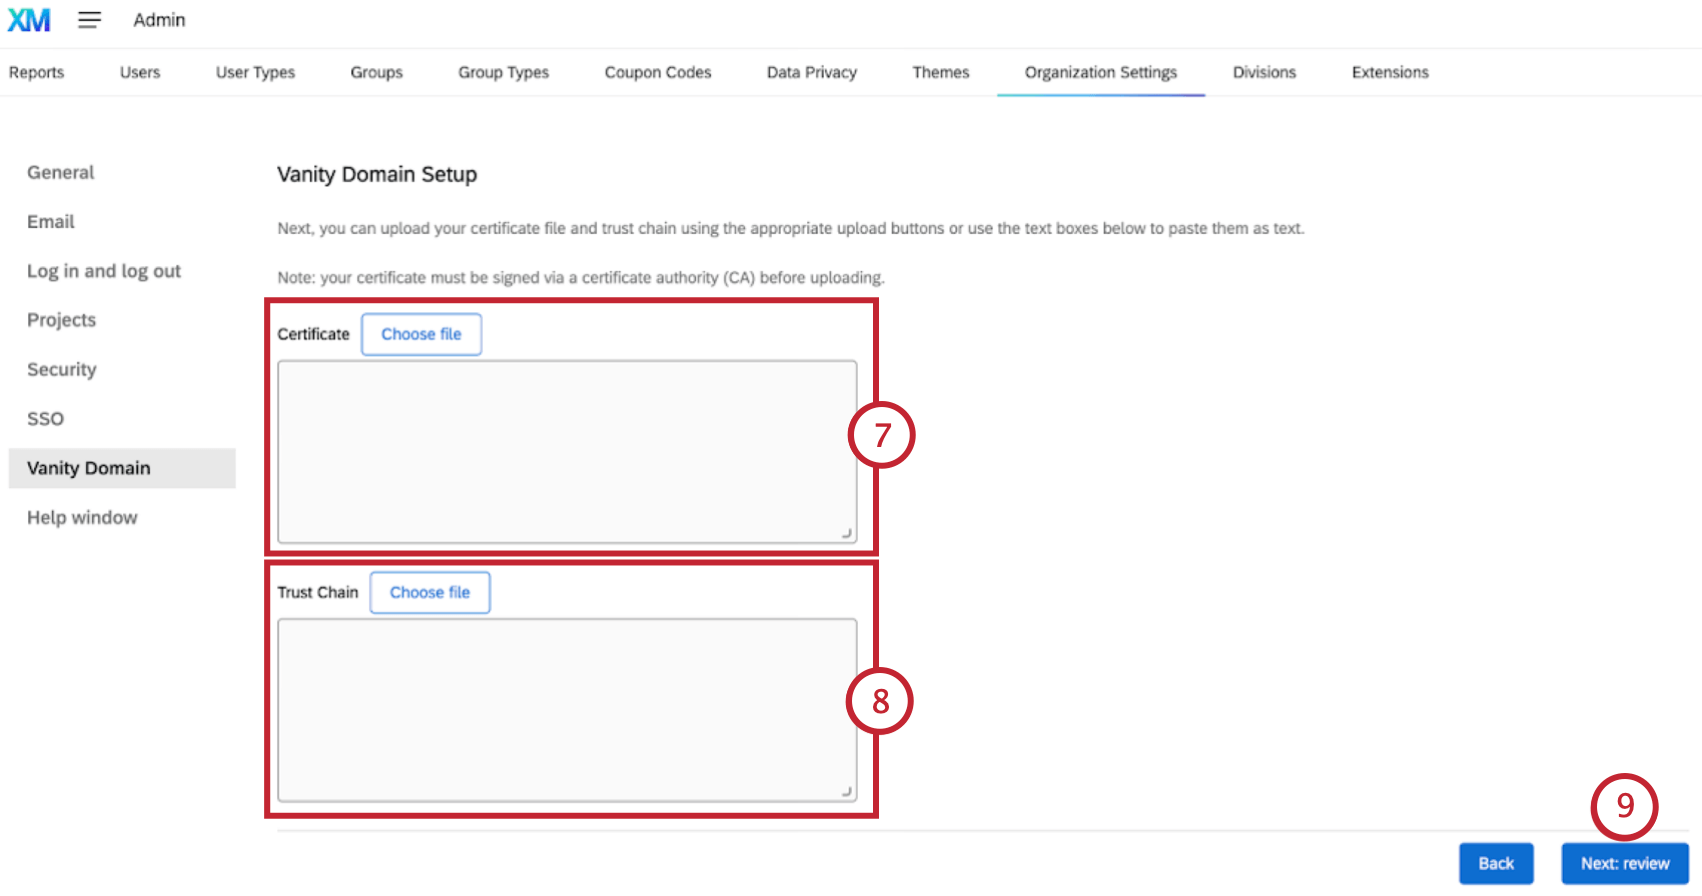
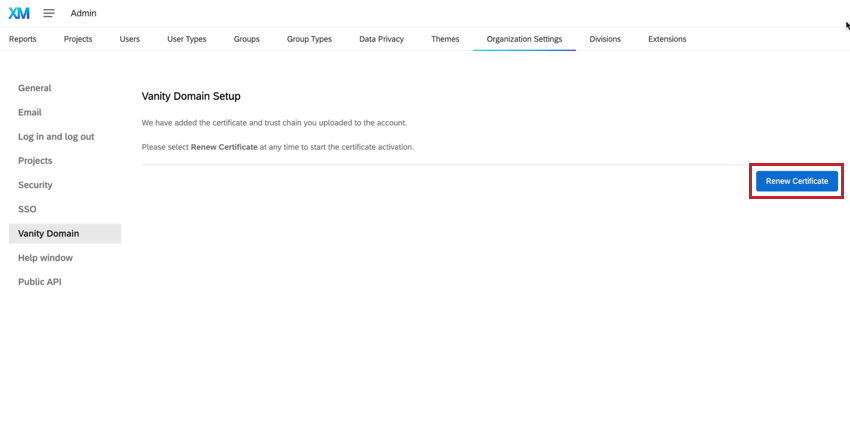
Qtip: Some organizations require additional proof that a particular certificate originates from a trusted source. This can be accomplished by uploading a trust chain, which is created by the signing authority at the time the certificate was signed.
Viewing Vanity Domain Status
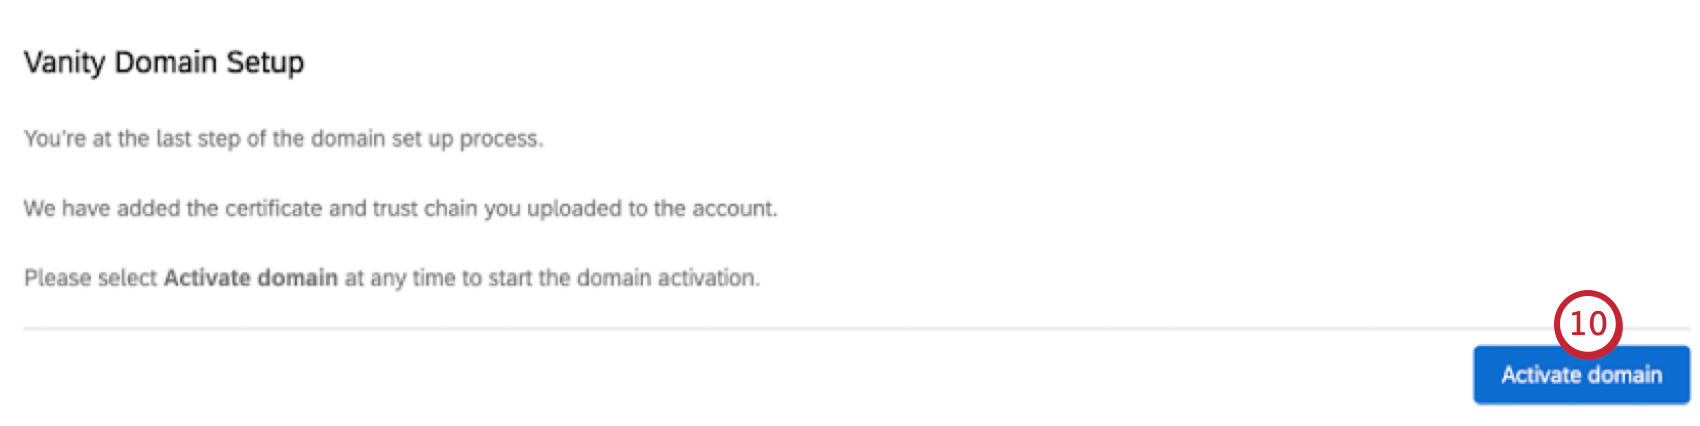
After clicking Start Domain Creation, you will be brought to the status page, where the domain will be shown as Pending.
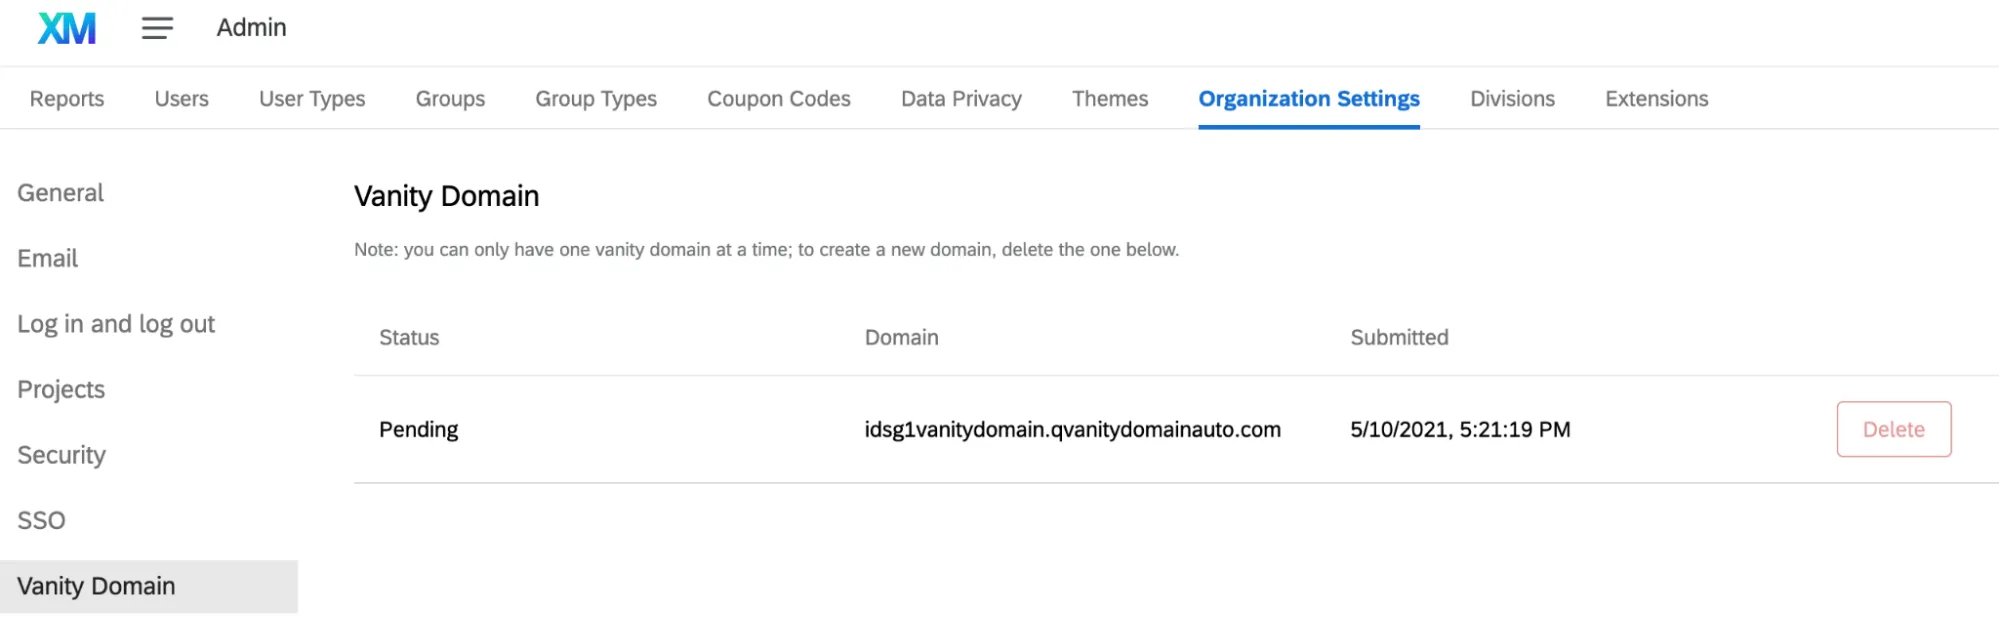
Once the certificate is successfully provisioned and deployed, the domain’s status will change from Pending to Active.
Qtip: You can visit the vanity domain tab at any point to view the status of your domain. Please note that the preparation of the vanity domain can take up to 7 business days.
Attention: You can also choose to Delete your vanity domain once the status is Active. However, this will cause the domain to be unable to serve traffic, so make sure you are absolutely certain you want to delete the vanity domain before you proceed.
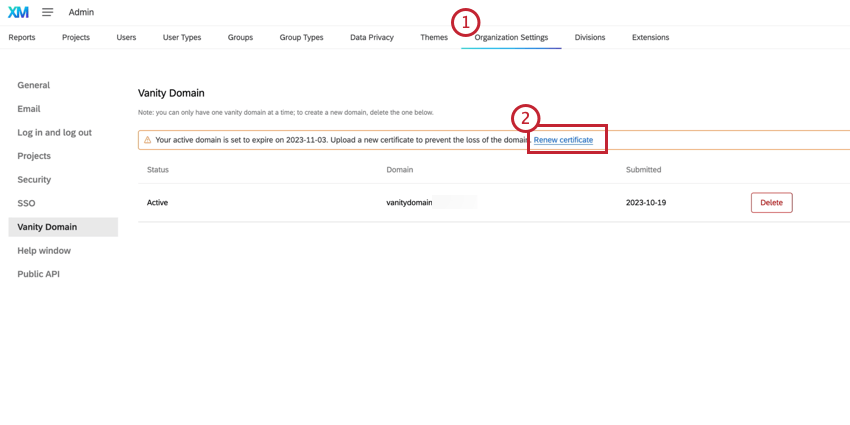
Renewing Your Active Domain Certificate
Your active domain will typically expire every year. 60 days before your active domain is set to expire, you will receive a message in the vanity domain section of your organization settings. Your Brand Administrator will need to follow these steps to renew your certificate.

FAQs
Why don't I see the Vanity Domain option in Organization Settings?
Why don't I see the Vanity Domain option in Organization Settings?
Can Qualtrics Support assist with setting up a Vanity URL?
Can Qualtrics Support assist with setting up a Vanity URL?
Why can’t I create more than 1 Vanity URL?
Why can’t I create more than 1 Vanity URL?
If you need to change your vanity URL, you must delete your existing one and then create the new one.
Once configured, can I use my URL Domain as a custom From Email address?
Once configured, can I use my URL Domain as a custom From Email address?
That's great! Thank you for your feedback!
Thank you for your feedback!