
Job Scheduling
What's on this page
About Job Scheduling
When creating a job in XM Discover, you can choose when that job runs. Some jobs can be scheduled to run on a recurring basis, while other jobs can be scheduled as a one-time occurrence.
You can set the job’s schedule in 2 different places:
Qtip: Ad-hoc file upload and XM Discover Link jobs cannot be scheduled as they run immediately after being configured.
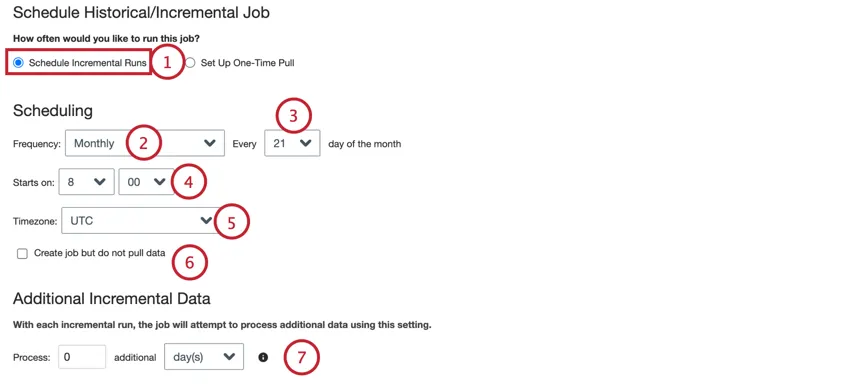
Setting a Job Schedule
Follow the instructions in this section to set a recurring job schedule:
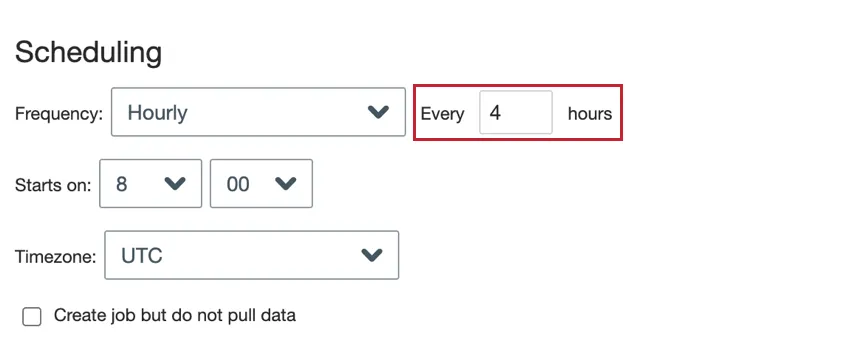
- Hourly: The job runs every X amount of hours.
- Daily: The job runs once a day.
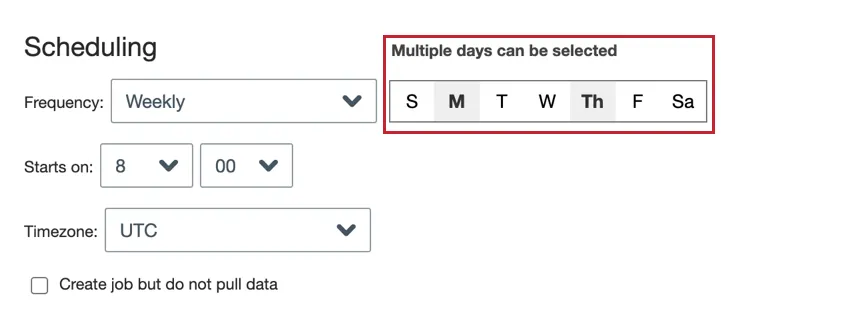
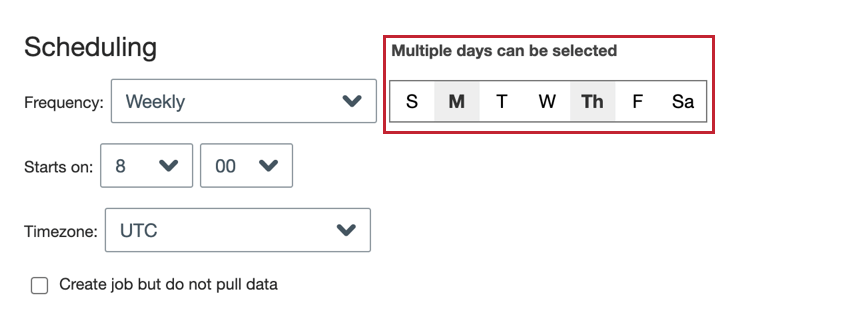
- Weekly: The job runs each week on the days that you choose.
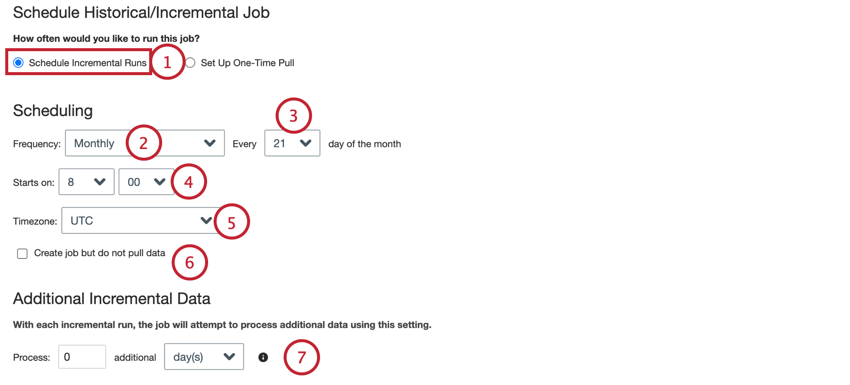
- Monthly: The job runs once a month on the day you choose.
- Hourly: Enter the number of hours between job runs.
- Daily: There is no additional setup step for daily schedules. Continue to the next step.
- Weekly: Choose the day(s) of the week you want the job to run.
- Monthly: Choose the day of the month you want the job to run.
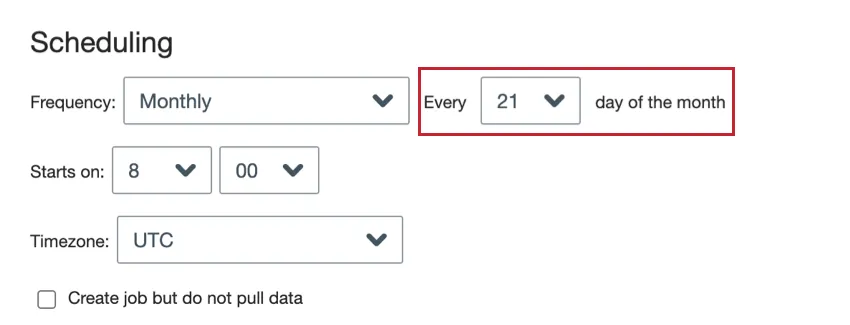 Qtip: Choose 31 if you want the job to run on the last day of the month. For months without 31 days, the job will still run on the last day of the month.


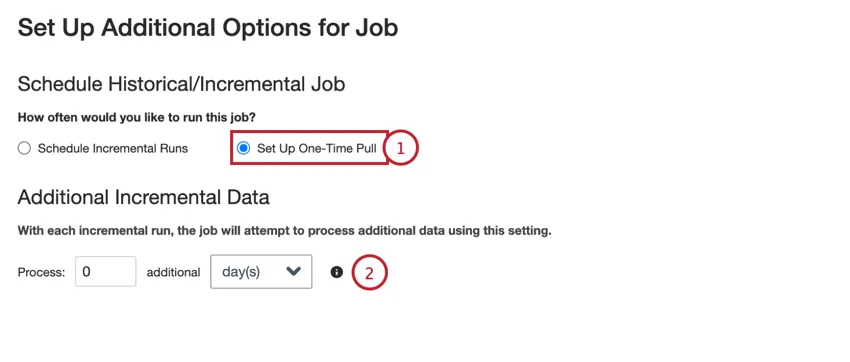
Scheduling a One-Time Job
When creating a job, you can set that job to run immediately after the job is created:
Determining Next Run Time
When creating a job schedule, you choose how often the job runs and when. This section covers how to figure out your job’s next scheduled run time based on your settings.
Hourly Jobs
If you configure a job to run hourly, it will trigger as soon as possible as opposed to waiting for the next available instance of the “Starts on” time.
For example, let’s say you’re creating a new job that runs hourly, starting at 8:30 AM. When you save the job, the current time is 9:18 AM. The job will not wait until 8:30 AM the next day to begin running. Instead, the next scheduled run time will be 9:30 AM later that day.
Daily, Weekly, and Monthly Jobs
For daily, weekly, and monthly jobs, the next run is set to the earliest available instance of the “Starts on” time.
For example, let’s say you create a new job on March 15 at 1:00 PM. The table below contains the next scheduled run times for different schedule settings:
| Schedule | Next Run |
|---|---|
| Daily, start time is earlier than 1 PM | March 16 |
| Daily, start time is later than 1 PM | March 15 (on the same day) |
| Every 4th day of the month | April 4 |
| Every 20th day of the month | March 20 |
| Every 15th day of the month, start time is earlier than 1 PM | April 15 |
| Every 15th day of the month, start time is later than 1 PM | March 15 (on the same day) |
| Every 31st day of the month | March 31 (then April 30, May 31, and so on) |
Advanced Settings
For jobs that run on a regular schedule, there are 2 advanced settings to customize the job’s behavior:
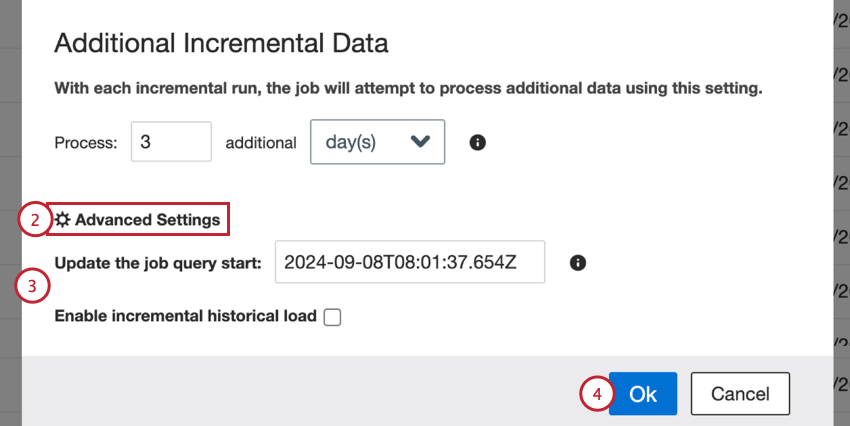
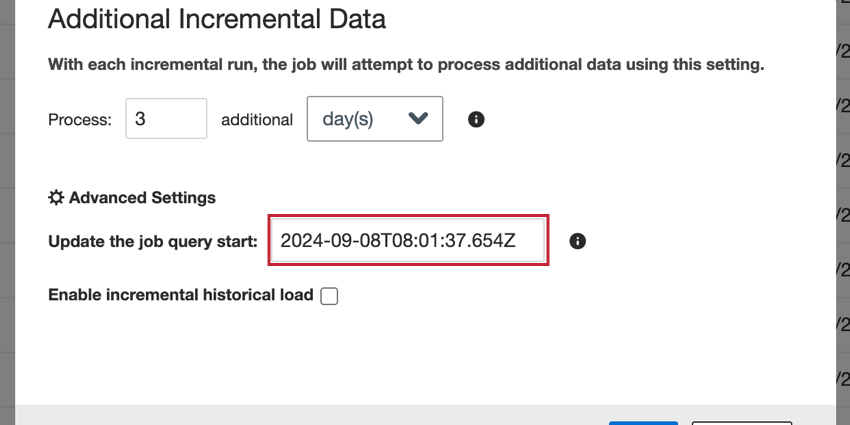
- Update the job query start: When a paused job is resumed, it will load all data from the time the job was disabled. For large amounts of data, this action may time out. You can use this option to change the start date for data to be loaded.
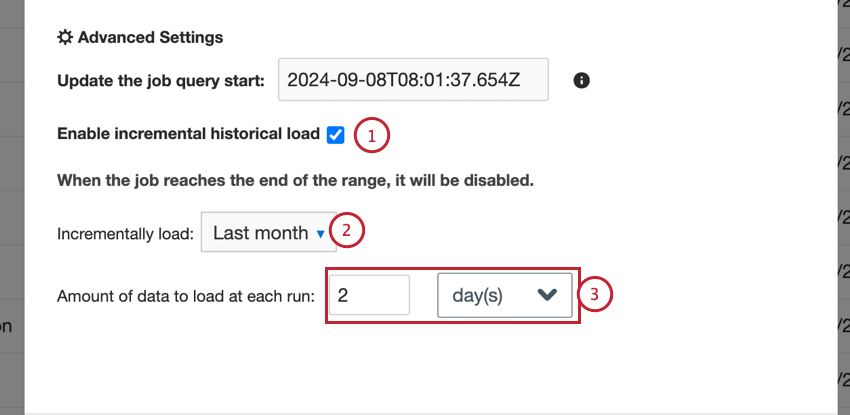
- Enable incremental historical load: When setting up a connector, it’s common to load historical data to the current date. For large datasets, this action may time out. To fix this issue, you can use this option to load your historical data in incremental batches.
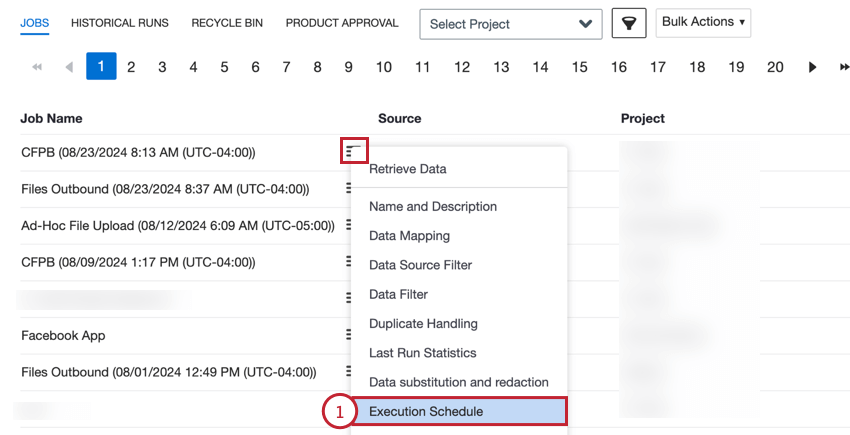
To access these settings:
Update the job query start
Incremental jobs are configured to run on a regular schedule, loading all data available from the end of the previous run until the current time. If a connector has been disabled for some time and then is turned back on, it will try to load all data since the connector was disabled. You can change the start date used for loading data when the job is turned back on.
To change the date, enter a new date in the Update the job query start box.
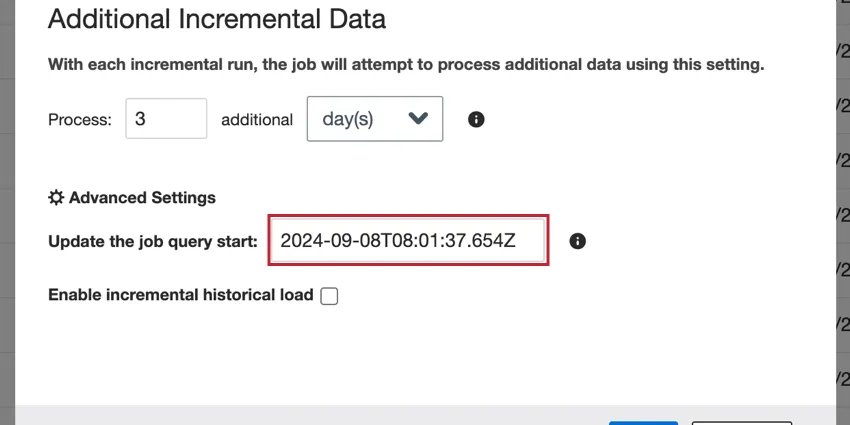
The date should be in the following format: YYYY-MM-DDTHH:mm:ss.SSSZ.
Example: 6AM on September 1, 2024 becomes 2024-09-01T06:00:00.000Z.
Enable incremental historical load
When setting up a connector for the first time, it’s common to load historical data up until the current date. For large amounts of data, the job can time out before completing. You can load data incrementally in batches, allowing you to import the full dataset.
Attention: Once the job reaches the end date, it is automatically disabled. When configuring a job to load historical data, it is recommended to create a second job to load the actual data moving forward (if needed).
To load historical data incrementally:

Qtip: You cannot use the “update the job query start” option if the job is incremental, as the start date is defined by the Incrementally load option instead.
Qtip: If your job times out, try reducing the amount of data being loaded.
You can monitor jobs as usual under the Last Run Status field or in the Historical Runs tab. The run type will be Incremental historical.
Example: In this setup, the job will run once a day to load 30 days of data. Since it is configured to load from “Year to Date,” the first run will load January’s data. The next day, February’s data will be loaded. Once the job reaches the current month, it will be disabled.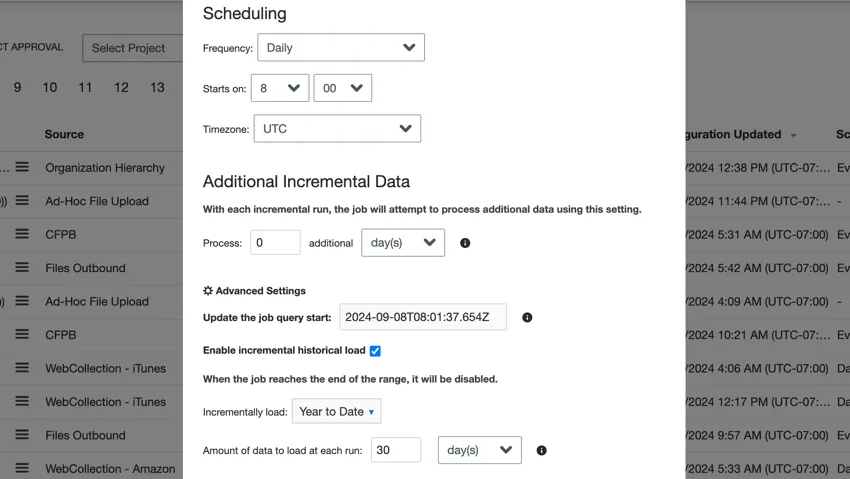
That's great! Thank you for your feedback!
Thank you for your feedback!