
Supplemental Data Sources Basic Overview
What's on this page
About Supplemental Data Sources
Supplemental data sources (SDS) are datasets you can reference in autocomplete questions and use to customize survey flows. Supplemental data sources let you search multiple related data points based on just one piece of information. This simplifies a process that otherwise might require lots of embedded data and branches in your survey flow.
Example: You ask a customer which representative they spoke to. Based on their answer, you can pull information into your survey about the representative, such as their team and the office they’re located in. From there, you can customize the questions you ask the customer next.
Attention: Qualtrics provides admin tools that help you remove and redact personal and identifying information. These tools include the personal data tool, sensitive data policies, and retention policies. While SDS data saved in a survey response can be removed or redacted by admin tools, SDS data saved in the library cannot be removed this way. If you want to delete personal or identifying data from a library SDS, you must follow the steps on this support page.
Attention: Supplemental data sources are not compatible with data isolation.
Common Use Cases for Supplemental Data Sources
Library: Whenever you create an SDS, it’s saved in the library so you can reuse it as needed. This is the case even if you created it in the survey flow. Using the library, you can easily edit, rename, or delete any supplemental data sources you have. This means if you need to make a change, rather than edit every connected survey, you just edit the SDS. Libraries also allow you to share your SDS with other Qualtrics users.
Autocomplete questions: Autocomplete questions suggest answers to respondents as they type a reply. You can use an SDS as the autocomplete’s source, giving you more advanced capabilities; instead of typing an exact name, people can type related data, like locations and parts of an address.
Survey flow: Use SDS to customize the survey experience based on information without having to first store it all in the survey itself. For example, you can build display logic, branch logic, and insert piped text based on information saved in the SDS. You can also use the SDS in the survey flow to pull in additional information you’d like to include in your analysis.
Workflows: You can automatically update info in your SDS on a schedule with with the “Load to SDS” workflow task. This can be useful if you have a survey (or other source) that receives relevant info you want to regularly add to the SDS. For example, if your SDS is a list of locations, and you have a survey where store managers submit changes to important store info, you can make a workflow with this task than ingests those survey responses to the SDS every Monday.
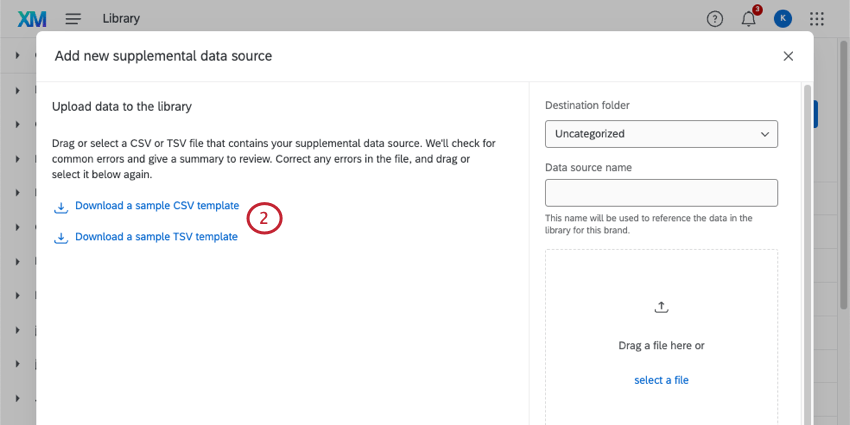
Creating and Uploading Your File
You can create a supplemental data source in the library or in the survey flow. No matter where you create and upload the file, its guidelines are the same.
To create supplemental data sources, you’ll need the Manage Supplemental Data permission. Talk to your Brand Administrator about enabling this permission.
Attention: You can only have up to 200 supplemental data sources in your entire organization.
Attention: Please be careful when uploading or updating multiple supplemental data sources at a time. You can only create or update 30 supplemental data sources per minute across the organization, or 10 SDS per single user.
Qtip: TSV files are better at supporting non-English characters.
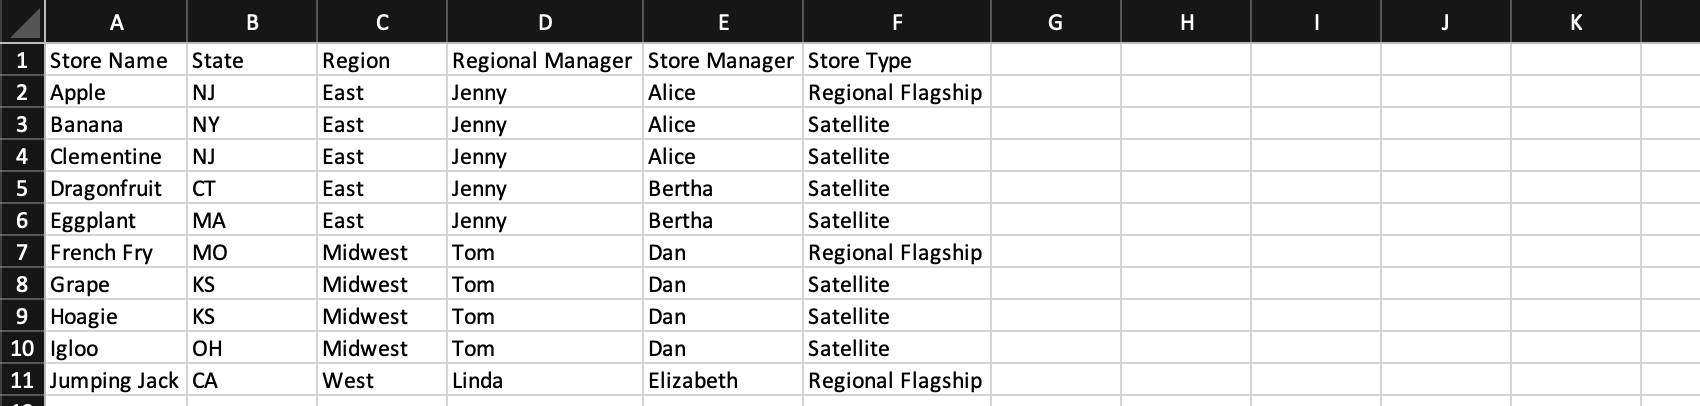
- Each column should be a new field and each row should be a separate record.
- You should have only 1 row of headers.
- There is a maximum of 100,000 rows.
- There is a maximum of 30 columns.
- For searchable fields, there is a maximum of 200 bytes per cell.
- For non-searchable fields, you can have up to 5000 bytes / characters per cell.
- Formatted text (e.g. HTML) is not supported in supplemental data sources.
- Files can be a maximum of 10MB.
- The file should be a TSV or a UTF-8 encoded CSV.
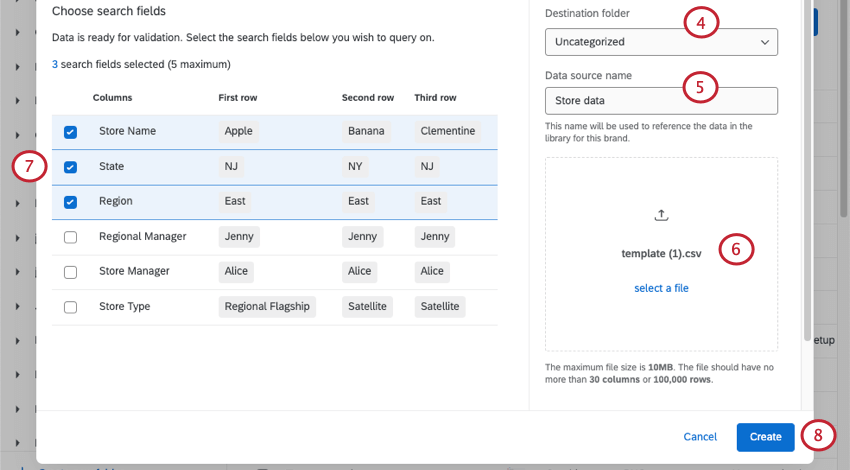
Example: Let respondents find a store location by street address or city name.
Qtip: You can choose up to 5 searchable fields.
Qtip: If you only choose 1 field to search on, each record must have a value for this field. If you choose multiple searchable fields, it’s okay to not have a value for every record, but each record must be searchable by at least 1 of your searchable fields.
FAQs
Can I use my library SDS in both autocomplete and a survey flow?
Can I use my library SDS in both autocomplete and a survey flow?
What’s the difference between SDS and data joins, and when should I use each one?
What’s the difference between SDS and data joins, and when should I use each one?
By using a unique identifier, joins let you match information from 2 different sources to combine them into 1 record. For example, you can use a Customer ID to combine a customer’s feedback survey data with support tickets they’ve submitted in the past.
Joins can be performed in CX Dashboard data models and the workflows merge task.
What’s the difference between SDS and a location directory, and when should I use each one?
What’s the difference between SDS and a location directory, and when should I use each one?
However, location directories allow you more flexibility to edit your location data than supplemental data sources do. Location directories are primarily used in reputation management projects where you search the web for reviews and in the location selector question.
That's great! Thank you for your feedback!
Thank you for your feedback!