
Alerts (Designer)
What's on this page
About Alerts in Designer
Alerts allow you to be notified when a topic or customer feedback matches conditions that you set. When new data is loaded into your project, it is analyzed. If the data matches your alert conditions, an alert will be triggered. Alerts can also be used to create cases which can be tracked to resolution in Studio.
Qtip: Alerts are distributed through Studio. See Viewing Verbatim Alerts for more information.
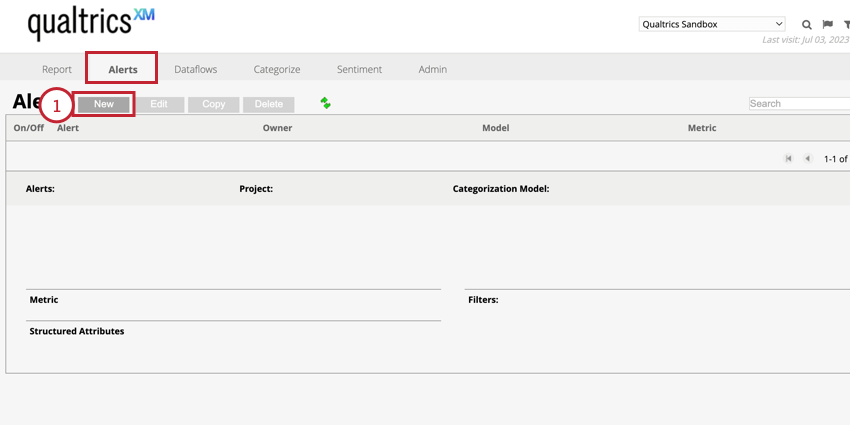
Creating an Alert
You can set up new alerts for topics, structured attributes, or filters to trigger whenever any related feedback is received.
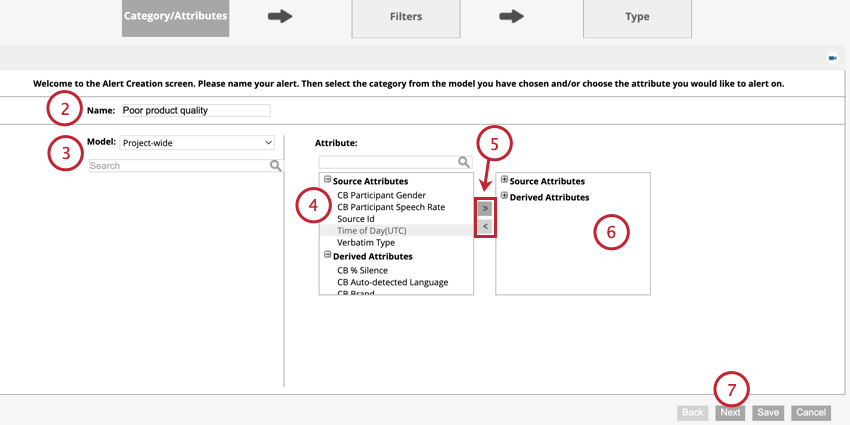
Qtip: Each topic that is selected will trigger an individual alert if the alert criteria are met. If a single document or case contains multiple sentences that are related to the alert’s topic, you will only get a single alert.
Qtip: The alert will only trigger if the document contains all attributes you select here.
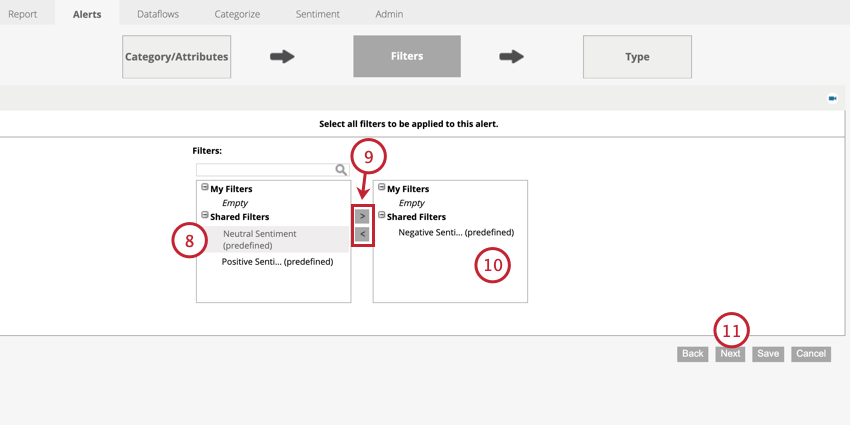
Qtip: Filters help you limit the triggering conditions. For example, if you need to limit an alert to a particular store location, you would make that selection here.
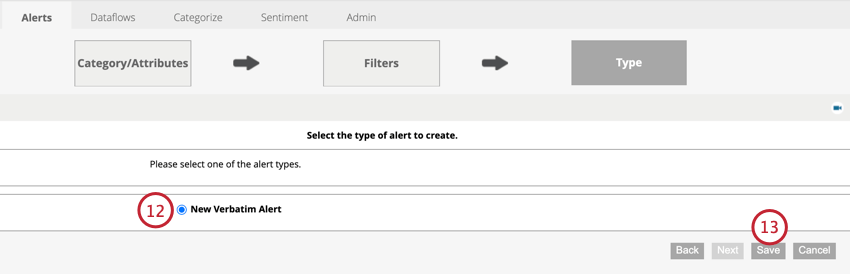
After creating your alert, it will automatically be enabled.
Managing Alerts
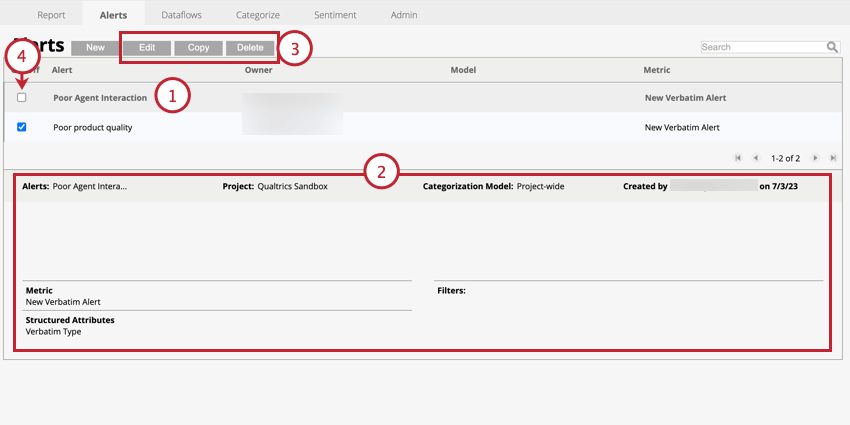
You can edit, copy, and delete alerts from the Alerts page. Additionally, you can enable or disable your alert from this page.
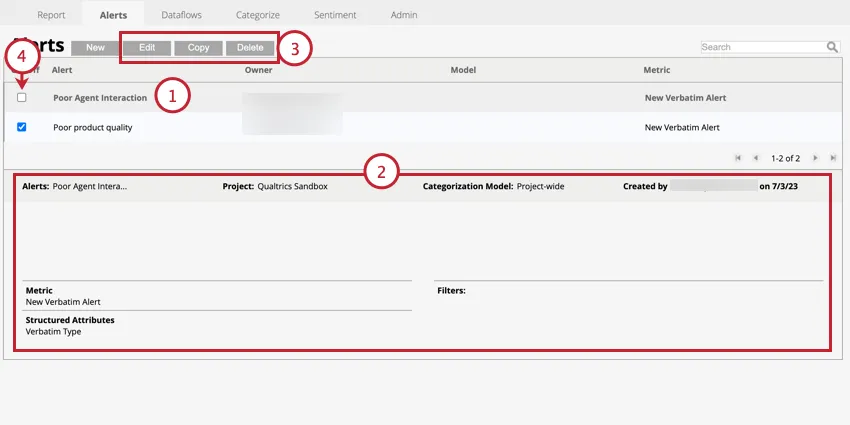
- Edit: Edit the alert’s details. Qtip: Changes to alert details in Designer will not be automatically reflected in Studio. After editing an alert, you may need to manually update smart folder definitions and other filtering conditions in case management.

- Copy: Make a copy of the alert. Qtip: After copying the alert, you’ll need to make the new alert unique by editing either the categories and attributes or filters.
- Delete: Delete the alert.
Qtip: If you delete a filter, structured data, model, or category referenced in an alert, the alert is deactivated automatically. To reactivate the alert, you need to edit it to no longer reference the missing attribute.
Triggering Alerts
Your alerts will trigger after data is processed. The Alert Detector dataflow is what triggers your alerts. The alert detector can only be triggered manually or through custom dataflows.
Please note the following about triggering alerts:
- Running ad hoc upload and classification separately does not trigger the alert detector. In this case you can run the alert detector manually.
- If your project uses custom dataflows, please contact your Discover Representative to determine the amount of effort required to enable the alert detector.
Qtip: You can contact your Discover Representative directly by email. If you don’t have their contact information, you can contact the Discover Support Team instead.
The alert detector works as follows:
- Alerts are triggered only once per upload session. This means that once the alert detector processes a session, no further changes to classification models or filters will cause any more alerts to be triggered by that session.
- Alerts only trigger for data that is uploaded after the alert is set up.
- 1 record will always trigger only 1 alert in Studio. If a record satisfies several alert conditions, it will trigger a single joint alert.
Starting Alert Detector Manually
Alert Detector is a dataflow that looks through incoming data to find records that match any defined alert conditions. An alert is triggered for every record that matches alert conditions.
You can trigger the alert detector manually by following the below steps:
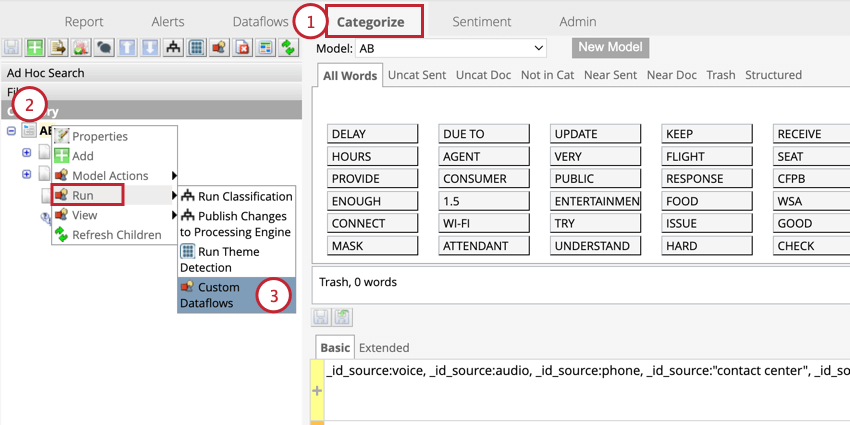
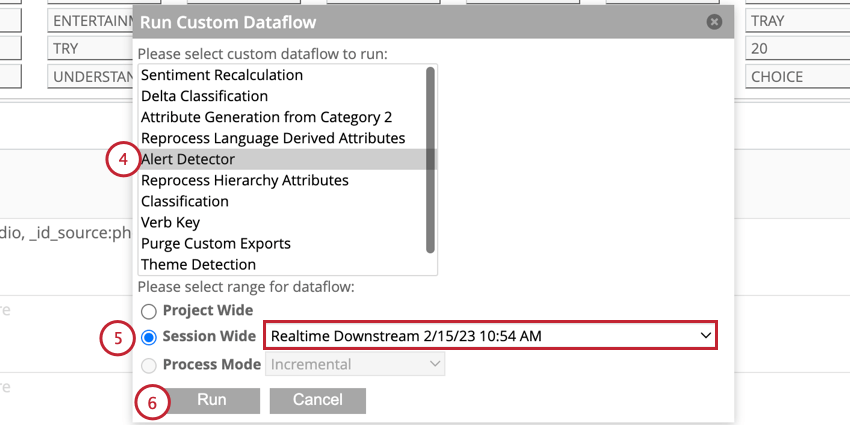
Qtip: The alert detector does not support the Project Wide range.
That's great! Thank you for your feedback!
Thank you for your feedback!