
Organizing & Viewing Your Projects
What's on this page
About Organizing & Viewing Your Projects
There are several options available in the Projects page to make organizing and sorting your projects easier, such as custom folders, advanced sorting, and more.
Understanding Folders in the Projects Page
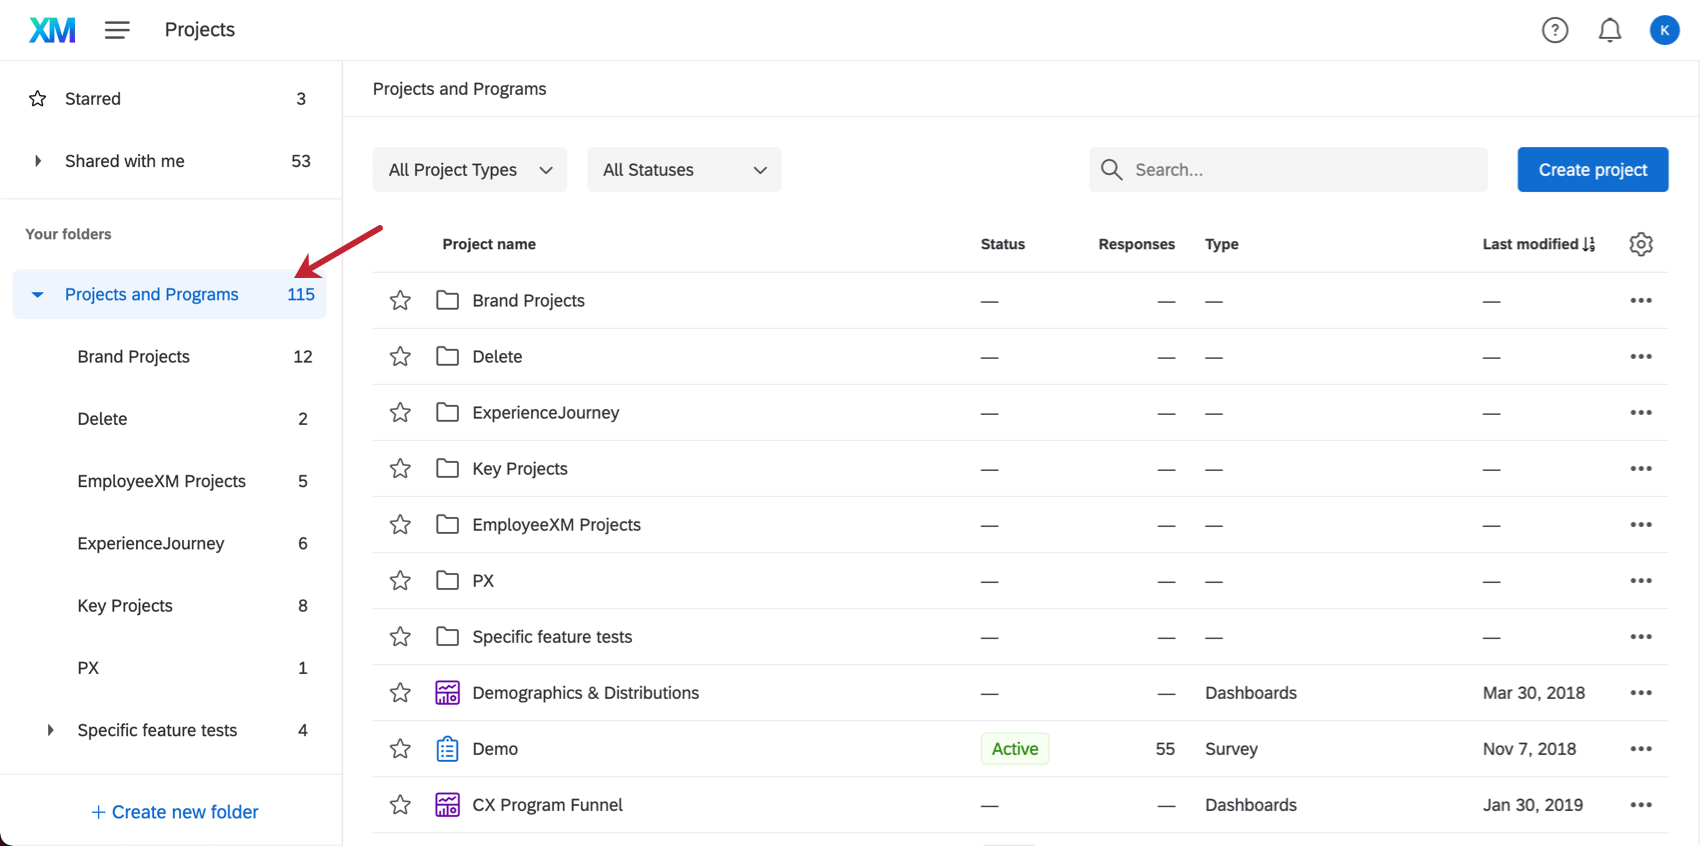
Think of the Projects and Programs folder as your outermost folder, or the foundation of your Projects page. From here, you can find any project you haven’t categorized into a deeper folder, in addition to all the folders you’ve created.

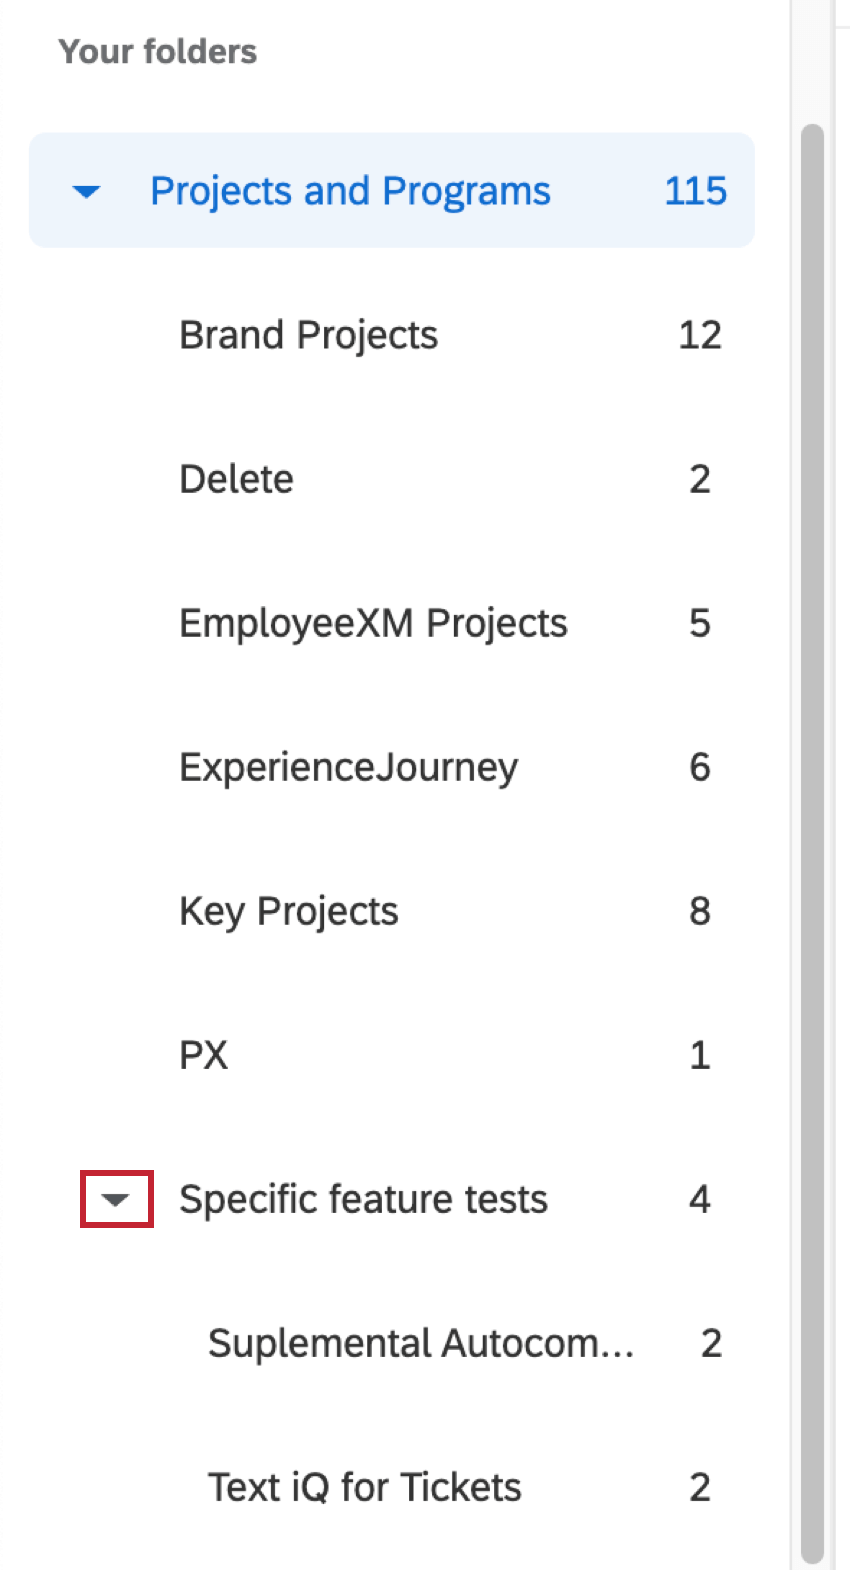
Example: Notice how in the image above, the list of projects and folders you see when you click Projects and Programs matches the same list of folders in the pane to the left. Now let’s click the “Specific feature tests” folder and see what’s inside.
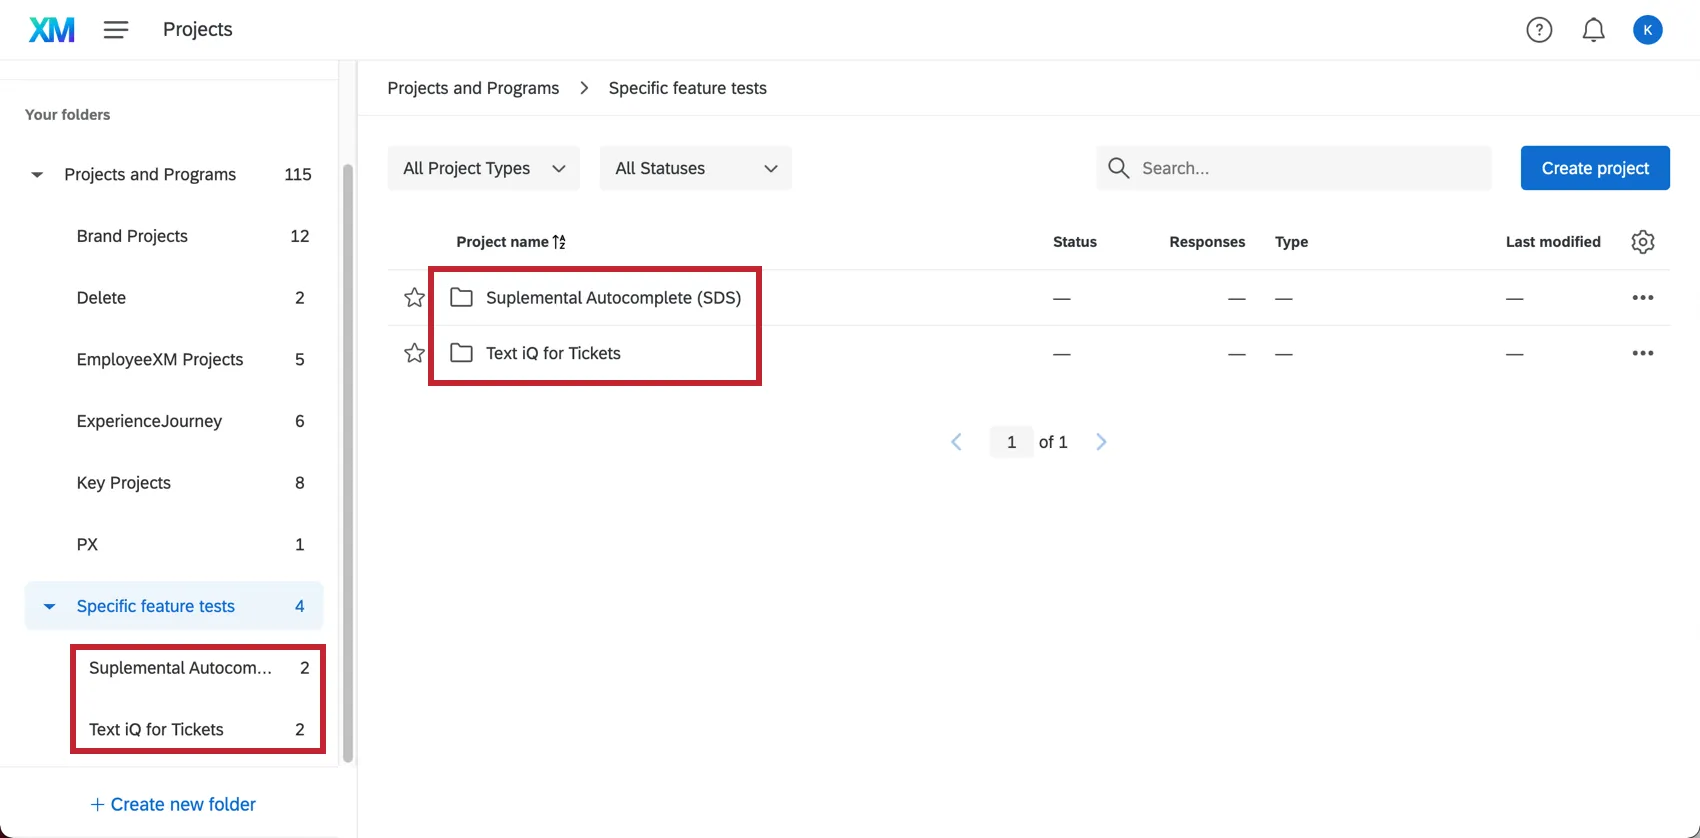
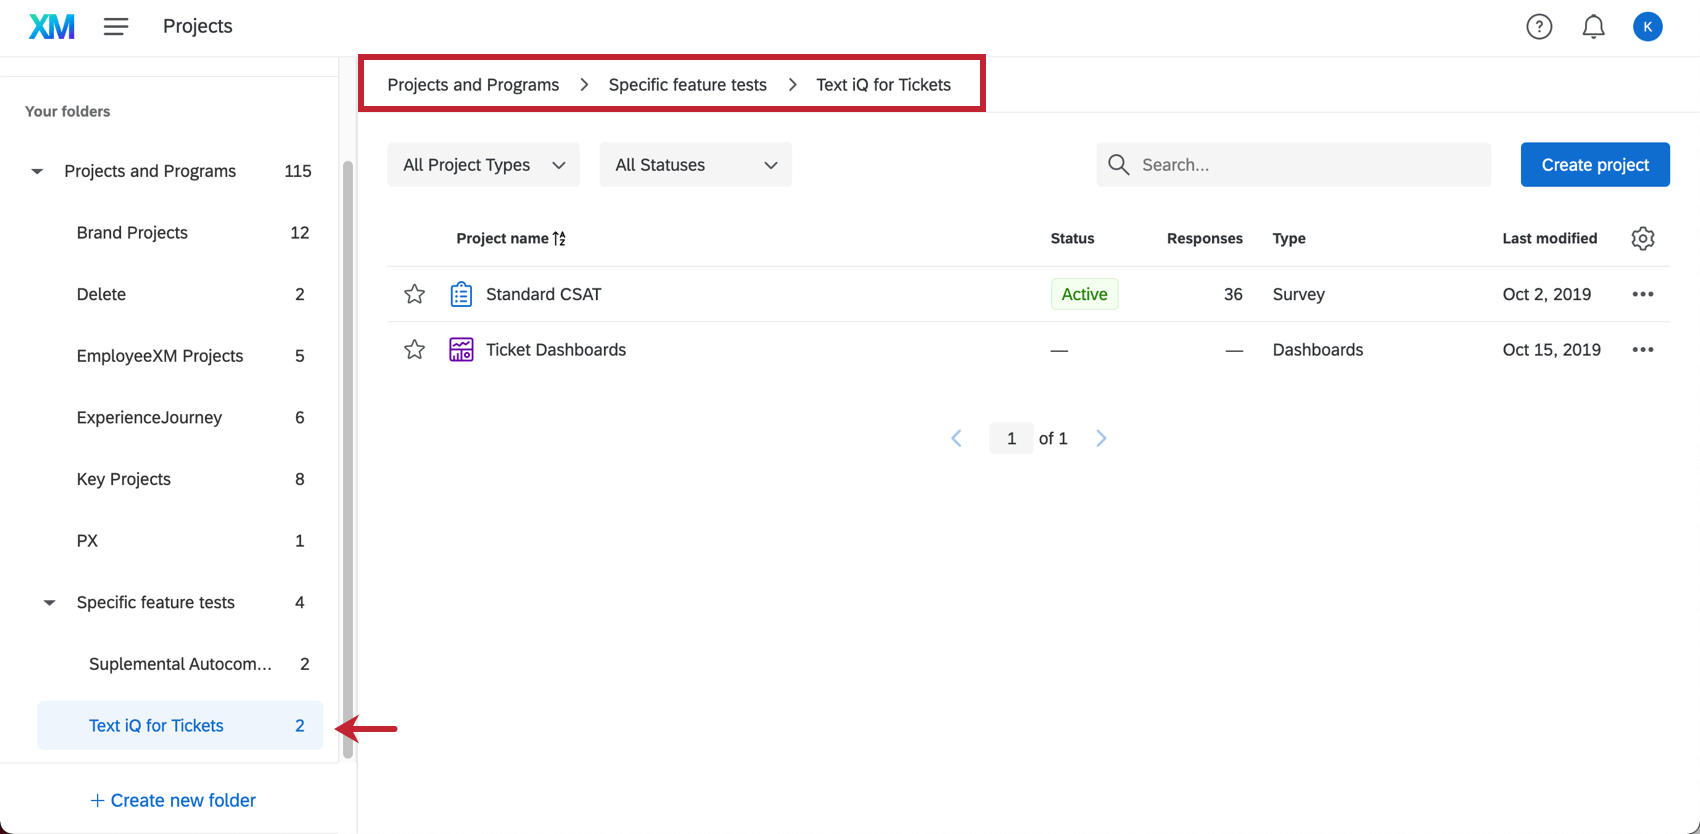
Now we can see the 2 folders nested inside this folder.
As you travel through the folders of your projects page, the breadcrumb bar along the top will reflect your folder path. You don’t just have to use the pane to the left to navigate; you can also use this top bar to go back a few folders, if you want.

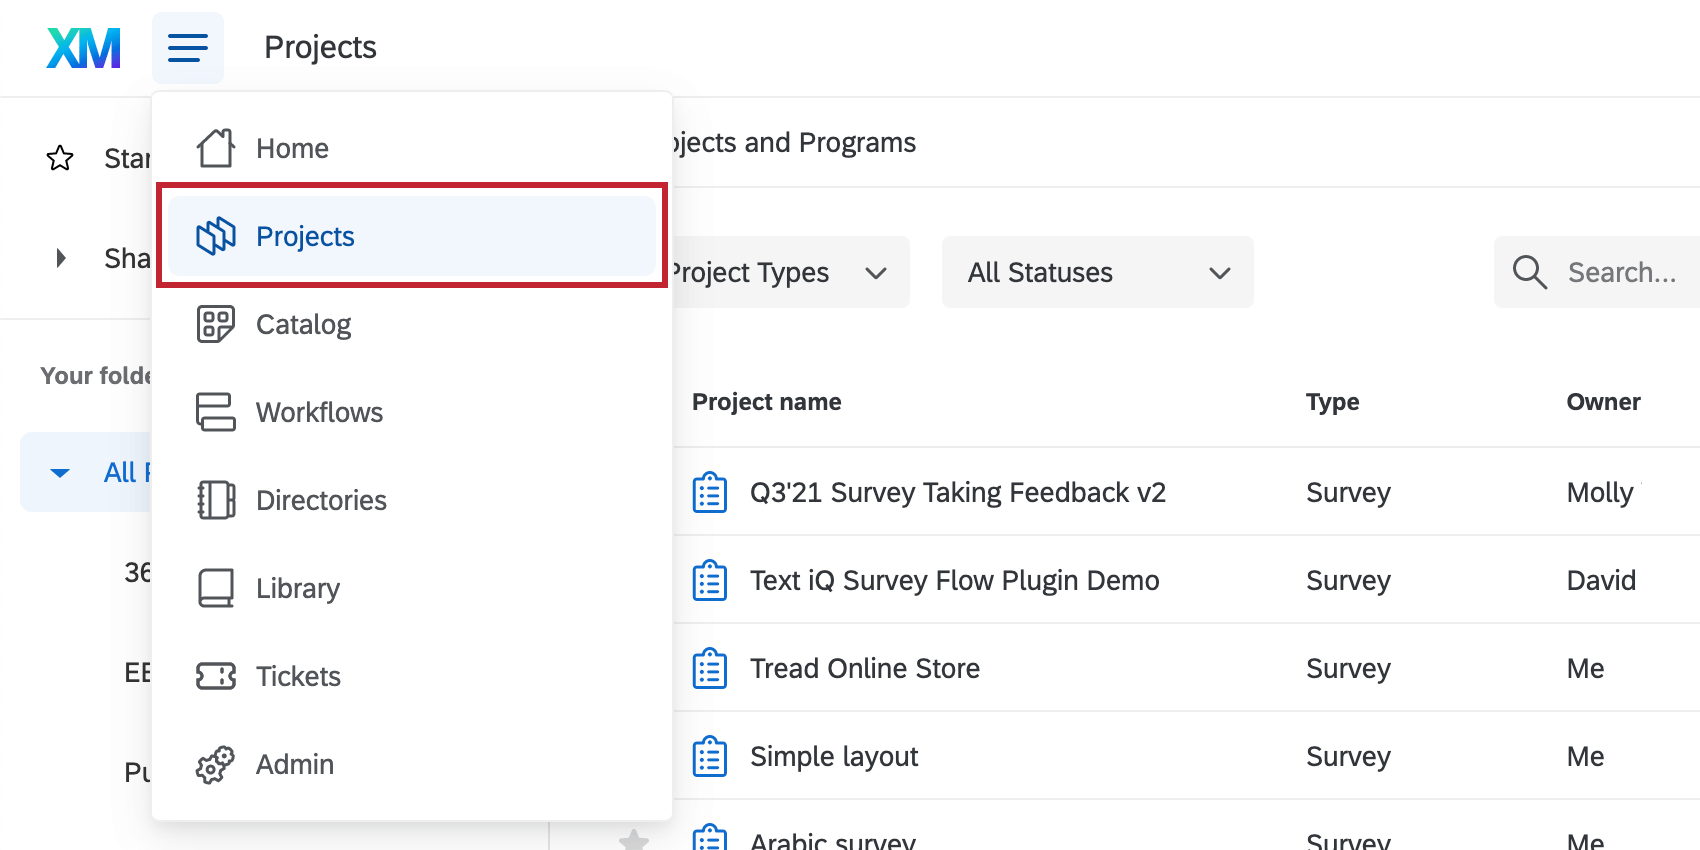
For more information on how to navigate the projects page, see the guide on the Projects Basic Overview.
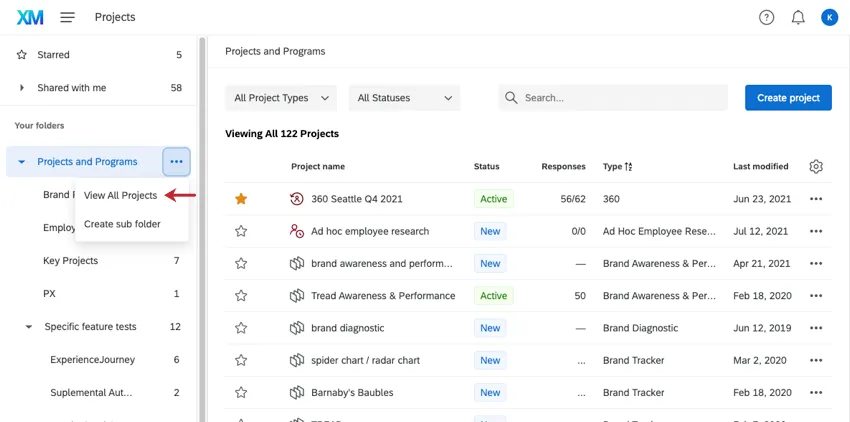
Qtip: Want to view all the projects in your account, regardless of the folders they’re sorted into? Click the options dropdown next to Projects and Programs and select View All Projects.
Searching Projects
The search bar on the Projects page can locate items by name, owner, and response type. Any terms that match your search will be bolded. You can also paste a survey ID into the search bar to find a project.
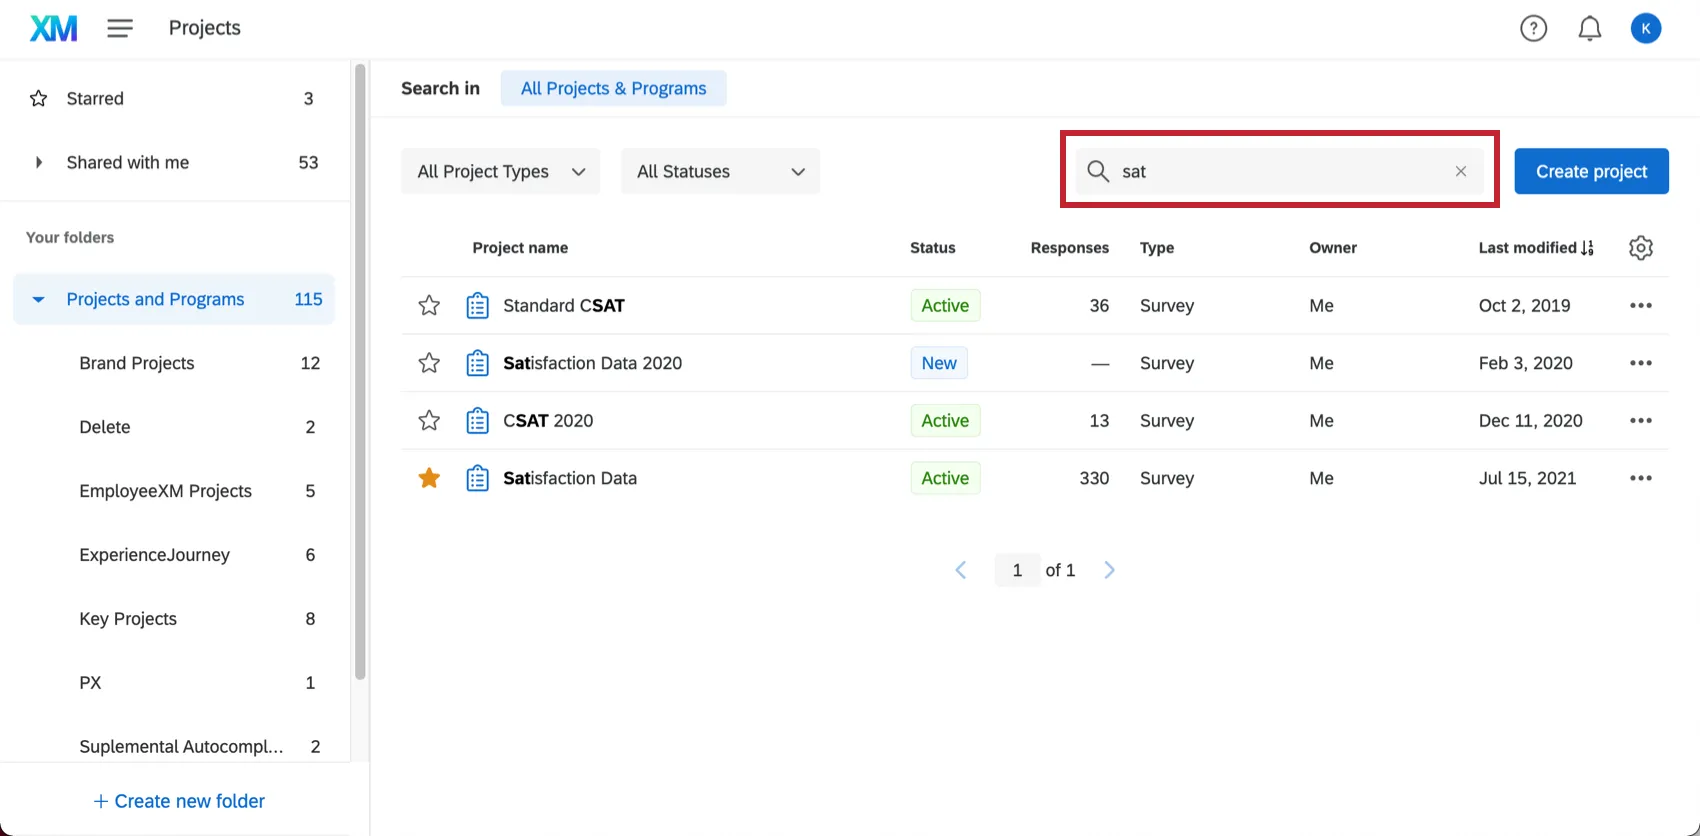
The search bar will return projects, programs, and even folders. The search bar will only narrow down results for the folder you’ve selected. If you want to search all projects, programs, and folders, make sure you have Projects and Programs selected to the left.
Qtip: Columns don’t have to be displayed to be searched.
Filtering Projects
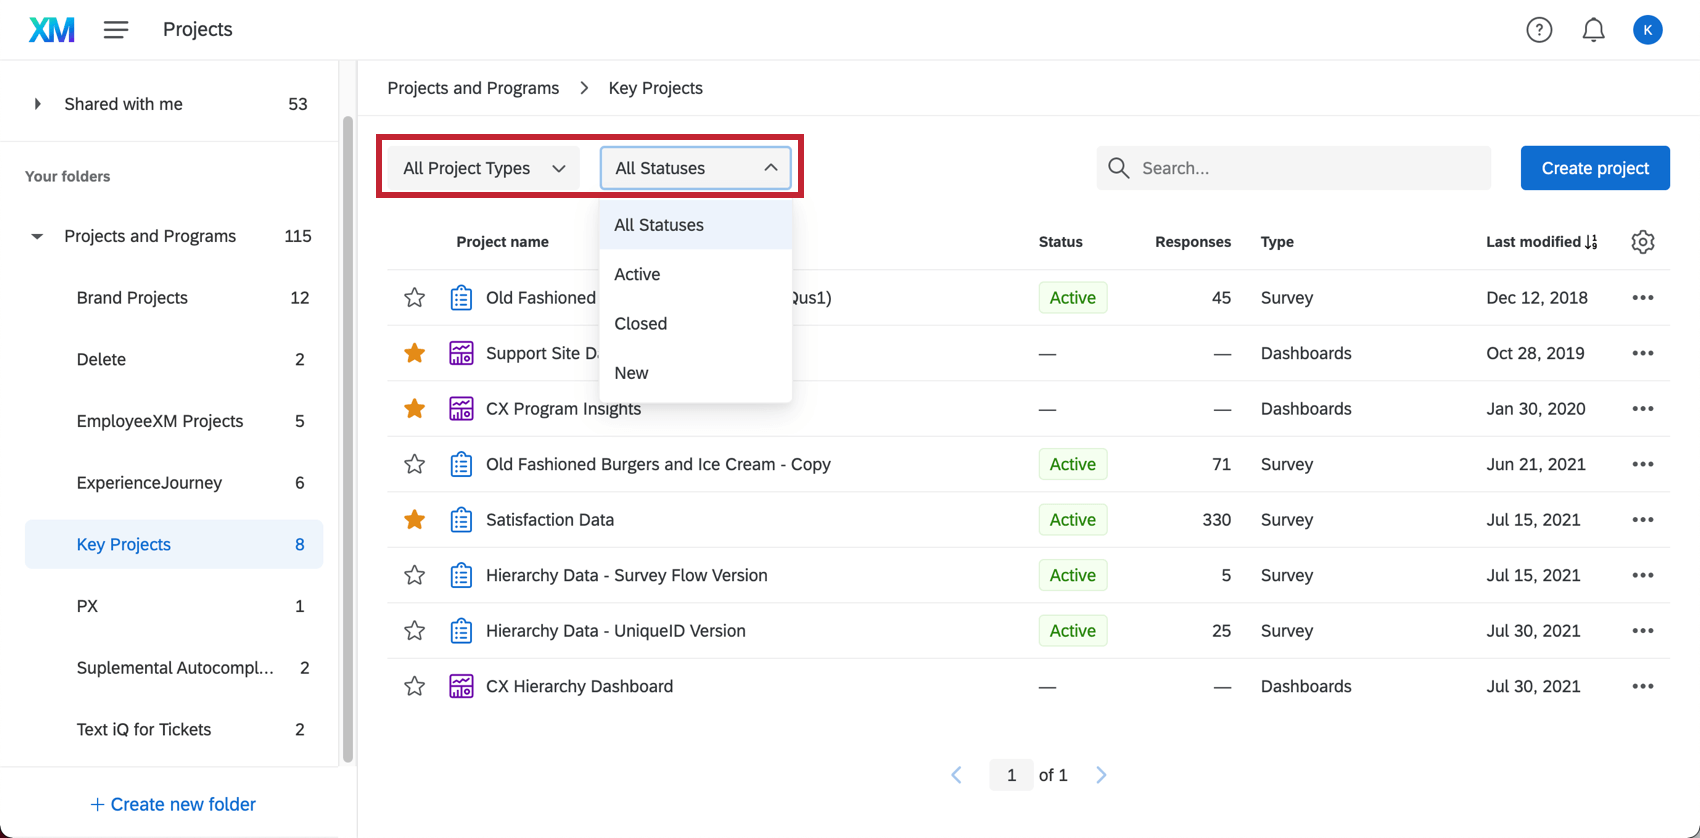
In addition to the search bar, there are 2 helpful filters located in the upper left.
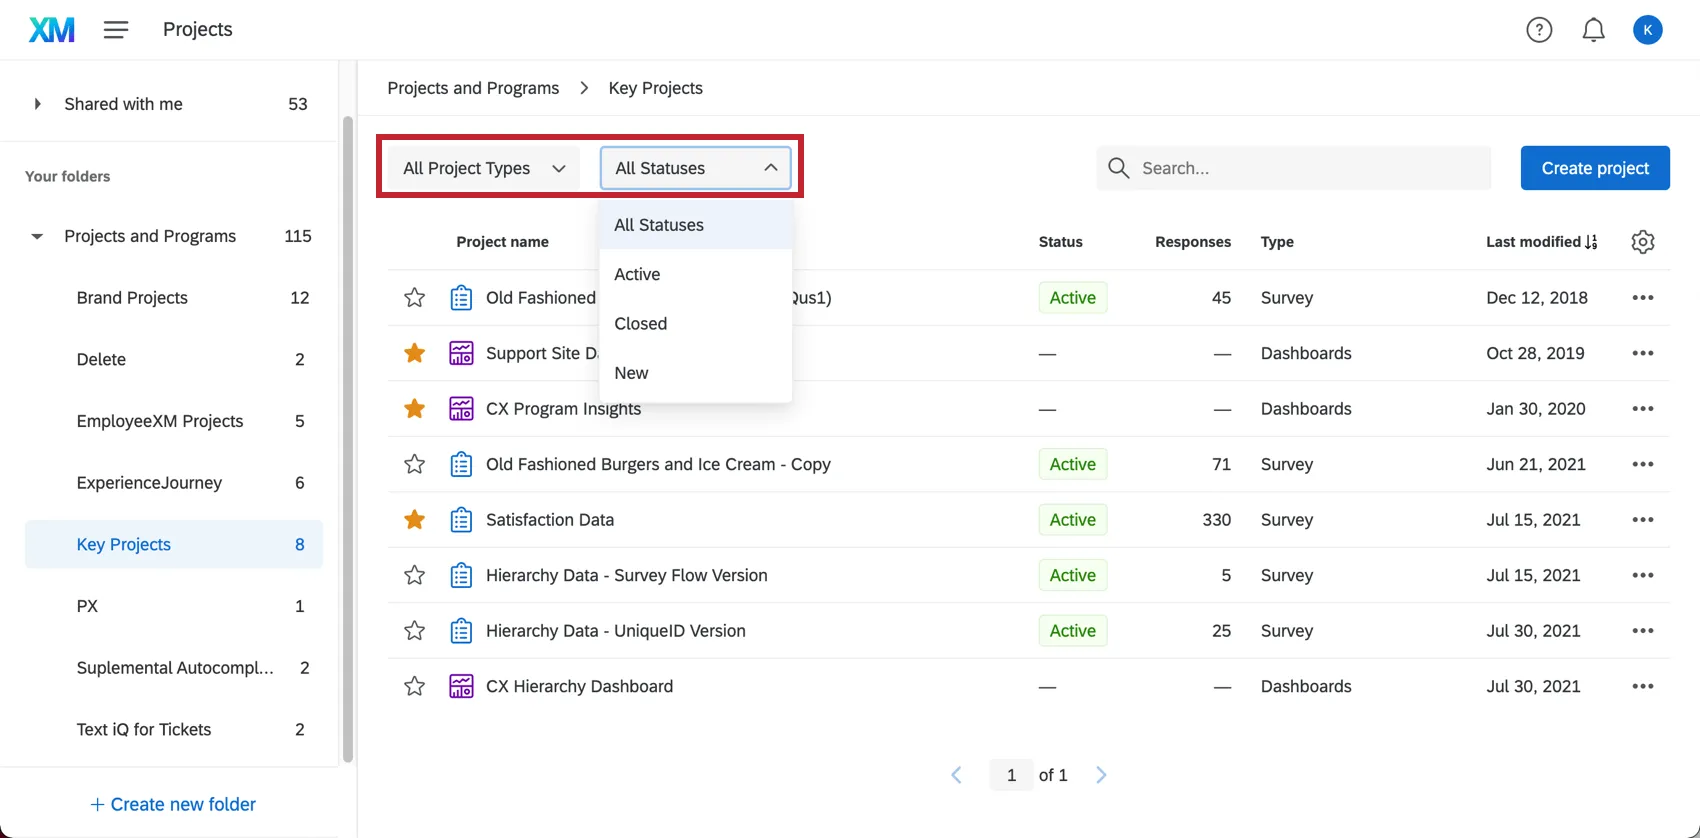
- Project types: Search by the types of projects you have created in your account. You can select 1 type at a time. For more information on all the project types available, see Selecting Your Project Type.
- Project statuses: Search by project status. Please keep in mind that these can vary both by the statuses and types of projects you currently have created in your account. Example: You have selected a folder where none of the projects are closed, so you cannot filter by closed projects.

Qtip: Both of these filters narrow down results in the folder you have selected. If all of your projects are sorted into folders, and you have Projects and Programs selected, you wouldn’t necessarily see any results that match your filters, because you’d only be narrowing down a list of folders.
Displayed Columns and Sorting
You can adjust the columns of information you have displayed on your Projects page. You can sort by any of these columns once they’re added simply by clicking the column’s name. You can sort by ascending or descending for every column available.
Available Columns
Please note that not all projects have data for each of the columns listed below. When there is no data, you will see a dash ( – ) instead.
- Project name: Always visible. When used to sort, arranges your projects alphabetically by name.
- Status: A project’s activation status (new, active, or closed).
- Responses: The total number of responses recorded for your project so far (includes both completed responses and incomplete responses that have been closed). There won’t be a value if you have not yet collected responses or activated your project.
- Type: Sort your projects by their type, e.g., survey, FrontlineFeedback, Dashboards, and more.
- Owner: The project’s owner.
- Group: The groups the project has been shared to. Note that when sorting by group, you may see the same survey more than once if it’s shared with more than 1 group. In addition, starring will star all instances of the survey across groups.
- Last modified: When your projects were last modified.
- Creation date: When your projects were created.
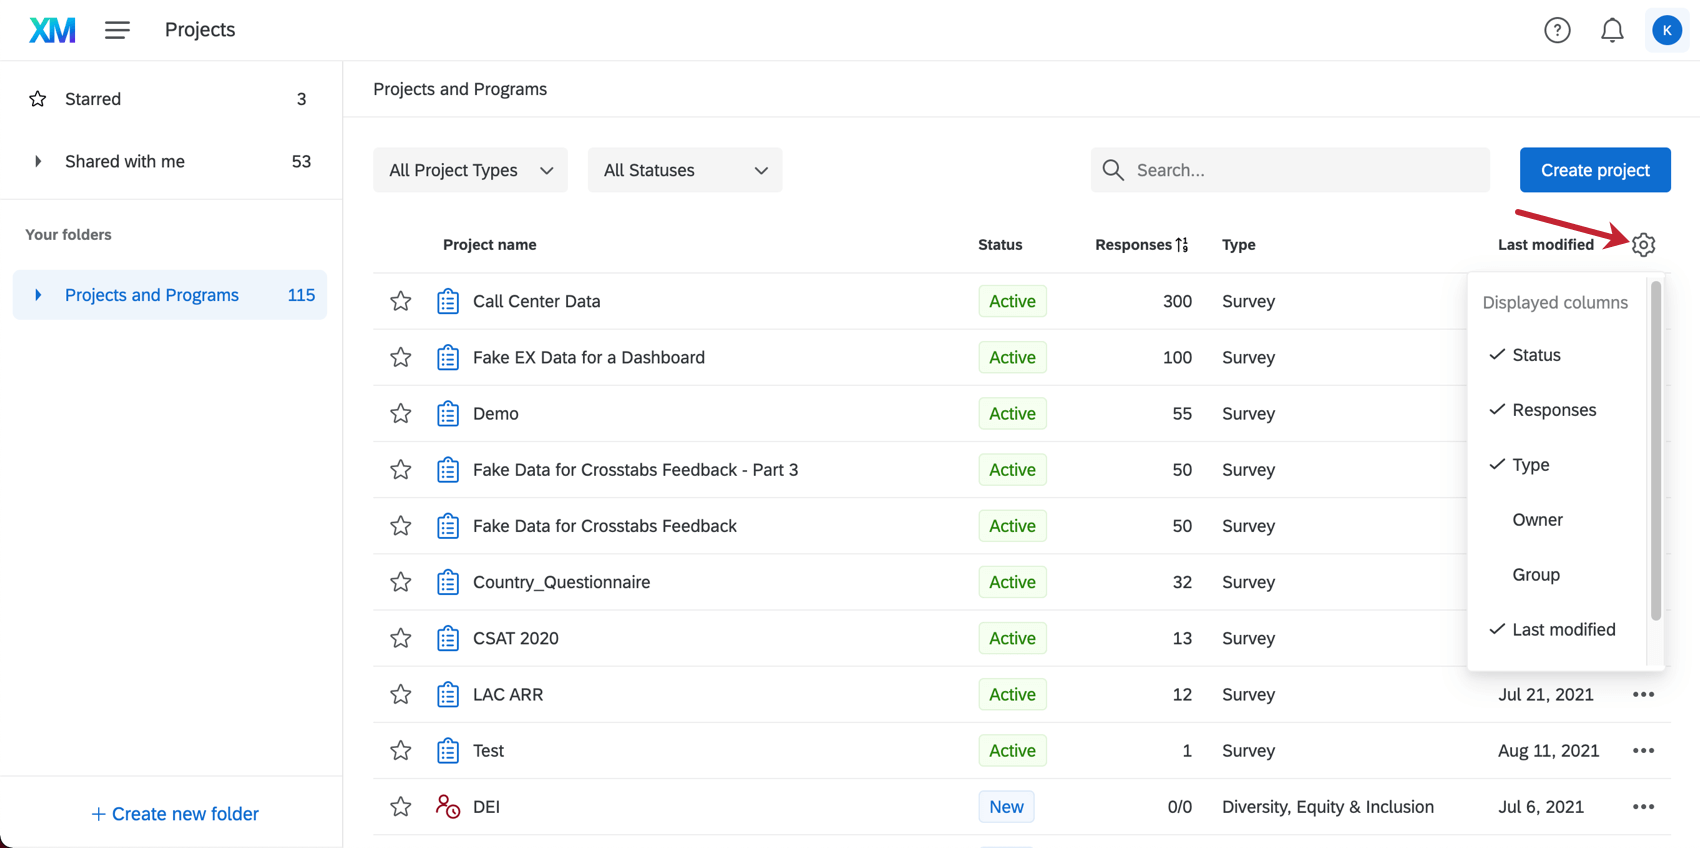
Adding and removing columns
Click the gear on the far-right of the column names. Click column names to select or deselect them.

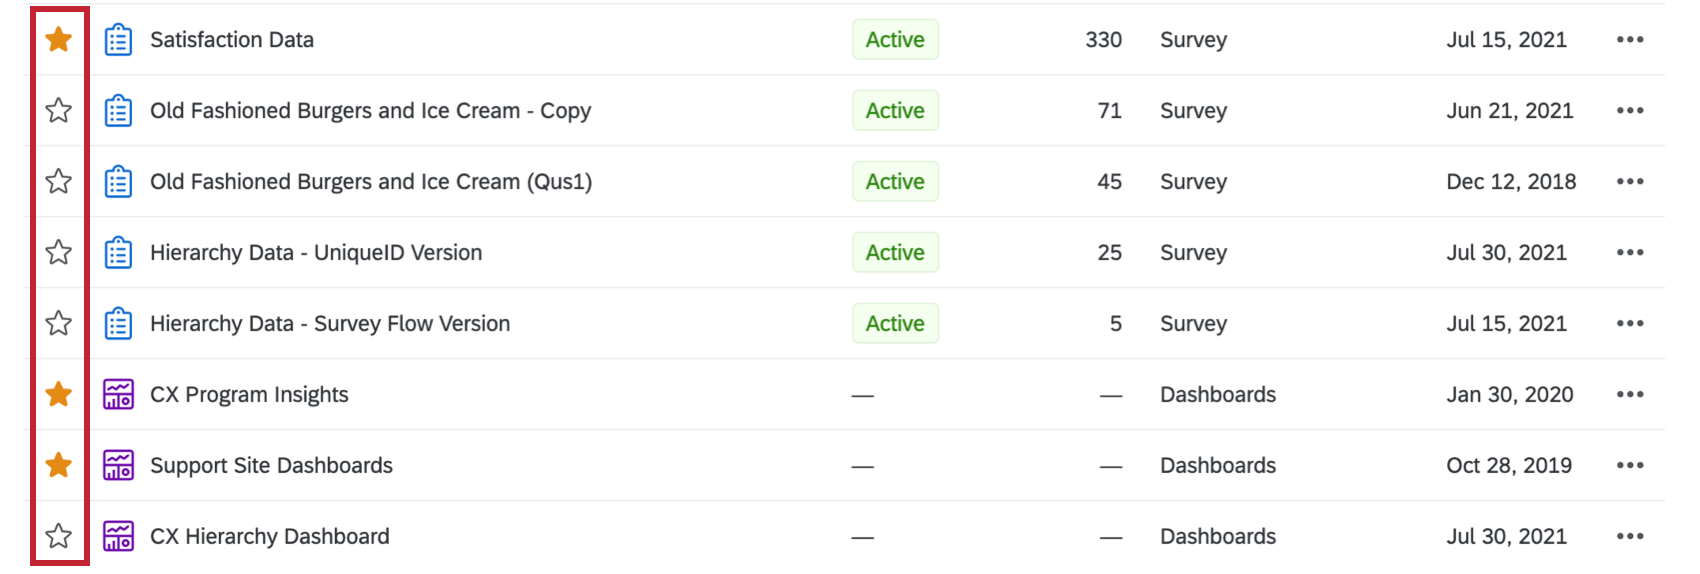
Starred Content
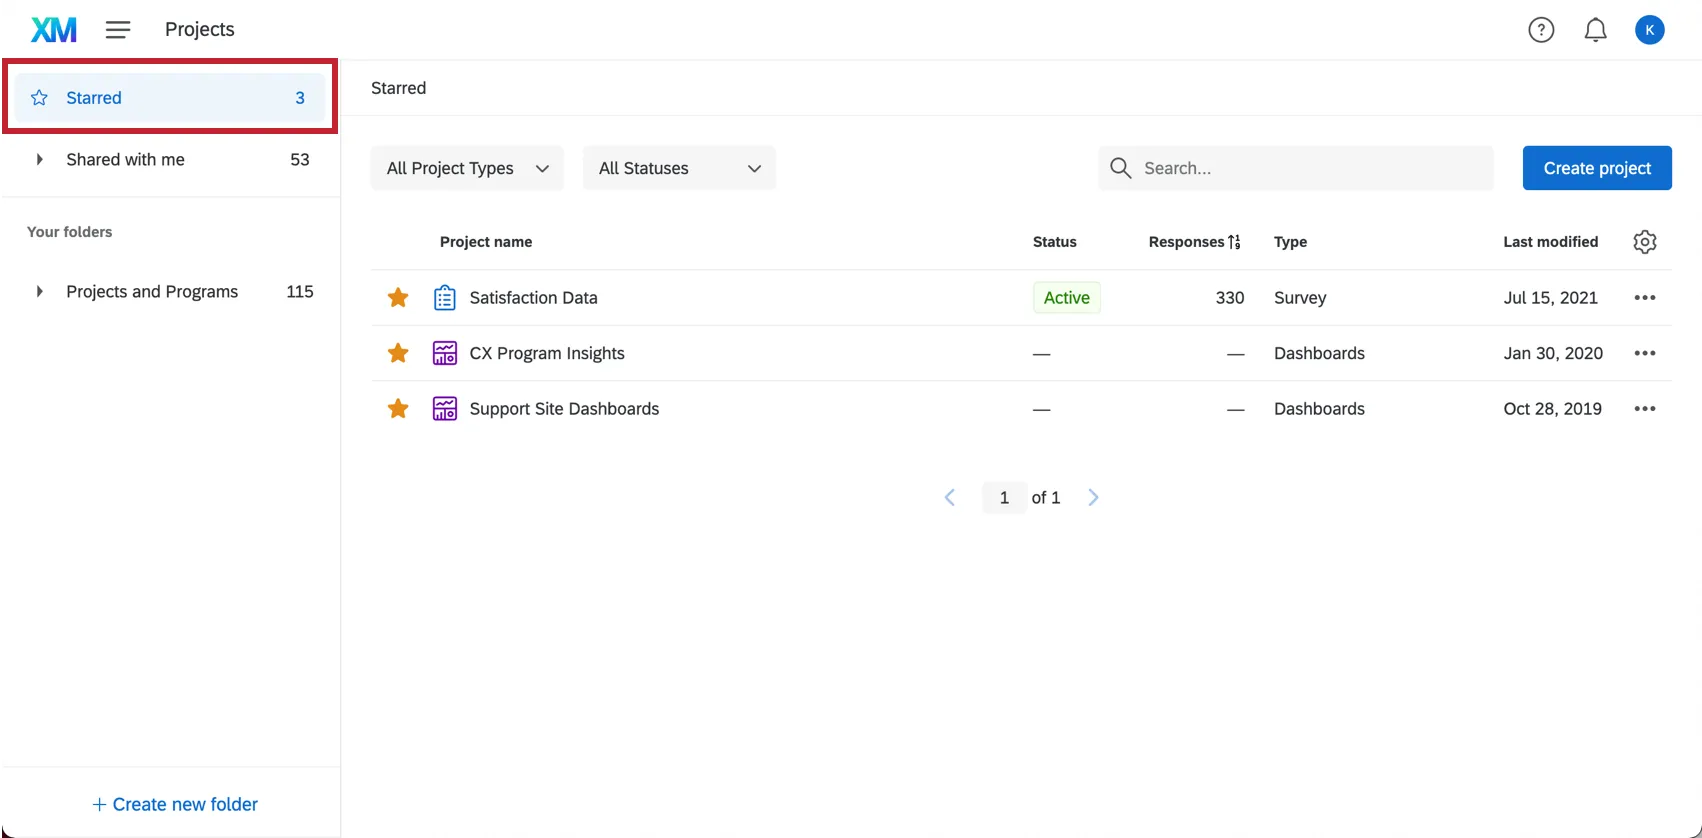
Starring your key projects makes it easier to find them. Click the star to the left of a project to add or remove it from your starred content.

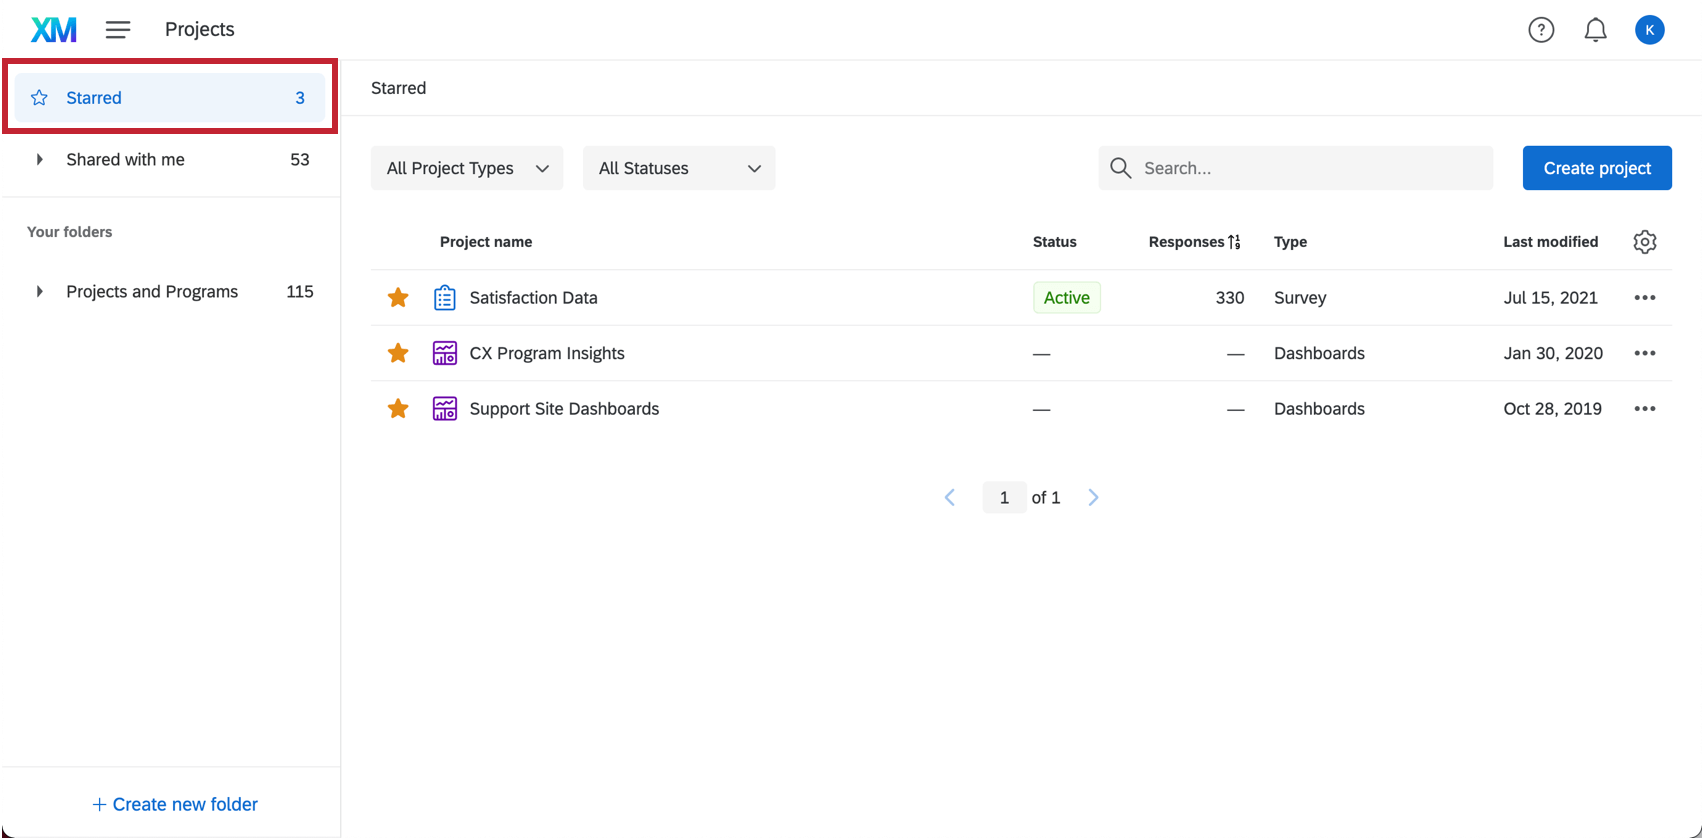
On the left, navigate to Starred to see every item you’ve starred on the Projects page.
Folders Pane
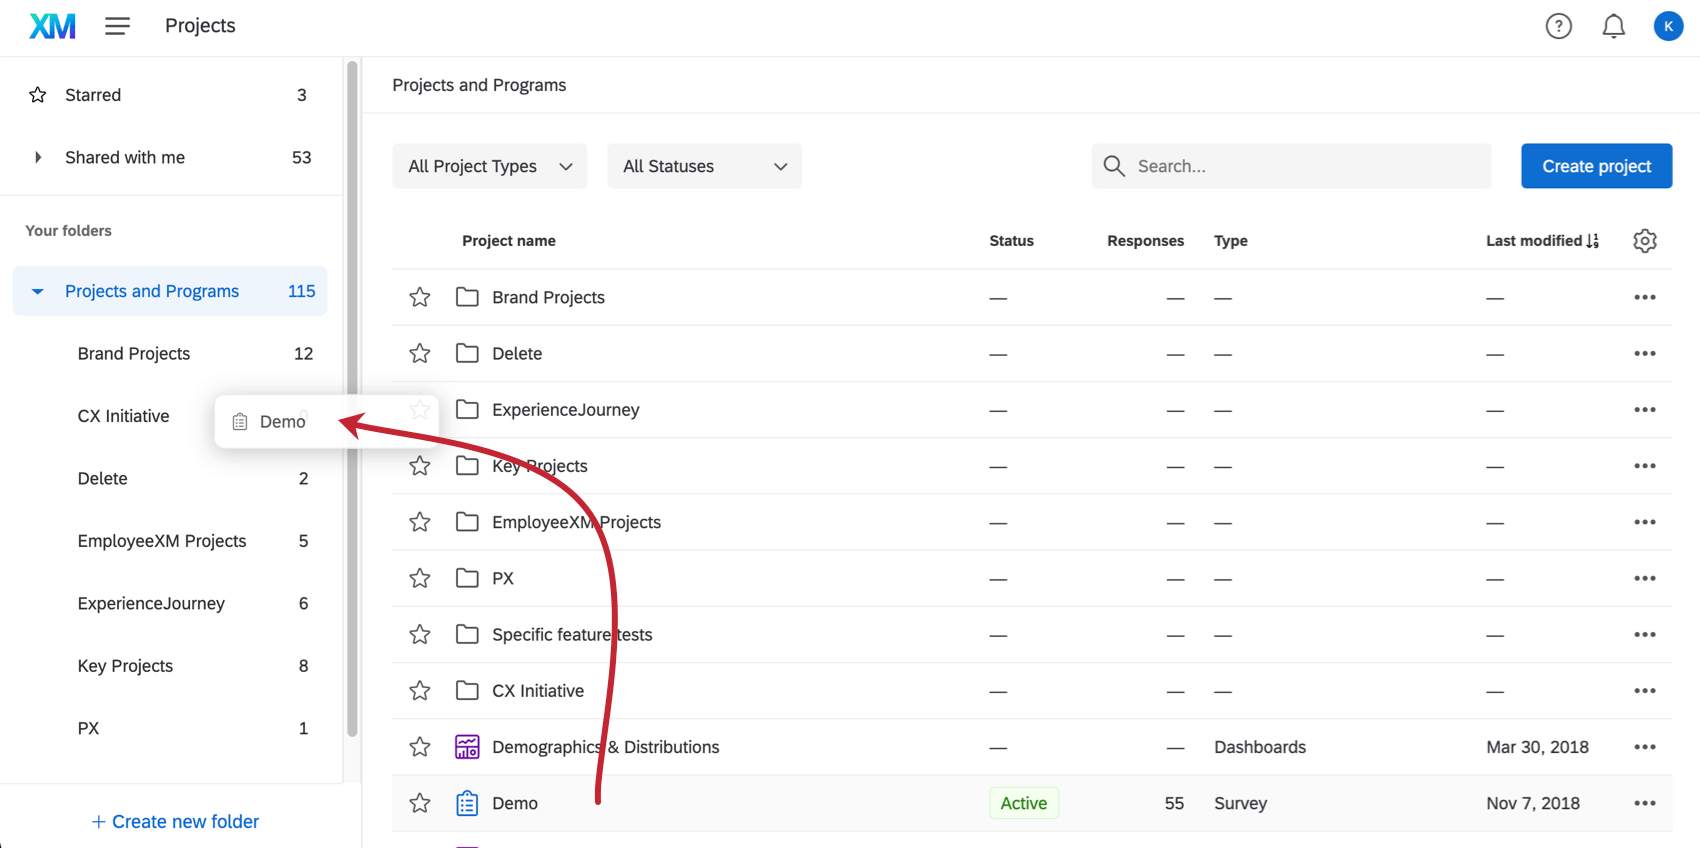
You can organize projects by clicking, dragging, and dropping them into any folders you’ve created.
Default Folders
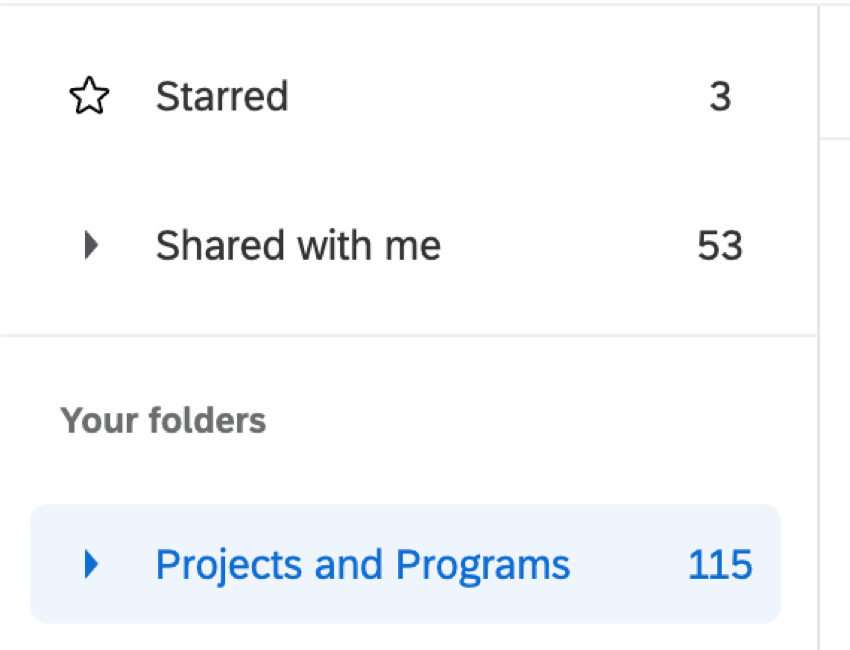
There are 3 default folders:
- Starred: See all the projects you’ve starred.
- Shared with me: See all the projects other users have invited you to collaborate on.
- Projects and Programs: See all the projects, programs, and folders in your account you haven’t categorized into other folders.

In addition to the 3 default folders, you can create custom folders and subfolders to organize your projects. Don’t limit yourself—go ahead and create all the folders, subfolders, and sub-subfolders you’d like!
Adding and using custom folders
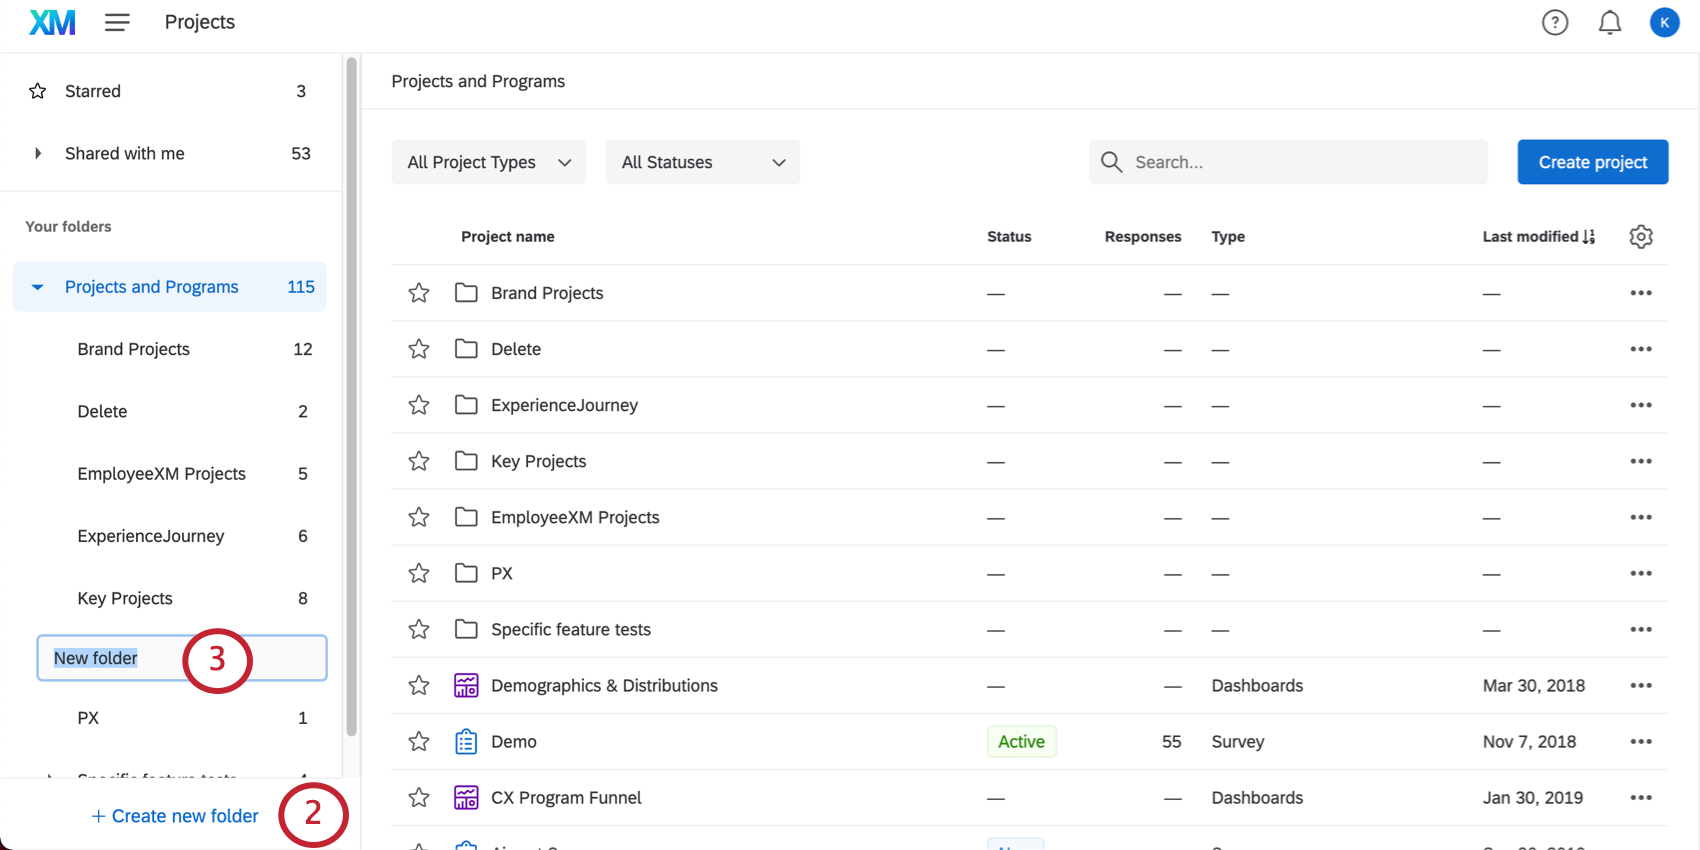
Qtip: You can nest folders by dragging a folder and dropping it into another one. To hide nested folders, click on the arrow to the left of the main folder’s name.

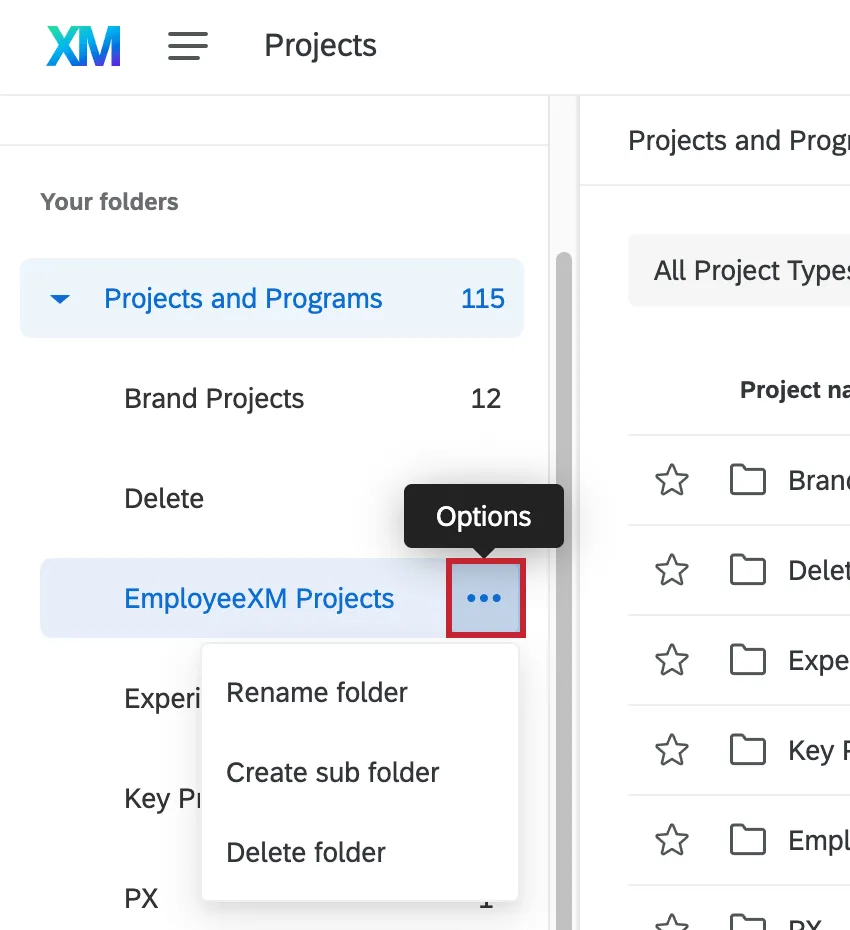
Folder Options
For custom folders, you can perform the following actions by clicking the gear next to the folder’s name:
- Rename folder: Edit the name of the folder.
- Create sub folder: Create a new subfolder within the selected folder. Qtip: You can create up to 5 layers of subfolders.

- Delete folder: Delete this folder and any subfolders, automatically moving all contents to the default “Projects and Programs” folder.
Warning: As a Brand Administrator, if you transfer surveys from one account to another, keep in mind that any folders that the surveys were in will not transfer with the survey. If you decide to transfer a survey back to the original account, the surveys will be placed back in the folders in which they were before.
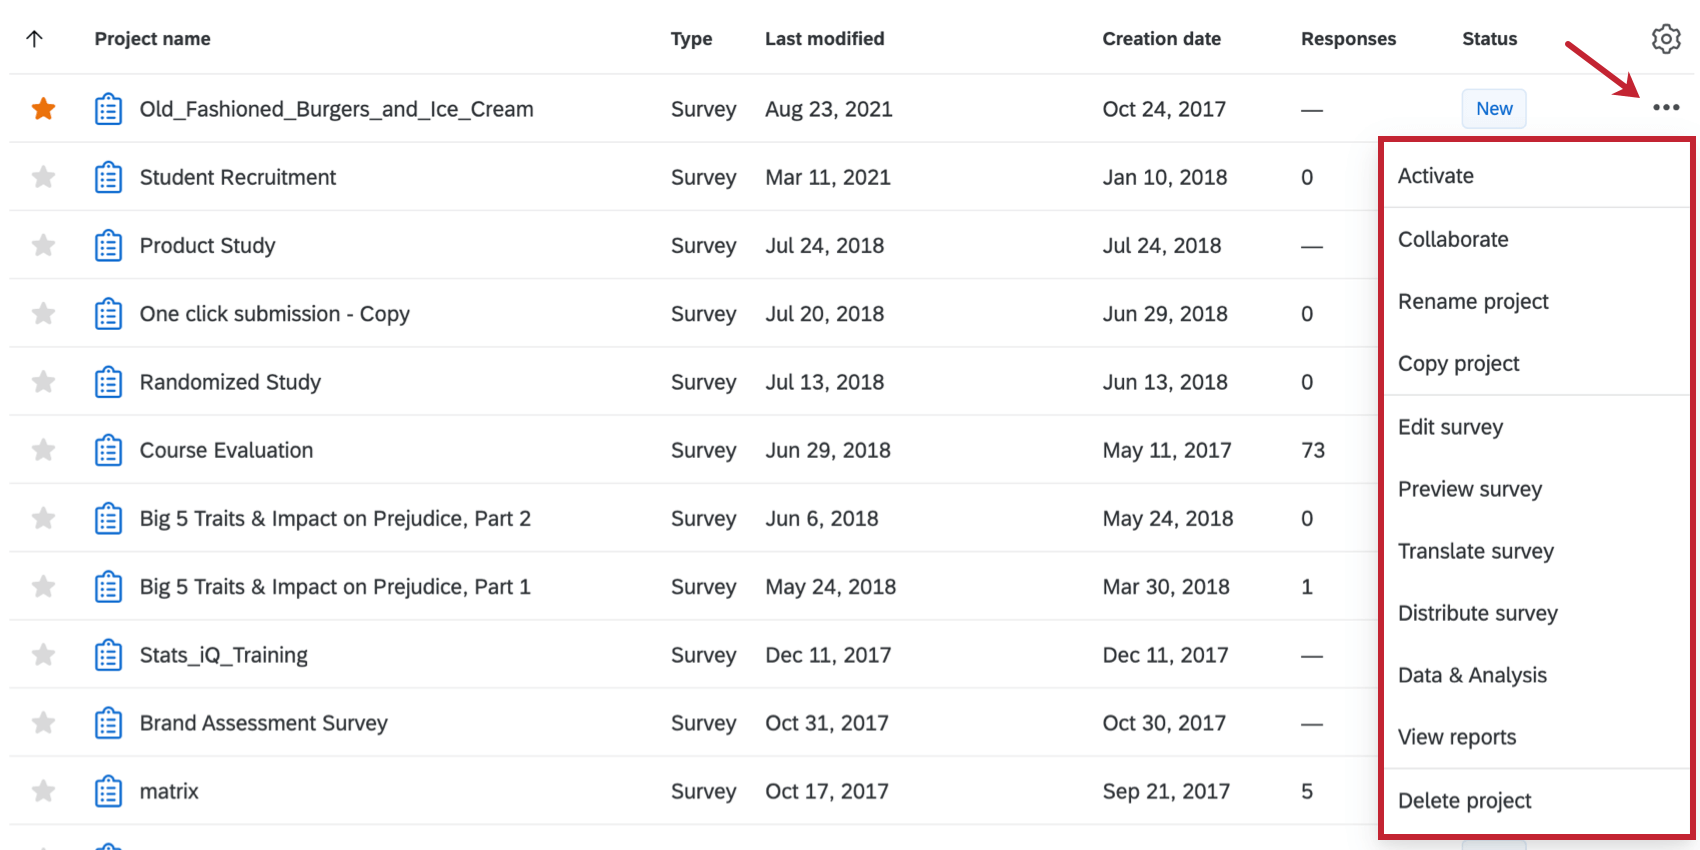
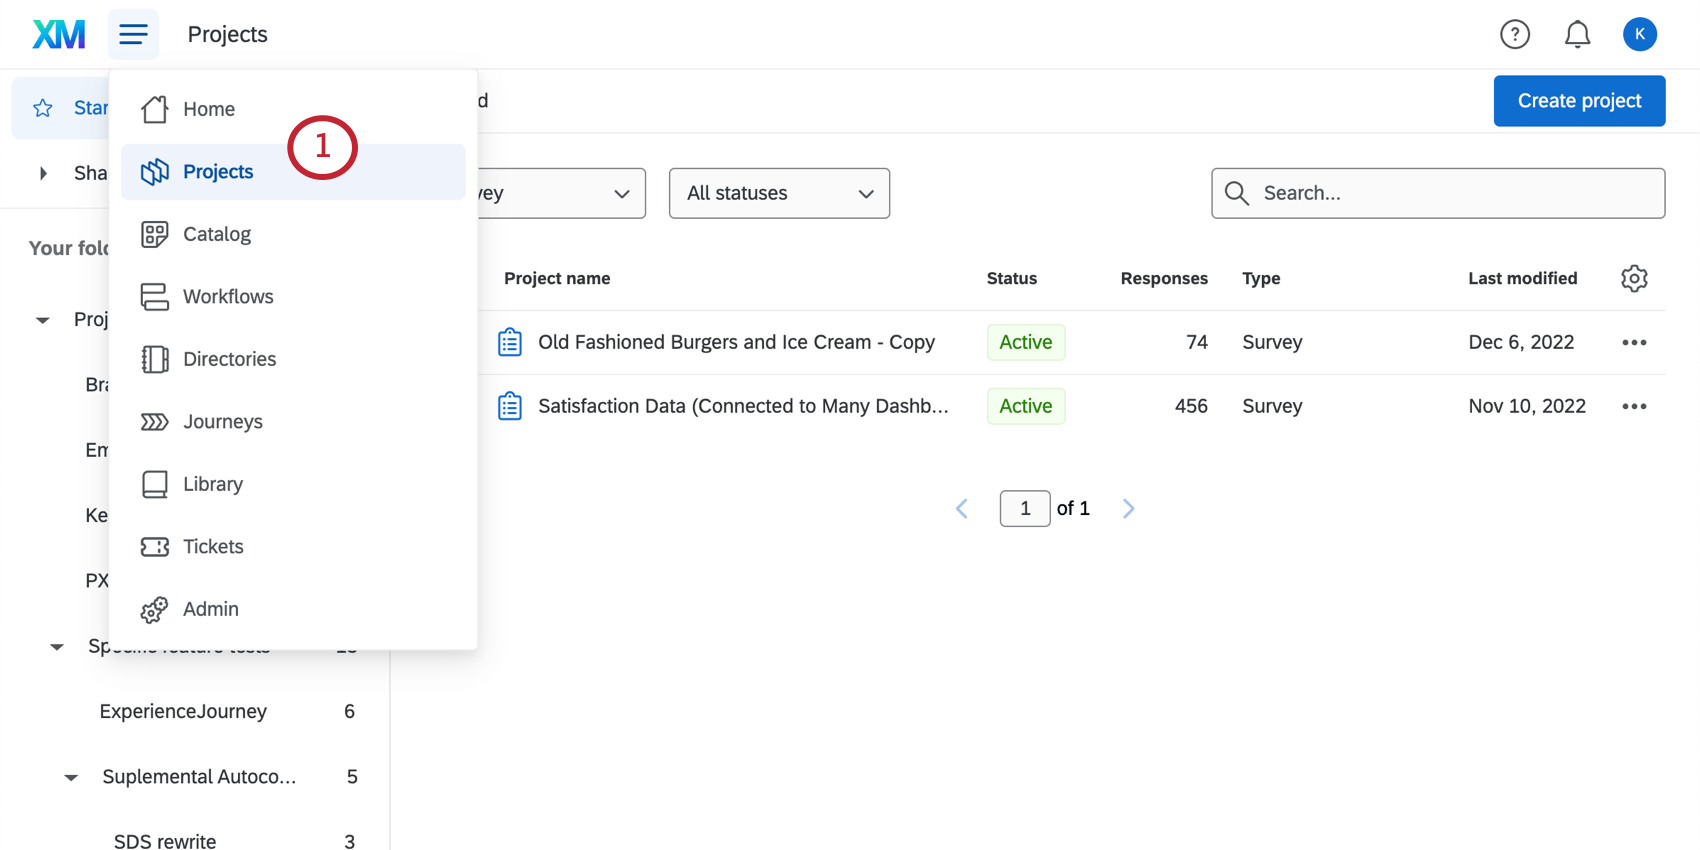
Survey Project Actions
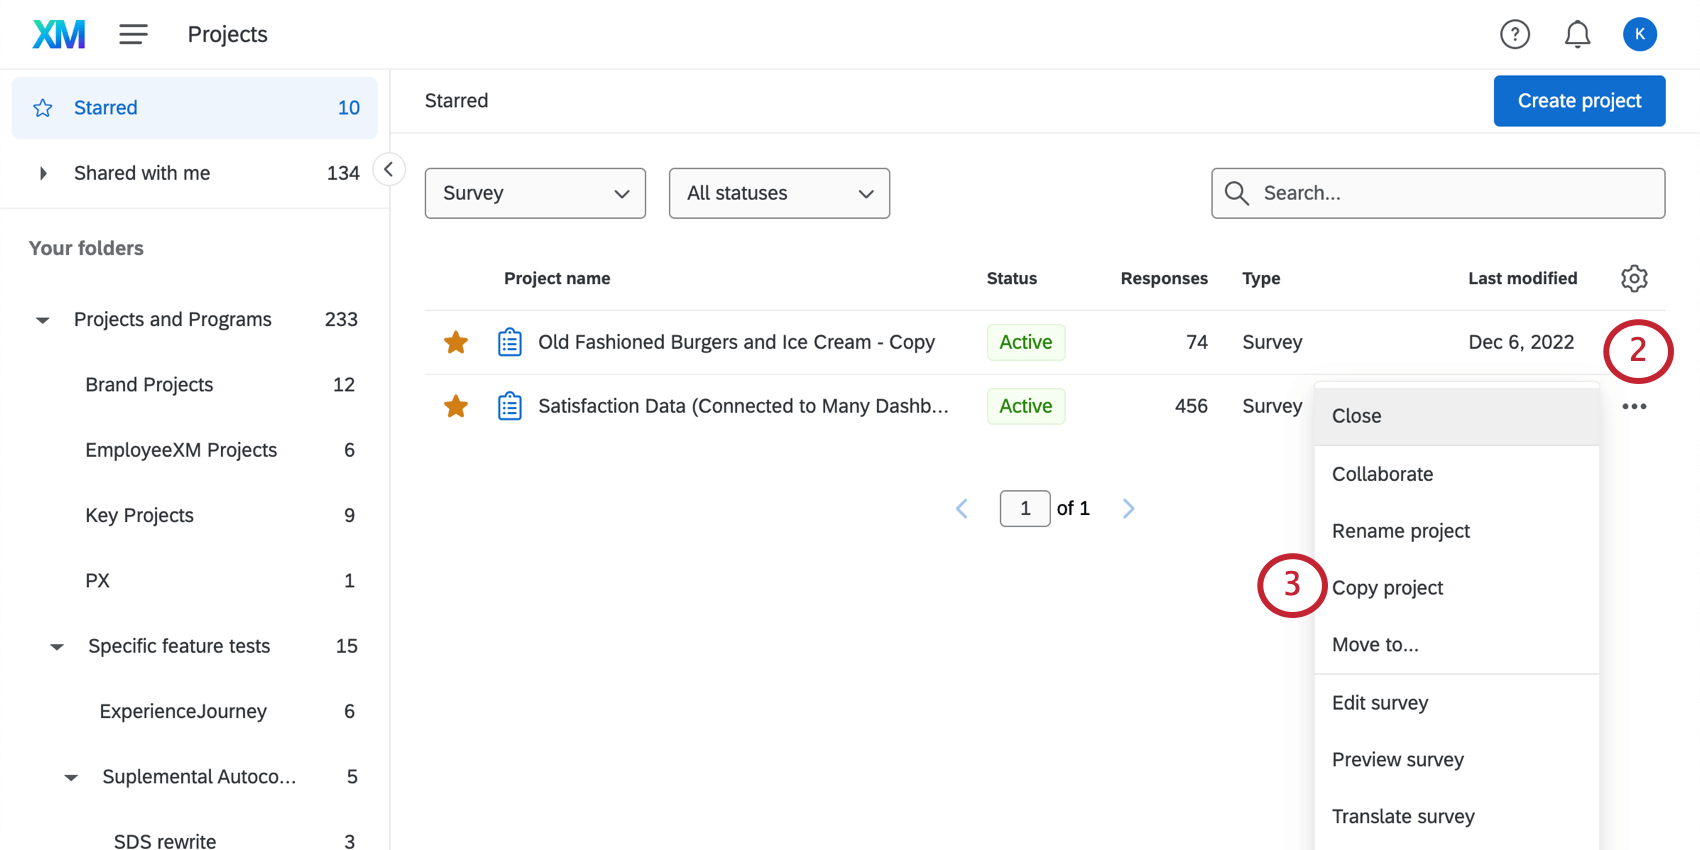
Every project has a project actions menu located in a dropdown to the far-right. These options allow you to access different aspects of the project or perform different actions directly from the Projects page.
The following is a list of actions available to survey projects:

- Activate/Close: Enable or disable a project’s ability to actively collect new responses.
- Collaborate: Invite others Qualtrics users to collaborate on a survey with you.
- Rename project: Edit the name of your project. See more on project names.
- Copy project: Copy the project to your account, a library, or another user’s account (note that this user’s account must be within your organization). Warning: When you copy a project, you copy more than just the questions in the survey. You also copy survey flow elements, survey options, Look & Feel settings, and more. For example, if a survey has an expiration date, and that project is copied, the new survey created as a copy will also have that same expiration date.

- Edit survey: Navigate to the Survey tab to change your survey.
- Preview survey: See your survey the way a respondent would see it on a desktop or mobile device.
- Translate survey: Translate your survey into multiple languages.
- Distribute survey: Navigate to the Distributions tab to access distribution options for your survey.
- Data & Analysis: Navigate to the Data & Analysis tab and view individual response entries.
- View reports: Navigate to the Reports tab and view aggregate data from your survey.
- Delete project: Delete your project (note that deleted projects can’t be recovered, so you’ll be asked to confirm this decision).
- Reveal in Folder: Navigate to the folder the project is stored in. This option won’t appear if your project hasn’t been sorted into a folder or if you’re in the project’s home folder.
This list covers the actions available to survey projects. Other project types, such as Employee Experience projects, Conjoints, MaxDiff, and Website / App Feedback, may have different list of project actions, or a limited number of these actions available to them.
Qtip: Are any of these options grayed out? The person who invited you to collaborate on the project probably didn’t give you full access to every collaboration permission. Contact the survey owner to gain access. See the Collaborating on a Project support page for additional troubleshooting.
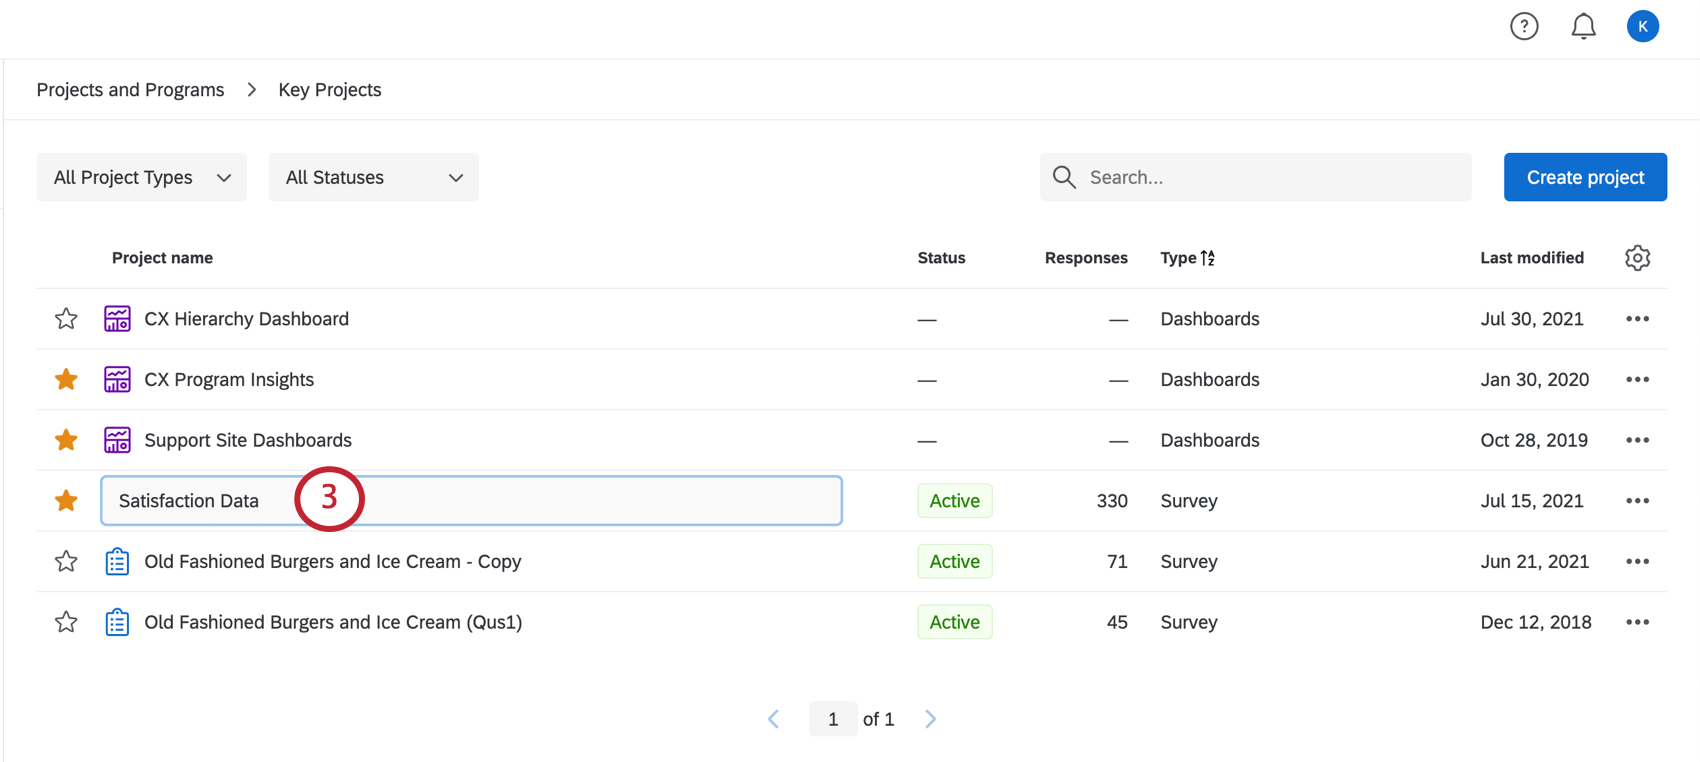
Renaming a Project

Deleting a Project
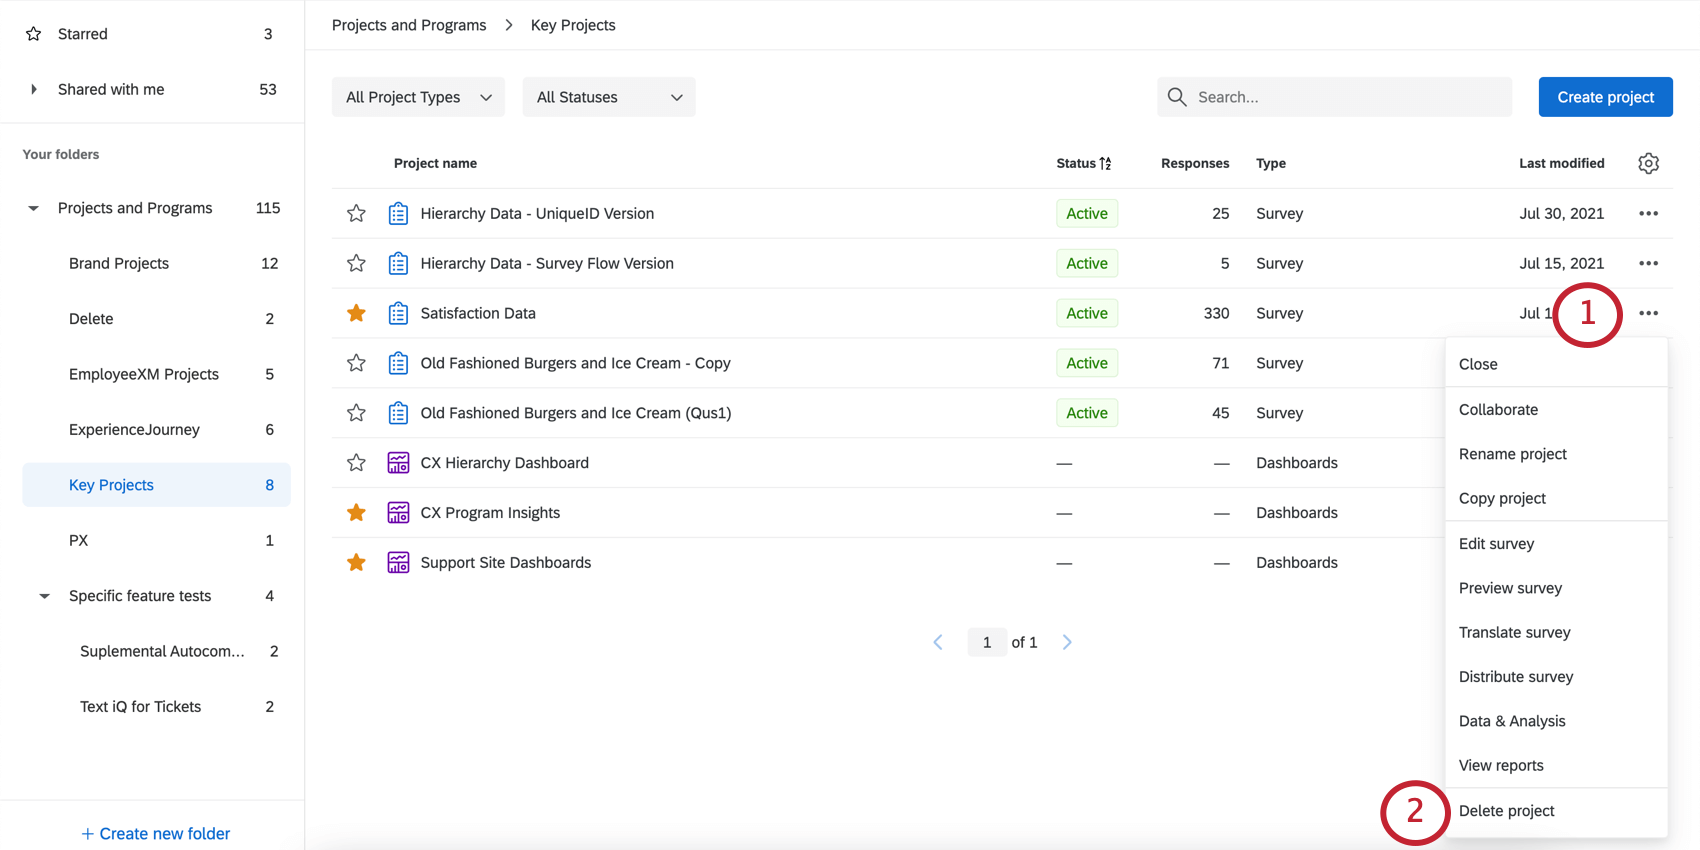
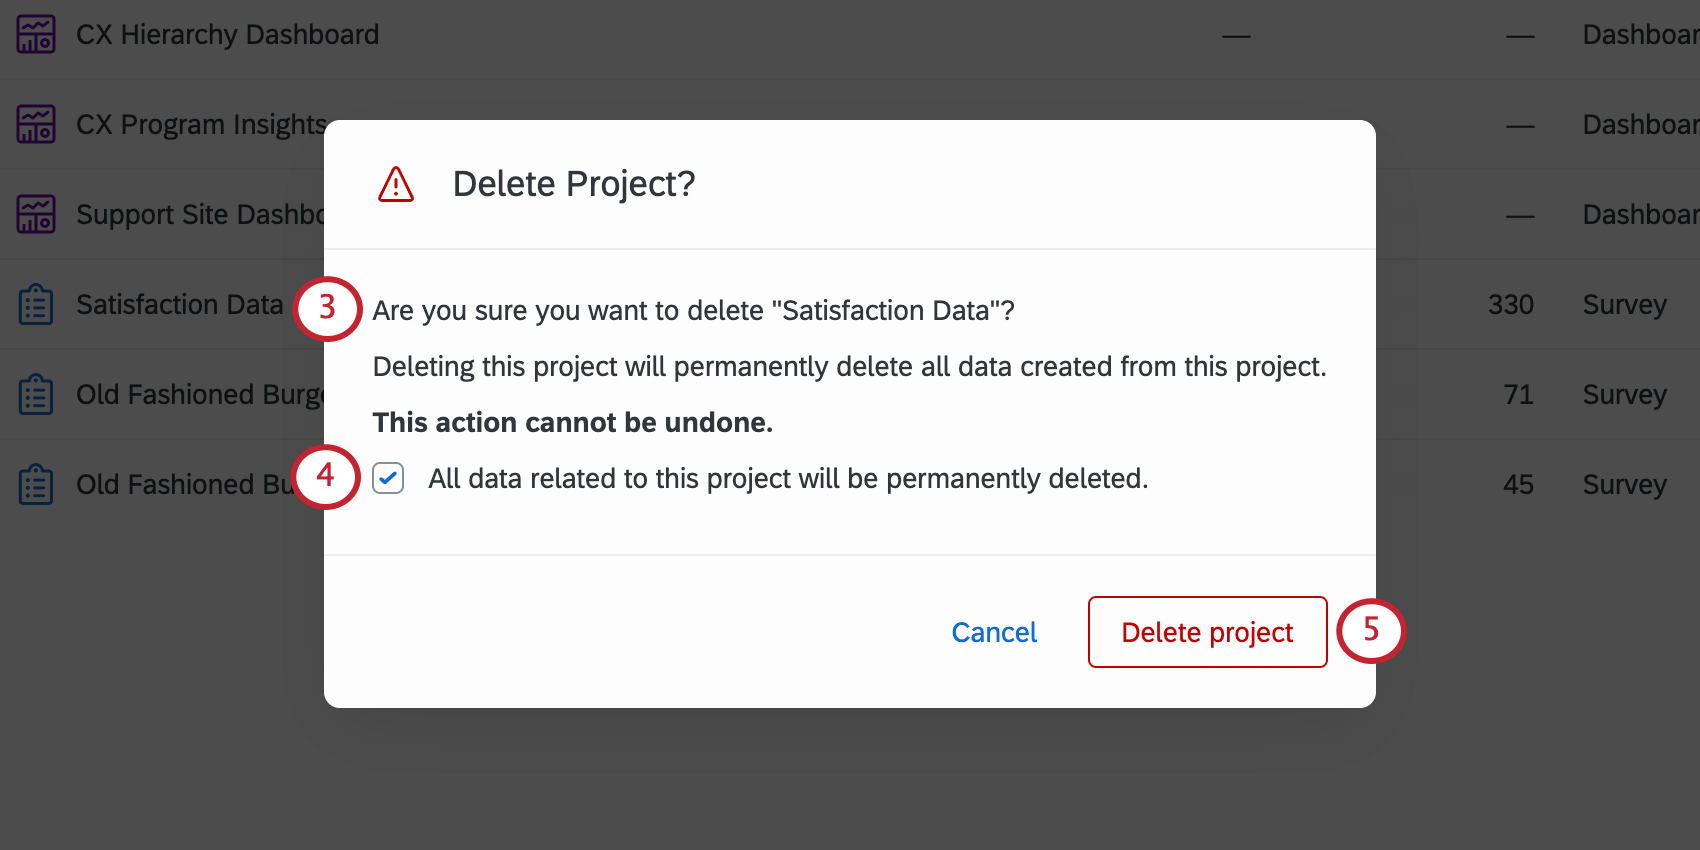
Attention: Be sure you don’t need any data or reports from this project. They’ll be irretrievable once the project is deleted.
Qtip: To verify that all data has been permanently deleted, please reach out to your Brand Administrator. Brand Administrators, see Right to Erasure for more information.
Copying a Survey Project
You can copy a survey project right on the Projects and Home pages. This modal also lets you copy projects to your library or to another user’s account.
Qtip: You can also create a project from a copy in the catalog. See Creating from a Copy.
Qtip: The options described in this section are for surveys, and may not work the same for other project types.
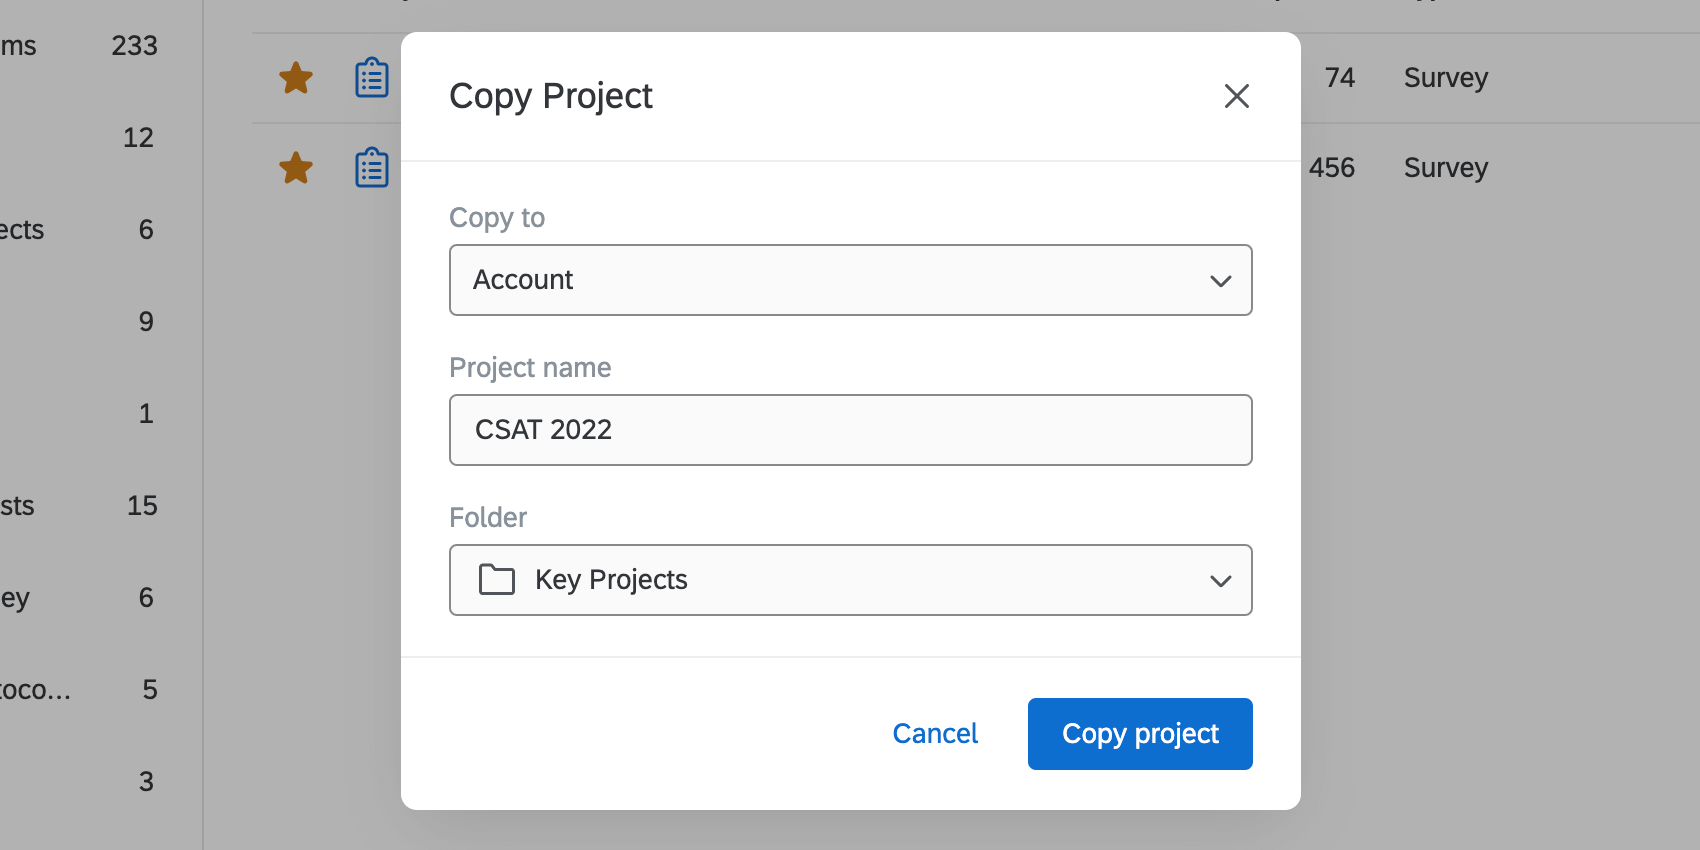
- Account: Create a copy of the project in your account.
- Library: Save a copy of the survey to your library.
- User: Share a copy of the project with another user.
Qtip: You can create a copy of most project types. However, surveys are the only projects you can copy to the library and to other users’ accounts.
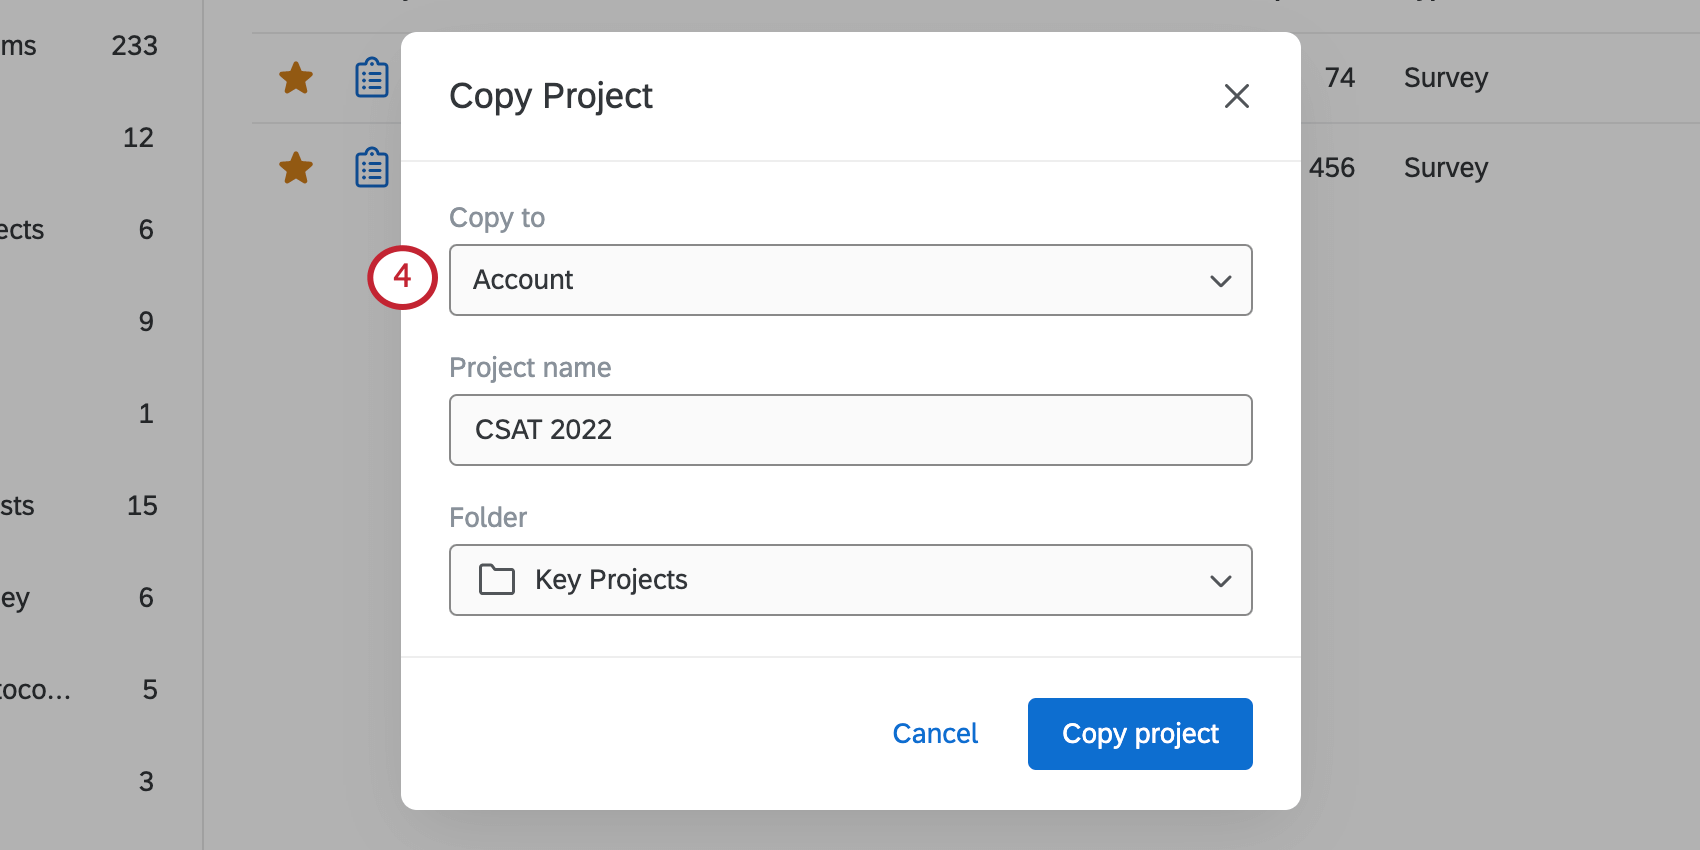
Copy to account
Give the project a name and choose a folder to save it in. Once you’re finished, click Copy project.

Copy to library
If you use similar surveys, blocks, or questions repeatedly, you can store templates of these in your library for later use. Saving content to your library is a great way to help minimize repetition in your work.
See Copying a Survey to the Library to learn more.
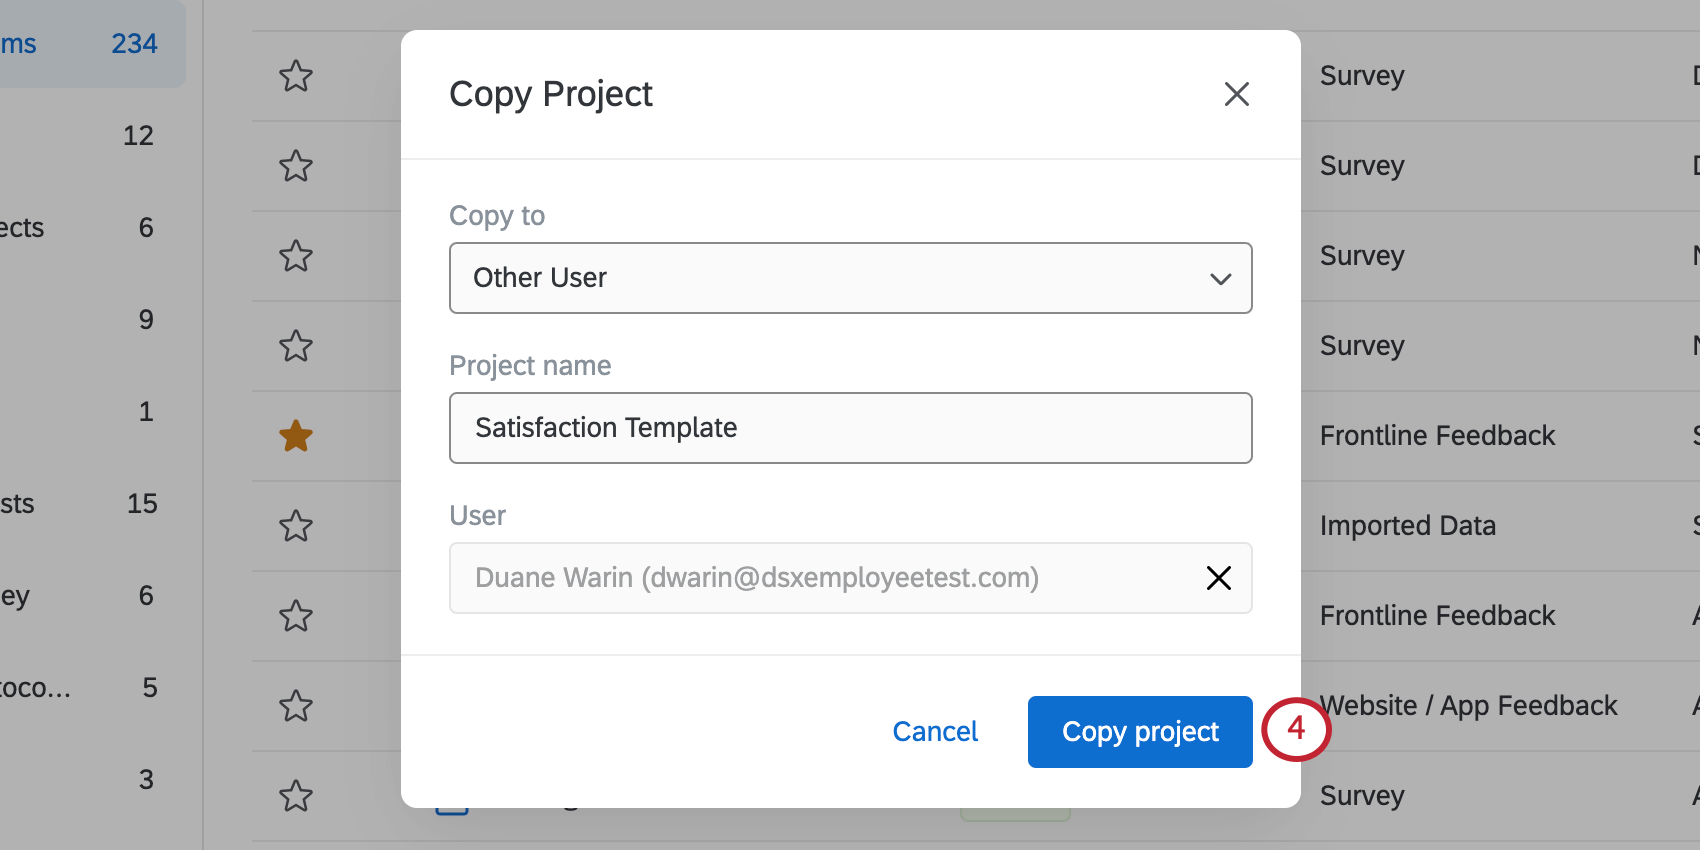
Copy to user
You can create a copy of your survey in another user’s account. The other user will own this copy and can edit it independently of the original. You will not have access to the copy unless the new owner shares it with you.
You don’t have to own a project to copy it to another user’s account. In other words, you can copy projects that you’ve been invited to collaborate on.
Qtip: If you’d like to work together with someone on the same survey, try collaboration instead.
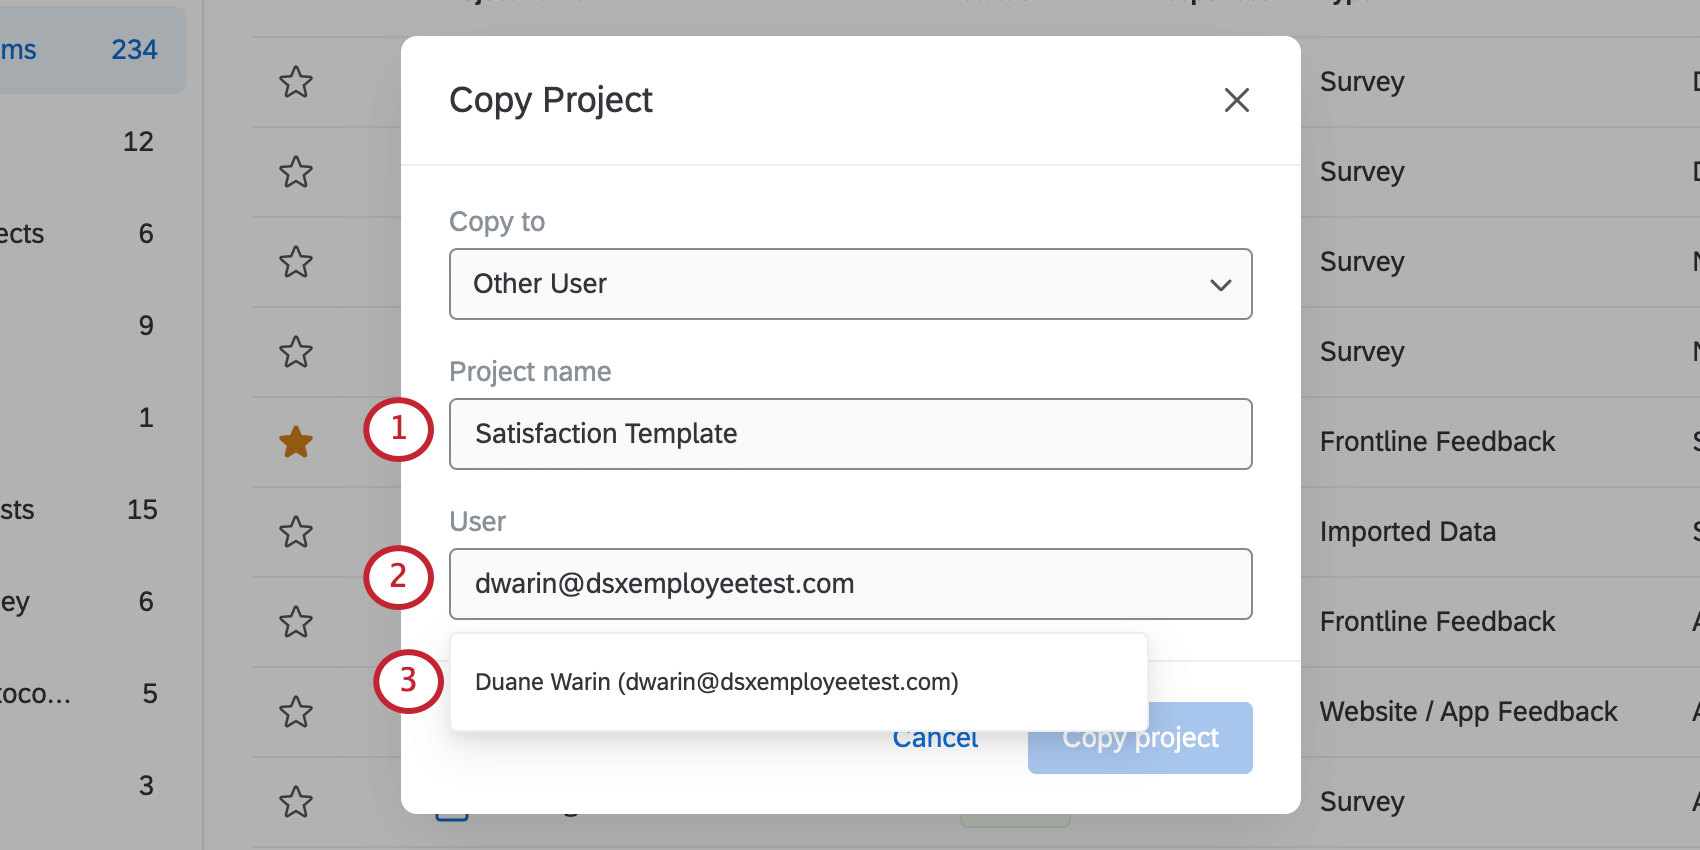
Qtip: It’s usually best to search by an email address.
Qtip: You can only select 1 user at a time.
Qtip: You need the “Collaborate Projects” permission to be able to copy projects to other users’ accounts. You don’t need the “Access Organization Address Book” permission enabled.
FAQs
How do I rename my project?
How do I rename my project?
How do I assign my projects to a folder?
How do I assign my projects to a folder?
How do I see the project owner?
How do I see the project owner?
When sorting by owner, all projects become grouped by their respective owner, regardless of what folder you’re in. We recommend looking in the Shared With Me folder to make locating the owner and project easier.
What does CX/EX/BX stand for? / What does _ Experience mean?
What does CX/EX/BX stand for? / What does _ Experience mean?
- Customer Experience (CX): Learn more about your customers' experience with your company. Build beautiful dashboards to display your data, or target users on your site using creative intercepts.
- Employee Experience (EX): These projects are specially designed to get at the heart of your employees’ experience working for your company, and provide actionable results and dynamic reports. Assign relationships and easily create individual reports with 360, or survey the whole company and create a secure dashboard that only reveals data based on each employee’s position in the company hierarchy.
- Brand Experience (BX): Find out what’s working and what isn’t for your brand’s reputation, and build towards a better experience for your customers.
That's great! Thank you for your feedback!
Thank you for your feedback!