
Managing Custom Attributes (Designer)
What's on this page
About Managing Custom Attributes
You can create your own custom attributes that you can apply to documents. This page will cover how to create, edit, and delete your own custom attributes.
You can also organize attributes into attribute sets which makes reporting on these attributes easier.
Qtip: See Derived Attributes for information on creating attributes based on existing attributes.
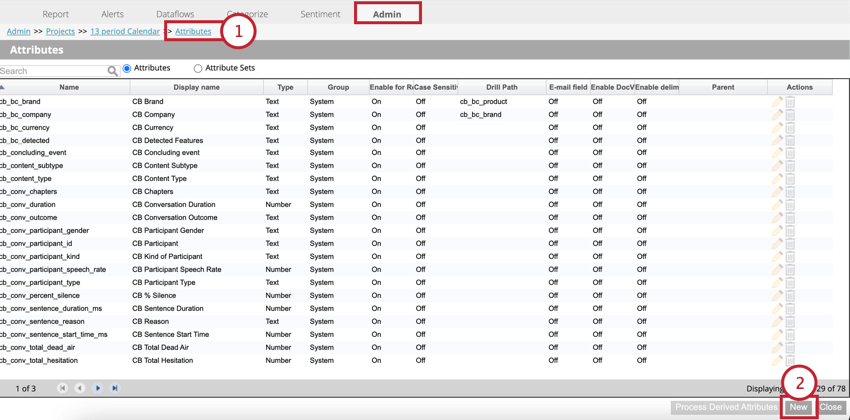
Creating a Custom Attribute
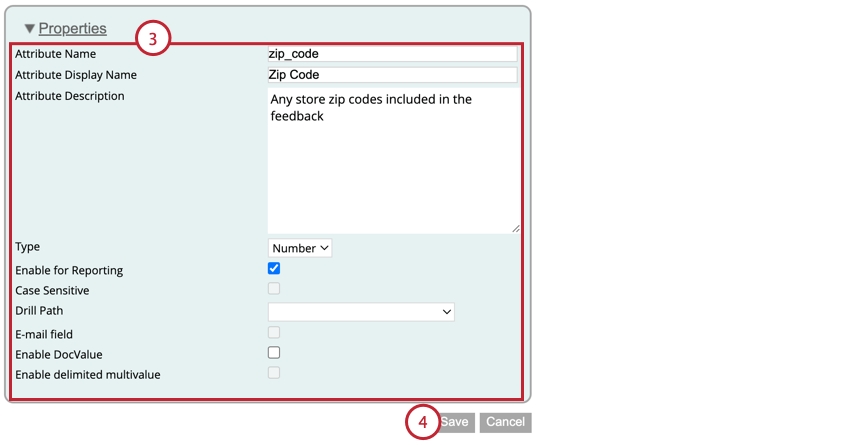
- Attribute Name: The attribute’s system name. This field is required See Naming Attributes for more information about this field.
- Attribute Display Name: The attribute’s display name. This field is required. See Naming Attributes for more information about this field.
- Attribute Description: A description of the attribute’s purpose. This field is optional.
- Type: The type of attribute.
- Enable for Reporting: When enabled, allows you to use this attribute as a drill path in reports. Qtip: If an attribute is numeric and you want to use it as an additional metric in a report, then disable this option.

- Case Sensitive: This option is only available for text attribute types. When enabled, the attribute will be treated as case sensitive. Qtip: To make sure all links in customer feedback work correctly, store them as case-sensitive attributes.Example: For example, when enabled, “Qualtrics” and “qualtrics” will be treated as 2 separate values.

- Drill Path: Select an attribute which the report viewers should drill to when double-clicking this attribute in reports. Leave this option blank for a default drill path.
- E-mail field: This option is only available for text attribute types. Enable this option if the attribute value is an email.
- Enable DocValue: This option allows you to search by this attribute when enabled.
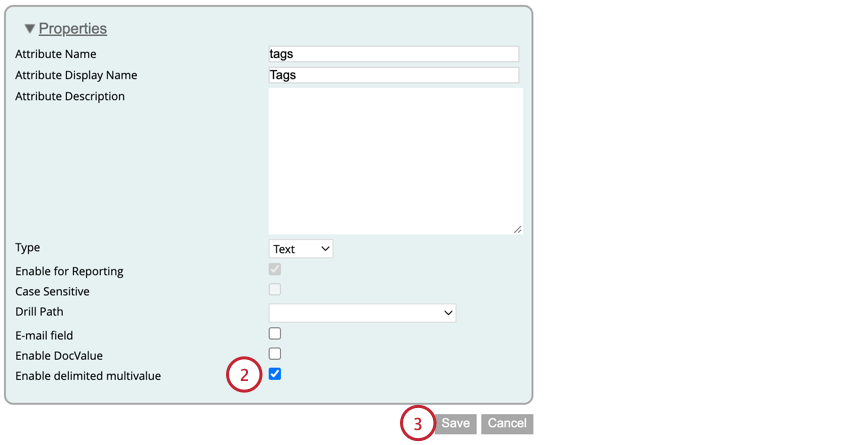
- Enable delimited multivalue: This option is only available for text attribute types. Enable this option if the attribute can have multiple values. See Multivalue Attributes for more information.
Naming Attributes
When creating a custom attribute, you must give the attribute both a display name and a system name. These names have different requirements. There are also reserved field names you cannot use. This section covers these attribute naming requirements.
System names are only exposed via XM Discover API, while display names are shown in reports, alerts, and so on.
Qtip: Neither type of attribute name can begin with SC_ or LU_.
System names must meet the following requirements:
- Allowed characters: English letters (a-z, A-Z), numbers (0-9), underscores (_)
- Maximum length: 21 characters
- Must begin with a letter
Display names must meet the following requirements:
- Allowed characters: Letters, numbers, white spaces, quotes, and other punctuation marks
- Maximum length: 99 characters
- Does not need to begin with a letter, except for category-derived attributes.
Reserved Attribute Names
The following attribute names are reserved and cannot be used for your custom attributes:
- ACCESS
- ADD
- ALL
- ALTER
- AND
- ANY
- AS
- ASC
- AUDIT
- BETWEEN
- BY
- CB_BC_BRAND
- CB_BC_COMPANY
- CB_BC_DETECTED
- CB_BC_EMAIL
- CB_BC_EMOTICON
- CB_BC_EVENT
- CB_BC_INDUSTRY
- CB_BC_PERSON
- CB_BC_PHONE
- CB_BC_PRODUCT
- CB_CONTENT_SUBTYPE
- CB_CONTENT_TYPE
- CB_SENTENCE_QUARTILE
- CHAR
- CHECK
- CLUSTER
- CMP_COMPONENT_ID
- CMP_SRC_NAME
- CMP_STATUS
- COLUMN
- COMMENT
- COMPRESS
- CONNECT
- CREATE
- CURRENT
- DATE
- DATE_LAST_UPDATED
- DATE_LAST_UPDATED_ID
- DECIMAL
- DEFAULT
- DELETE
- DESC
- DISTINCT
- DOCUMENT
- DOCUMENT_DATE
- DOCUMENT_DATE_ID
- DOCUMENT_ID
- DROP
- ELSE
- EXCLUSIVE
- EXISTS
- FILE
- FLOAT
- FOR
- FROM
- GRANT
- GROUP
- HAVING
- IDENTIFIED
- IMMEDIATE
- IN
- INCREMENT
- INDEX
- INITIAL
- INSERT
- INTEGER
- INTERSECT
- INTO
- IS
- LEVEL
- LIKE
- LOCK
- LONG
- MAXEXTENTS
- MINUS
- MLSLABEL
- MODE
- MODIFY
- NATURAL
- NATURAL_ID
- NOAUDIT
- NOCOMPRESS
- NOT
- NOWAIT
- NULL
- NUMBER
- OF
- OFFLINE
- ON
- ONLINE
- OPTION
- OR
- ORDER
- PCTFREE
- PRIOR
- PRIVILEGES
- PUBLIC
- RANK
- RAW
- RENAME
- RESOURCE
- REVOKE
- ROW
- ROWID
- ROWNUM
- ROWS
- SELECT
- SENTIMENTINDEX
- SENTIMENTNEGCOUNT
- SENTIMENTPOSCOUNT
- SENTIMENTPOSNEGDELTACOUNT
- SESSION
- SESSION_ID
- SET
- SHARE
- SIZE
- SMALLINT
- SOURCE
- SOURCE_ID
- START
- SUCCESSFUL
- SYNONYM
- SYSDATE
- TABLE
- THEN
- TIME
- TIMESTAMP
- TO
- TRIGGER
- UID
- UNION
- UNIQUE
- UPDATE
- USER
- VALIDATE
- VALUES
- VARCHAR
- VARCHAR2
- VERBATIM_TYPE
- VERBATIM_TYPE_ID
- VIEW
- WHENEVER
- WHERE
- WITH
Editing Attributes
Qtip: You cannot edit default system attributes.
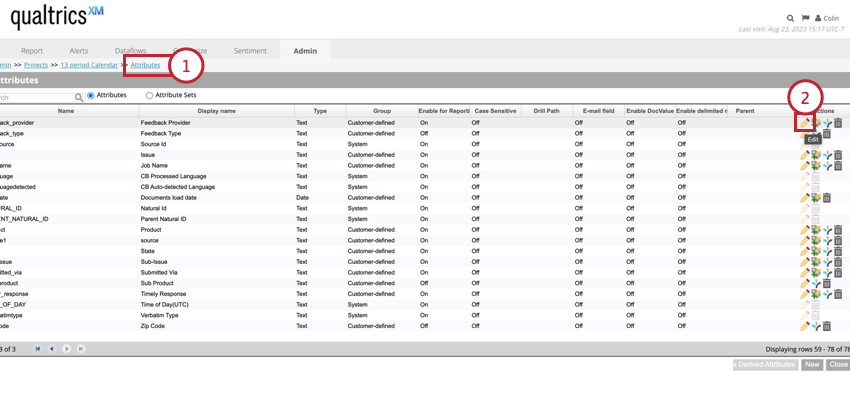
To edit a custom attribute:
Deleting Attributes
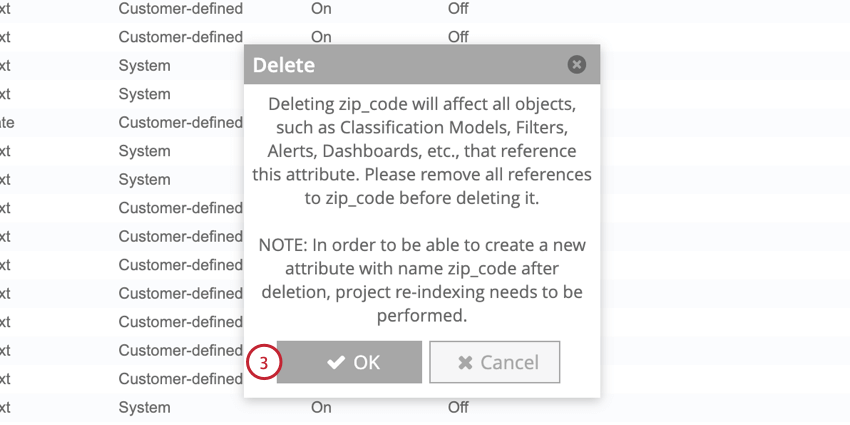
Qtip: You cannot delete default system attributes.
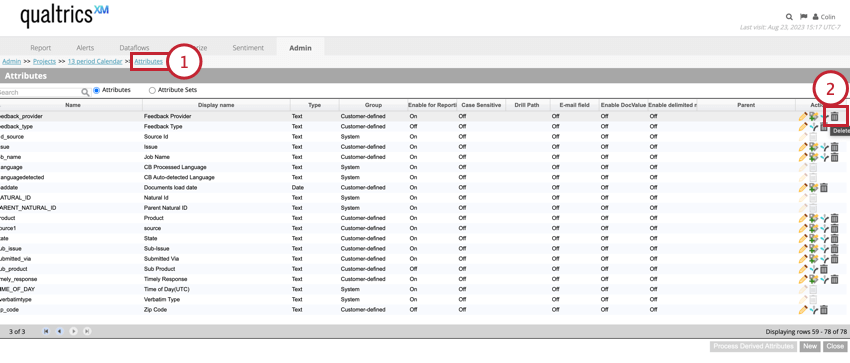
You can delete custom attributes you no longer need. Please be aware of the following when deleting attributes:
- In case an attribute has derived attributes, you need to delete derived attributes first.
- In case an attribute is used in alerts, you need to remove these references first by either editing or deleting corresponding alerts.
- In case an attribute is defined as the drill path for another attribute, the drill path will be reset to default after the attribute is deleted.
- In case an attribute is part of an attribute set, deleting the attribute will remove it from the set. If the last attribute in a set is deleted, the set will be deleted automatically as well.
Attention: If you plan to create a new attribute with the same system name as the one you deleted, you must first request your project be reindexed by contacting your Qualtrics representative. To avoid reindexing, use a slightly different system name. You can reuse the same display name.
Attribute Sets
You can organize numeric attributes into sets for easier reporting.

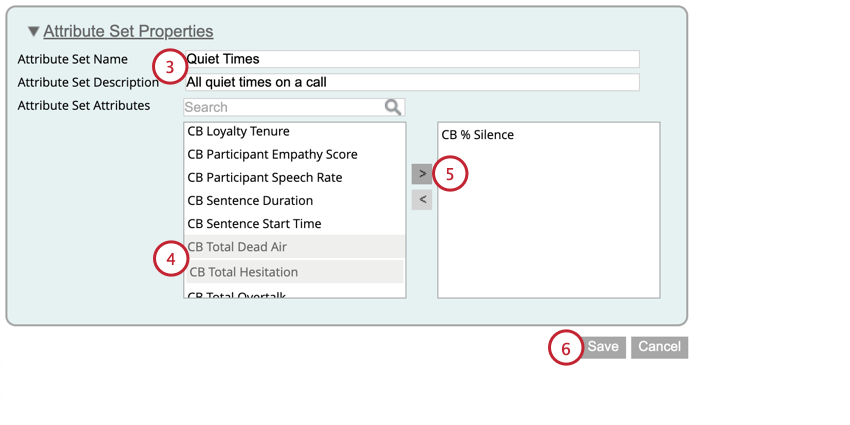
Qtip: One attribute set can contain either the satisfaction score or the source attribute from which that score has been derived, but not both.
You can then report on these attribute sets by running an attribute set report.
Multivalue Attributes
By default, attributes contain a single value for each record. If desired, you can enable an attribute to store multiple values for a single record.
Qtip: You can only create multivalue attributes from new text attributes. You cannot edit an existing attribute to make it multivalue.
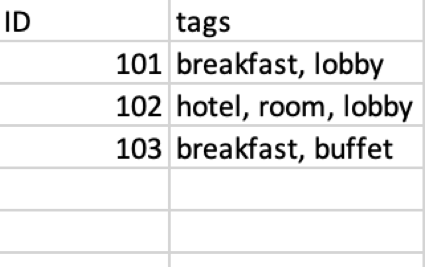
When uploading data with a file connector, you can now include multiple values for this attribute, separated by commas. Phrases do not need to be enclosed in double quotes unless you want a phrase to contain a comma.
Example: The example below shows a file with multiple values for the “tags” field.
That's great! Thank you for your feedback!
Thank you for your feedback!