
Custom Embedded Feedback
What's on this page
Qtip: If you don’t have access to any of the features described on this page, reach out to your Account Executive. For more information about the differences between Digital Feedback and CustomerXM for Digital, see Digital Feedback vs. CustomerXM for Digital.
About Custom Embedded Feedback Creatives
Custom embedded feedback allows you to create custom content that is displayed as part of your page. This custom content can be anything from an advertisement to an embedded survey.
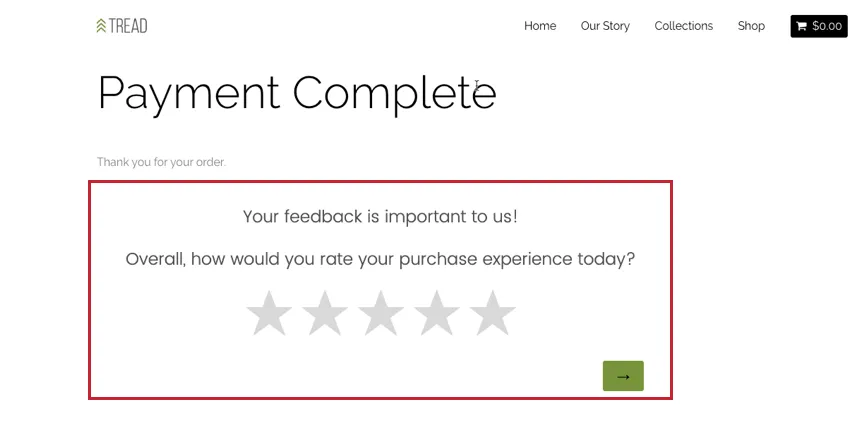
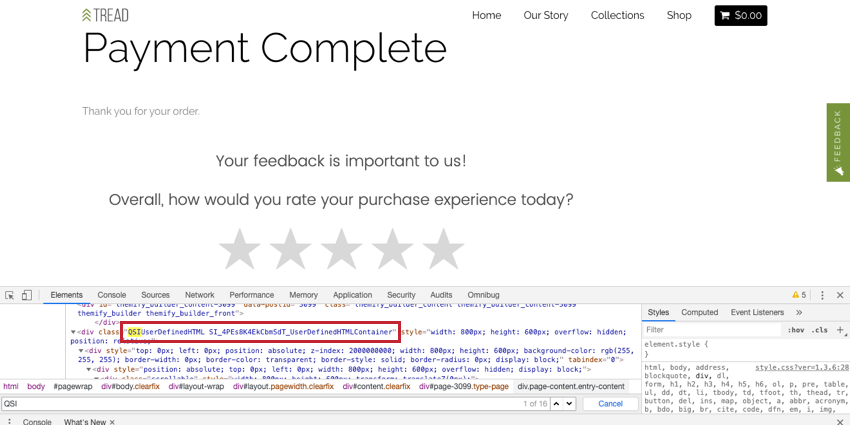
Example: In this screenshot, a survey appears embedded in the web page after a visitor completes a payment. The survey is built in the survey platform and embedded on the page using a custom embedded feedback creative.
Custom embedded feedback is more noticeable than a more passive creative, like the feedback button, while also never overwhelming website visitors by interrupting what they are doing. In a world where customers are trained to quickly give feedback after an interaction, embedding custom feedback directly into your page allows respondents to give feedback during an experience.
Custom embedded feedback creatives can also be useful for content management, allowing you to choose which surveys are shown to specific types of website visitors.
Example: For example, you could choose to display a discount offer only to those visitors located in areas near physical store locations, and alternate material to everyone else.
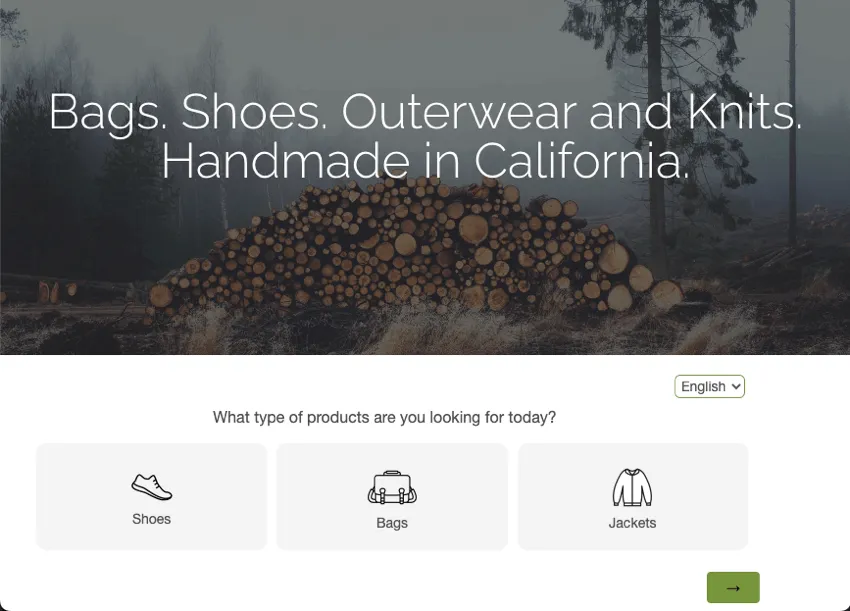
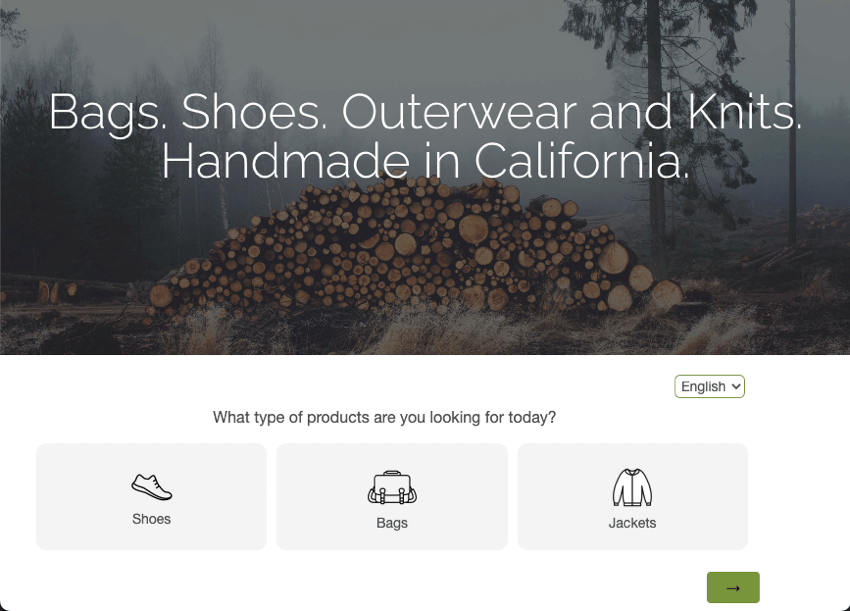
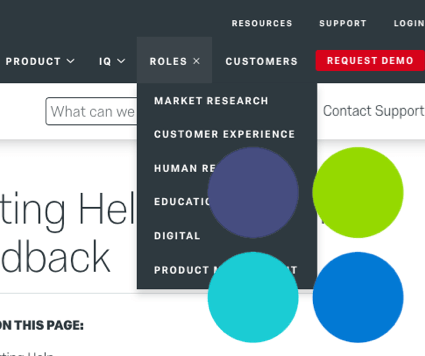
Example: In the screenshot below, we ask visitors what they are shopping for today. If they choose shoes, we can redirect them directly to the Shoes section of our website.
Qtip: This feature used to be named Custom HTML creative.
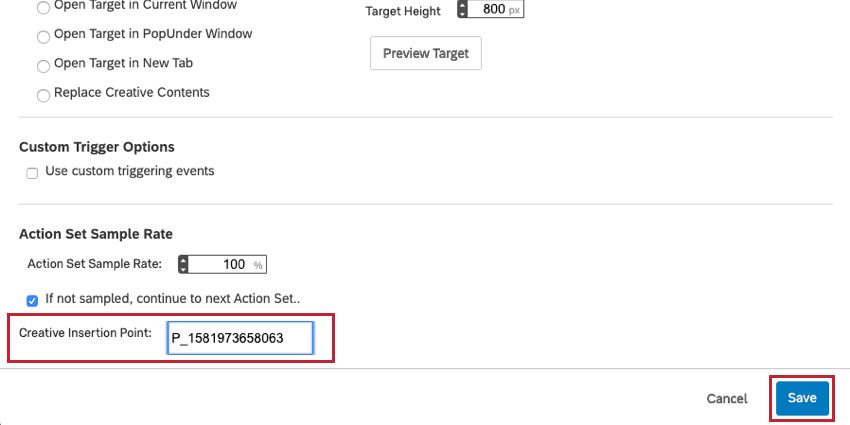
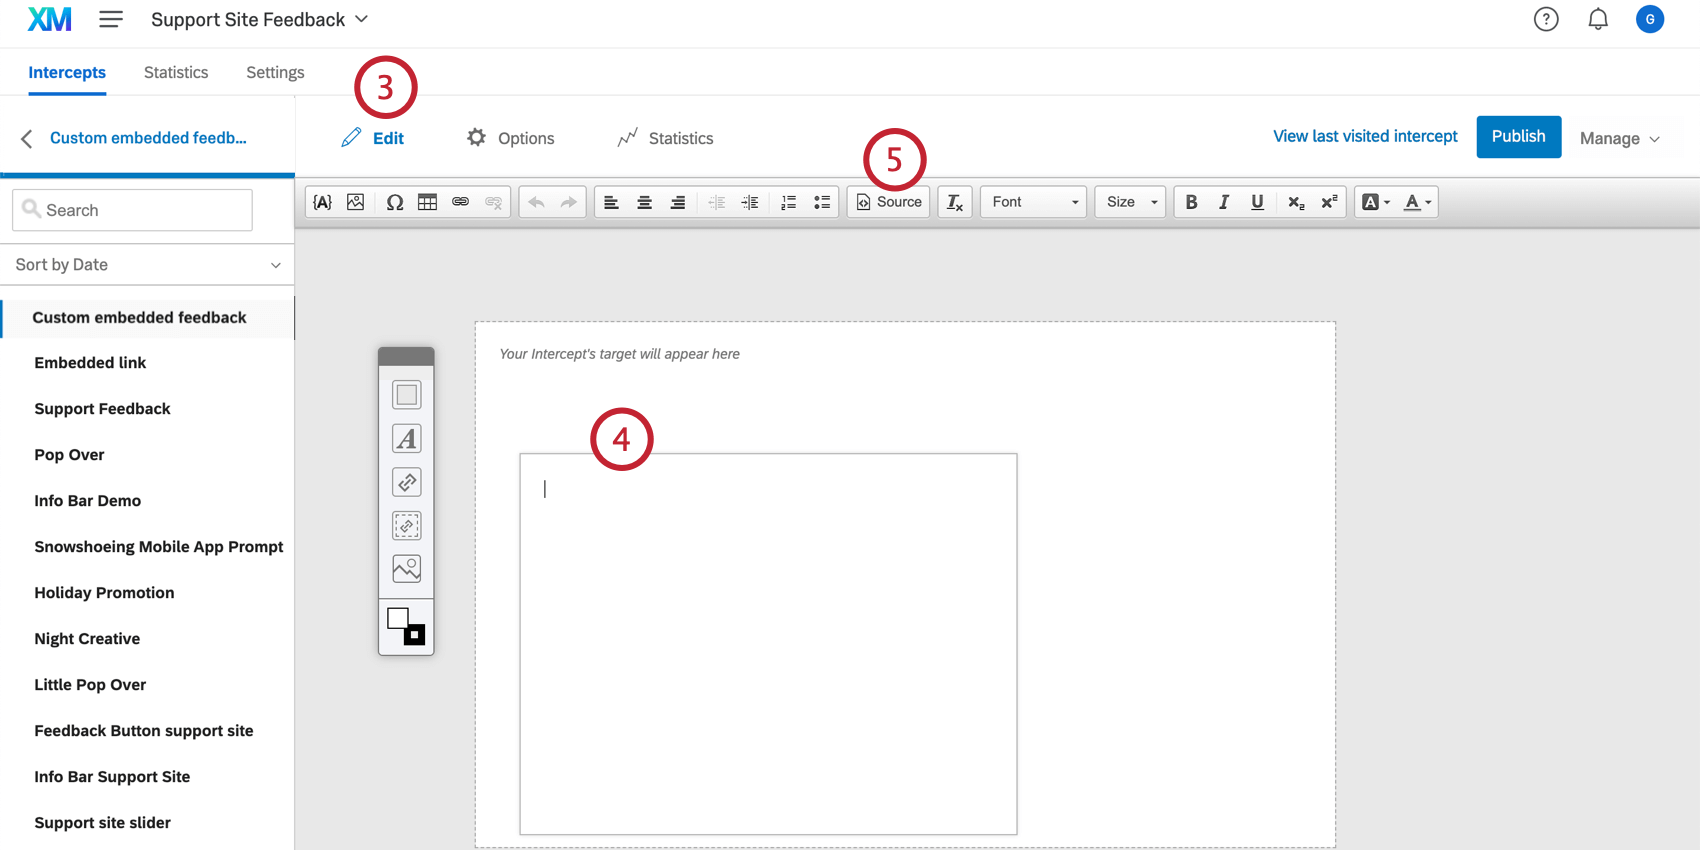
Implementing Custom Embedded Feedback
Attention: The name of your creative cannot exceed 100 characters.
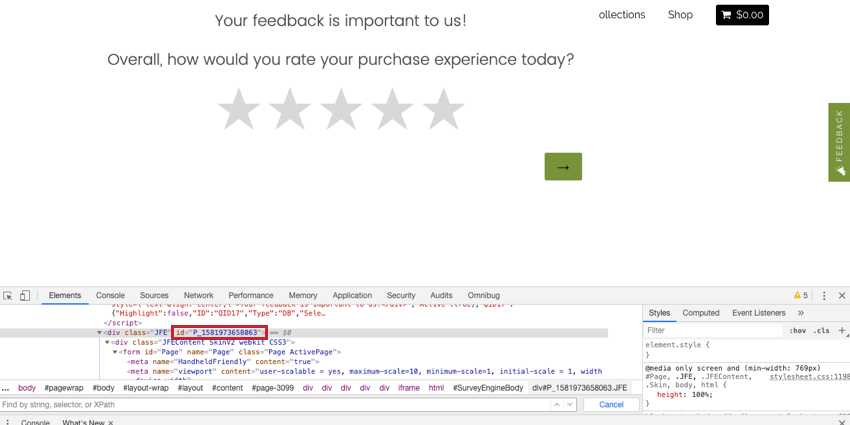
In many cases, an HTML tag with an ID already exists in the proper location, and no site modifications are necessary.
Qtip: Use your browser’s “Inspect Element” function to determine the HTML ID of an element. In most browsers, simply right click on the portion of the page you would like to inspect, and select “Inspect” or “Inspect Element.”
Qtip: In the examples above, we’re embedding a Qualtrics survey right on the page. To achieve a similar effect, when editing your creative, you’d simply add an embedded target in the size and shape you’d like the survey to take up on the page.
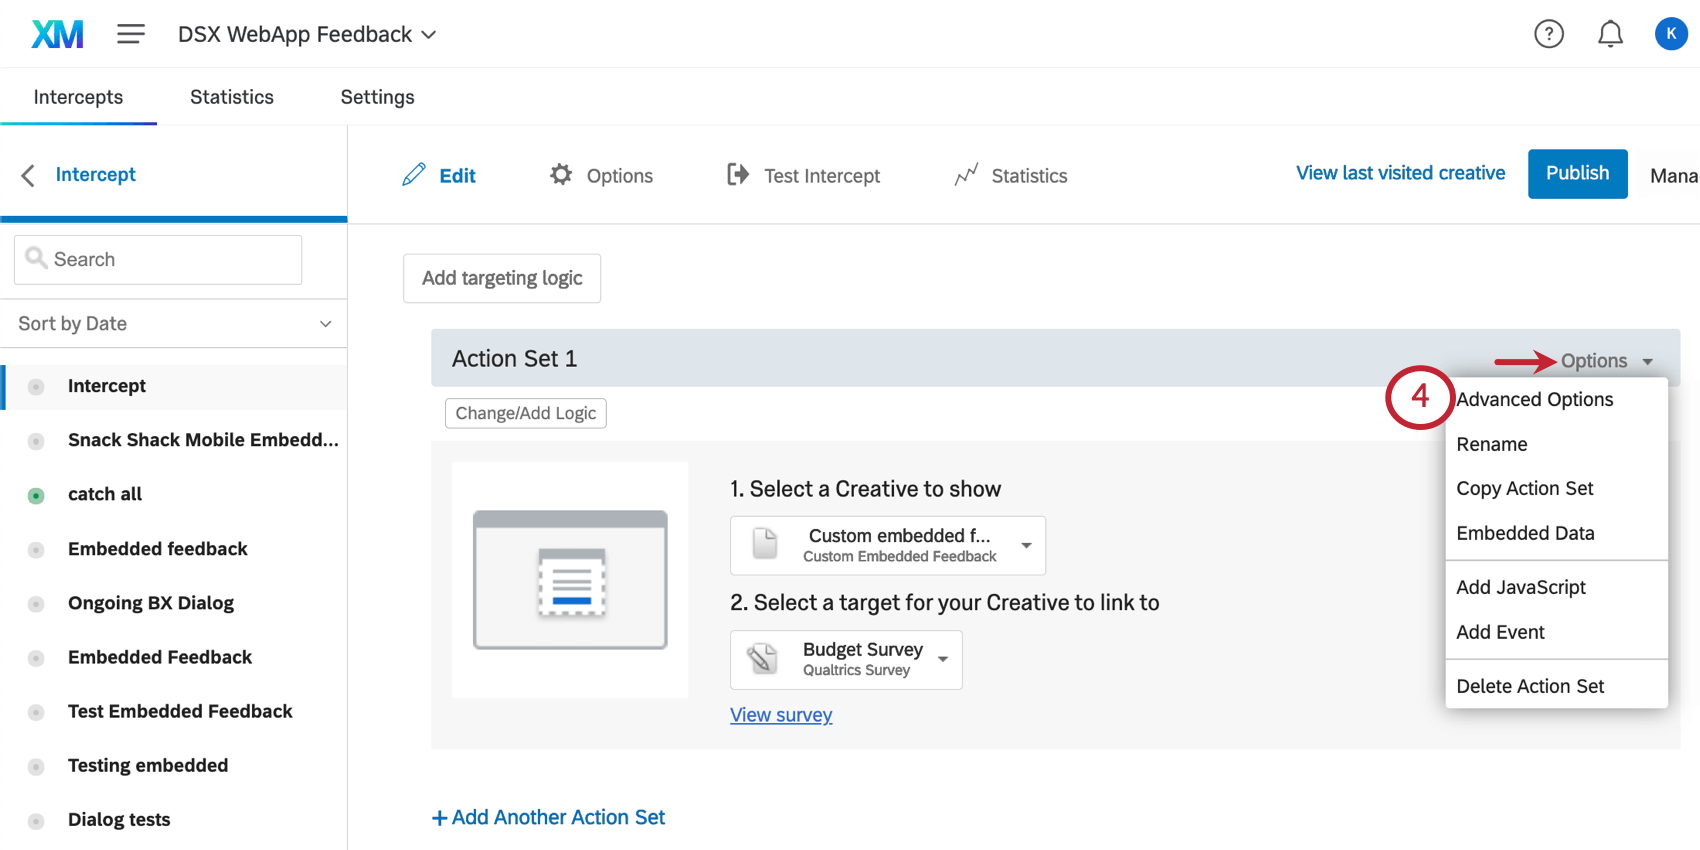
Custom Embedded Feedback Options
In the Options section of your creative, you will find settings specific to custom embedded feedback creatives.
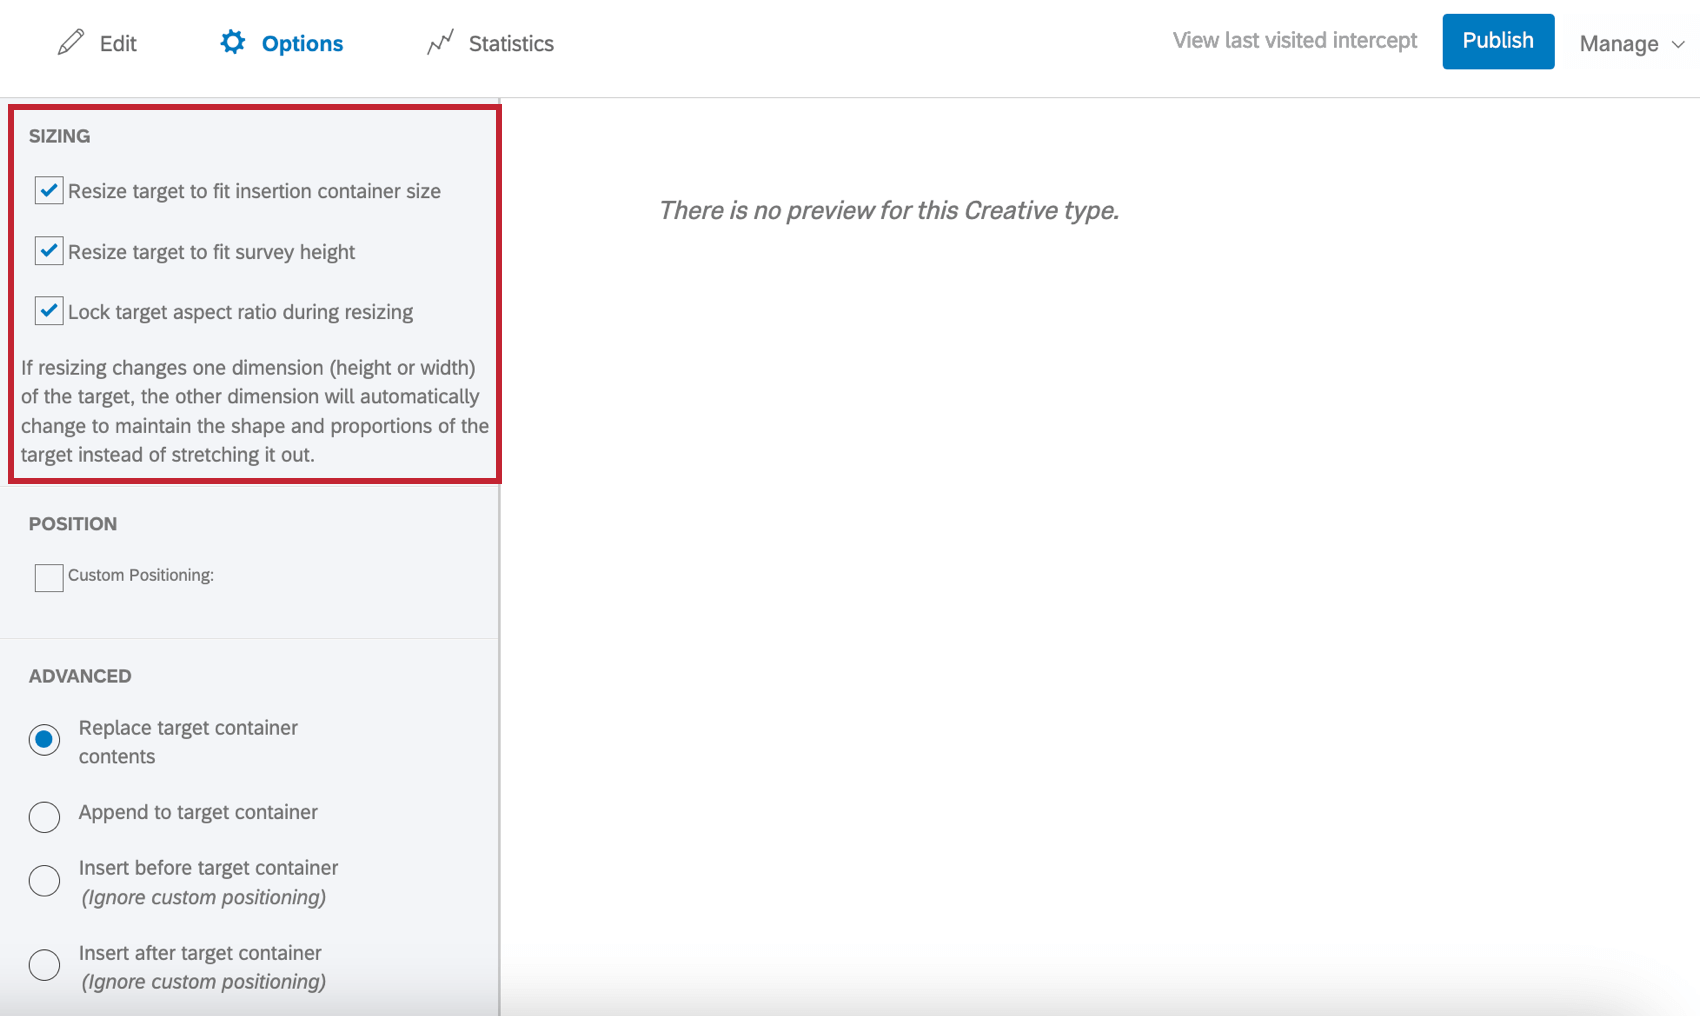
Sizing
By default, custom embedded feedback creatives have a specific size. This size is the size your creative will be displayed, regardless of the size of the screen it is on.
To have your creative dynamically resized to fit different screen sizes and types, check Resize target to fit insertion container size. This will automatically resize the creative to match the size (length and width) of the container you configured when implementing custom embedded feedback.
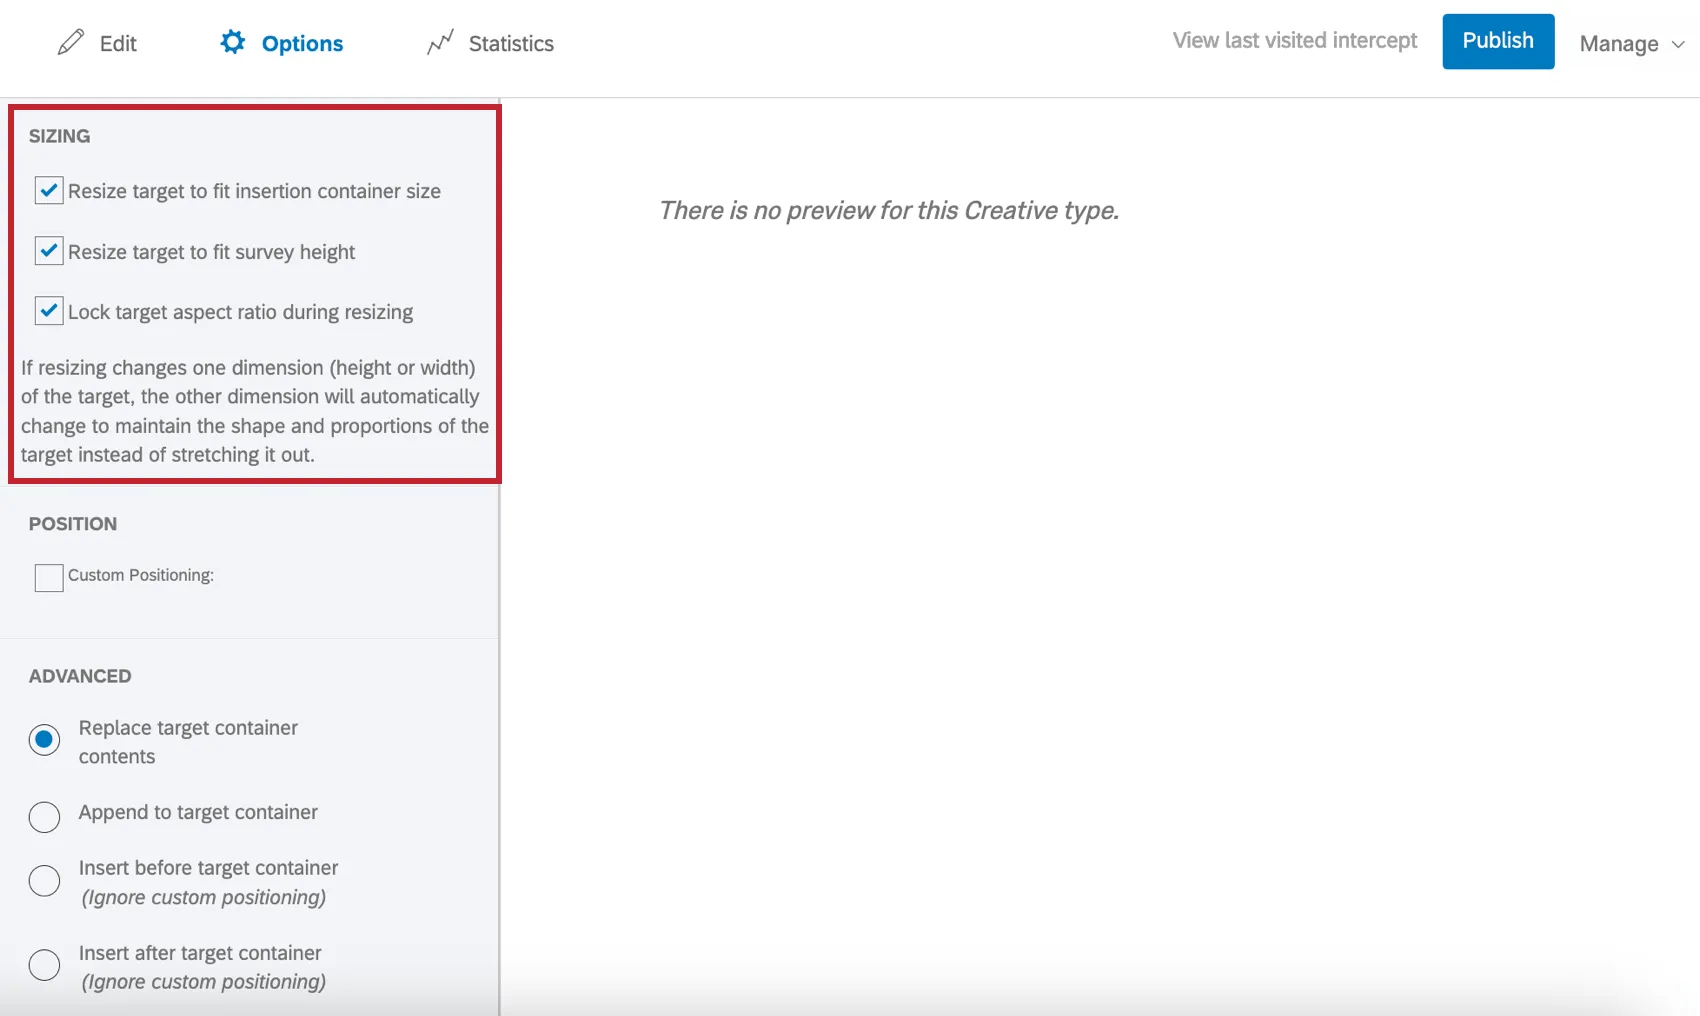
Attention: This option overrides the creative size set in the editing menu. If you would like a specific creative size, do not use resizing options.
Qtip: Containers on websites typically change size due to different page sizes and device types, so choosing this option will allow your creative to resize based on the page size and device type of each user.
When Resize target to fit insertion container size is selected, there are 2 additional options you can select:
- Resize target to fit survey height: When selected, the full height of the survey is shown, and height is not determined by container size.
- Lock target aspect ratio during resizing: When selected, the original proportions of the creative are maintained. Qtip: Selecting this option will prevent text, images, and buttons from changing size even as the creative is resized to fit the container.

Attention: Creatives cannot be resized when Fix to Page is selected within “Custom Positioning”.
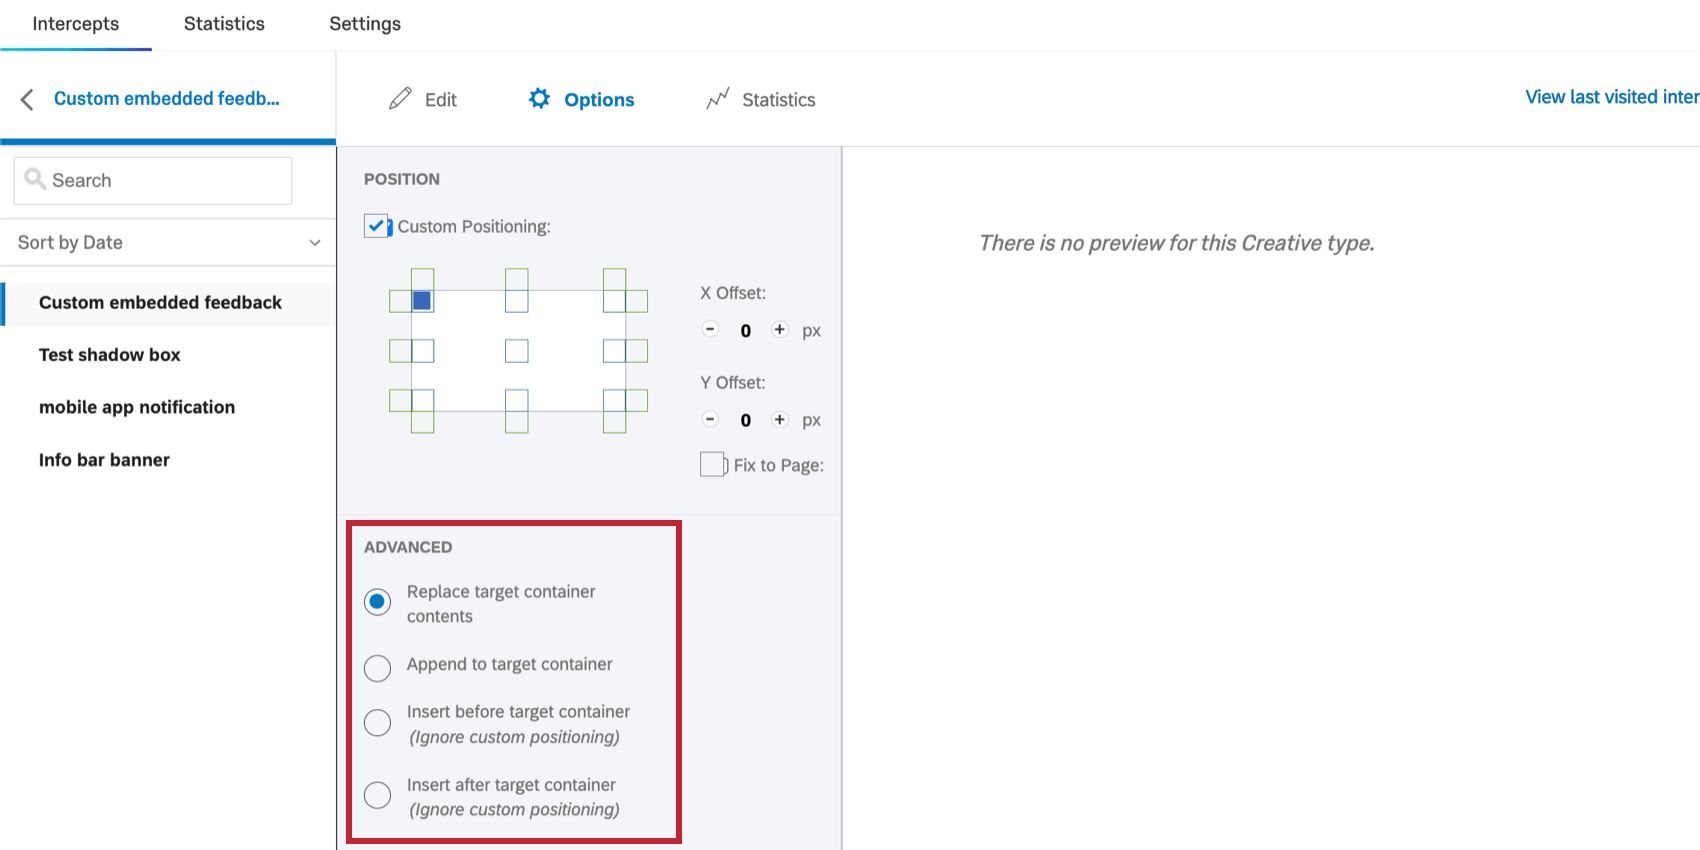
Custom positioning
Sometimes your custom embedded feedback may be smaller than the target container where it will be inserted on your website. In this case, you can use Custom Positioning to specify where in relation to the target container your HTML will display.

For even more control over positioning, you may offset the X or Y position of the creative from its initial position or select Fix to Page so the custom embedded feedback follows the visitor as they scroll.
Replace target container contents
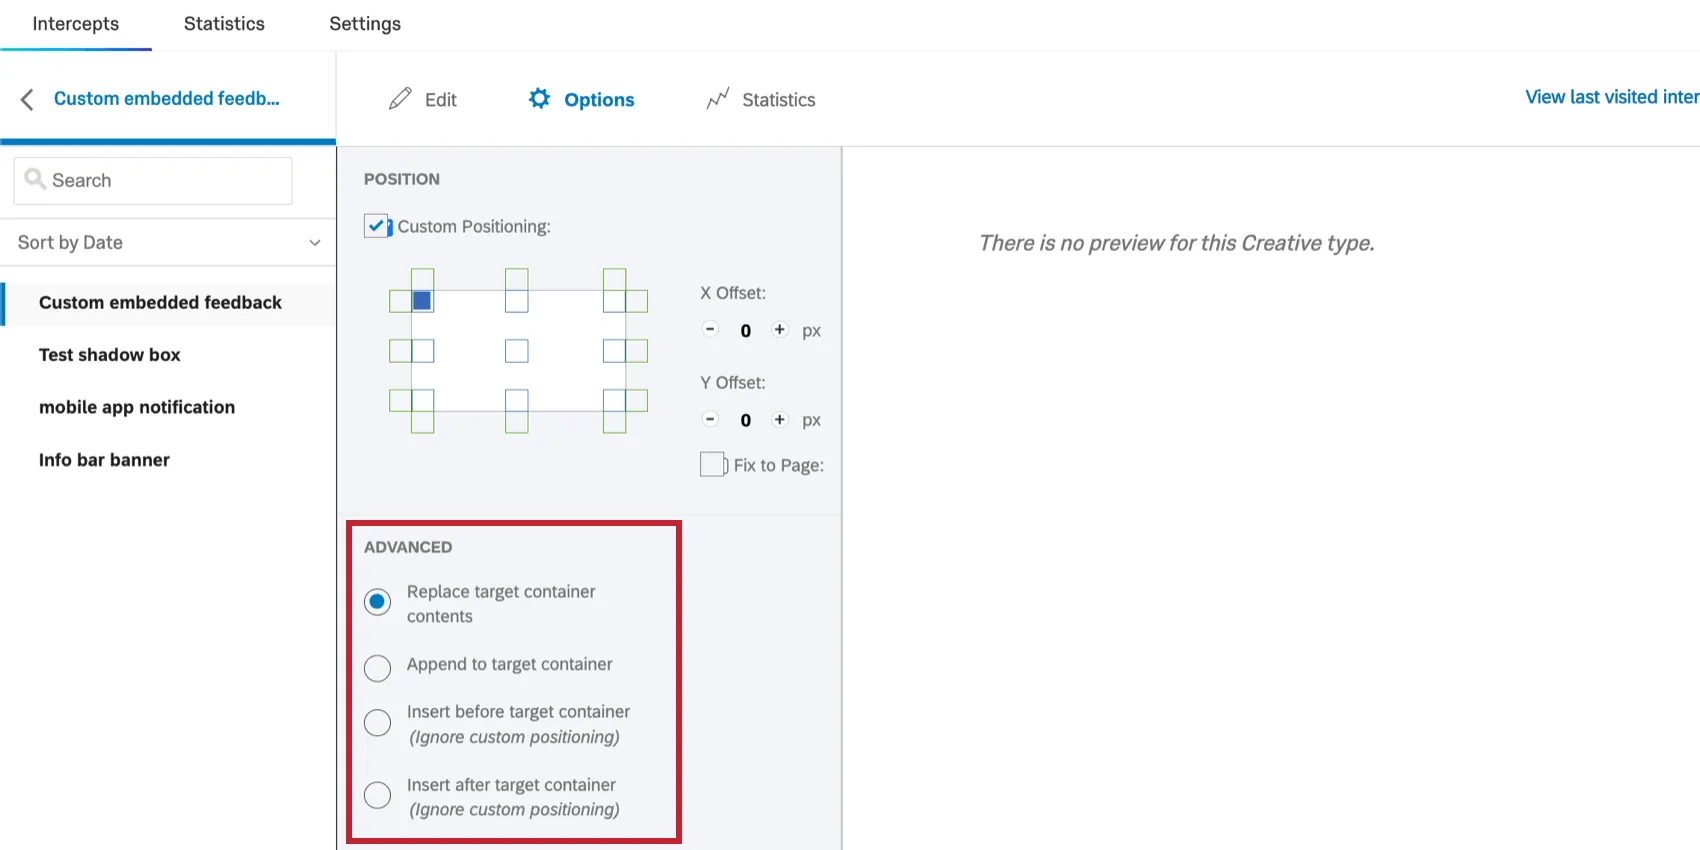
By default, when a custom embedded feedback creative is inserted into a page, it replaces the existing content of the target HTML element. You’ll see this option selected as Replace target container contents.
Append to target container
Rather than replacing the target container contents, you can select Append to target container to place your creative within the target container, but after any existing content.
Insert before target container
This option allows you to insert the custom embedded feedback before the target container.
Qtip: This will ignore the options for custom positioning.
Insert after target container
This option allows you to insert the custom embedded feedback after the target container.
Qtip: This will ignore the options for custom positioning.
A Note On Z-Index
Z-index is a CSS property that specifies which elements on your web page should be on top when elements overlap. By default, creatives will have a higher z-index than other elements on your page so that they are always on top.
This is usually best, but in some cases this may not be preferable. For example, a dropdown menu might be covered by your custom embedded feedback.
Warning: Be careful! You shouldn’t add the Z-index CSS to an embedded target. However, adding Z-index to other element types is okay.

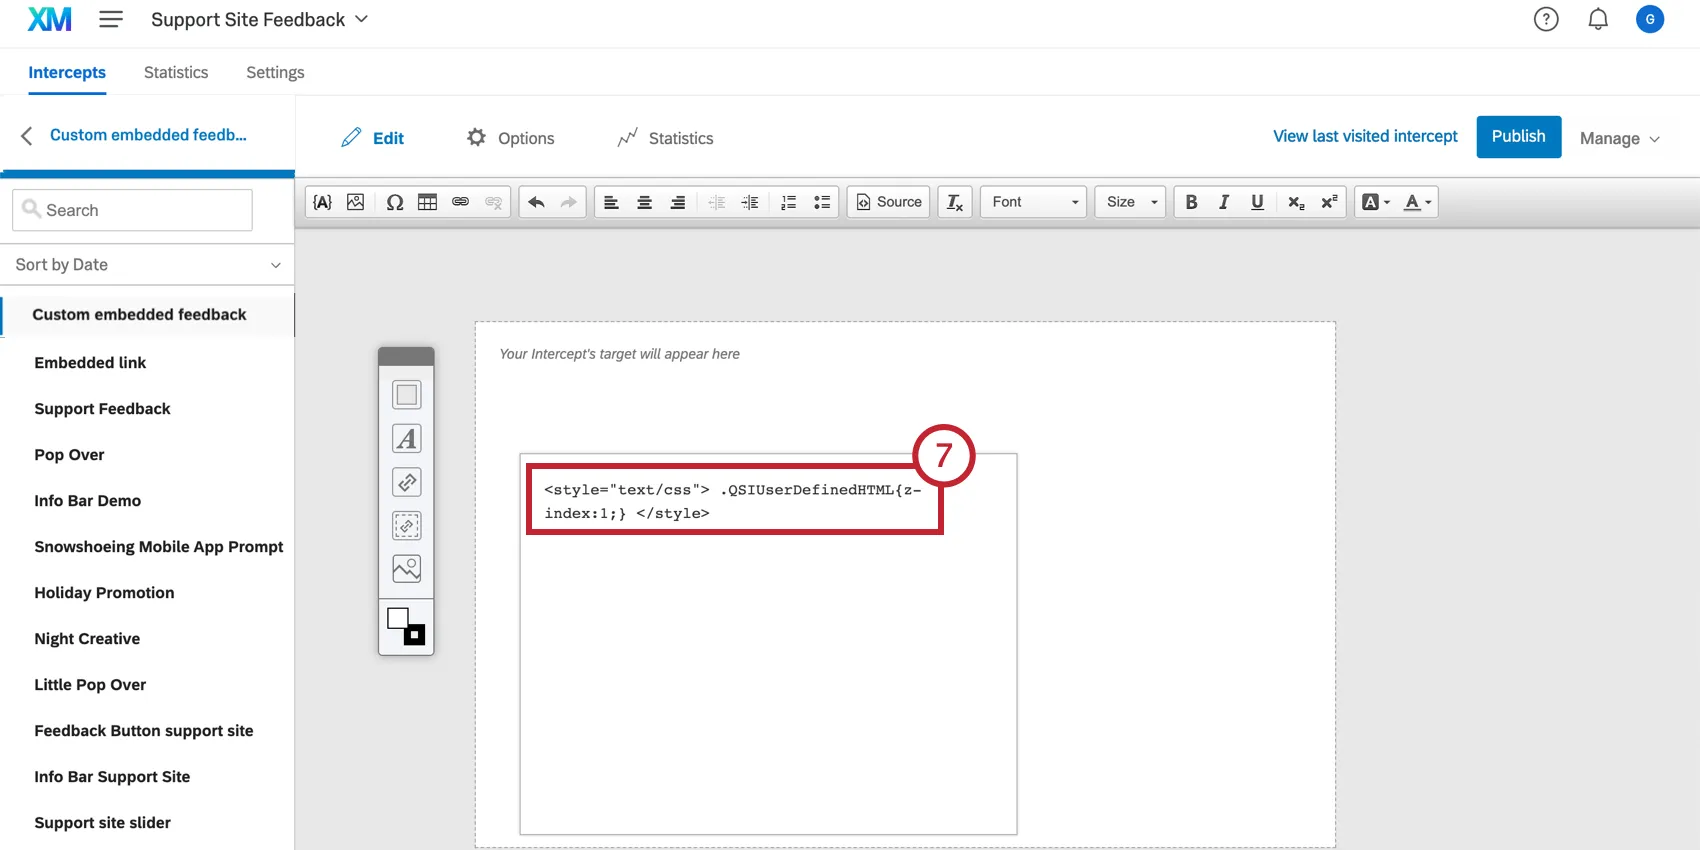
To adjust the z-index of your Custom embedded feedback:
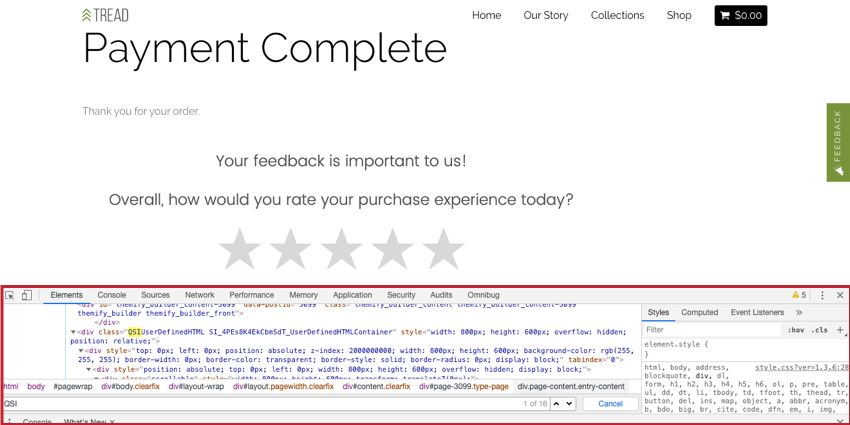
QSIUserDefinedHTML SI_4PEs8K4EkCbmSdT_UserDefinedHTMLContainer and then after replacing the space with a period, we now have:
QSIUserDefinedHTML.SI_4PEs8K4EkCbmSdT_UserDefinedHTMLContainer 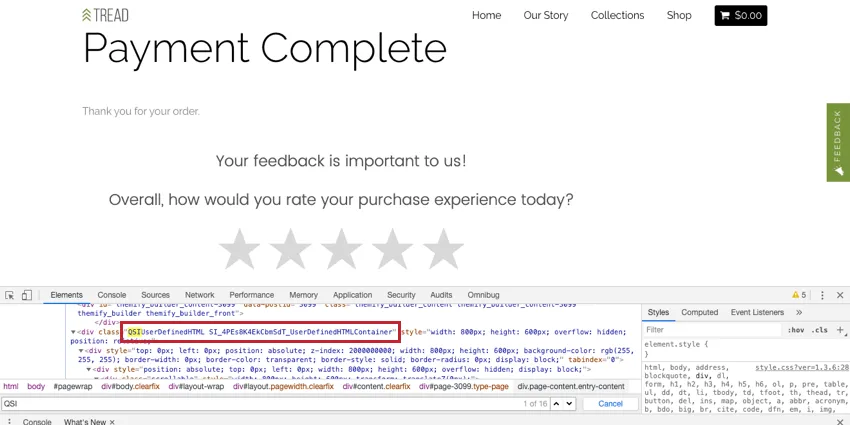
Warning: We recommend against adding the Z-index CSS element to an embedded target because you may have issues with other parts of your page getting accidentally covered. However, adding Z-index to other element types is okay.
<style type="text/css"> .QSIUserDefinedHTML{z-index:1;} </style><style type="text/css"> .QSIUserDefinedHTML.SI_4PEs8K4EkCbmSdT_UserDefinedHTMLContainer{z-index:1;} </style> 
FAQs
I have built my intercept but would like to test it before activation. How can I do that?
I have built my intercept but would like to test it before activation. How can I do that?
That's great! Thank you for your feedback!
Thank you for your feedback!