-

Qualtrics Platform -

Customer Journey Optimizer -

XM Discover -

Qualtrics Social Connect
Previewing & Publishing Journeys
About Previewing and Publishing Journeys
After you’ve built your journey, you must preview and test it before publishing live. Previewing your journey is important because it ensures that your journey processes the correct traveler data and sends the desired actions when travelers enter the different milestones of your journey. Once you’ve previewed your journey, you can publish it live, and it will begin processing travelers and sending actions.
Recommended Testing Process
Follow the below workflow to properly test and launch your journey:
- Preview your journey using a data upload.
- Preview your journey using historical data.
- Test your journey with shadow mode.
- Publish your journey live.
Previewing Journeys
After you’ve built your journey, you can Preview it using traveler data. Previewing your journey can help you test that your journey is working properly by simulating the journey’s results before it is published live. You must successfully preview your journey at least once before you can publish it live.
The preview feature works by using historical traveler data already available in your account or a data upload to test what would happen if those simulated travelers were to go through your newly built journey.
The actions from the journey are never sent to the third-party systems, so you can safely run as many previews as you need. Once your preview is processed, you can see which travelers were processed, what rules were evaluated, and what actions were generated by the journey.
You may want to preview multiple times with different data to ensure that the journey behaves as expected. We recommend performing a final preview that spans a large amount of time (at least a month) to make sure that your journey logic can handle the edge cases that might arise in a larger data set.
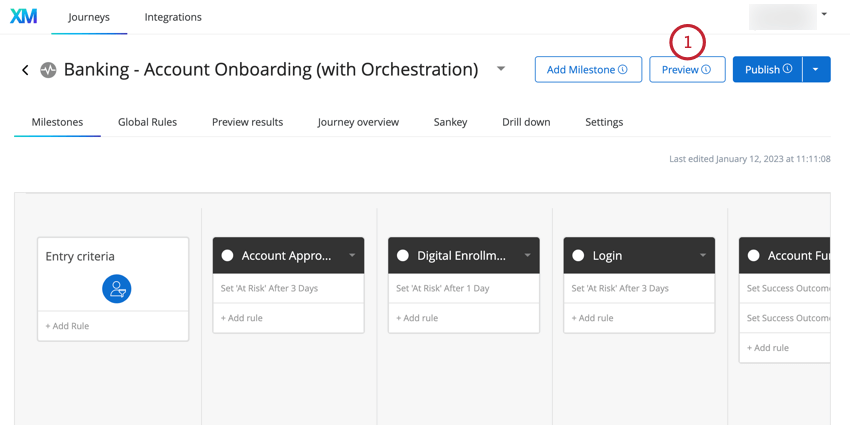
- After creating your journey, click Preview.
- Choose the data to use for the preview. You have 2 options:
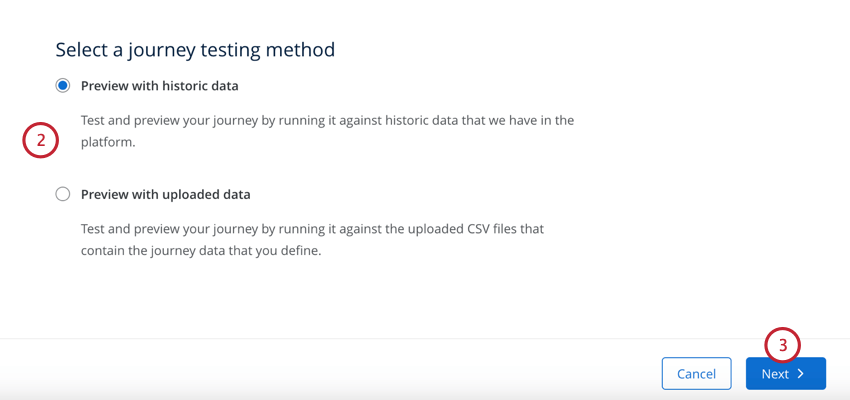
- Preview with historic data: Test your journey using historic traveler data that has already been ingested into the Customer Journey Optimizer. This option is useful if you have existing data and want to see what would have happened if the journey had been live for the past week, month, or quarter. See Previewing with Historical Data for more information.
- Preview with uploaded data: Test your journey by uploading a CSV file with traveler data. This option is useful if this is your first journey and you have not yet processed travelers through a live journey. See Previewing with a Data Upload for more information.
- Click Next.
The remaining steps will depend on your selected preview method. Visit the linked sections for more instructions.
Previewing with Historical Data
Follow these steps after choosing Preview with historic data when previewing your journey.
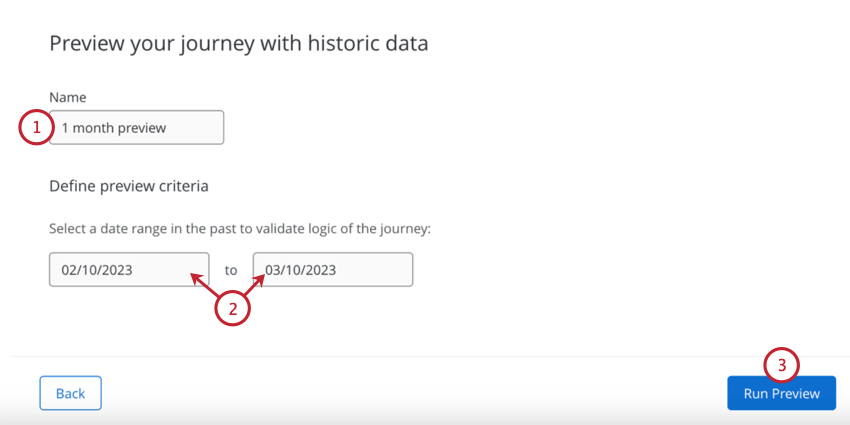
- Give your preview a name so you can identify what data was used in the preview.
- Select the date range for the time period that contains the traveler data you want to test with. Click on one of the boxes to open a calendar date picker to choose a date.
- Click Run Preview.
Your preview will begin processing. Once it’s finished, go to the Preview results tab to view the results of your preview.
Previewing with a Data Upload
Follow these steps after choosing Preview with uploaded data when previewing your journey. The data that you need to upload for your preview is dependent on the data that is used in your journey’s map.
- Give your preview a name so you can identify what data was used in the preview.
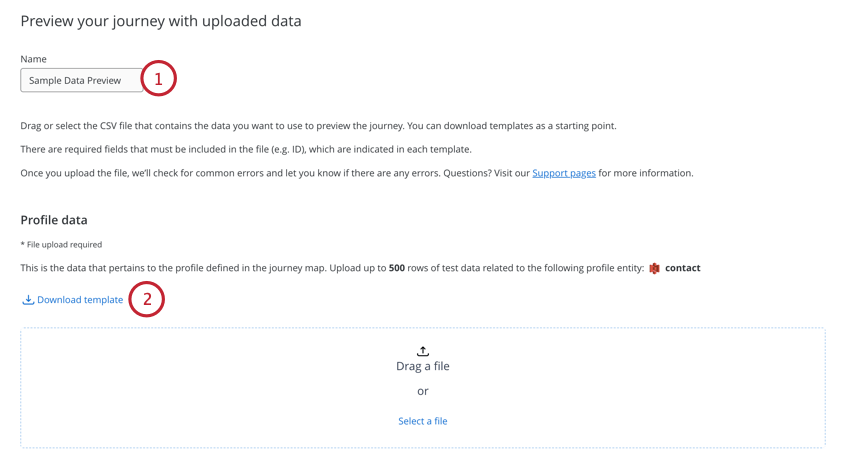
- The first data upload you’ll need to provide is the Profile data. Click Download template to download a CSV file that contains the fields you’ll need to upload.
- Open the CSV file in a spreadsheet editor on your computer.
- Add test profile data. You do not need to include values for all fields in all entries. You can include up to 500 rows of test profiles.
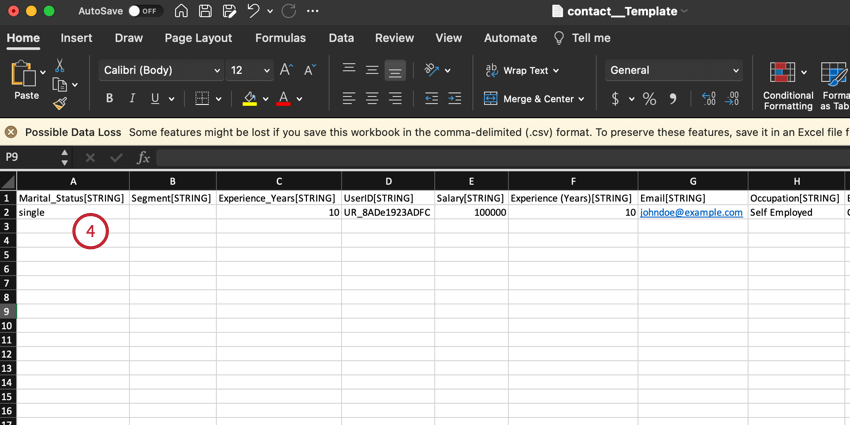
- Save your file as a CSV.
- In the Customer Journey Optimizer, click Select a file and then select the file on your computer. Alternatively, you can drag the file into the Select a file box to upload it.
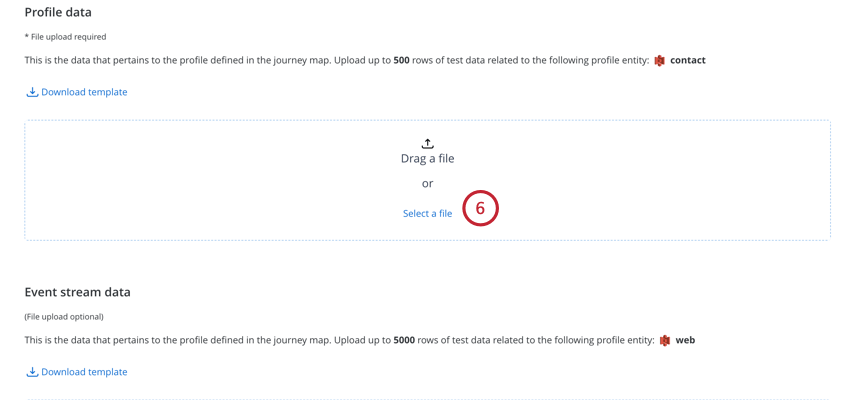
- You can optionally upload Event stream data. The event data you upload here is useful for testing different paths through your journey. The process for uploading event data is the same as it is for profile data (download a template file, add data to the file, and then upload the file). You can add up to 5000 rows of event data for each file in your upload.
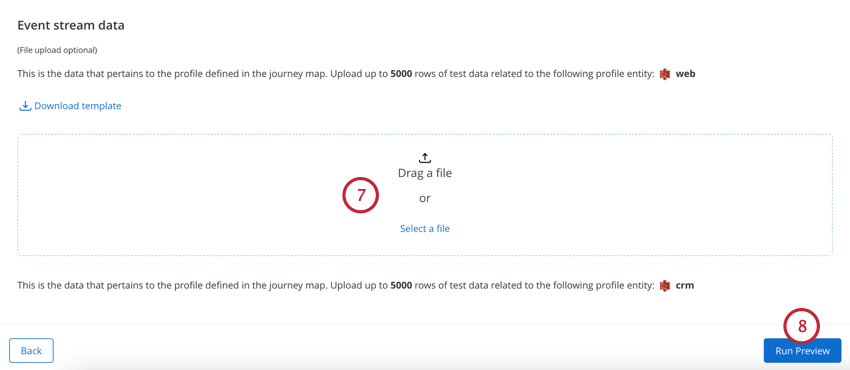
- Click Run Preview.
Your preview will begin processing. Once it’s finished, go to the Preview results tab to view the results of your preview.
Viewing Preview Results
To see the results of your preview, go to the Preview results tab in your journey. This page displays a table containing all previews for your journey.
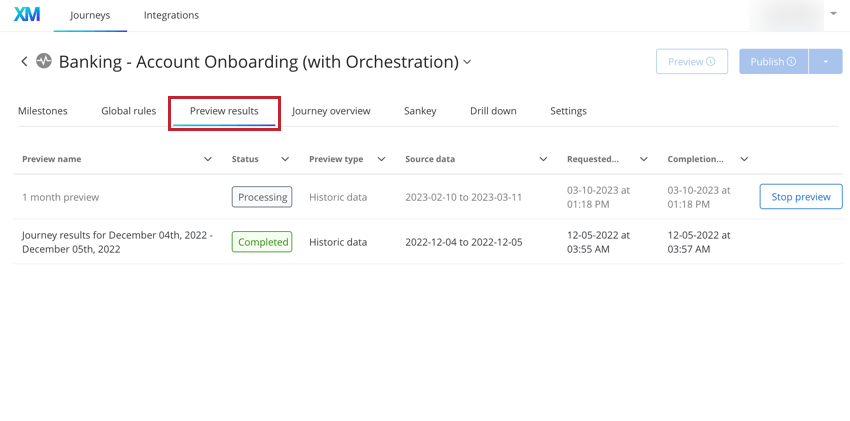
This table displays the following information about each preview:
- Preview name: The name given to the preview.
- Status: The preview’s status. Possible statuses are Completed, Processing, Stopped, and Failed.
- Preview type: The type of preview, either historic data or data upload.
- Source data: If a historic data preview, this will be the date range used for the preview. If a data upload preview, this will be the file names of the uploaded files.
- Requested date: The date and time that the preview was started.
- Completion date: The date and time that the preview finished processing.
- Stop preview: If the preview’s status is “Processing,” then you can click Stop preview to cancel the preview.
Click on a preview run in the table to view the Journey paths diagram for your journey. Using this Journey paths diagram is the exact same as using the Journey paths diagram that’s generated when you publish your journey live, with one exception. Preview journey paths diagrams do not allow filtering. See Viewing Journey Paths for more information about using this visualization.
Testing with Shadow Mode
After previewing your journey, you can test it using shadow mode. Shadow mode executes every step of a live journey, but it does not send actions to third-party systems. In shadow mode, the Customer Journey Optimizer will process all entities and events, execute all rules, and calculate analytics, but not push changes back to your connected systems. This is a safe way to validate that your journey is doing what you expect it to do with live customer data.
To test your journey with shadow mode:
- Click the Publish button.
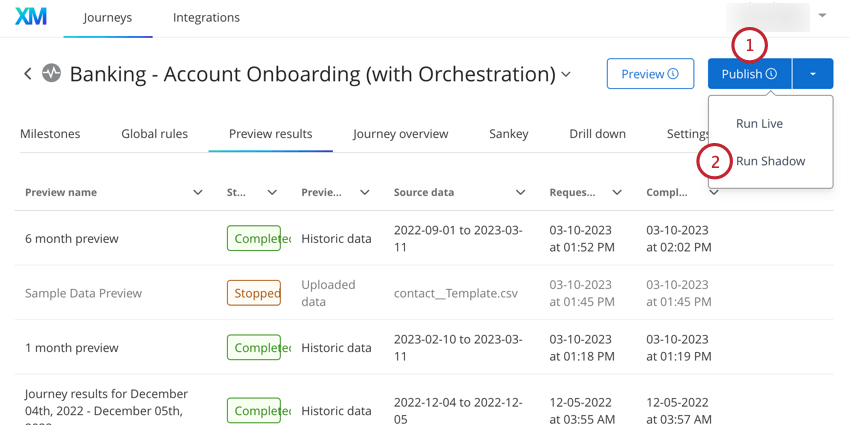
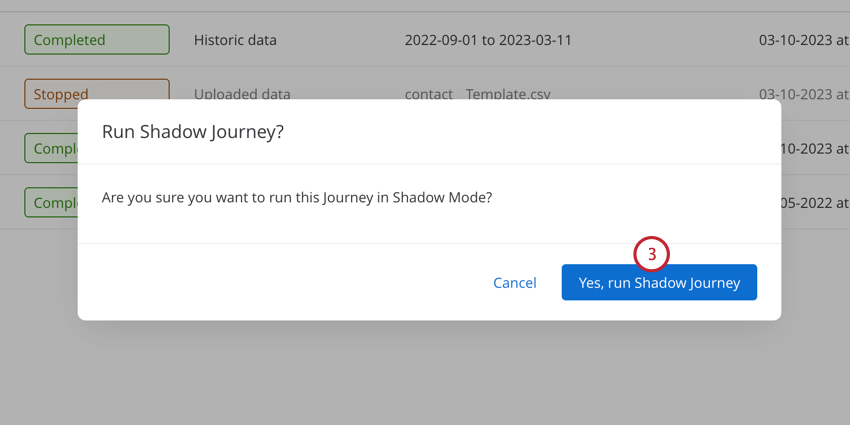
- Select Run Shadow.
- Click Yes, run Shadow Journey.
Note that once your journey is running in shadow mode, you cannot make any changes to the journey rules or milestones.
As travelers begin to process, go to the Journey overview tab to view the results of your journey. You can also view the Journey paths diagram for your journey.
Click Stop journey to pause shadow mode. This allows you to make changes to your journey and perform more previews before publishing live.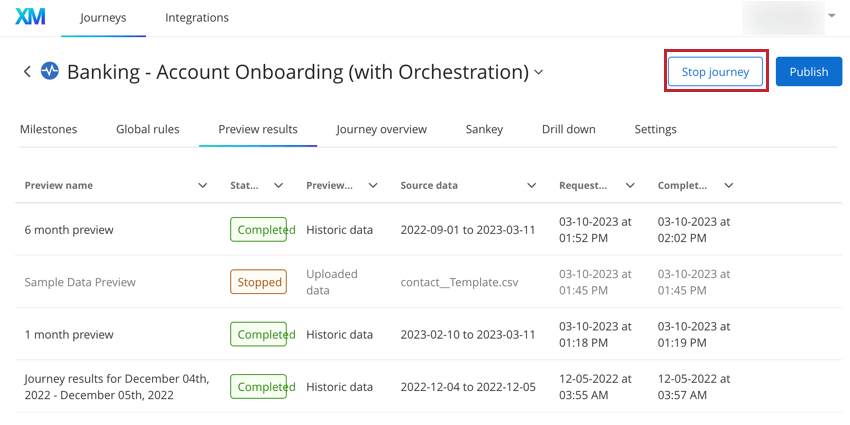
To relaunch your stopped shadow journey:
- Make any needed changes to your journey.
- Run a journey preview (either data upload or historical).
- Enable shadow mode.
Publishing Journeys
Once you’ve previewed your journey and have validated that it’s processing events correctly, it’s time to publish it live.
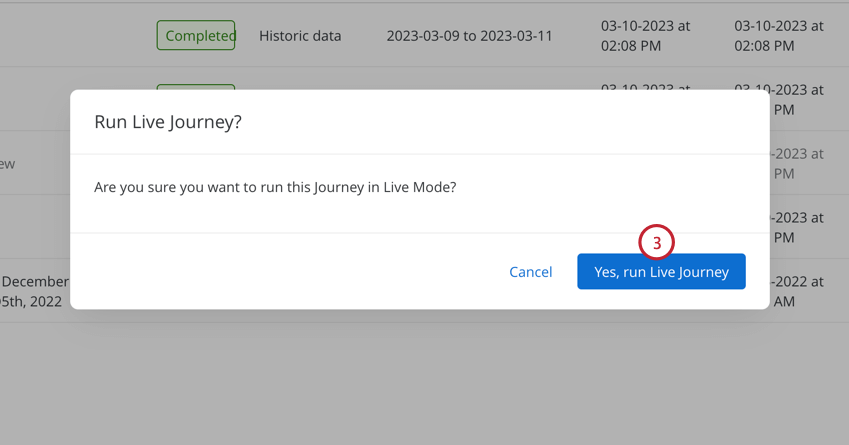
To publish your journey:
- Click the Publish button.
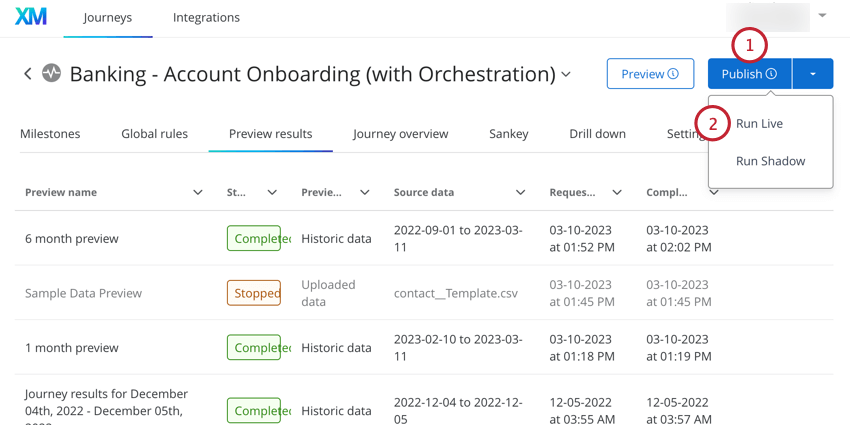
- Choose Run Live.
- Click Yes, run Live Journey.
Your journey will now begin processing real traveler data and it will fire actions to third-party applications. You can view the results of your journey by going to the Journey overview and Journey paths tabs.
Note that you cannot make any changes to your journey while it is published live. You must stop your journey to make any changes. Click Stop Journey to stop your journey from processing events.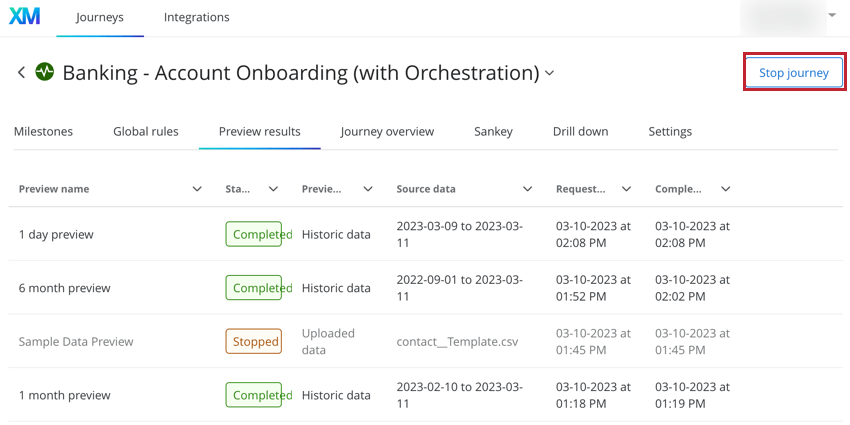
Once a journey is stopped, no new entities or events will be processed through that journey. You can now make changes to your journey’s milestones and rules. Once you are finished with your edits, you should preview the journey again before publishing it live again.