
Intercept Settings
What's on this page
About Intercept Settings
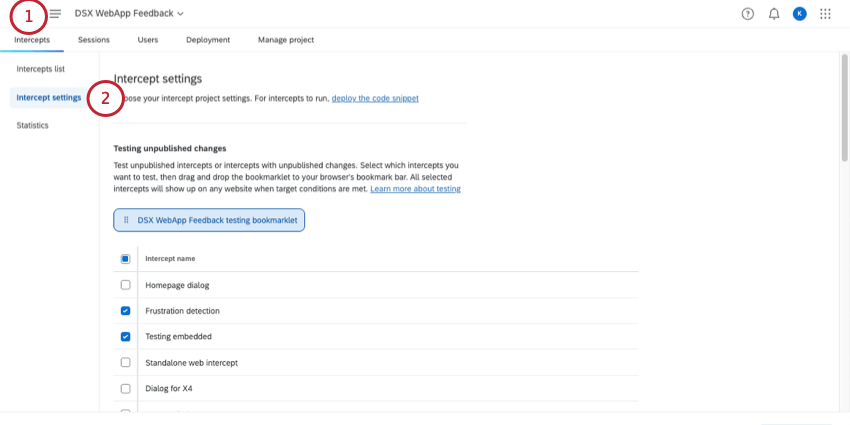
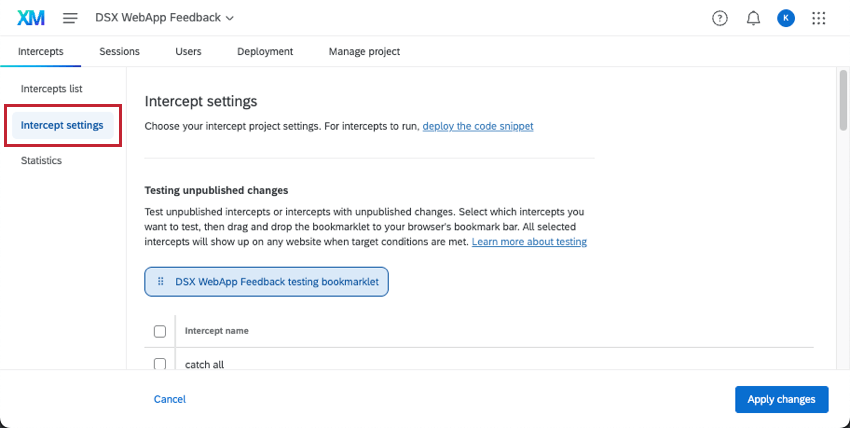
By going to Intercepts, then Intercept settings, you can set up project-wide settings for your intercept behavior. Here, you can test unpublished changes, set up approval processes, and add notification emails. You can also configure single-page application settings, intercept loading options, and browser storage.

Whenever you make changes to the intercept settings, make sure you save them by clicking Apply changes.
Testing Unpublished Changes to Intercepts
On the Intercepts settings page, you can run tests on multiple intercepts at once. Using the bookmarklet provided, you can test your unfinished, unpublished intercepts on any website you want. This can be a great way to make sure your intercepts work the way you want before publishing changes to the live code on your website, where visitors can see.
For steps and troubleshooting tips, see Testing Unpublished Changes to Intercepts.
Qtip: Do you want to create a test session replay to explore, complete with replay capture and frustration detection? See creating test sessions instead.
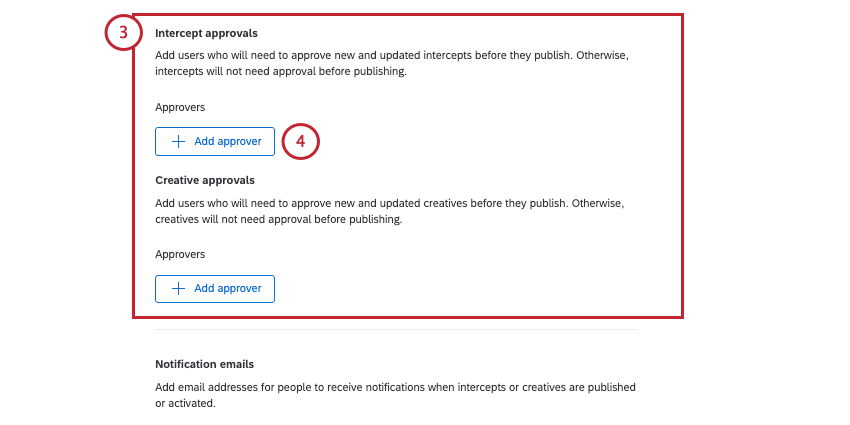
Making Approval Processes for Intercepts and Creatives
Approval requirements can be used to ensure only quality content is published to your website. With the approval system, you can specify individual users or groups of users who must be given permission for a creative or intercept to be published.
ADDING APPROVAL REQUIREMENTS
In this section, learn how to make it so that users must be granted approval before their changes are published.
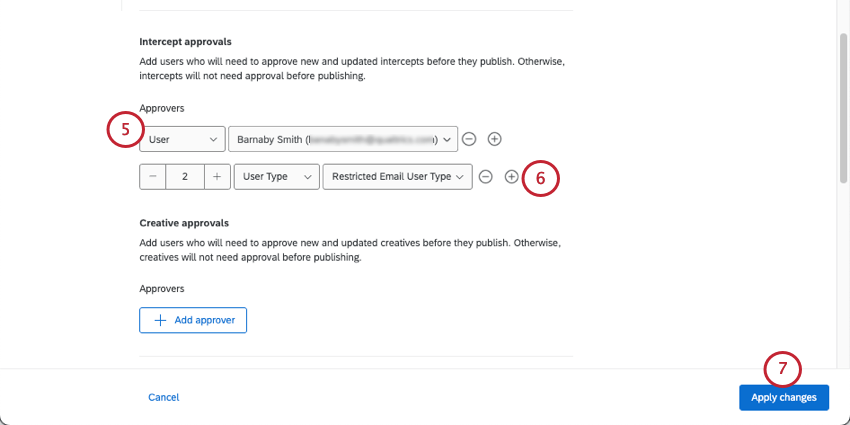
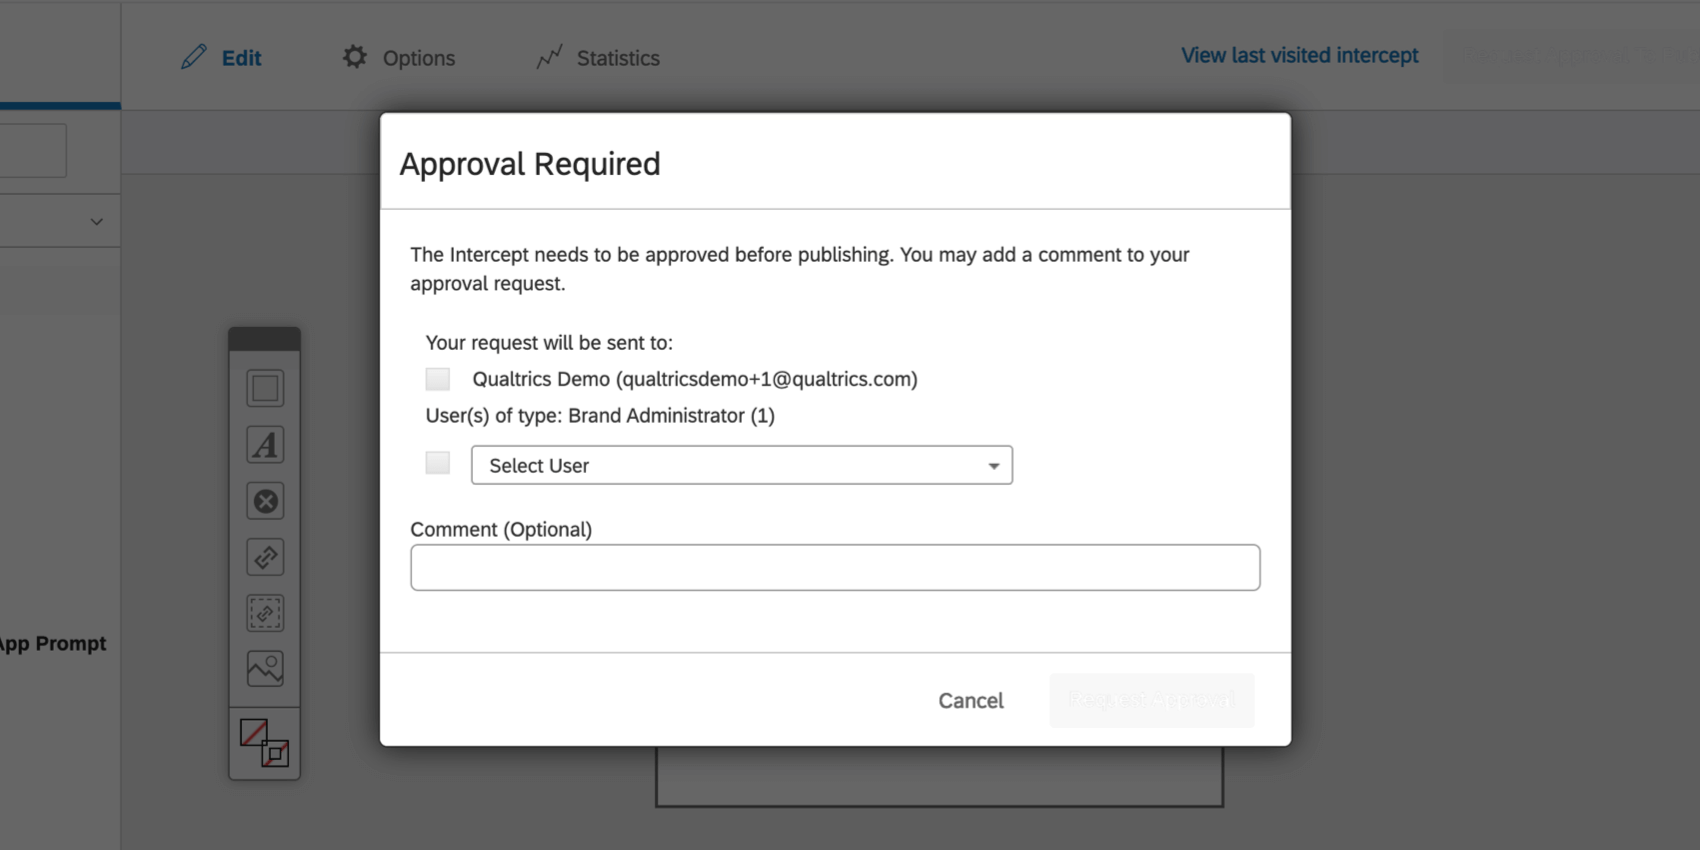
- If set to User, select the user who must approve an intercept or creative before it can be published.
- If set to User Type, select a user type. Example: In the above image, intercepts need the approval of Barnaby Smith and 2 Brand Administrators. Creatives, however, do not require approval.
 Qtip: Even if you belong to a certain user type, your own intercepts or creatives will follow user type rules. For example, let’s say you are a Brand Administrator. If you have configured an intercept to require an approval from one Brand Administrator user, you will still need to explicitly approve your own request to publish.
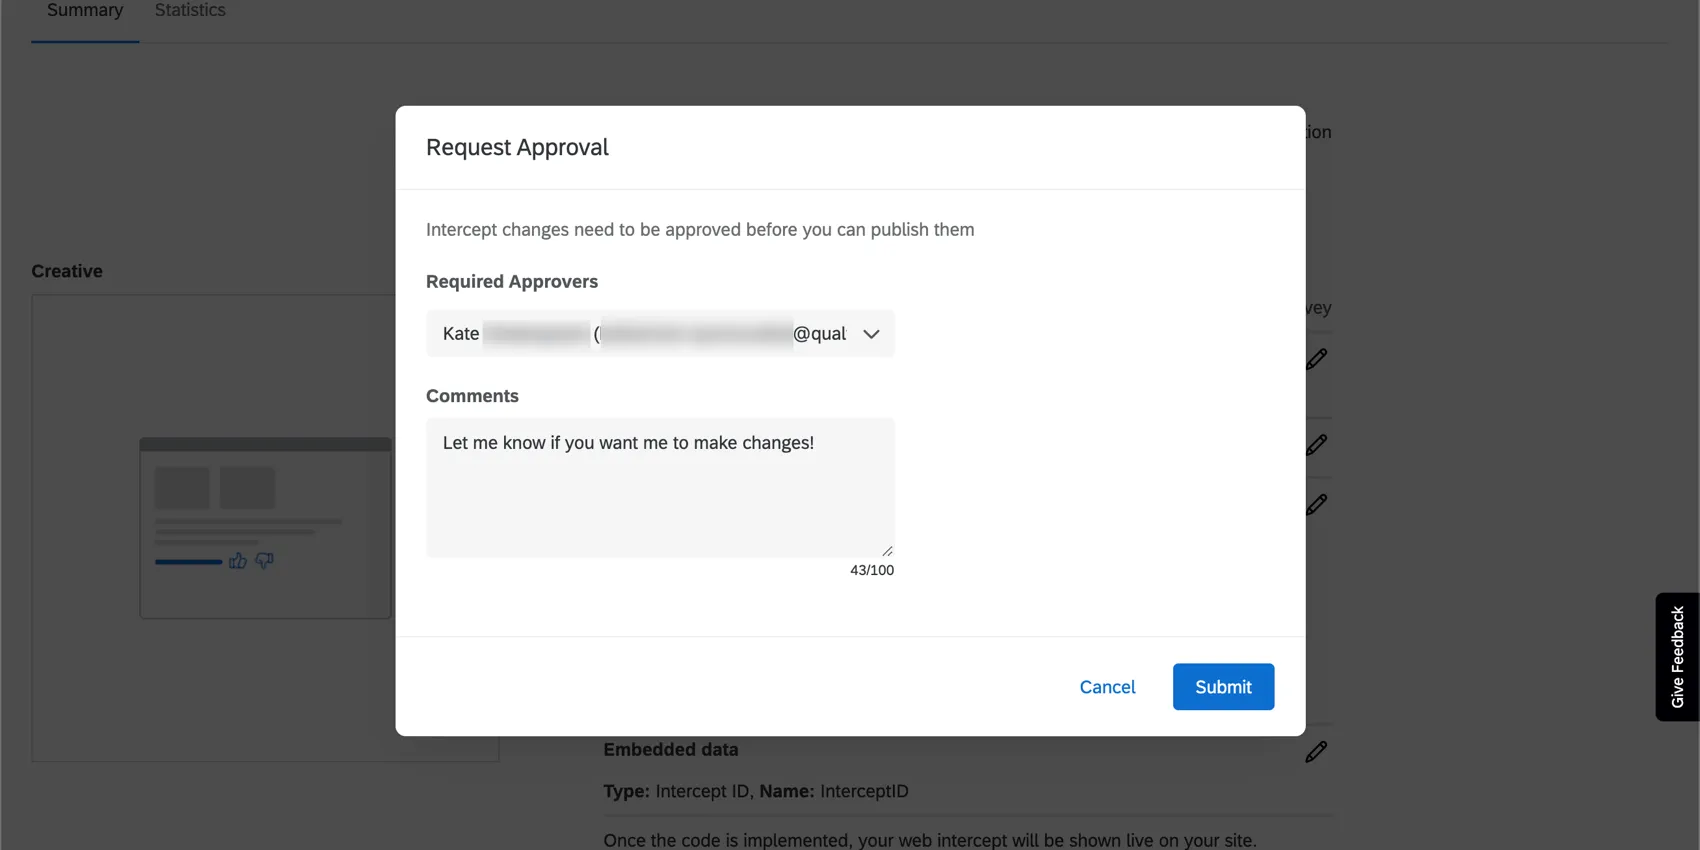
APPROVEE PROCESS
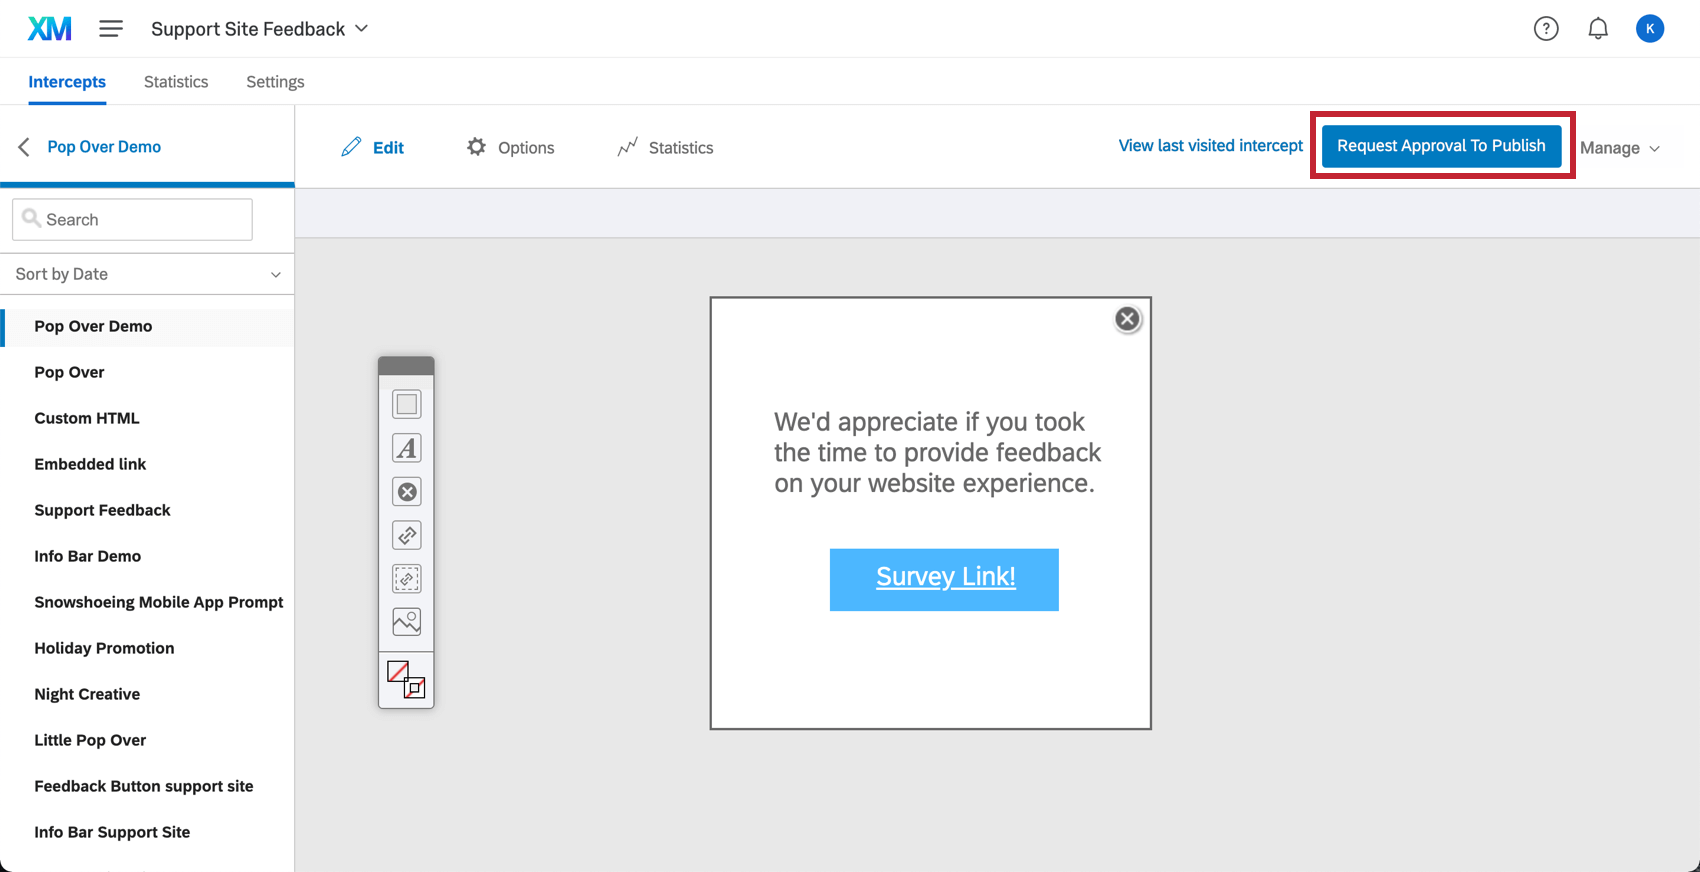
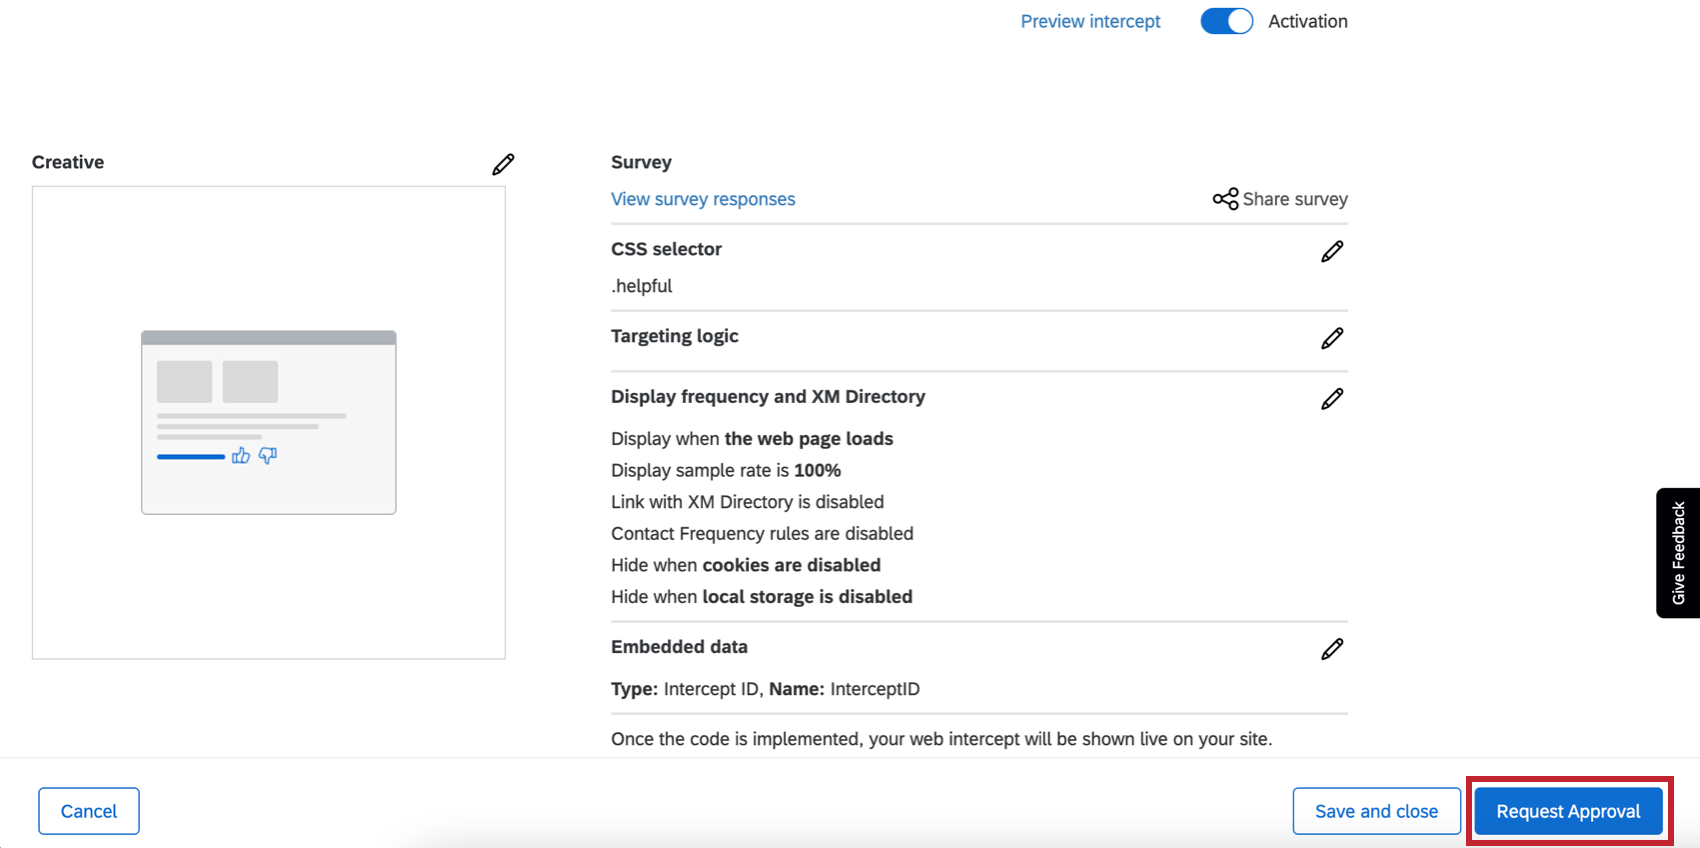
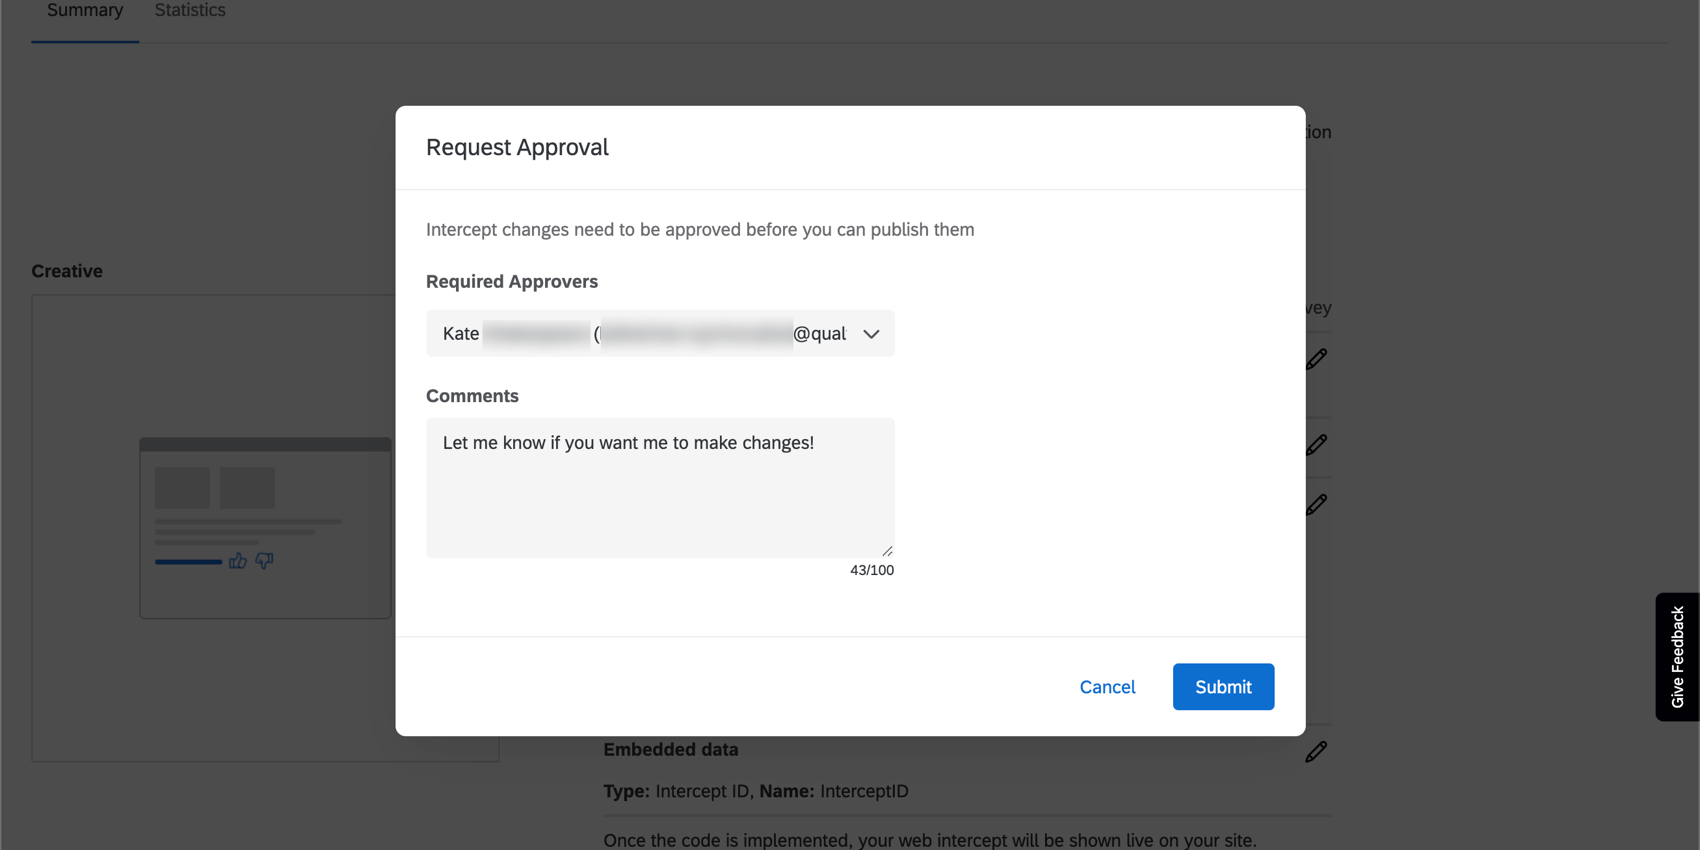
When a user goes to publish new content, they will see a Request Approval to Publish button instead of a Publish button.
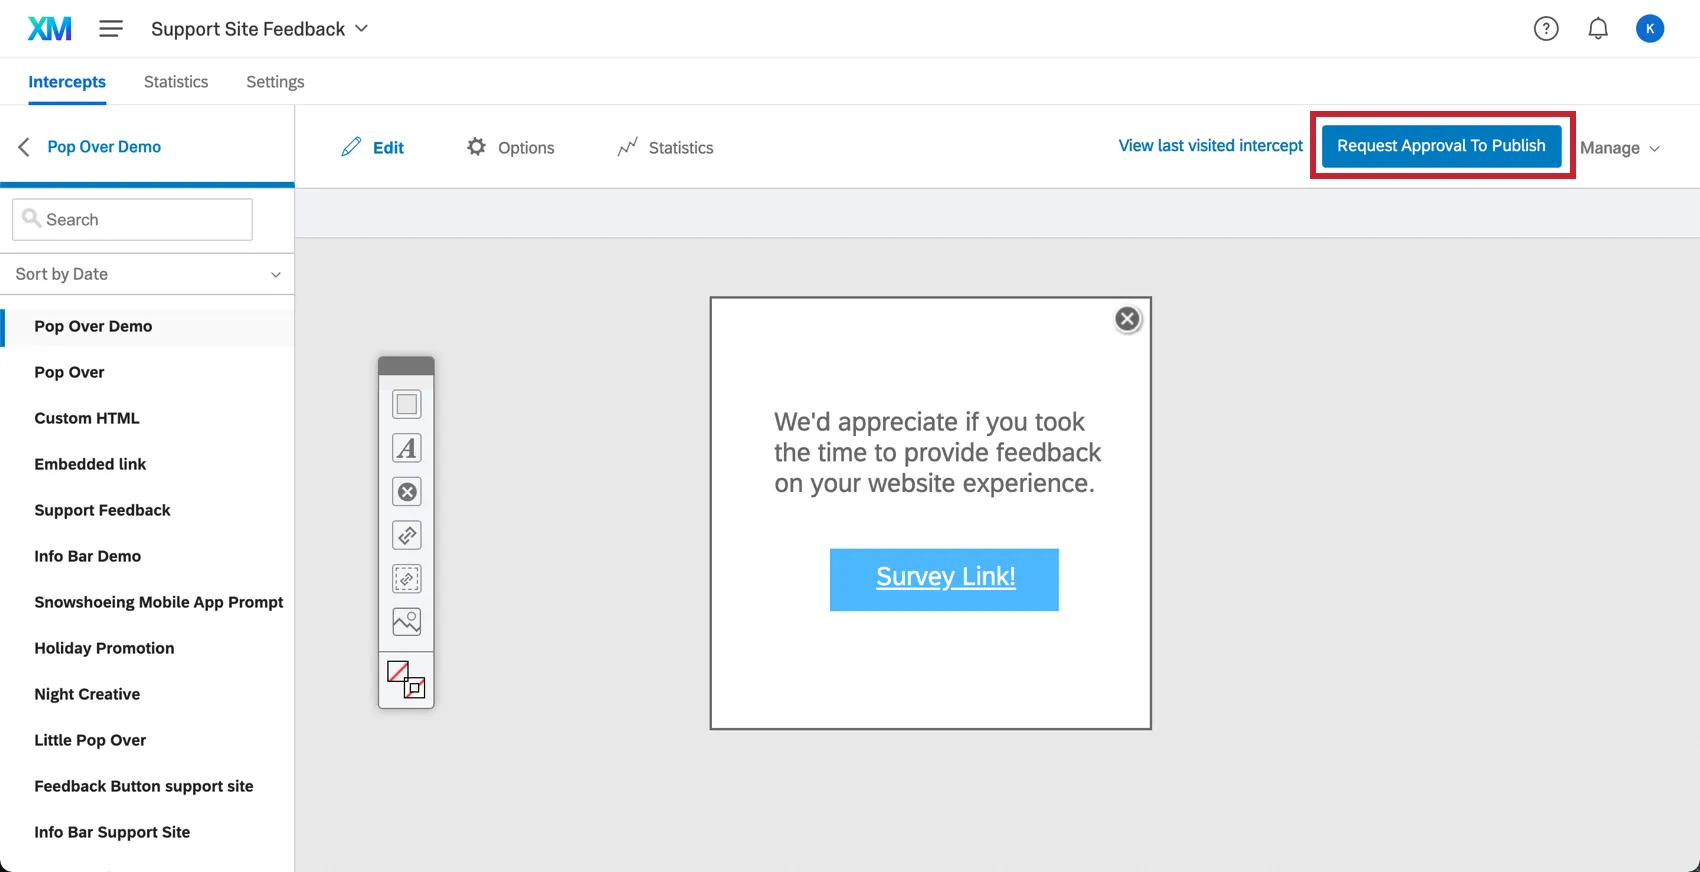
After clicking this, the user will have to select an individual or group from your list to approve their change. That person will receive an email with the opportunity to either approve or reject the changes.
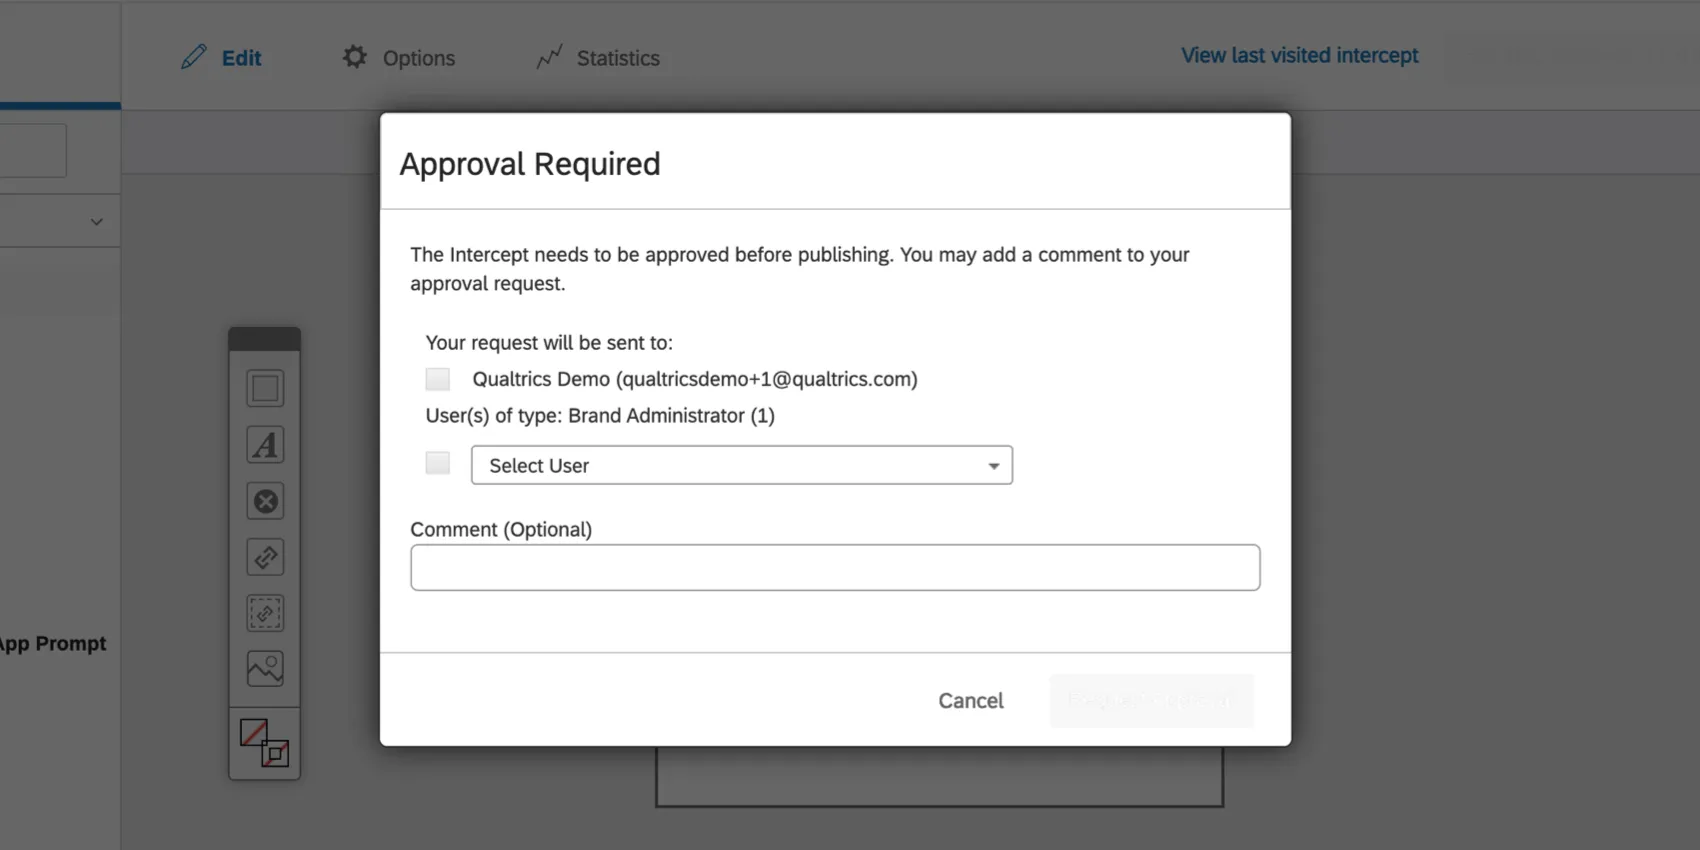
The same is true for guided intercepts, such as the responsive dialog and feedback button. At the end of guided creation, you’ll see a Request Approval button and be able to pick who you’d like to review your intercept.

You can also choose to cancel your current request for approval and resend a new one if you find you’d like to make more changes.
APPROVER PROCESS
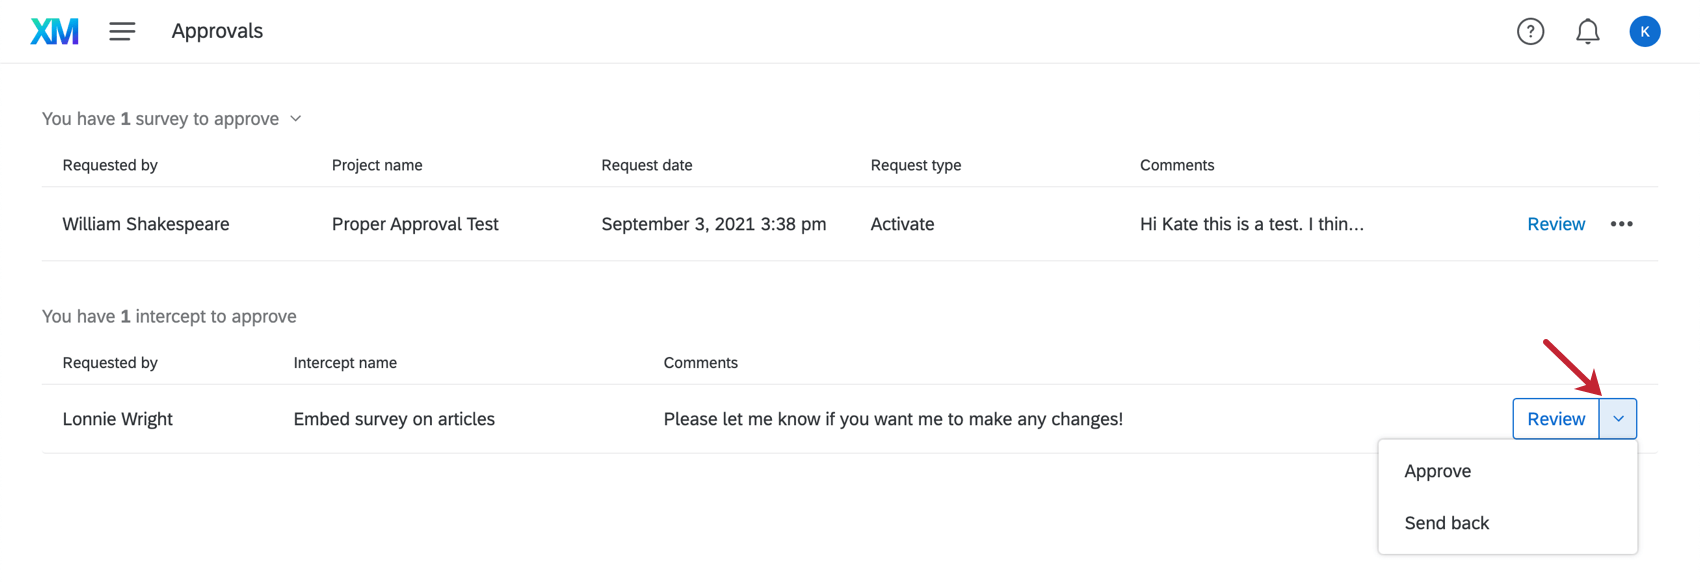
If you are one of the users being asked to approve an intercept or creative, you will receive a notification email. Upon logging in, you will see all pending approvals at the top of your Homepage.
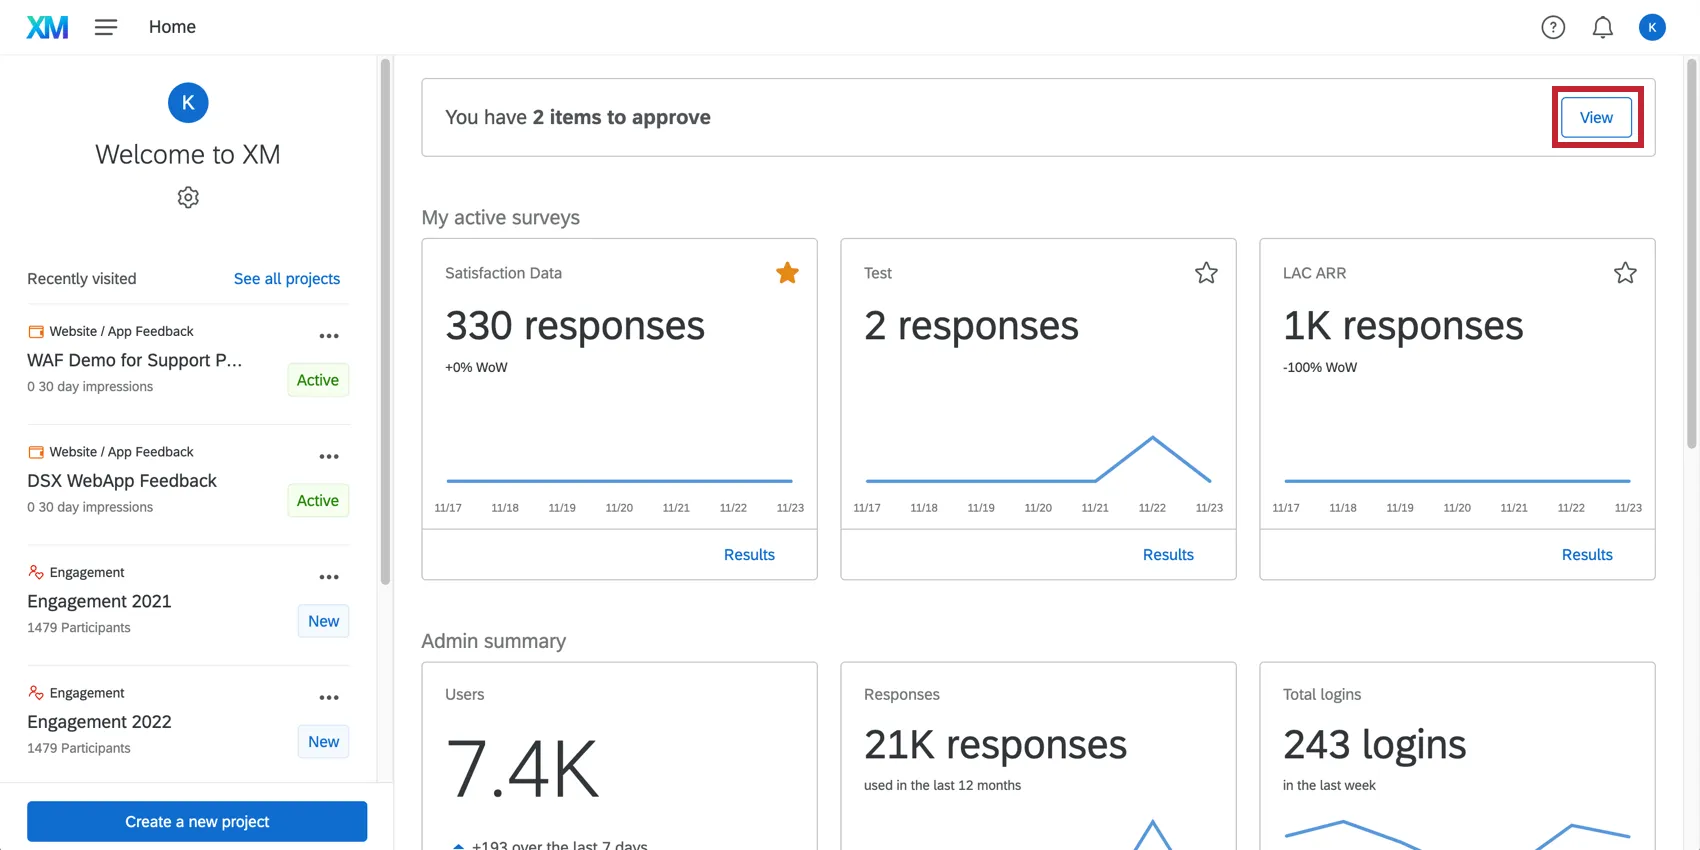
Click View to take a look at the list of creatives or intercepts awaiting approval.
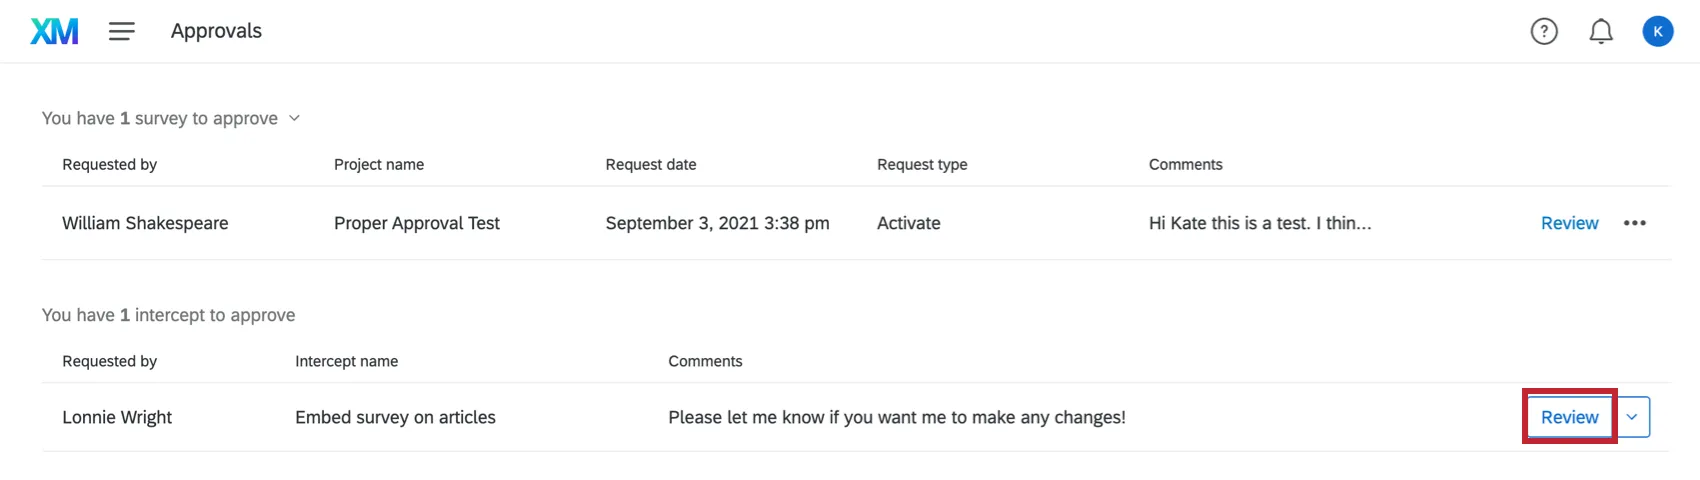
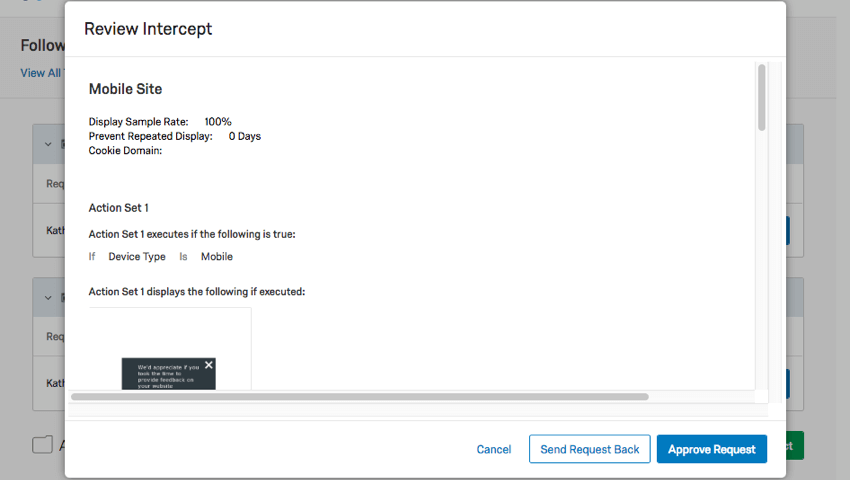
Click Review next to an intercept or creative to view it.

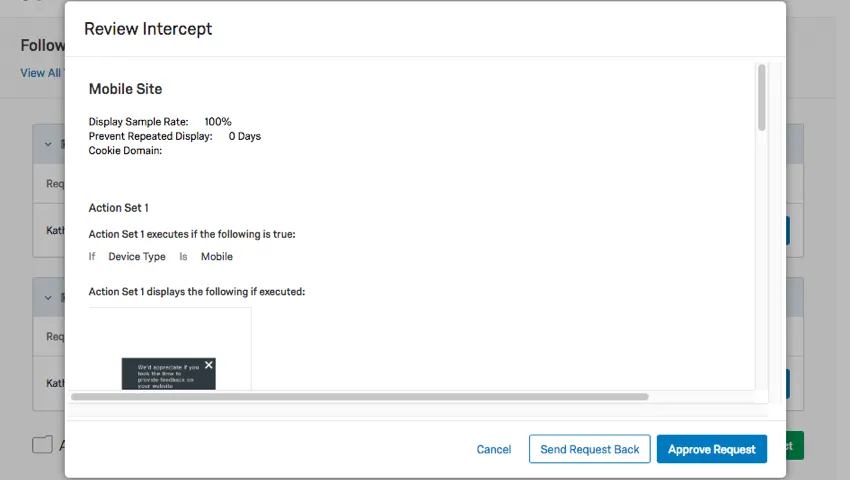
You may decide to Send Request Back to reject it or Approve Request to allow it to be published.
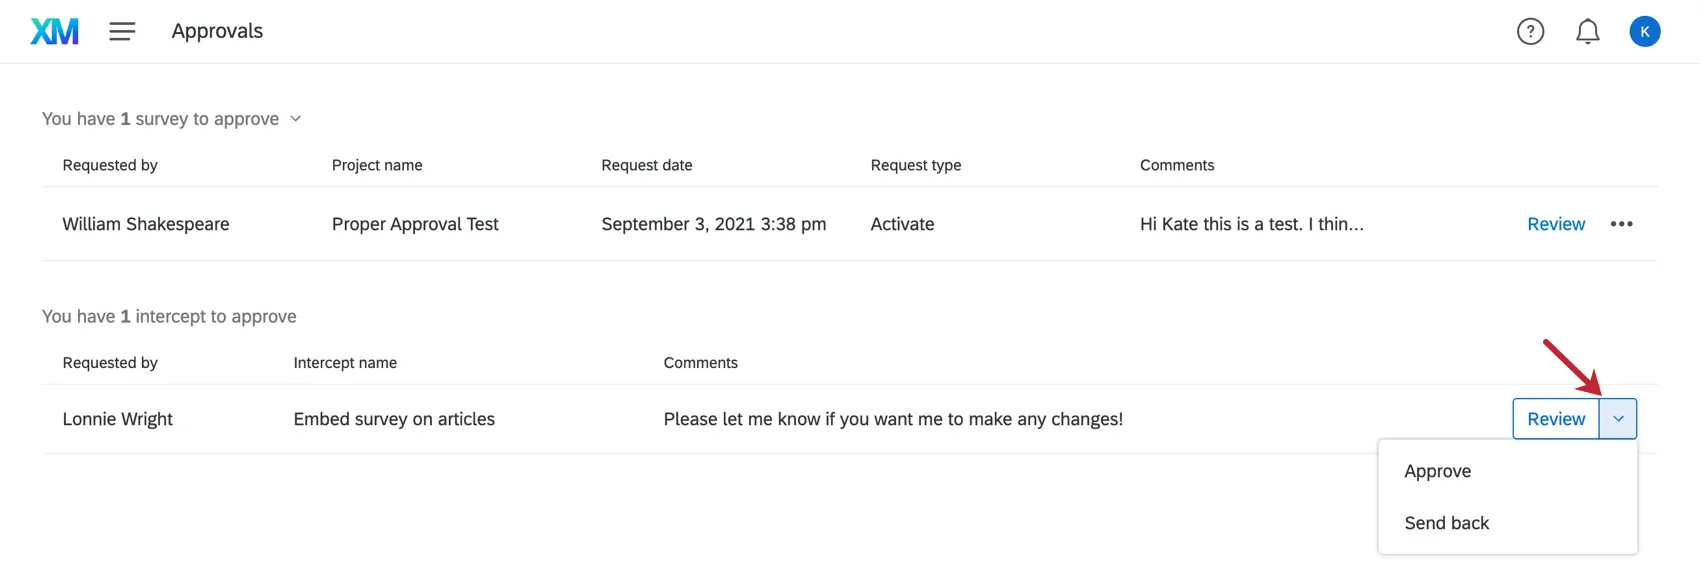
Click the dropdown next to Request for Approval for additional options.
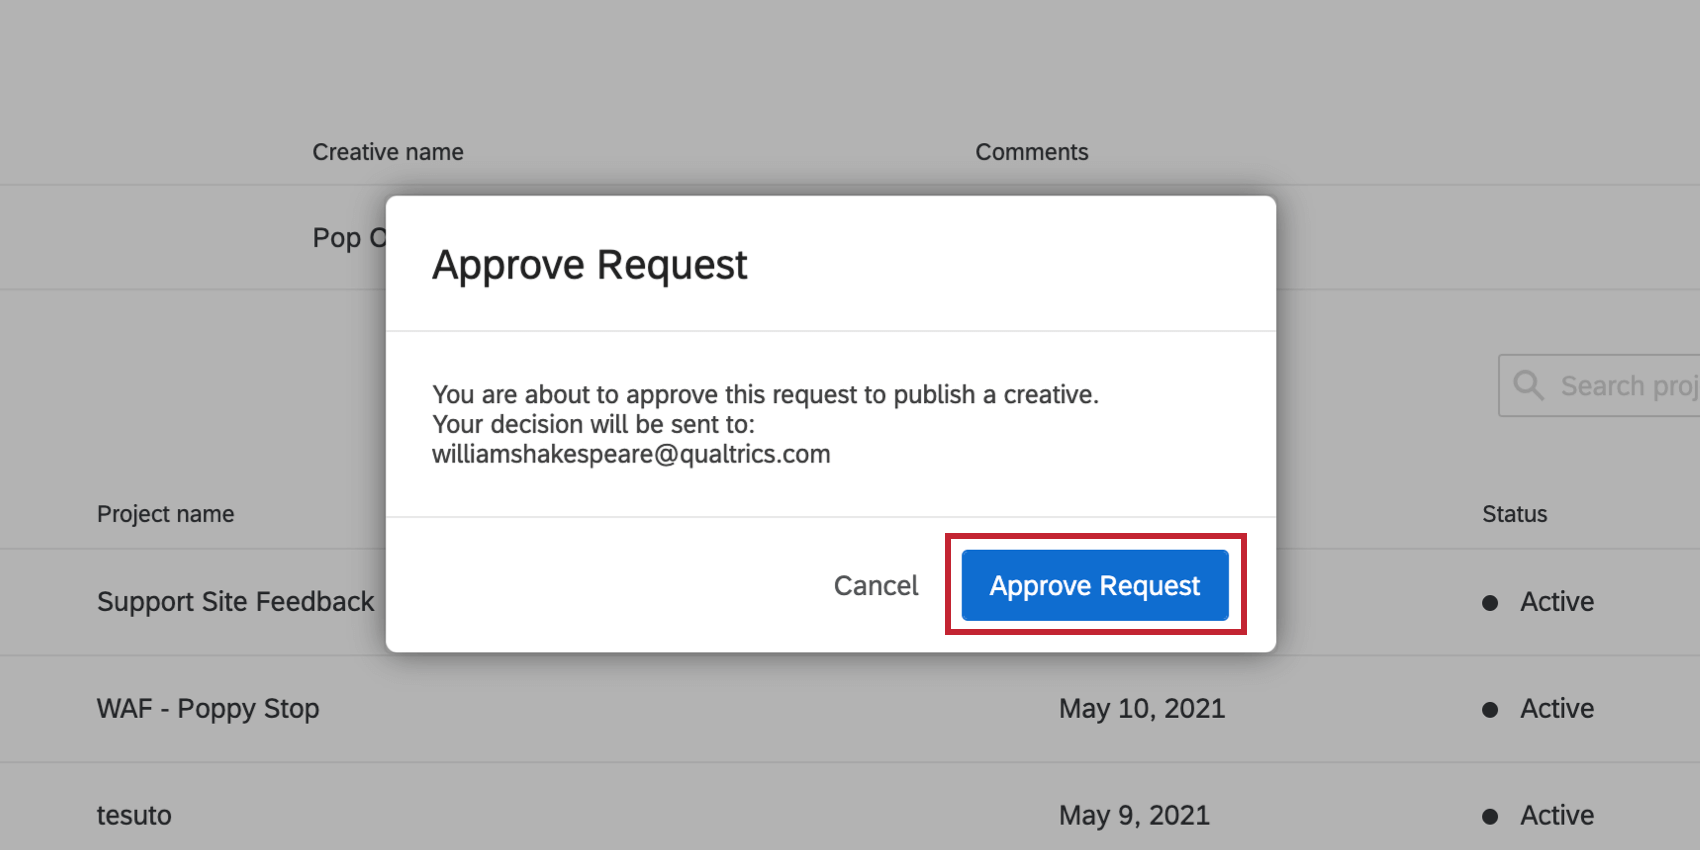
- If you select Approve, you will be asked if you’re sure. Click Approve Request on the next window to publish the changes.

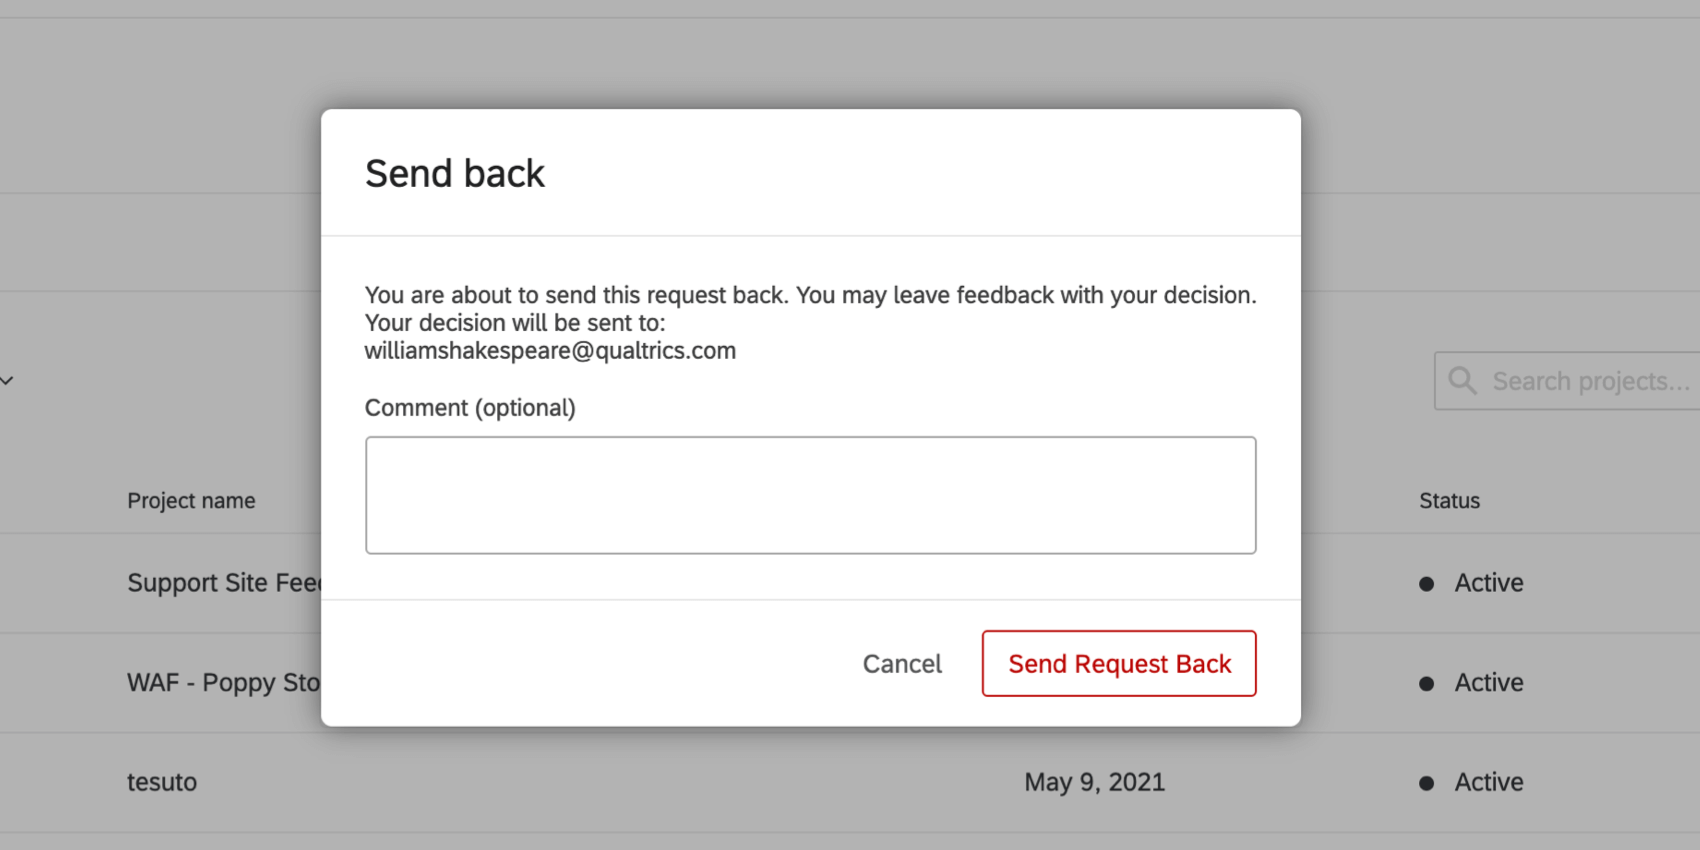
- If you select Send Back, the changes will not be published. You will be able to submit a comment explaining to the user why you did not approve so they know what edits to add next time.

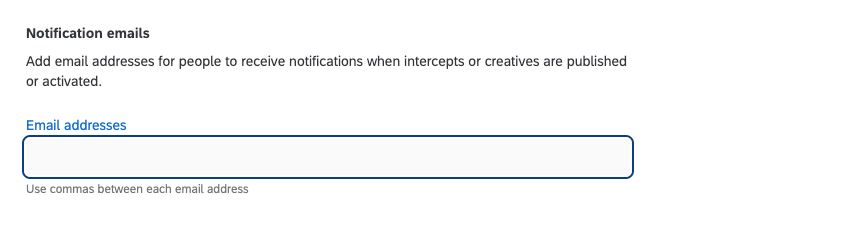
Notification Emails
In addition to requiring approvals, you can enter email addresses in the Notification emails area if you wish for yourself or others to receive a notification when creatives or intercepts are published or activated.
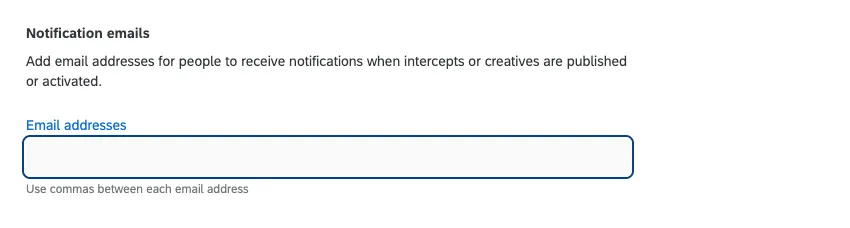
Qtip: If you are entering multiple emails, make sure they are separated by commas.
Single-page Application Support
If you’re using an intercept on a Single Page App, you can turn on a setting to check the display logic each time the URL changes, even if the entire page doesn’t reload. Select Re-evaluate intercept logic when the URL changes to enable this.
To learn more, see Single Page Application.
Intercept Loading Options
This option allows you to load the entire project using JavaScript code. Despite the project being active, intercepts will not begin evaluating logic, nor will any creatives display, until the project code is loaded manually with the JavaScript code, QSI.API.run().

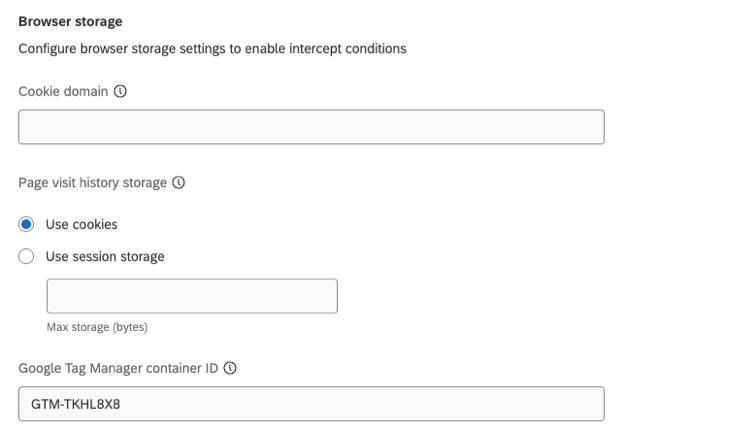
Browser Storage
In the Browser Storage section, you can configure browser storage settings for your project..
- Cookie domain: Specify where the cookie that records the visitor’s site history will be stored. This can be useful for websites with multiple subdomains (e.g., shop.siteintercept.com and about.siteintercept.com). By default, cookies are saved independently for each subdomain so that each would have its own Site History, Time On Site, and Page Count. You can only add 1 cookie domain at a time. Example: Setting the cookie domain to siteintercept.com would ensure just one cookie is used for the entire website.
- Page visit history storage: This refers to how visit history is stored. This will only be used if site history or page count targeting criteria is used in intercepts. Qtip: For older projects, the default is Use cookies. For all projects made after May 7, 2019, the default is Use session storage.
- Use cookies: Browsing session history and page count are stored as a cookie on the browser.
- Use session storage: Browsing session history and page count are stored in that particular browsing session.
- Max storage: This setting allows you to set a project-wide limit on how large Website Insights cookies or session storage can be when your intercepts’ action set logic is based off of Site History or Page Count. This is particularly important if you have several services running on your site utilizing their own cookies. Enter the maximum storage size in bytes. Attention: The organization-level limit overrides the limit set at the project level.

That's great! Thank you for your feedback!
Thank you for your feedback!