
Derived Attributes (Designer)
What's on this page
About Derived Attributes
Derived attributes are attributes that are created based on your existing attributes or classification results. These derived attributes can be used in dashboards, filters, and category rules in the same way that standard attributes can.
A regular attribute can be mapped to any number of derived attributes. You cannot use a derived attribute to create another derived attribute.
Types of Derived Attributes
There are 4 different types of derived attributes you can create. The field type of the existing attribute determines what kinds of derived attributes you can use.
- Dimensional lookup: Available for text and numeric attributes. Allows you to map standard attributes to a different related attribute that’s based on the standard attribute. For example, a regular “city” attribute may be rolled up into a derived “region” attribute. See Dimensional Lookup Attributes for more information.
- Range rollup: Available for numeric and date attributes. Allows you to map ranges of standard attributes to a different related attribute range. For example, a regular “age” attribute may be rolled up into a derived “age group” attribute. See Range Rollup Attributes for more information.
- Satisfaction score: Available for numeric attributes only. Allows you to view the percentage of customers who are loyal to a company’s products or services based on their answers to satisfaction-related questions. See Satisfaction Score Attributes for more information.
- Category derived attribute (CDA): This attribute is created from your category models. Allows you to turn classification results into structured data by deriving attributes (such as product being discussed or the author’s gender) from any unstructured text. See Category Derived Attributes for more information.
Dimensional Lookup Attributes
This section covers how to create a dimensional lookup attribute.
Preparing a Lookup Data File
Before you can create your dimensional lookup attribute in XM Discover, you must first prepare a data file that contains your lookup data. This can be done by creating a spreadsheet with your data that follows the format below:
- Column A should contain your standard attribute values. This should be the attribute you want to use to create your derived attribute.
- Columns B, C, and so on should contain your corresponding derived attribute values. You can include multiple derived attributes in your file as long as they’re based on the same source attribute.
- Save your file as an XLS or XLSX format.
Additionally, please be aware of the following when preparing your file:
- If your file contains empty values, these will appear in XM Discover as “undefined.”
- You can include attribute values that are not yet present in your dataset but you anticipate will appear later. When these values are uploaded to your project, they will be automatically mapped according to your lookup data file.
Example: This example shows a data file for creating “country” and “state” derived attributes based on the “city” standard attribute.


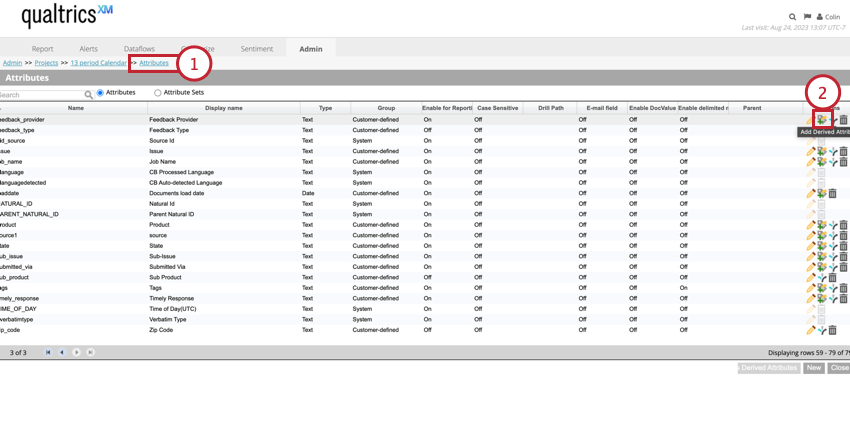
Creating the Dimensional Lookup Attribute
After you’ve prepared your lookup data file, you can create your dimensional lookup attribute in XM Discover.
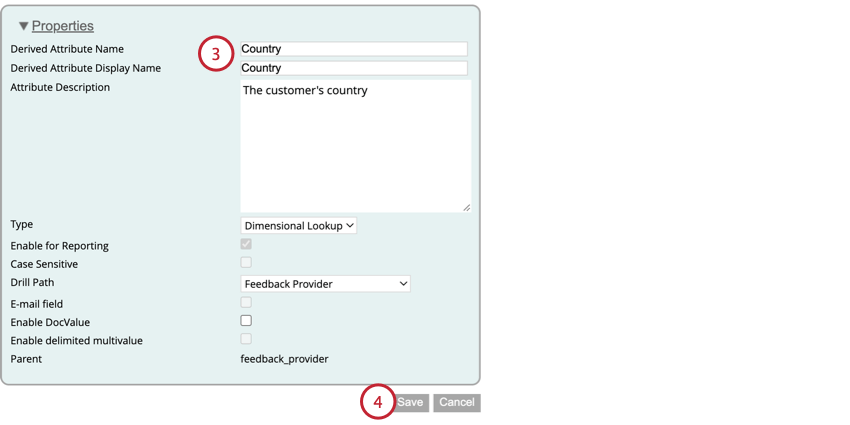
- Most of these options can be set to whatever you’d like. However, make sure that the Type is set to Dimensional Lookup.
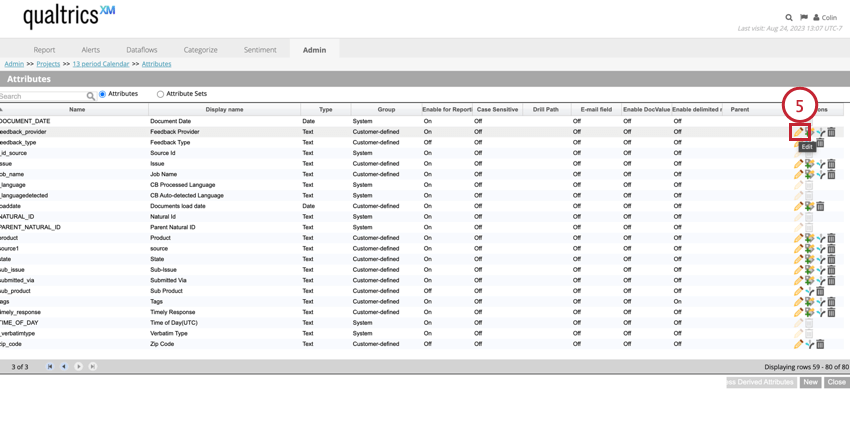
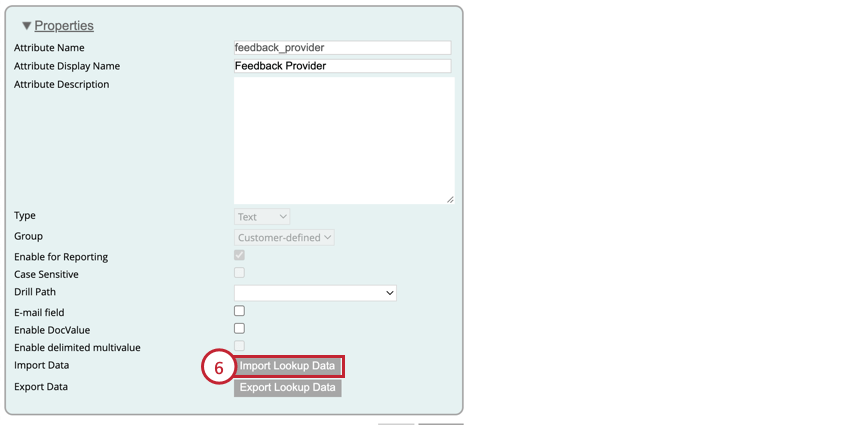
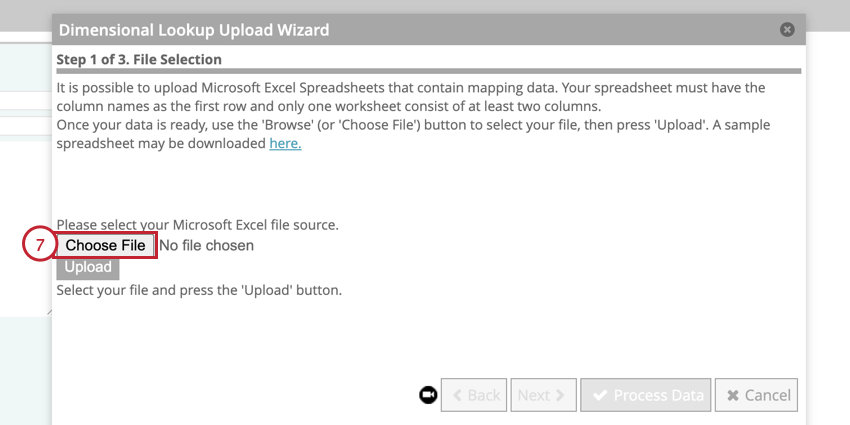
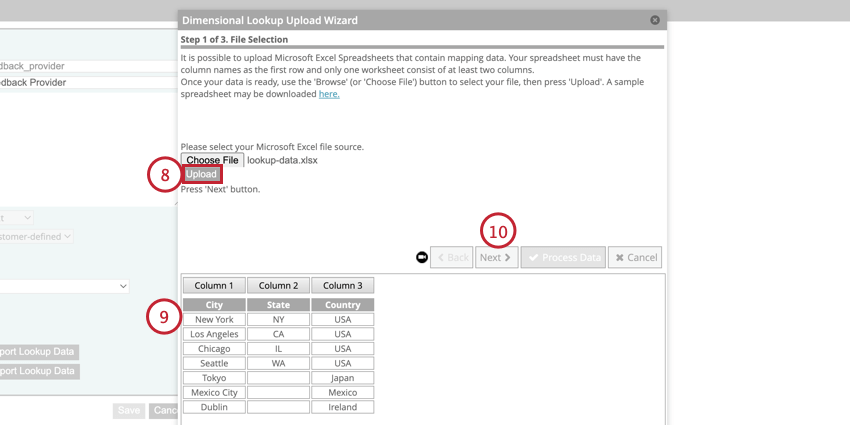
Qtip: If you need to make any changes, edit your data lookup file and then reupload it by clicking Choose File and then Upload.
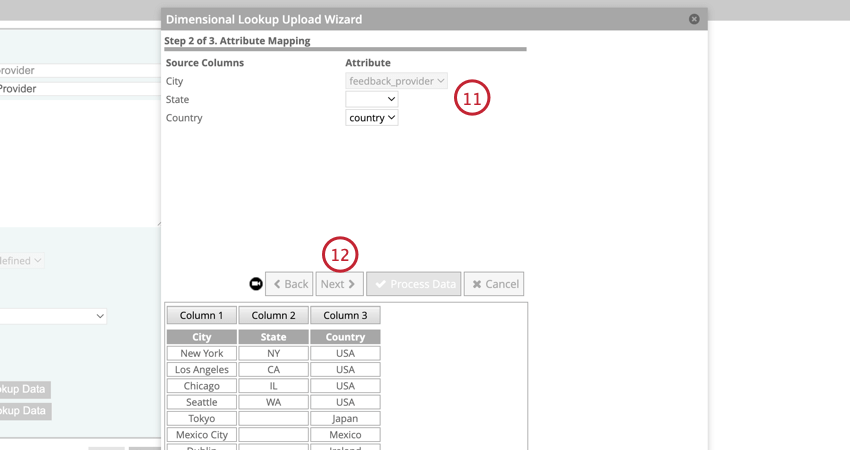
Qtip: When importing lookup data for several derived attributes at once, you can leave a mapping blank to clear the derived attribute’s mapping. This will record the values as “undefined” as if the row values were blank in the lookup data file. This will not replace existing lookups unless the “Replace lookups” option is selected later in the import process.
- Reject duplicates and process only new lookups: New lookups are added while existing lookups are ignored. New values do not replace existing ones and empty values will not remove existing values.
- Replace lookups: All previously uploaded mappings are deleted before the new ones are processed. Use this option if you want your lookups to look exactly like your uploaded file. If your file is missing lookups that were previously available, these lookups will be removed.
- Update values for existing lookups: Both new and existing lookups are processed. For existing lookups, new values from the upload replace existing ones while empty values do not replace existing ones.
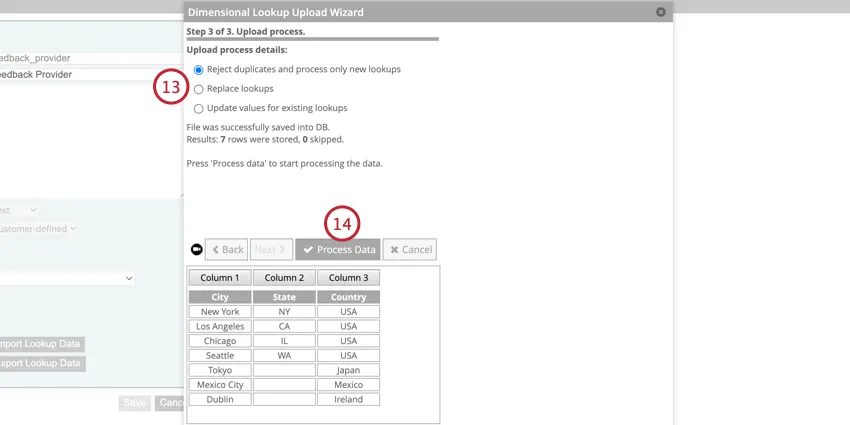

Qtip: You can monitor the progress of this job by looking at the Import Lookup Data dataflow in the Dataflows tab.
Range Rollup Attributes
This section covers how to create range rollup attributes. There are 2 different types of range rollup attributes, depending on your source attribute type:
- Custom Range: If your source attribute is a numeric field, you can create different range buckets categories.
- Custom Period: If your source attribute is a date field, you can create different date range categories.
To create your range rollup attribute:
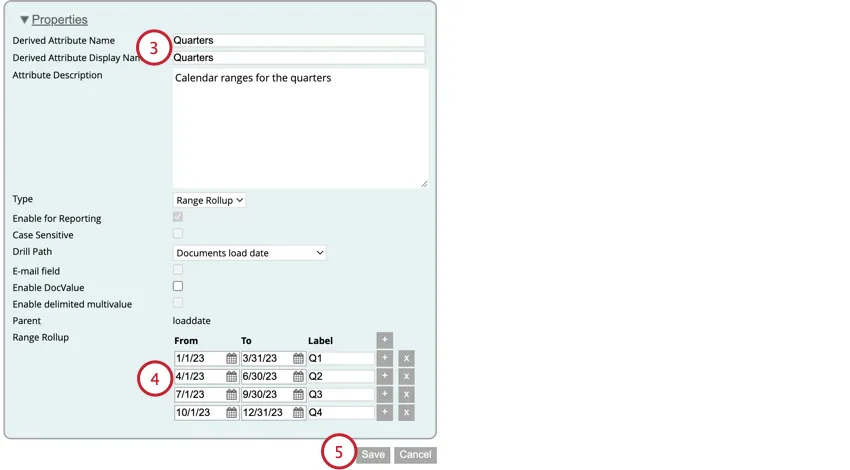
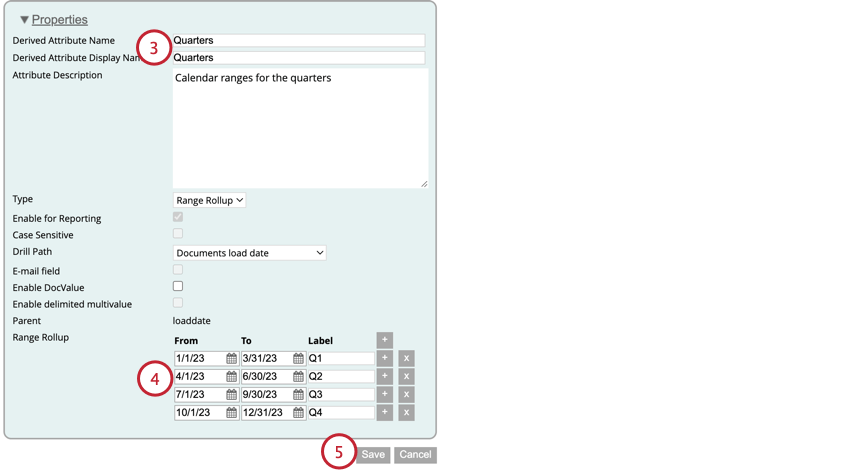
- Most of these options can be set to whatever you’d like. However, make sure that the Type is set to Range Rollup.
After you create your range rollup attribute, you can apply it to your reports.
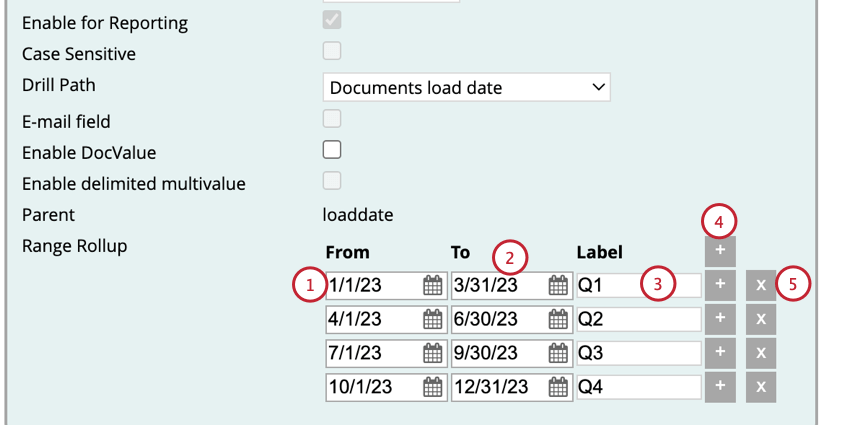
Custom Ranges
Follow these instructions to create your custom ranges for derived attributes based on numeric fields.
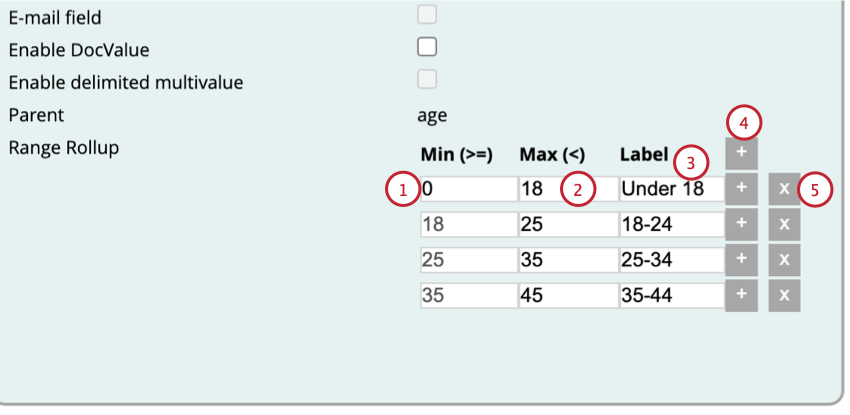
Qtip: Your maximum value will automatically become the minimum value for the next range in your attribute.
Qtip: When adding multiple ranges, your ranges cannot overlap or have gaps in between them. The maximum for one range will automatically become the minimum of the range that follows it.
Custom Periods
Follow these instructions to create your custom periods for derived attributes based on date fields.
Qtip: When adding multiple periods, your periods cannot overlap. However, there can be gaps between periods.
Satisfaction Score Attributes
You can create a satisfaction score attribute to find the percentage of loyal customers. Satisfaction scores can be created based on any numeric attribute.
The satisfaction score is calculated based on the customer’s response to a survey. For example, a customer may be asked to rate a company’s service on a scale of 1 to 5. You can then calculate a satisfaction score based on this metric. You can also combine multiple metrics together in one satisfaction score calculation.
Satisfaction score is calculated using the following formula:
Satisfaction score = ([Number of Most Loyal] – [Number of Least Loyal]) / Total * 100
Qtip: The Total in this calculation can differ depending if you have the Include Null Values in Satisfaction Score Calculation option enabled.
Creating a Satisfaction Score Attribute
Follow the instructions below to create a satisfaction score attribute:
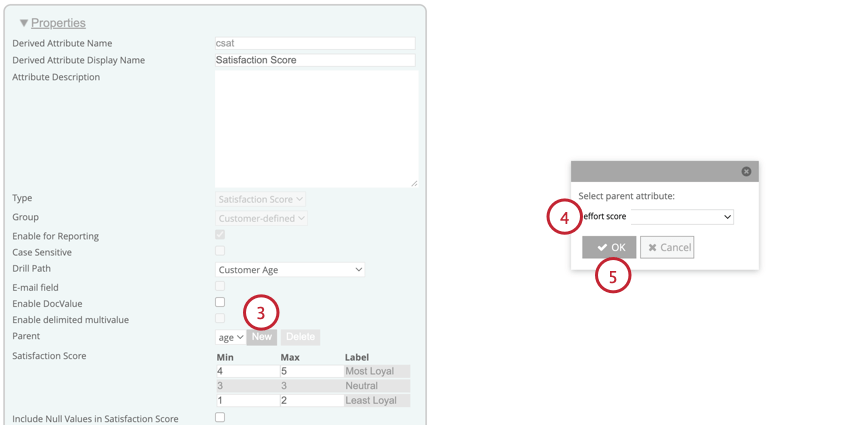
- Most of these settings can be whatever you’d like. However, make sure to select Satisfaction Score as the attribute type.
- When enabled, the Include Null Values in Satisfaction Score Calculation includes responses that did not answer the question in the total number of responses. Enabling or disabling this option will affect how your satisfaction score is calculated.
- Do not adjust the Parent field as this is the source attribute that is used for the calculation. It should have the same name as the attribute you selected in step 2.
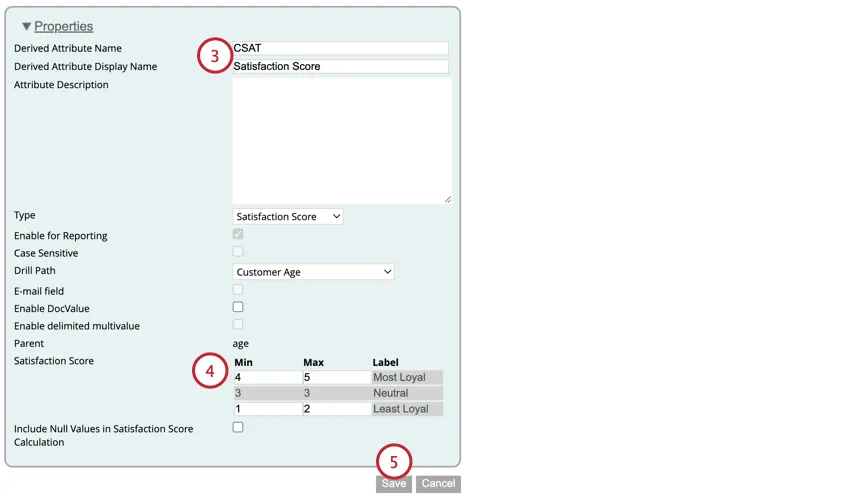
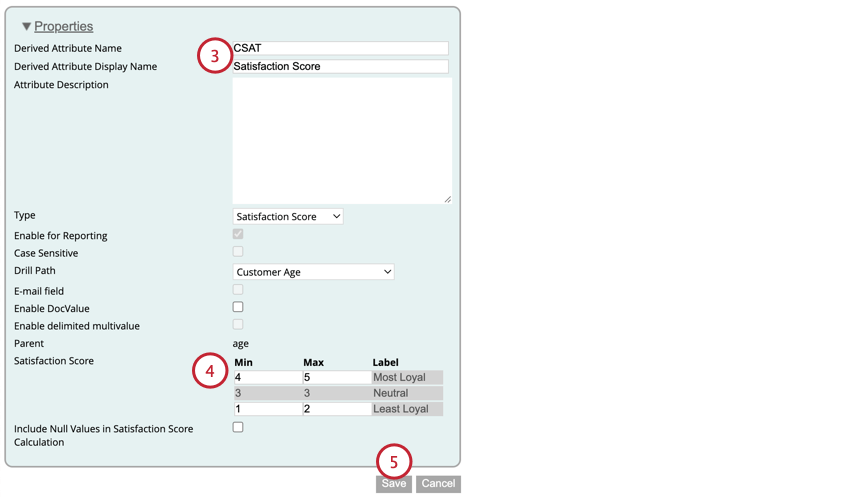
- Most Loyal: Enter the minimum and maximum score for a customer to be considered loyal. On a 5 point scale, this is usually 4 and 5.
- Least Loyal: Enter the minimum and maximum score for a customer to be considered not loyal. On a 5 point scale, this is usually 1 and 2.
- Neutral: The minimum and maximum score for a customer to be considered neutral (neither loyal or not loyal). The ranges for a neutral score are automatically generated based on the ranges for Most and Least Loyal.
After creating your attribute, make sure you apply it to your reports.
Satisfaction Scores Based on Multiple Attributes
If needed, you can calculate a satisfaction score based on several numeric attributes.

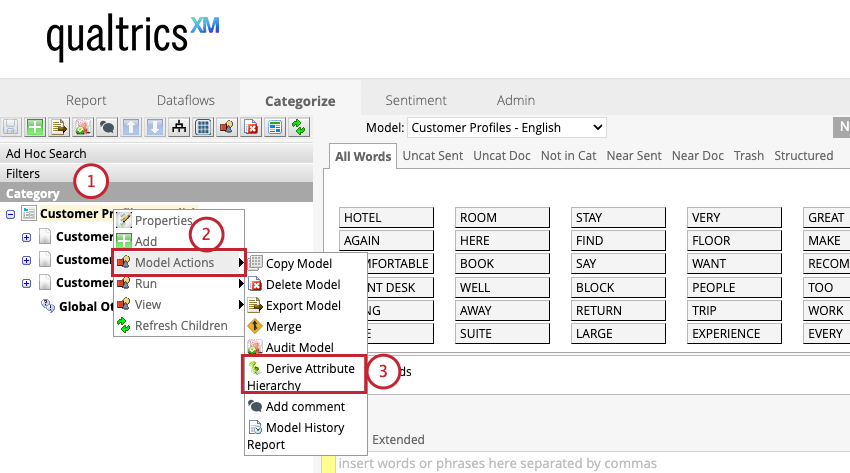
Category Derived Attributes
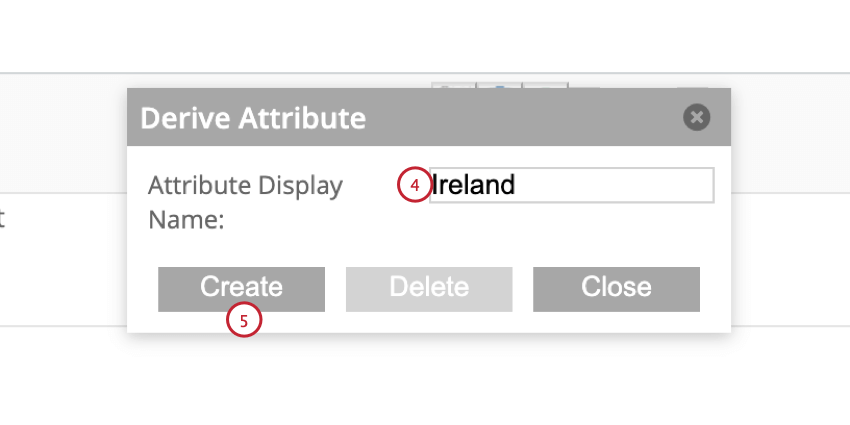
You can use your category models to create attributes. This allows you to derive attributes from any unstructured text, such as your product being discussed in a customer feedback survey.
Qtip: Category derived attributes are applied to the entire document. If you want to view insights on a sentence-level, then apply your category model to your document instead.
Qtip: If an individual category in a model already has an attribute derived from it, you cannot derive an attribute based on the whole model and this option will be missing.
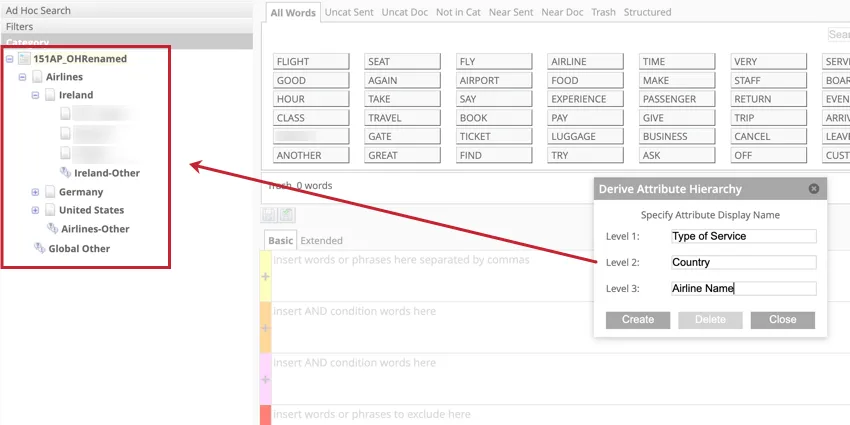
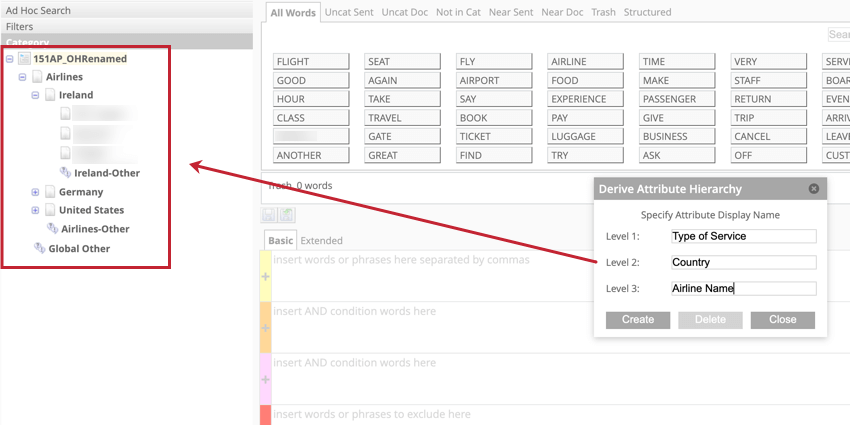
- If deriving attributes based on a whole model, you’ll need to add names for each level in the model instead. In the below example, there are 3 levels. The first level covers the type of service, which in this case is airline. The second level covers the country of service. The third level covers the individual airlines in each country.
Qtip: To remove an attribute based on a category model, right click on the model and select Derive Attribute in the Model Actions menu. In the window that appears, click Delete.
After creating your attribute, it will be applied to your data using the following logic:
- Existing data will not have the attribute applied unless you run classifications for this category model.
- New data will be tagged with the attribute when appropriate.
- If you edit your category model, make sure you also edit the derived attribute name.
- If you have multiple category derived attributes, documents may be tagged with multiple attributes. If a document does not match any values, then it will be tagged with “undefined.”
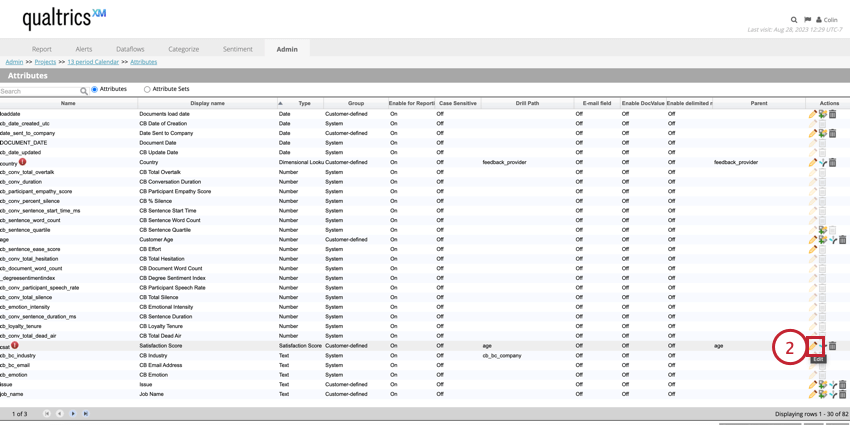
Applying Derived Attributes
After you create a dimensional lookup, range rollup, or satisfaction score attribute, you must process them before they’re available for you to use in reports.
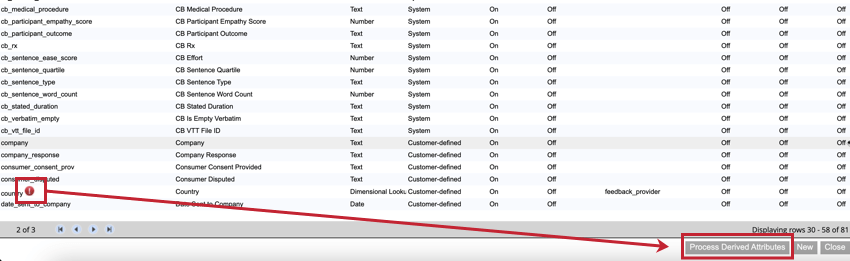
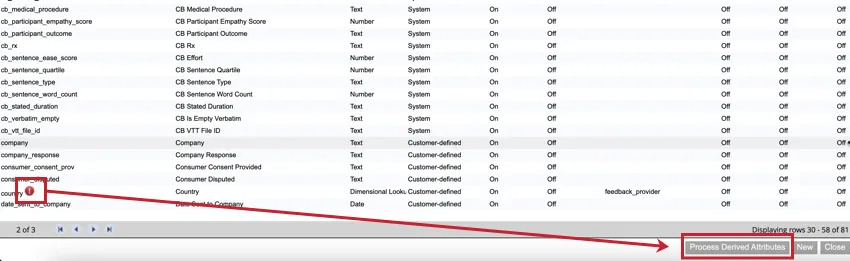
Whenever there are unapplied mappings, you will see a red exclamation mark ( ! ) next to the attribute name. Click Process Derived Attributes to apply your derived attributes. XM Discover will process all documents and apply the relevant attributes.
Qtip: When new data is loaded into the project, derived attributes are automatically applied. You only need to process derived attributes if you want those attributes available in your existing data.
That's great! Thank you for your feedback!
Thank you for your feedback!