
Extract Responses from a Survey Task
What's on this page
About Extracting Responses from a Survey
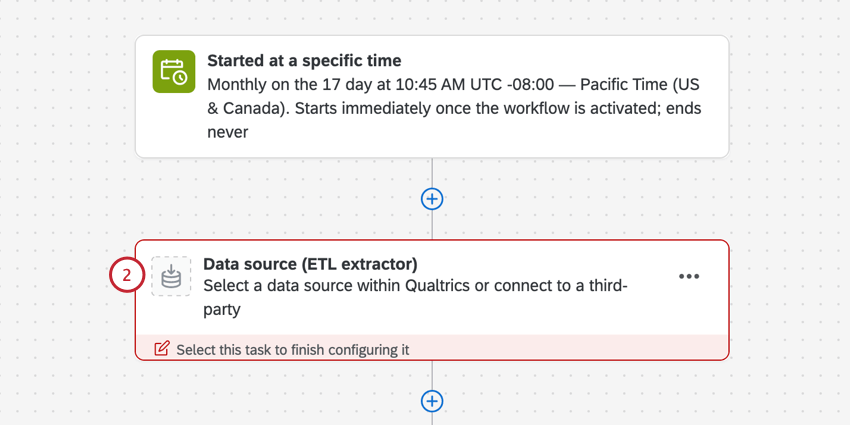
You can create a workflow that automatically uploads your Qualtrics survey data to a location of your choice on a regular basis. This makes it easier to send your data where it needs to go, without having to manually export and import it over and over again.
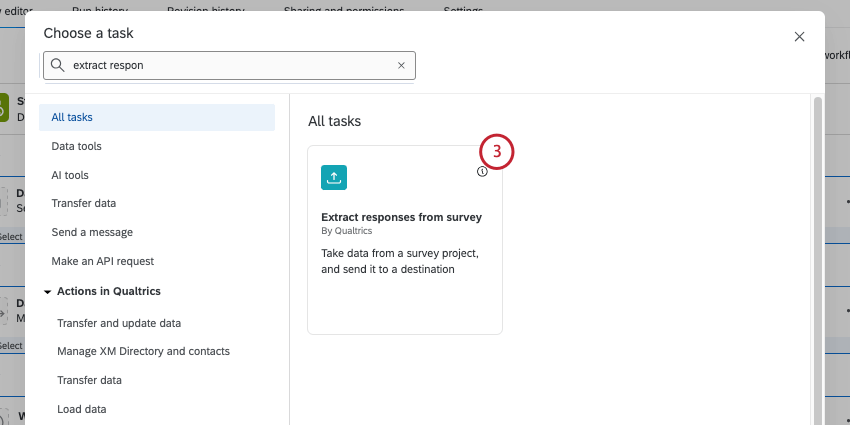
These kinds of workflows are made using an ETL data extractor task called “Extract responses from survey.” Every time you extract data from your surveys, you then have to choose a destination using an ETL data loader task.
When the workflow extracts responses, it’ll only extract those responses collected since it last ran. For example, if your workflow runs on Wednesdays, it’ll only upload responses to your chosen destination that the survey has collected since last Wednesday. The workflow will also only export responses that are at least an hour old.
Example: You can regularly extract data from your Qualtrics surveys and then upload it to an SFTP server.
Attention: The order of extracted survey columns is not guaranteed, and solutions should not be built based on this order as it may change at any time. If the column order is important, a Transform Task should be used to reorder the columns.
Attention: By default, the extracted file contains 3 header rows, which may cause issues with tasks referencing that data. You can enable the Remove extra header fields from exported survey response file option in the workflow set-up to avoid this.
Qtip: For information on general limits that apply to ETL workflows, see Workflow Limits. For any task-specific limits, refer to the information on this page.
Extracting Responses from a Survey
Qtip: Survey responses extracted using this task will always be in UTC+0, not your account’s time zone.
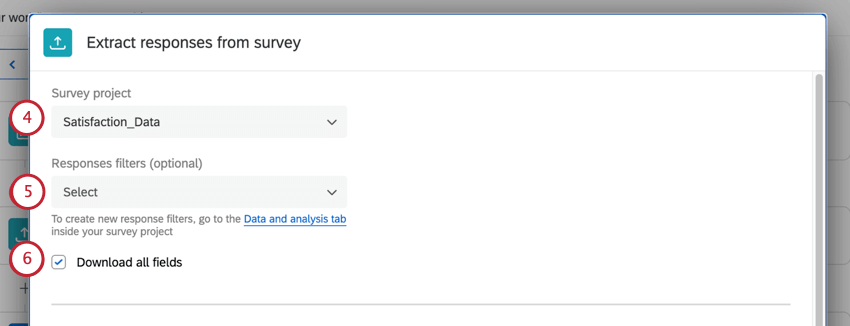
Example: Filter out responses that are unfinished or contain screen-outs.
Attention: Only responses collected since the last run are extracted in this task. Any filter added to this task will only apply to newly recorded responses since the last run. We do not advise creating a filter based on time fields, such as Start Date, End Date, or Recorded Date, as your exported dataset may not contain the responses you expect.
Qtip: Filters use the UTC+0 time zone, not your account’s time zone.
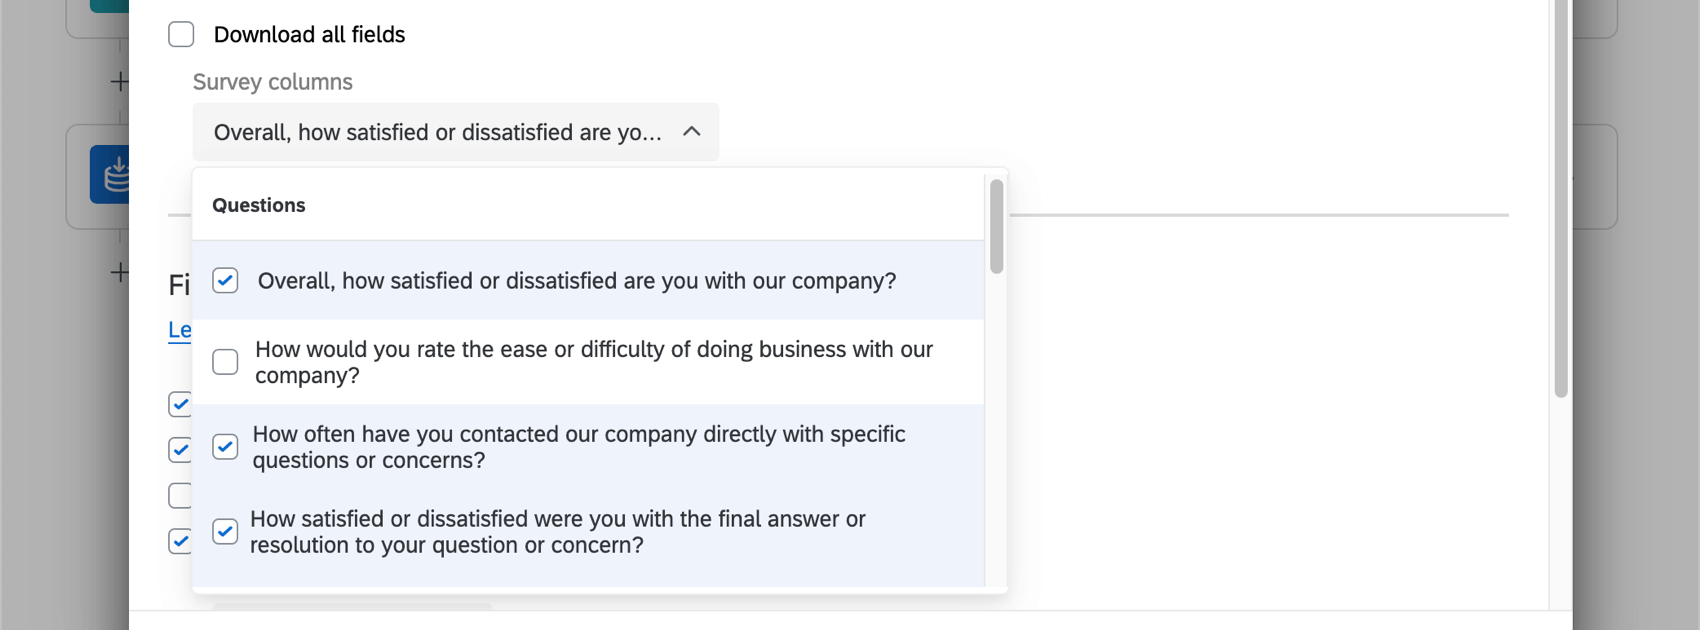
Qtip: Questions or embedded data fields that are set in the survey flow can be selected. This means that respondent contact information will not be included by default, unless it is set as embedded data in the survey flow.
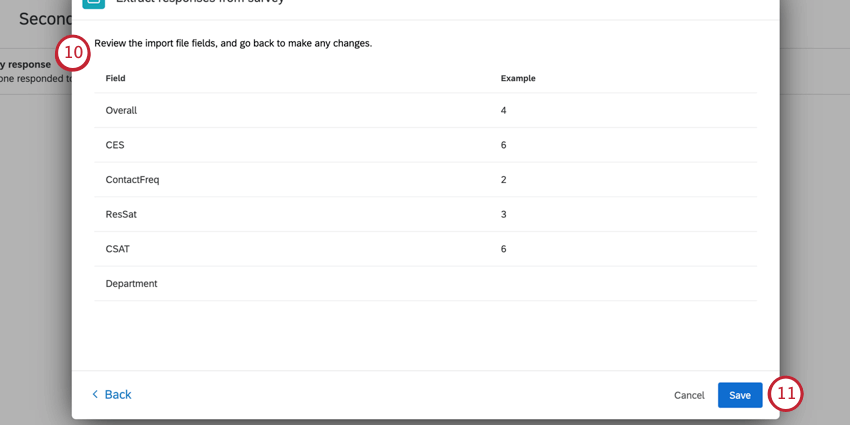
Warning: Make sure your fields have unique names. If your resulting output file contains duplicate field names, then this will cause issues with downstream tasks. You can check your fields during step 10.
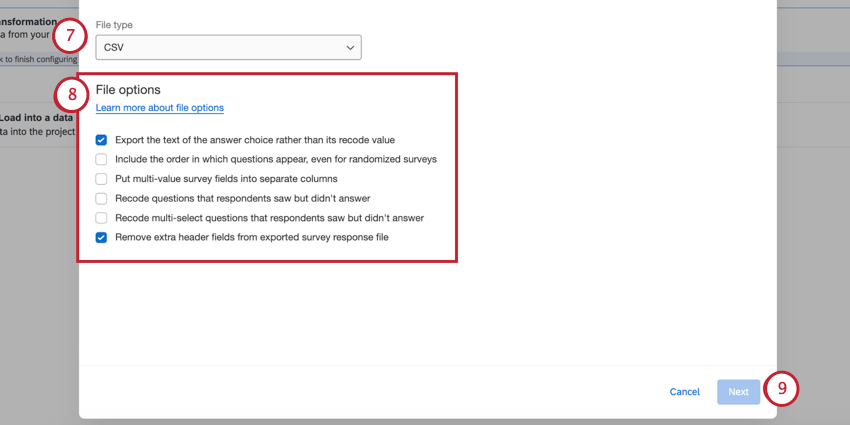
- CSV
- TSV
- JSON
- NDJSON
- SPSS
- XML Qtip: Usually, you will select CSV. The only load data tasks that can support the other file type options are Load to SFTP and Load to Amazon S3.

- Export the text of the answer choice rather than its recode value: If this option is enabled, you will get answers in text (custom variable names will appear if you have configured them; otherwise it defaults to the answer text). If this option is disabled, you will see only numeric values for each answer. Qtip: Once data is extracted from Qualtrics and uploaded elsewhere, it is no longer dynamic. That means if you make edits in Qualtrics, such as to the recode values, changes will not be reflected in your SFTP server, or anywhere else you’ve exported the responses to.
- Include the order in which questions appear, even for randomized surveys: This option is most useful for surveys with randomized questions, since it allows you to see the order in which questions appeared to each respondent. This functions the same as Export viewing order data for randomized surveys.
- Put multi-value survey fields into separate columns: See Split multi-value fields into columns.
- Recode questions that respondents saw but didn’t answer: See Recode seen but unanswered questions as -99.
- Recode multi-select questions that respondents saw but didn’t answer: See Recode seen but unanswered multi-value fields as 0.
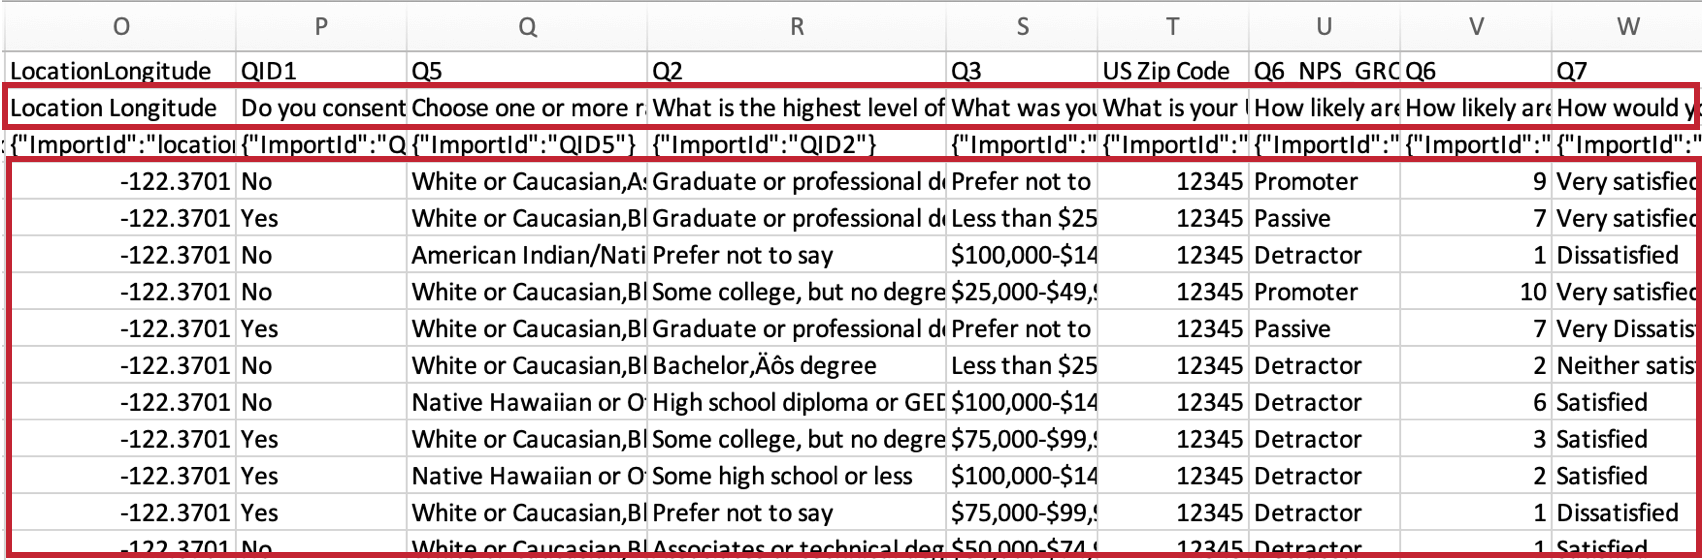
- Remove extra header fields from exported survey response file: Normally, data files exported from Qualtrics have 3 rows of headers. If you select this option, you will only get 1 of these rows of headers, as shown below.
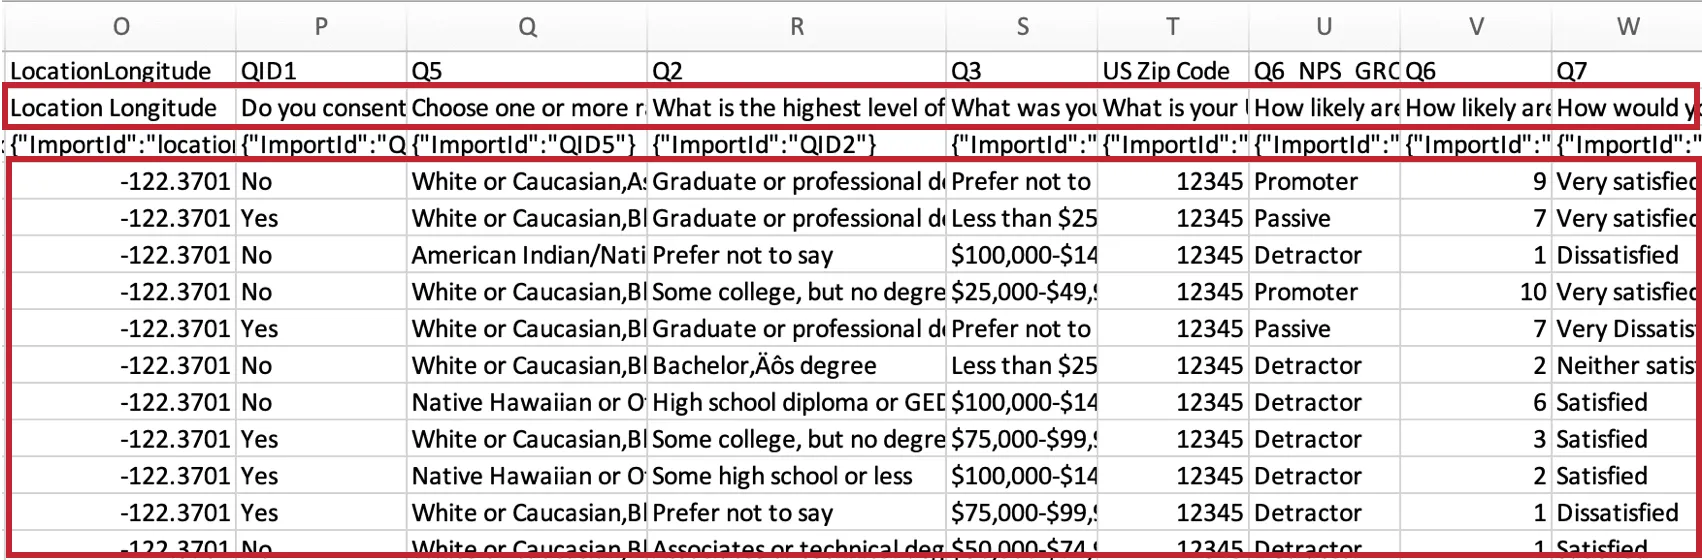 Qtip: If you de-select the “Remove extra header fields from exported survey response file” option in File Options, the headers will include the survey question text. This means that any changes to survey question wording made after the initial configuration changes the output of this task. Without any updates to the workflow configuration, those changes cause the subsequent load task to fail.
Qtip: The extracting responses task is based on a response’s created date. If you update a previously existing response, it will not be included in new exports.
Qtip: You can reorder your output fields by adding a Transform task after you extract survey responses. This is the only way to guarantee a certain field order in your workflow’s output.
Specifying Where the Survey Data Should be Uploaded
Once you save your data extractor task, you’ll return to your workflow. Next, you’ll add another task to your workflow that allows you to upload the extracted data somewhere. For example, you can upload the survey data to an SFTP server.
A list of all data upload tasks can be found on Available Loader Tasks.
Types of Projects You Can Extract From
You can extract data from several types of projects, including:
Qtip: Conjoint and MaxDiff-specific data can be extracted, but will appear in numeric format instead of full text.
You cannot extract data from imported data projects using the Extract Responses from a Survey Task. Instead, try the Extract Data from Data Project Task.
That's great! Thank you for your feedback!
Thank you for your feedback!