
OpenAI Tasks
What's on this page
About OpenAI Tasks
Attention: To use a workflow task that uses the Qualtrics LLM, see AI Response Task.
Qtip: Any data sent through these tasks will be processed subject to your own agreement with OpenAI or Microsoft Azure and not your agreement with Qualtrics. Qualtrics is not appointing OpenAI or Microsoft Azure as a subprocessor with respect to these tasks.
ChatGPT is a generative language model developed by OpenAI. You can use the Qualtrics OpenAI workflow tasks to integrate ChatGPT into your Qualtrics workflows. This allows you to build workflows that enable scenarios such as summarizing text, extracting information from text, generating responses based on text, generating code, classifying text, translating text, and more.
There are 2 different OpenAI tasks available:
- GPT: Integrate directly with ChatGPT using your OpenAI credentials. Qtip: To use this task, you must have OpenAI API access.

- Azure OpenAI: Integrate with ChatGPT using Microsoft’s Azure OpenAI service. Qtip: To use this task, you must have Azure OpenAI API access.
The GPT OpenAI integration provides a fast and easy integration with the latest AI models. Alternatively, the Azure OpenAI integration provides enterprise-level security, the ability to integrate with existing Azure services, and customizable AI models. See Choosing an OpenAI Task for more information about the benefits of each task.
Example: Let’s say you send a CX survey to your customers to ask them about their recent in-store experience. You want to create a personalized response to their feedback. You can use the GPT task to generate a response to the customer that incorporates elements of their initial feedback.
Example: Let’s say you send a yearly CX survey to all customers to ask them for any feedback about their experience with your company. You can use the GPT task to automatically categorize responses based on their content. You can then use a ticket task to create tickets based on those categories, and assign the tickets to users who are best equipped to respond to that specific customer feedback.
Qtip: To facilitate a secure and confidential collaboration with third-party LLM vendors, we prioritize strict privacy and security standards to safeguard our customers’ data. If you’re interested in learning more, see our dedicated security and privacy guide for AI.
While we have guardrails in place and are continually refining our products, artificial intelligence may at times generate output that is inaccurate, incomplete, or outdated. Prior to using any output from Qualtrics’ AI features, you must review the output for accuracy and ensure that it is suitable for your use case. Output from Qualtrics’ AI features is not a substitute for human review or professional guidance.
Choosing an OpenAI Task
Qtip: Azure OpenAI tasks are available for FedRAMP users, but GPT tasks are not.
While both tasks integrate with AI models and have the same base functionality, each task provides unique benefits depending on your use case:
- GPT task:
- Rapid access to latest AI models: Gain immediate access to OpenAI’s newest language models as soon as they’re released.
- Flexible pricing: Pay-as-you-go model suits varying workloads without long-term commitments.
- Global availability: Access services globally without regional restrictions or delays.
- Azure OpenAI task:
- Enterprise-grade security and compliance: Benefit from Azure’s robust security features and compliance certifications (e.g., GDPR, HIPAA).
- Seamless Azure ecosystem integration: Easily connect with other Azure services for extended capabilities and centralized management.
- Customization and control: Fine-tune AI models with your own data for tailored solutions.
- Scalability and reliability: Leverage Azure’s global infrastructure for high availability and performance guarantees.
- Cost management tools: Utilize Azure’s tools for monitoring and optimizing resource usage and spending.
Setting Up OpenAI Tasks
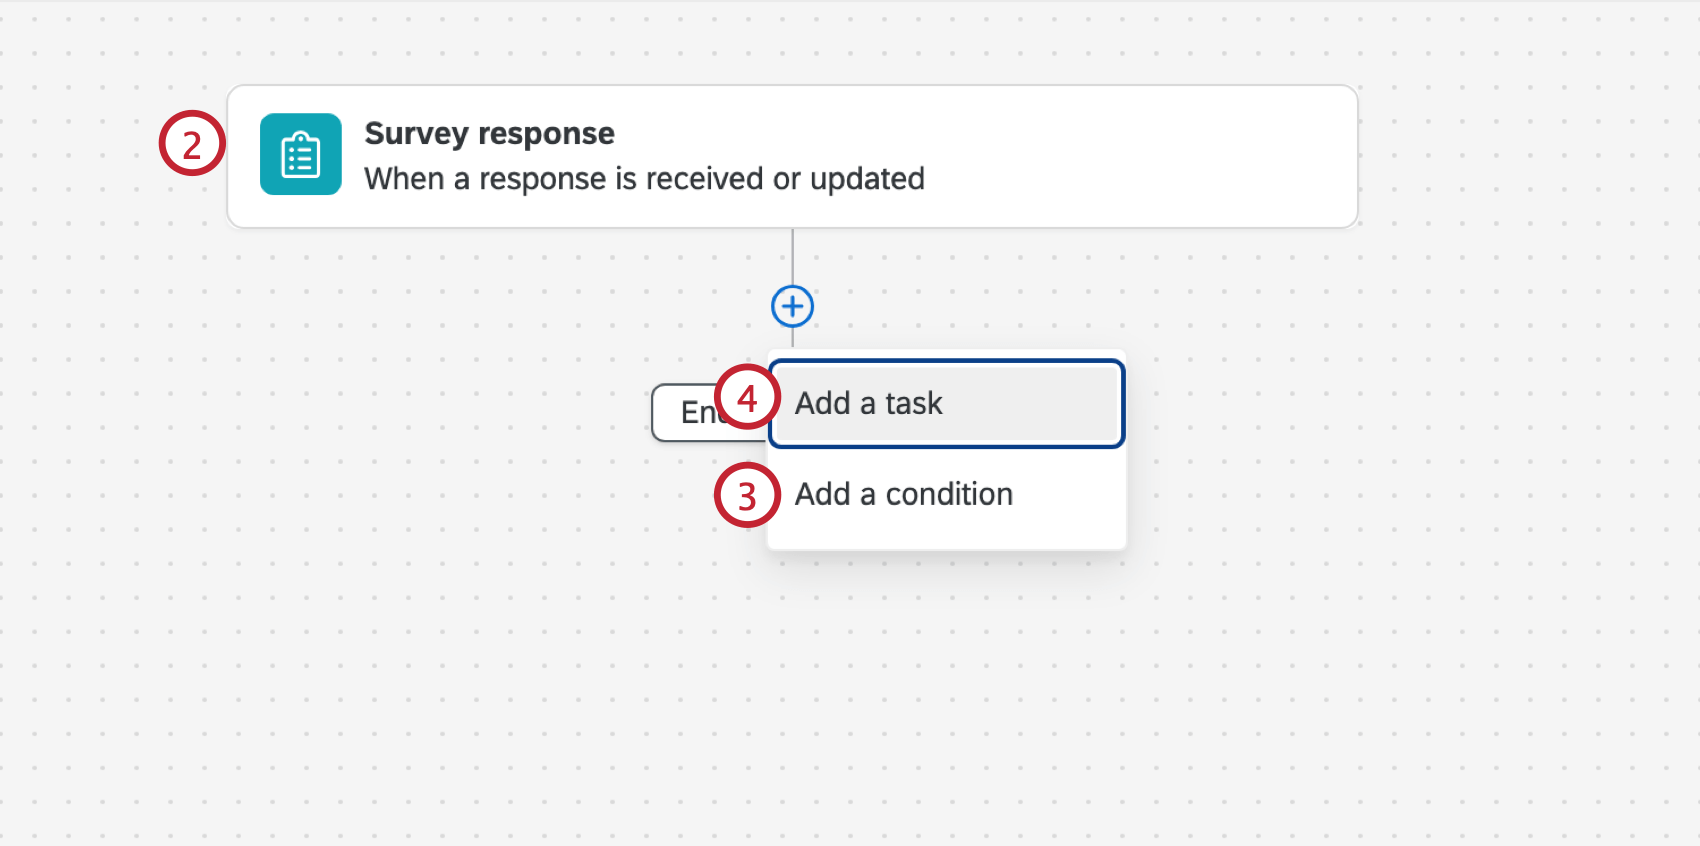
Qtip: Other common events include the ticket event, third party events (such as the Zendesk and Salesforce Workflow Rule events) and dataset record events for online review data.
Example: For example, if you want to respond to only negative customer feedback, you add a condition based on the response’s sentiment.


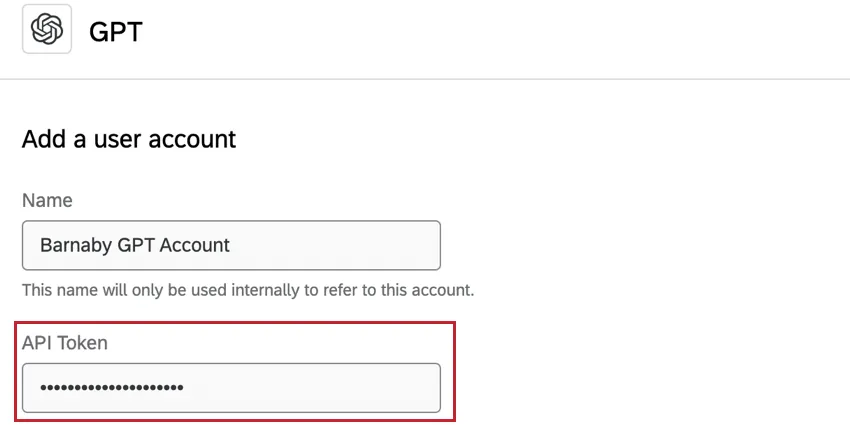
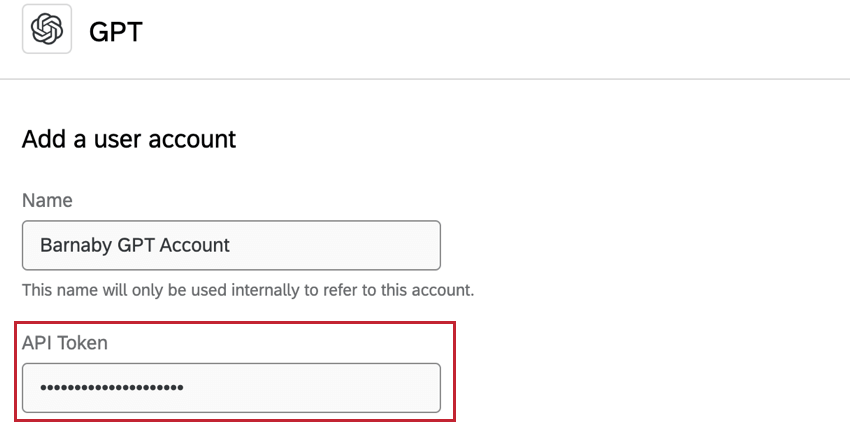
- For the GPT task, enter your OpenAI API token.
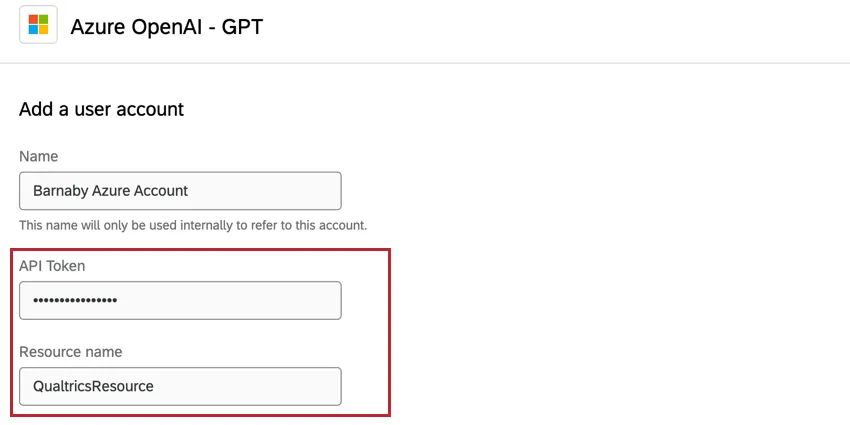
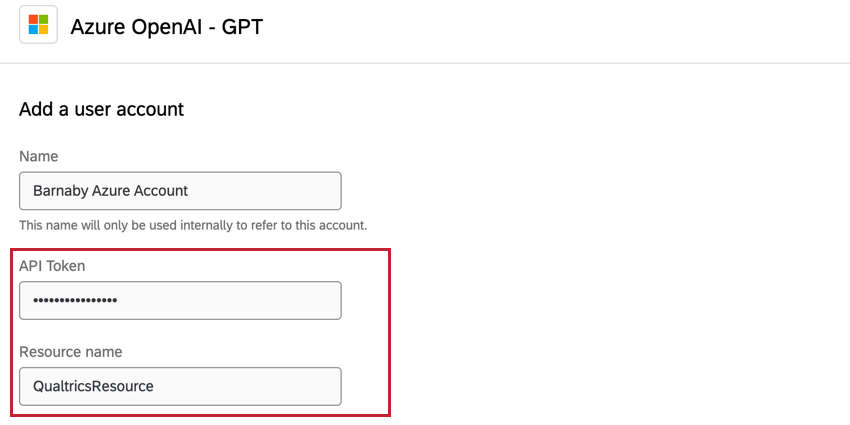
- For the Azure task, enter your Azure API token and the name of the resource you want to use.
Qtip: The remaining steps will use the GPT task. The steps and functionality are the same for the Azure task except where noted.
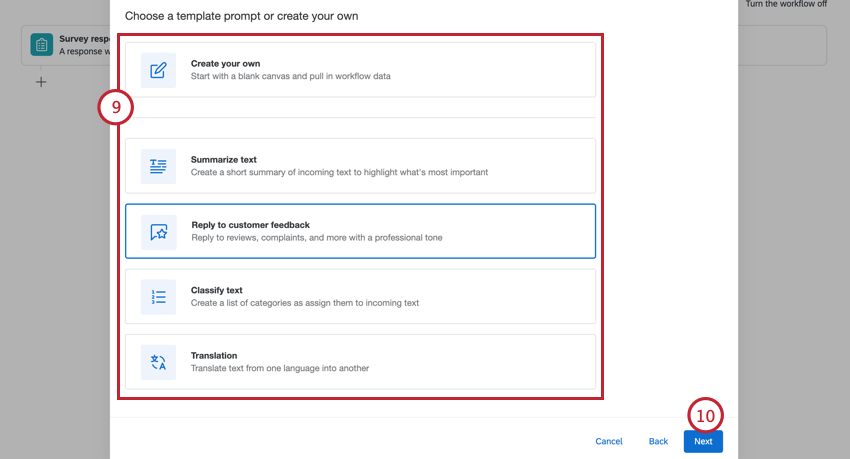
The following options are available:
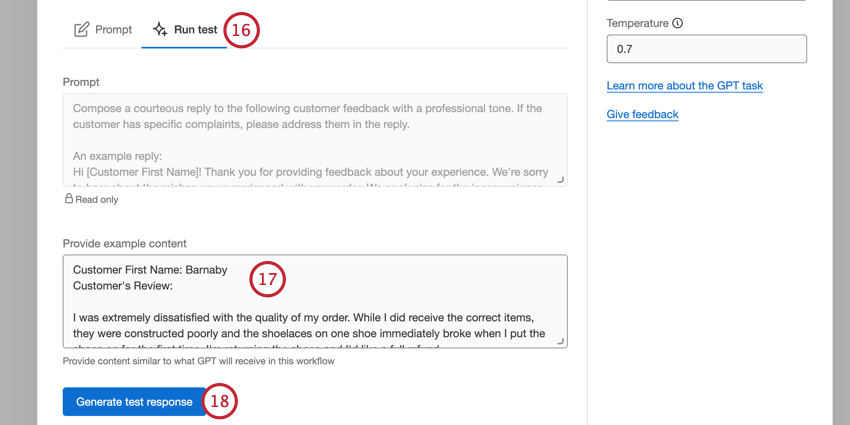
- Create your own: Create your own prompt from scratch.
- Summarize text: Summarizes the incoming text to highlight what’s most important.
- Reply to customer feedback: Reply to reviews, complaints, and more with a professional tone.
- Classify text: Create a list of categories and assign them to incoming text.
- Translation: Translate text from one language into another.
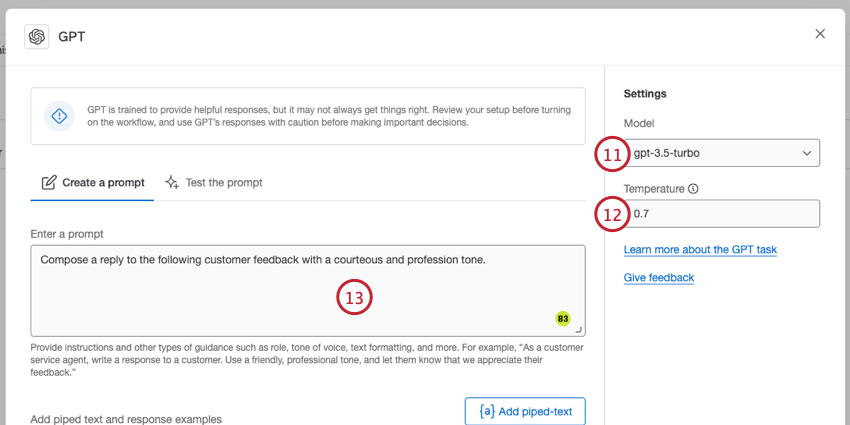
- For the GPT task, choose the model you want to use. The following models are supported: gpt-4, gpt-3.5-turbo, text-davinci-003, text-davinci-002, text-davinci-001, text-curie-001, text-babbage-001, text-ada-001, davinci, and ada. You can also use any fine-tuned models you have access to.
- For the Azure task, enter the Deployment name from Azure. This deployment must use a non-deprecated version from Azure.
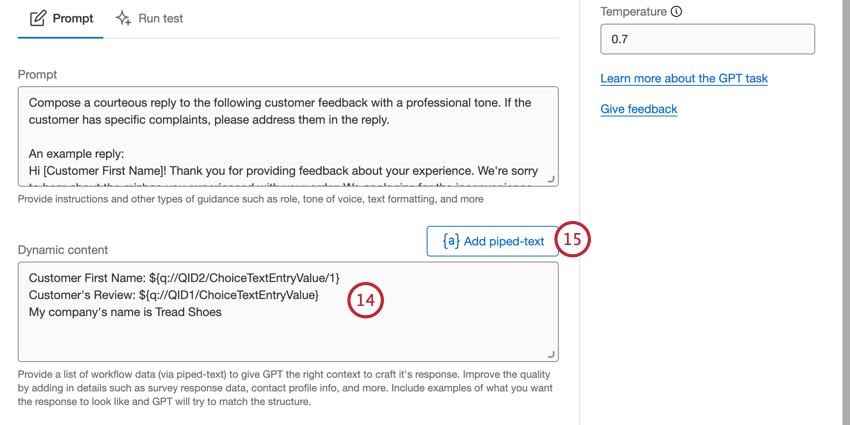
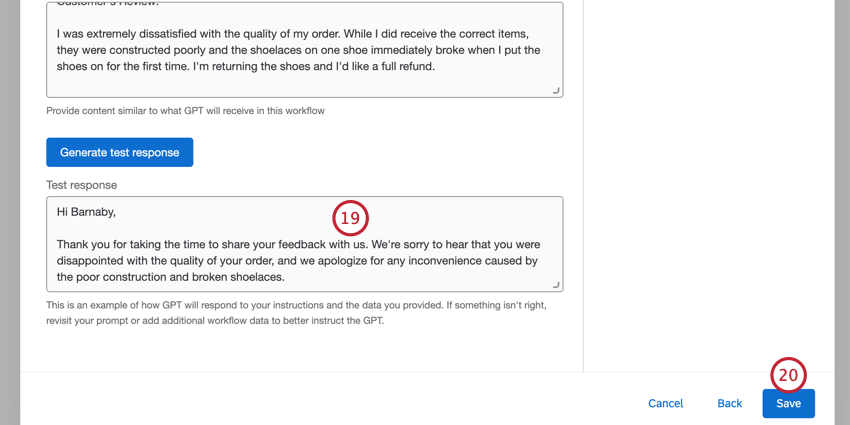
Qtip: If you need to make changes, navigate back to the Prompt tab.
That's great! Thank you for your feedback!
Thank you for your feedback!