Email as a Stream
About Email as a Stream
Email as a stream allows you to forward emails received in your current email client to the Qualtrics Social Connect Inbox. A user will then have the capability to reply to emails from the Qualtrics Social Connect Inbox.
Adding a New Email as a Stream
- Navigate to the Topics section of Account settings.
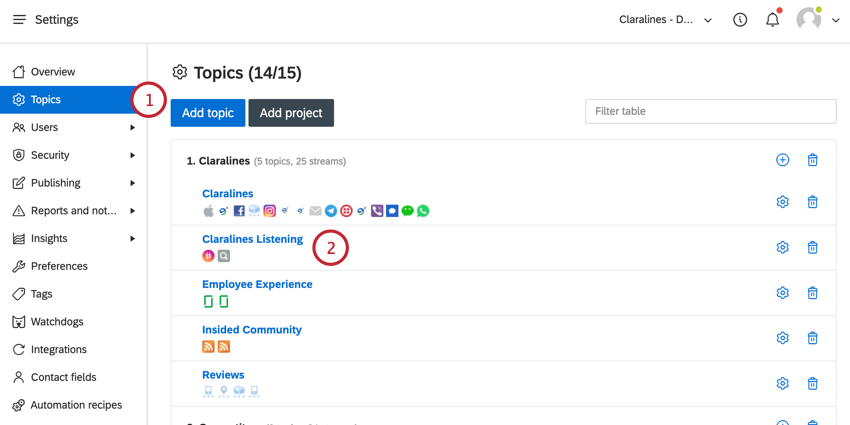
- Click on the topic you want to add the email to.
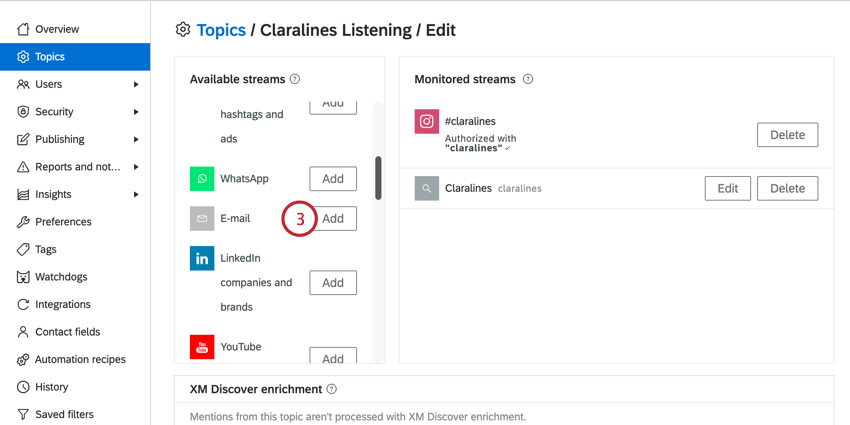
- In the “Available streams” section, click Add next to E-mail.
- Enter the email address you want to reply with in the Your email address field. Customers will see this email address and can reply to it.
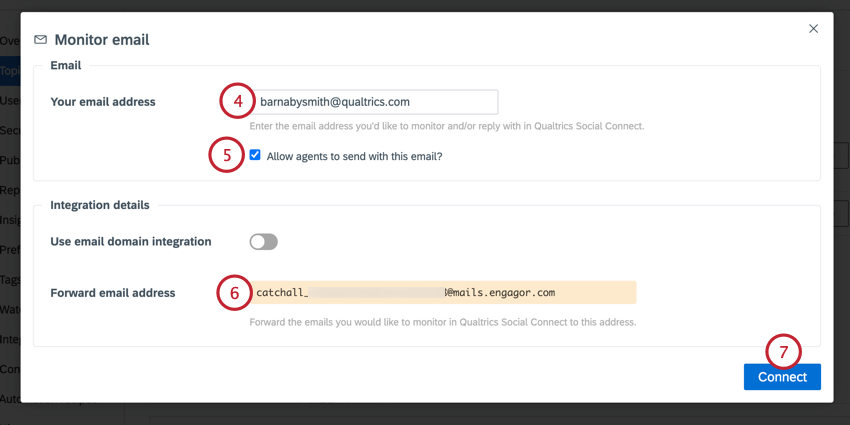
- Enable the Allow agents to send with this email option to allow users to reply to emails with this address. If you only want to use this stream for tracking, uncheck this box.
- Copy your Forward email address. Any emails sent to this address will be monitored in Qualtrics Social Connect. You will want to set up a forwarding rule for your email provider so that any emails are automatically forward to Qualtrics Social Connect.
- Click Connect.
Setting Up a Forwarding Rule
To receive the emails in Qualtrics Social Connect, you will need to create a forwarding rule for your email provider so that any emails sent to your email address are automatically forwarded to the forward email address. See the following external support pages for more information on creating forwarding rules for common email providers.
Configuring Your Email Domain: SPF
All emails are sent and received by a third party vendor, . To avoid outgoing emails being marked as spam, you should configure an SPF record within your DNS settings.
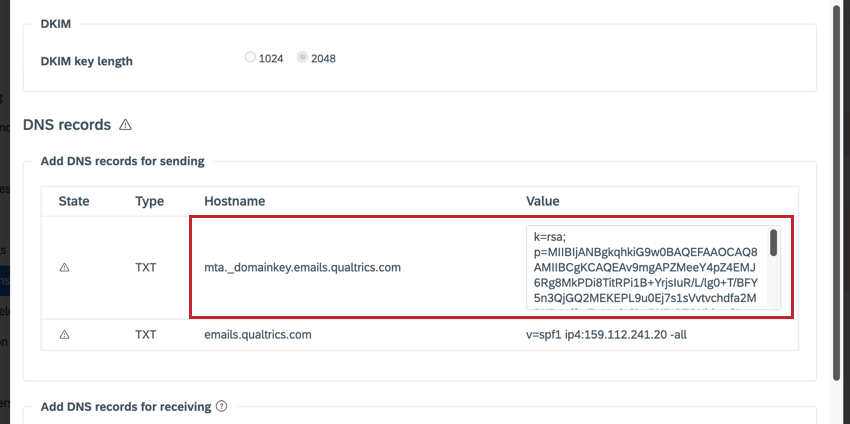
A Sender Policy Framework (SPF) record is a type of Domain Name Service (DNS) TXT record that identifies which mail servers are permitted to send email on behalf of your domain. The purpose of an SPF record is to detect and prevent spammers from sending unauthorized messages using your email domain. If you set up an SPF record for your domain, this will result in “mails.engagor.com“ being seen as an allowed sender for that domain.
Configuring Your Email Domain: DKIM/DMARC
To ensure that your sender reputation remains positive and secure, you can use DKIM (DomainKeys Identified Mail).
This email authentication protocol allows the email recipients to verify that you are the legitimate sender of a message. It also helps to prevent others from using your domain or other identifiers to impersonate you or your company.
DKIM is a widely-accepted standard in the email industry, necessary for both bulk marketing and transactional campaigns. Without DKIM and/or SPF, a message may be flagged as suspicious by various email analysis tools.
Follow the instructions below to configure DKIM in Social Connect:
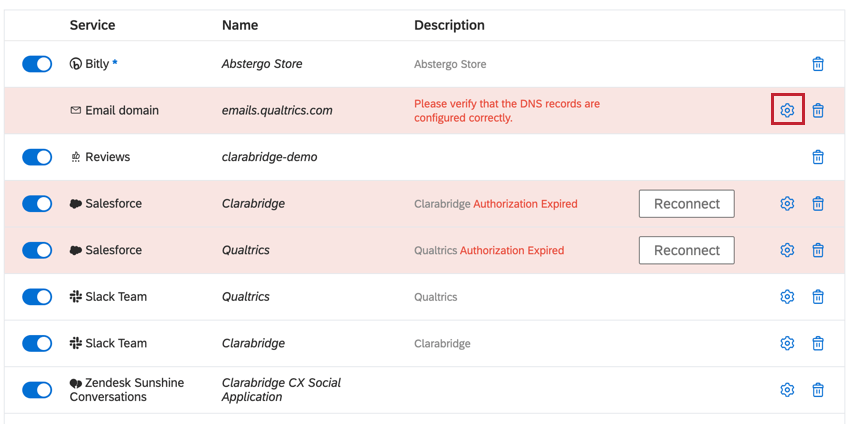
- Navigate to your Account settings by clicking the user icon in the top right corner.
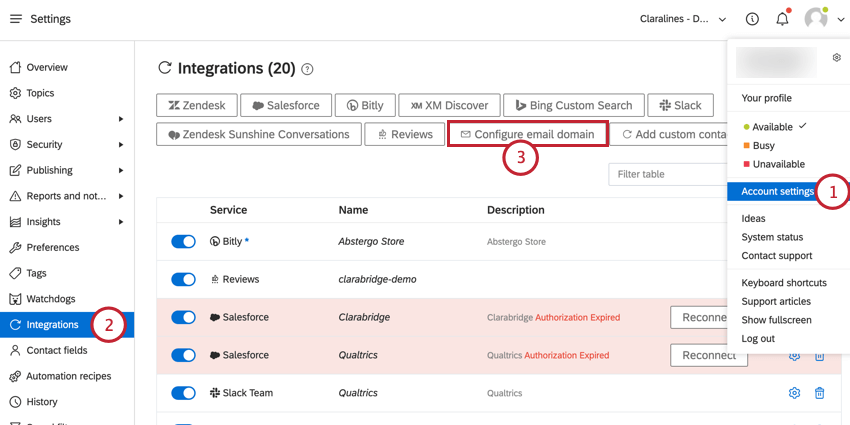
- Select Integrations.
- Click Configure email domain.
- Add your domain (e.g., qualtrics.com) or subdomain (e.g., mails.qualtrics.com) into the Domain name box.
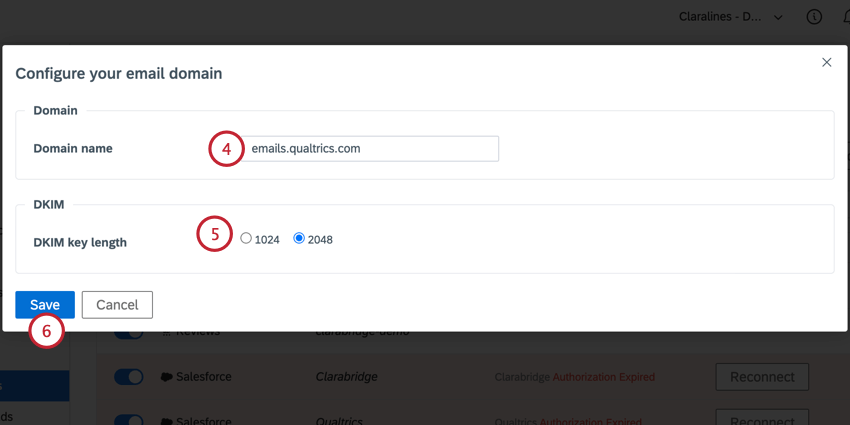
- Choose your DKIM key length, either 1024 or 2048. We recommend using longer keys for added security.
- Click Save.
Sending Outgoing Emails
This section covers features for customizing your outgoing emails.
- You can respond to emails using canned responses.
- By default, your outgoing email will have your account’s email template automatically applied.
- Use an automation recipe to automatically reply to incoming emails.
