
Code Task
What's on this page
About Code Tasks
Attention: Access to and continued use of this feature may require an upgrade to your license. Contact your Qualtrics Account Executive for more information.
The code task lets you use custom JavaScript to perform data manipulation, formatting, and calculation operations before or after other tasks in a workflow. For example, you can use the code task to transform an API call’s return output into a more user-friendly result (say, you needed to communicate the result to your non-technical manager). You can then pipe that transformed result into an email task which sends an email to your manager.
Attention: Custom coding features are provided as-is and require programming knowledge to implement. Qualtrics Support does not offer assistance or consultation on custom coding. You can always try asking our community of dedicated users instead. If you’d like to know more about our custom coding services, please contact your Qualtrics Account Executive.
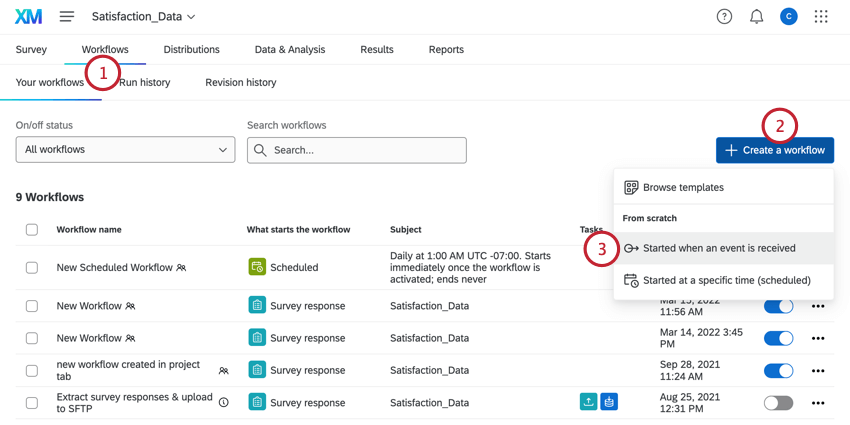
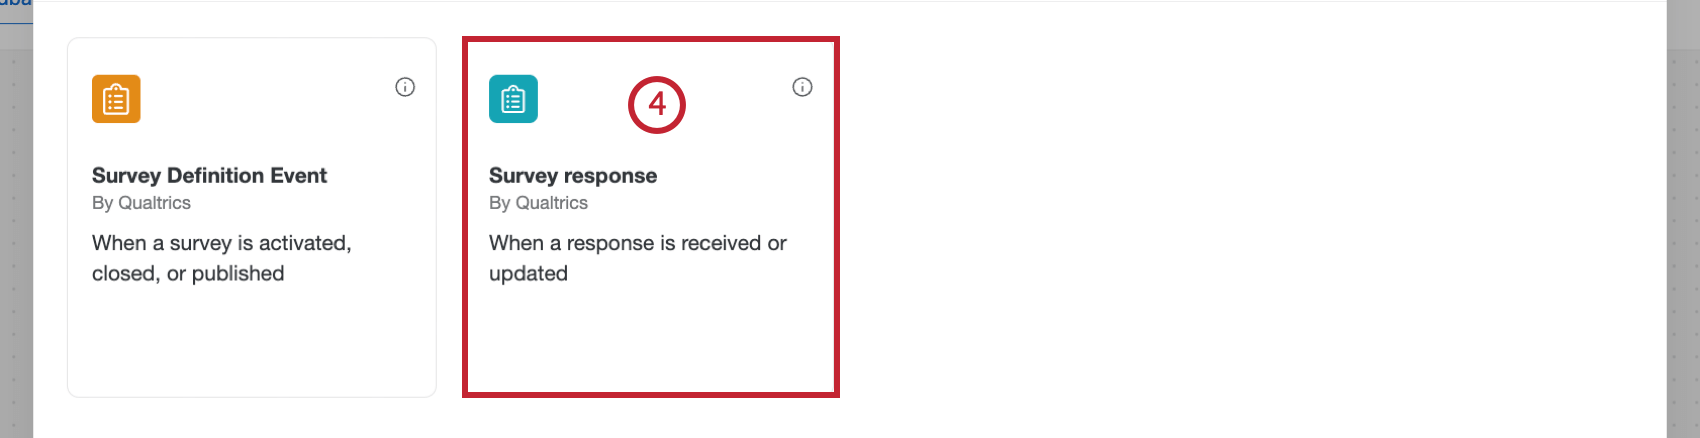
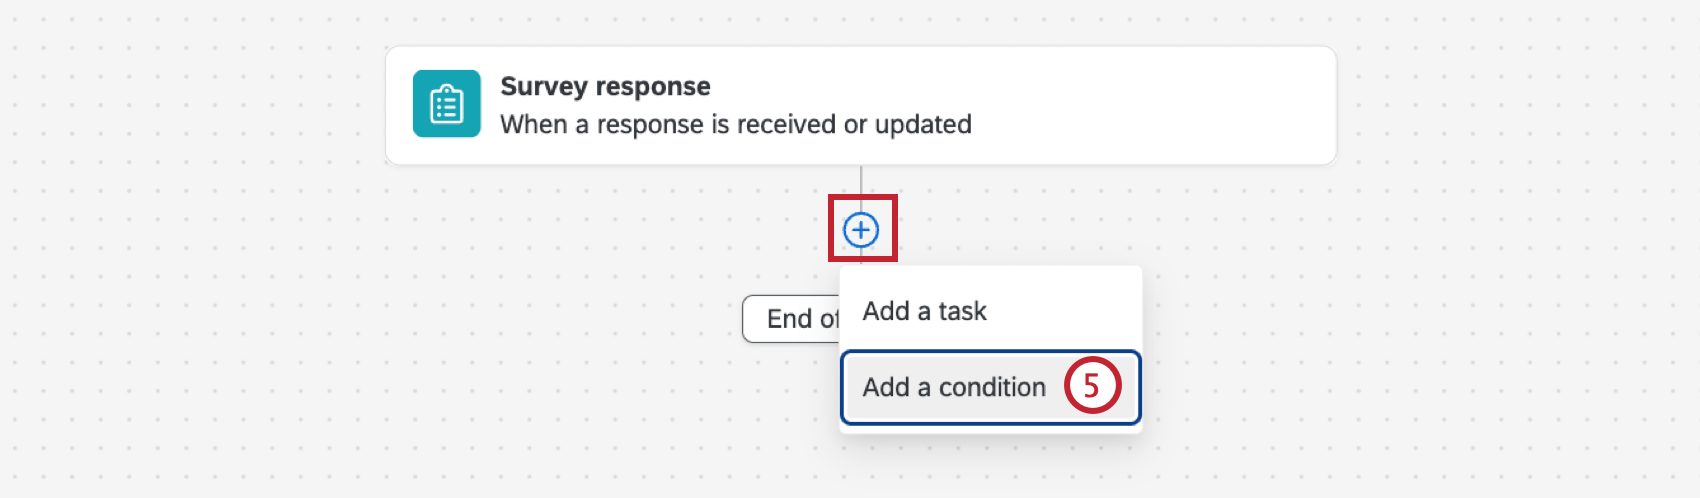
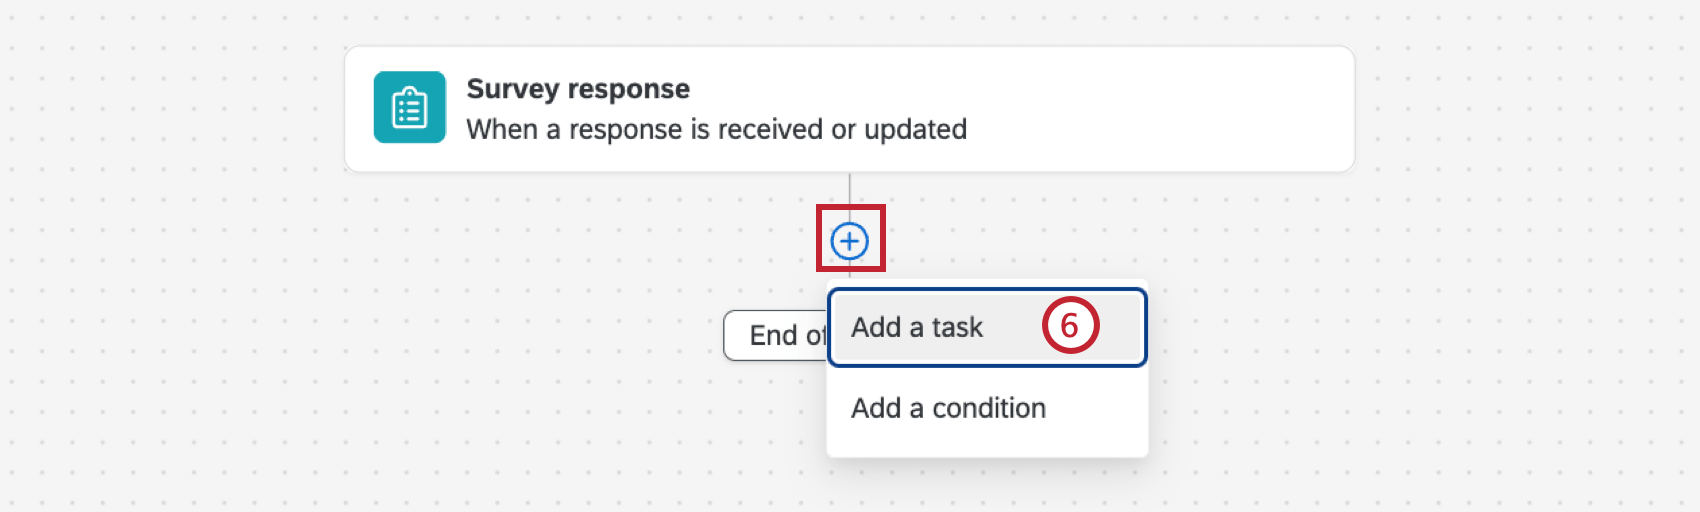
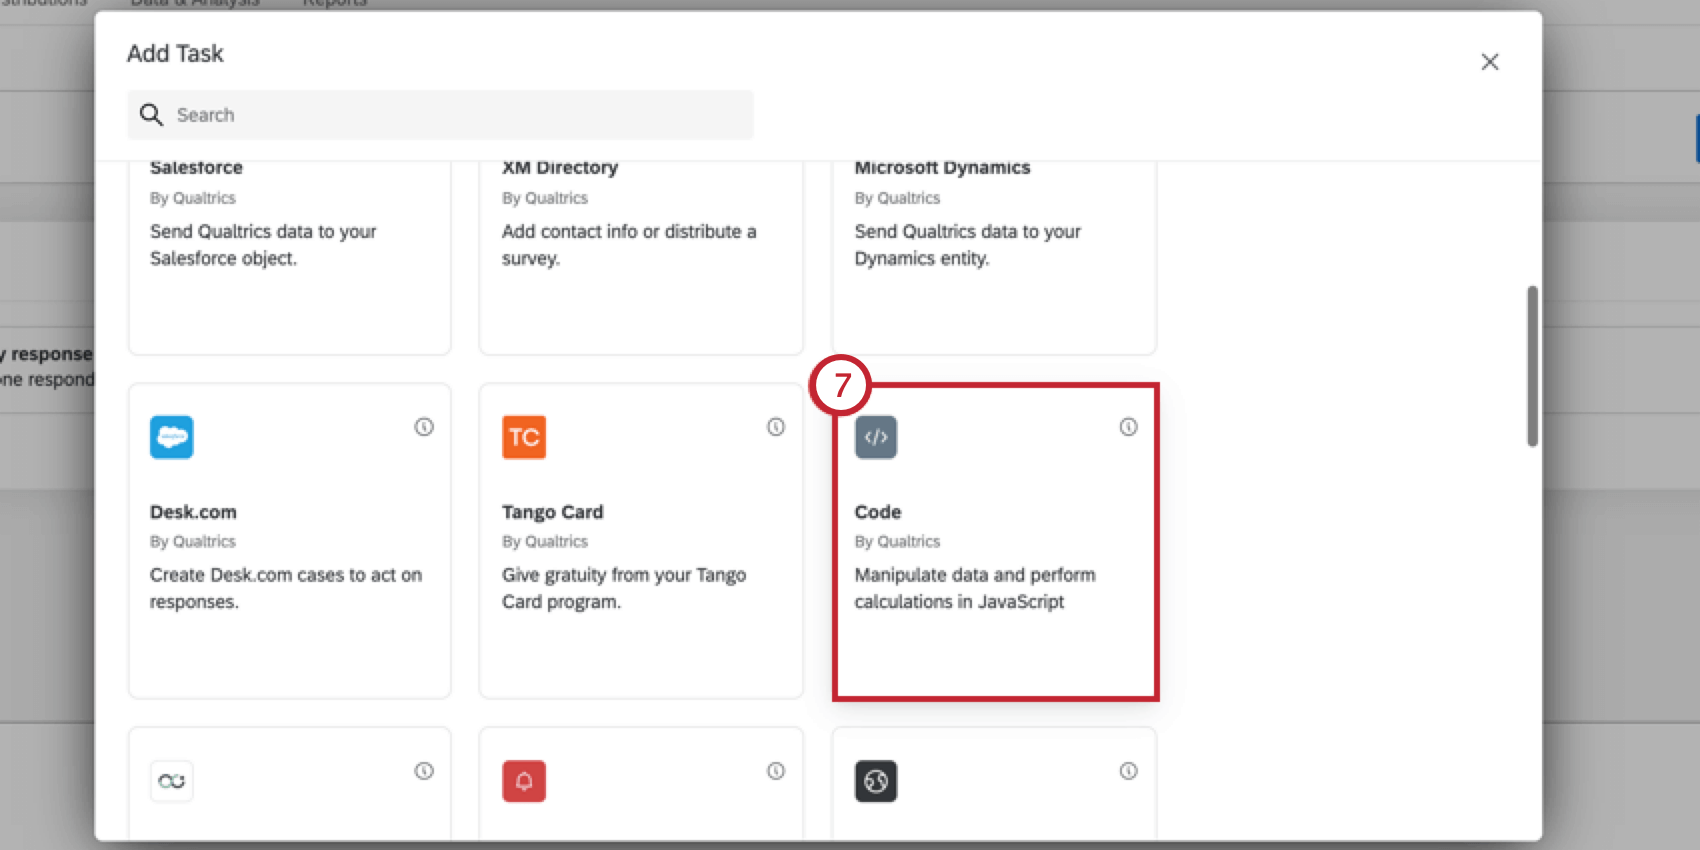
Setting Up Code Tasks
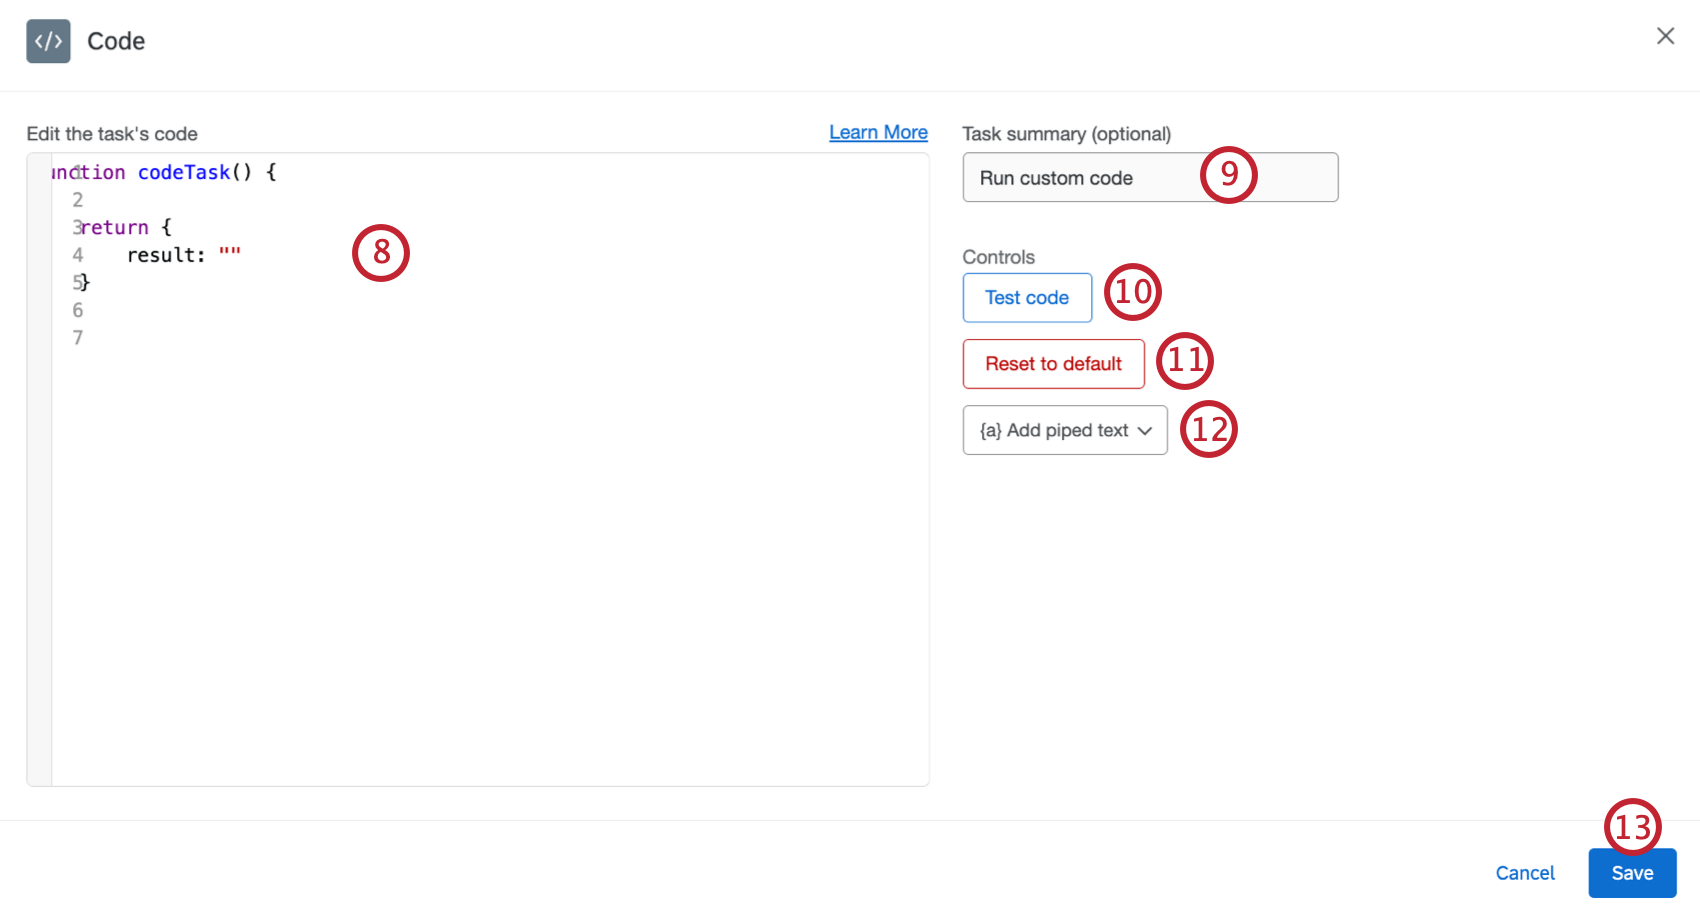
Qtip: The code editor maintains a history of edits so you can undo code changes by pressing CTRL + Z (PC) or CMD + Z (Mac). Use SHIFT + CTRL + Y (PC) or SHIFT + CMD + Y (Mac) to redo a change.
Qtip: As you write your code, you may see errors in the window. These errors are checking for syntax errors, not execution errors. Syntax errors will always appear in English regardless of your account language setting. Execution doesn’t take place until the task is saved and the workflow is triggered.


Qtip: Since they take place in different environment, testing the code may not give the exact same result as executing it in the workflow.

Qtip: When setting up your subsequent tasks, the code task’s output will be available in the task’s piped text menu.

JavaScript Execution Limits
When writing your JavaScript code to include in the code task, please be aware of the following execution limits:
- Maximum execution time: 10 seconds
- Maximum JavaScript length: 200KB
- No outbound API requests: For security reasons, the code task cannot make outbound requests to other APIs or services, nor can it retrieve other JavaScript libraries at run-time using HTTP requests.
If your JavaScript code exceeds these limits, then the code task will fail. If your workflow fails, head over to Workflows Reporting for more information about why your workflow failed.
Best Practices
When writing your JavaScript, follow the below best practices:
-
- Your code should conform to ES6 syntax.
- Your code will be executed with plain JavaScript.
Your code must return your result as a JavaScript object. When the return result is formatted in this way, the system can automatically infer what fields your custom code will be returning, and provide appropriate piped text for subsequent tasks.

Example: In this example, we return multiple results:
function codeTask() {return {hello: "world",foo: "bar",status: 200};}Example: In this example, we return a single result:
function codeTask() {return {result: "hello world",};}Depending on the type of information you are expecting, you may need to encapsulate your locator syntax in quotes. You will need to add quotes if you want your locator to resolve to a string. You do not need to add quotes if it resolves to an object
Example: For example, code such as the one below would need quotes:
function codeTask() {let ticketId = "~{ch://OCAC_31HNMUuEpm3Jg/exports.data.key}";...}- When using piped text for fields that may contain quotes, you should use template literals (`) instead of quotes around the piped text.
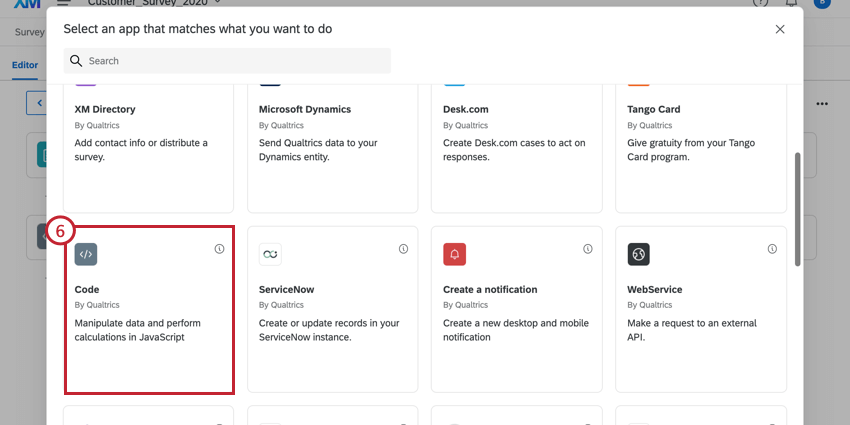
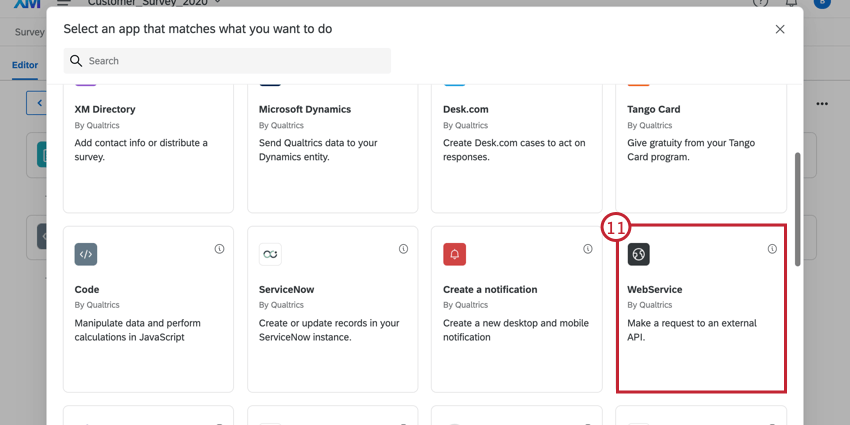
Example: Using a Code Task with a Web Service Task
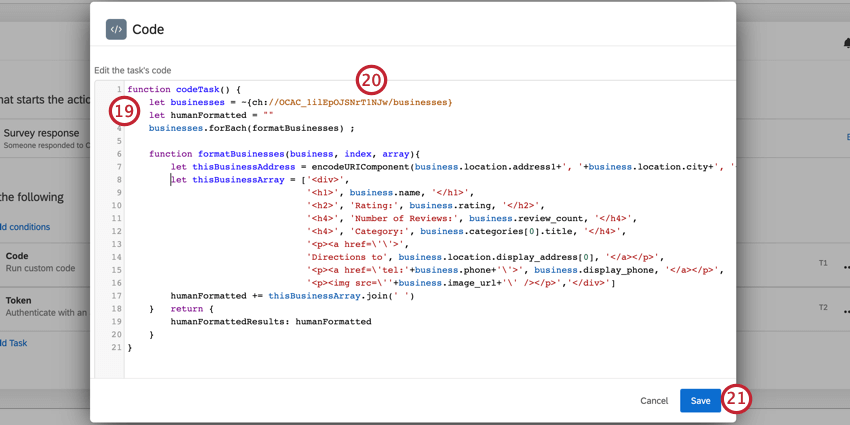
This example walks through using a code task with a web service task. You can use a code task with a web service task to transform a respondent’s survey response into API-friendly code, and then use the returned values to perform an API call. You can then take the results of the API call, and use another code task to transform the returned values into a human-friendly response.
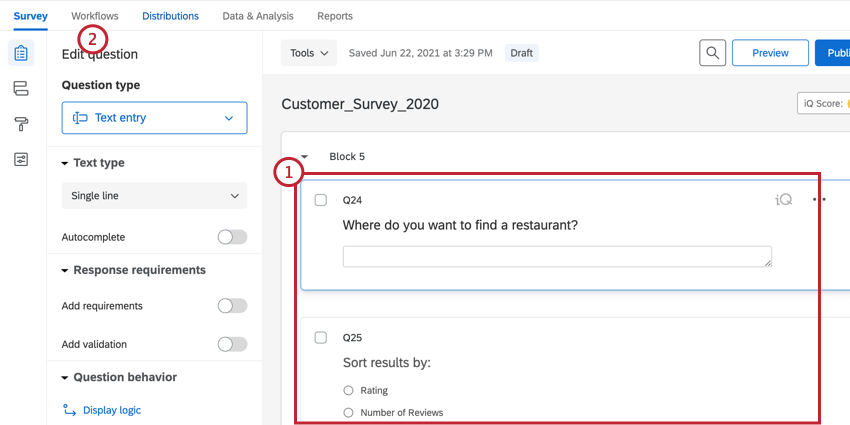
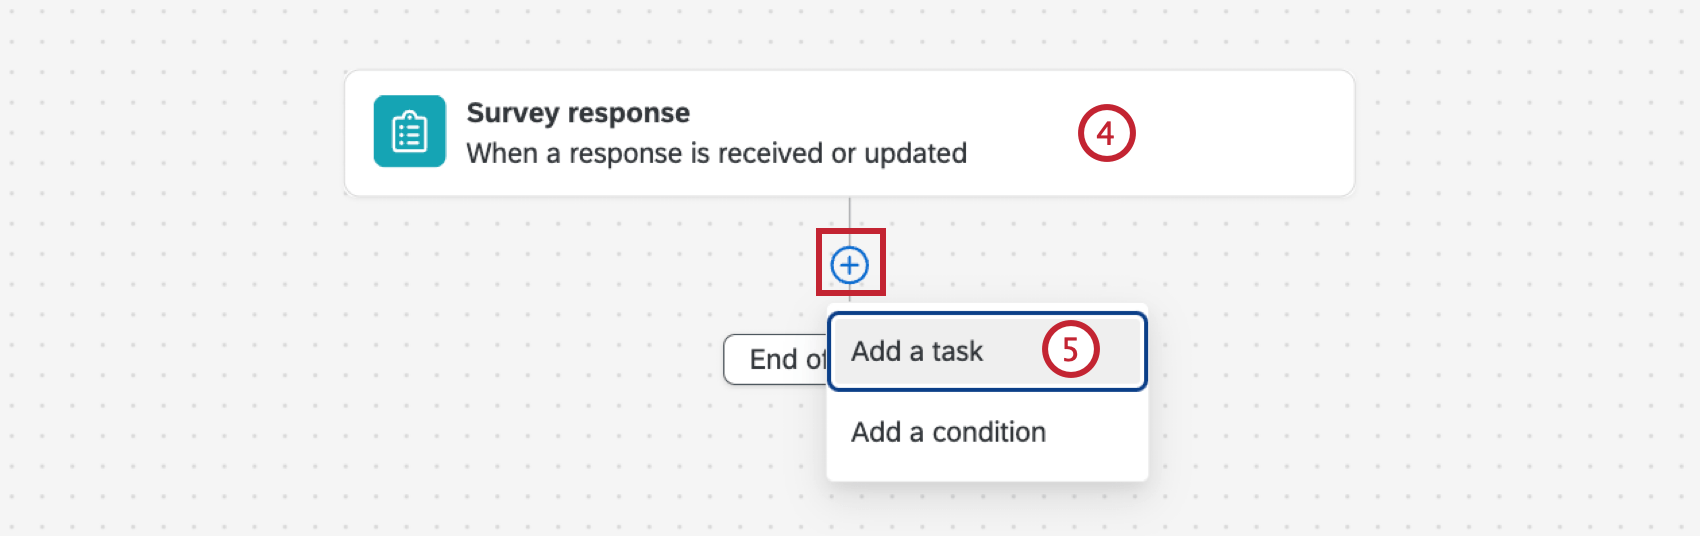
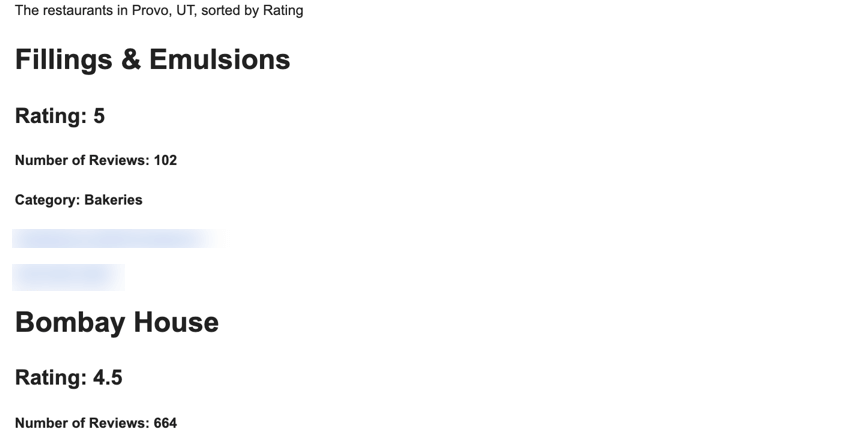
In this example, we are building a restaurant finder in Qualtrics. We’ll dive into the specifics a bit more later, but below is an overview of how we’ll accomplish this.
Creating a Restaurant Finder with Code Tasks
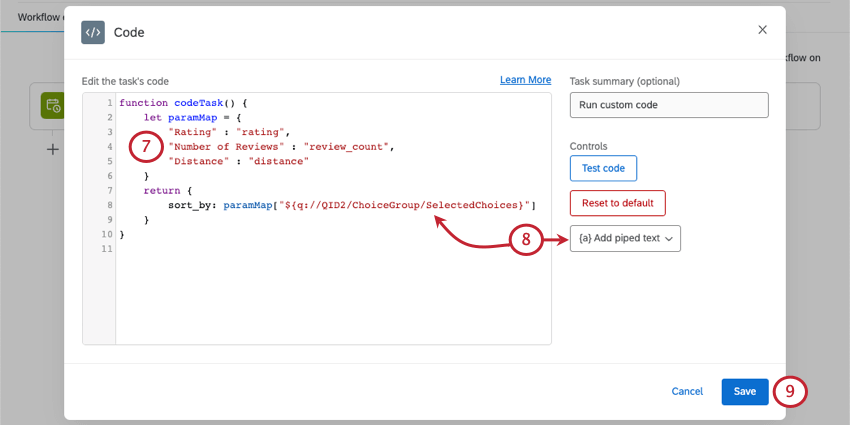

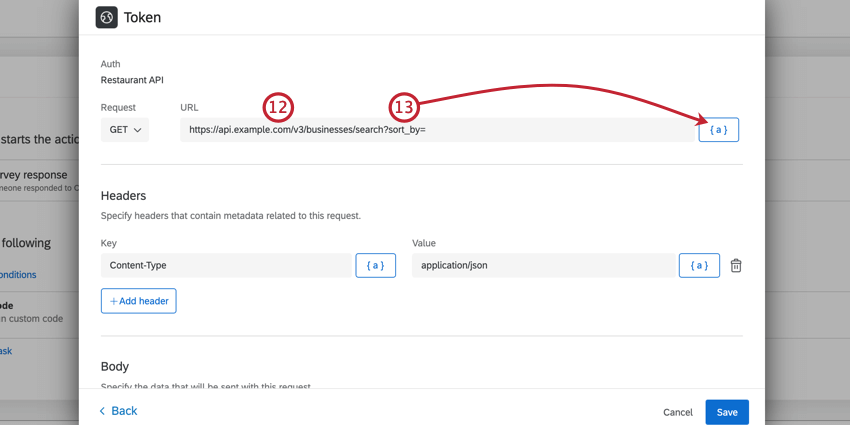
Example: Our fully built URL is
https://api.example.com/v3/businesses/search?sort_by=~{ch://OCAC_Zt2TNQYggAb6u89/sort_by}&location=${q://QID1/ChoiceTextEntryValue}This contains 2 parameters: sort_by and location. For sort_by, the value is the result of our first code task. For location, the value is the respondent’s answer to the text entry question.
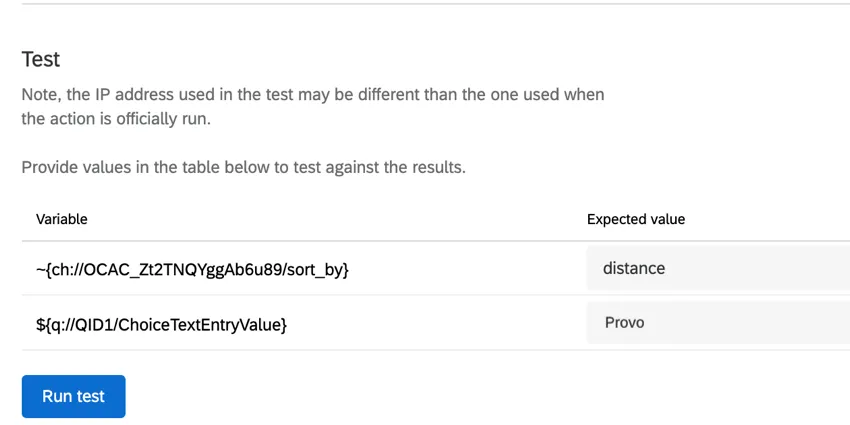
Qtip: In the web service task, you can test your expected returned values to make sure the API call works.

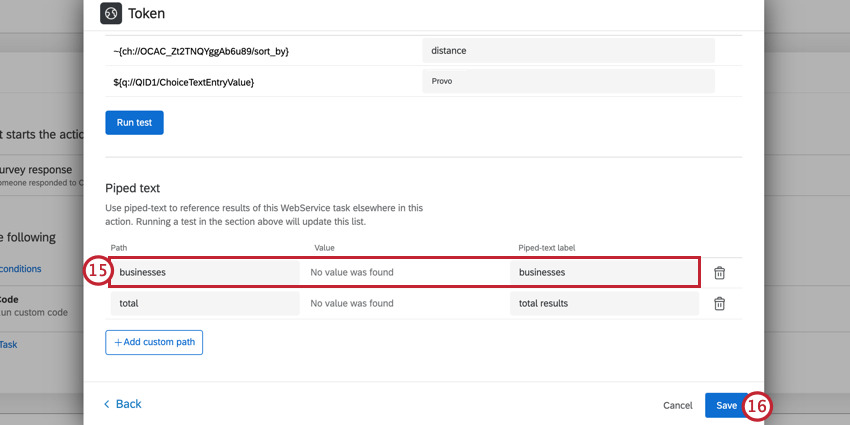
Qtip: If you tested your web service task, Qualtrics will automatically identify JSON paths and add them here. Feel free to delete any unneeded ones by clicking the trash can icon.

Qtip: If using piped text, you may receive a warning since the piped text designator is not valid JavaScript. However, this will be resolved before execution, as the piped text designator will be replaced with the field’s value before the code is executed.
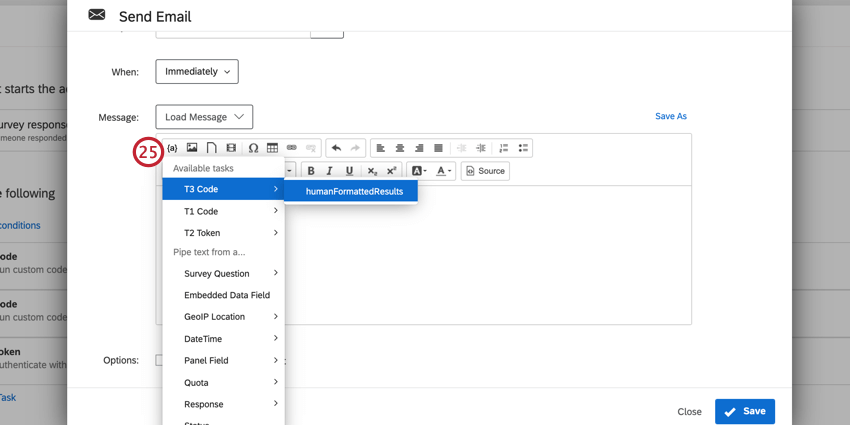
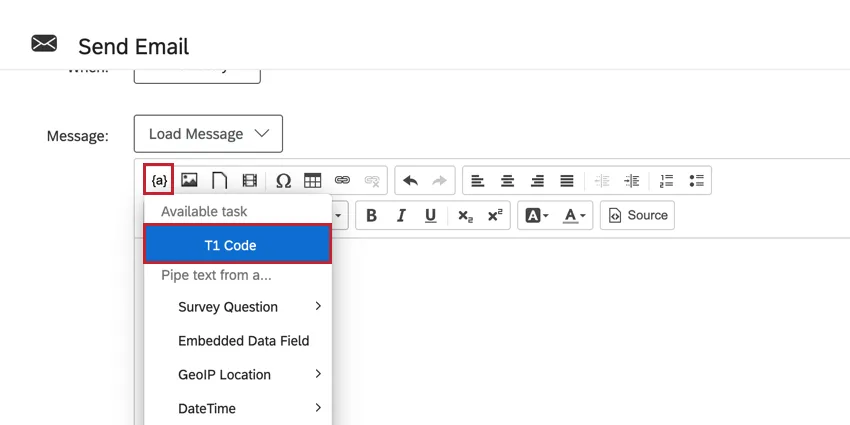
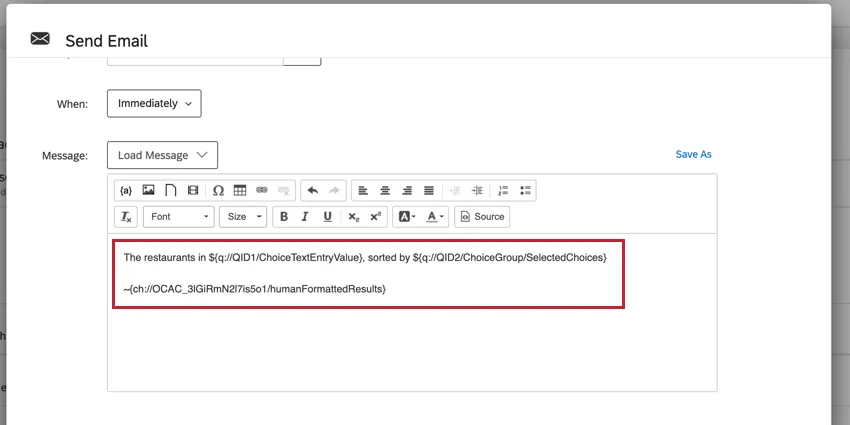
Example: Below is what the email editor looks like with the respondent’s answers piped in, along with the result of the second code task.

FAQs
Do I have access to all extensions available through the Workflows templates?
Do I have access to all extensions available through the Workflows templates?
Is there a link to all Workflows events and tasks?
Is there a link to all Workflows events and tasks?
What are Workflows templates?
What are Workflows templates?
What are workflows? / Where are actions?
What are workflows? / Where are actions?
There are no changes to workflow functionality as part of this update.
That's great! Thank you for your feedback!
Thank you for your feedback!