
Analyzing Individual & Team Performance
What's on this page
About Analyzing Individual and Team Performance
Once the scoring criteria is in place and call center interactions are getting scored automatically, your team’s scoring results can be analyzed in Studio.
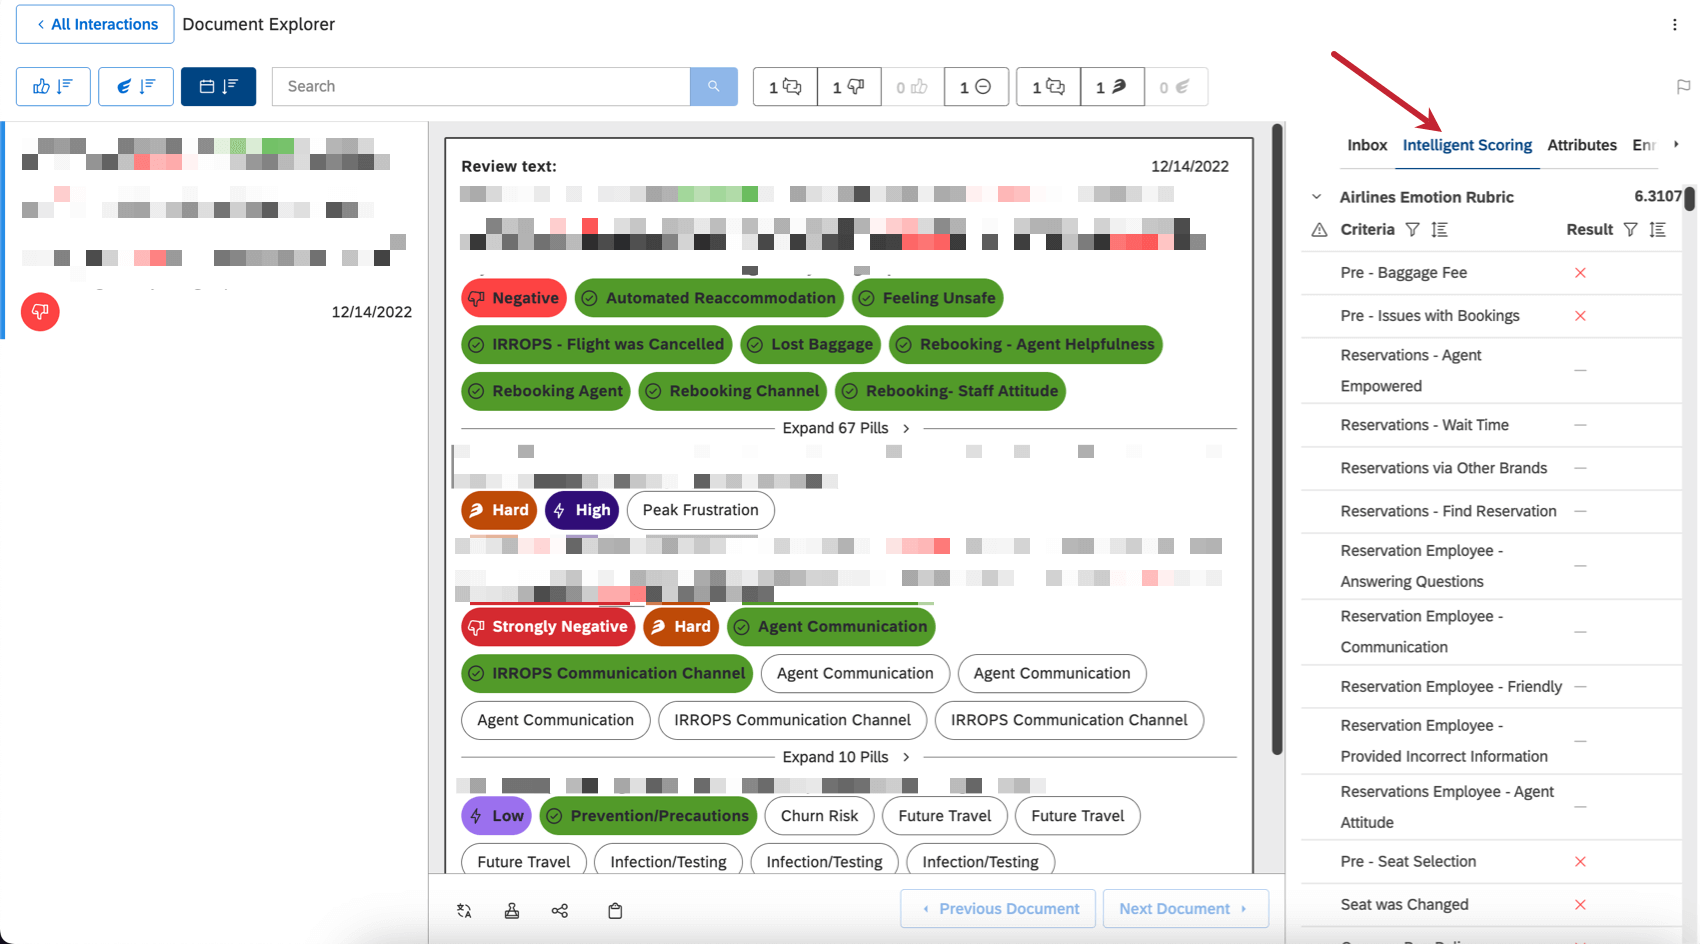
Viewing Scorecards for Specific Interactions
Dive into specific interactions between customers and representatives to review them on a case-by-case basis. For more details, see Viewing Scorecards per Document.

Sharing Scoring Criteria with the Contact Center Team
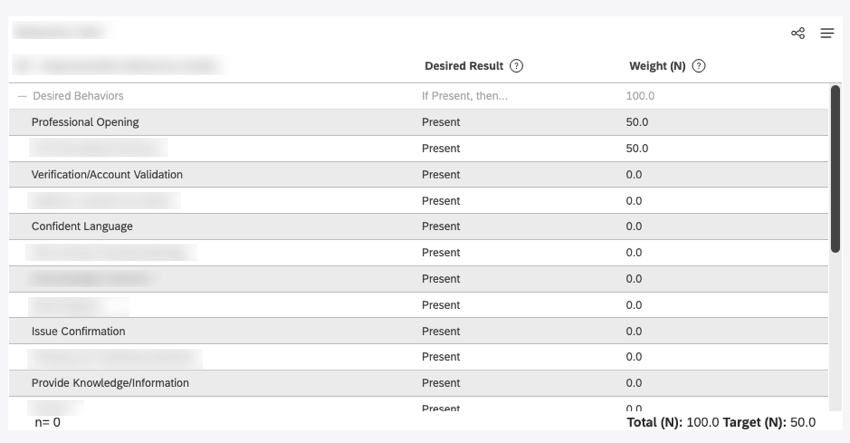
When you create a rubric to score someone’s performance, it’s important to be transparent with your team about the expectations they need to meet. The object viewer widget makes it extremely easy to report on the rubric and scoring model, so you can share this information with your contact center team.
Use the “Rubric” version of the object viewer widget to show the rubric itself representatives, managers, and supervisors. This version of the widget displays rubric’s criteria and their weights, along with the target score and total. These details update dynamically when any change is made to the rubric.

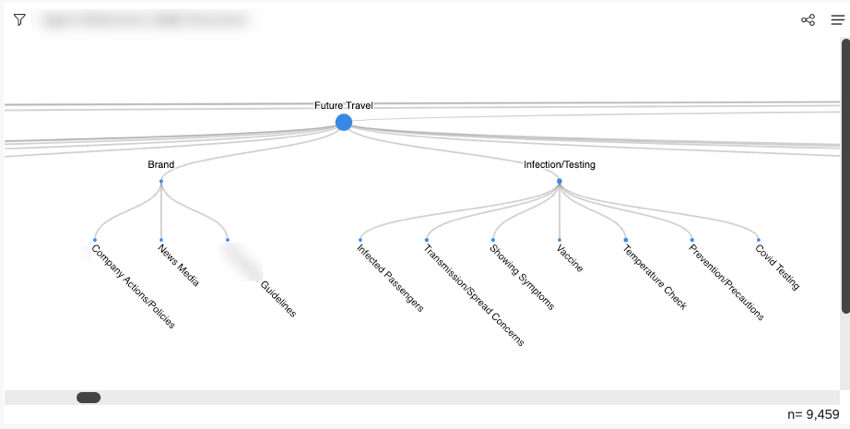
Use the “Model” version of the object viewer widget to show the category model behind the rubric. This version of the widget visualizes a model as a hierarchy of topics presented as nodes in a tree with key metrics.

Other Ways to Report on Intelligent Scoring
Once you’ve successfully set up intelligent scoring, you can incorporate that data into your Studio dashboards using a number of objects, such as special filters, metrics, and alerts. For more details, see Using Intelligent Scoring in Reports.
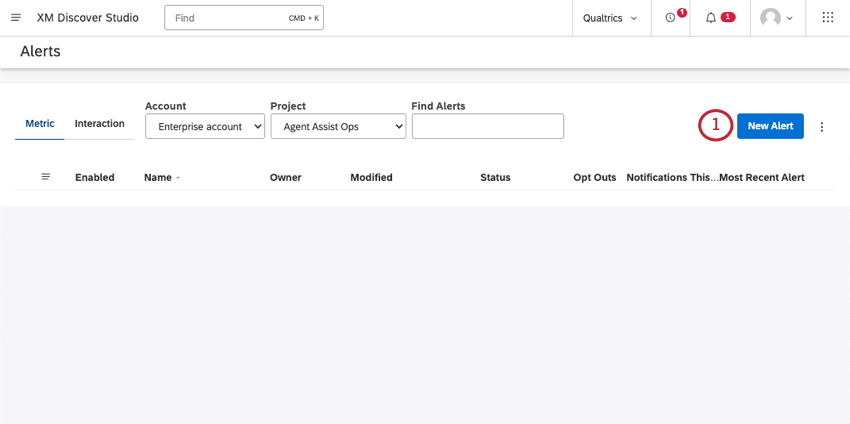
Monitoring Score Changes with Metric Alerts
In addition to the automatic scorecard alerts that trigger for each failed interaction, you can set up metric alerts to monitor score fluctuations against a custom threshold on a regular schedule.
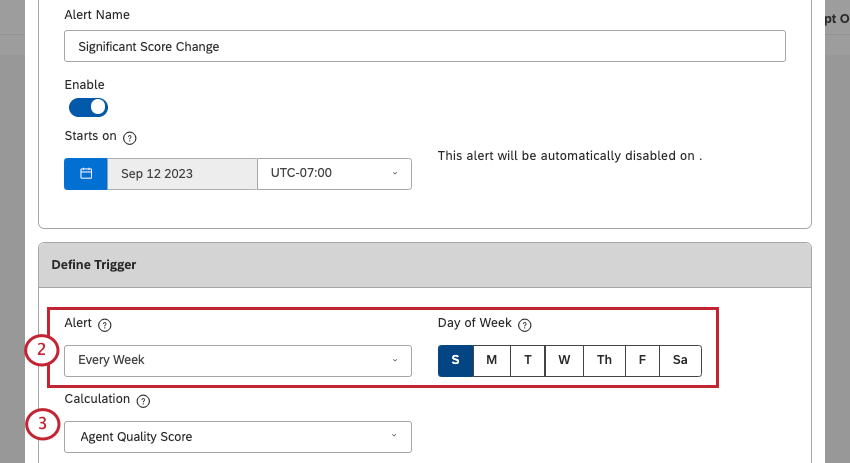
In this section, we’ll show you how to build a metric alert that notifies you whenever there are any significant changes to the score on a weekly basis.
Qtip: When you base a metric alert’s calculation on a rubric and either use the Criteria of is greater/less than or equal to, the threshold for the alert is automatically set to the rubric’s target score. In this case, you cannot edit the threshold directly; it’s updated automatically based on the rubric’s definition.
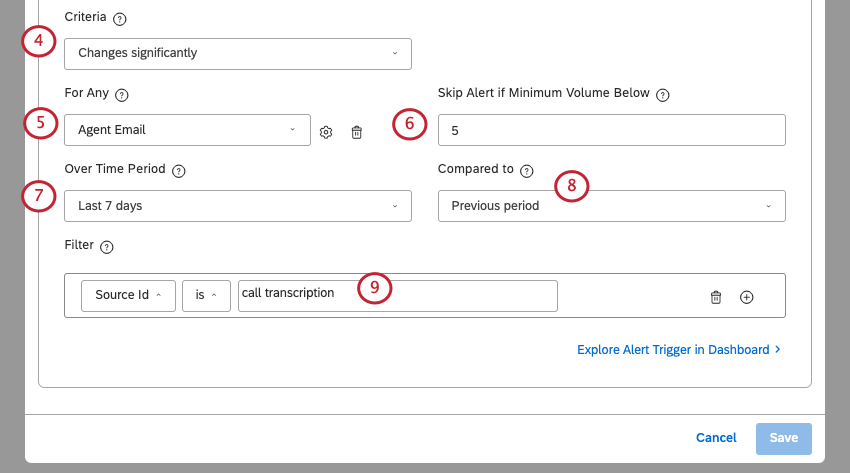
Example: We represent agents by unique email, so we added “Agent Email” here. You can also choose names or IDs, depending on the information you have in your dataset.
Example: For example, to monitor score variations over at least 5 interactions, set this property to 5.
Example: If you’re sending weekly alerts, it makes the most sense to monitor change over the last week, so you should select Last 7 Days.
Example: If you only want to monitor call transcripts, use the Source ID attribute to identify them.
That's great! Thank you for your feedback!
Thank you for your feedback!