-

Qualtrics Platform -

Customer Journey Optimizer -

XM Discover -

Qualtrics Social Connect
Creating Maps
About Creating Maps
You can begin building maps once you’ve connected your inbound data sources to the Customer Journey Optimizer. Maps connect the data from your different data sources to create a cohesive profile for a customer. When building a map, you decide how different pieces of data relate to each other.
There are 4 different types of maps: simple, single channel, branched, and advanced. See Types of Maps for more information about each map type and their use cases.
When creating a map, the map should contain only the minimum number of entities required to define a traveler in that journey.
Map Entities
Your map will be created using one contact schema and usually one or many event schemas. The primary ID will be your ID that identifies customers and joins the data sets together. Your primary ID should be a unique identifier; otherwise, you risk unintended duplication of customers. Once chosen, the primary ID will be mapped to the customer ID, otherwise known as the unique identifier for a customer.
Some common primary ID fields are:
- Contact email
- Account ID
- User ID
- Phone number
- Contact ID
The rest of the fields in your map come from your data ingested by events. You can only use an event field once in a map. When you are creating simple or branched maps, events that are already in use will be disabled. However, when you are creating advanced maps, event fields are not automatically disabled after being used. Nevertheless, advanced maps still have a limit on only using a given event field once in the map.
Creating a Map
- Navigate to Integrations.
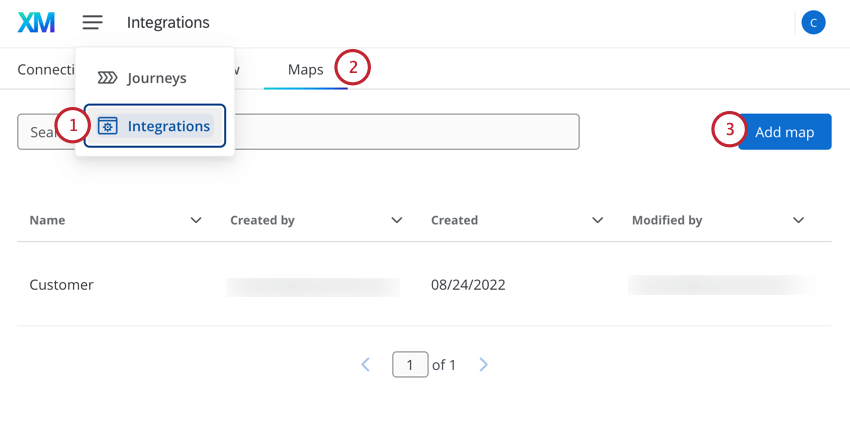
- Select Maps.
- Click Add map.
- Give your map a descriptive name so you can identify it later.
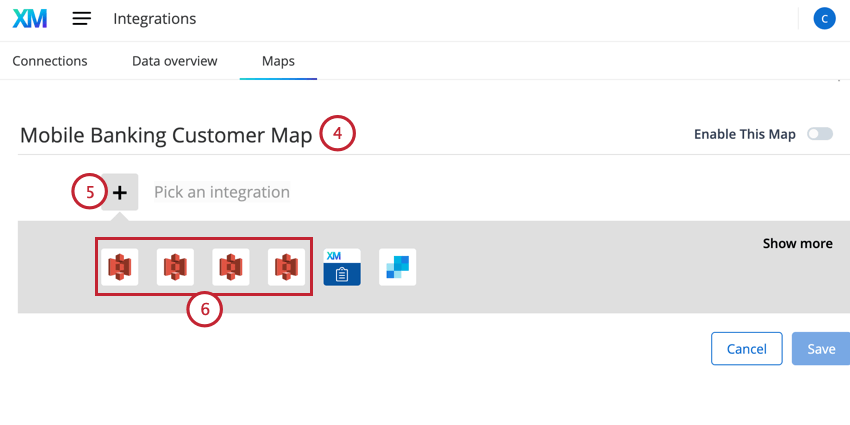
- Click the plus sign, (+).
- Choose the integration that contains your primary ID.
- Select the profile data source that contains your primary ID.

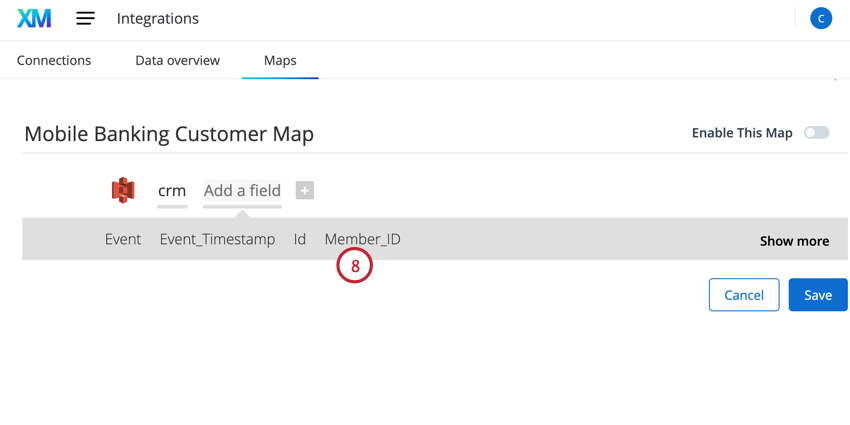
- Choose the field to use as the primary ID.
- Click maps to +.
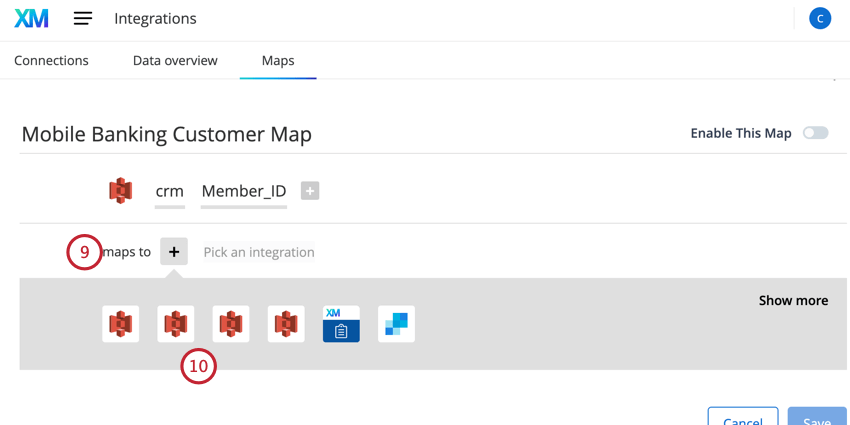
- Choose the integration that contains the field you want to map to your primary ID (or to an alternative ID if that is found in the Traveler schema specific to that event source). Finish the mapping by choosing the desired data source and field like in steps 7 and 8.
- If you’d like to map a field from a new integration, click branch +.
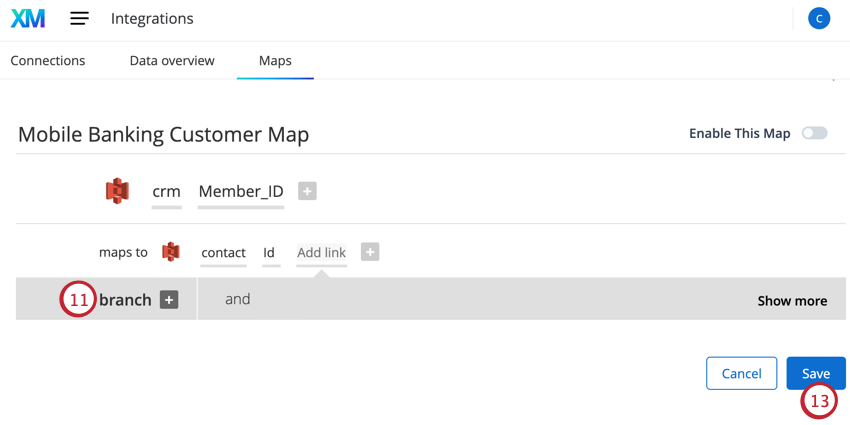
- Repeat the steps above to include all desired entities in your map.
- After you’ve mapped all the entities you need, click Save.
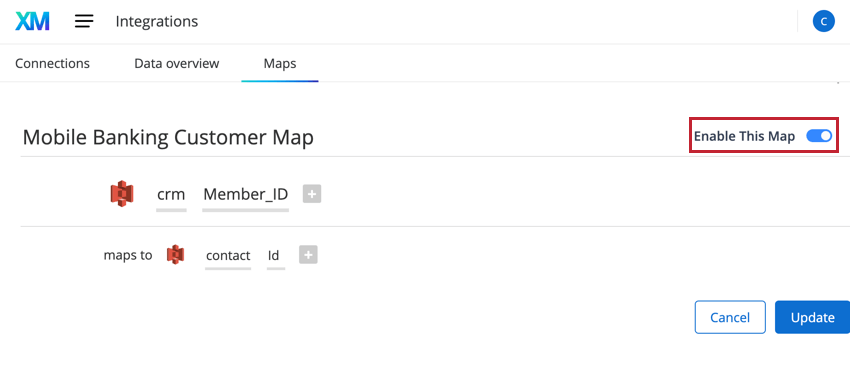
You won’t be able to use your map in a journey until it has been enabled. After creating your map, select it from the Maps page. Once you have the map open, turn on the Enable This Map option.
Map Options
From the Maps page, you can edit and delete maps you’ve created. Click the three dots to the right of a map to access the following options:
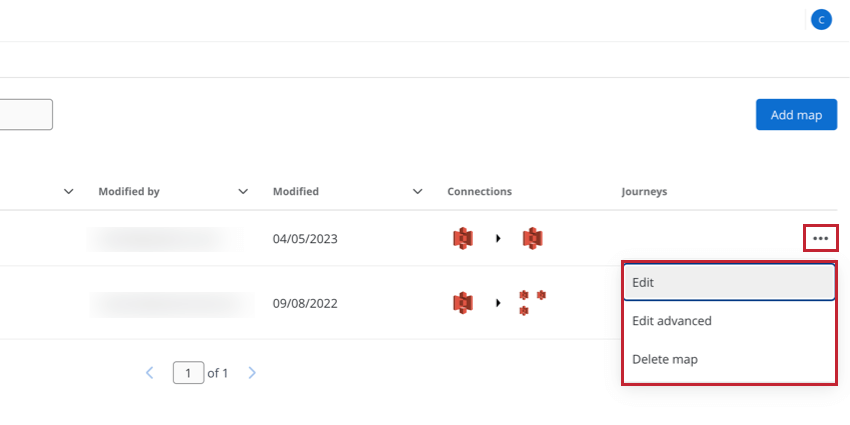
- Edit: Allows you to edit your map.
Attention: You can only update a map if it is not in use by a published journey. When a journey has been published live or in the Shadow mode, no more changes are allowed to the map. If you want to update a map that’s associated with a published journey, then pause your journey to make any adjustments.
- Edit advanced: Opens the advanced map editor, where you can modify the JSON for your map.
Qtip: You can only create advanced maps through JSON editing.
- Delete map: Deletes the map. You can only delete a map that is not in use by a journey. Note that deleted maps cannot be recovered.