-

Qualtrics Platform -

Customer Journey Optimizer -

XM Discover -

Qualtrics Social Connect
Creating & Using Journey Filters
About Creating & Using Journey Filters
You can create filters for filtering your journey data in your journey’s Settings tab.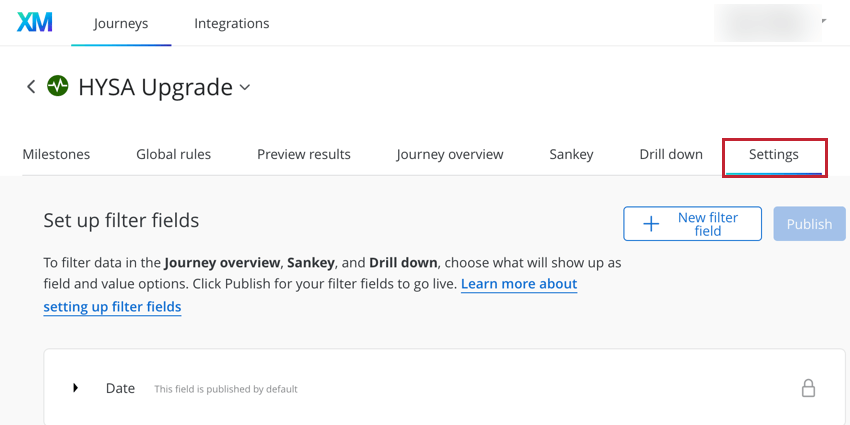
This page will cover how to create journey filters and where you can use them within the journey.
Creating Journey Filters
- In the Settings tab, click New filter field.
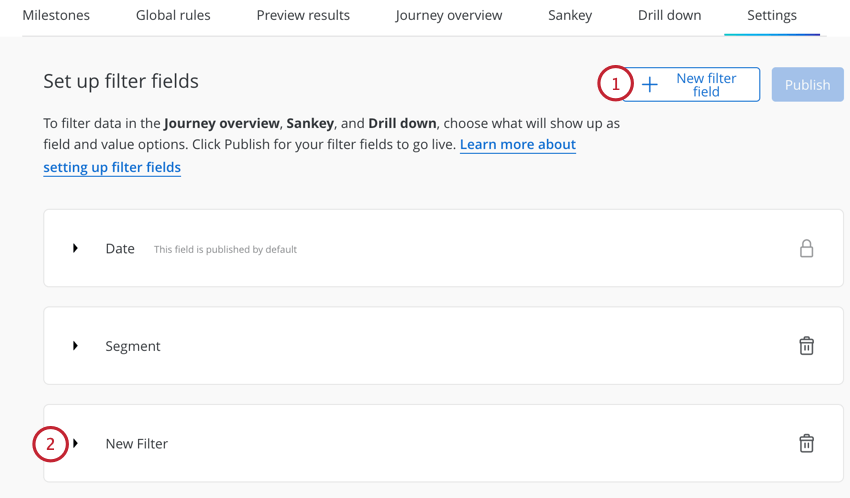
- Your filter will be added to the list of filters as a New Filter. Click the arrow next to the filter name to begin setting it up.
- Choose the field you want to use for the filter.
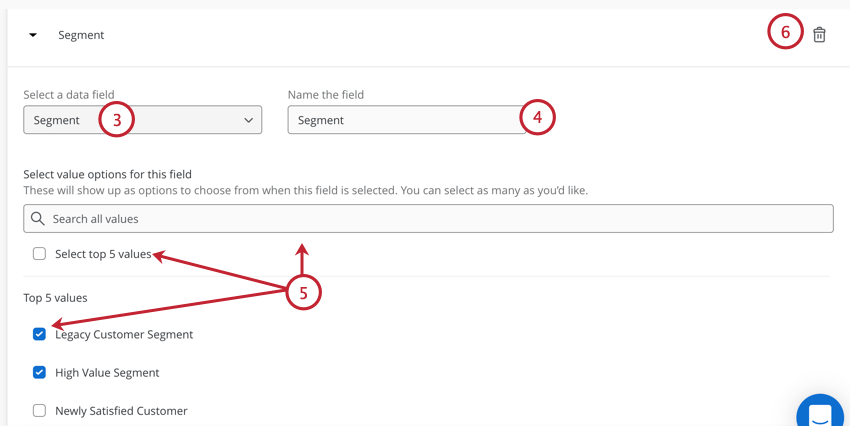
- Name your filter.
- After choosing a field, a list of possible values will appear. Check the boxes next to the values you want to be available in the filter. You can use the Select top X values option to automatically select all possible values. You can also use the search bar to search for a specific value.
Qtip: If new values have been ingested into CJO, they will not automatically be aded to your filter. You must edit your filter and select the new values.
- If you want to remove a filter, click the trash can icon.
- When finished, click Publish to make your filters available to use.
Using Journey Filters
After you’ve created your filter, you can use it in the following areas of your journey:
To use your filter:
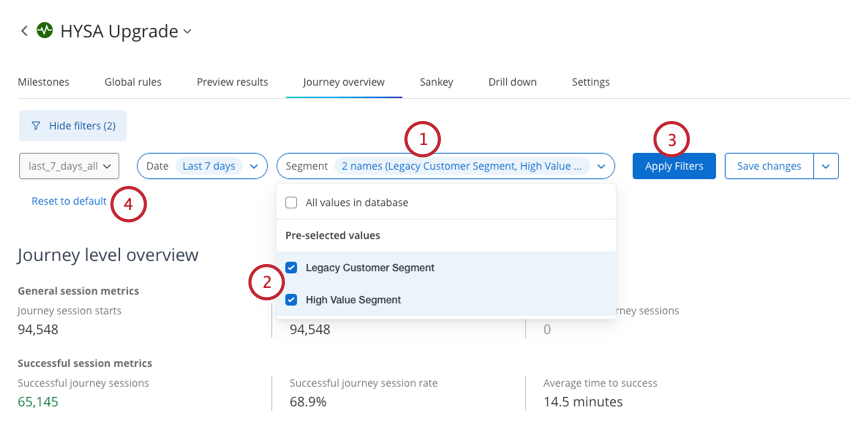
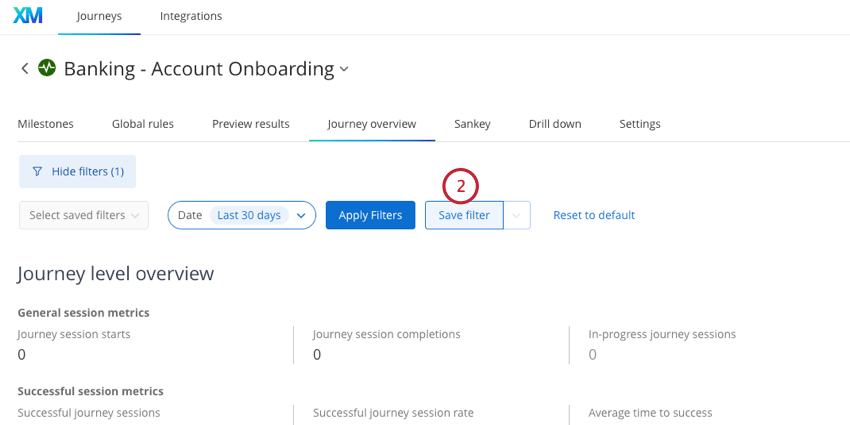
- Click the filter you want to apply at the top of the page.
- Check the boxes next to values you want to filter for.
- Click Apply Filters. The page will update with your filtered data.
- Select Reset to default if you want to remove your filters (i.e., show all data).
Saving Journey Filter Sets
You can save a filter set so that you can easily switch between multiple different filtered views. When you save a filter set, the set’s data is recalculated each day which allows you to change the applied filter set without having to wait for your data to reprocess.
- Follow the steps in Using Journey Filters to create the filter set that you want to save.
- Click Save filter.
 Qtip: If you currently have a filter set selected and would like to save your changes as a new filter set, you’ll notice this button says “Save changes” instead. To save a new filter set, click the arrow next to this button and select Save as.
 - Give your filter a name. This name should be descriptive so others users know what data is included in the filter.
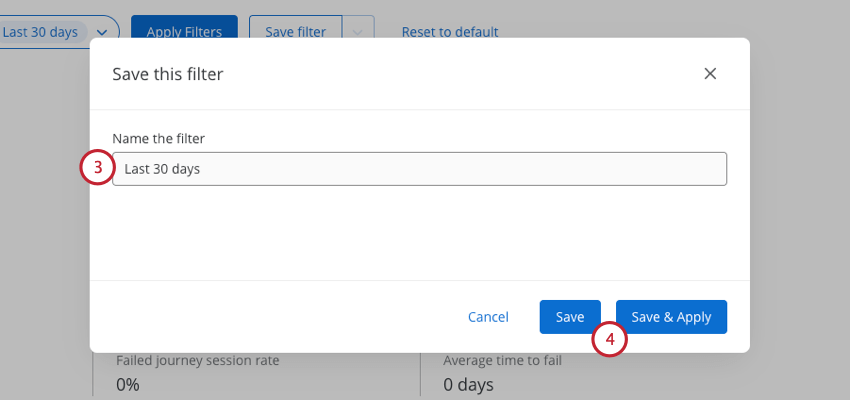
- Click either Save or Save & Apply depending on what you want to do:
- Save: Saves the filter but does not apply it to your data.
- Save & Apply: Saves the filter and applies it to your data. Choosing this option will cause your page to recalculate the data displayed on it.
Using & Managing Filter Sets
This section will cover how to switch between saved filter sets and how you can edit a set’s name or delete existing sets.
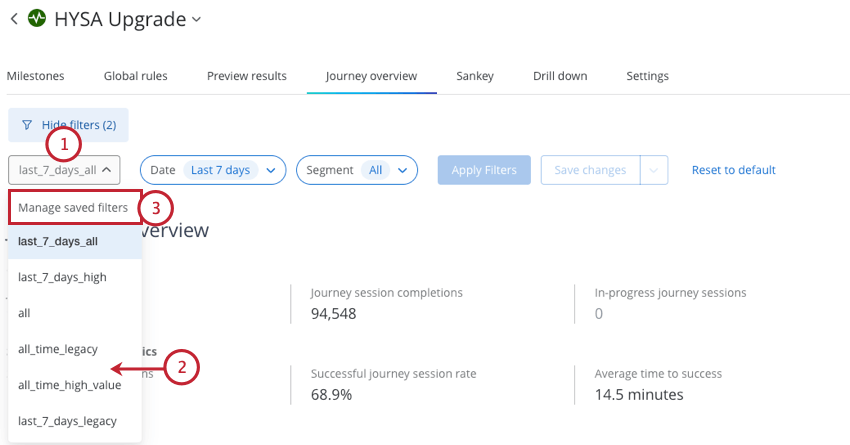
- Click the filter set’s name.
 Qtip: If you do not have any filter sets saved yet, this button will be grayed-out and will say “Select saved filters.” You’ll need to create a filter set before you can continue.
 - Choose the filter set you want to apply.
Qtip: Don’t forget to click Apply Filters after choosing a filter set.
- To edit or delete a filter set, click Manage saved filters.
- Click the arrow next to a filter set to expand it and see what data is included in the filter.
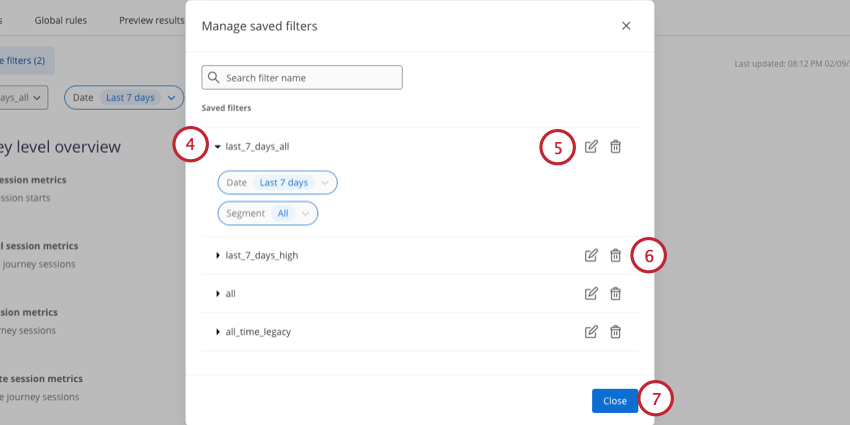
- To edit a filter set’s name, click the pencil icon.
Qtip: To edit the data included in a filter set, apply the filters and then make any adjustments. Click the Save changes button to update the filter set.
- To delete a filter set, click the trash can icon.
Qtip: Deleted filter sets are unrecoverable. Click Delete in the confirmation popup to delete your filter set.
- When finished making changes, click Close.
Using Session Attributes as a Filter
You can use global rules to create filters based on session attributes. This allows you to save transient event data as a traveler attribute, making the event data available to use as a filter.
See Building Rules for a general overview of how to build journey rules.
- For the “if” statement of your rule, choose your event source and field and set the condition to is not blank.
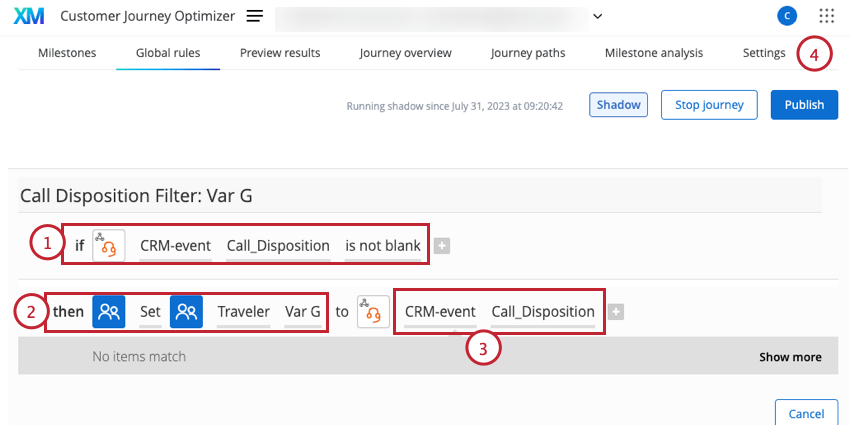 Example: An example rule is “CRM-event Call_Disposition is not blank.” In this example, CRM-event is our event source and Call_Disposition is the specific event field.
 - For the “then” statement of your rule, set a custom traveler variable (e.g., Traveler Var G). The traveler variable you select here does not matter as long as the variable isn’t defined in a different rule.
- For the value of the traveler variable, set it to the event field you used in the “if” statement of your rule.
Example: Since the event field we chose for step 1 is “Call_Disposition” from the “CRM-event” source, we select that same field here.
- Go to the Settings tab of your journey to begin setting up the filter.
- Follow the linked instructions to create a new filter.
- For your filter field, choose the custom traveler variable you used in step 2.
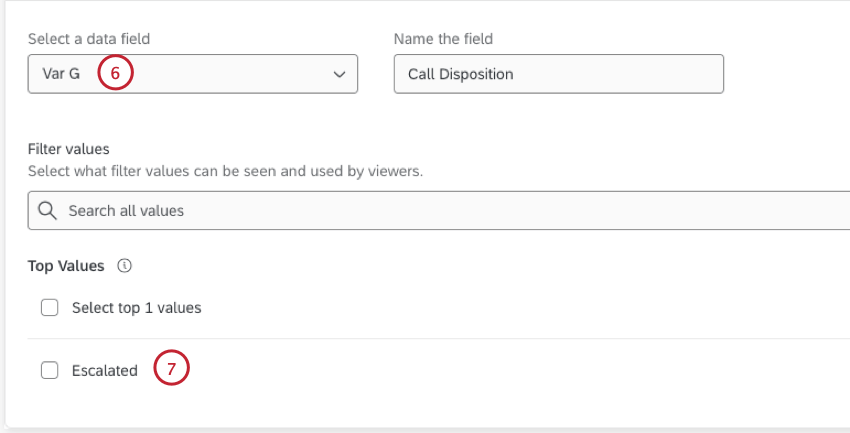
- You can select the different possible event values to use in your filter. Only values that have been ingested into CJO will appear here.
Attention: Since event data is transient and set on a session-level, values can be overwritten. If a traveler has multiple values for the same event in the same session, then the most recently received event data is what will appear in for your filter values.