
Administration (EX)
What's on this page
About the Admin Page
Creating, managing, and organizing users is an important part of Qualtrics. Employee Experience projects come with a unique set of administrative needs and features. Read on to learn more about them.
In the product, these features can all be found on the Admin page.
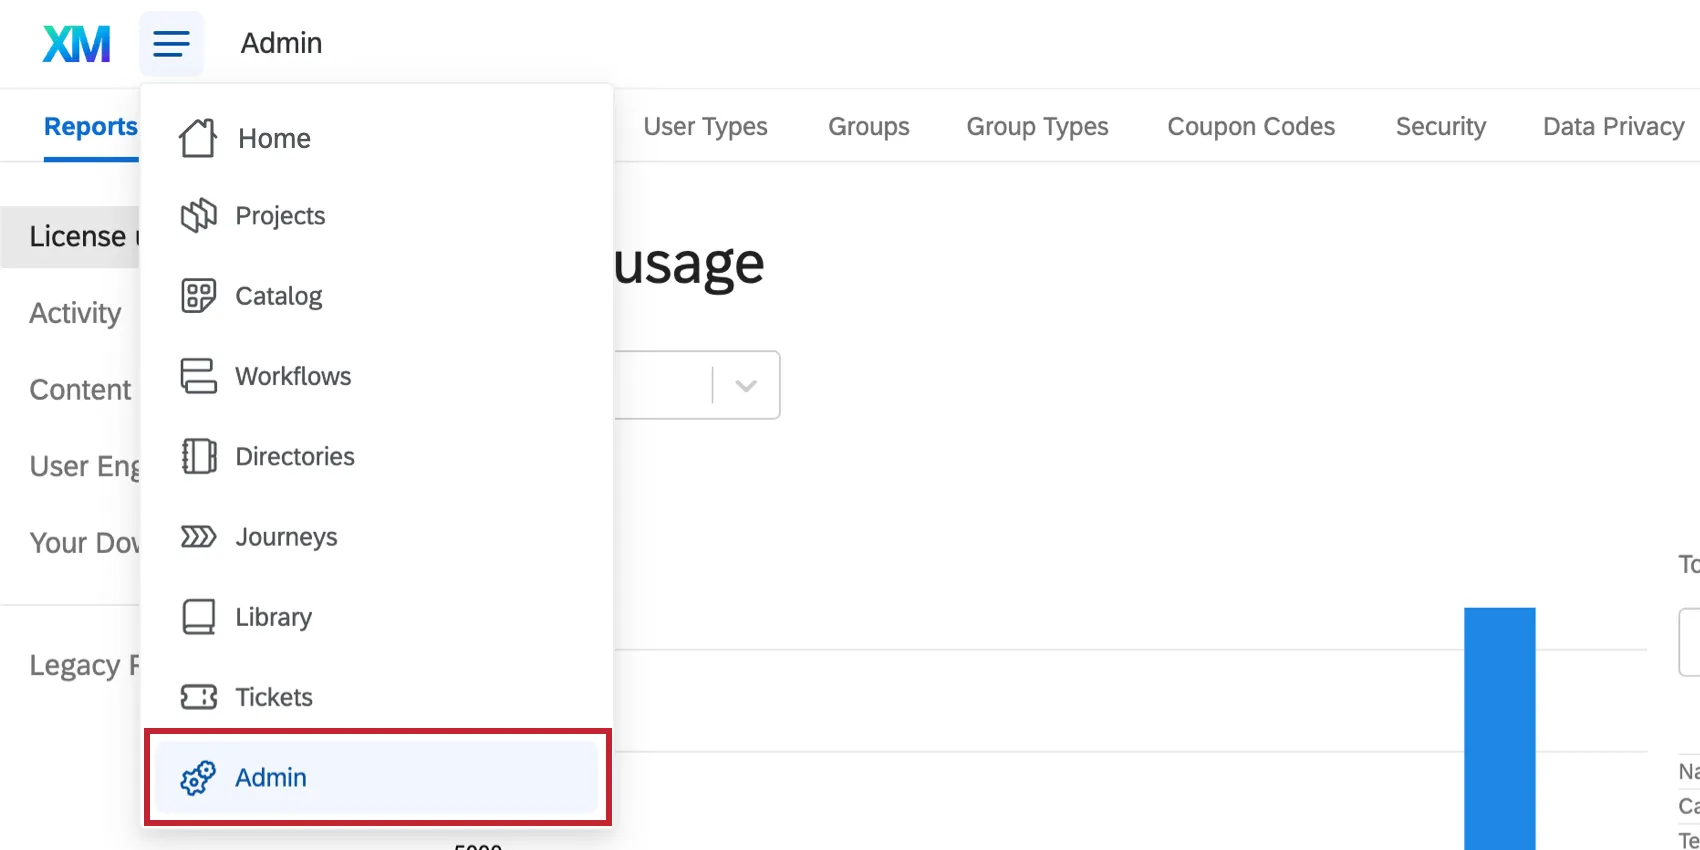
Qtip: To access this page, you will need to be a Brand Administrator. This means your account user type is Brand Administrator, or you have been made a Division Administrator of a specific division for your organization. If you need administrative access but don’t have it yet, contact your organization’s current Brand Administrator.
Attention: Many links on this page link back to pages regarding standard Qualtrics features, not just Employee Experience features. Detailed below are the differences you will need to be aware of on each page. While some content may look slightly different when setting up administration for Employee Experience, feature functionality remains the same.
Admin Report
The Report tab is your primary resource for understanding the usage for your license. It will include both the Survey Platform and Employee Experience projects. You can see graphs for number of responses, surveys, and users. If your organization has purchased SMS distributions, you’ll also see a graph for your organization’s SMS usage. This page also includes a list of the most active surveys within your organization. These admin reports work the exact same way in Employee Experience as they do in the Survey Platform. For more information, see the Admin Reports support page.
Attention: Auditable response reports in the admin reports do not include EX responses.
Projects
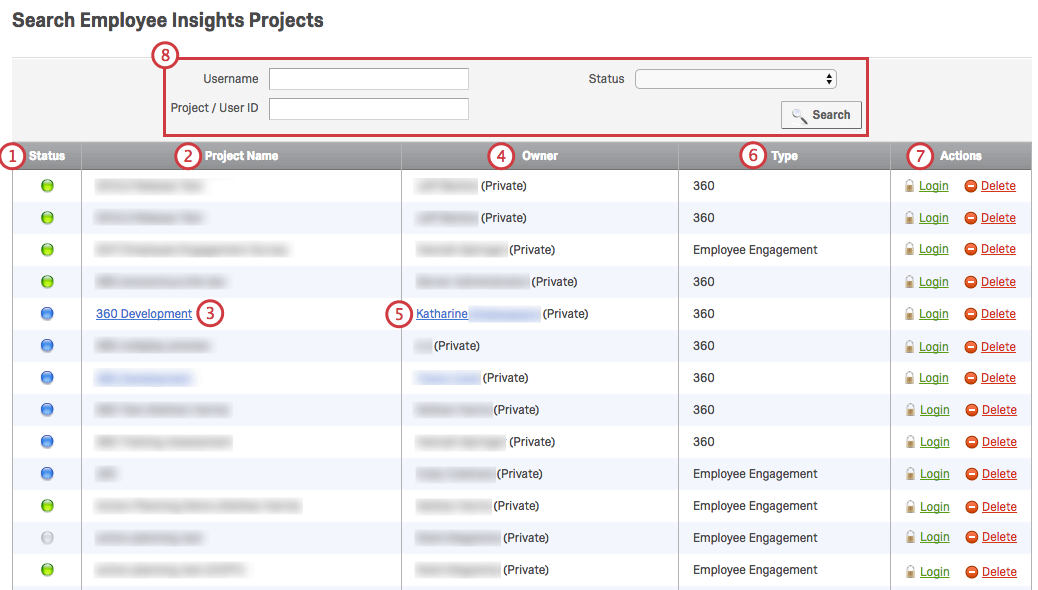
The Projects tab allows you to search for and manage all of the Employee Experience projects in your organization.

Attention: When transferring EX projects, dashboards will not automatically transfer. If you would like the transferee to have access to the dashboards, make sure that the original owner has made the transferee a participant of the project and gives them editing access to the dashboard.
Qtip: The Projects tab allows you to transfer ownership of most EX project types, including Pulse programs, Engagement, 360, Lifecycle, and Ad Hoc Employee Research.
- Username: The username can be found in the Username section when editing a user’s permissions. This often matches the user’s email, however, this is not always the case. You must enter the entire username.
- Project / User ID: The ProjectID (i.e., TS_….) can be found in your URL when in the Survey tab for a project. This is a unique ID assigned to a project. The UserID (i.e., UR_…) can be found by following the instructions in the Locating Qualtrics IDs by Inspecting the Element section.
- Status: Matches the Status column.
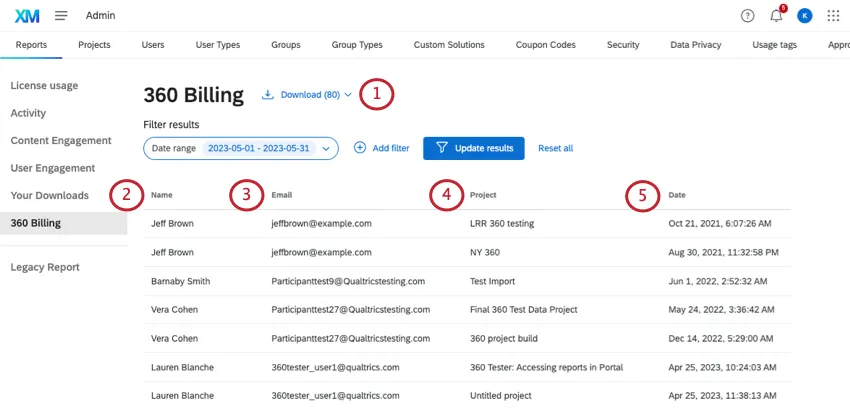
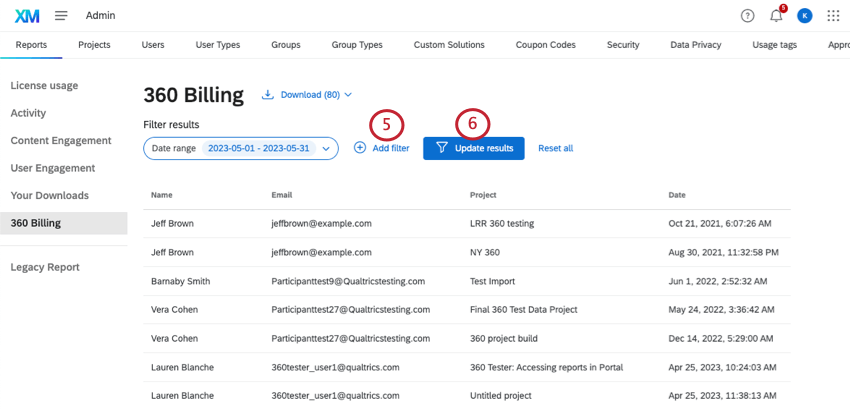
360 Billing
360 billing information can be found on the Admin Reports page.
The 360 Billing tab only lists subjects that you will be billed for. It is possible for a subject to be listed in your billing twice if they participate in multiple 360 surveys.
Qtip: The 360 Billing tab is only available to corporate clients that have 360 projects enabled for their organization. Academic clients will not have a 360 Billing tab and will instead have to contact Account Services for any billing inquiries.
Qtip: 360 bills per subject for each 360 project. This means that you can have as many people as you would like to evaluate one subject in one 360 project, however, you will want to be mindful of the number of subjects in your project.
Filtering Results
You can search all billed 360 subjects in your organization based on last name, first name, email address, and/or date range.

- Last Name, First Name, Email: This will be the subject’s personal information. It must match the subject’s information that was uploaded in the Participants tab.
- Date Range: Allows you to select a date range for your billing.
Qtip: Participants must meet all filter criteria to be included in results.
Qtip: To remove all your filters, click Reset all.
Users
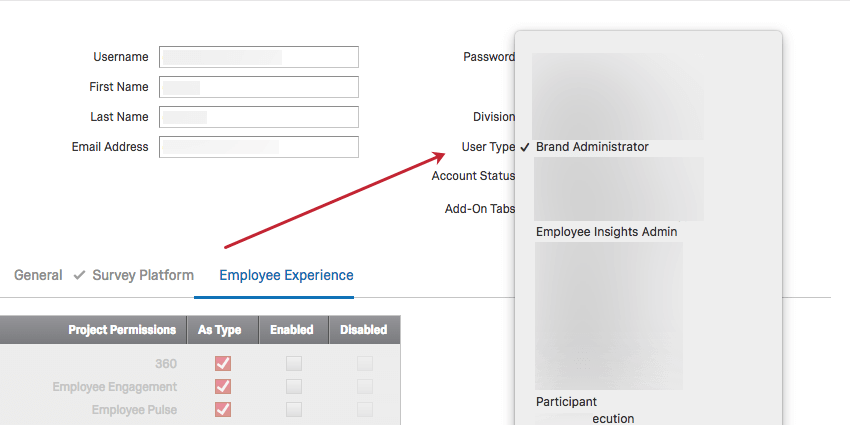
There are two key differences when creating each Employee Experience user and determining their permissions: you will have to specify if you want to edit the General, Survey Platform, or Employee Experience permissions, as well as specify one of the three Employee Experience-specific user types detailed below. For information regarding what each Employee Experience permission does, see the Employee Experience Permissions section below. Employee Experience users should be one of three user types:
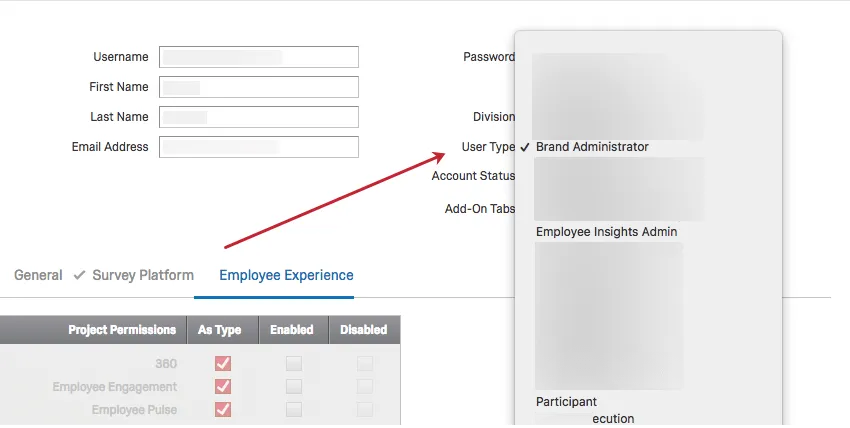
With the differences detailed above and below in mind, Users work the exact same way for Employee Experience as they do for the Survey Platform. For more information, visit the Survey Platform’s Creating and Managing Users support page.
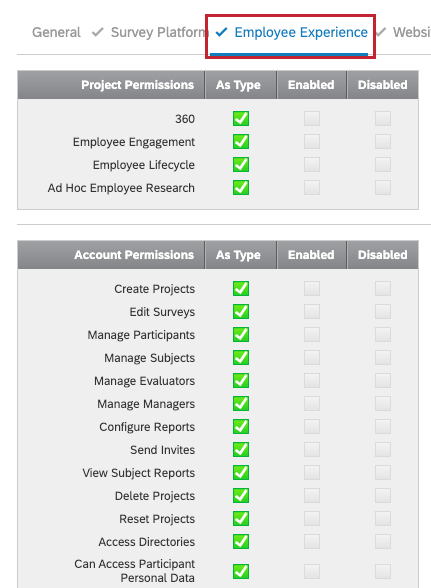
Employee Experience Permissions
Employee Experience permissions are ones that affect 360, Employee Engagement, Employee Lifecycle, Ad Hoc Employee Research, and Pulse projects. See the User Permissions support page for a full list.

User Types
Setting user permissions one account at a time can be tedious. Through user types, you can quickly update and maintain permissions for many users at once. User types are sets of permissions that can be assigned to user accounts. Whenever you want to make a widespread permission change, just edit the user type and all associated user accounts will update automatically.
Using Specialized User Types
Employee Experience comes with pre-built user types specialized to EX use cases. These are:
- EX Administrator
- Employee Insights Admin
- Participant
The 2 administrator user types allow you to assign users who can exclusively administrate EX projects and directories, without having to give these users Brand Admin access to your entire Qualtrics organization.
To learn more about these user types and which ones are best for you, check out Existing User Types.
Creating Custom User Types
For information regarding Employee Experience-specific user types and what each Employee Experience permission does, visit the Users section of this page.
With the differences detailed above in mind, user types work the exact same way for Employee Experience as they do for the Survey Platform. For more information, visit the Survey Platform’s User Types support page.
Groups
As an administrator, you can use groups to allow two or more users to share projects, graphics, files, and messages in libraries. Groups can include everyone in your organization, everyone in a specific division, or only specific users that you manually select. The key difference when creating groups for Employee Experience is that for one particular user’s editing rights within a group, you will have to specify if you want to edit the General, Survey Platform, or Employee Experience permissions. For information regarding what each Employee Experience permission does, visit the Users section of this page. To edit a specific user’s permissions in a group, click on the group name in the Groups tab and then click on the user’s name to view the editing window below.
With the difference detailed above in mind, groups work the exact same way for Employee Experience as they do for the Survey Platform. For more information, visit the Survey Platform’s User Groups support page.
Qtip: The groups listed on the Directories page are not the same as the groups here on the Admin page!
Group Types
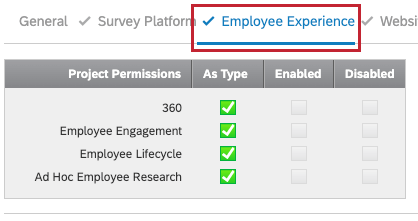
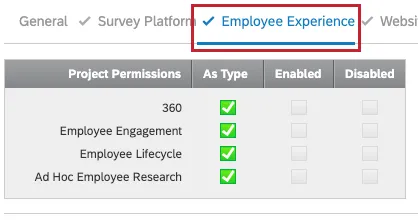
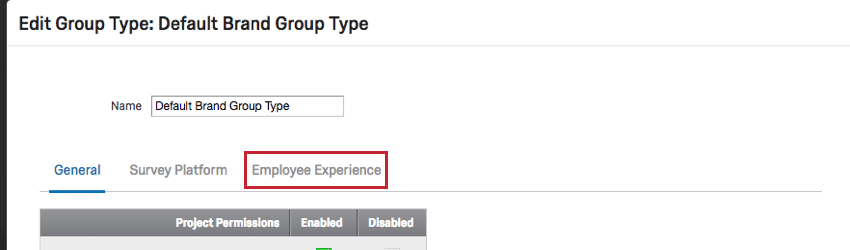
Group types, similar to User Types, are sets of permissions that determine what a user is allowed to do with content owned by a group. The group type permissions will apply to all group members, unless otherwise specified for an individual member. The key difference when creating groups for Employee Experience is that for one particular user’s editing rights within a group, you will have to specify if you want to edit the General, Survey Platform, or Employee Experience permissions. For information regarding what each Employee Experience permission does, visit the Users section of this page.
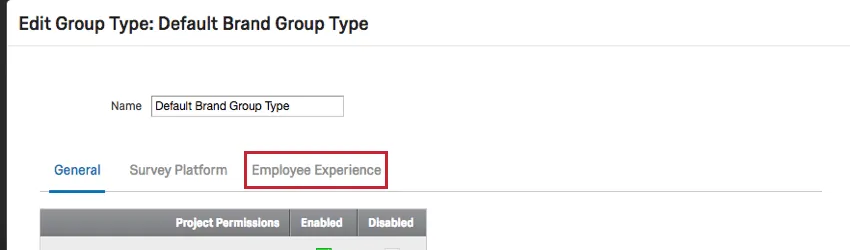
With the difference detailed above in mind, group types work the exact same way for Employee Experience as they do for the Survey Platform. For more information, visit the Survey Platform’s Group Types section of the User Groups support page.
Coupon Codes
As a Brand Administrator of a large organization, Coupon Codes (or Upgrade Codes) make managing user permissions easier. Rather than changing permissions one-by-one for several users, you can create Coupon Codes that change User Type or Division. Once you’ve created the code, you simply email it to your users and they’ll enter the code into their account to update permissions on their existing accounts, or use these codes during the sign-up process. Coupon Codes work the exact same way in Employee Experience as they do in the Survey Platform. For more information, visit the Survey Platform’s Coupon Codes support page.
Data Privacy
The Data Privacy tab is available to all Brand Administrators, and comes with special features that allow you to manage the data in your Qualtrics organization.
For Employee Experience (EX) customers, the Data Privacy tab has access to the following tools:
- Personal Data (GDPR Compliance): Locate data for an individual or a group of individuals by searching for their email address, and then delete or export this information as needed.
- Sensitive Data Policy: Regulate the private personal information collected by your organization by flagging questions and data that may violate your organization’s standard for respondent data privacy.
- Pseudonymization: Enable a default pseudonymization policy for the entire brand to remove personal identifying data from EX responses in real time. This tool is exclusive to EX.
- Retention Policy: Set a brand-wide policy for how long Qualtrics stores survey response data before deleting it. Attention: The Anonymization policies described here are not available in EX licenses. Instead, see Pseudonymization.

- Anonymous Responses: Set anonymity thresholds for all dashboards in a brand, to determine when data is displayed in a dashboard. This tool is exclusive to EX.
- Data Access Settings: Control which members of your Qualtrics organization have access to employee metadata. This tool is exclusive to EX.
Organization Settings
The Organization Settings tab allows you to view and manage options that apply to your whole license. From here, you can set up contact info, password parameters, logout redirects, and more. Organization settings work the exact same way in Employee Experience as they do in the Survey Platform. For more information, visit the Survey Platform’s Organization Settings support page.
Divisions
Attention: We strongly advise that you do not use divisions with EX projects. Although divisions have Employee Experience permissions, these aren’t as effective as the custom Employee Experience user types we describe above.
FAQs
How many administrators can I have in my organization for 360 projects?
How many administrators can I have in my organization for 360 projects?
Should I be using divisions or groups for sharing in 360?
Should I be using divisions or groups for sharing in 360?
You can also collaborate with individual users.
That's great! Thank you for your feedback!
Thank you for your feedback!