
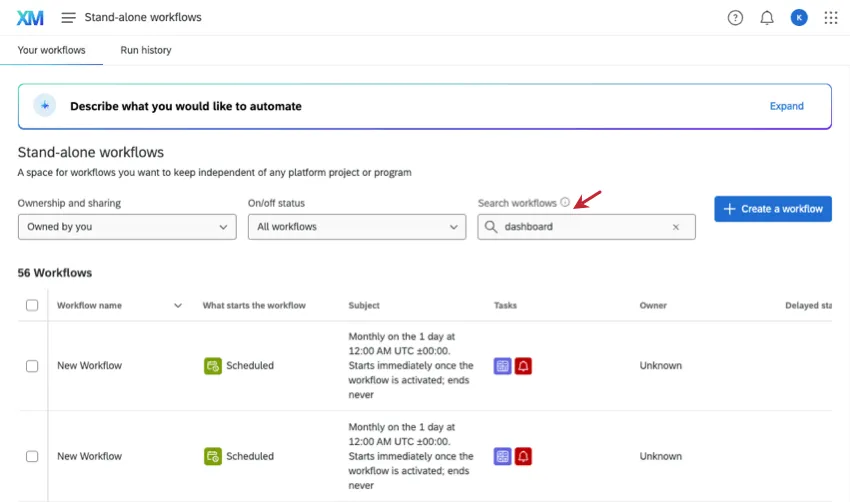
Dashboard Workflows
What's on this page
About Dashboard Workflows
In your dashboard settings, there’s a page where you can create workflows, giving you a space to store automated tasks relevant to your CX program. Set up notifications to alert you and your team when there’s a significant change in your dashboard metrics, so you can keep an eye on performance trends and take action when necessary.
Using Dashboard Workflows
Like other dashboard settings, only dashboard administrators can create and edit dashboard workflows.
- CX Dashboards
- Results Dashboards
- Engagement
- 360
- Lifecycle
- Pulse
- Ad Hoc Employee Research
- BX


Qtip: Once created on the Dashboard Workflows page, you can always find your workflows again through this page or through the global workflows search.
Qtip: In the next sections, we’ll show examples of common workflows that can be helpful for CX Dashboards. If you’d like more general instruction on workflows, see Workflows Basic Overview and Building Workflows.
Creating Metric Change Notifications
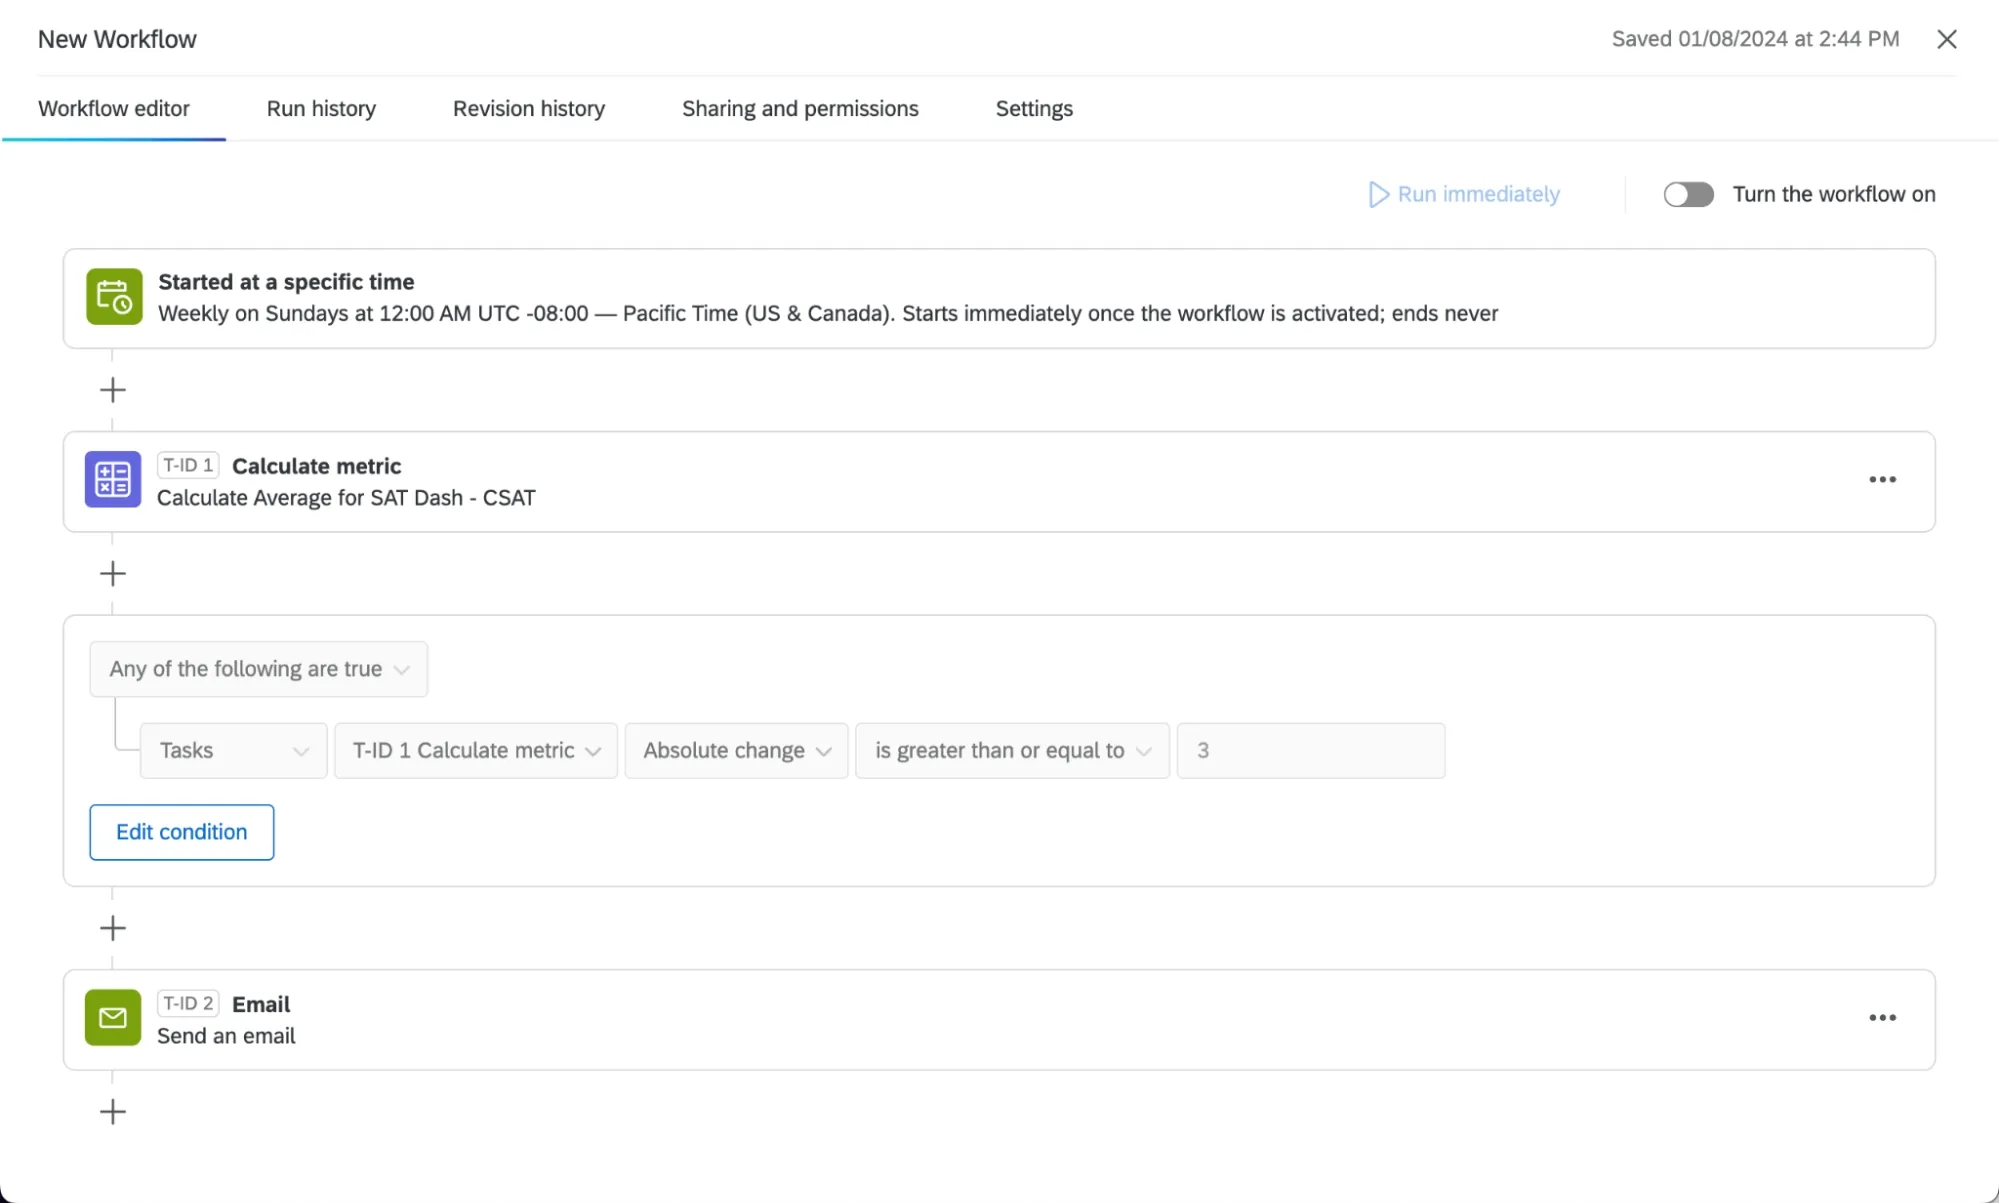
Once fields are mapped to your dashboard, you can base notifications off of them. Here are the most important components of a dashboard notification that identifies metric changes:
- Calculate metric task: Set up automated workflows based on changes to a dashboard metric over a selected time period. The resulting calculation can be used to trigger other tasks within your workflow, such as communications. Example: You compare your dashboard’s Satisfaction metric over the last 7 days vs. the previous 14 days. When it’s lower than expected, you trigger a series of communications.
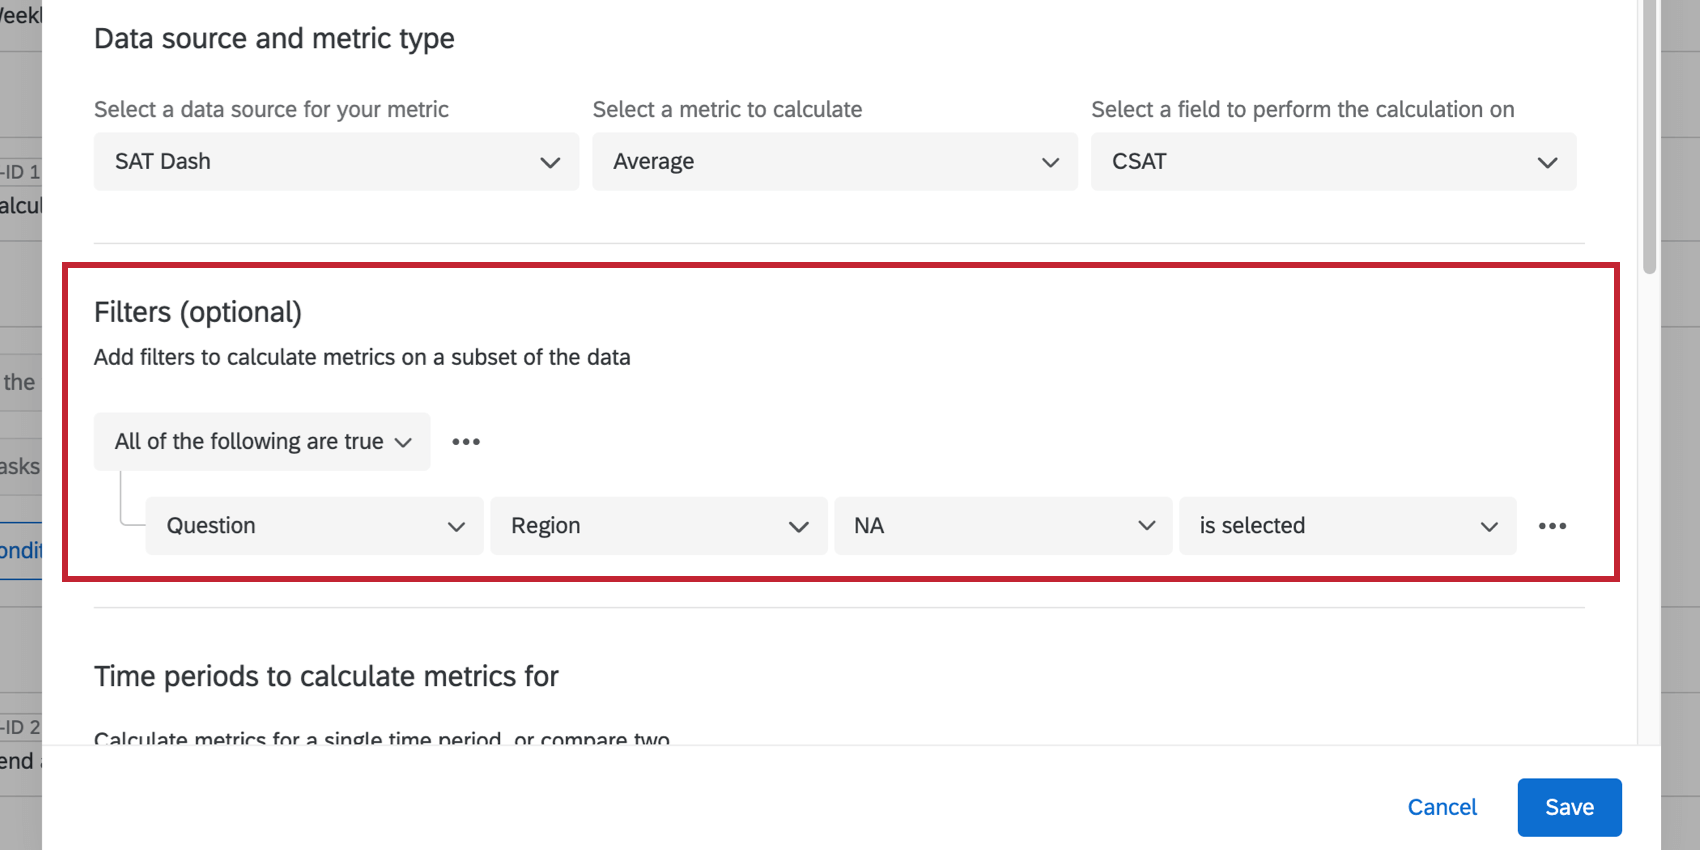
 Qtip: You can add filters to your metric while setting it up! That way you can make calculations based on a subset of data.
- Conditions: Determine the thresholds that should be met before the next steps happen in your workflow. If you exclude a condition, you can create a general notification showing metrics for the week (e.g., a digest). Example: Only notify your team over Slack if average satisfaction is less than 4 points.
 Example: Only notify your team over email if average satisfaction increased by 3 or more points.


- Assorted communication tasks: Notify your team about this metric over an assortment of channels. For example:
Qtip: Use piped text in your communication task to show the metrics or metric changes you’re interested in. See more on the Calculate Metric Task page.
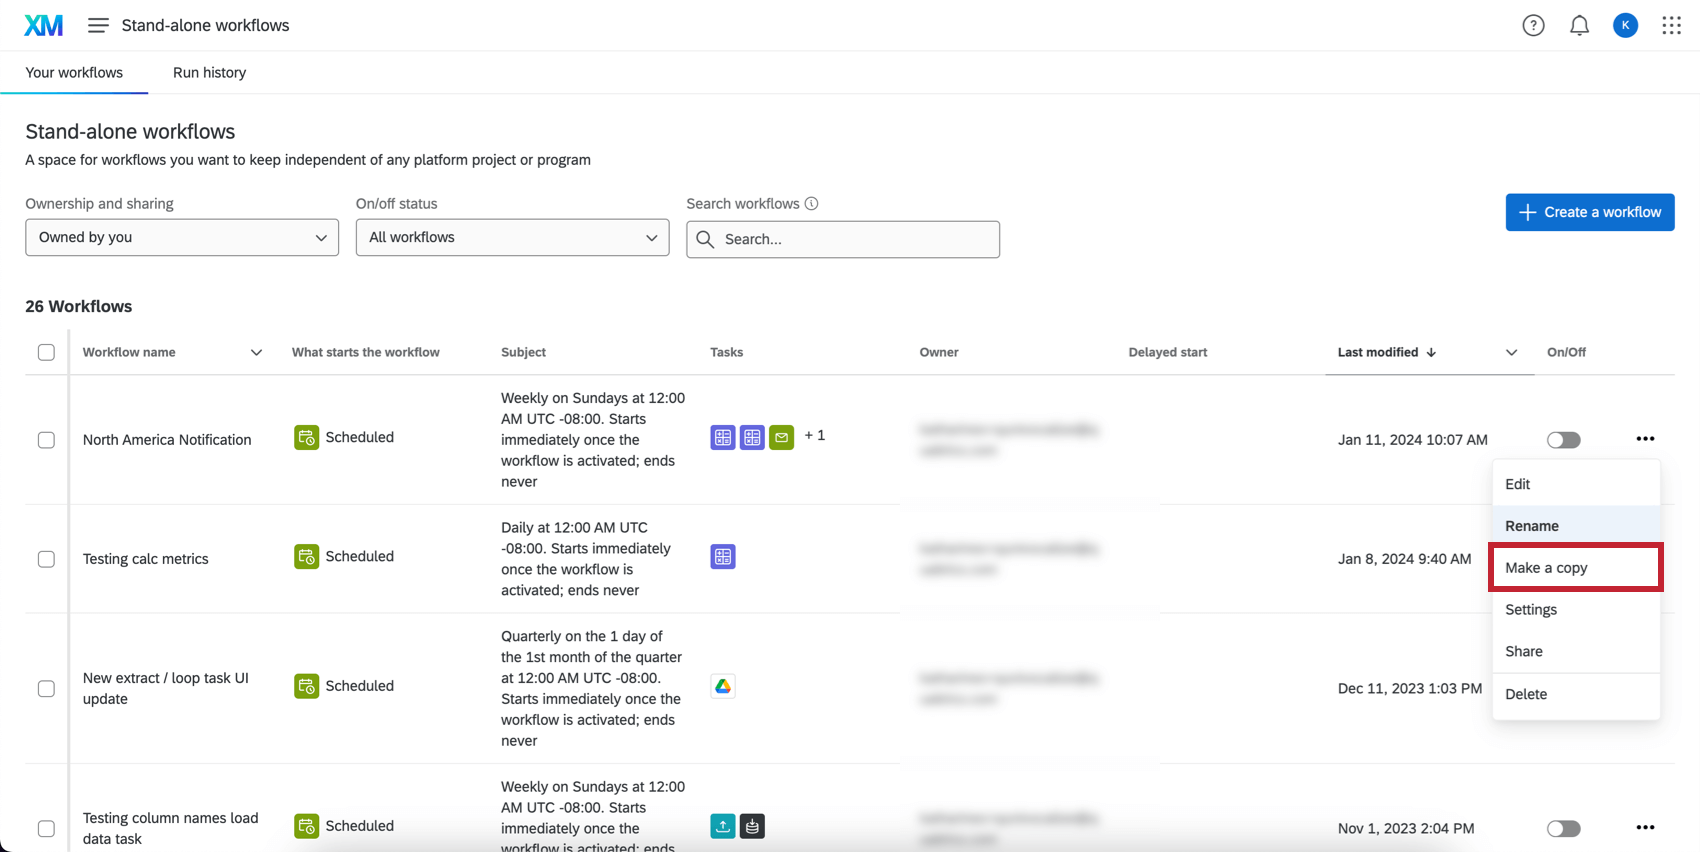
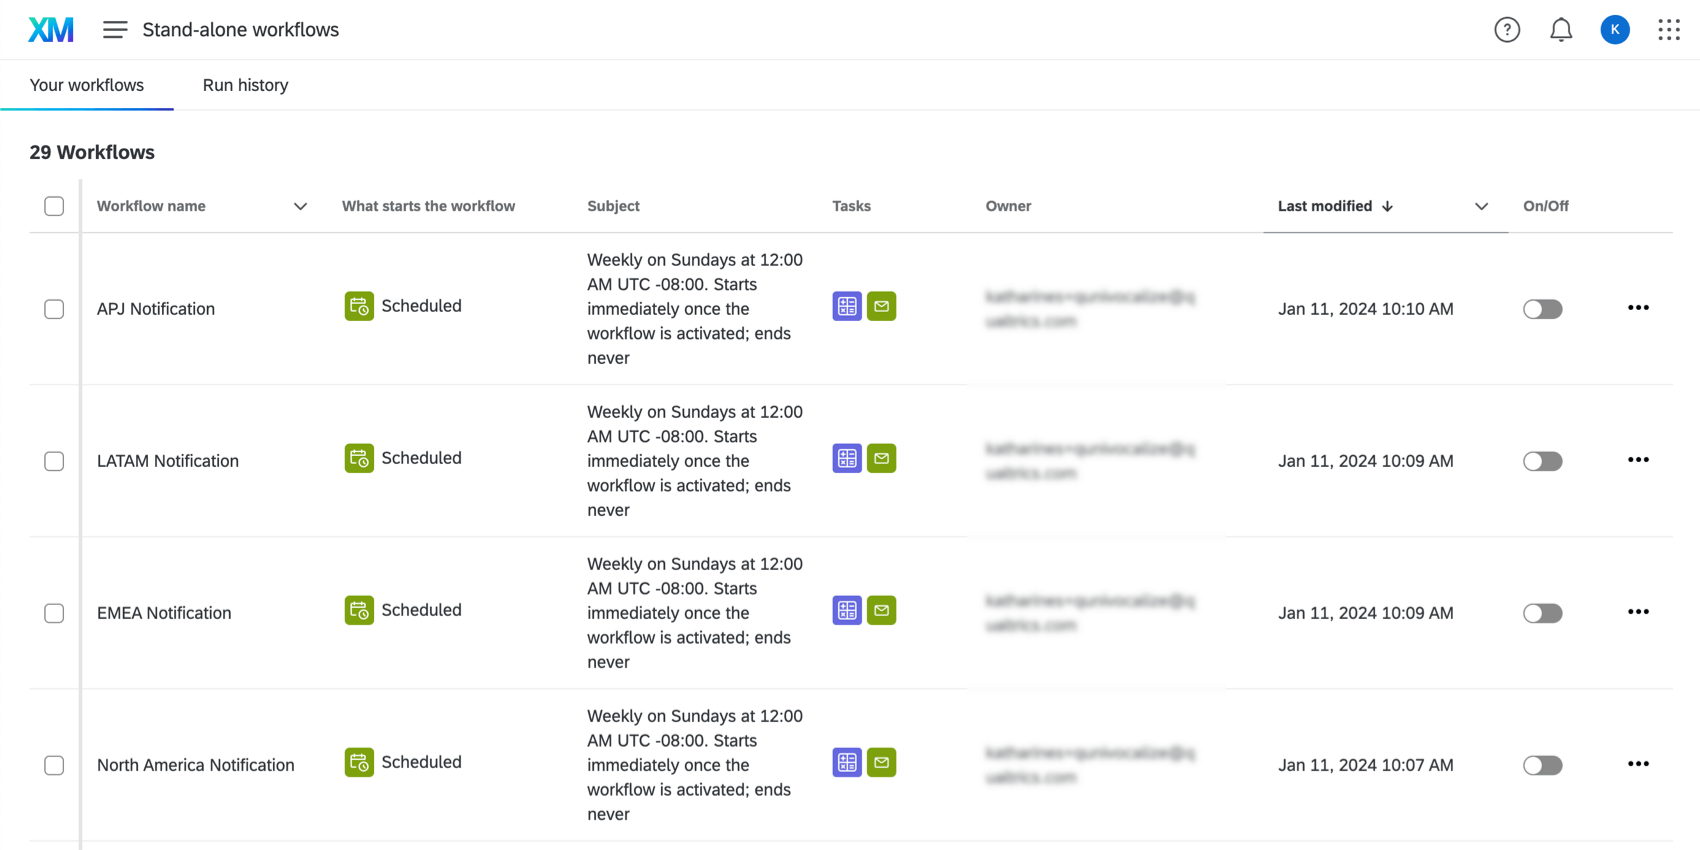
Breaking Out Notifications by Groups
To create new notifications that are broken out by different groups, we recommend creating separate workflows for each group. If you copy workflows, you’ll only have to make a few small edits to each version.
For example, let’s say we want to let managers know about their region-specific satisfaction trends.
Qtip: For a dashboard dataset, select Question to find all mapped fields.
Text Analytics Notifications
You can automate workflows based on topics, sentiments, and actionability in customer feedback. See TextFlow for more details.
Attention: You can only create workflows based on text analysis conducted in a survey, not dashboard text analysis.
That's great! Thank you for your feedback!
Thank you for your feedback!