
Custom Calendars (Designer)
What's on this page
About Custom Calendars in Designer
You can create custom calendars in XM Discover to use in reporting. Custom calendars enable you to map calendar dates to custom week, month, quarter, and year calendars.
Example: Let’s say your company’s fiscal new year begins in June. You can create a custom calendar so that June is the first month in your calendar year.
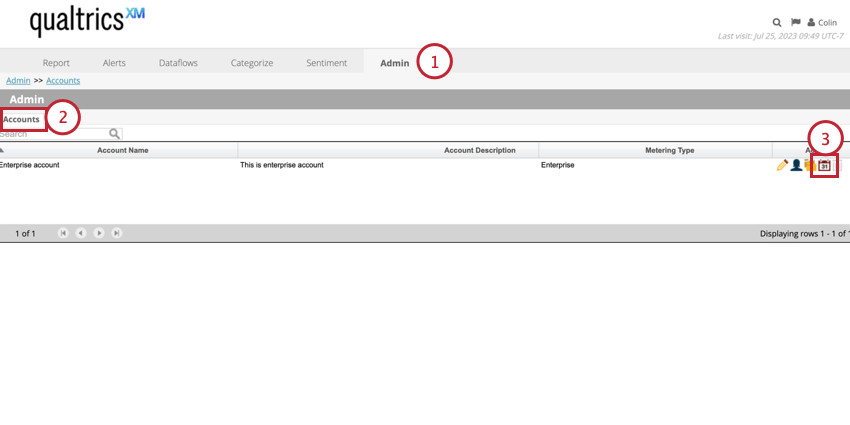
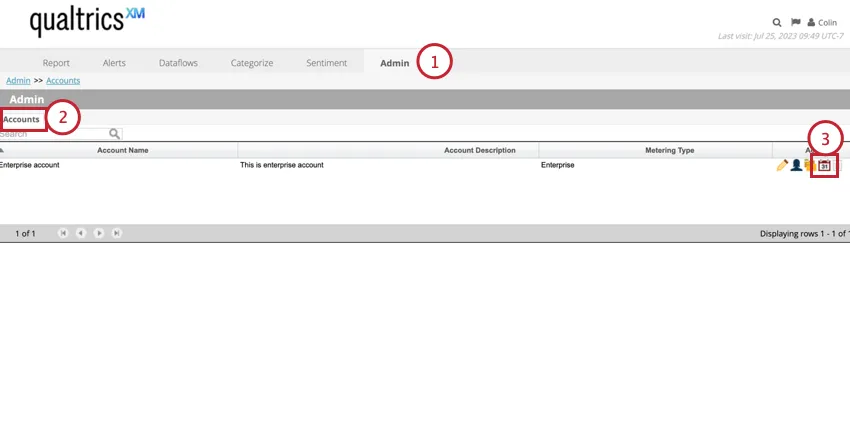
Navigating to Calendars
Calendars are created and managed on an account level. To manage the calendars in your project:
Default Calendars
The following standardized calendars are available in all accounts by default:
- Standard Calendar: The Gregorian calendar where the week starts on Sunday and ends on Saturday.
- European Calendar: A calendar where the week starts on Monday and ends on Sunday.
- NRF Calendar: A retail calendar created by the National Retail Foundation.
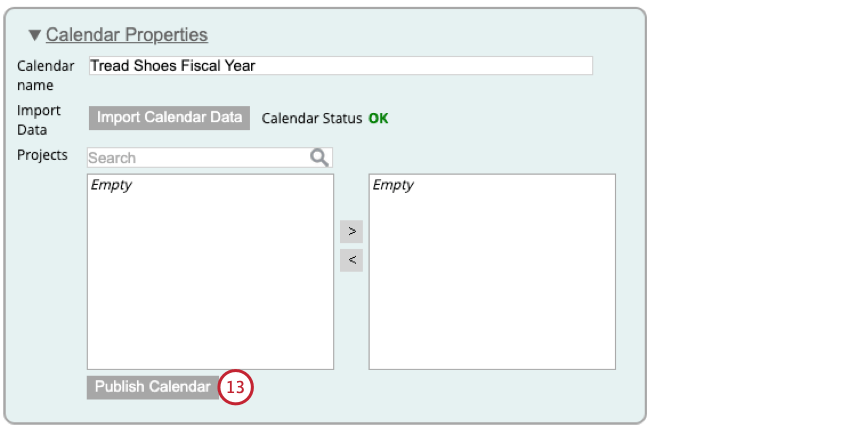
Creating a Custom Calendar
Follow the steps in this section to create a custom calendar.
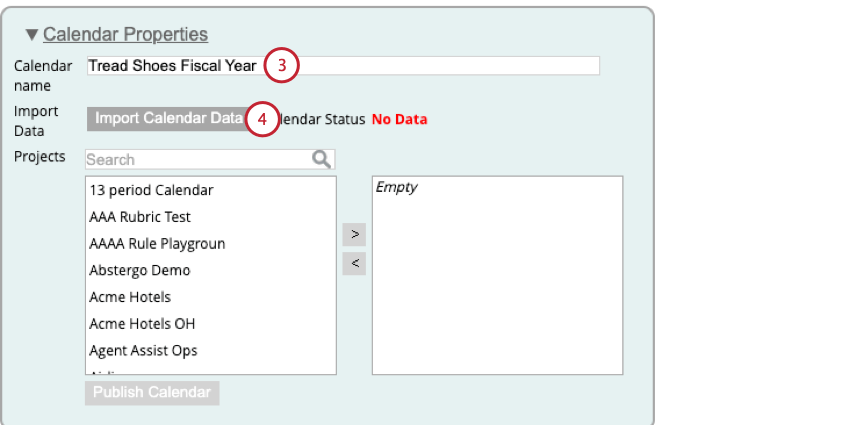
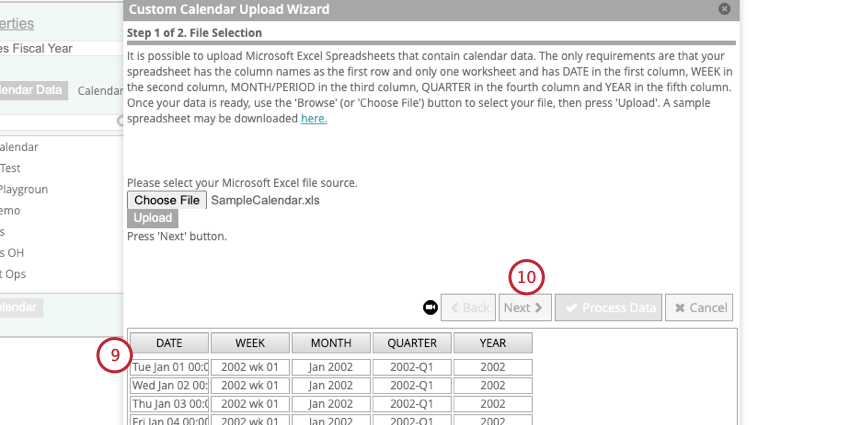
Qtip: If your data looks incorrect, edit your file and then reupload it.

- Reject duplicates and process only new calendar data: Select this option if you wish to retain any calendar data uploaded previously if it overlaps with the new import file and process only new data.
- Replace calendar data: Select this option if you wish to clear any calendar data uploaded previously before processing the Excel file.
- Update values for existing calendar data: Select this option if you wish to overwrite any calendar data uploaded previously if it overlaps with the new import file.
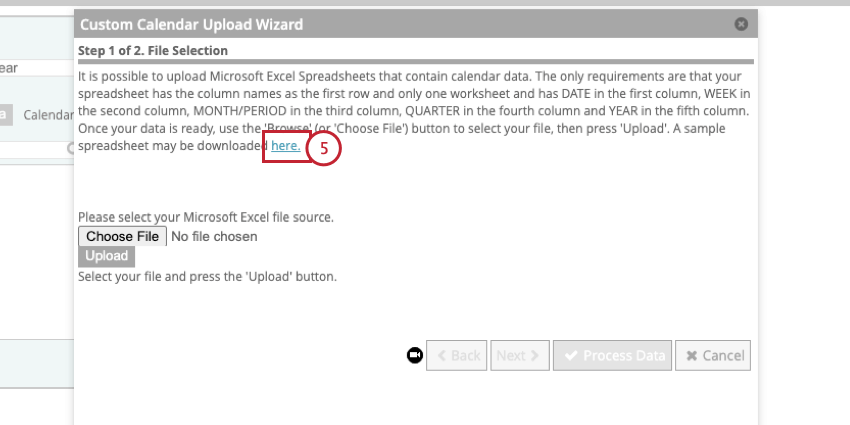
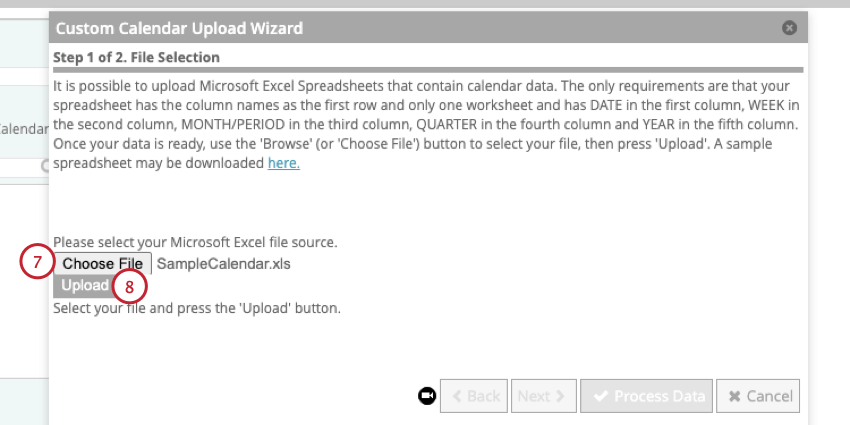
Preparing a Custom Calendar Data File
This section covers how to create a file to import custom calendar data.
- Column A: This column should contain the dates from the standard calendar year that you want to map to a custom calendar.
- Column B: This column should contain the custom week definition you want to map the date from column A.
- Column C: This column should contain the custom month definition you want to map the date from column A. Qtip: The month column can contain up to 13 months, instead of 12 calendar months, where each accounting cycle is typically four weeks long (or 28 days). This makes it easier to report on and compare financial KPIs period over period, which is key for certain industries, such as financial, retail, or hospitality, where the bulk of sales occurs on a specific weekend or holiday.

- Column D: This column should contain the custom quarter definition you want to map the date from column A.
- Column E: This column should contain the custom week year you want to map the date from column A.
Qtip: Make sure you match the formats used in the template file.
Applying a Calendar to a Project
After you’ve created a calendar, you can apply it to a project.
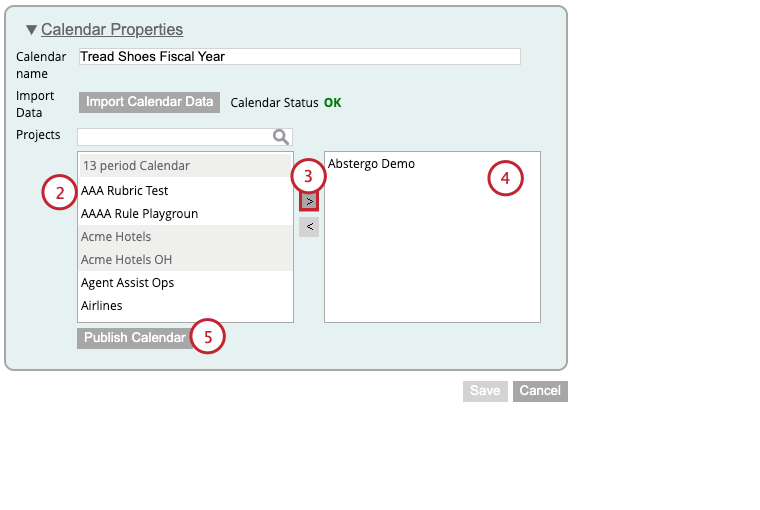
Qtip: Select multiple projects at once by holding down CMD on Mac or CTRL on PC while clicking on the project names.
You can monitor the progress of this action in the Dataflows tab.
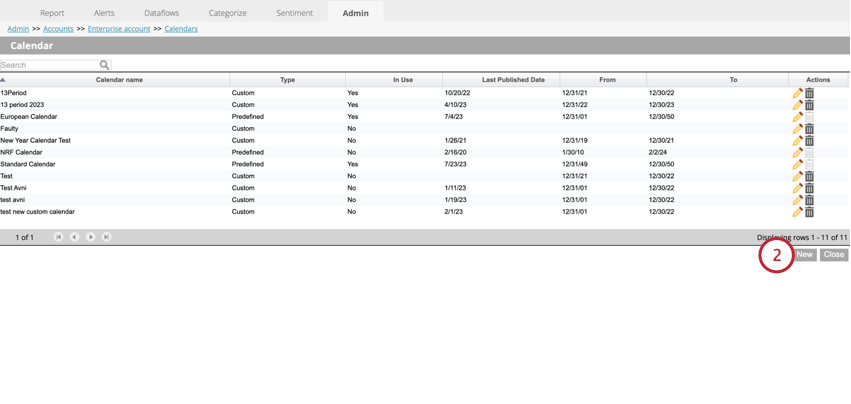
Managing Calendars
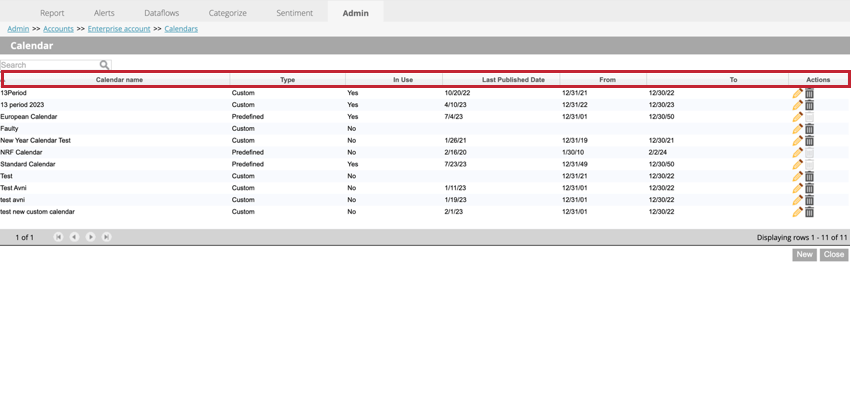
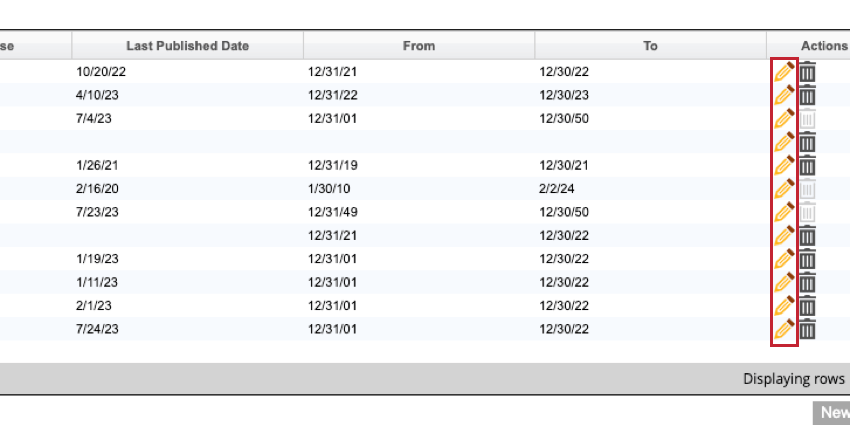
While in the calendars section of your account, you can view a table that contains the following information about each calendar in your account:
- Calendar name: The name of the calendar.
- Type: Indicates whether the calendar is predefined or custom. Predefined calendars are default calendars that cannot be changed. Custom calendars are created by you and can be edited and deleted.
- In Use: Indicates whether the calendar has been applied to any projects (Yes) or not (No).
- Last Published Date: The latest date when calendar data was applied to associated projects.
- From: The first date of the year for the calendar.
- To: The last date of the year for the calendar.
- Actions: Edit or delete calendars.
Editing Calendars
To edit a calendar, navigate to the calendars section of your account and then click the pencil icon next to the calendar you’d like to edit. See Creating a Custom Calendar for more information about custom calendars.
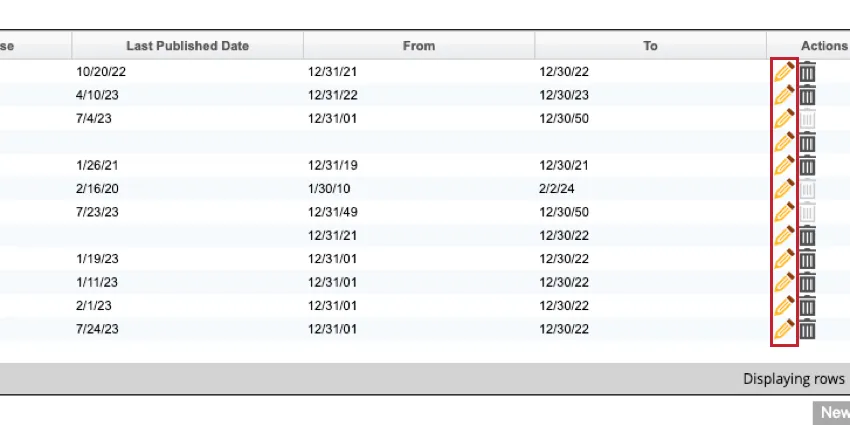
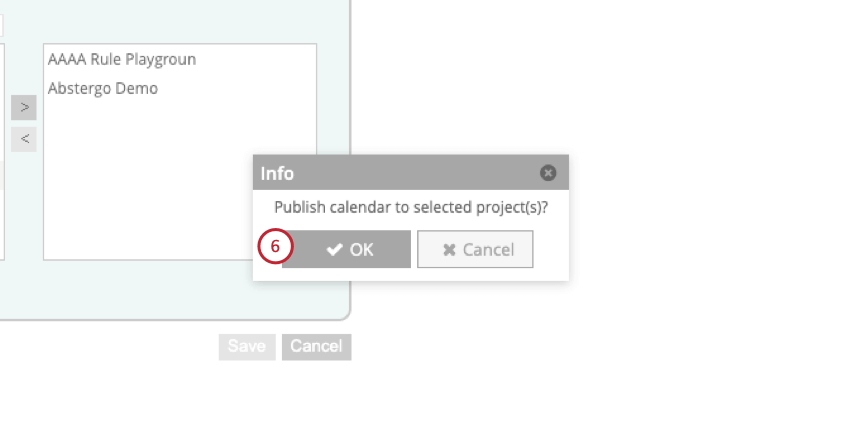
Qtip: After editing your calendar, make sure you click Publish Calendar so your changes are reflected in any projects that use the calendar.
Qtip: You cannot rename or modify a predefined calendar. You can only apply it to projects.
Deleting Calendars
To delete a calendar, navigate to the calendars section of your account and then click the trash can icon next to the calendar you’d like to delete.
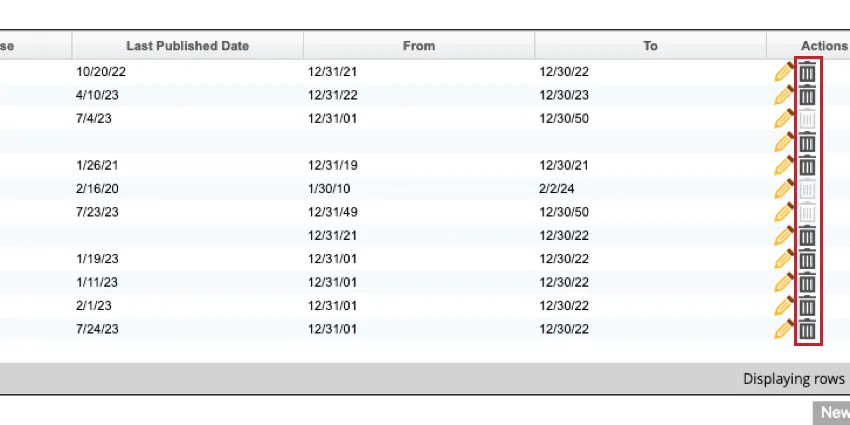
Then, click OK in the pop-up window to delete the calendar.
Qtip: If the calendar is used by at least one project, you’ll need to apply a different calendar to the project before you can delete the calendar.
Qtip: Predefined calendars cannot be deleted.
That's great! Thank you for your feedback!
Thank you for your feedback!