
Appointment & Event Registration Surveys
What's on this page
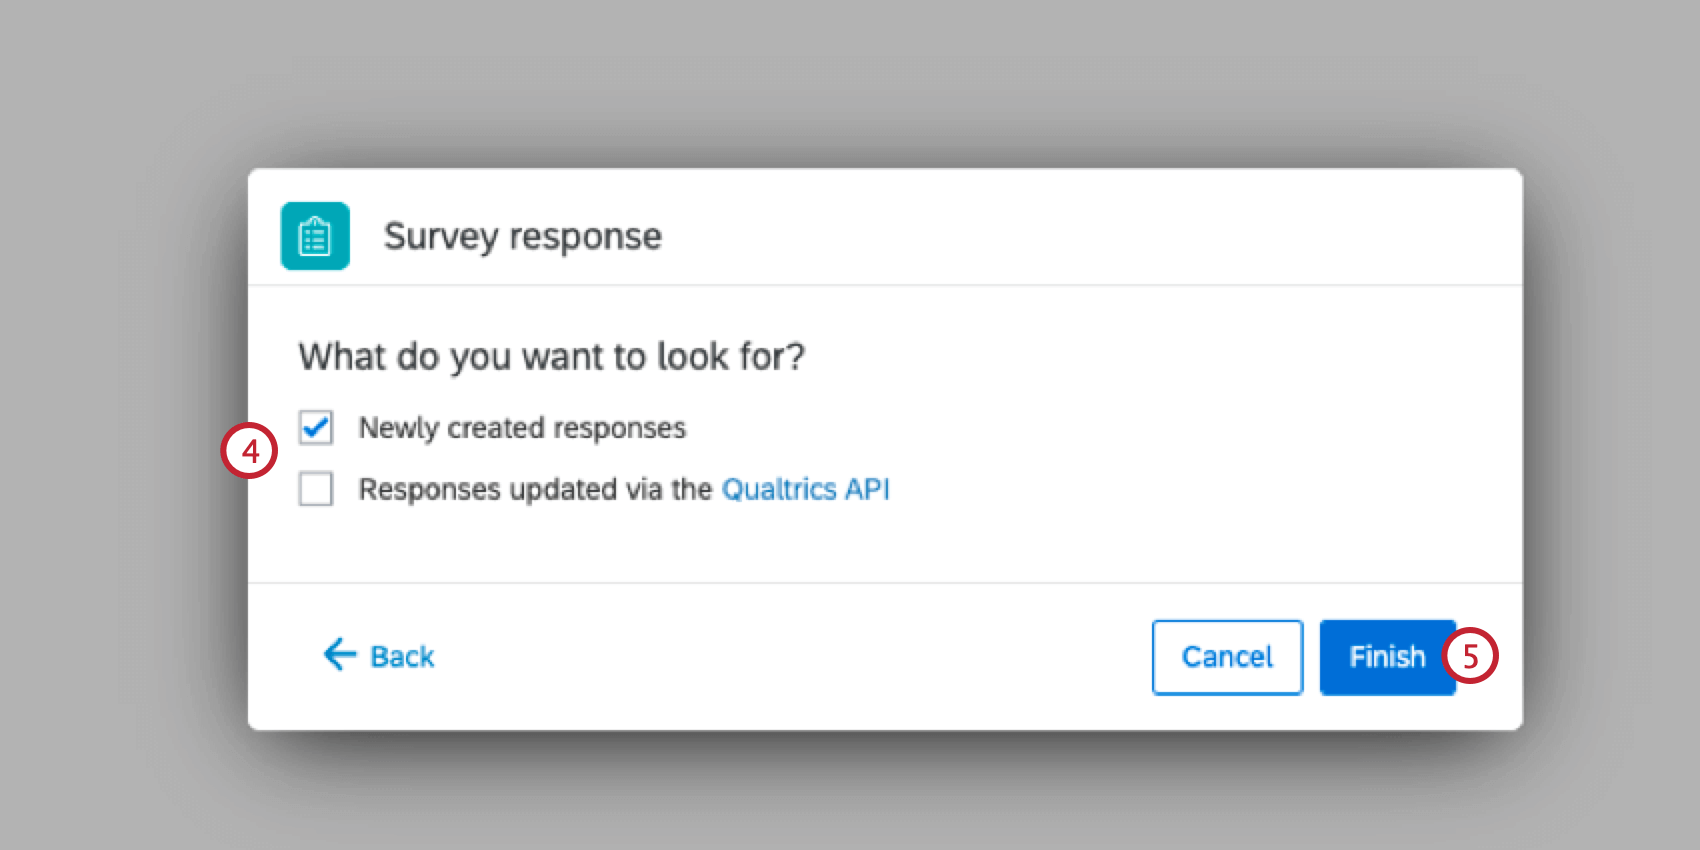
About Appointment / Event Registration Surveys
Do you want to use Qualtrics for appointment sign-ups? Maybe you’re scheduling an event, and want there to be a finite number of people at each time. You can create Multiple Choice questions where the choices disappear as they are selected. That way, only one person at a time can select a time slot.
Qtip: This solution is not foolproof. Quota information is not saved until the respondent submits their survey, giving respondents time to change their answers or deliberate over their choices. Because more than one person can enter the survey at a time, there is a very small chance that two people submit the same answer at the same time, resulting in a quota that should have only had one registrant now having two. This is a rare occurrence. If it does happen, follow the steps at the end of the page to help your respondents change their answers.
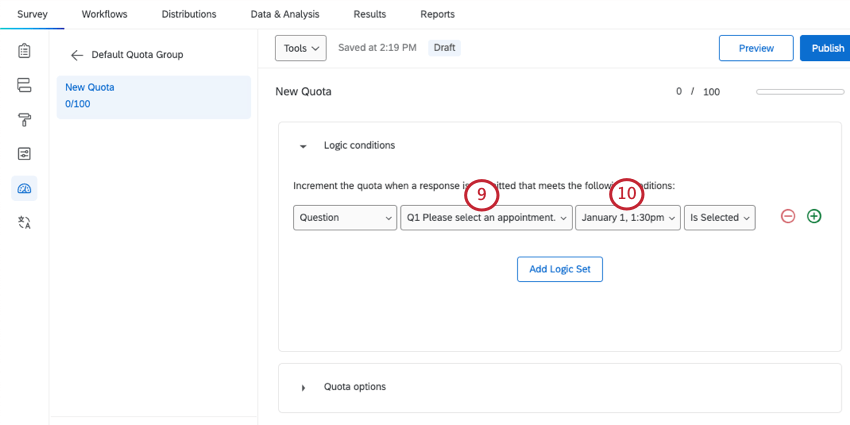
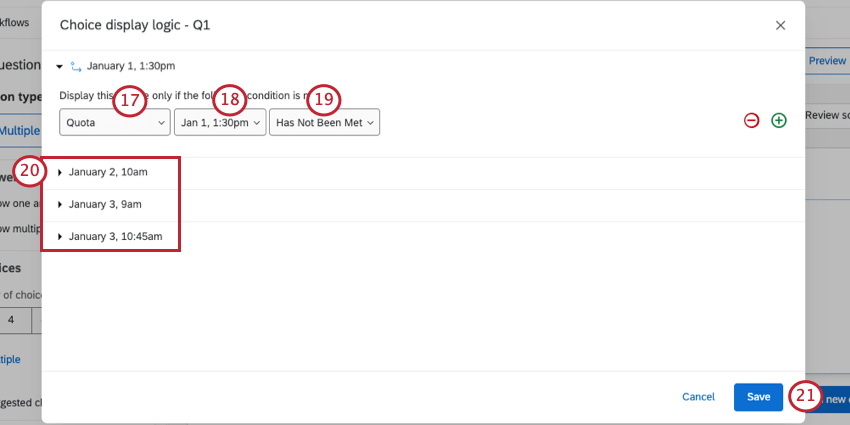
Quotas save automatically as you make changes. A timestamp will appear along the top next to the quota’s name to show the last time it was saved.
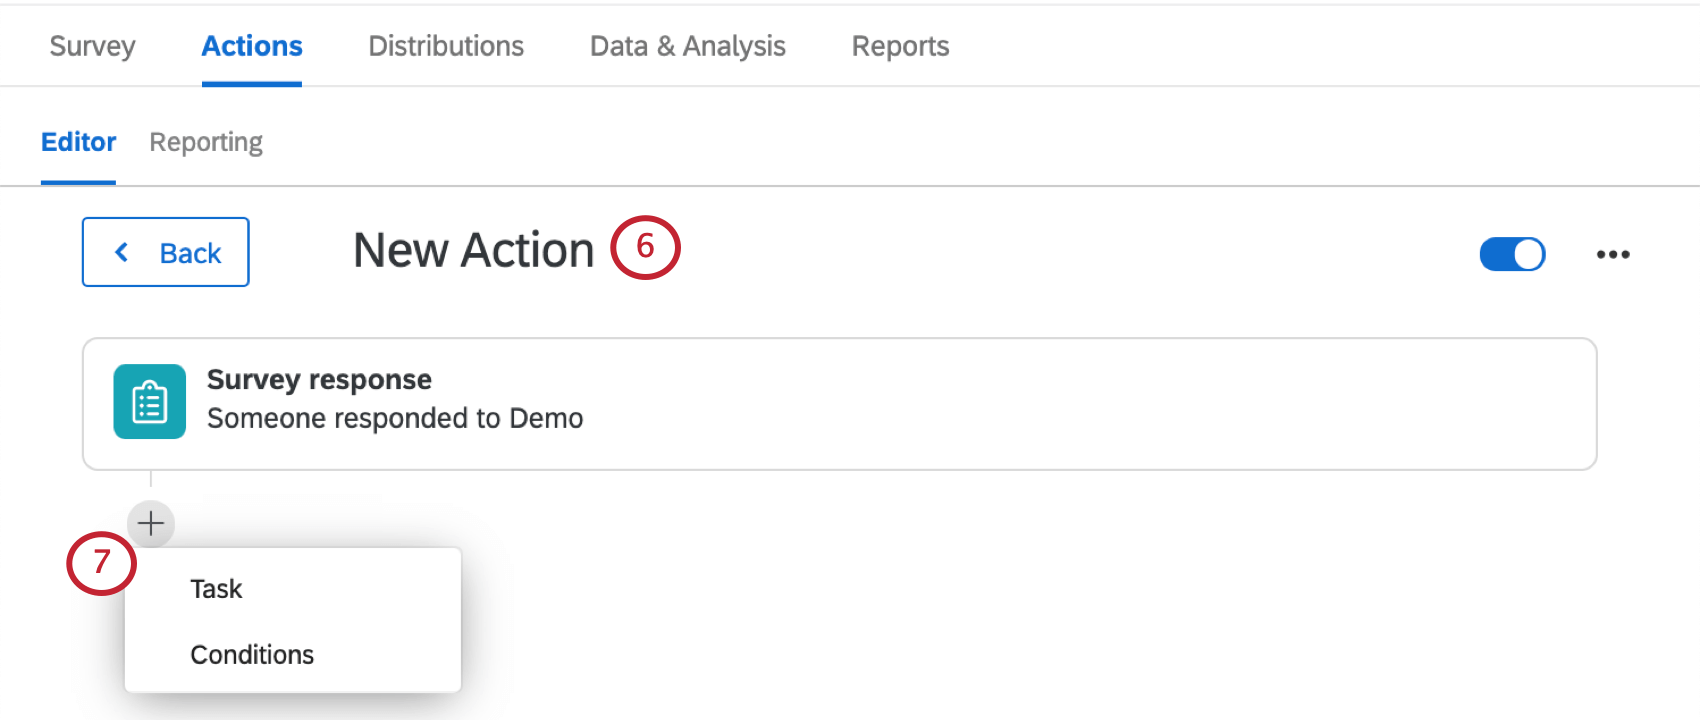
Setting Up the Question

Qtip: If the Edit multiple button appears on the question editing pane, then you can use this to enter all of the choices, separated by line breaks. Make sure you have no blank lines between choices.

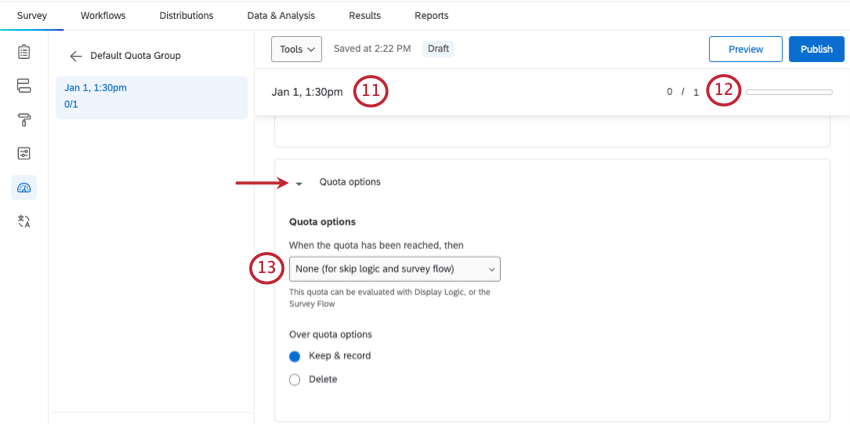
Qtip: If you are not given a choice, any quota you create will be simple logic.
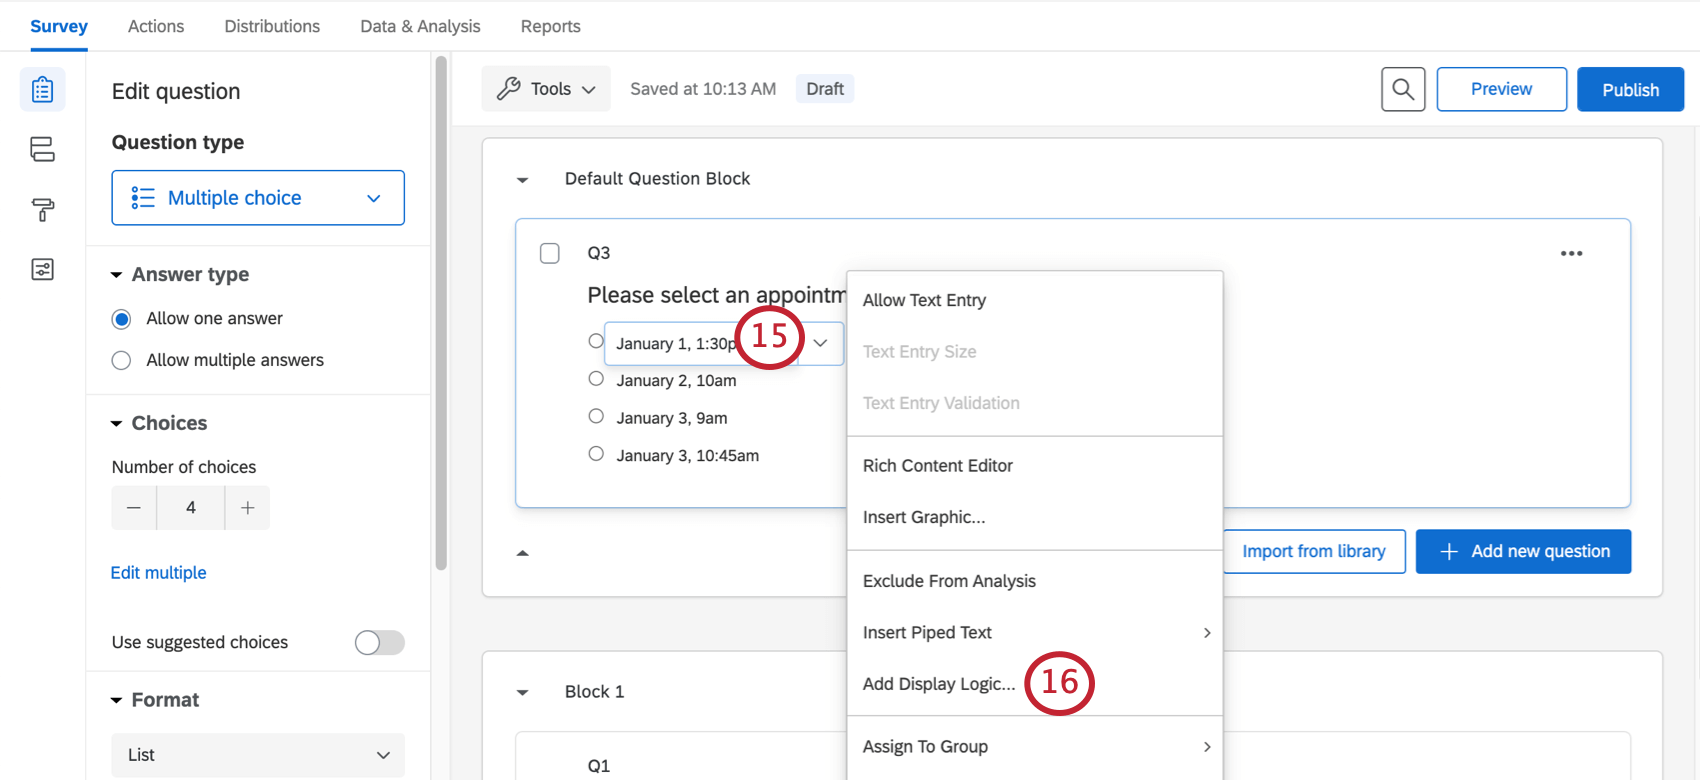
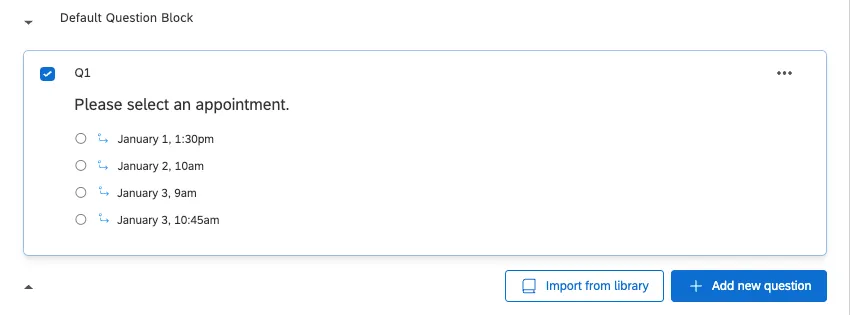
When finished, your question should have arrows next to each choice, like in the following screenshot.
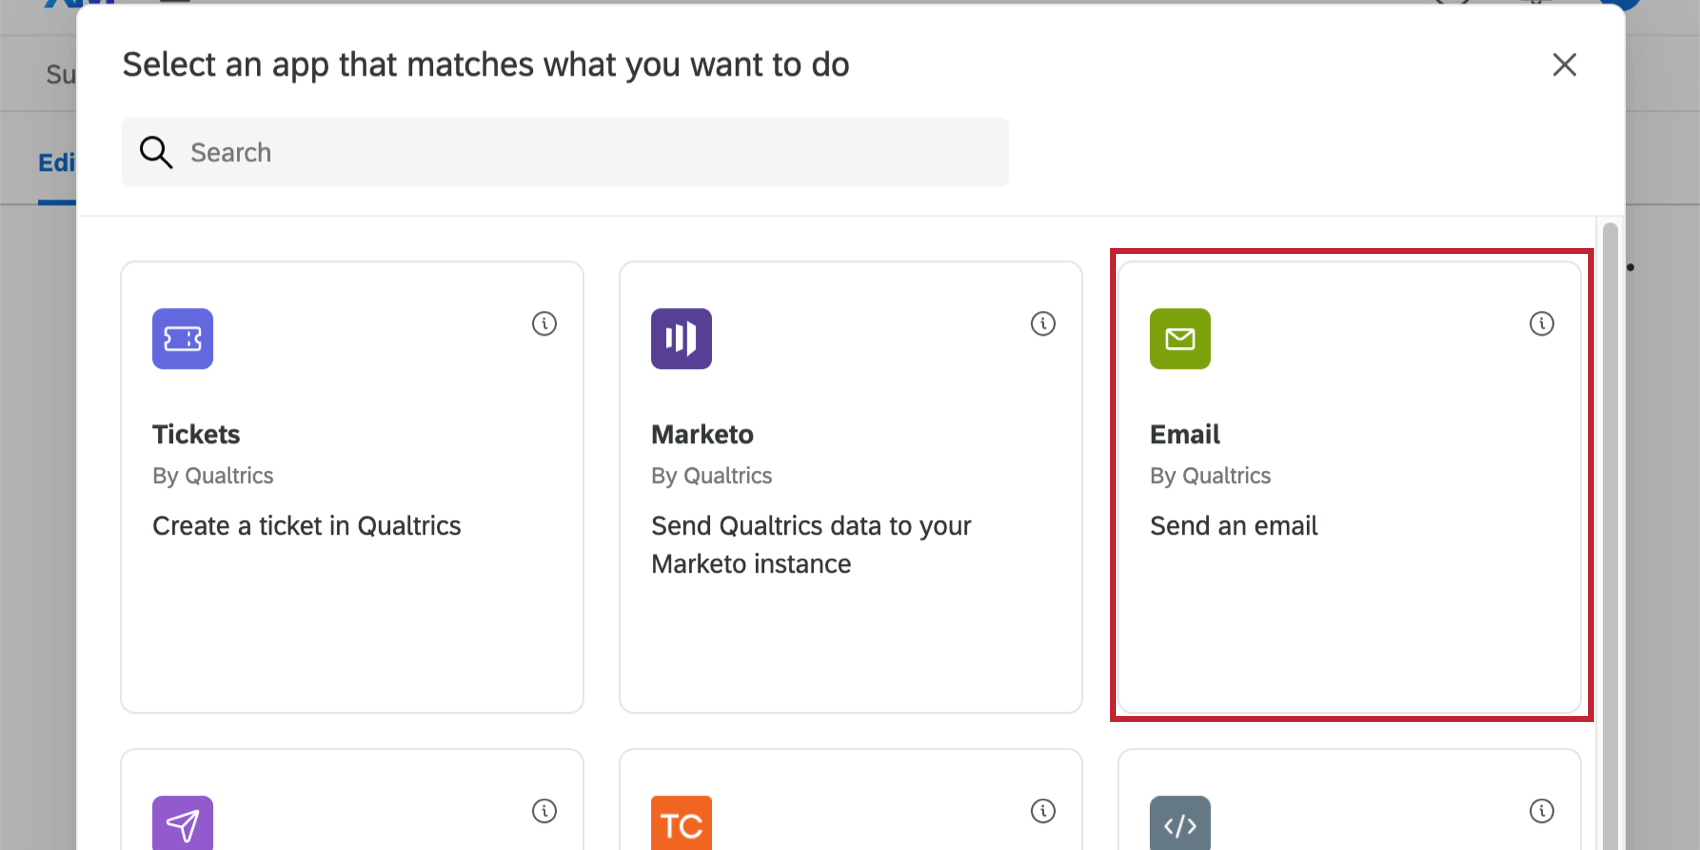
Email Confirmation
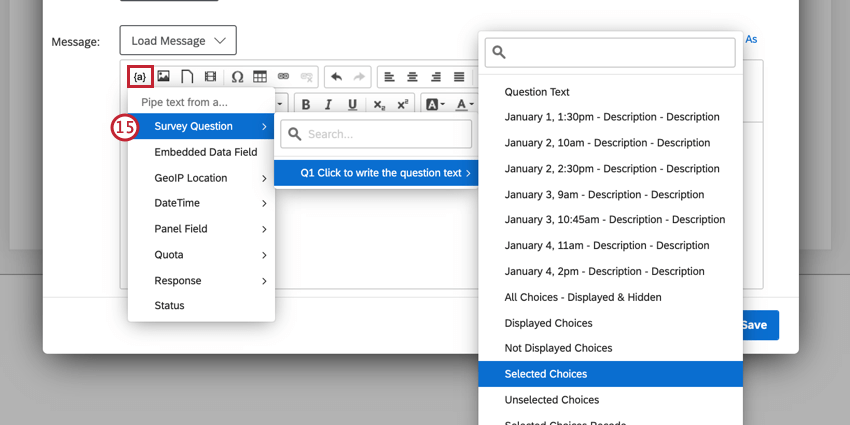
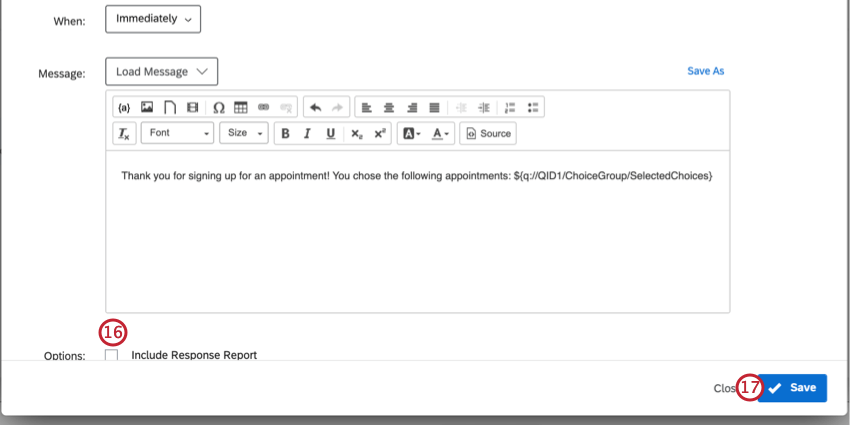
As an extra step, you can send an email to the recipient confirming what time they signed up for.
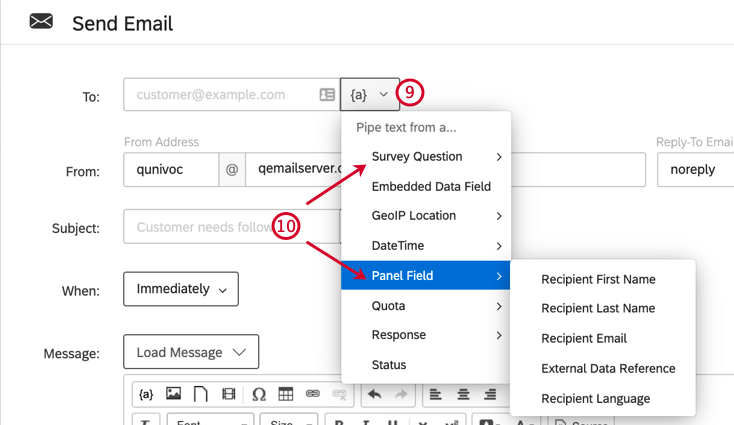
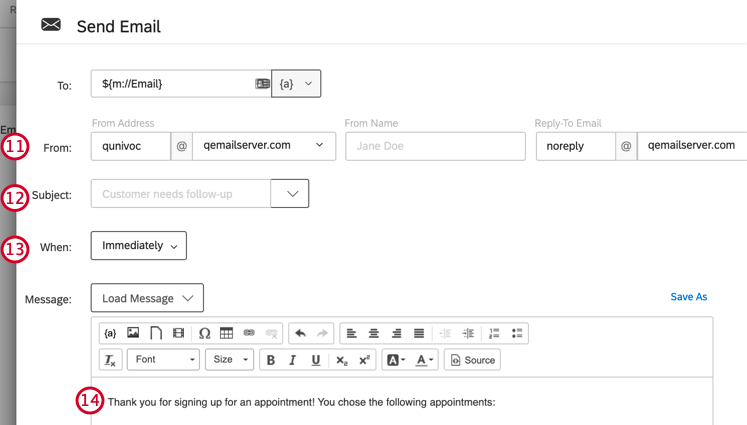
Qtip: If you click the dropdown next to the subject field, you can choose a subject saved in your library (which can have translations), or add piped text.
Qtip: Feel free to add whatever details you want to this email, such as a special Reply-To or From Name. Learn more on the Email Task page.
Preventing Repeated Responses
If your respondents can take the survey more than once, they will be able to select more appointment slots. In order to prevent respondents from answering your survey more than once, you will want to be mindful of how you are distributing your survey.
Anonymous Links
If you are using an anonymous link (for example, you want to post a link on your website), then go to the Survey options and select Prevent multiple submissions.
Email and Personal Links
If you’re emailing your survey through Qualtrics, make sure you are using the default link setting, called the individual link.
If you are using personal links, then no further action is necessary.
Authenticators
If you are using an authenticator, go to the options and ensure that Allow authenticating respondents to retake authenticated section is not selected.
Changing Appointment Selections
Sometimes a respondent may reach out to you later asking to change their response. Since there are quotas involved in your responses, you want to be careful how you edit the responses so that the correct choices are available to your other respondents.
Changing the Answer
You can send the respondent a retake link to allow them to change the response. This will increment the quota for the new response so other people can’t select it, but it won’t decrement the old response, so no one will be able to choose the new response. This means you have to edit one quota.
If you choose to response edit, the new response’s quota won’t be incremented, and the old quota won’t be decremented. This means you have to edit two quotas.
Editing the Quota Count
The quota “count” is the number of people who have matched the quota and completed the survey. In the event you need to change some responses, you can edit this number to be whatever you want.
The Setting Quota Counts page explains how to edit quotas. Use this method to fix your quota counts if a user retakes the survey or if you edit their response.
That's great! Thank you for your feedback!
Thank you for your feedback!