
Creating Dashboards (Studio)
What's on this page
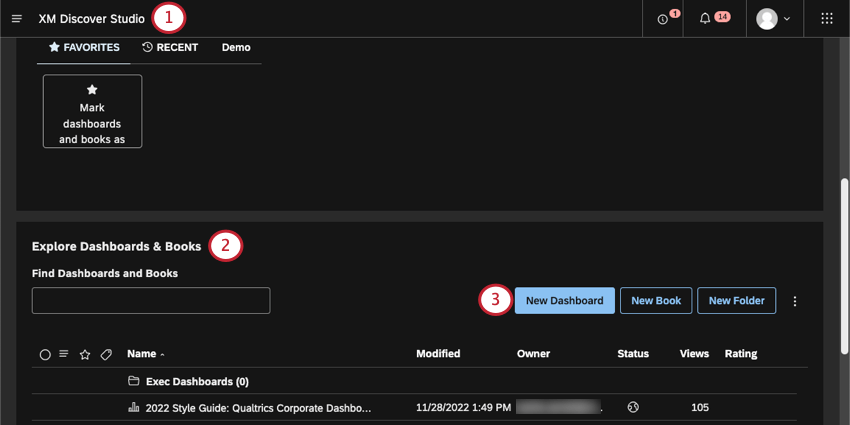
About Studio Dashboards
Studio allows you to create customizable dashboards featuring charts and tables called widgets. You can arrange the widgets freely around the dashboard’s canvas. We recommend creating separate dashboards for different purposes and target audiences.
Qtip: A single dashboard can hold up to 25 reporting widgets and up to 50 content widgets. See more on content vs. reporting widgets.
Creating a Studio Dashboard
In Studio, you can create any number of dashboards for different business needs.
Qtip: You need the Create Dashboard permission to perform the steps below.
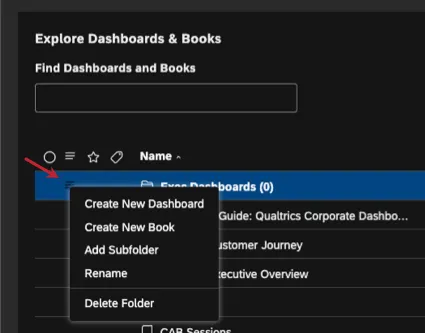
Qtip: To create a dashboard inside a specific folder, click the menu next to that folder and select Create New Dashboard.

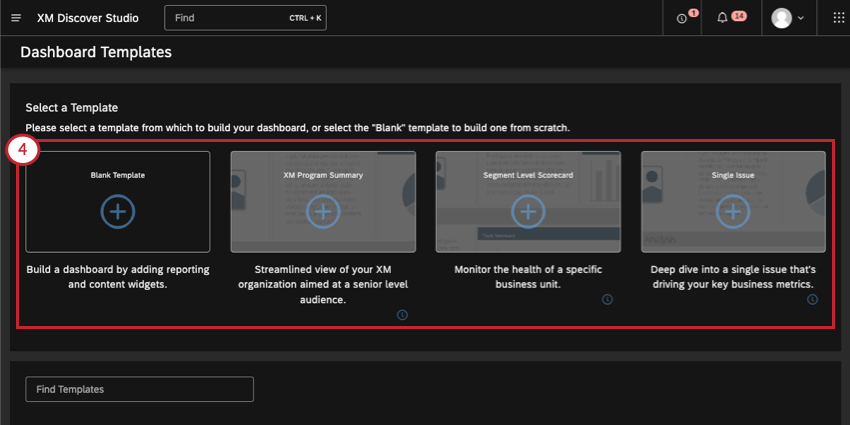
- Blank Template: Create a blank dashboard you can customize however you want.
- CX Program Summary: A template that provides a streamlined view of your organization aimed at a senior level audience.
- Segment Level Scorecard: A template aimed at monitoring the health of a specific business unit.
- Single Issue: A template aimed at deep diving into a single issue that’s driving your key business metrics. Qtip: Click the info icon ( i ) in the bottom-right corner of a template to learn more about it.

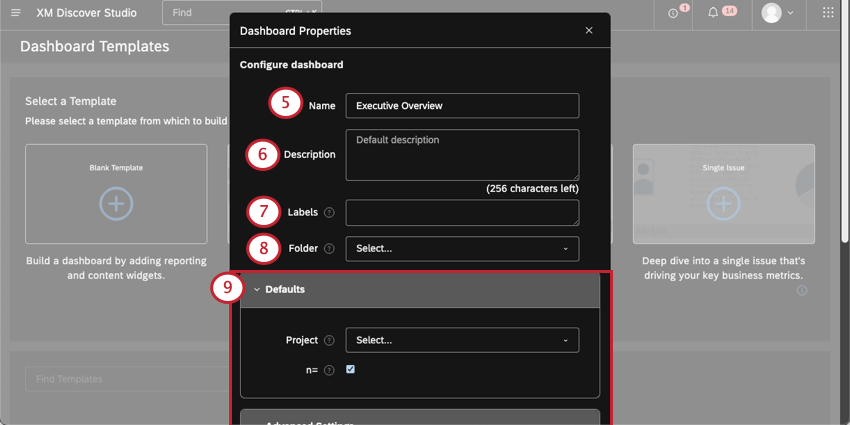
Qtip: The dashboard name must be unique when compared to all other dashboards in your organization. For example, you and another user cannot both name your dashboard “Executive Dashboard.” Studio will warn you if you try to use a name that is taken.
Qtip: You can save dashboard properties you want to reuse in your user preferences.

You will then be redirected to a new dashboard in edit mode.
Qtip: Not sure where to start editing your new dashboard? Try one of these guides:
Filling Out a Template
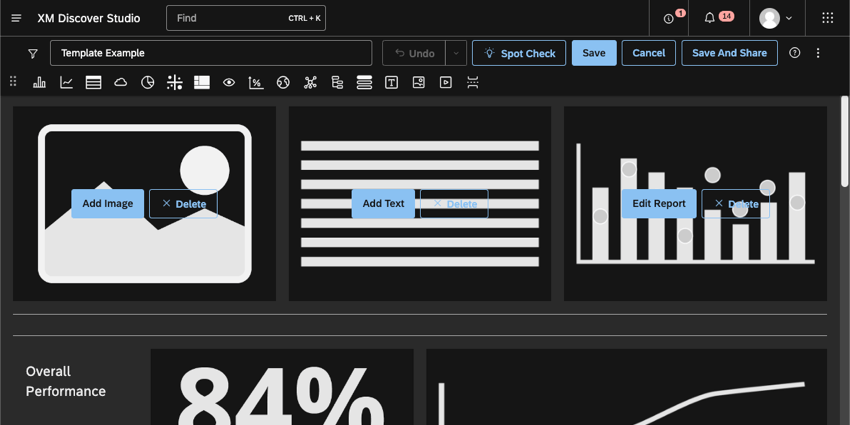
After you create a dashboard using a template, you can fill out its widget placeholders.
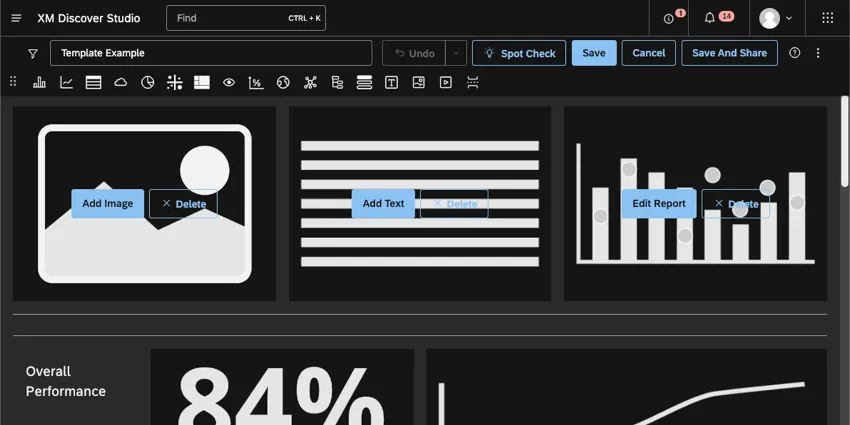
Click the Add button to create each widget. Some may be images, text, or various reporting widgets.
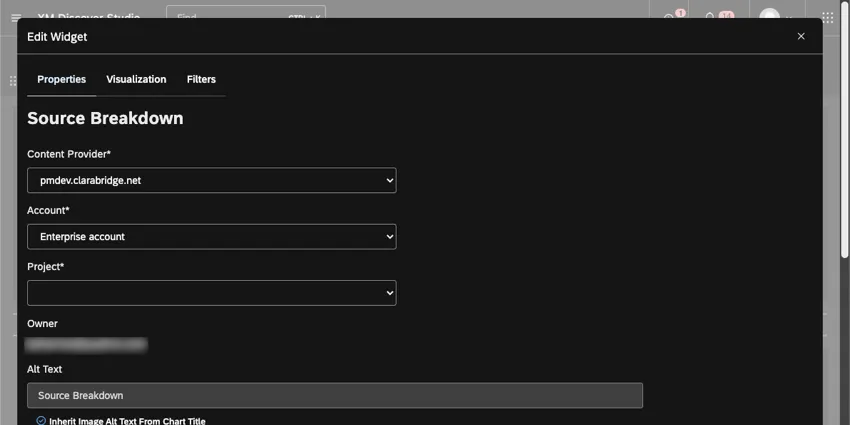
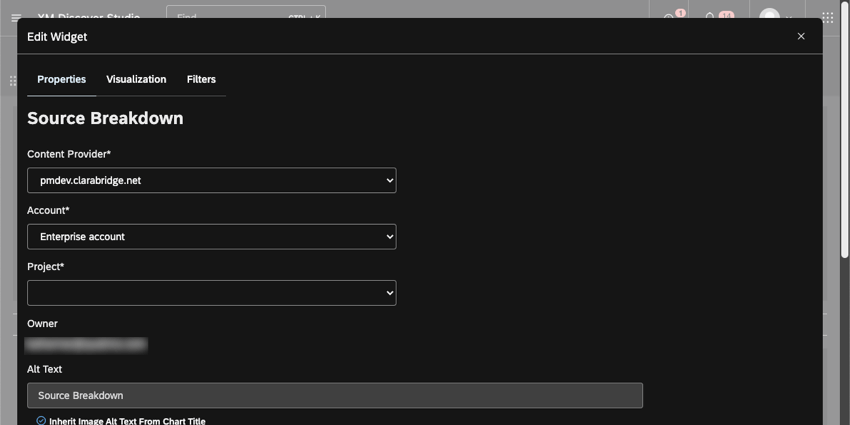
Then fill out the widget properties. These properties vary based on the type of widget you are adding. See more on Widgets.
Qtip: You can also click Delete to get rid of any widgets you don’t need.
That's great! Thank you for your feedback!
Thank you for your feedback!