
User Roles & Permissions (Designer)
What's on this page
About User Roles and Permissions in Designer
User permissions and roles in Designer are used to control access to data and to limit the actions that a user can take in Designer.
Qtip: Permissions for a user are initially set in Studio and can then be changed in Designer. We recommend keeping as much user administration as possible in Studio to prevent unwanted project access. See XM Discover Licensing for more information.
Permission Levels
There are 3 different levels of access in Designer:
Qtip: To limit user access to specific data within a project, use mandatory filters.
Designer User Roles
A user role is a predefined set of permissions that determine what actions a user can take in Designer. The following roles are available in Designer:
- System Administrator: Can perform unlimited administrative functions. Requires a Configuration Analyst license in Studio.
- Account Administrator: Can perform all administrative functions within an account. Requires a Configuration Analyst license in Studio.
- Project Manager: Can perform all administrative functions within a project. Requires a Configuration Analyst license in Studio with Administrator access to the project’s data.
- Report Viewer: Can run Designer reports, create personal filters, and view sentiment settings (but not change them). Requires a Configuration Analyst license in Studio.
- Category Viewer: Can run Designer reports, create personal filters, view classification models (but not change them), and view sentiment settings (but not change them). Requires a Configuration Analyst license in Studio.
- Analyst: Can run Designer reports, create personal filters, view and modify classification models, and view sentiment settings (but not change them). Requires a Configuration Analyst license in Studio.
- Power Analyst: Can run Designer reports, create personal and shared filters, view and modify classification models, and view and modify sentiment settings. Requires a Configuration Analyst license in Studio.
See the table below for more information about the specific permissions included in each user role:
| Report Viewer | Category Viewer | Analyst | Power Analyst | |
|---|---|---|---|---|
| Project access | Read | Read | Read | Write |
| Sentiments | View | View | View | Run calculation |
| Exception rules | View | View | View | View |
| Shared filters | View | View | View | Update |
| Add models | No | No | No | Yes |
| Model access | No | Read | Write | Execute |
| Delete models | No | No | No | Yes |
| Sentence exclusion | No | No | Yes | Yes |
| Write categories | No | No | No | Yes |
| Execute categories | No | No | No | Yes |
Qtip: See Designer Permissions for more information about the permissions listed in this table.
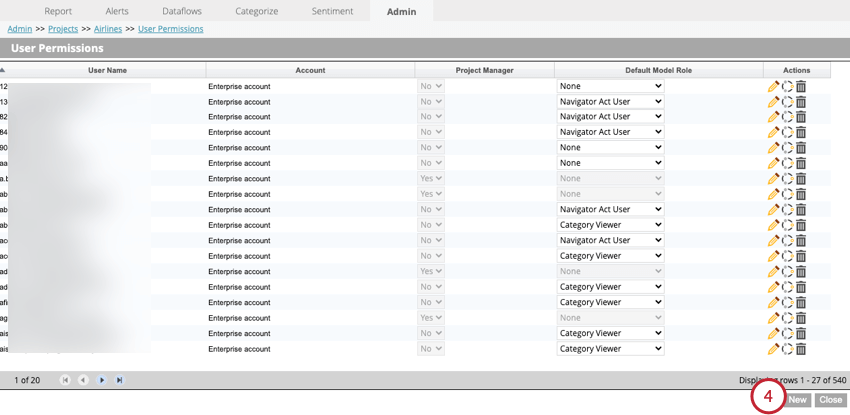
Assigning Project-Level Roles
As a project manager, you can assign project-level roles to other users in Designer.
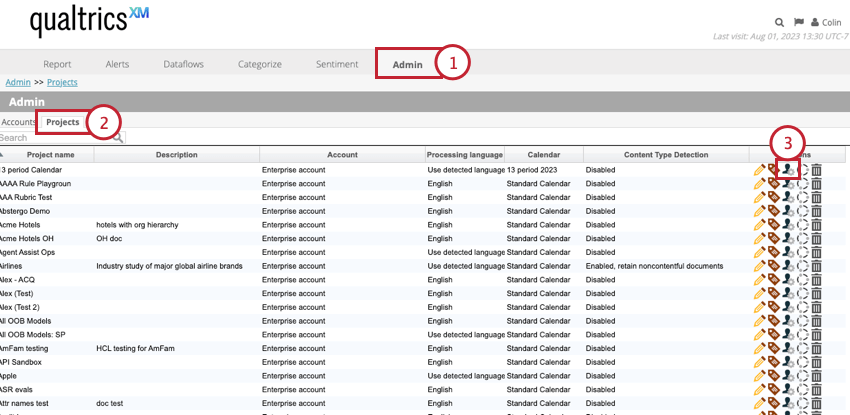

Qtip: There are 2 reasons why a user may be missing from this dropdown menu:
- If the user does not exist yet in your account, contact your Account Administrator to have their user account created.
- If the user already has permissions for this project, then you cannot select them in this dropdown. To change permissions for the user, select the user after navigating to the User Permissions page.
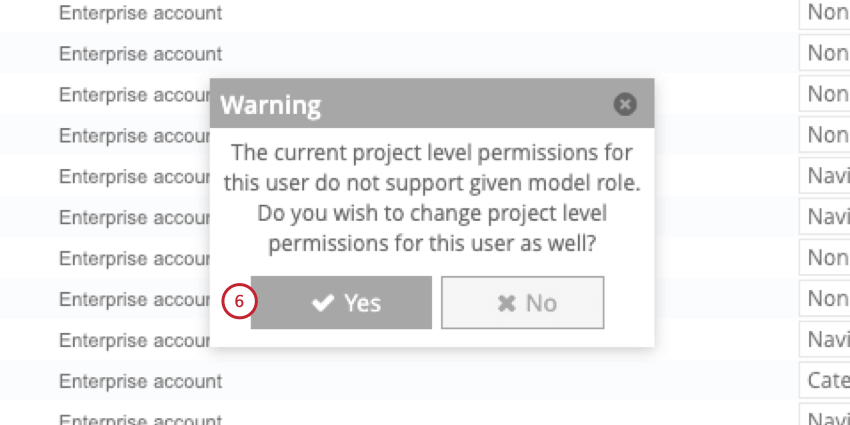
Qtip: You can apply this role to existing models as well by selecting Yes in the popup window that appears after choosing a role.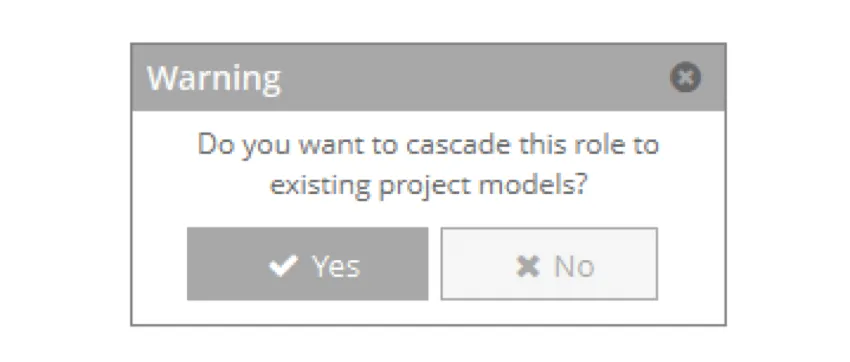
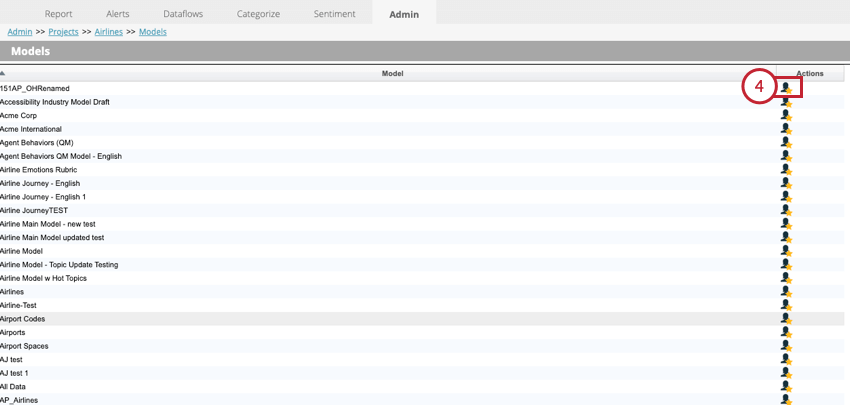
Assigning Model-Level Roles
If you’ve assigned project-level permissions to a user, you can assign additional model-specific permissions for each model in that project.

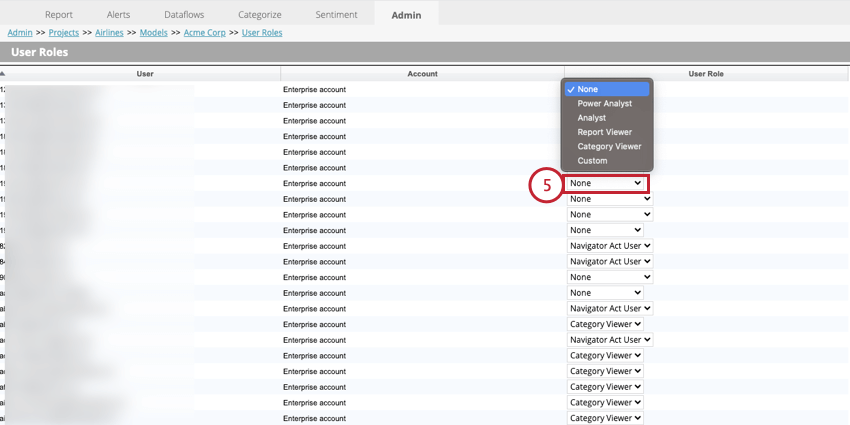
Qtip: Project-level permissions granted through this popup do not apply to future models as long as “Default Model Role” is set to “None” in the project settings.
Designer Permissions
Qtip: See Editing User Information and Permissions for instructions on how to change these permissions.
This section covers the different permissions available for Designer users. This section is broken into different subsections by the different permission levels.
Account-Level Permissions
- Add Project: User can create a project. When a user creates a project, they are automatically set as the Project Manager.
- Settings: Gives administrator-level privileges to all projects a user has access to.
- Taxonomy: User can manage taxonomies in the Admin tab.
- DB List: User can specify a default database for the account and select non-default database when creating a project.
Project-Level Access
Qtip: If a user does not have least Read level access to a project, they will not be able to view the project.
- None: User cannot access the project.
- Read: User can view limited project information in Designer (such as project statistics and dataflow logs) and can explore project data using ad hoc search and keywords in the Categorize tab.
- Write: In addition to the permissions for Read, the user can save project settings. Qtip: The account-level “Settings” permission must also be enabled.

- Execute: In addition to permission for Read and Write, the user can delete a project, clean project data, and schedule completed dataflows.
Actions Permissions
Qtip: These permissions appear when changing a user’s project-level permissions.
- Add model: User can add new classification models using any method, edit category rules, modify category trees, run classifications, and create ad-hoc reports.
- Strict Node Lock: Can lock a category.
- Ad Hoc Upload: This permission has been deprecated and is no longer used.
- Sentiments: Choose one of the following:
- None: User cannot access sentiments.
- View: User can open the Sentiment tab, see existing sentiment tuning but not edit it, view exception rules, and export sentiments.
- Update: In addition to View access, the user can modify sentiment tuning.
- Run Calculation: In addition to View and Update access, the user can run a sentiment recalculation.
- Exception Rules: Choose one of the following:
- View: User can view exception rules. Qtip: A user must also have the Sentiments permission set to View access or higher.
- Update: In addition to View access, the user can activate and deactivate exception rules, create and edit exception rules, and import sentiments.
- Simulate: In addition to View and Update access, the user can run sentiment simulation.
- View: User can view exception rules.
- Shared Filters: Choose one of the following:
- View: Use can view and apply shared filters created by others.
- Update: In addition to View access, the user can create and edit their own shared filters.
- Edit Other User’s: In addition to View and Update access, the user can edit shared filters created by others users.
- Report Distribution (deprecated): This permission has been deprecated and is no longer used.
- Force Disconnect: User can force stop dataflows.
Model-Level Access
Qtip: If a user does not have at least Read level access to a model, they will not be able to view the model.
- Permissions: Choose one of the following:
- None: User cannot access the model.
- Read: User can view category model tree and category rules, view deleted nodes, view node status, view node history, preview rules, and copy the model.
- Write: In addition to Read access, the user can delete detected themes.
- Execute: In addition to Read and Write access, the user can run classifications, run theme detection, run custom dataflows, and merge models.
- Delete Model: User can delete the model.
- Sentence Exclusion: This permission has been deprecated and is no longer used.
- Write (category): User can modify category rules, lock a category, copy a category, and delete a category.
Qtip: The project-level Lock Nodes permission is also required for locking categories.
That's great! Thank you for your feedback!
Thank you for your feedback!