
Editing Custom Fields
What's on this page
About Custom Fields
You can add new information to responses after they’ve already been recorded. You can categorize based on items like age, dates, or certain answers to questions, bucket answers into new categories, combine answers, calculate new formulas, and more.
Qtip: For steps to create these fields, please see the linked support pages.
- Manual fields: Manually add tags, dates, numeric fields, or text fields to your responses.
- Bucketed fields: Sort answers to a question into different groups, allowing for new reporting opportunities and data cleanup.
- Formulas: Calculate math operations with your existing data.
- Combined fields: Combine of 2 or more fields in your dataset, either by concatenating or coalescing answers.
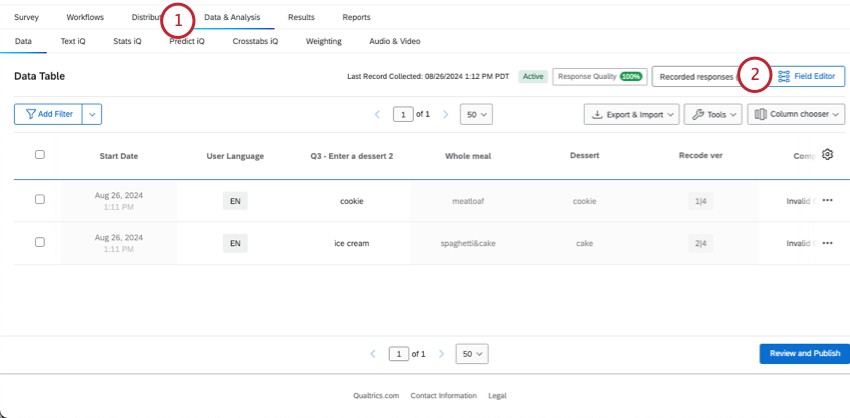
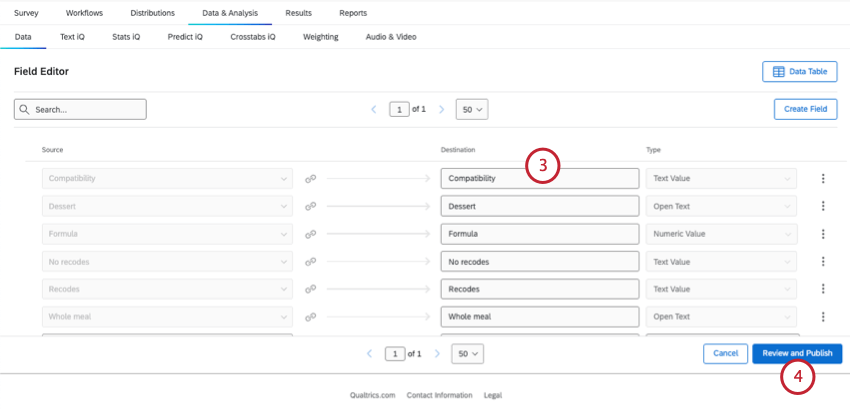
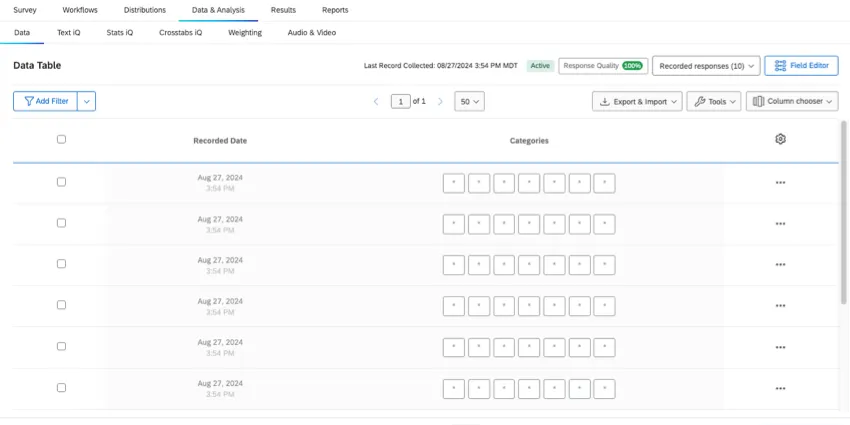
Custom fields can be edited at any time in the Field Editor in Data & Analysis. However, the kinds of edits you can make varies based on the field you created.
Qtip: Custom fields can be exported with the rest of your data. They can also be used in weighting and reports. If you prefer API, you can export your dataset with custom fields included if you use the Start Response Export, Get Response Export Progress, and Get Response Export File calls.
Basics to Editing Fields
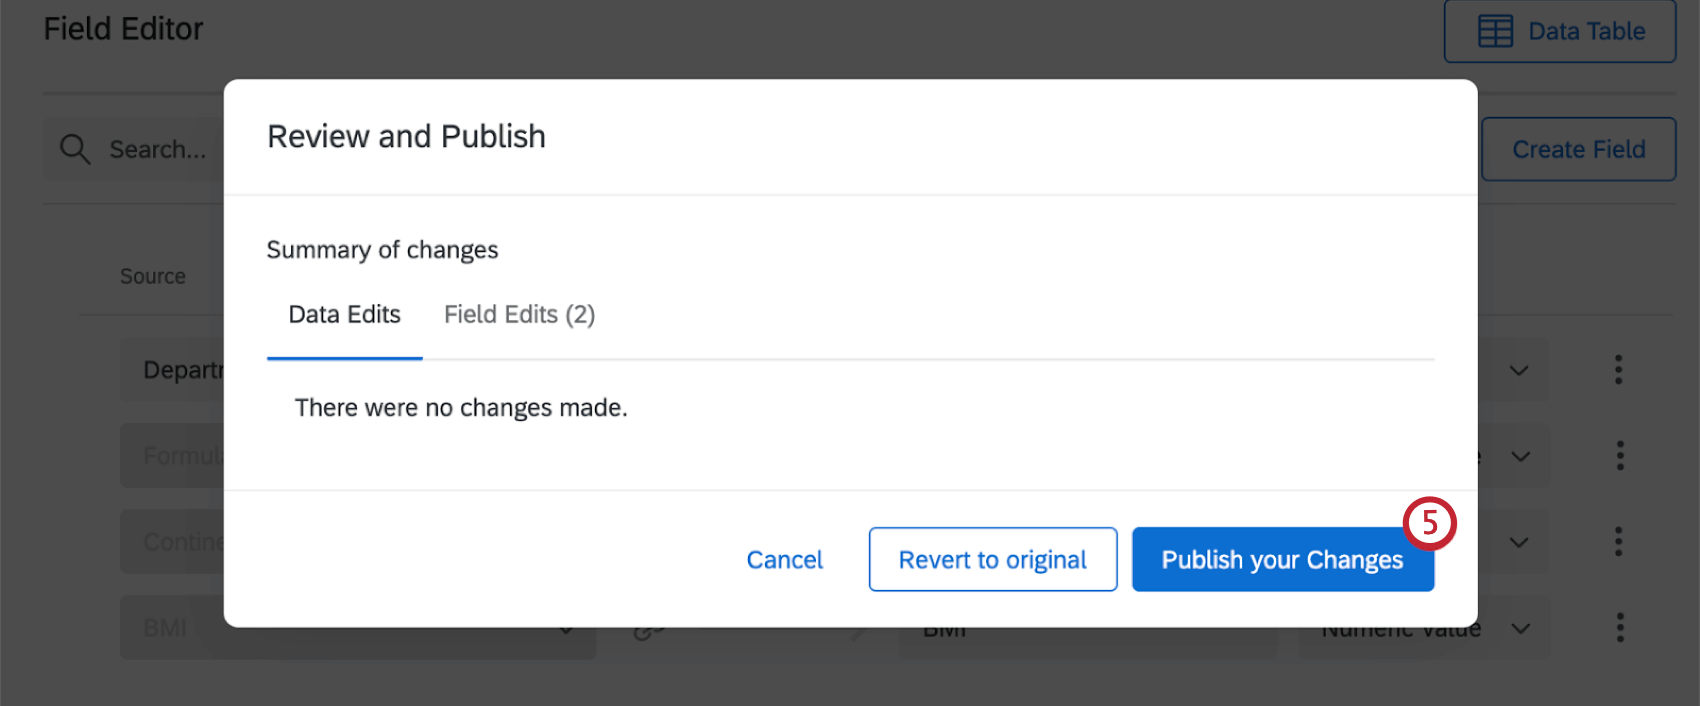
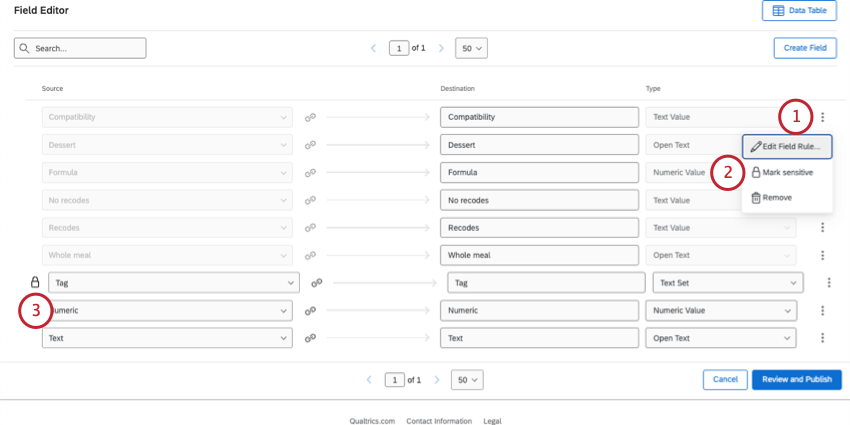
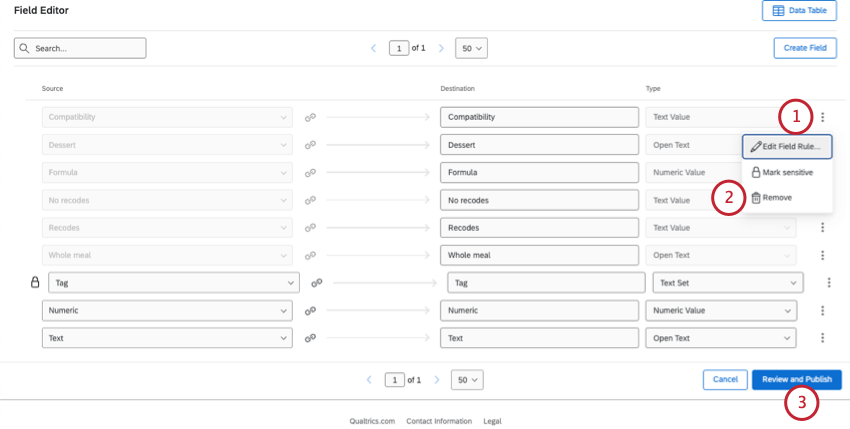
Regardless of what kind of field you’re editing, you can always change its name, and you must publish your edits.
Qtip: Remember you can always edit your survey responses after they’ve been collected. However, editing the response with a retake link will overwrite any custom field values you’ve added.
Edits You Can Make to Each Field
For all kinds of custom fields, you can:
- Edit the name.
- Mark a field as sensitive.
- Delete the field.
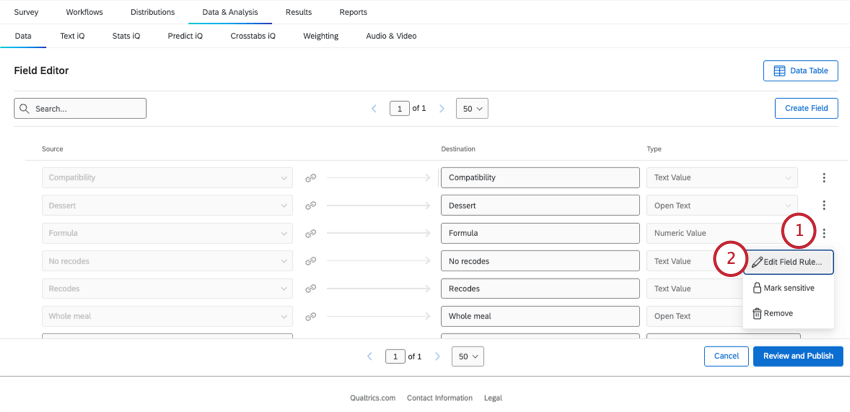
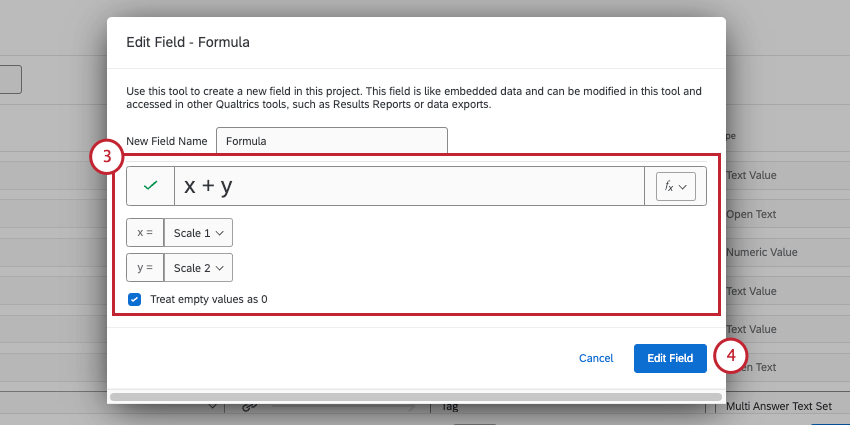
For bucketed, formula, or combined fields only, you can change the rules.
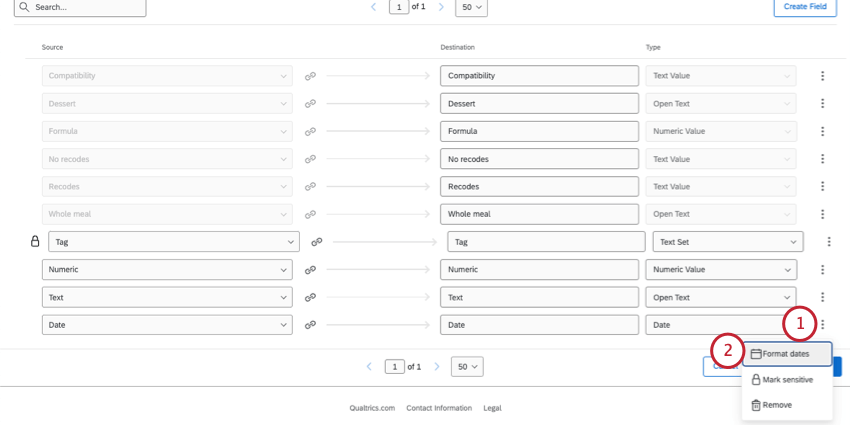
For manual fields only, you can:
- Assign field types.
- Format dates (Dates only).
Changing Rules for Bucketed, Formula, or Combined Fields
You can make change to how your bucketed, formula, or combined fields calculate their answers.
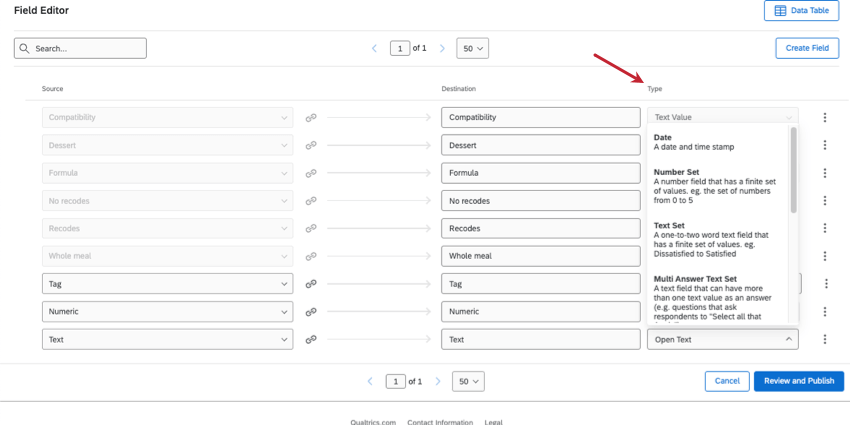
Assigning Types to Manual Fields
Attention: You can only make these edits for manual fields, such as date, numeric, text, and tags.
A field’s “type” is the same as its data format. For example, numeric data is very different from multiple choice, and both can be very different from open-ended feedback. Because of this, the field type determines what kind of edits you can make to the data and what widgets you can use in results dashboards.
Example: If your field is a numeric value or number set, then you can only enter numbers when you edit responses to this field. You might make your Age field numeric to ensure all answers are in the form of numbers.
Example: Your Age field is set to the open text type. Open text is only compatible with a few widgets, such as word clouds and response tickers; because of this, you aren’t able to display your respondents’ age ranges in a graph like the simple table.
- These field types are the same as those in CX Dashboards. For definition of each field type, see Field Types.
- For a guide of how to match results dashboard widgets to field types, see Field Types & Widget Compatibility.
Click the Type column to select a different field type.

Formatting Dates
For date fields, you can specify a format and time zone.
Qtip: If your data contains dates with different formats, you can add multiple formats. Date formats will be applied in the order they are listed.

Qtip: You must select from the date format options. You cannot create a custom date syntax.
Marking a Field as Sensitive
Sometimes you may want to hide some data from reports or dashboards, such as personal respondent information. Fields marked as sensitive will be hidden to users you share the survey with, so long as they have the View Reports permission View Restricted Data turned off. See more on collaboration permissions.
Once fields are marked sensitive, restricted users will not be able to see that data in Data & Analysis.
Warning: Marking sensitive fields does not affect what users see in results dashboards or reports. If you do not want collaborators to see certain data, we recommend turning off report access altogether.
You can mark any kind of custom field as sensitive.
Qtip: You can mark as many fields as sensitive as needed.

Deleting a Custom Field
Warning: Once you delete a field, it is irretrievable. Do not delete a field unless you are absolutely sure you want to remove it permanently.
FAQs
Can I edit or add information to a response after it has been submitted?
Can I edit or add information to a response after it has been submitted?
If you would like an individual to retake their response instead, you can find instructions for this on the Retake Survey Link support page.
Now that I have my new custom field, how do I add responses?
Now that I have my new custom field, how do I add responses?
My custom fields don't have data and say "Invalid." What happened?
My custom fields don't have data and say "Invalid." What happened?
That's great! Thank you for your feedback!
Thank you for your feedback!