
Marketo Task
What's on this page
Qtip: The Marketo extension is an additional purchase for your Qualtrics license. If you do not have access and are interested, you can purchase this solution from the XM Marketplace.
About Marketo Tasks
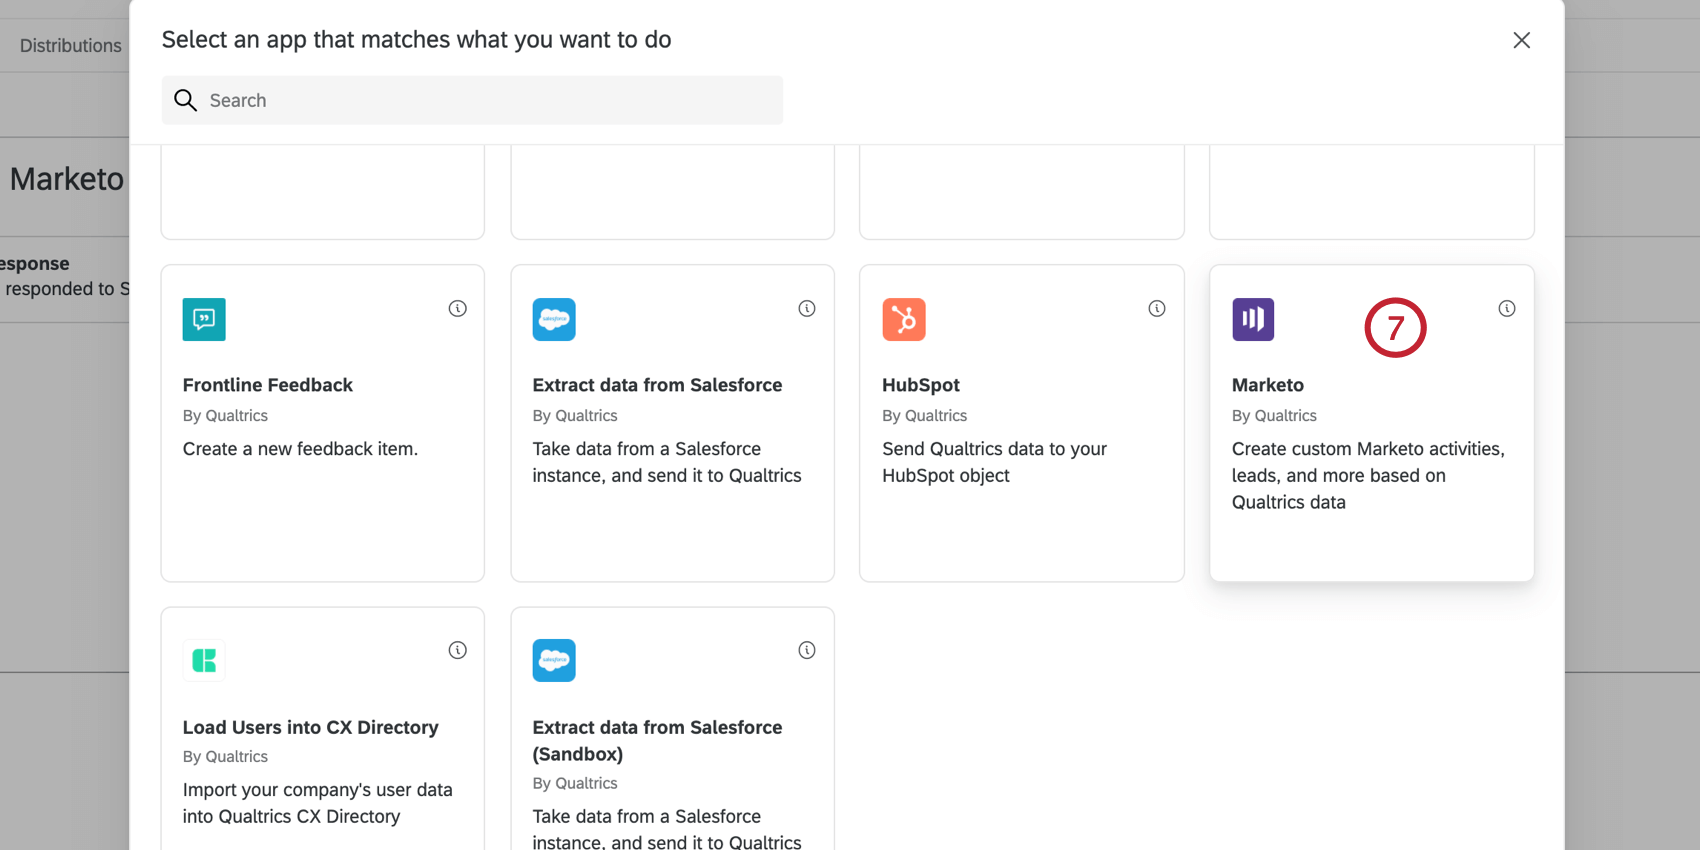
The Marketo task allows you to pass data from Qualtrics to Marketo. You can use this data to create or update a Marketo Lead, or create one or more Marketo activities. Custom activities can be used inside Marketo to filter data or create triggers. When setting up this task, you can select one of three options:
- Create a Marketo activity: Link a single activity to your task to create one activity for every response a lead takes. This means that you can pick and choose which response fields you want to pass to Marketo as attributes for the activity.
- Create multiple Marketo activities: Link multiple activities to your task to create multiple activities for every response a lead takes. For this task, every data point connected to a response will count as a new activity.
- Create or update a Marketo lead: Link a survey response to a new or existing Marketo lead. After the lead is created, you will have a Lead ID that you can use in subsequent Create a Marketo activity or Create multiple Marketo activities tasks.
Qtip: You can also use Qualtrics to generate links for a static list, then send customized emails to customers through Marketo.
Marketo Configuration
There are a few actions will you have to take in your Marketo account before you can use this extension.
See the Marketo Extension Overview for more on setting your Marketo account.
Qtip: Qualtrics Support can help with the setup of the Marketo extension on the Qualtrics side. However, for help troubleshooting actions inside your Marketo account, we recommend reaching out to Marketo’s support team.
Marketo Task Initial Setup
Once you have gotten your Marketo account ready, it’s time to begin setting up the Marketo task in Qualtrics. This section will cover the initial setup for connecting a Marketo account and selecting your desired task in Marketo.
Qtip: This is most helpful if you don’t want custom activities created in Marketo every time a response is submitted to the survey.
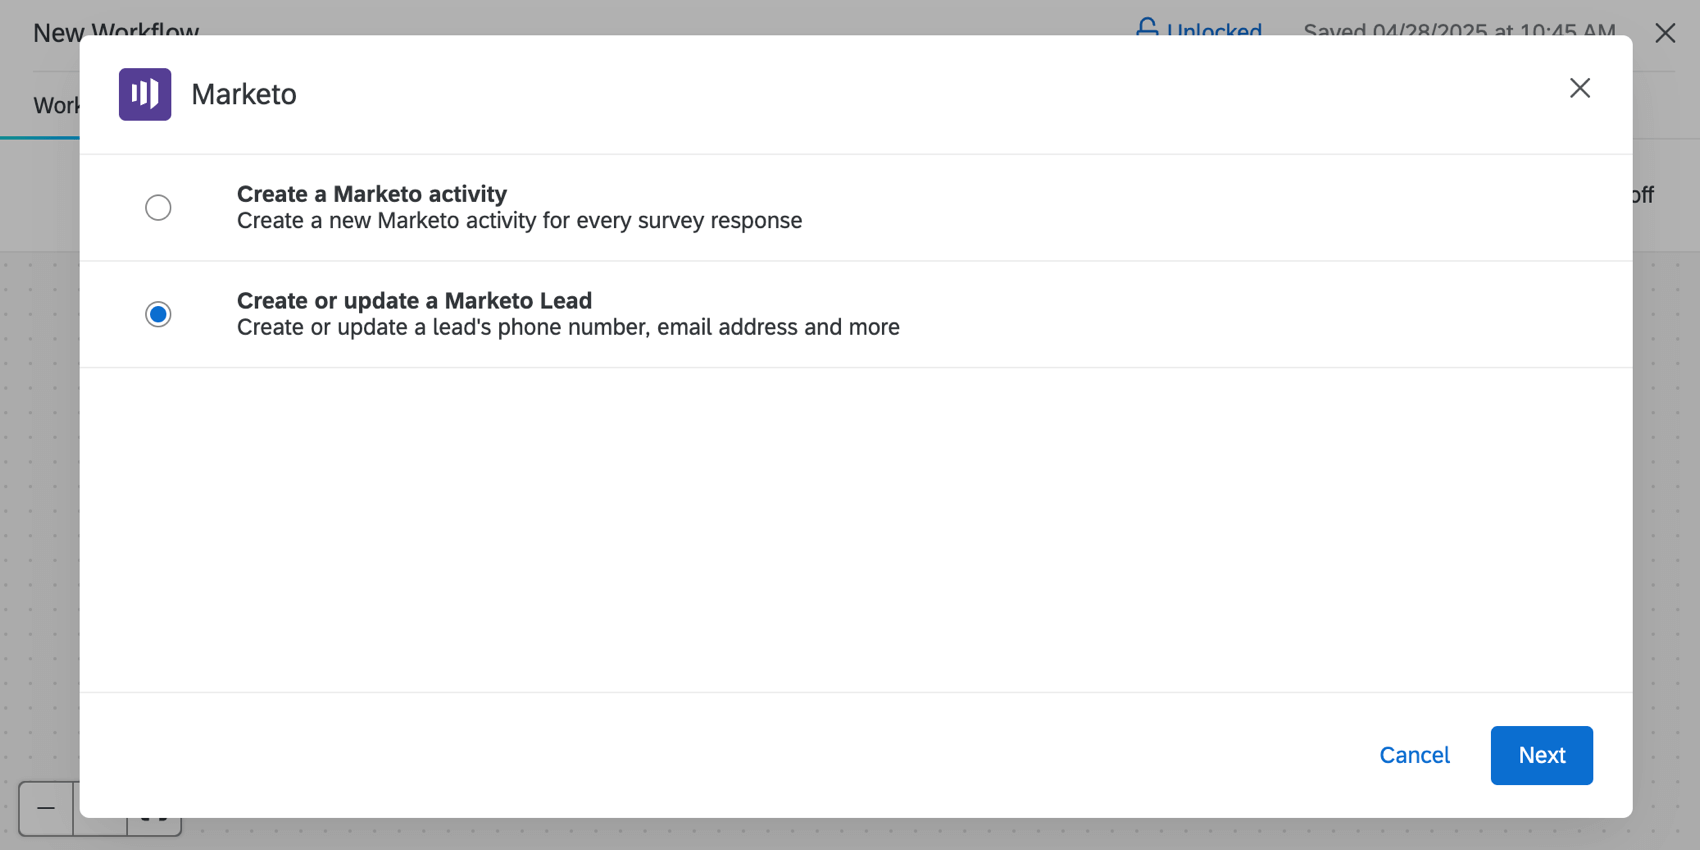
Your options include:
- Create a Marketo activity: Create a new Marketo activity for every survey response.
- Create or update a Marketo Lead: Create or update a lead’s phone number, email address, and more.
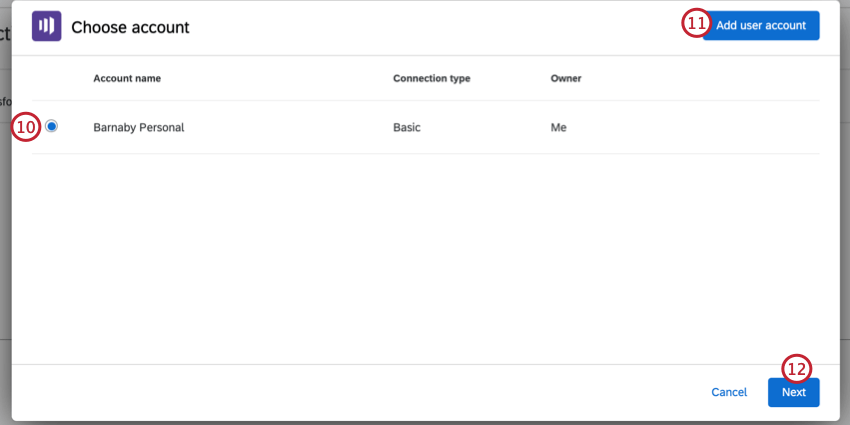
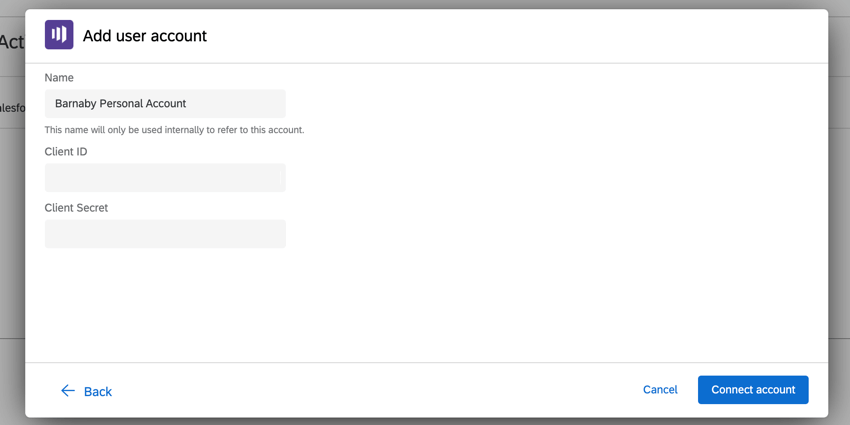
Qtip: After clicking Add user account, give your account a name to identify it. Then, add your Client ID and Client Secret.

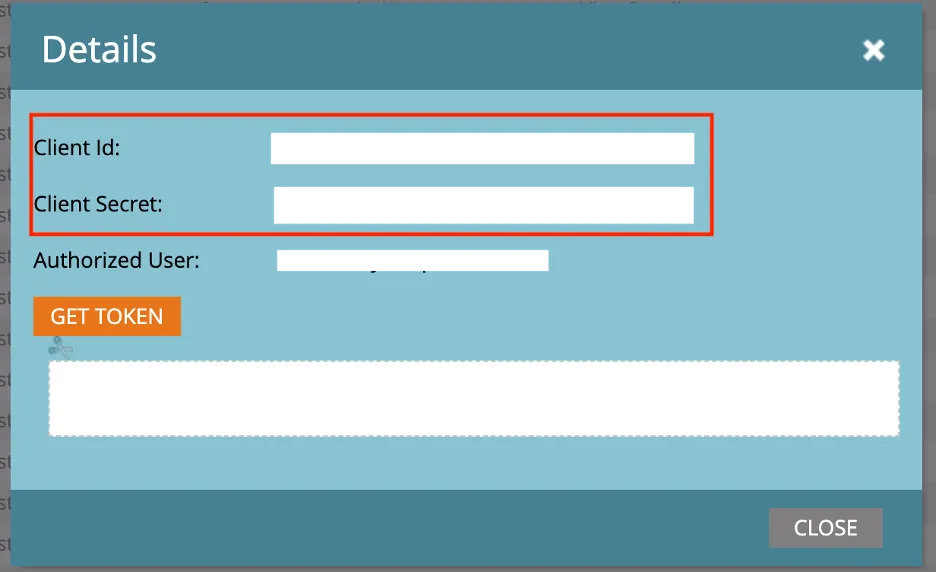
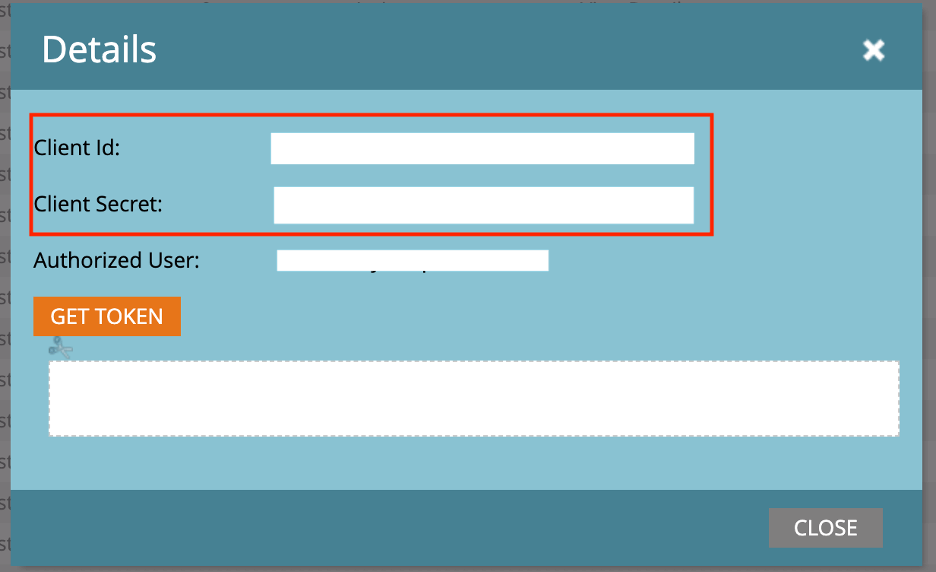
Qtip: Your Client ID and Client Secret can be found by going to Admin and then Launchpoint in Marketo. Once there, click View Details next to your service.
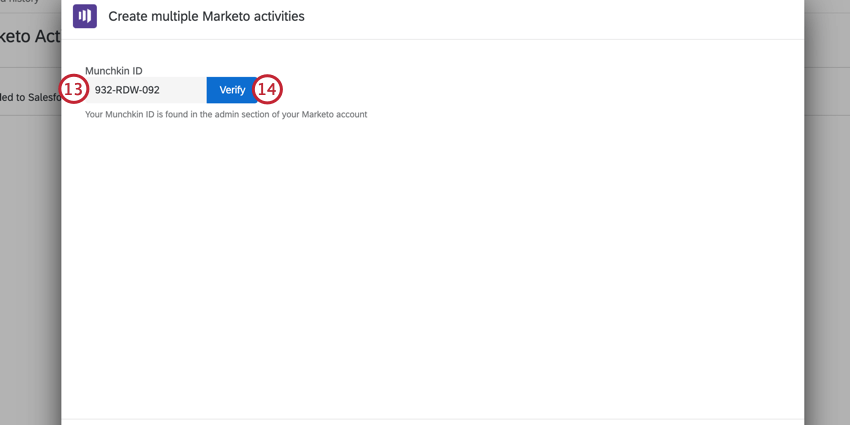
Qtip: The Munchkin ID is the first 11 characters in your identity URL on Marketo.
Create a Marketo Activity
Linking a single activity will create one Marketo activity for every survey response a lead takes. With this option, you can pick and choose which response fields you want to pass to Marketo as attributes for the activity.
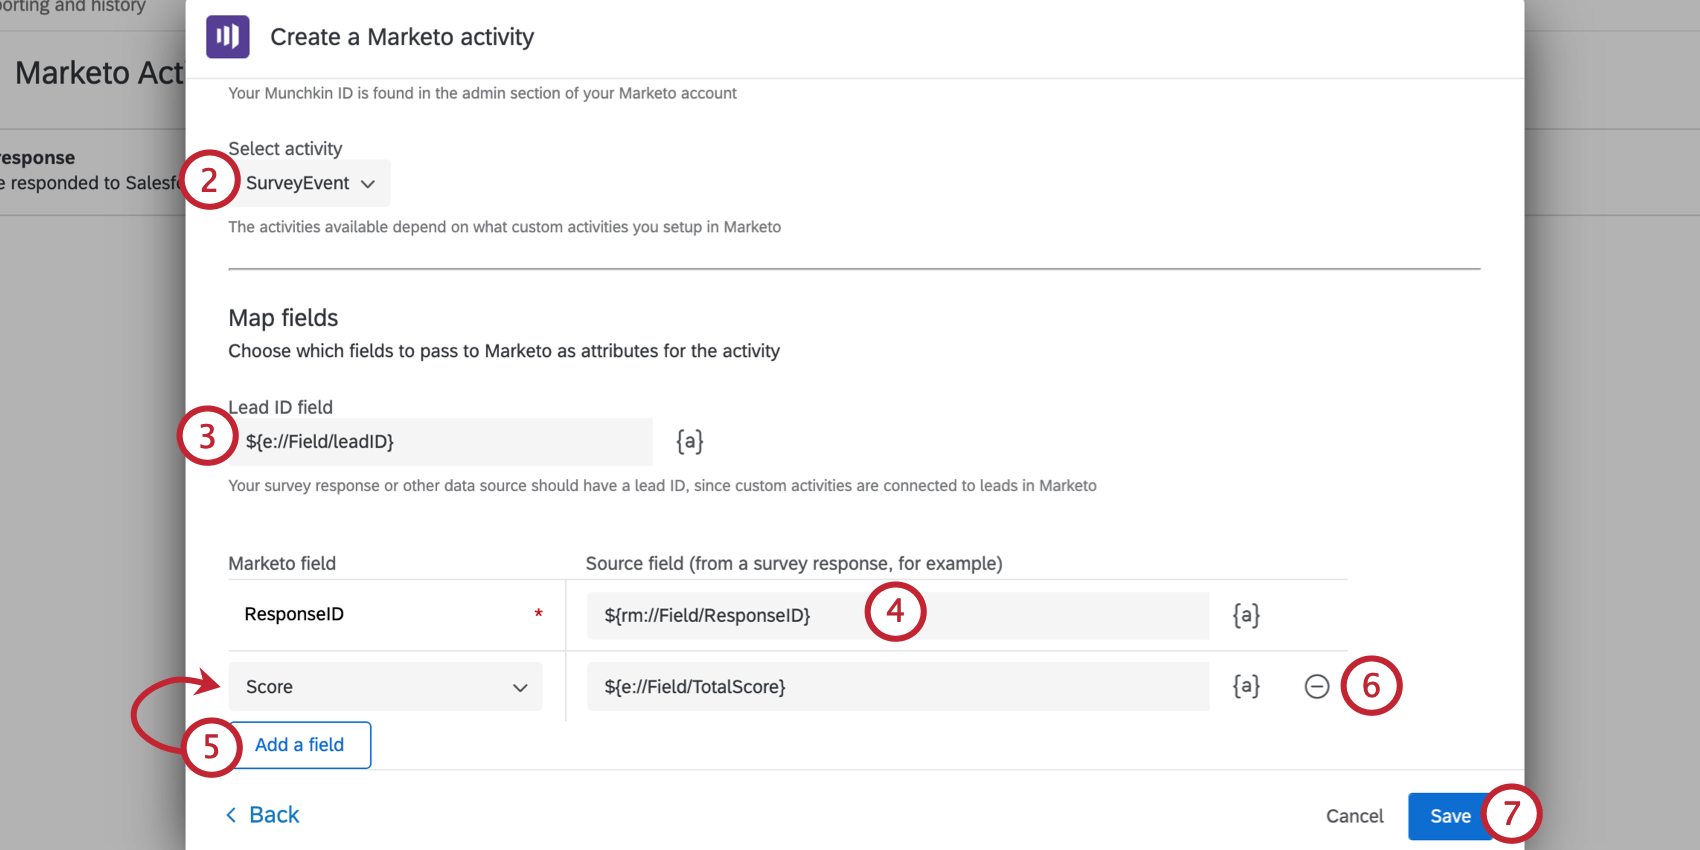
Qtip: The activities available in this dropdown are dependent on what custom activities you have set up in Marketo. See Marketo’s documentation on activities for assistance.
Attention: If you do not see any activities in the activity dropdown, you may have entered the wrong credentials. If you are using the correct credentials, then you may need to adjust the permissions granted for the user or role in Marketo. See Marketo Configuration for more information.
Qtip: For the responses to be pushed to Marketo, every response should have a Lead ID, since custom activities are connected to leads in Marketo.
Example: You can use the Create or update a Marketo Lead task to first create or update a lead in Marketo, which will make the Lead ID an available field in Qualtrics. Then, use the Create a Marketo activity task to insert an activity. The piped text menu will contain the Lead ID to pipe in.
- Survey Question: The respondent’s answer to a survey question.
- Embedded Data Field: An embedded data field.
- GeoIP Location: The postal code, city, state / region, area code, or country name for the response based on GeoIP data.
- DateTime: The current datetime, or a datetime relative to the current datetime
- Panel Field: The respondent’s first name, last name, email, external data reference, and language, if saved in a mailing list.
- Quota: Indicates if the response incremented a survey quota.
- Response: The responses’ ID and response link.
- Status: The response’s status.
Qtip: To test the Marketo task, take a survey response. Then verify that your response has an expected leadId in embedded data you’ve designated as the leadId field. Then login to Marketo and verify that the activities are created.
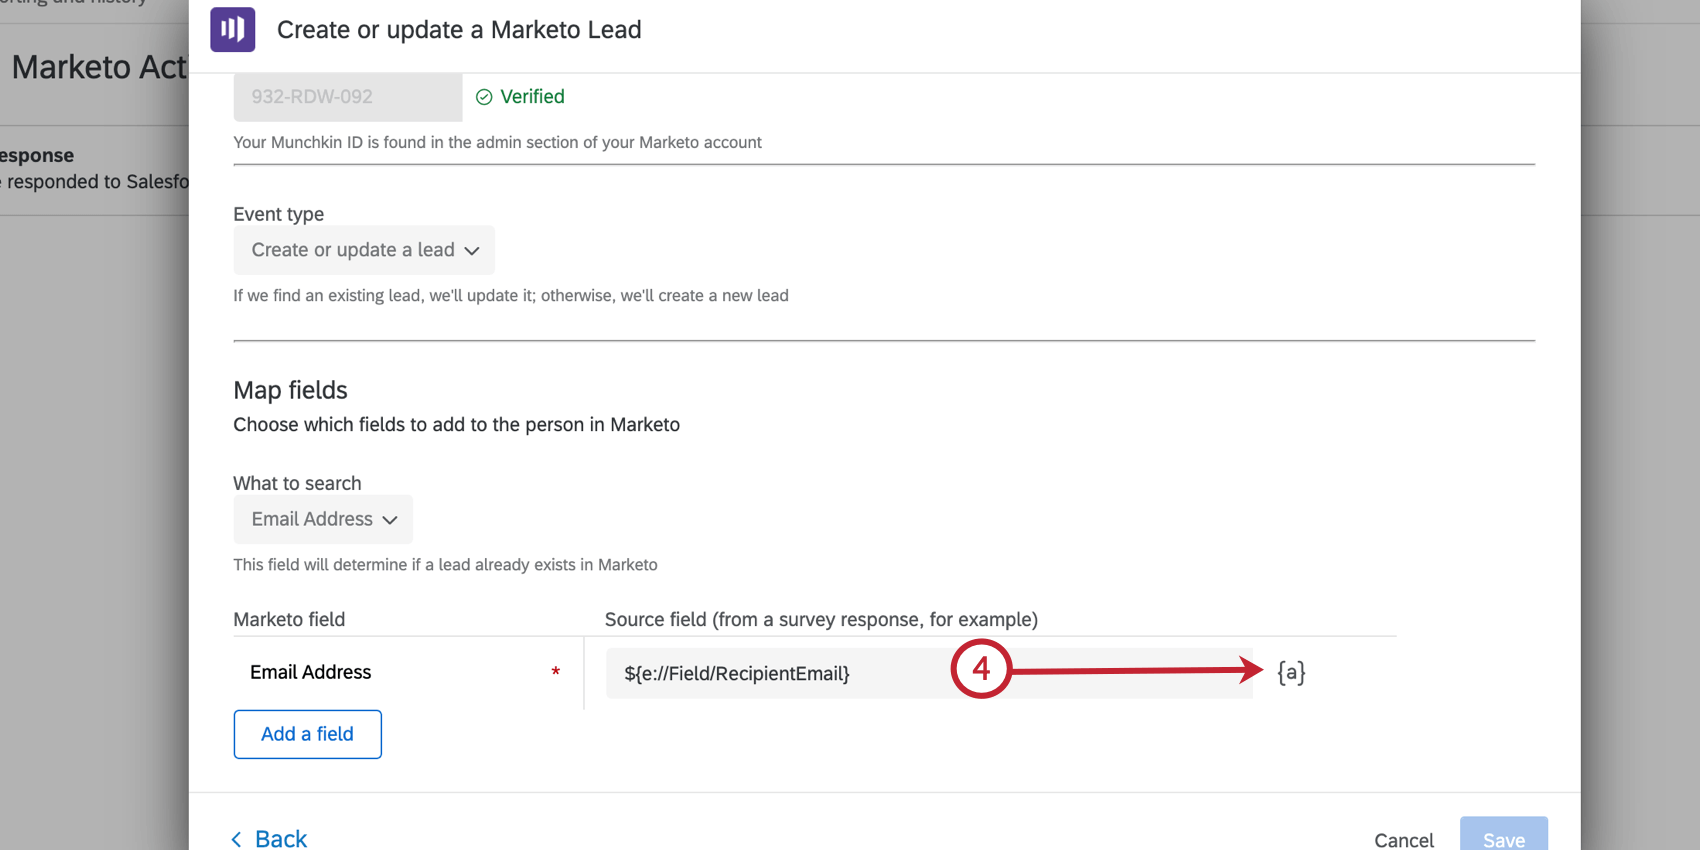
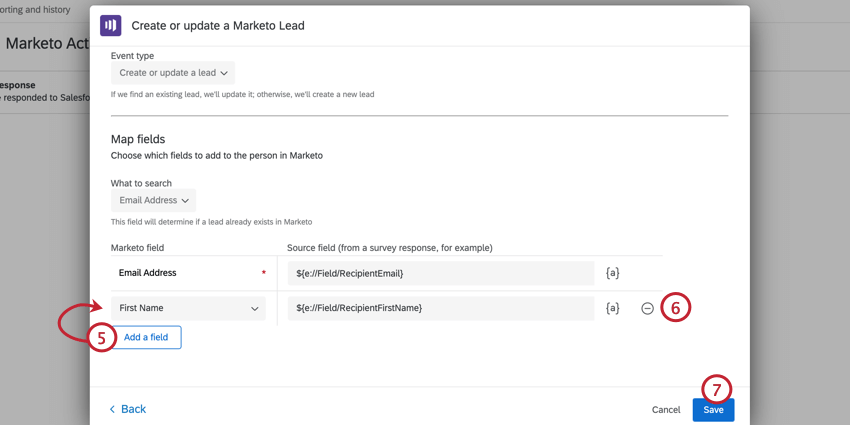
Create or Update a Marketo Lead
Creating or updating a lead in Marketo allows you to take Qualtrics event data, like a survey response, and create a new lead in Marketo with this information or update the lead with new information. As part of a successful create or update, the lead ID will then be returned which can be used with the Create a Marketo activity or Create multiple Marketo activities task.
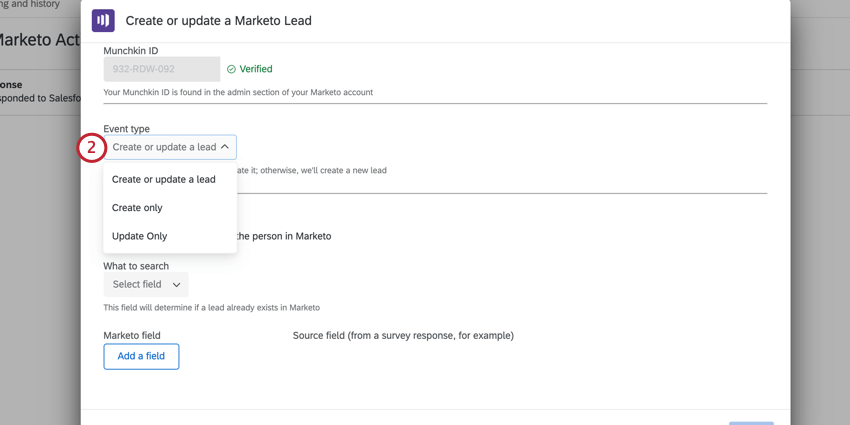
- Create or update a lead: Will attempt to find the lead in Marketo first and update the mapped fields to that user. If the lead is not found, a new lead is created with the mapped fields.
- Create only: Will try to create a new lead in Marketo. If the lead already exists, Marketo will return an error.
- Update only: Will try to update an existing lead in Marketo. If the lead doesn’t exist, marketo will return an error.
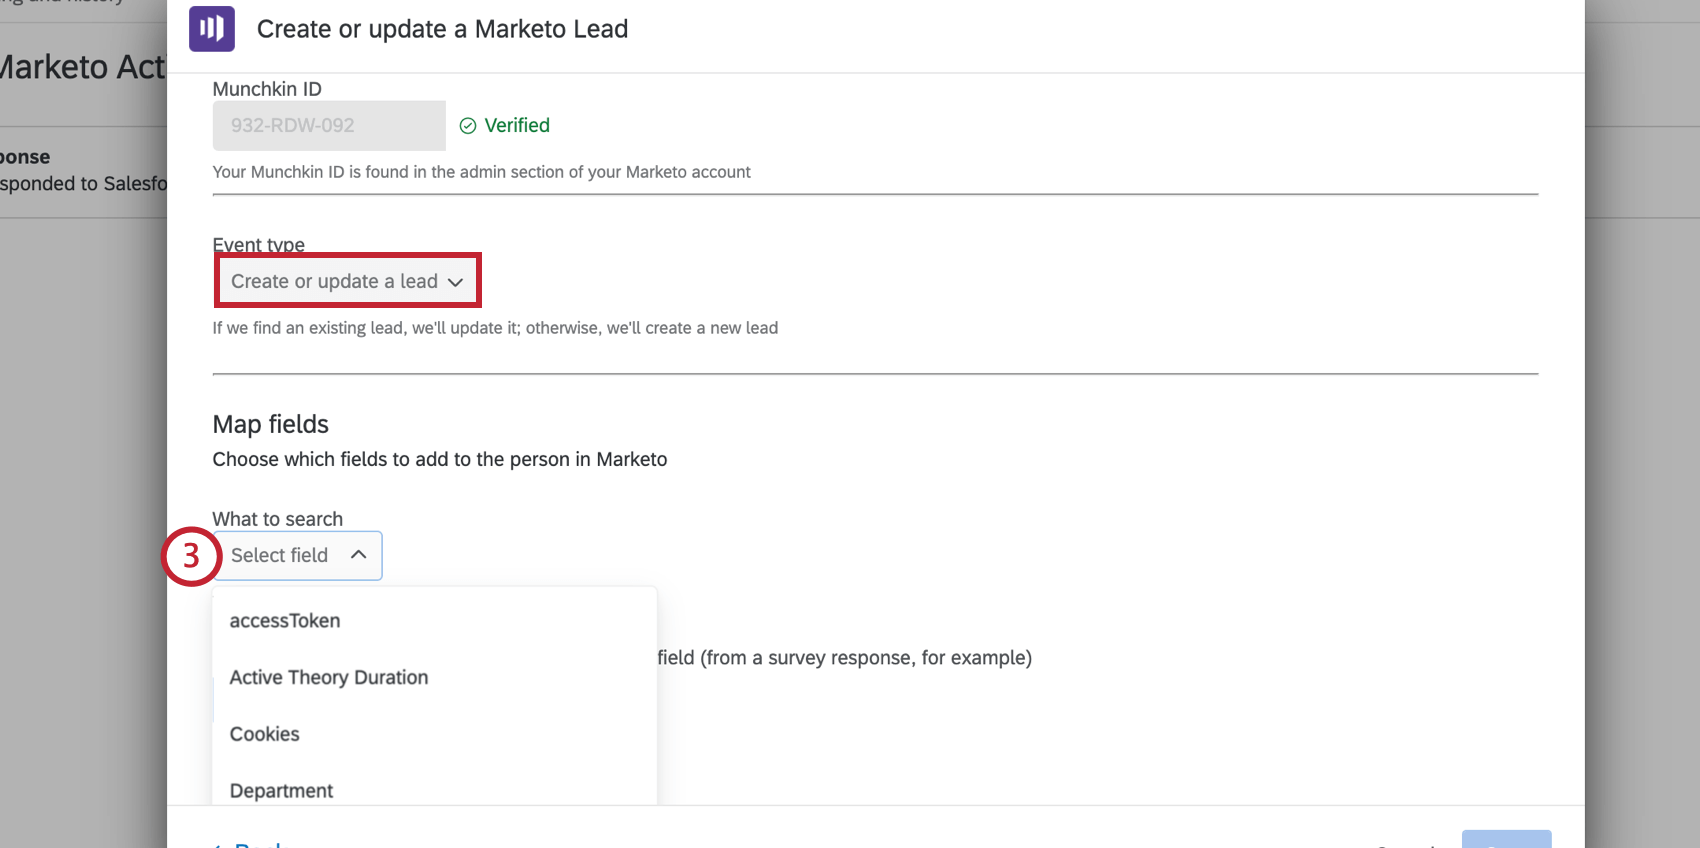
Qtip: The fields you can search will typically be a subset of all lead fields. These are considered searchable fields. See more information on searchable fields on this Marketo support page.
- Survey Question: The respondent’s answer to a survey question.
- Embedded Data Field: An embedded data field.
- GeoIP Location: The postal code, city, state / region, area code, or country name for the response based on GeoIP data.
- DateTime: The current datetime, or a datetime relative to the current datetime
- Panel Field: The respondent’s first name, last name, email, external data reference, and language, if saved in a mailing list.
- Quota: Indicates if the response incremented a survey quota.
- Response: The responses’ ID and response link.
- Status: The response’s status.
Qtip: You can begin your workflow with a “Create or Update a Marketo lead” task to generate the Lead ID of your Marketo leads. Then in the following task, such as ‘Create a Marketo activity’, you can select the Lead ID in the piped text menu.
FAQs
How do I add or remove an extension from my Qualtrics account?
How do I add or remove an extension from my Qualtrics account?
That's great! Thank you for your feedback!
Thank you for your feedback!