
Zendesk Task
What's on this page
Qtip: If you’re interested in purchasing this extension, check it out on the XM Marketplace!
About the Zendesk Task
Workflows triggered in Qualtrics can create Zendesk tickets. Maybe you’re interested in flagging low NPS ratings to your Customer Success team; maybe you want to build a Qualtrics survey where people can reach out to your support team. You can do all this and more by using the Workflows tab of your survey.
This extension is with Zendesk Support. We currently do not integrate with Zendesk Chat, Zendesk Talk, or Zendesk Sell.
Qtip: This page explains how to use Qualtrics to create and update Zendesk tickets. For more on processes set up on the Zendesk side, see Zendesk’s support portal.
Qtip: Are you curious how actions in Zendesk can trigger tasks in Qualtrics, such as a CSAT survey that goes out when Zendesk tickets are resolved? Check out our JSON Event page for an example on integrating with Zendesk.
Setting Up a Zendesk Task
Navigate to the Workflows tab of a survey or the stand-alone Workflows page.
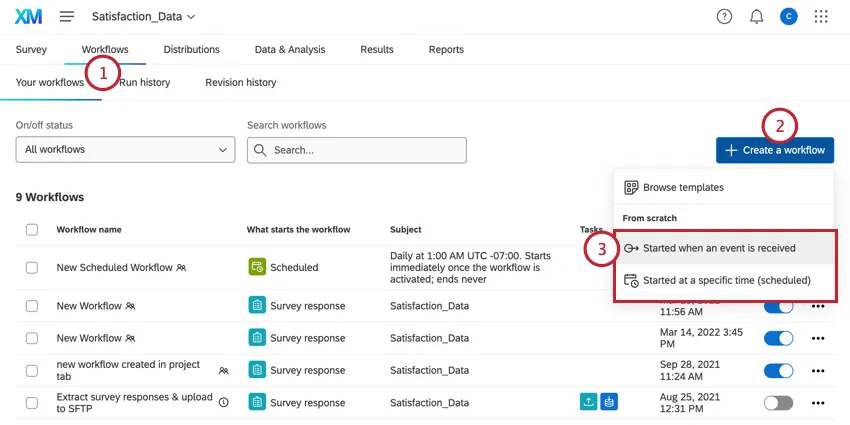
Click Create a workflow.
Choose whether you want your workflow to be Scheduled or Event-based. See Scheduled workflows vs. Event-based workflows for more information about each option.
Set up the event for your workflow (if event-based) or determine the schedule (if scheduled).
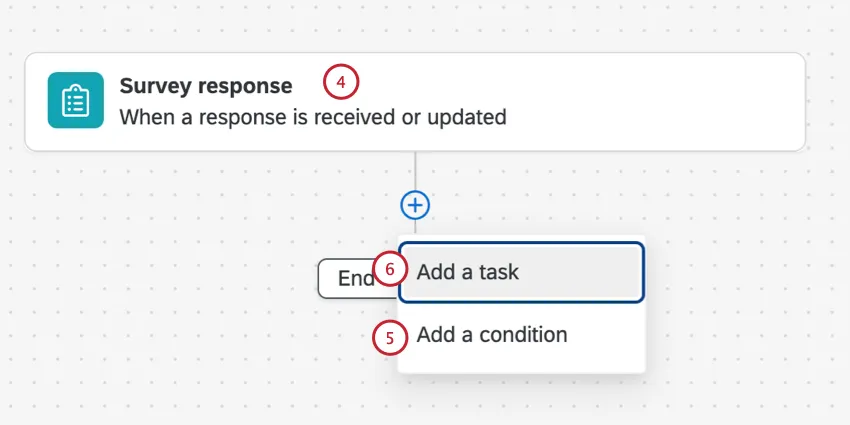
Click the plus sign ( + ) and then Add a condition to add conditions to your workflow. Conditions determine under what circumstances the workflow runs. See Creating Conditions for more information.
Click the plus sign ( + ) and then Add a task.
Select Zendesk.
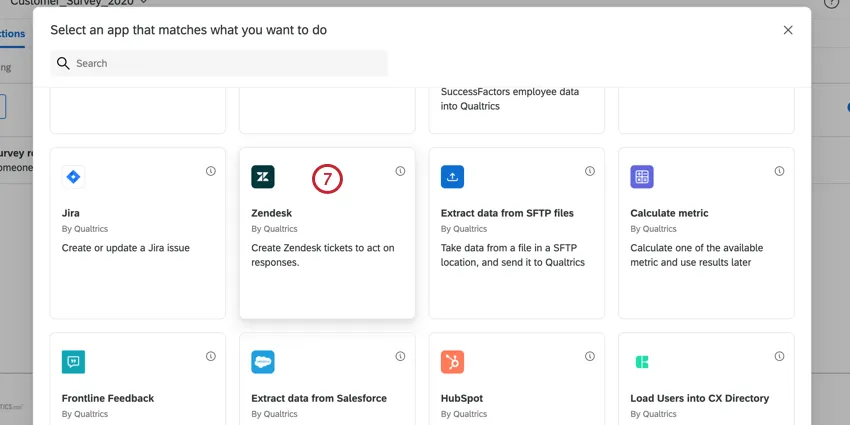
Choose the task you’d like to complete in Zendesk.
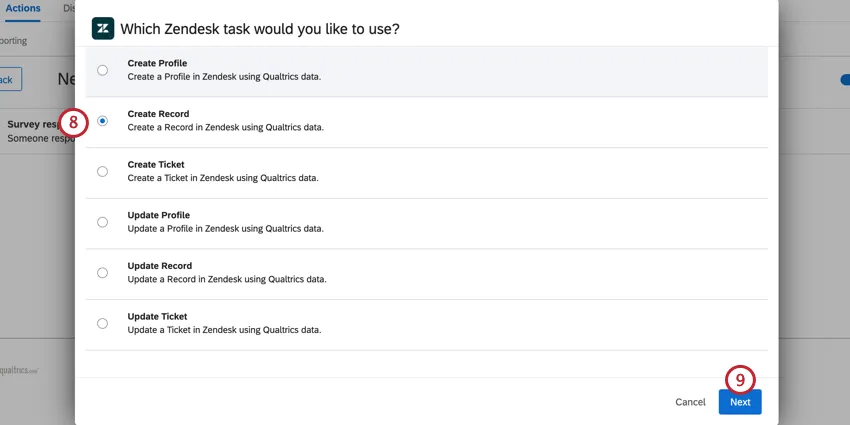
You may choose one of the following:
Click Next.
Select the Zendesk account in which the task should happen. You can select any accounts you’ve previously connected or any accounts a Brand Administrator has set up in the brand’s Extensions.
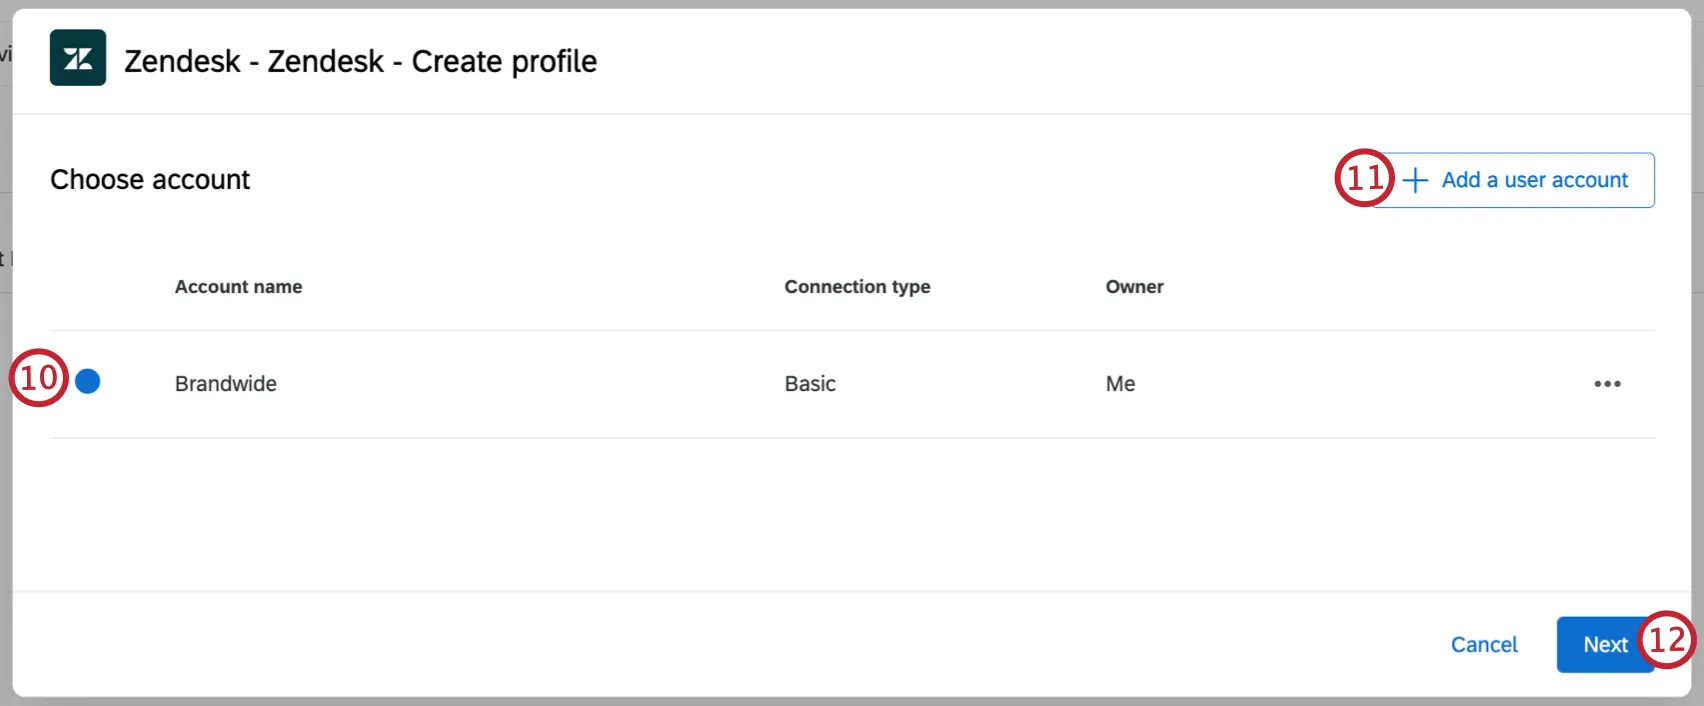
If you’d like to connect to a new Zendesk account, click Add a user account.
Qtip: You can connect to Zendesk via OAuth or with an API token. Visit the linked sections for step-by-step instructions.
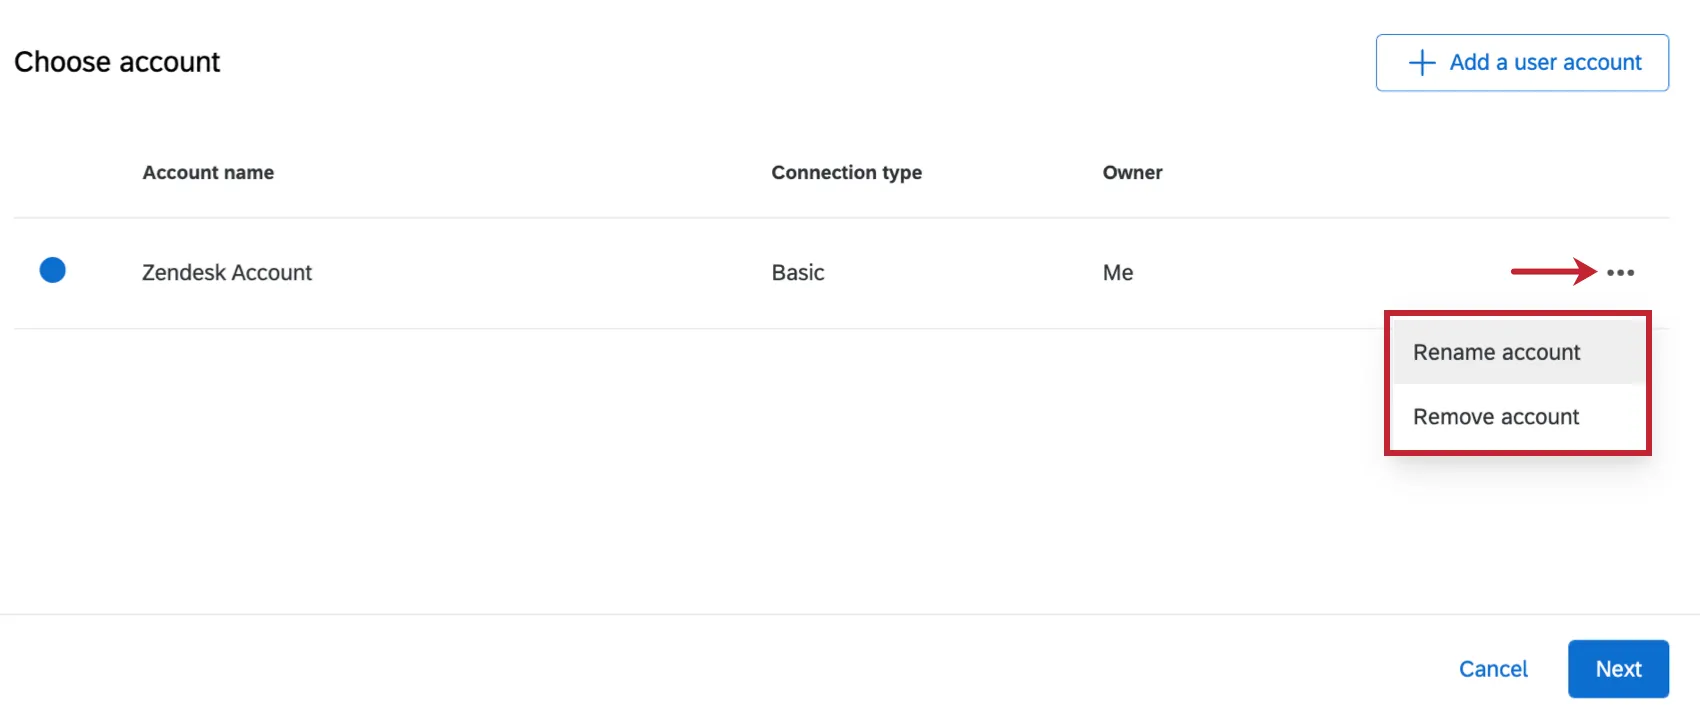
Qtip: You can edit your connected account’s name by clicking the pencil icon in the account selection window. To disconnect your account, click the trash can icon. Be careful when deleting accounts, as any plugins using this account will no longer work.
Click Next.
Finish setting up your Zendesk Task. The remainder of the setup depends on your selected task. See the below sections for more information on setting up each task.
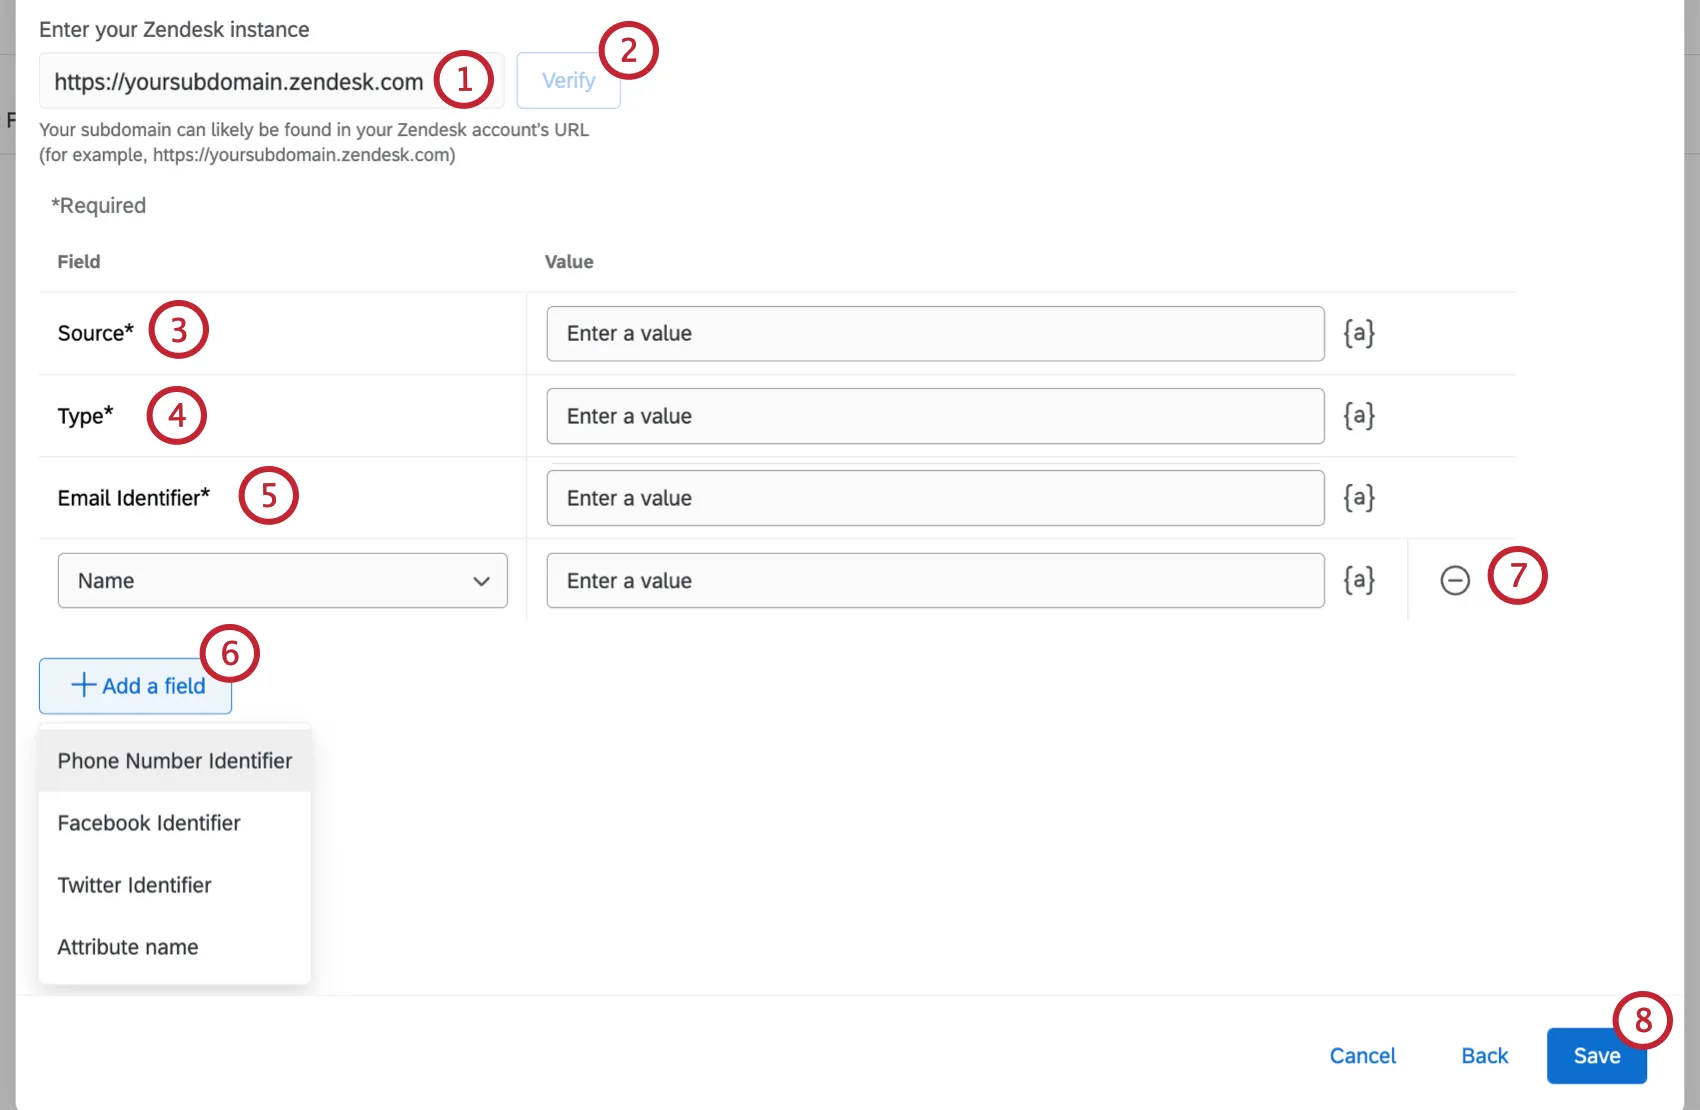
Creating a Zendesk Profile
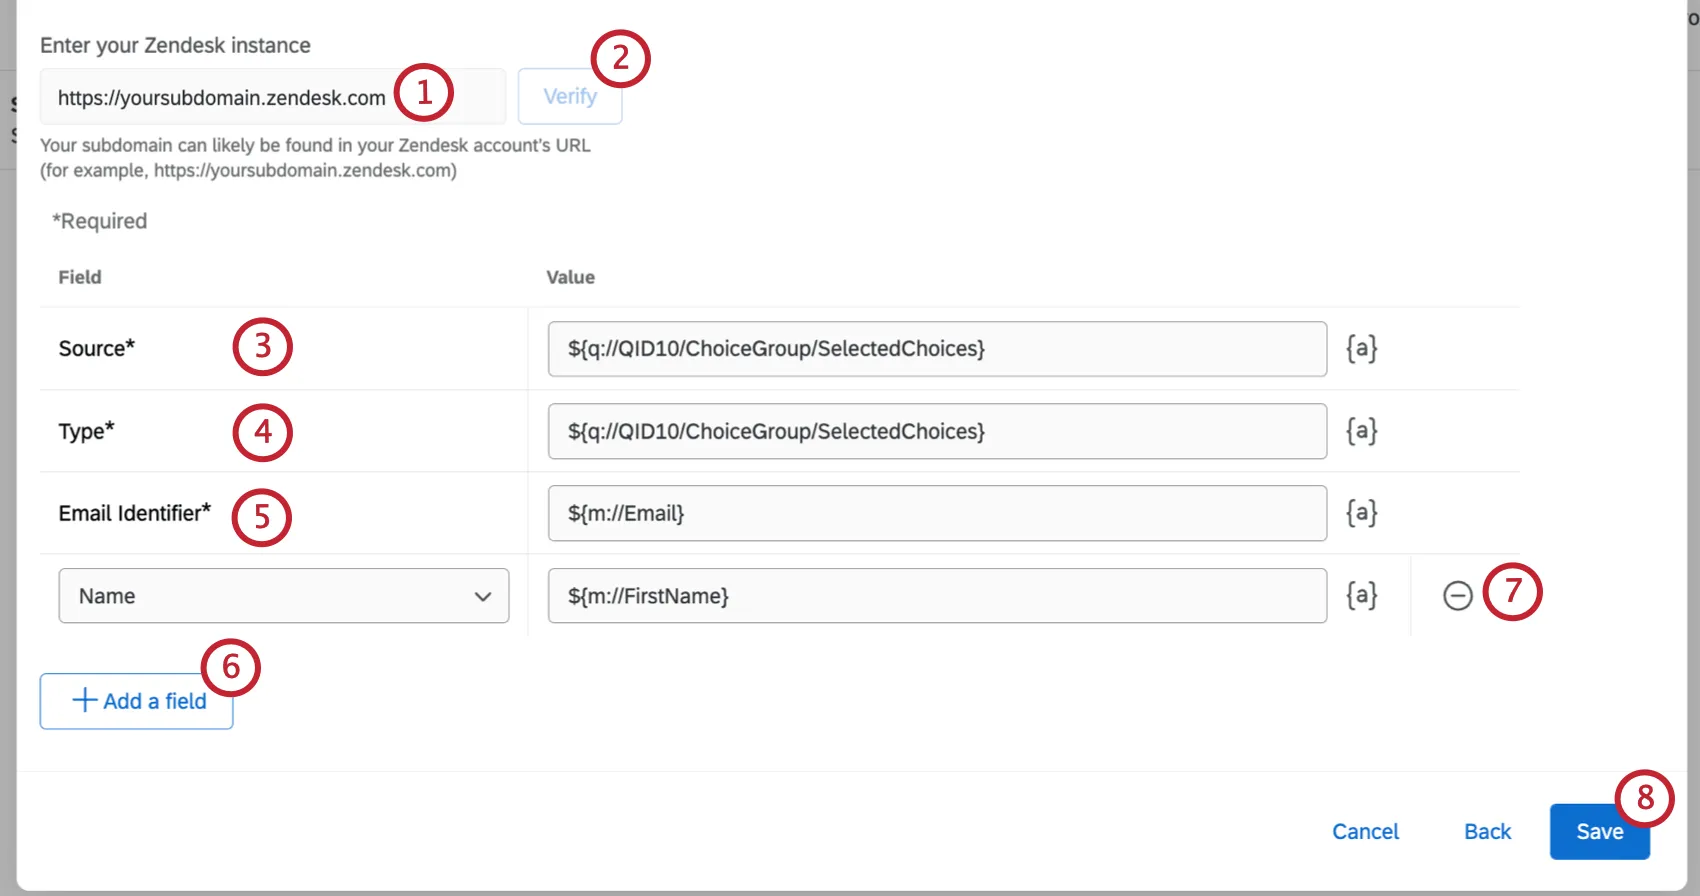
Qtip: Click the {a} icon to insert piped text for your field values. This is useful if the survey response triggering the task contains information to be used in the ticket.
- Name: The name of the person the profile is for.
- Phone Number Identifier: The phone number associated with the profile.
- Facebook Identifier: The Facebook username associated with the profile.
- Twitter Identifier: The Twitter username associated with the profile.
- Attribute name: A custom attribute for the profile. Enter the name and value for the custom attribute. You can add multiple attributes.
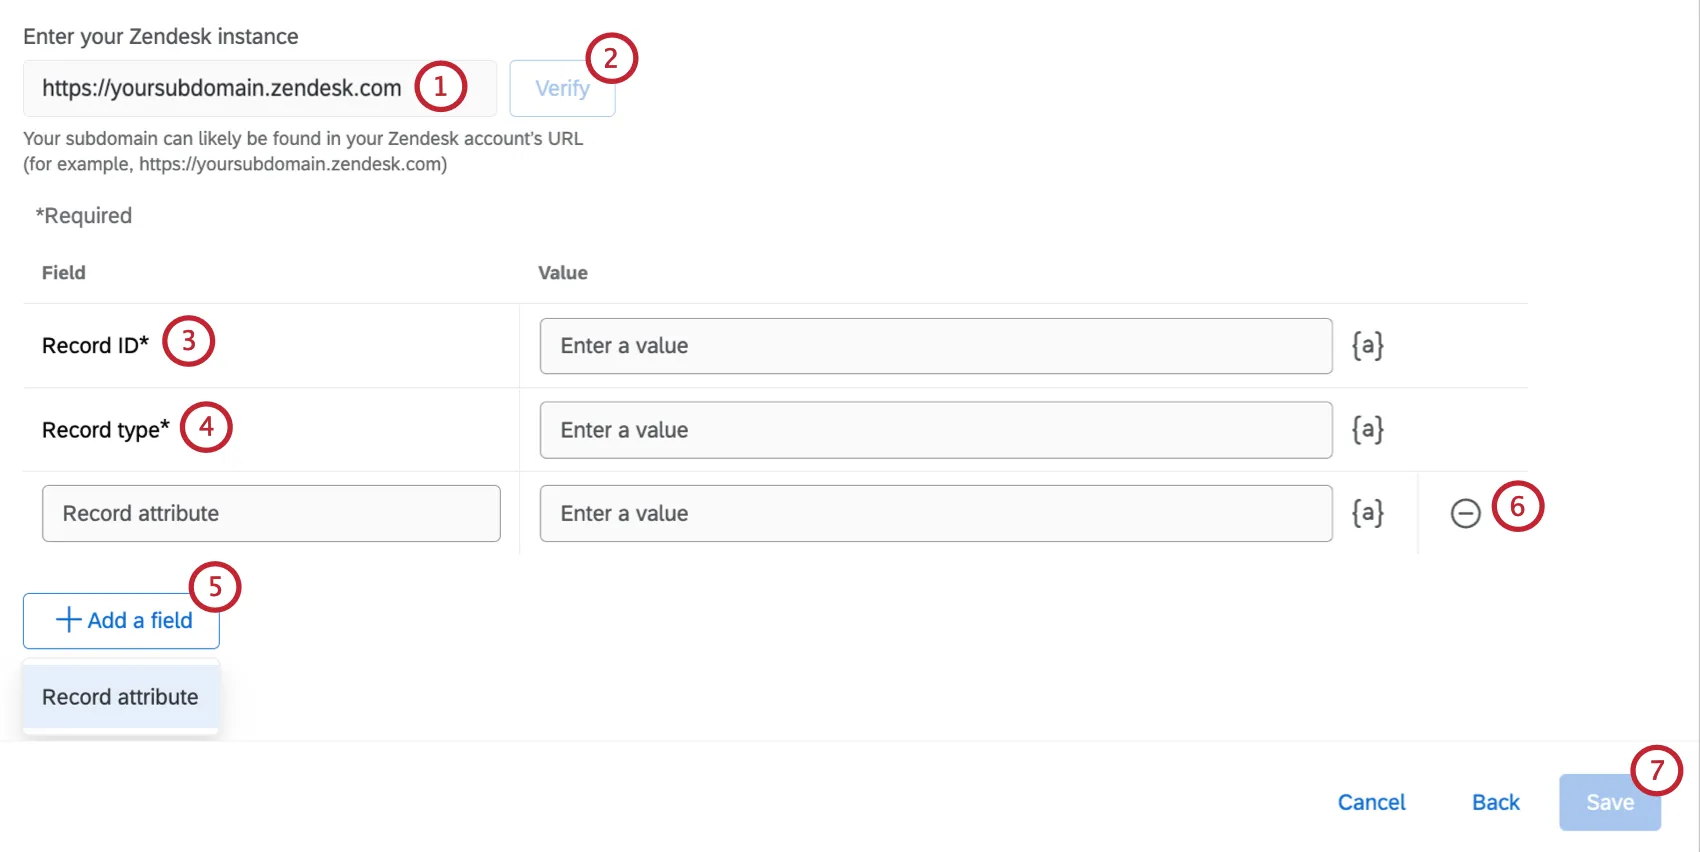
Creating a Zendesk Record
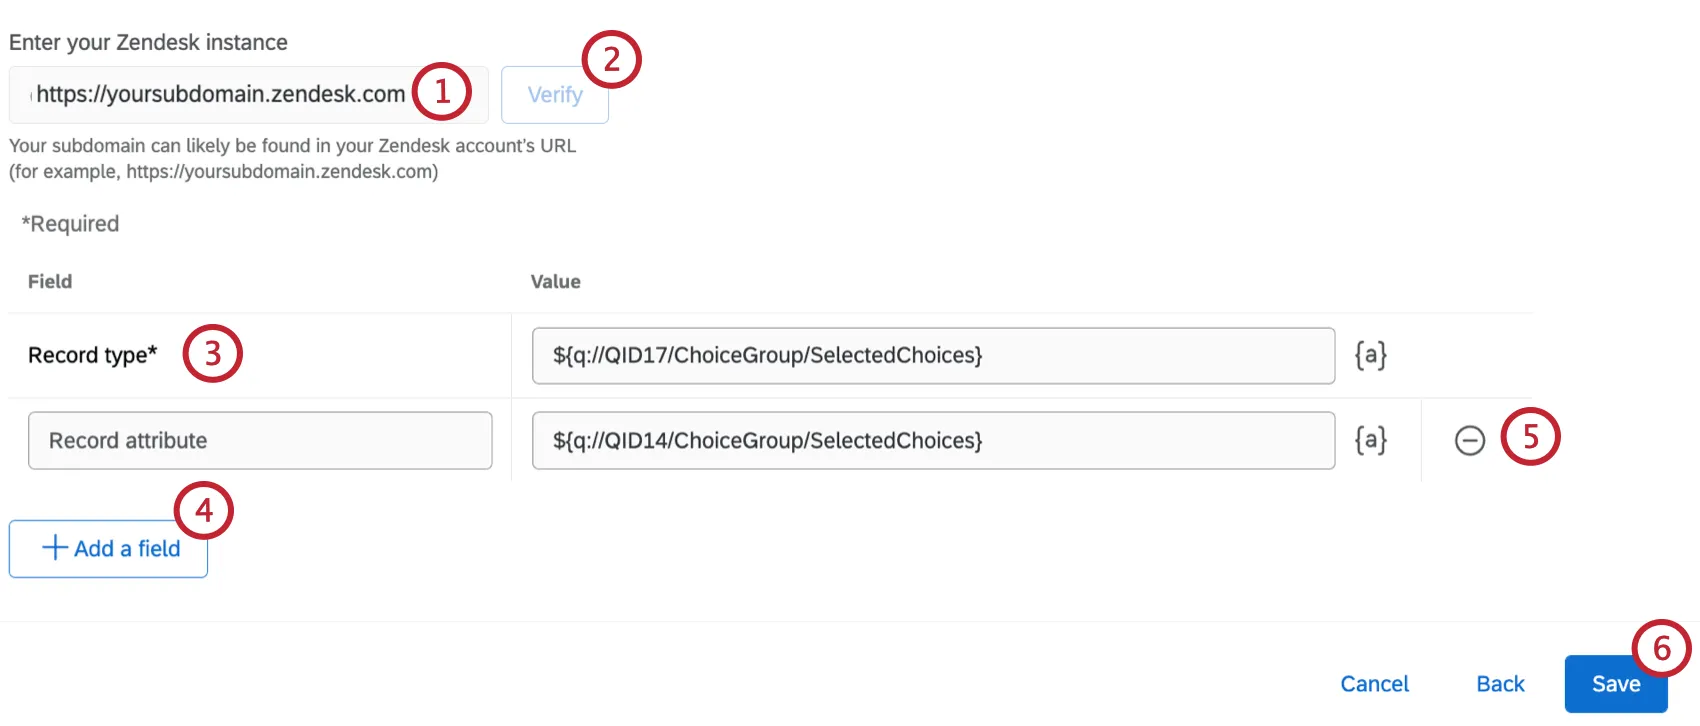
Qtip: Click the {a} icon to insert piped text for your field values. This is useful if the survey response triggering the task contains information to be used in the ticket.
- Record attribute: This is a custom field for the record. Enter the name of the attribute and the value for the attribute.
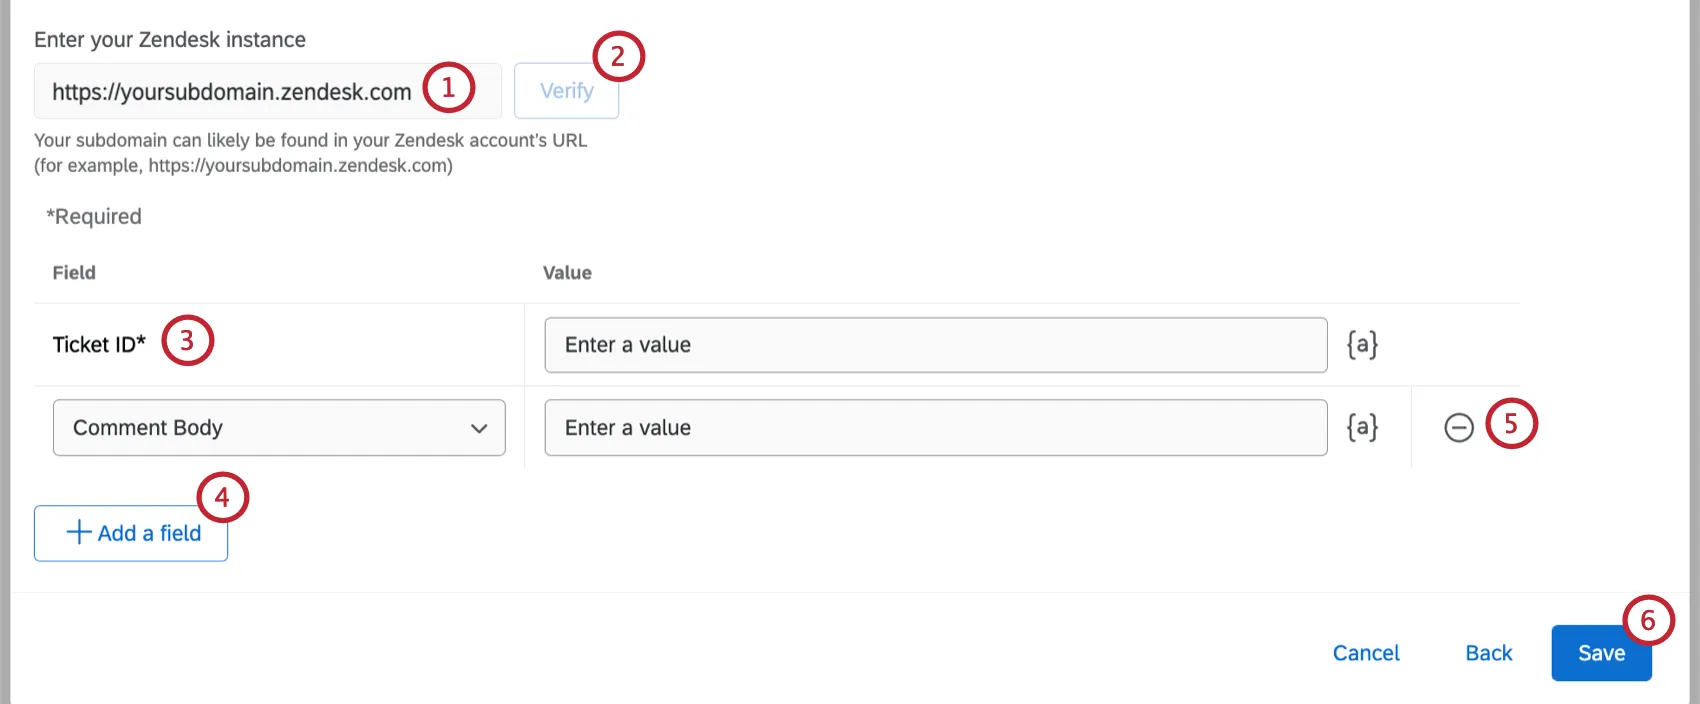
Creating a Zendesk Ticket
Qtip: Click the {a} icon to insert piped text for your field values. This is useful if the survey response triggering the task contains information to be used in the ticket.
- Requester ID: The ID of the user to be set as the requester on the ticket. Qtip: Contact Zendesk support if you need help finding IDs.

- Public: Select True to make the comment public and False to make it private.
- Tags: Tags allow you to add extra information to your tickets to be used in Zendesk. Enter your tags as a comma separated list in quotes. E.g., “Salesforce”, “360”.
- Assignee Email: The email address of the person assigned to the ticket
- Assignee ID: The ID of the user to be set as the assignee on the ticket.
- Priority: The priority of the ticket. Values include Low, Normal, High, and Urgent.
- Status: The ticket’s status. Values include New, Open, Pending, Hold, Solved, Closed
- Subject: The subject of the ticket; usually this is the subject line of the support request.
- Description: Enter a description to be on the ticket; usually this is the text of the support request.
- Custom Field: This is a custom field you’ve created in Zendesk. You can add multiple custom fields. You’ll need to enter the Numeric ID of the field.
Updating a Zendesk Profile
Qtip: Click the {a} icon to insert piped text for your field values. This is useful if the survey response triggering the task contains information to be used in the ticket.
- Name: The name of the person the profile is for.
- Phone Number Identifier: The phone number associated with the profile.
- Facebook Identifier: The Facebook username associated with the profile.
- Twitter Identifier: The Twitter username associated with the profile.
- Attribute name: A custom attribute for the profile. Enter the name and value for the custom attribute. You can add multiple attributes.
Updating a Zendesk Record
Qtip: Contact Zendesk support if you need help finding IDs.
Qtip: Click the {a} icon to insert piped text for your field values. This is useful if the survey response triggering the task contains information to be used in the ticket.
- Record attribute: This is a custom field for the record. Enter the name of the attribute and the value for the attribute.
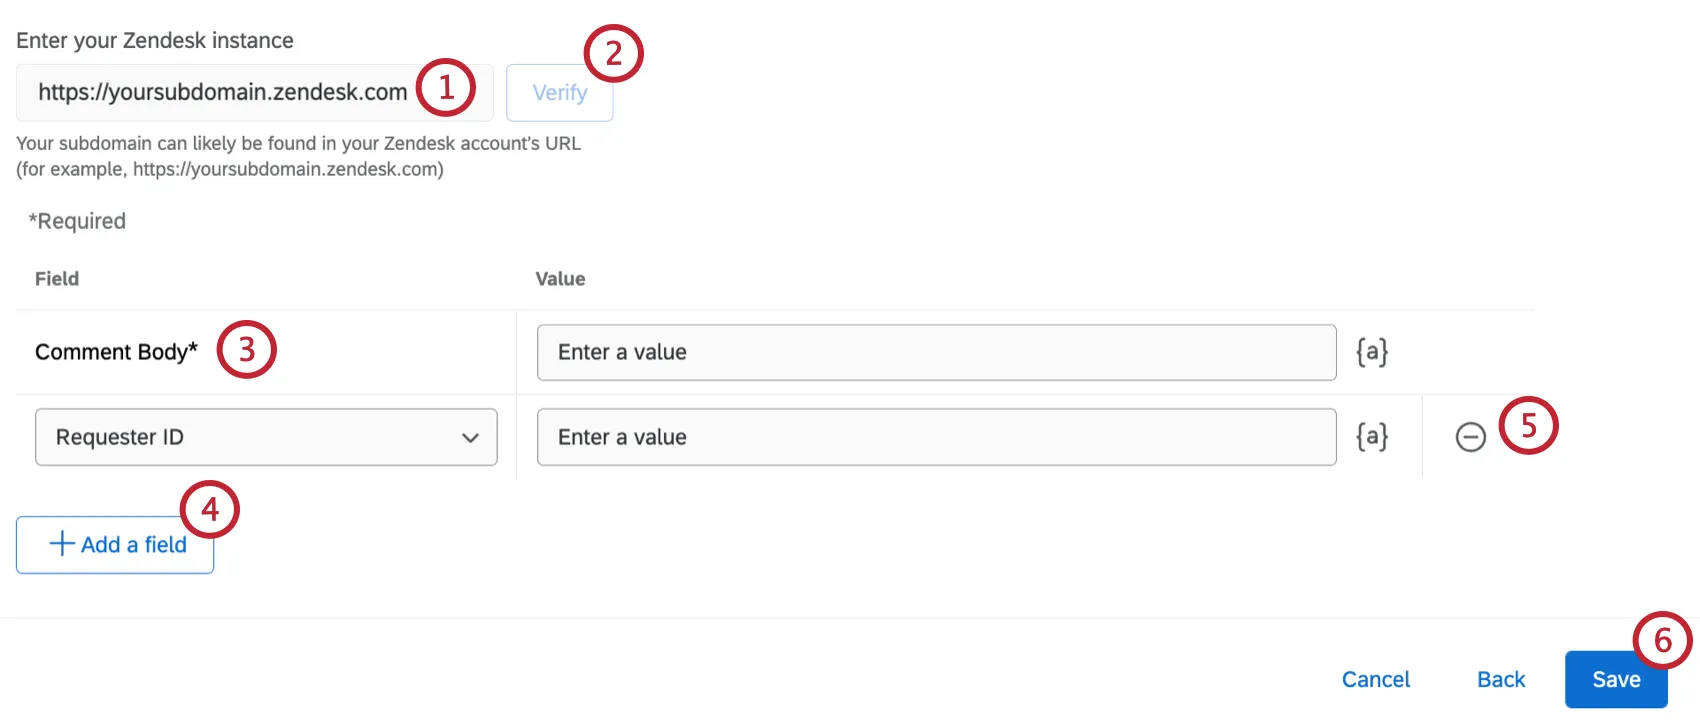
Updating a Zendesk Ticket
Qtip: Contact Zendesk support if you need help finding IDs.
- Comment Body: The body of the ticket. Qtip: Click the {a} icon to insert piped text for your field values. This is useful if the survey response triggering the task contains information to be used in the ticket.
- Requester ID: The ID of the user to be set as the requester on the ticket.
- Public: Select True to make the comment public and False to make it private.
- Tags: Tags allow you to add extra information to your tickets to be used in Zendesk. Enter your tags as a comma separated list in quotes. E.g., “Salesforce”, “360”
- Assignee Email: The email address of the person assigned to the ticket
- Assignee ID: The ID of the user to be set as the assignee on the ticket.Priority: The priority of the ticket. Values include Low, Normal, High, and Urgent.
- Status: The ticket’s status. Values include New, Open, Pending, Hold, Solved, Closed
- Subject: The subject of the ticket; usually this is the subject line of the support request.
- Description: Enter a description to be on the ticket; usually this is the text of the support request.
- Custom Field: This is a custom field you’ve created in Zendesk. You can add multiple custom fields. You’ll need to enter the Numeric ID of the field.
FAQs
How can I tell the difference between first party and third party extensions? Where do I go for support for either kind?
How can I tell the difference between first party and third party extensions? Where do I go for support for either kind?
How do I add or remove an extension from my Qualtrics account?
How do I add or remove an extension from my Qualtrics account?
That's great! Thank you for your feedback!
Thank you for your feedback!