
Supplemental Data in the Survey Flow
What's on this page
About Supplemental Data in the Survey Flow
Supplemental data sources (SDS) let you search multiple key data points based on just one. Use SDS to customize the survey experience based on information without having to first store it all in the survey itself. For example, you can build display logic, branch logic, and insert piped text based on information saved in the SDS. You can also use the SDS in the survey flow to pull in additional information you’d like to include in your analysis.
Example: In your survey, you collect feedback on your support agents. But the only identifying information you have is the agent’s employee ID. Using this ID, you can then pull in more information, such as the agent’s team, manager, and region. From there, you can analyze this information or create customized, branching survey paths.
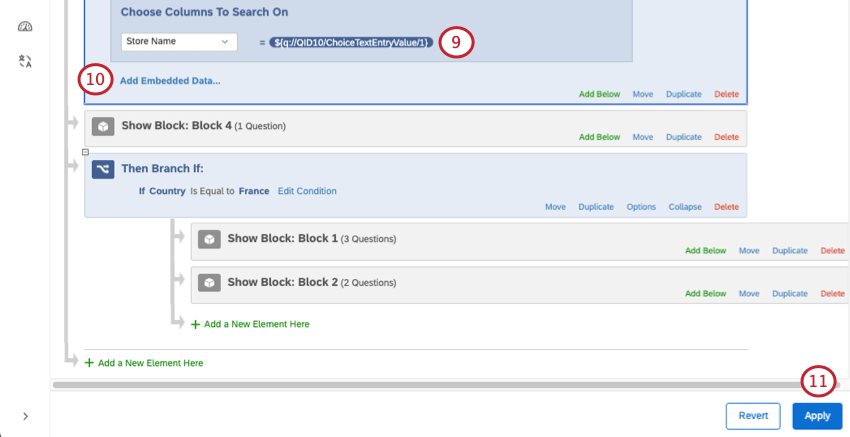
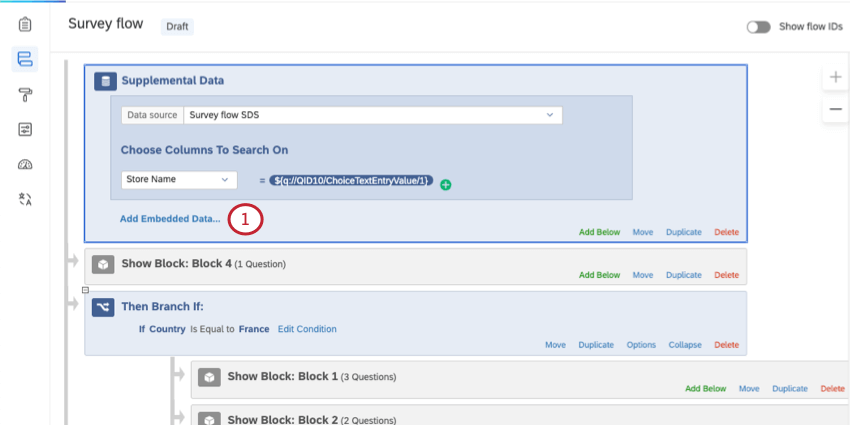
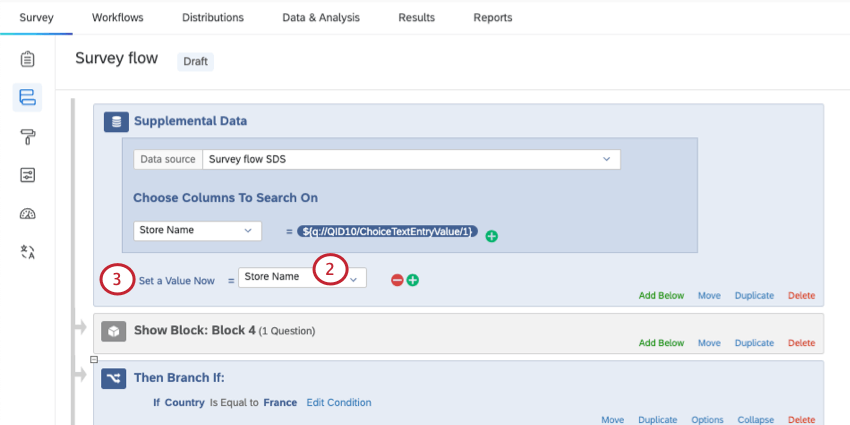
Adding a Supplemental Data Element to the Survey Flow
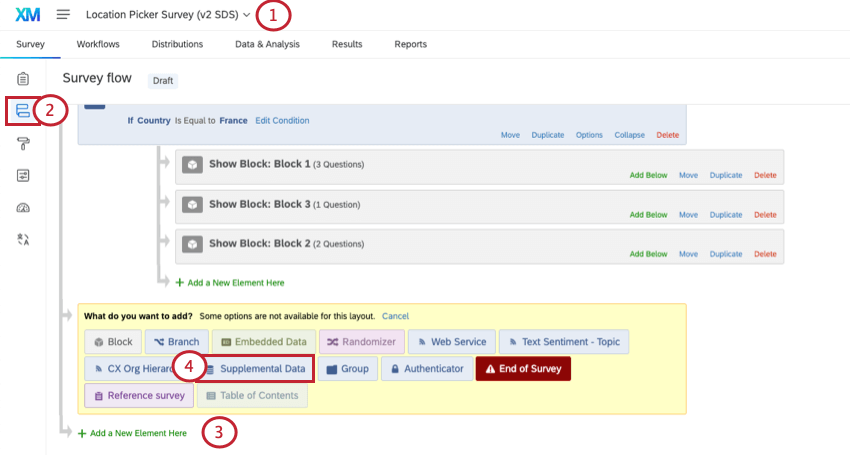
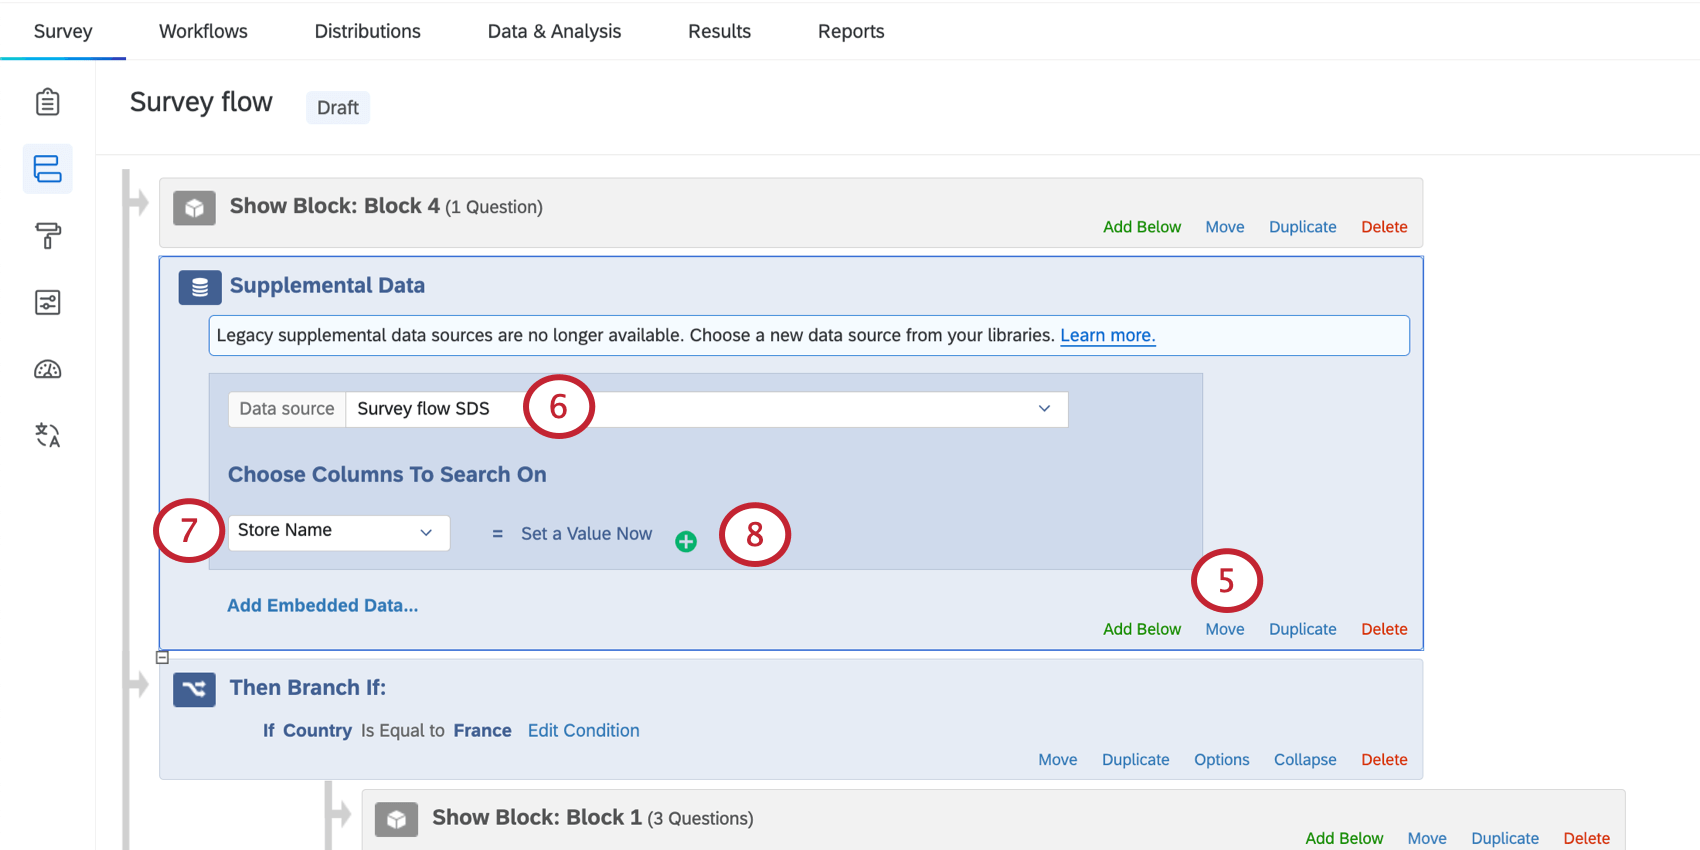
Example: You have a survey question where you ask what store the customer visited. After that block, you’d add this element.
Qtip: Let’s say you use store name to find a store’s address, and you want to show this address in the survey using piped text. You also need to make sure this element appears before the block with the piped text. To learn more about the survey flow and the importance of putting your elements in order, see Survey Flow.
Example: You have an autocomplete question where respondents search and select a store. To pull more information about that store into your survey, you need to select that autocomplete question in this step.
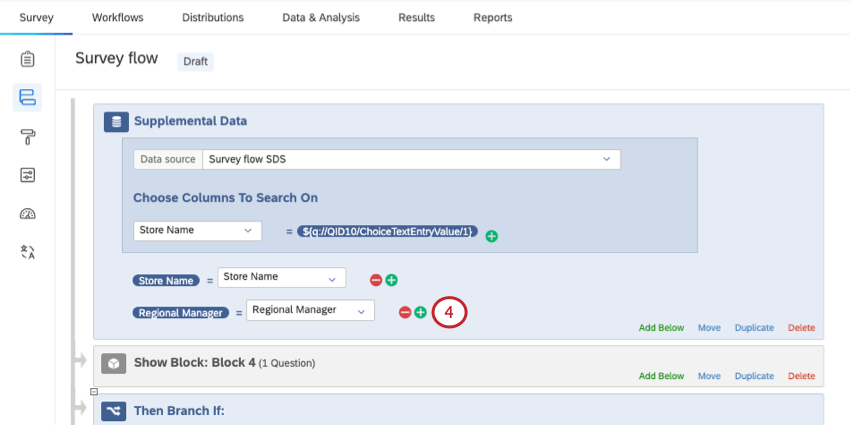
Example: You have an embedded data field where the support agent’s employee ID is saved. You match this to an “Agent ID” field you use as a column to search on. Make sure the embedded data element is above the SDS in the survey flow, though!
Attention: If your supplemental data element is between survey blocks, the survey’s back button will not appear.
Adding Embedded Data
Adding embedded data to your survey can be helpful for a number of use cases:
- Data analysis
- Branch logic
- Display logic
- Piped text
Qtip: Embedded data set in a supplemental data source is recorded as a “text set” variable type.
Qtip: Do not skip this step. It is ok to use either the exact same name you do in your SDS or a different one. Make sure all the field names you add are unique within your survey, though.
Using Supplemental Data in Branch Logic
Attention: You must save supplemental data as embedded data before you can use it in branch logic.
One of the most common ways to use supplemental data in the survey flow is in branch logic. Once you’ve pulled in the data you want, you can create different branching paths for your respondents.
Example: Once you identify the store the respondent visited, you can ask them region-specific questions.
For more on creating branch logic, see Branch Logic. For help creating conditions, see Using Logic.
Editing a Supplemental Data Source
Once you’ve created an SDS in the survey flow, it’s saved to your account library. Go there to make edits to your SDS’s data, delete the source, or rename it.
See Managing Supplemental Data Sources in the Library and Overriding Supplemental Data.
Types of Projects this Feature Is Compatible With
Once you have access to this feature, supplemental data sources can be used with the following projects:
FAQs
What are "columns to search on?"
What are "columns to search on?"
When you add an SDS to your survey flow, you must also choose columns to search on. The columns available will be the same ones you set in the SDS.
For example, when I create my list of store locations in my SDS, I made the store name and address searchable. When I add the same SDS to my survey flow, I can make fields searchable by store name and / or address.
That's great! Thank you for your feedback!
Thank you for your feedback!