
Inbox Templates (Studio)
Suite
Customer Experience
Product
Qualtrics
What's on this page
About Inbox Templates
Inbox templates are a legacy feature that can still be used in subscription emails. This page will go over currently supported inbox template functionality, in addition to suggestions on how to replace it.
Attention: You cannot create new inbox templates or copy existing ones. If you need to create new alerts, we recommend using the Qualtrics workflows described here.
Managing Inbox Templates
The purpose of the Inbox Templates page is so you can see what inbox templates you still have, enable or disable them, delete them, or edit them.
Click the Spaces menu.

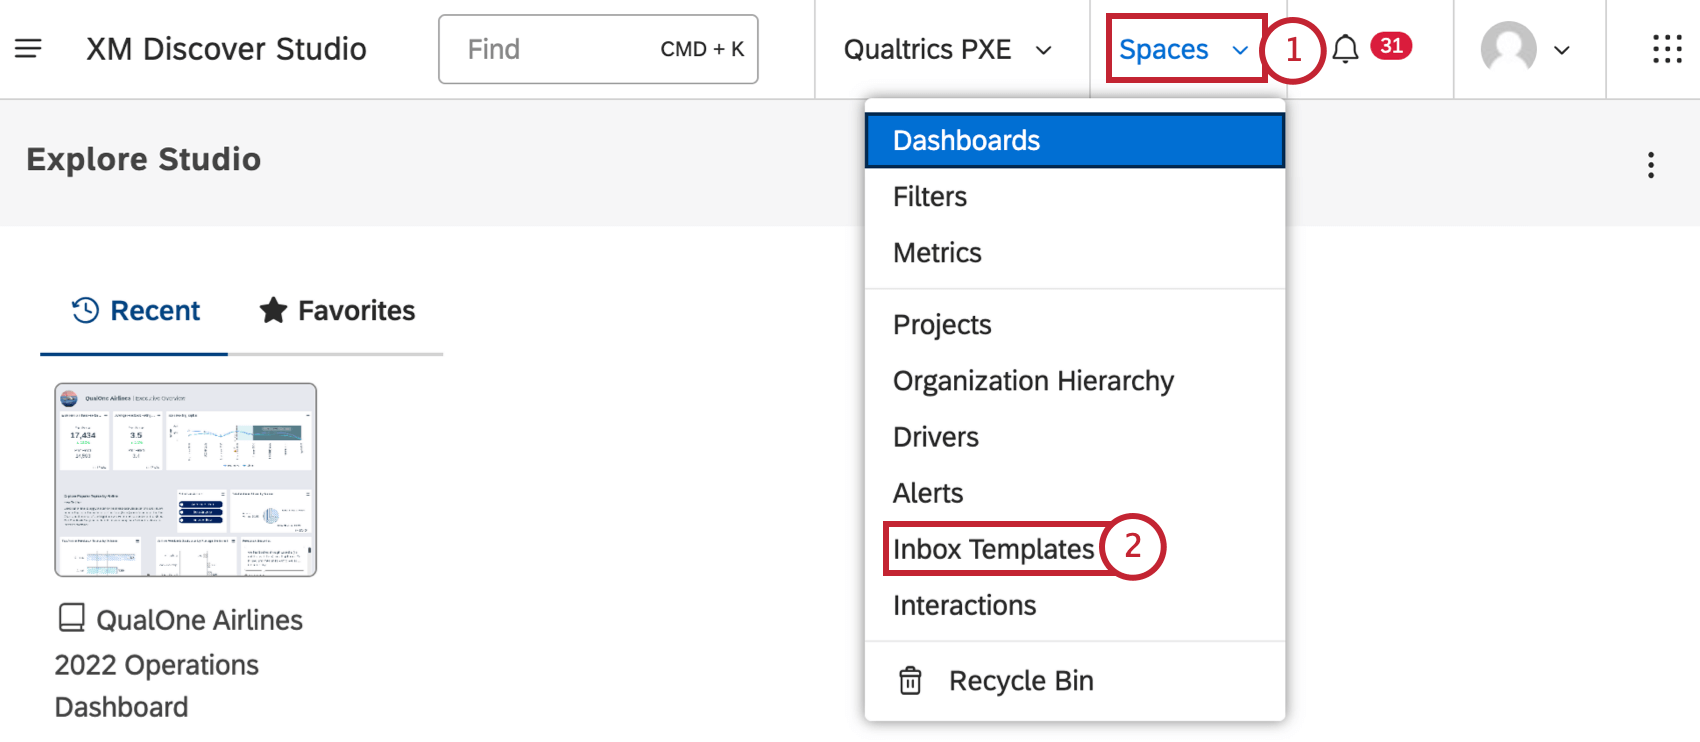
Select Inbox Templates.
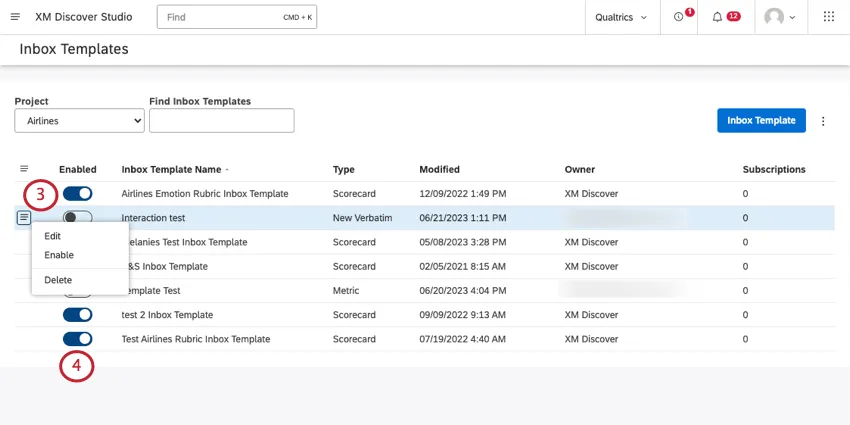
Use the Enabled toggle to switch the template on or off. When a template is enabled, it’s available for email subscriptions.

Qtip: Scorecard alerts are automatically enabled when the rubric is enabled. You can also enable and disable them as needed.
Click the dropdown next to each inbox template, and select from the following:
- Edit: Edit any of the inbox template settings.
- Enable / Disable: Enable or disable the template.
- Delete: You can delete interaction and metric inbox templates, but not scorecard templates.
Using Inbox Templates in Email Subscriptions
The only way to still use inbox templates is with email subscriptions to verbatim alerts.
Replacing Inbox Template Email Subscriptions
We recommend moving away from using inbox templates. Qualtrics Engage also has highly customizable options you can use to create useful email reports for your stakeholders.
Create a verbatim alert in Discover.
Log into Qualtrics.
Add an email task to your workflow.
In the email, use the piped text button ( {a} ) to pull in the following fields:
- Verbatims: Sentences that triggered the alert.
- Data fields from XM Discover: Any XM Discover attributes you want to highlight.
- Discover Document Explorer URL: A link to the verbatims in document explorer. This link requires you to log into an XM Discover account before you can view the data. Qtip: These fields are recommendations based on what inbox template emails can display. You can add and remove whatever information you want, so long as it’s an option in the email task’s piped text.

Customize your email message into the format you want your stakeholders to see. When you’re done, save your email.
Activate your workflow.
That's great! Thank you for your feedback!
Thank you for your feedback!