
Cloud Widget (Studio)
Suite
Customer Experience
Product
Qualtrics
What's on this page
About the Cloud Widget
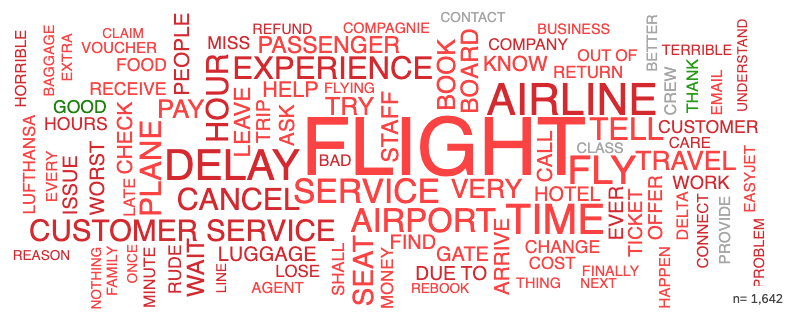
The cloud widget allows you to create a word cloud.

Setting Up a Cloud Widget
Qtip: If your dashboard doesn’t have default properties set, you’ll need to tell the widget what data to include. Follow these steps to add a content provider, account, project, and owner to your widget.

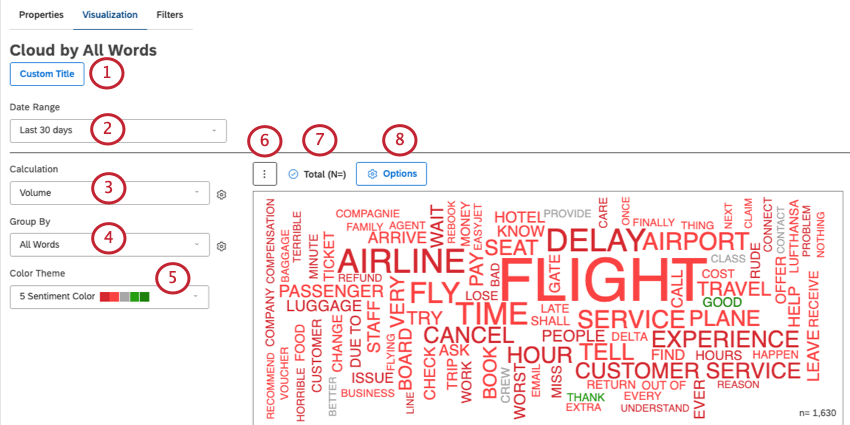
Click Custom Title to manually type a new widget title. Otherwise, you can leave the one automatically assigned.
Select a Date Range filter.
Qtip: Unless you set your widget to ignore the dashboard date range, the dashboard date range completely replaces the date range defined here.
The Calculation determines the size of each word. By default, word clouds are set to Volume.
Qtip: For all the calculations available, see Calculations (Studio).
Example: The calculation is volume. The more times a word appears, the bigger it gets.
Example: The calculation is sentiment. The higher the average sentiment of the sentence where the word is mentioned, the bigger the word.
Under Group By, select what you’d like to be displayed in your cloud.
- All Words (Default): Using all of the words in your dataset, see what are the most common. (Or, if you didn’t select volume, how words perform on the calculation you selected.)
- Other: Your cloud doesn’t have to just display all the words in your responses. You can choose to display names of topics, attributes, and other natural language processing features. See Grouping Data for all possible other options. Example: We group our cloud by brands mentioned in the feedback, and set our calculation to volume. The most commonly mentioned brands appear the largest in the word cloud.

Under Color Theme, select a color palette for your word cloud.
Click the 3 dot menu to switch to a different widget type while keeping your current settings (where applicable).
Decide whether to display total volume on the widget.
Click Options to see optional settings, which we’ll describe in the next section.
Advanced Options
When you click Options in the Visualization tab, you’ll see additional ways to customize your cloud widget.
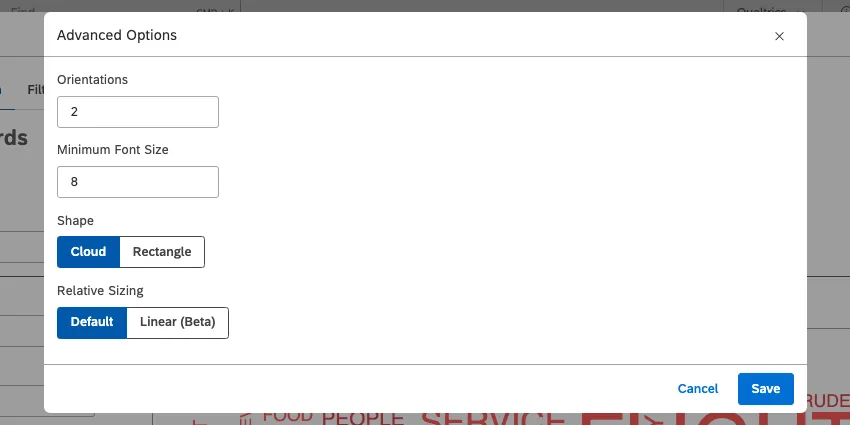
- Orientations: Choose the orientations text can be displayed in. Possible values range from 1 to 4.
- 1: All text is horizontal.
- 2 (default): Text is either horizontal or rotated 90 degrees counterclockwise.
- 3: Text is horizontal or rotated 45 or 90 degrees counterclockwise.
- 4: Text is horizontal, rotated 45 or 90 degrees counterclockwise, or 45 degrees clockwise.
- Minimum Font Size: Define the minimum font size for your word cloud. Default is 8.
- Shape: Choose the overall shape of your word cloud.
- Cloud (default): Text will follow a curved, Archimedian spiral.
- Rectangle: Position text along a rectangular spiral. Qtip: Because a text cloud does not translate well into a clearly defined shape, changing this setting may not produce a visible difference.

- Relative Sizing: Choose how text sizing is determined.
- Default: Text size and underlying metric values are in direct proportion. For example, if the volume for word A is twice the volume for word B, word A’s size will be twice the size of word B in a cloud.
- Linear: The difference in values is magnified to make text visibly different in size. In other words, a small difference in values results in a big difference in text size. This option is best for calculations with only small differences in values.
When you’re finished making changes, click Save.
Manually Hiding Words from a Cloud
Qtip: Words can only be hidden in edit mode of the dashboard. Once these changes are applied, changes will be reflected to dashboard viewers.
Click the options in the upper-right of your cloud.

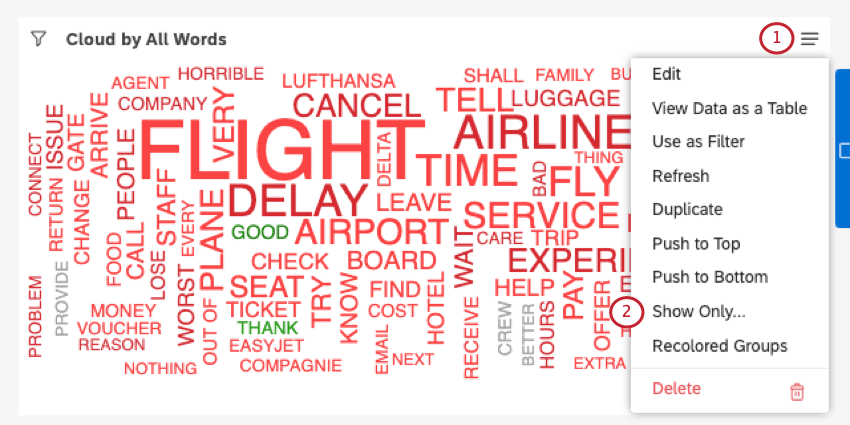
Select Show Only.
Select the words you want to include.
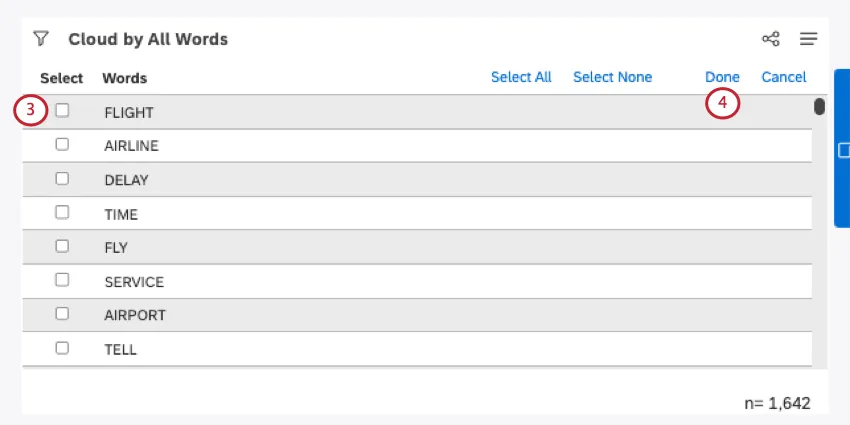
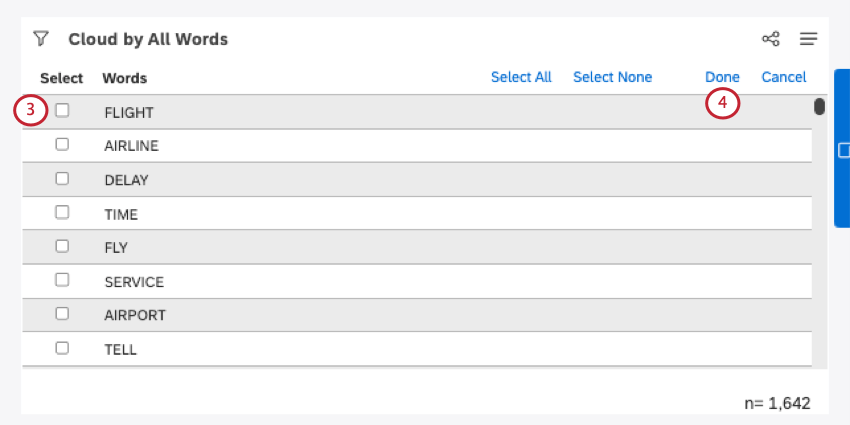
Qtip: For quick selection of multiple words, see Select All and Select None along the top.
When you’re finished, click Done.
Best Practices
Qtip: Cloud widgets cannot display more than 300 words or phrases at a time.
Here are some best practices for customizing word clouds:
- The cloud widget displays whatever words fit best according to browser dimensions, screen resolution, and the size of the widget. Adjust the size of your widgets to accommodate the number of items you want to show.
- Adjust the number of groupings displayed in your report using grouping settings or filters.
- Refresh your cloud widgets to rearrange the word placement.
- Manually hide words (as explained in the previous section).
FAQs
Why does the PDF of my cloud widget look different from what I see in the dashboard?
Why does the PDF of my cloud widget look different from what I see in the dashboard?
When you export a dashboard to PDF, Studio does not just take a screenshot of your screen. We regenerate the report and then create a PDF from that. Moreover, the dimensions of your browser can be different from those of a PDF file, which means that some report items may be visible in one format, but not the other.
That's great! Thank you for your feedback!
Thank you for your feedback!