
Sharing Metrics (Studio)
Suite
Customer Experience
Product
Qualtrics
What's on this page
About Sharing Metrics
You can share your metrics with other users if you want them to be able to use these metrics in their reports. You can share a metric with individual users, groups, or everyone in your master account. When sharing, you can choose between whether you want users to be able to edit the metric or just view it.
Sharing Metrics
Qtip: A Share Edit Metric or Share View Metric permission is required to share metrics.
Click the Spaces menu.
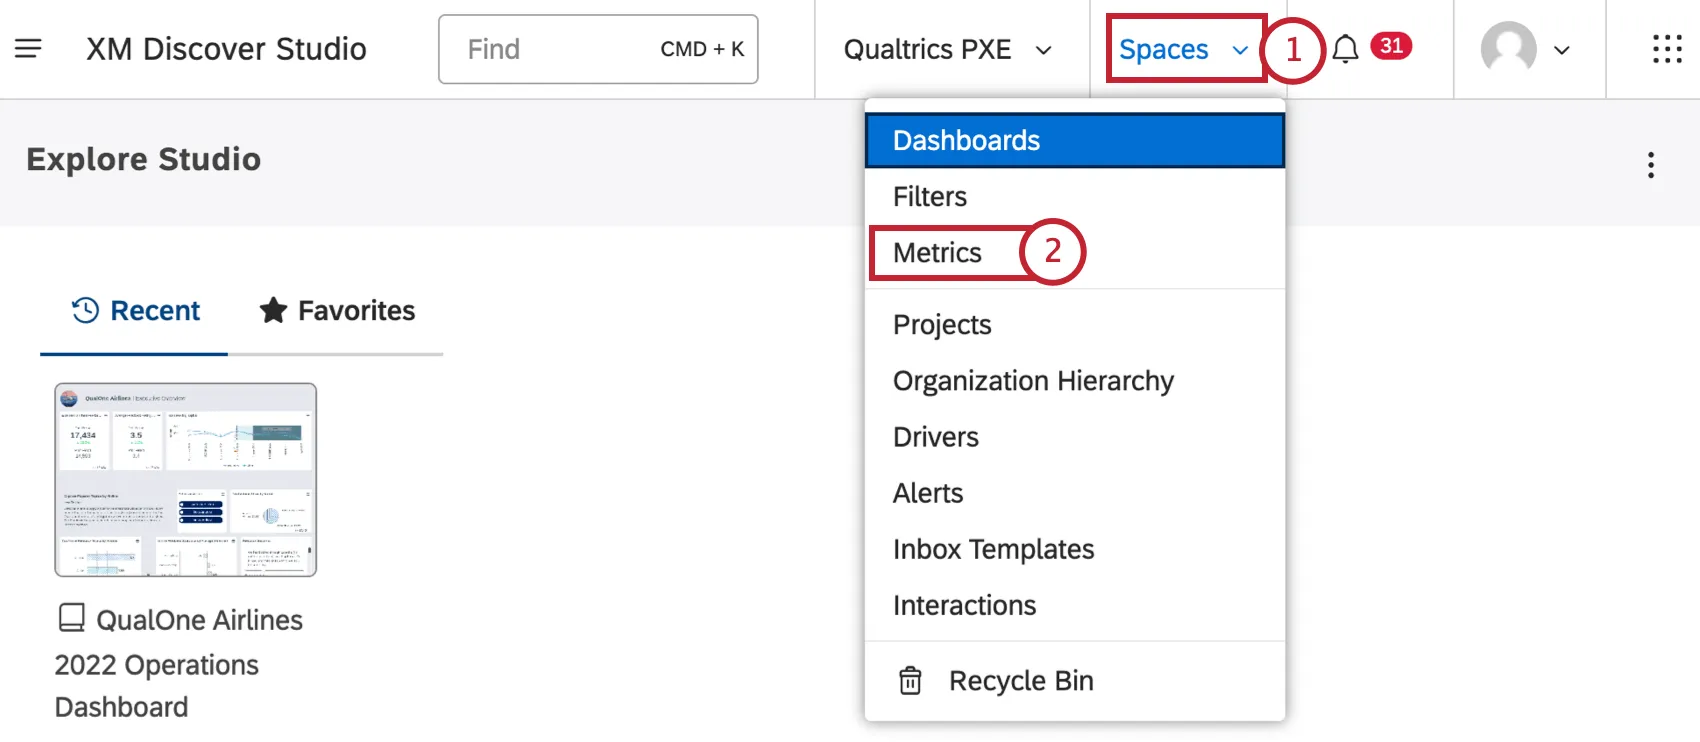

Select Metrics.
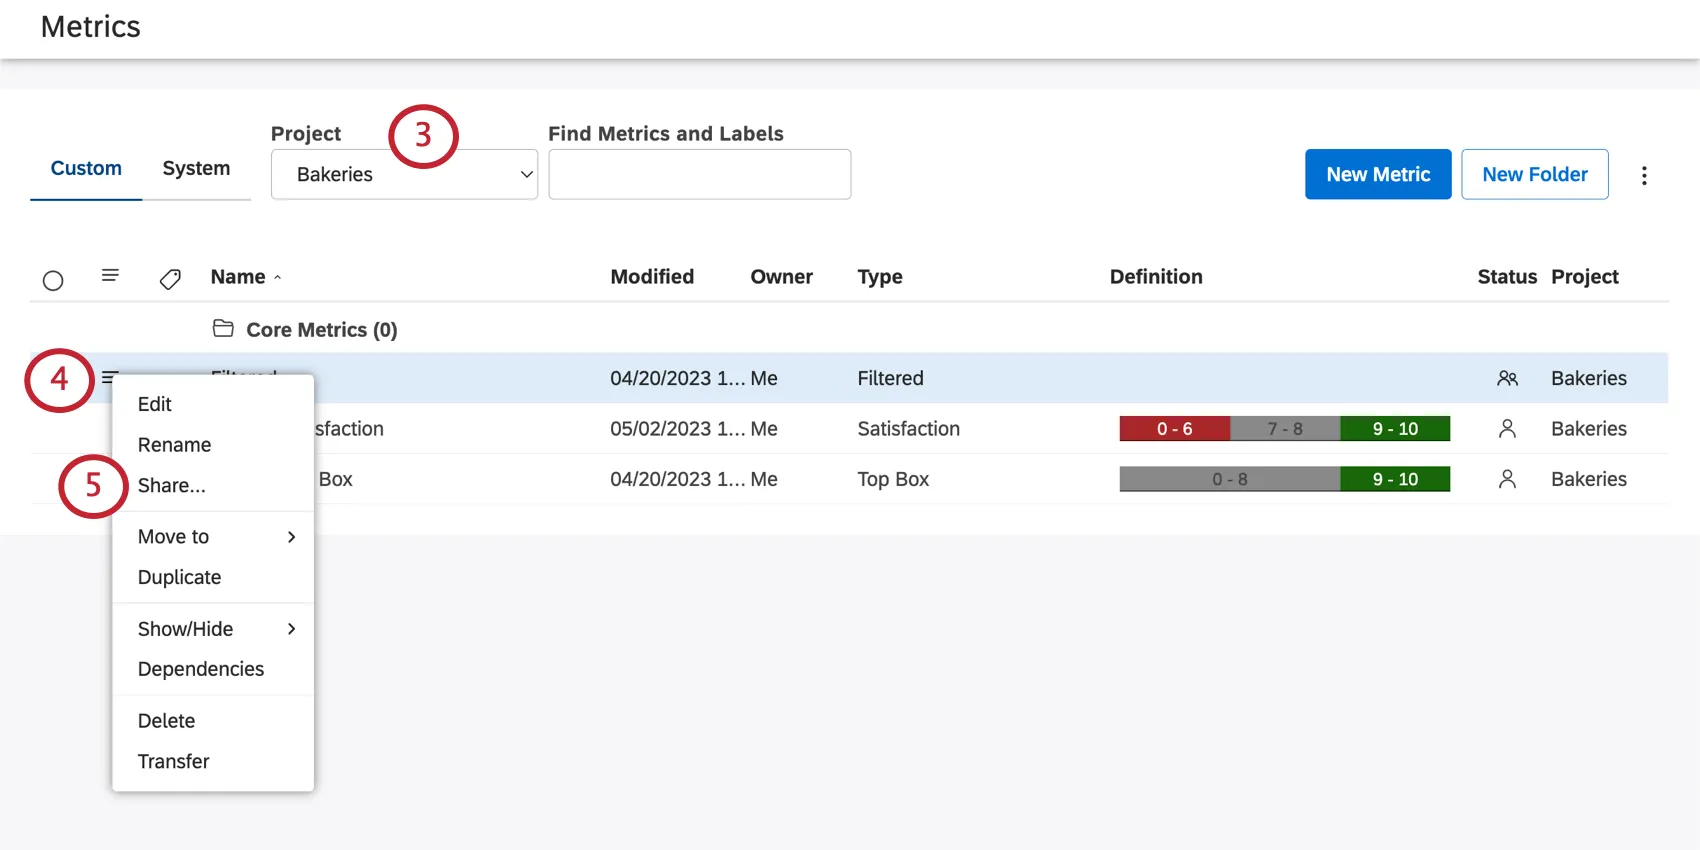
Choose a project the metric belongs to.
Qtip: You may also need to choose an account and a content provider, depending on what you have access to.
Click the dropdown next to a metric.
Select Share.
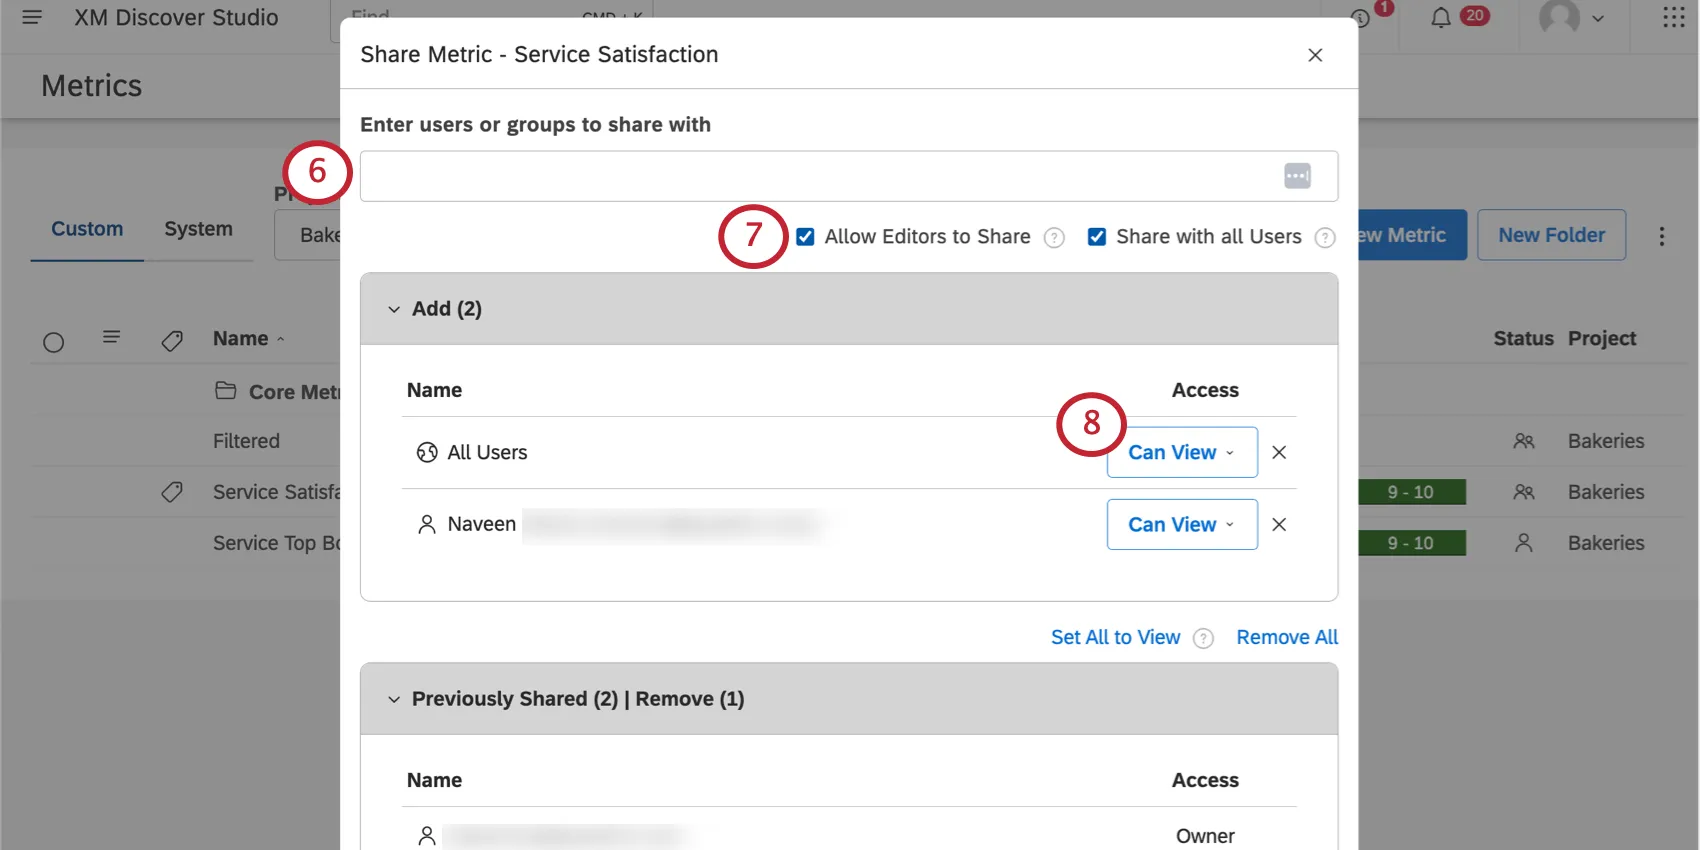
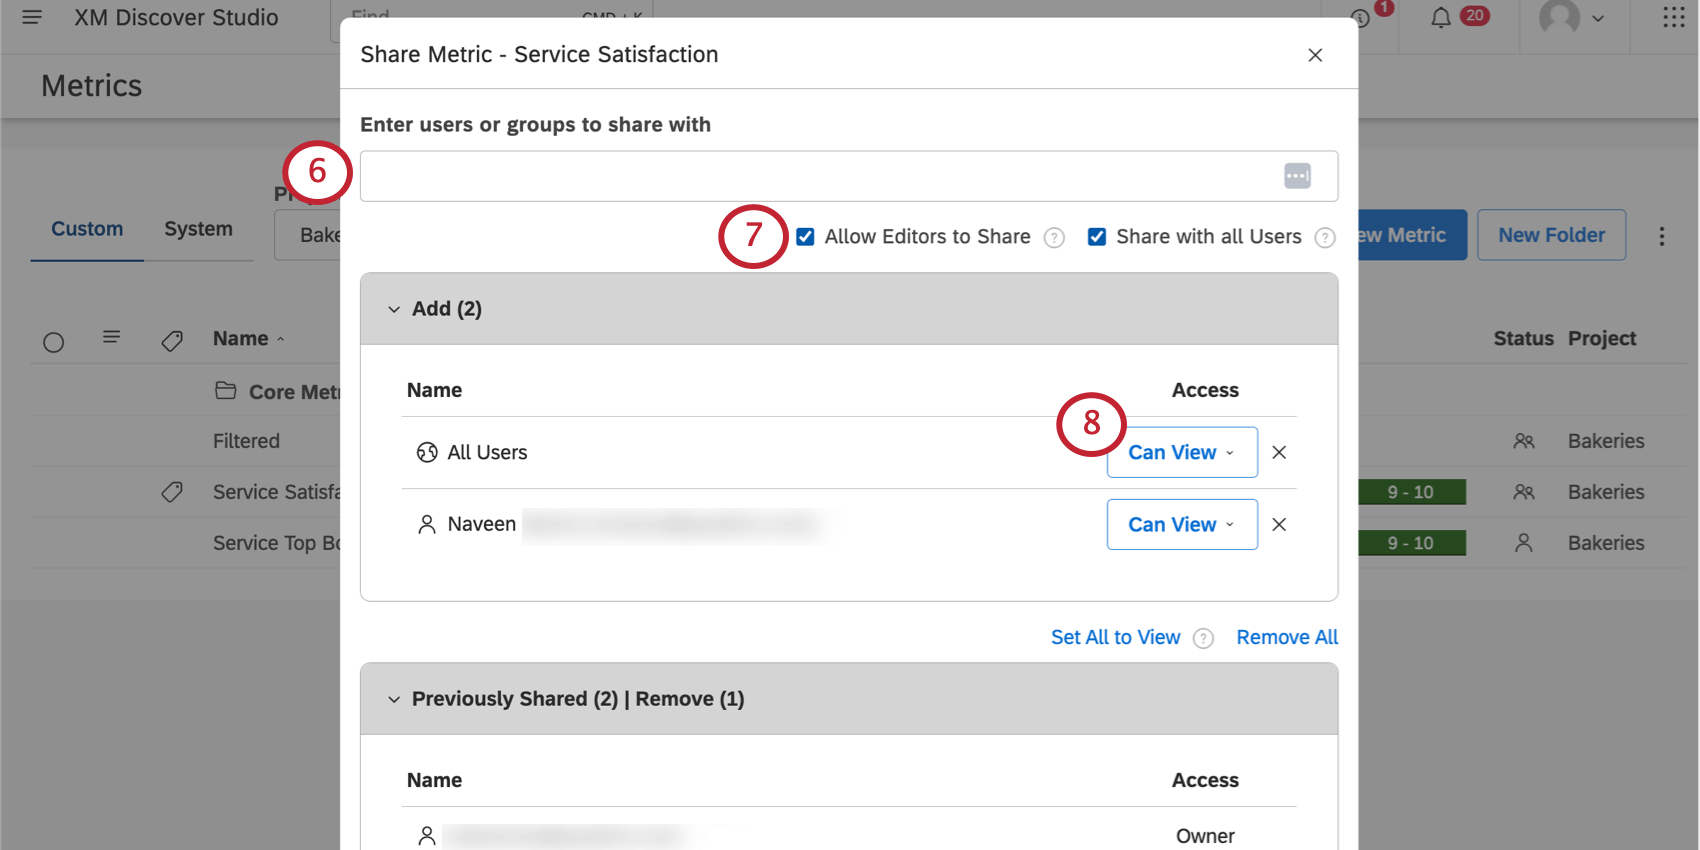
Enter the people you’d like to share your metric with.
- Studio users: Type the user’s first name, last name, or email, then click it.
- All Studio Users: You can distribute organization-wide metrics to every Studio user in your master account by selecting Share with all Users. This setting will make it available to every user, including new users who register after the metric is created. You can still add specific users and groups when you use this option. Qtip: This action requires a Share To All permission.

- Studio groups: Type the group’s name, then click it. When you share a metric or a book with a group, all members of that group will have access. It does not matter when a user joins the group—users who join the group after you have shared will still get access. However, as soon as any user leaves the group, your metric will no longer be accessible to that user.
- Unregistered users: Type the email address of a person you want to share your metric with. Then press Enter. When you finish sharing, this person will be invited to create a Studio account.
If you’re a metric owner, you will see Allow Editors to Share. Select this option to let all editors share the metric and add it to any books they have access to (created or shared). Leave this unselected to make sure only you can share the metric or add it to books.
In the Add section, determine what level of access each user or group should have. The following options are available:
- Can View: Allows users to use your metric in their reports, but not make any edits to the metric.
- Can Edit: Allows users to edit the metric. They will not be able to share the metric unless you specify, and they cannot transfer ownership of the metric. Qtip: The Can Edit access can only be granted to users that have the Create Metric permission and at least read-only data access to the corresponding project. It is not available when sharing a metric with all Studio users or unregistered users.
To remove an individual, find the user or group in the Previously Shared section, and select Remove Access.
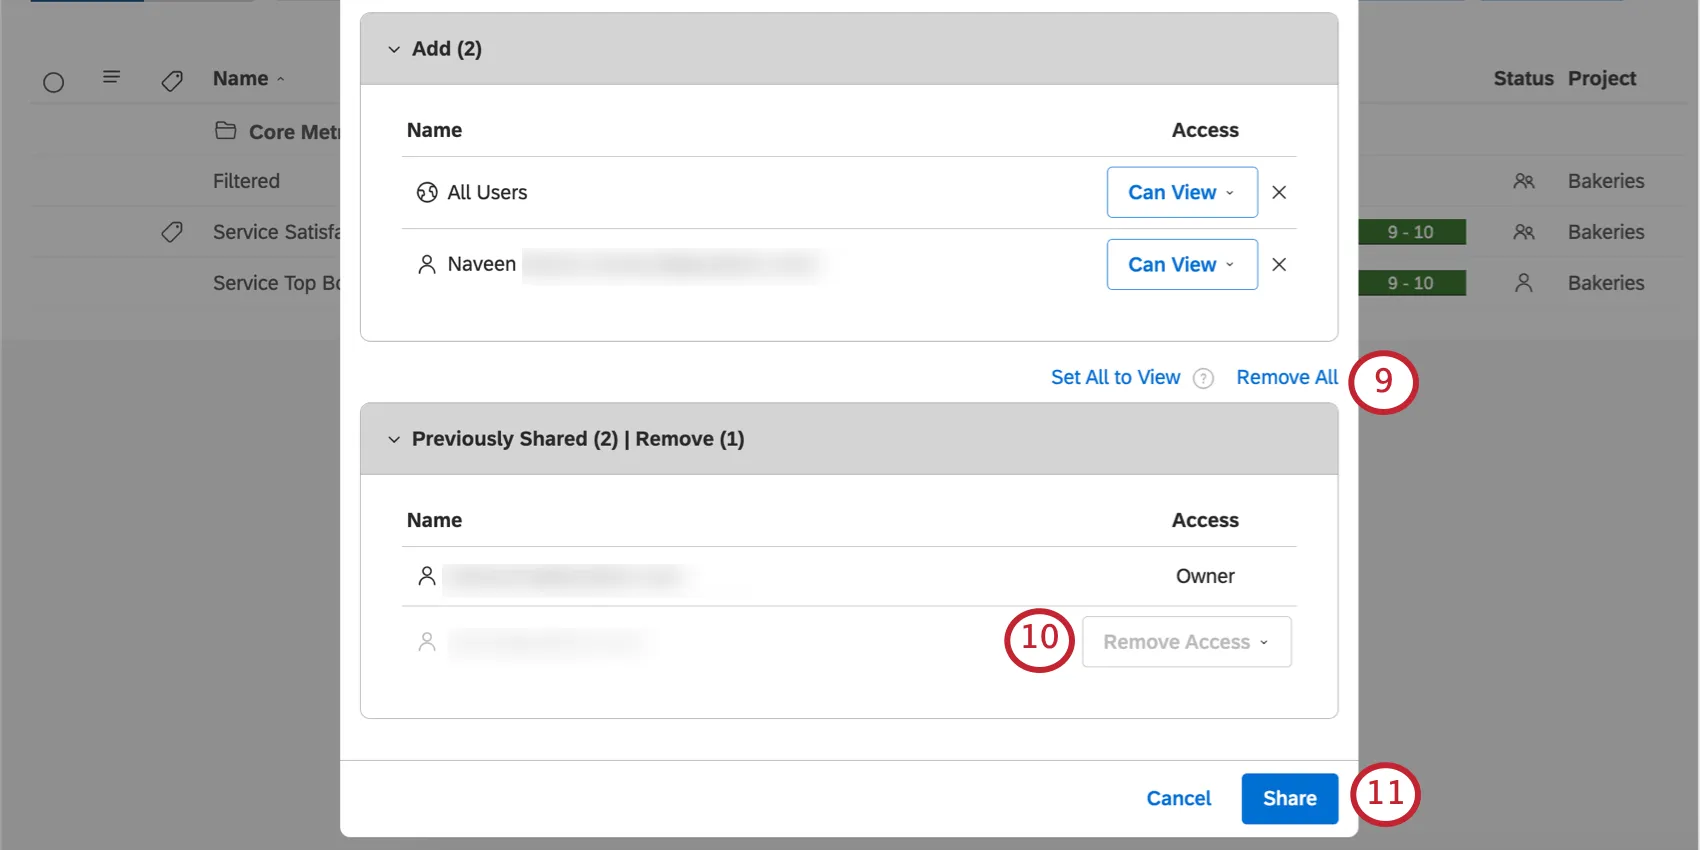
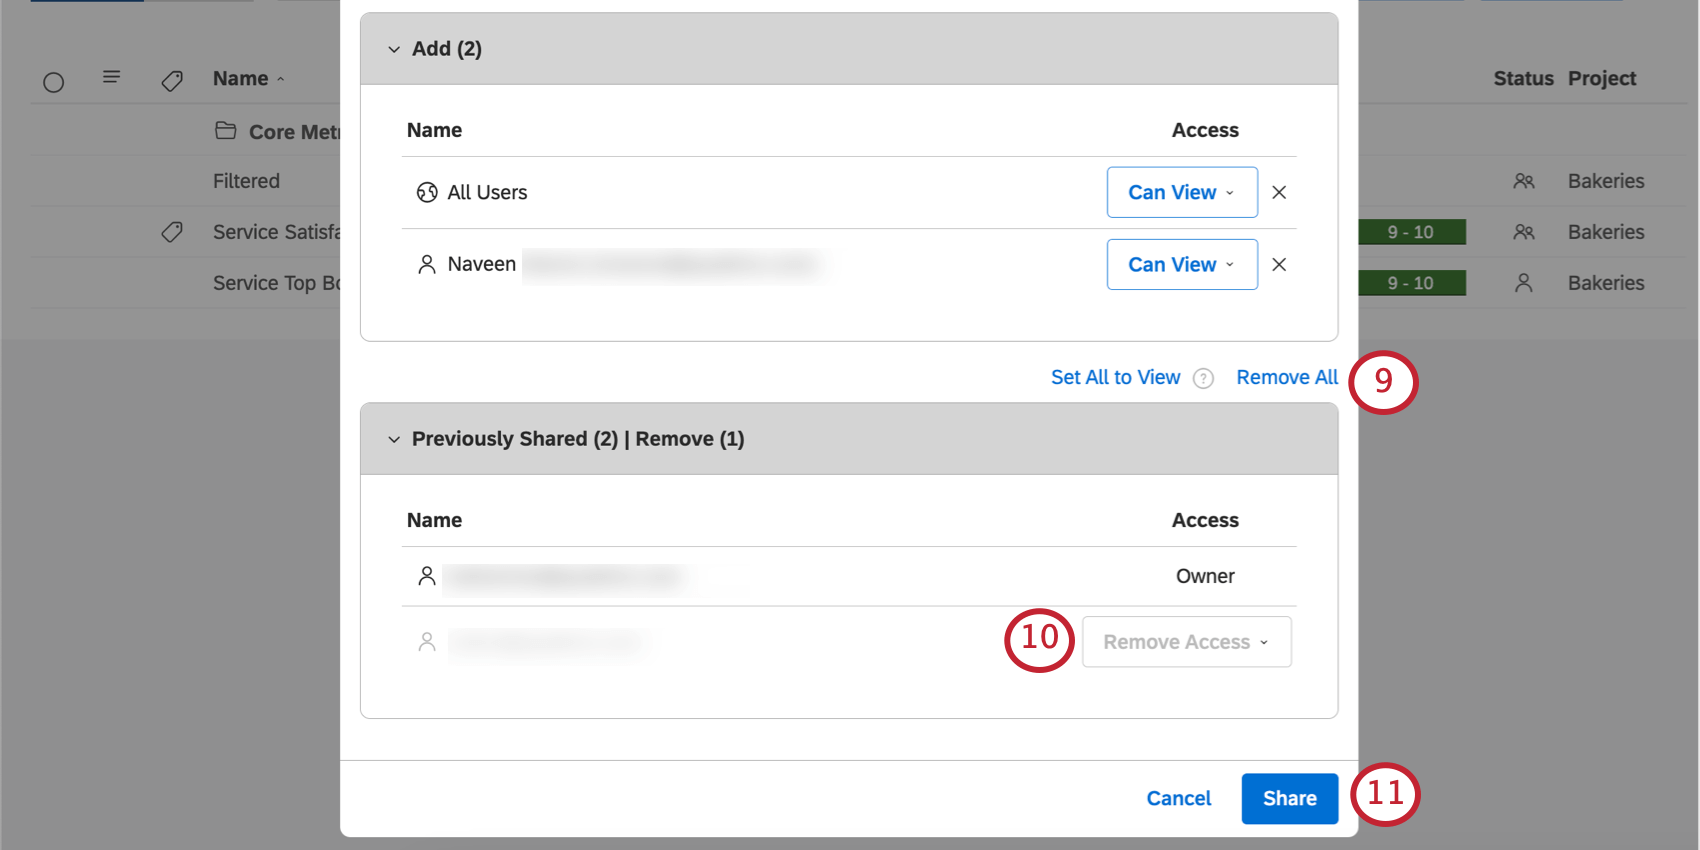
To stop sharing your metric with everyone, click the Remove All link on top of the Previously Shared section.
To save your changes, click Share.
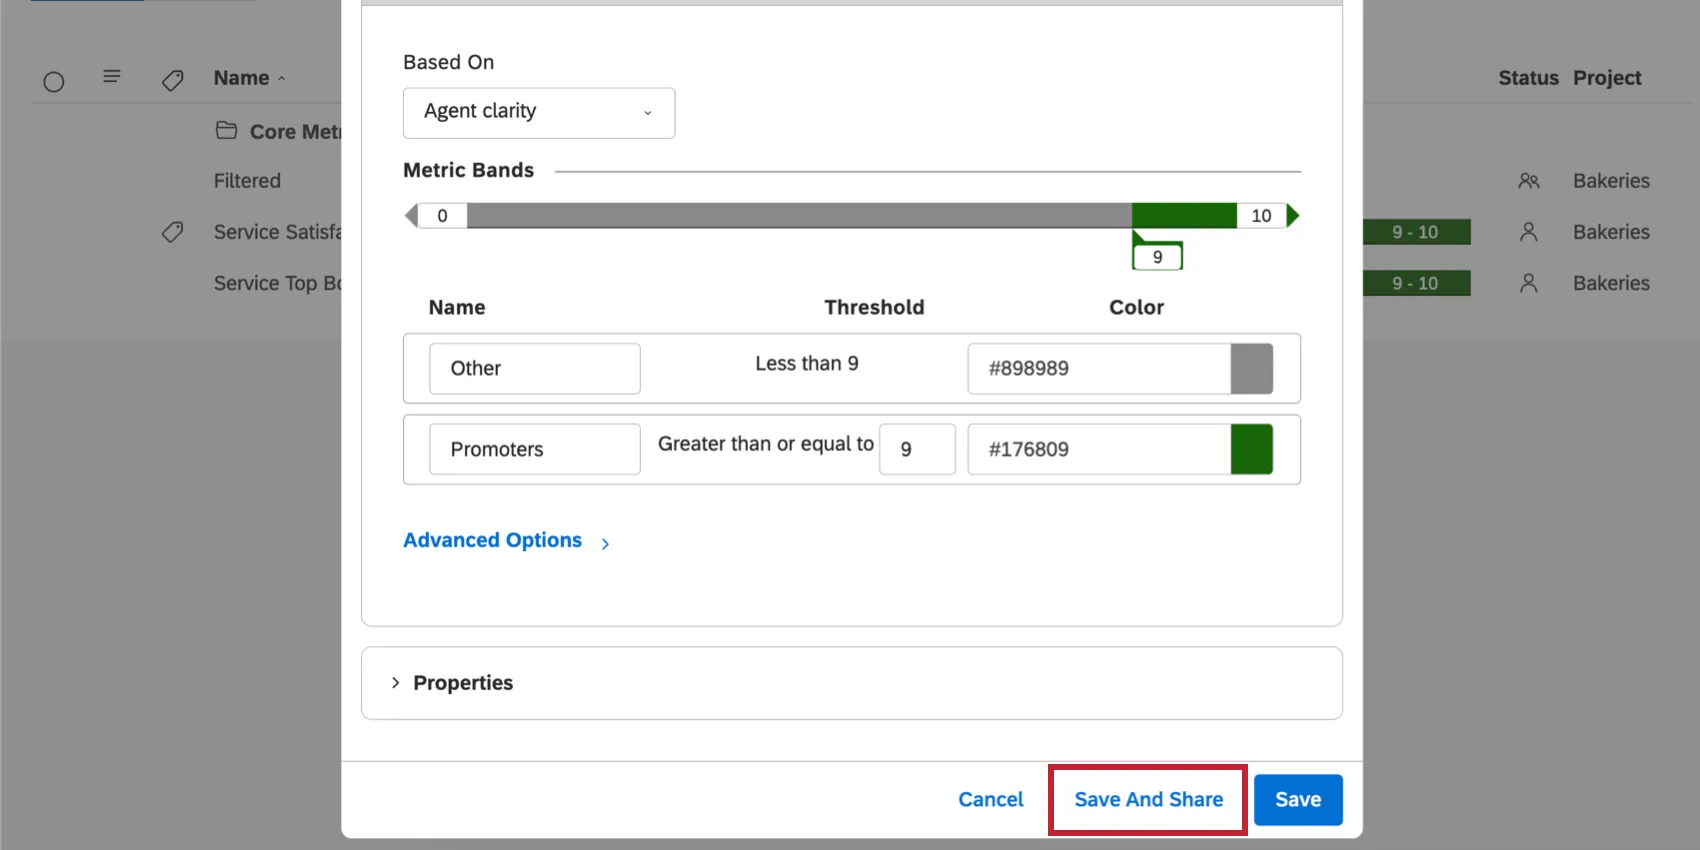
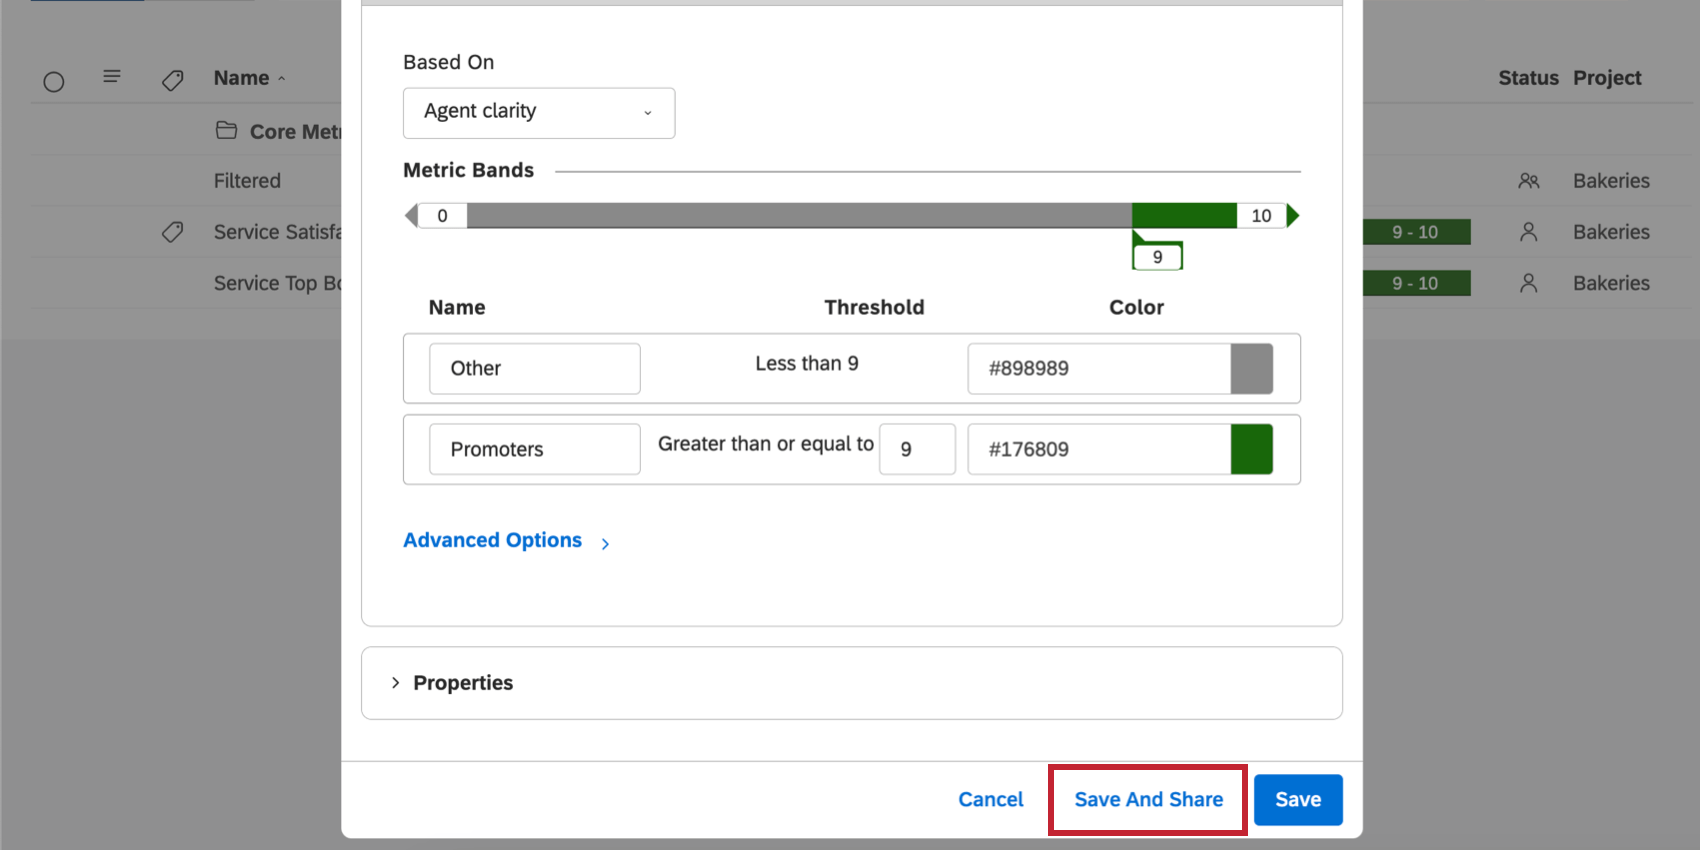
Qtip: You can also share a metric when creating or editing it, by clicking Save And Share.
FAQs
Why does the PDF of my cloud widget look different from what I see in the dashboard?
Why does the PDF of my cloud widget look different from what I see in the dashboard?
When you export a dashboard to PDF, Studio does not just take a screenshot of your screen. We regenerate the report and then create a PDF from that. Moreover, the dimensions of your browser can be different from those of a PDF file, which means that some report items may be visible in one format, but not the other.
How are chapters different from sentence quartiles?
How are chapters different from sentence quartiles?
Chapters are phases of a conversation. Sentences are marked to indicate where phases begin and end.
In contrast, sentence quartiles aren’t assigned by theme or phases, but automatically based on a mathematically equal division of the conversation. Depending on their length, conversations may only have 1 quartile.
In contrast, sentence quartiles aren’t assigned by theme or phases, but automatically based on a mathematically equal division of the conversation. Depending on their length, conversations may only have 1 quartile.
That's great! Thank you for your feedback!
Thank you for your feedback!