
Labeling Dashboards & Books (Studio)
What's on this page
About Labeling Dashboards and Books
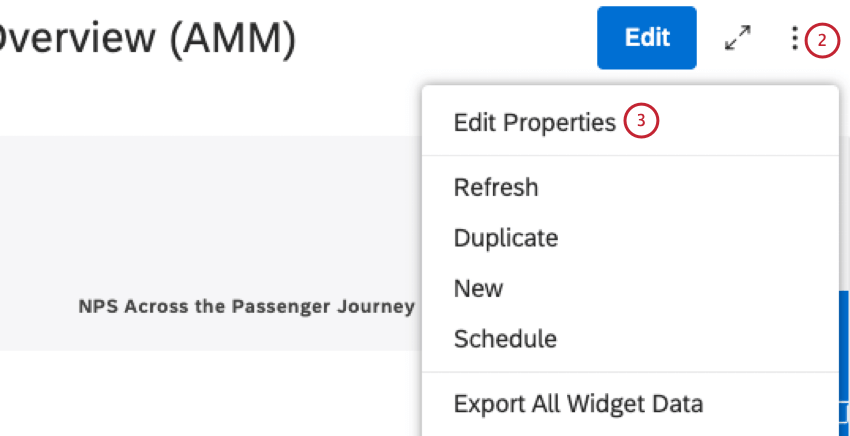
Attention: This action requires editor-level access to a dashboard or book.
You can add labels to dashboards and books to provide additional context into their purpose and enhance their findability. Additionally, you can use labels to showcase dashboards and books in the Dashboard Explorer’s thumbnail carousel.
You can add labels when creating a dashboard or when editing existing dashboards and books.
The following limitations apply to labels:
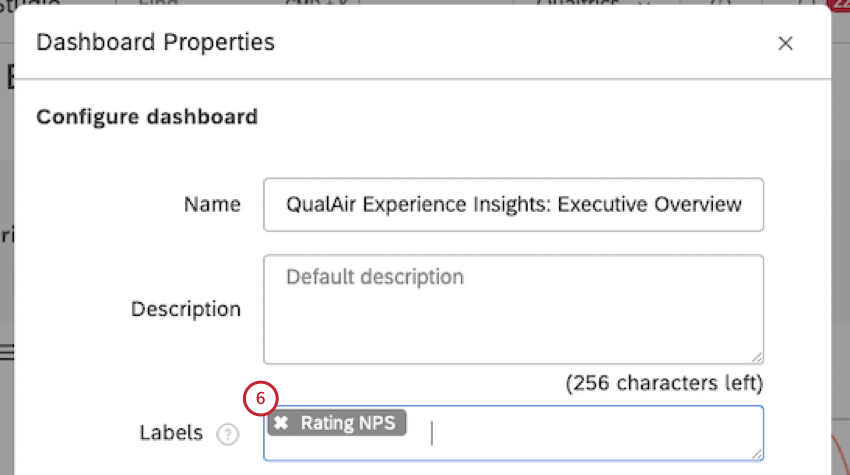
- Each object can have up to three labels.
- Each label can be up to 20 characters long.
Adding Labels to a Single Dashboard
Use this method when you need to focus on just one dashboard or when a dashboard might already contain labels.
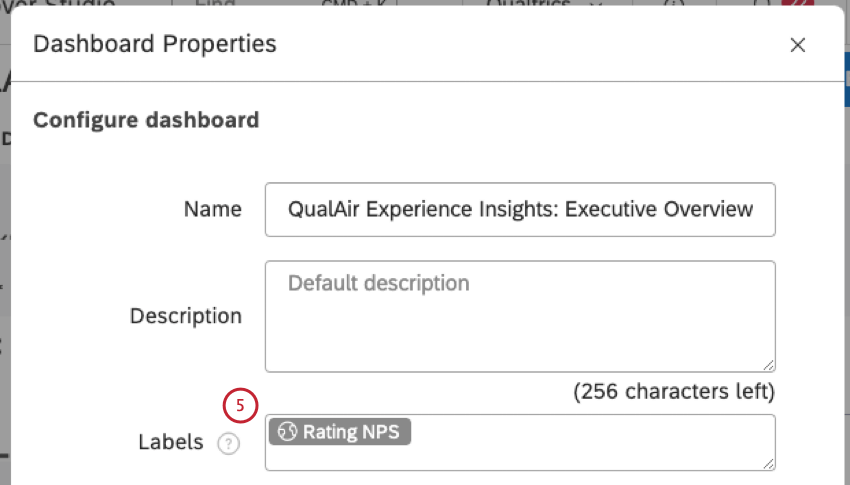
Qtip: As you start typing a label, similar labels that already exist in your Master Account are displayed as hints in a drop-down list (up to 10 labels at a time). You can keep typing or select an existing label from the list.
Qtip: If a label turns red, it means that its length has exceeded 20 characters. In this case you need to make it shorter.
Qtip: You can add up to three labels to a dashboard.
Adding Labels to a Single Book
Use this method when you need to focus on just one book or when a book might already contain labels.
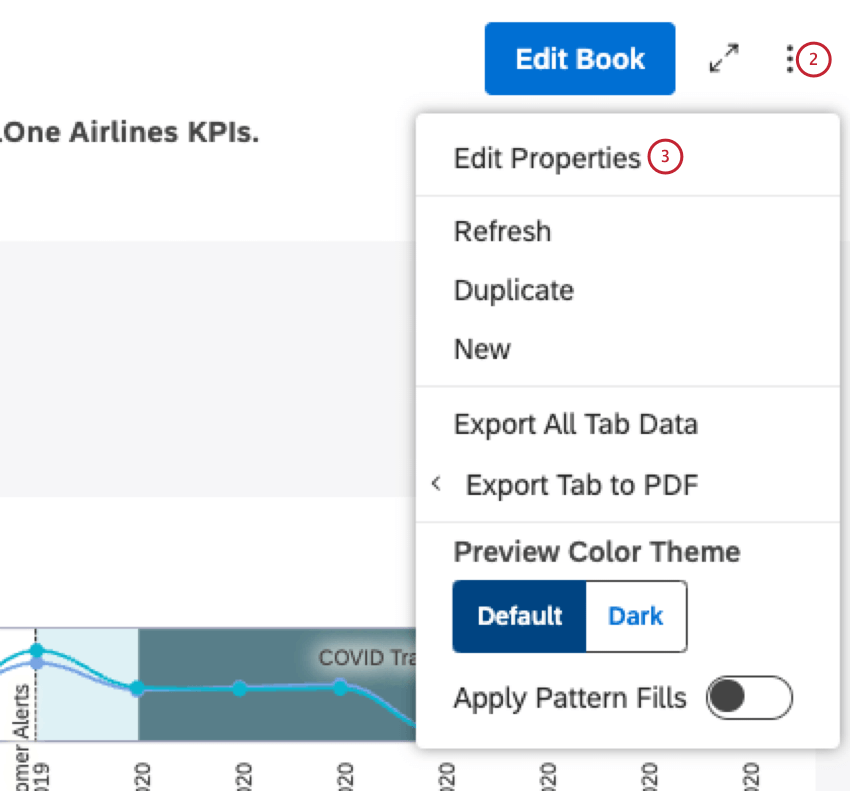

Qtip: You can add up to three labels to a book.
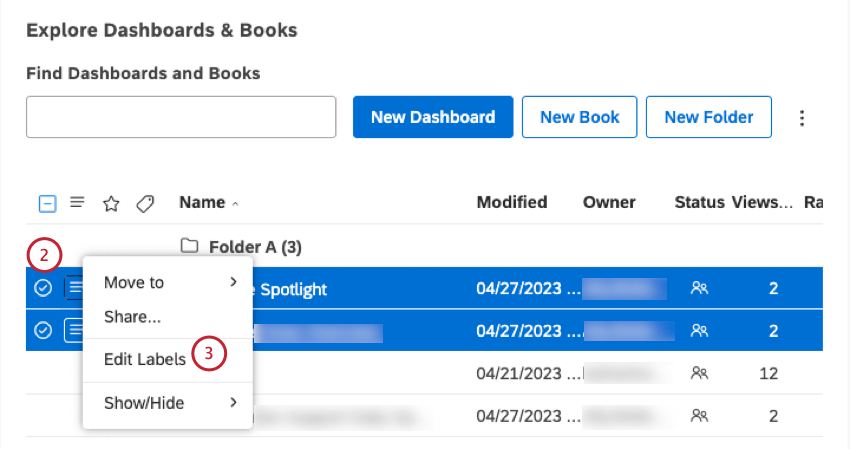
Adding Labels to Multiple Objects
Use this method when you need to label multiple objects all at once, overwriting any existing labels.
Attention: Adding bulk labels overwrites all other labels an object might have.
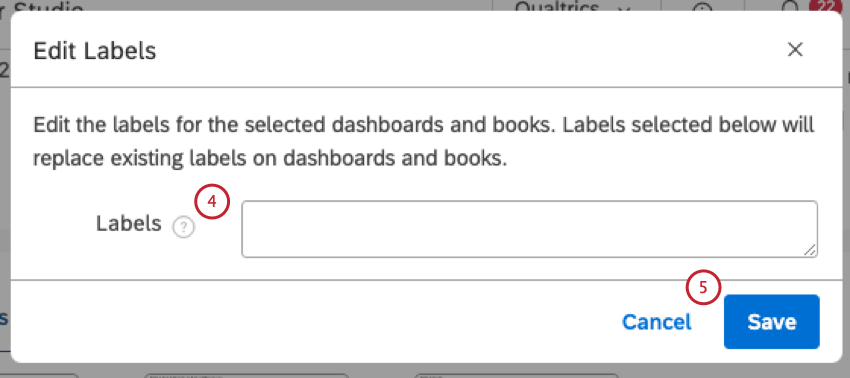
Qtip: You can add up to three labels.
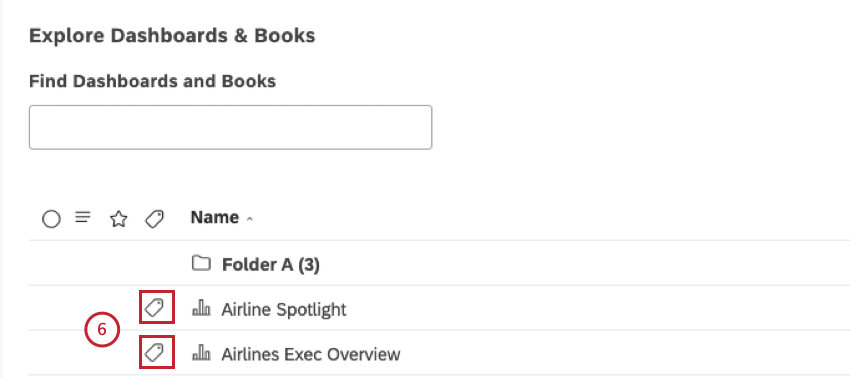
Once you add labels to a dashboard or book, a label icon appears next to it in Dashboard Explorer. Users can hover over the icon to see applied labels.Labels also enhance an object’s findability via the Dashboard Explorer search.

That's great! Thank you for your feedback!
Thank you for your feedback!