
Managing Filters (Studio)
What's on this page
About Using Filters (Studio)
When working with filters, you can perform several actions, including creating a folder for filters, moving filters to a folder and hiding filters. You can also edit, share, transfer and duplicate filters. It’s also possible to disable and enable predefined date filters and scorecard filters. You can also view filter dependencies, label filters, delete filters, and restore deleted filters.
Qtip: See Creating a Filter for information on how to build a filter.
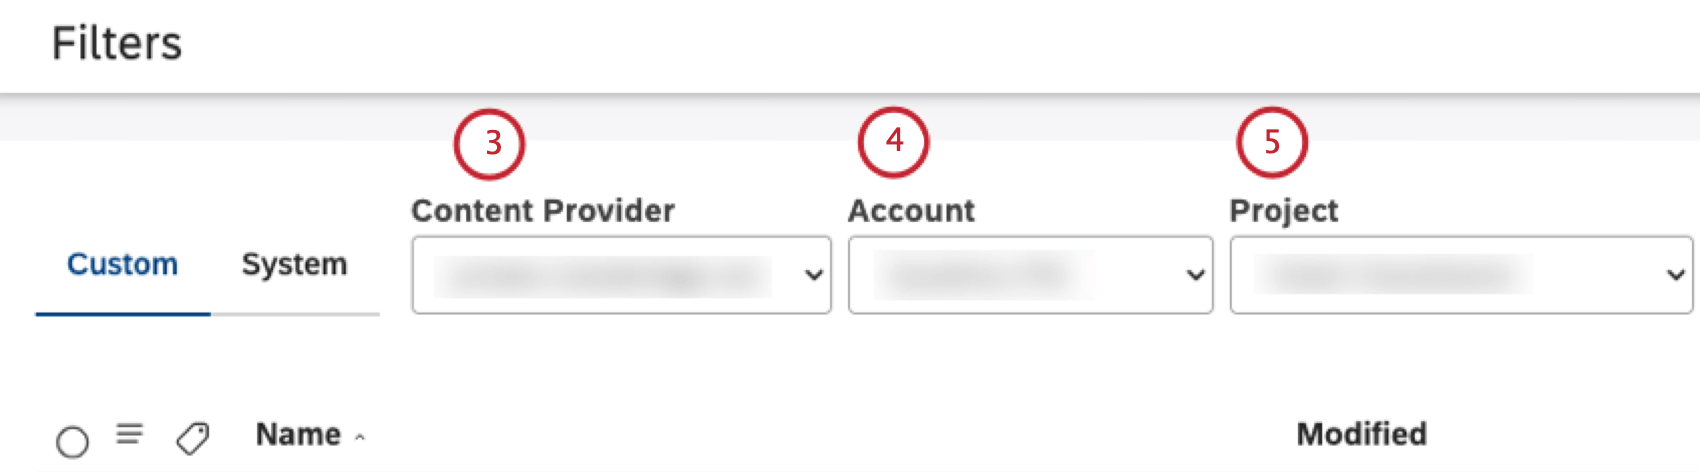
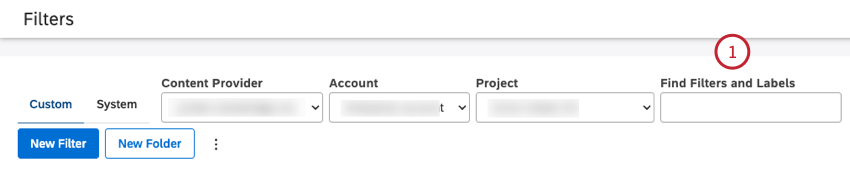
Accessing Filters
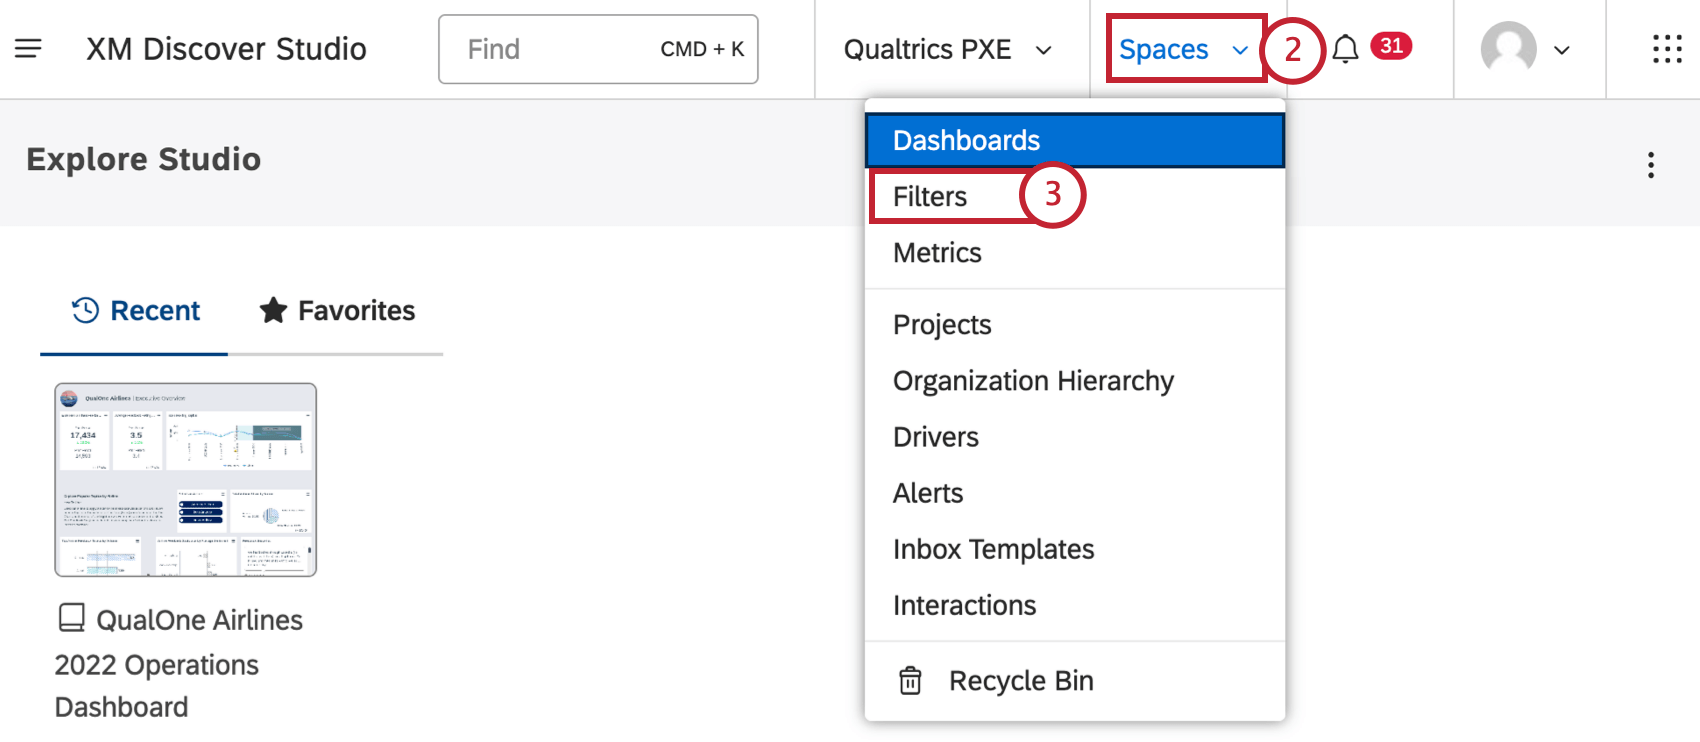
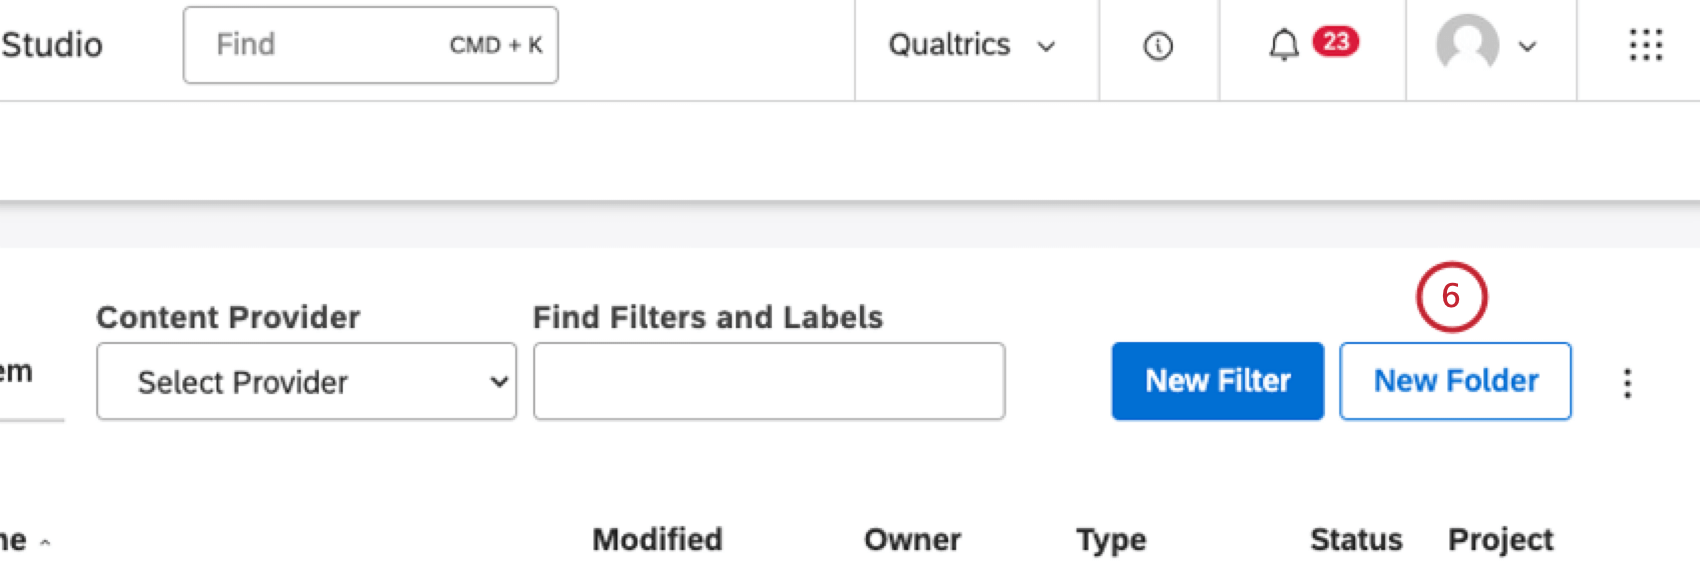
Creating a Folder for Filters
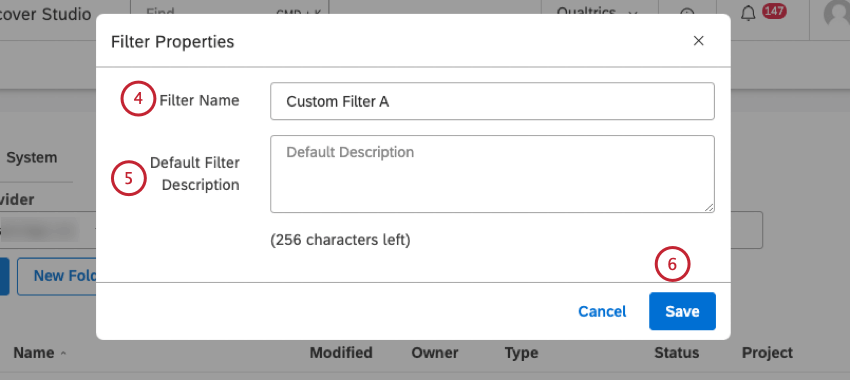
You can create folders to organize your filters.

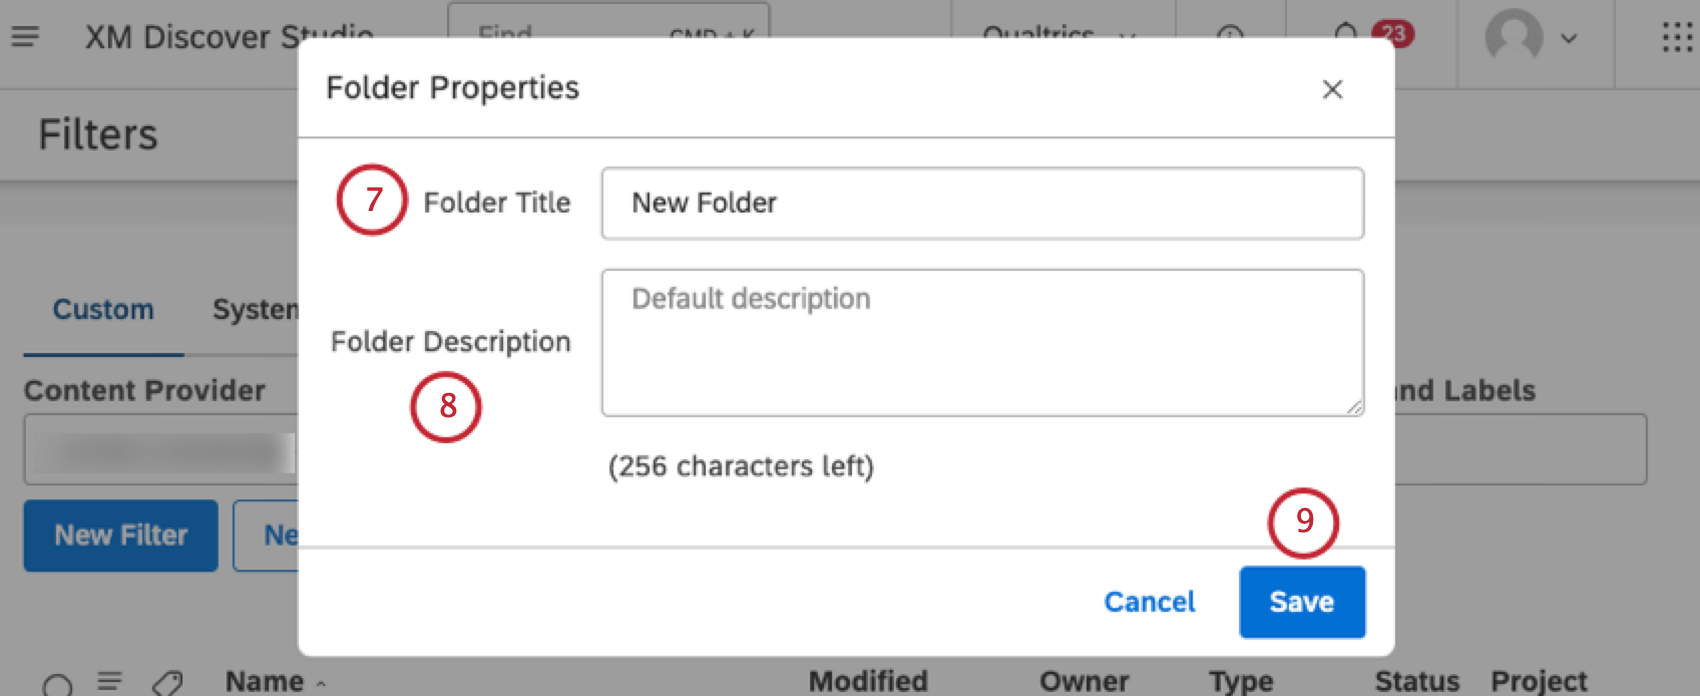
Qtip: The folder name must be unique per user.
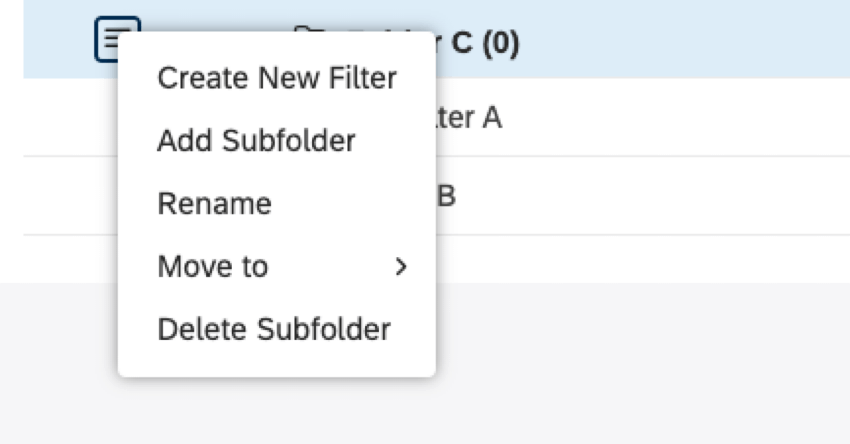
Qtip: Once a folder or subfolder is created, you can expand the actions menu next to it and perform the following actions:

- Create New Filter: Create a new filter.
- Add Subfolder: Create a nested folder (up to 5 levels deep).
- Rename: Change folder name or description.
- Move to: Move filters to a folder.
- Delete Subfolder (for nested folders): Delete a folder (without filters).
Attention: When a folder is deleted, the filters that were in it are moved to the filters root folder.
Moving a Filter to a Folder
After you have created a folder, you can move your filters to that folder.
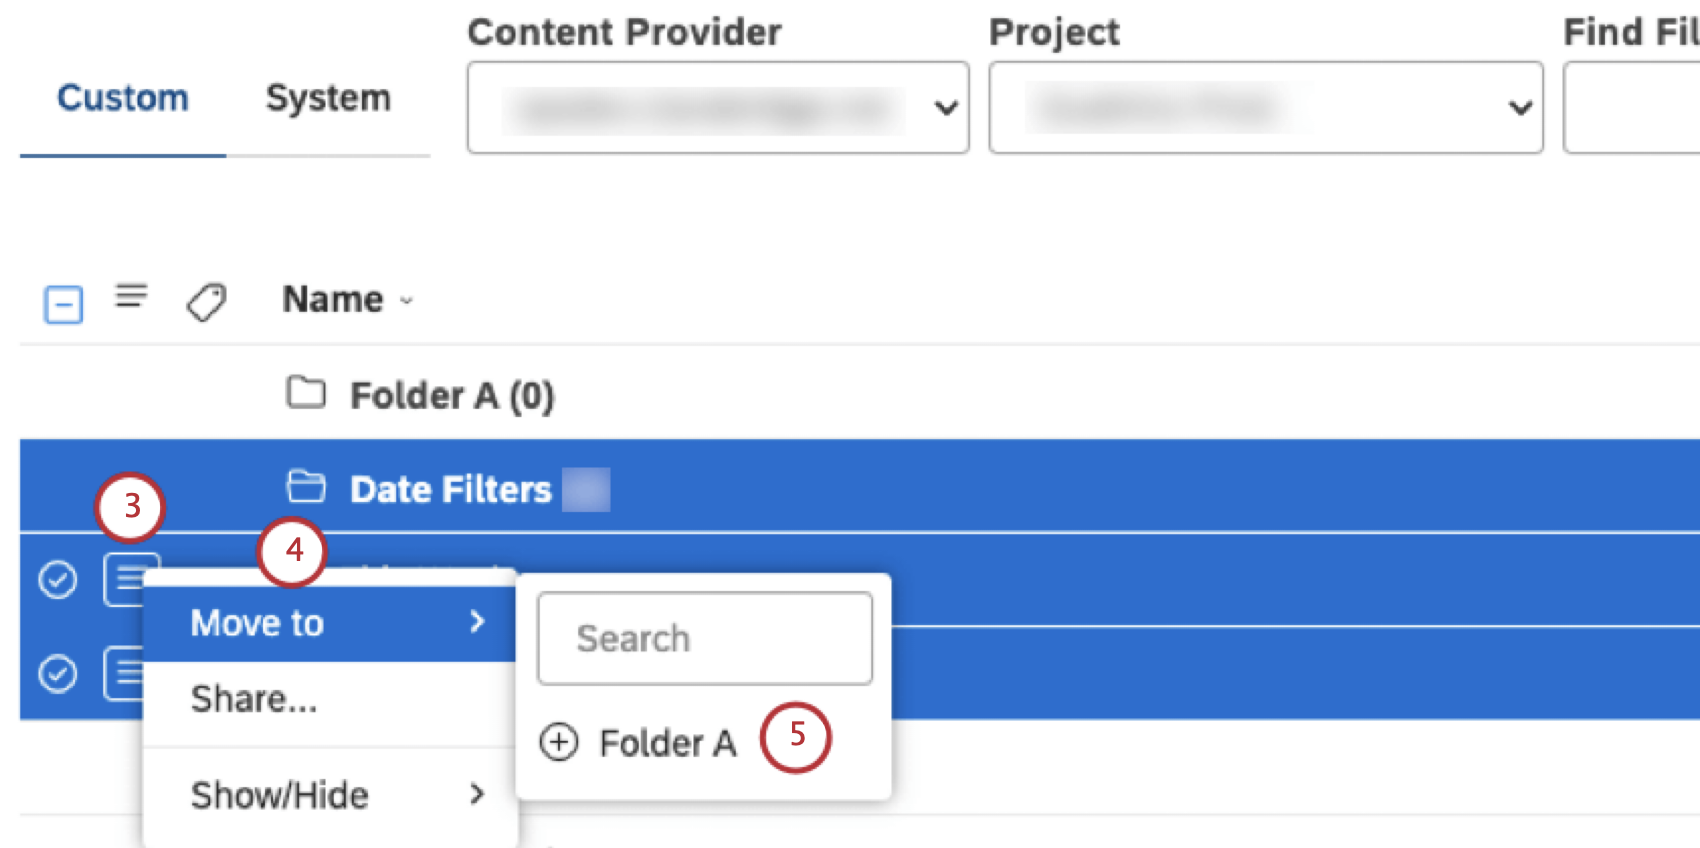
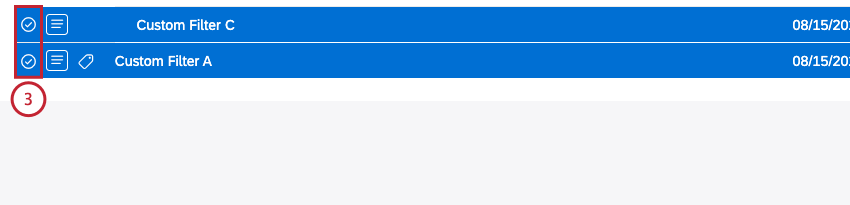
Qtip: If you need to move several filters, select each of the check boxes on the left of the actions menu next to the filter that you want to move. Multiple selections share the same actions menu.
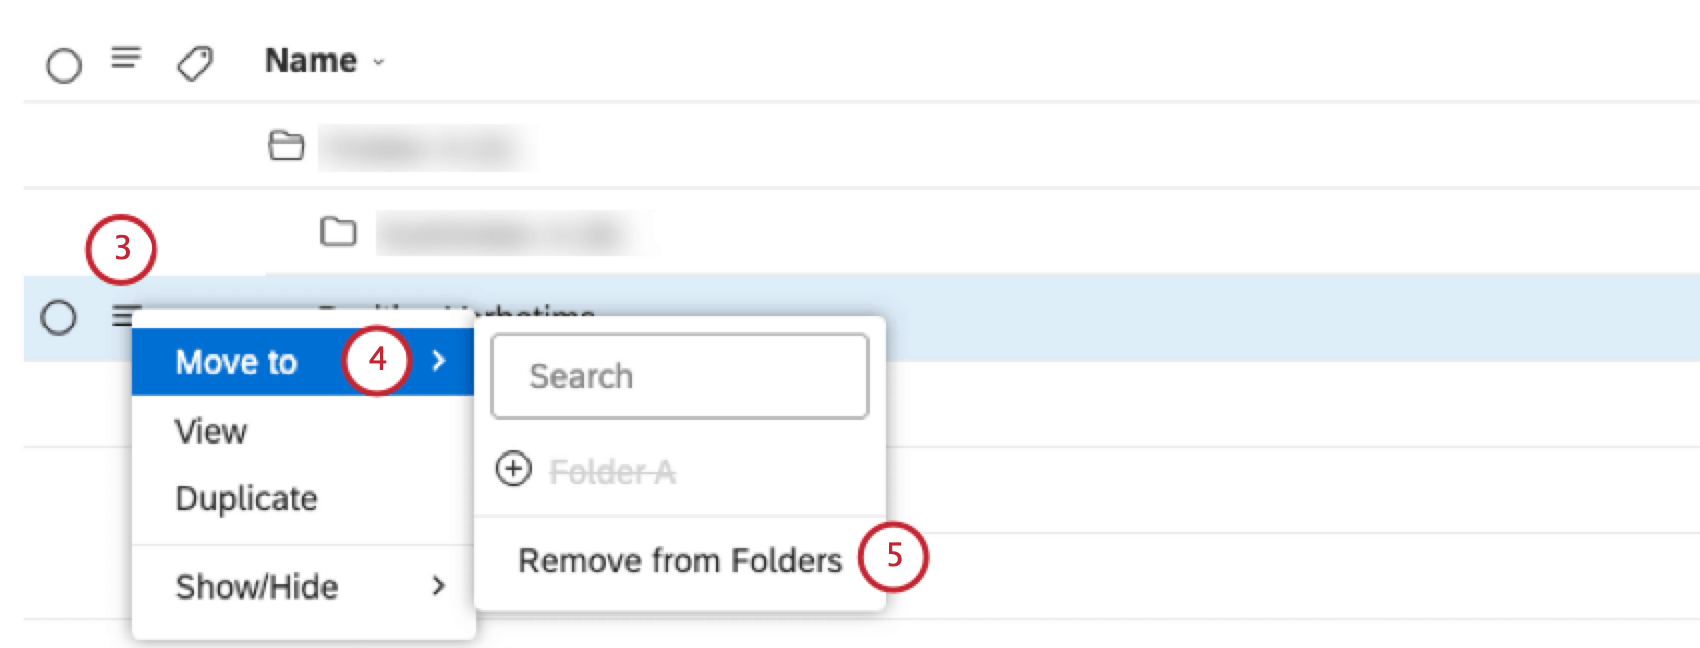
Moving a Filter to the Root Folder
After you have created a filter and moved it to a folder, you can move it back to the root folder.
Using the Text Filter
You can use a text filter to add a search field to your dashboards and widgets. You can use it to focus on data that contains specific keywords without making permanent changes to reports. A text filter works the same way a search field does in document explorer.
Adding a Text Filter
To add a search field to a dashboard, add a text filter in dashboard filters. To add a search field to a widget, add a text filter in widget filters. Search is available out of the box in document explorer.
How Search Works
- You can use the search to return exact matches, partial matches, or a combination of the two.
- All search queries are case-insensitive.
- When multiple keywords or phrases are used in 1 query, the OR condition is applied.
- Text filters are applied at a sentence level, while calculations are displayed by document volume. When a text filter is applied, the widget displays the number of documents where at least 1 sentence matches your query.
- When you close a dashboard, text filter criteria are cleared automatically.
Broad Match
Type a keyword that is 3 letters or longer to return sentences and documents that contain the keyword anywhere in the text. This means that in addition to exact matches the results will contain partial matches, or words in which your keyword is preceded or followed by any number of letters. For example, wait will return text containing the words wait, awaits, waiter, waiters, and so on.
You can type multiple search keywords, in which case the results will contain exact and partial matches to ANY of the keywords. Use spaces or commas to separate keywords.
Exact Match
Type a keyword or a phrase inside quotes to only return exact matches. For example, chocolate will return results that contain both chocolate and chocolates, but “chocolate” will only return an exact match in singular form.
If your search keyword contains less than 3 letters, the search returns sentences and documents that contain an exact match to your keyword.
Combined Query
You can combine broad and exact queries in 1 search. For example, the following query:
wait staff, “front desk”, cb
will return results that contain:
- a broad match to wait (wait, await, waiter and so on)
- OR a broad match to staff (staff, staffed and so on)
- OR have the exact phrase “front desk”
- OR have the exact word “cb”
Special Characters
If your query contains special characters, make sure to put the query inside quotes (“”), otherwise these characters will be ignored. This includes the following characters:
+ – = > < ! ( ) { } [ ] ^ ” ~ * ? : \ /
For example, a 1/2 query will return sentences containing the number 12, while a “1/2” query will return sentences containing the fraction 1/2.
If a search query has an odd number of quotes, the last quotation mark is removed from the search query.
Hiding Filters
If you do not want certain filters to appear in filters management and other filters selections without actually deleting them, you can hide them. Hiding a filter only affects its visibility for the current user and has no impact on other Studio users.
Here is how hiding a filter affects its visibility for you:
- In filters management: Hidden filters no longer appear in your list unless you switch their visibility on.
- In widget configuration: Hidden filters no longer appear in the list of available widget filters. Qtip: Hiding a filter does not remove it from widgets where it is already applied.

- In dashboard configuration: Hidden filters no longer appear among dashboards’ saved filters. Qtip: Hiding a filter does not remove it from dashboards where it is already applied.
- In Filtered metric configuration: Hidden filters no longer appear in your list of available conditions. Qtip: Hiding a filter does not remove it from Filtered metrics where it is already used.
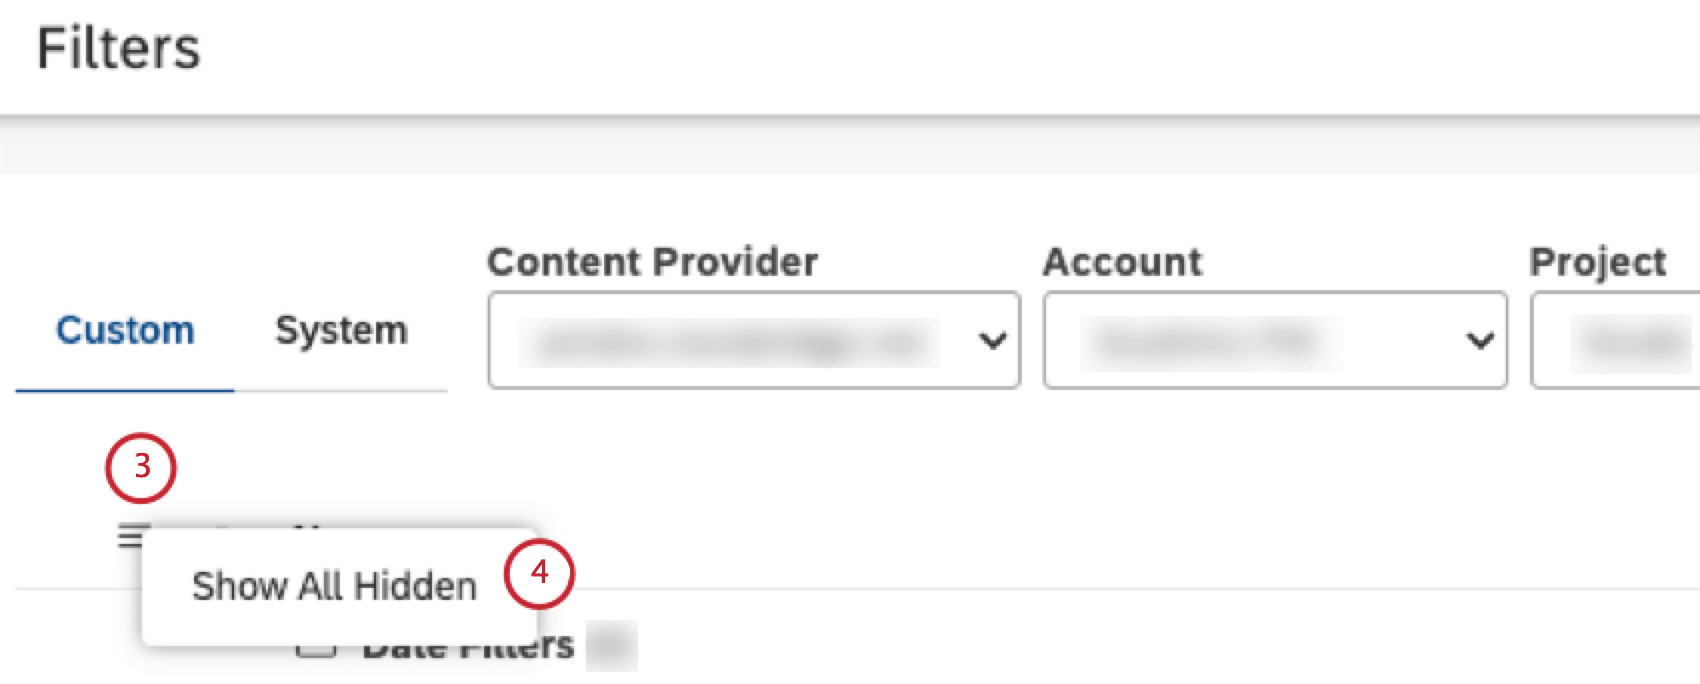
You can access hidden filters in filters management by switching their visibility on, as well as unhide them altogether.
Hiding filters is a two-step process: first, you mark selected filters as hidden, then you switch their visibility on or off.
Qtip: Alternatively, you can organize filters into folders. Note that folders cannot be hidden.
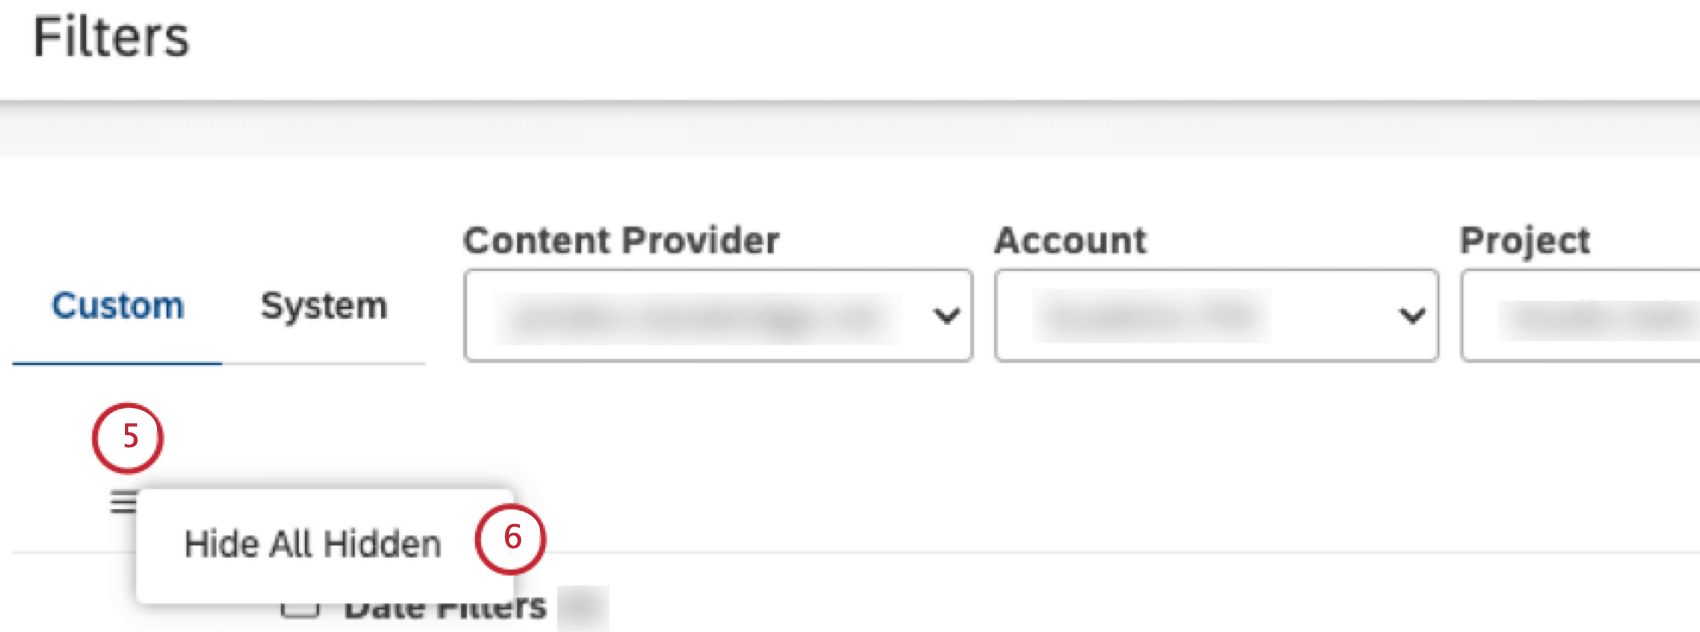
Switching Hidden Filters Visibility
You can switch hidden filters visibility on or off.
Marking a Filter as Hidden
Follow these steps to mark a filter as hidden.
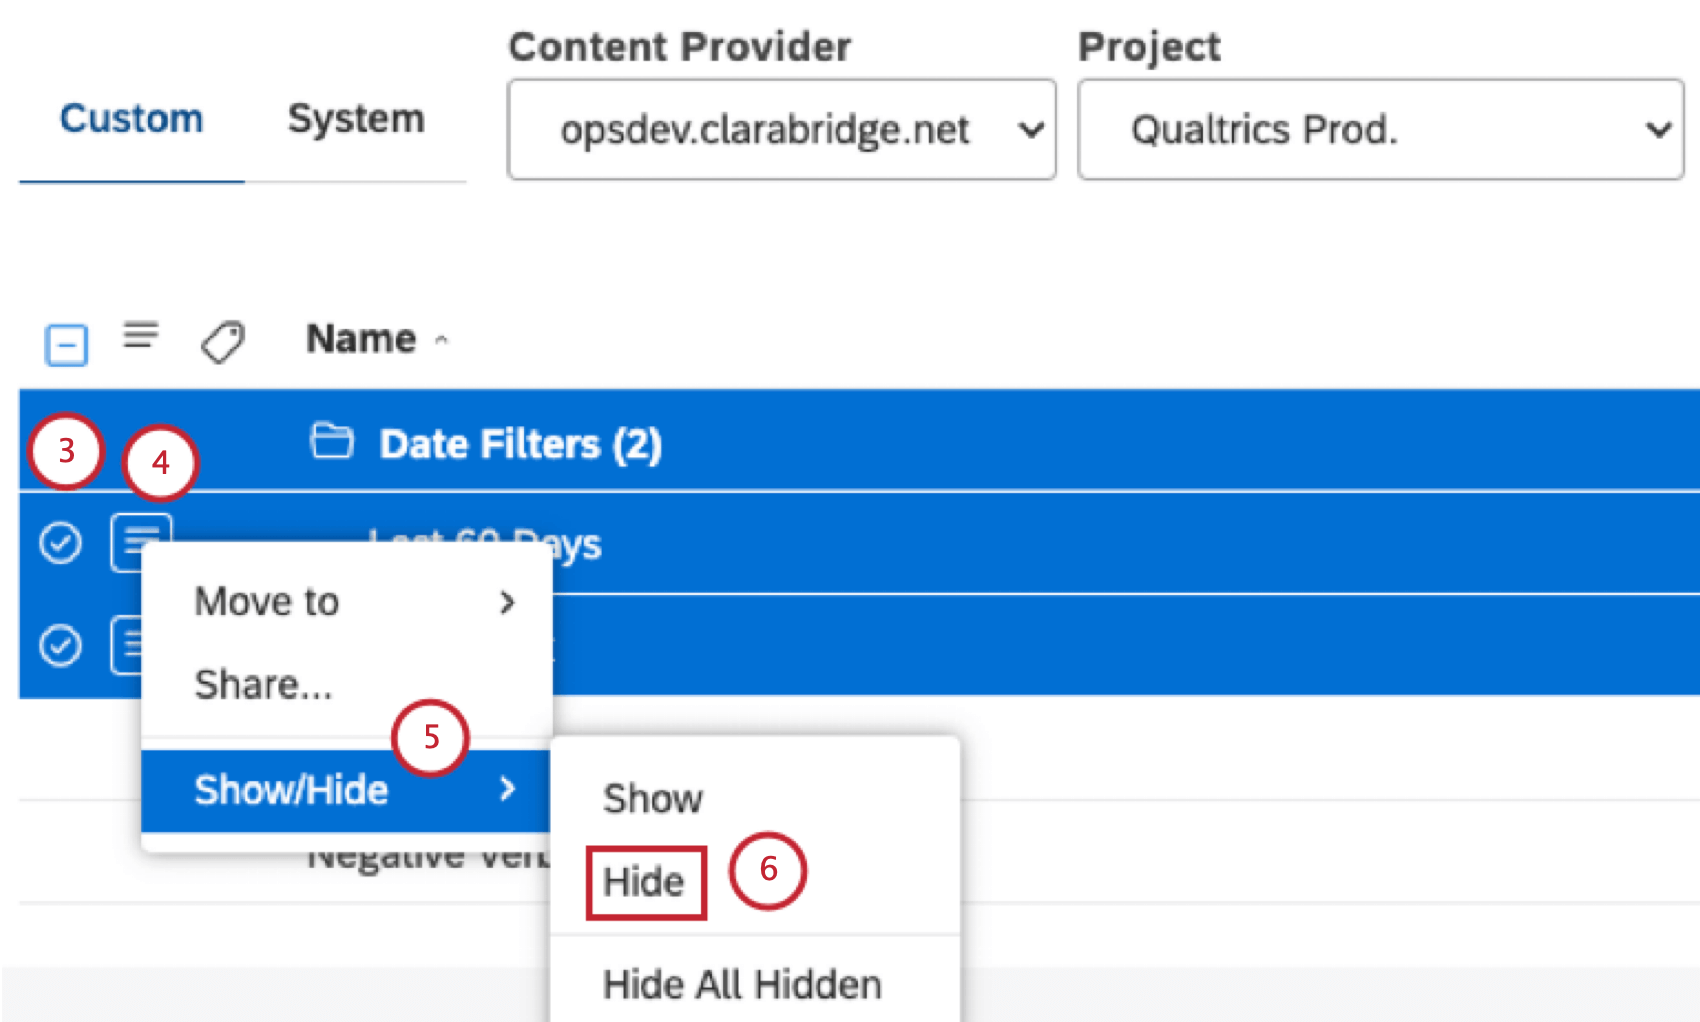
Qtip: Multiple selections share the same actions menu.
Marking a Filter as Not Hidden
Once a filter is hidden, you can unhide it.
Qtip: Hidden filters are displayed using lighter colors.
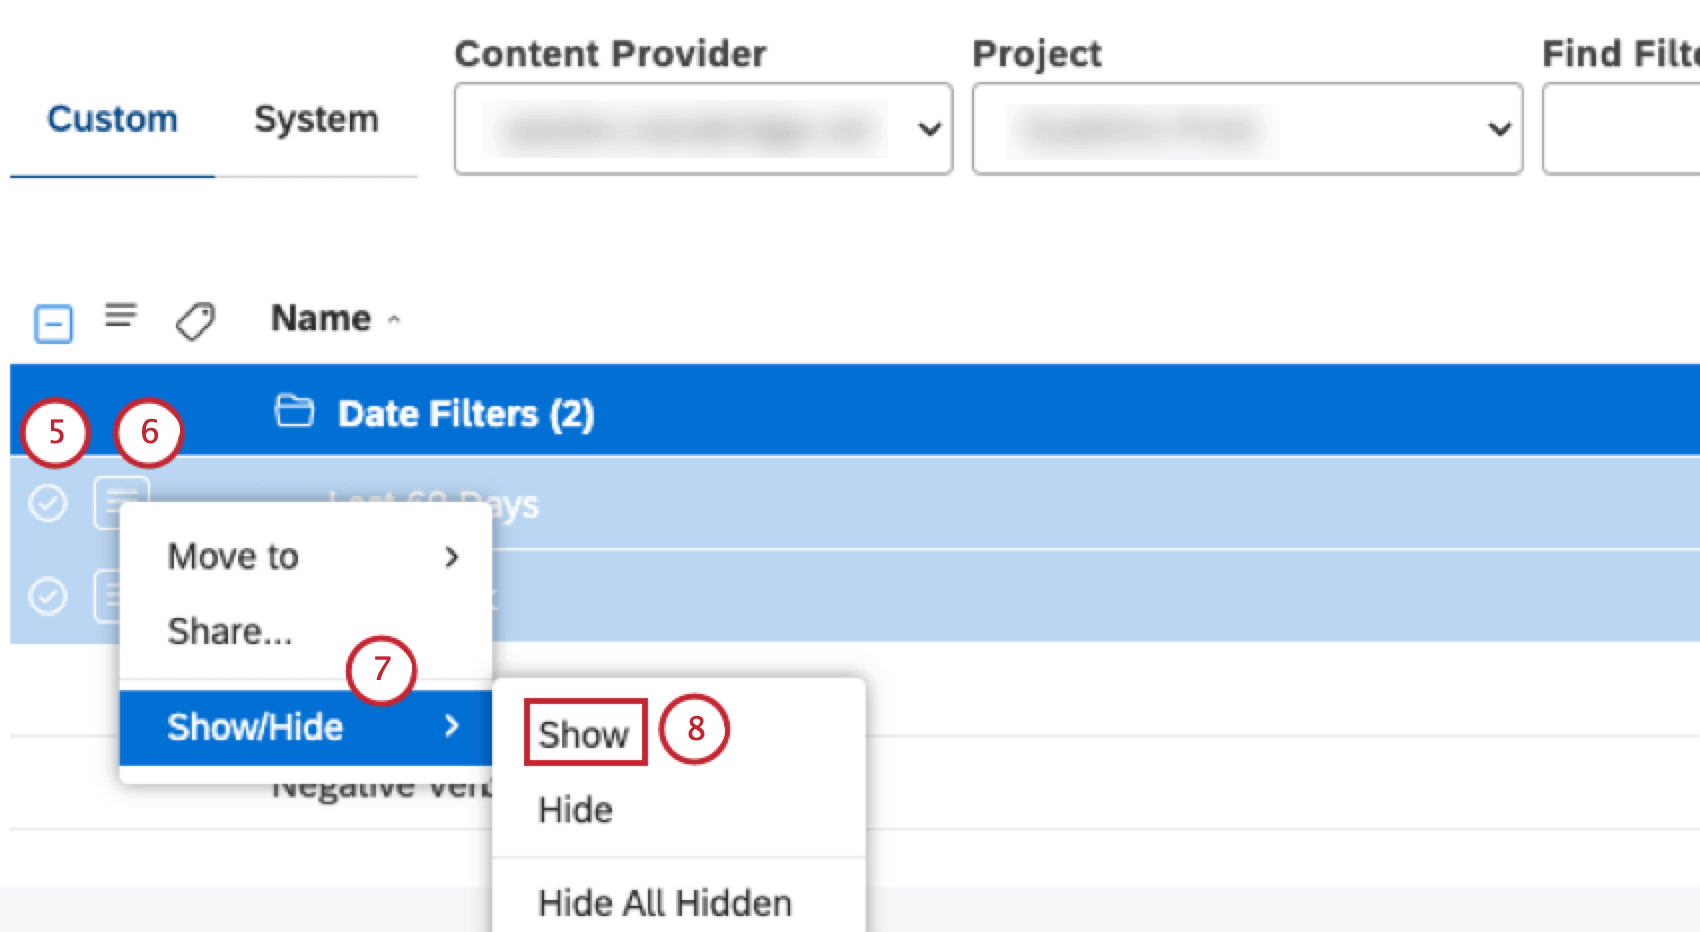
Qtip: Multiple selections share the same actions menu.
Disabling and Enabling Preset Date Filters
Qtip: A Manage Date Filters permission is required to perform this action.
You can disable 1 or more preset date filters to hide them from all users in your Master Account. If you disable a date filter that’s already used in a widget, metric, or dashboard, the widget, metric, or dashboard will continue to work using the disabled filter. The disabled filter will become unavailable for the widget, metric, or dashboard only after you apply a different date range and save it.
Qtip: The account and the project can be preselected as your favorites in User Preferences.

Qtip: The default Last 30 Days filter cannot be disabled.
Qtip: Once you disable a preset date filter, it does not show up in any date filter options throughout Studio.
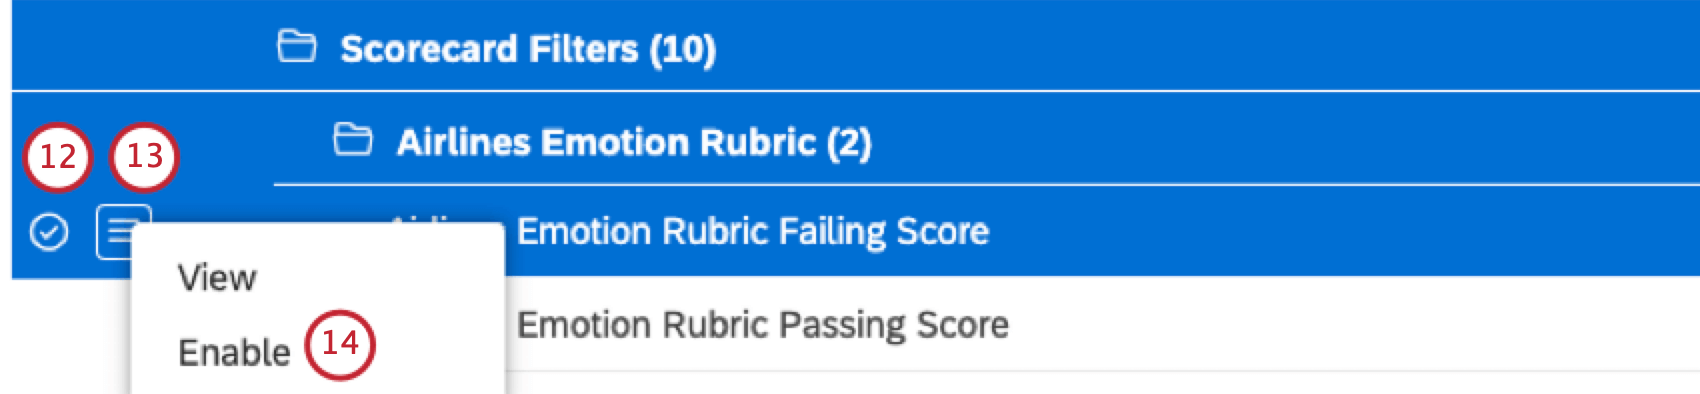
Disabling and Enabling Scorecard Filters
Qtip: This action requires a Manage Rubrics permission.
You can disable 1 or more scorecard filters to hide them from all users in your Master Account.
Qtip: The account and the project can be preselected as your favorites in User Preferences.
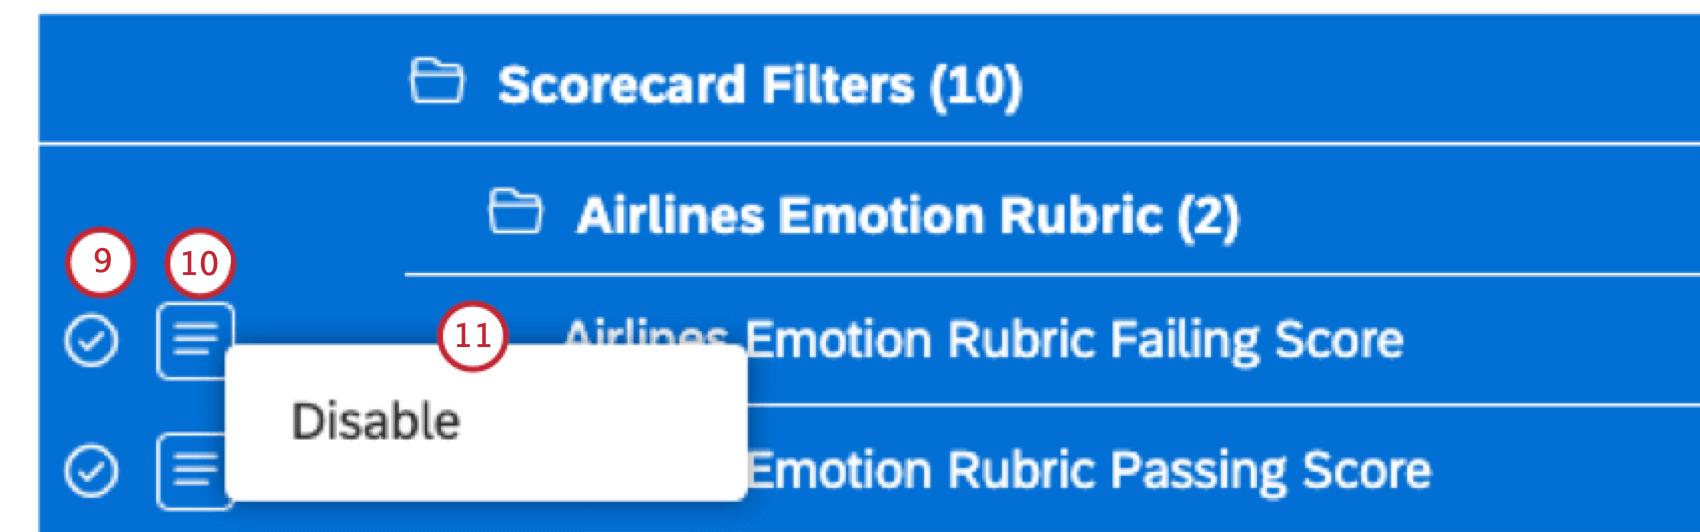
Qtip: To enable or disable filters 1 by 1, toggle the corresponding switch for that specific filter to On (enable) or to Off (disable) under the Status column.
Qtip: Once you disable a scorecard filter, it does not show up in any filter options throughout Studio.
Viewing Filter Dependencies
Qtip: This action requires editor-level access to the filter and at least read-only data access to the component’s source project.
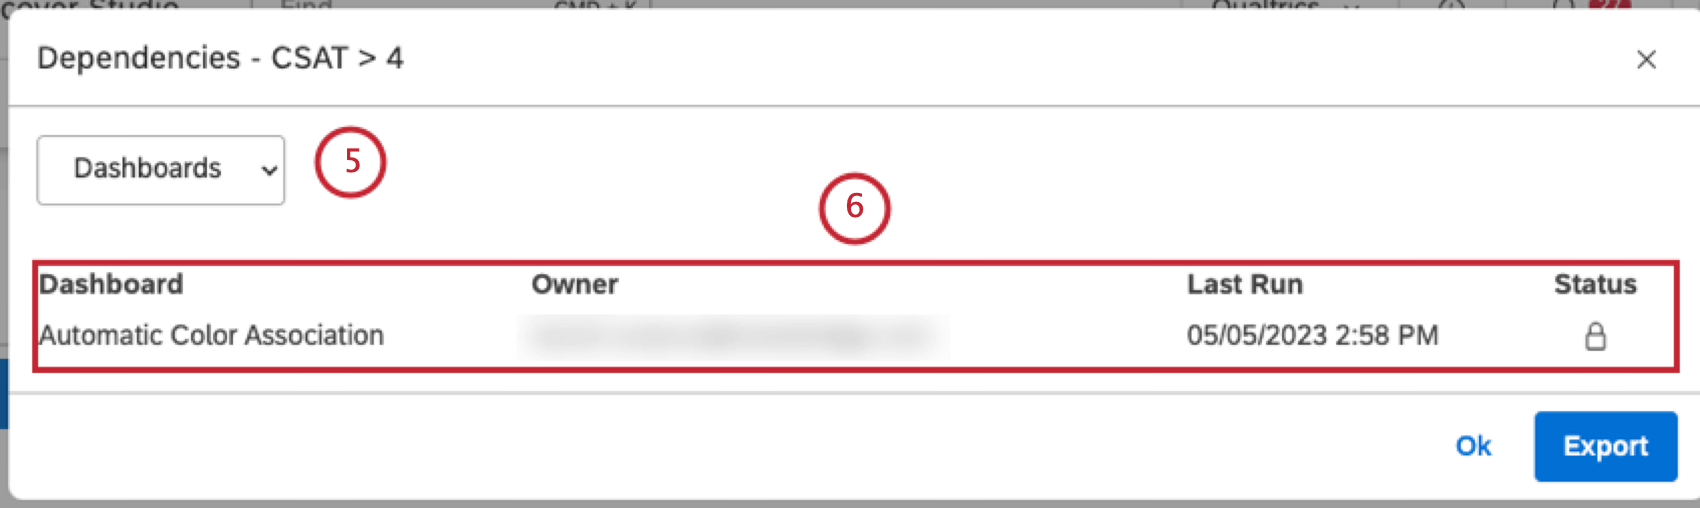
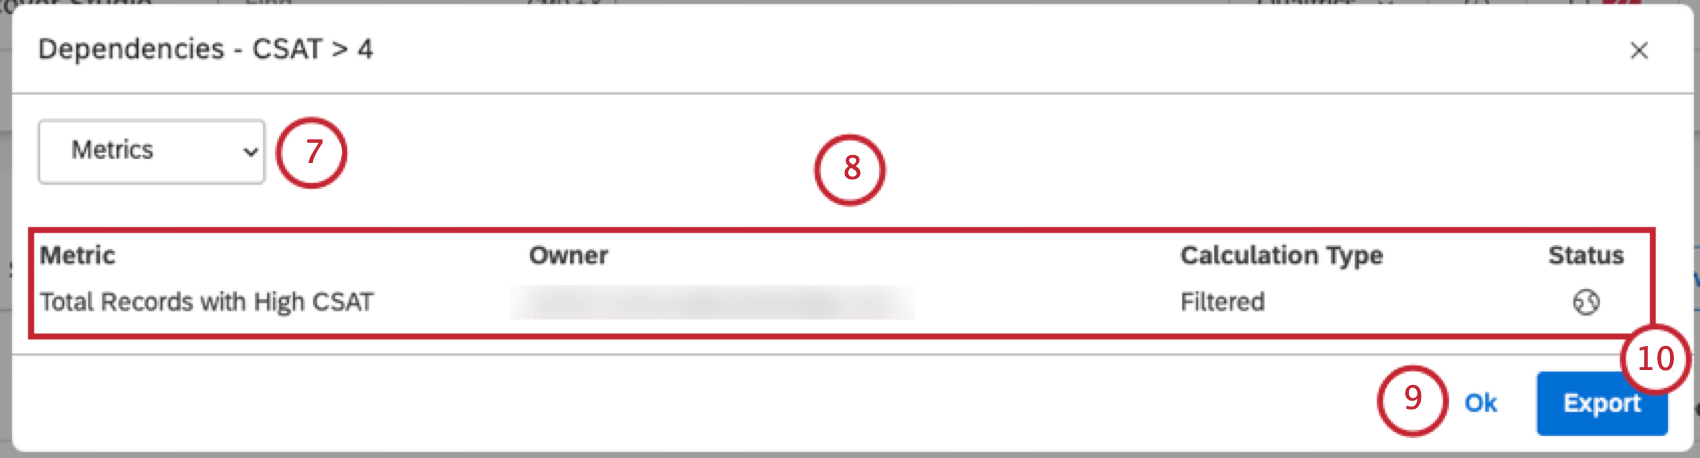
You can view which dashboards and metrics use your filters. This is useful to consider when editing or deleting filters.
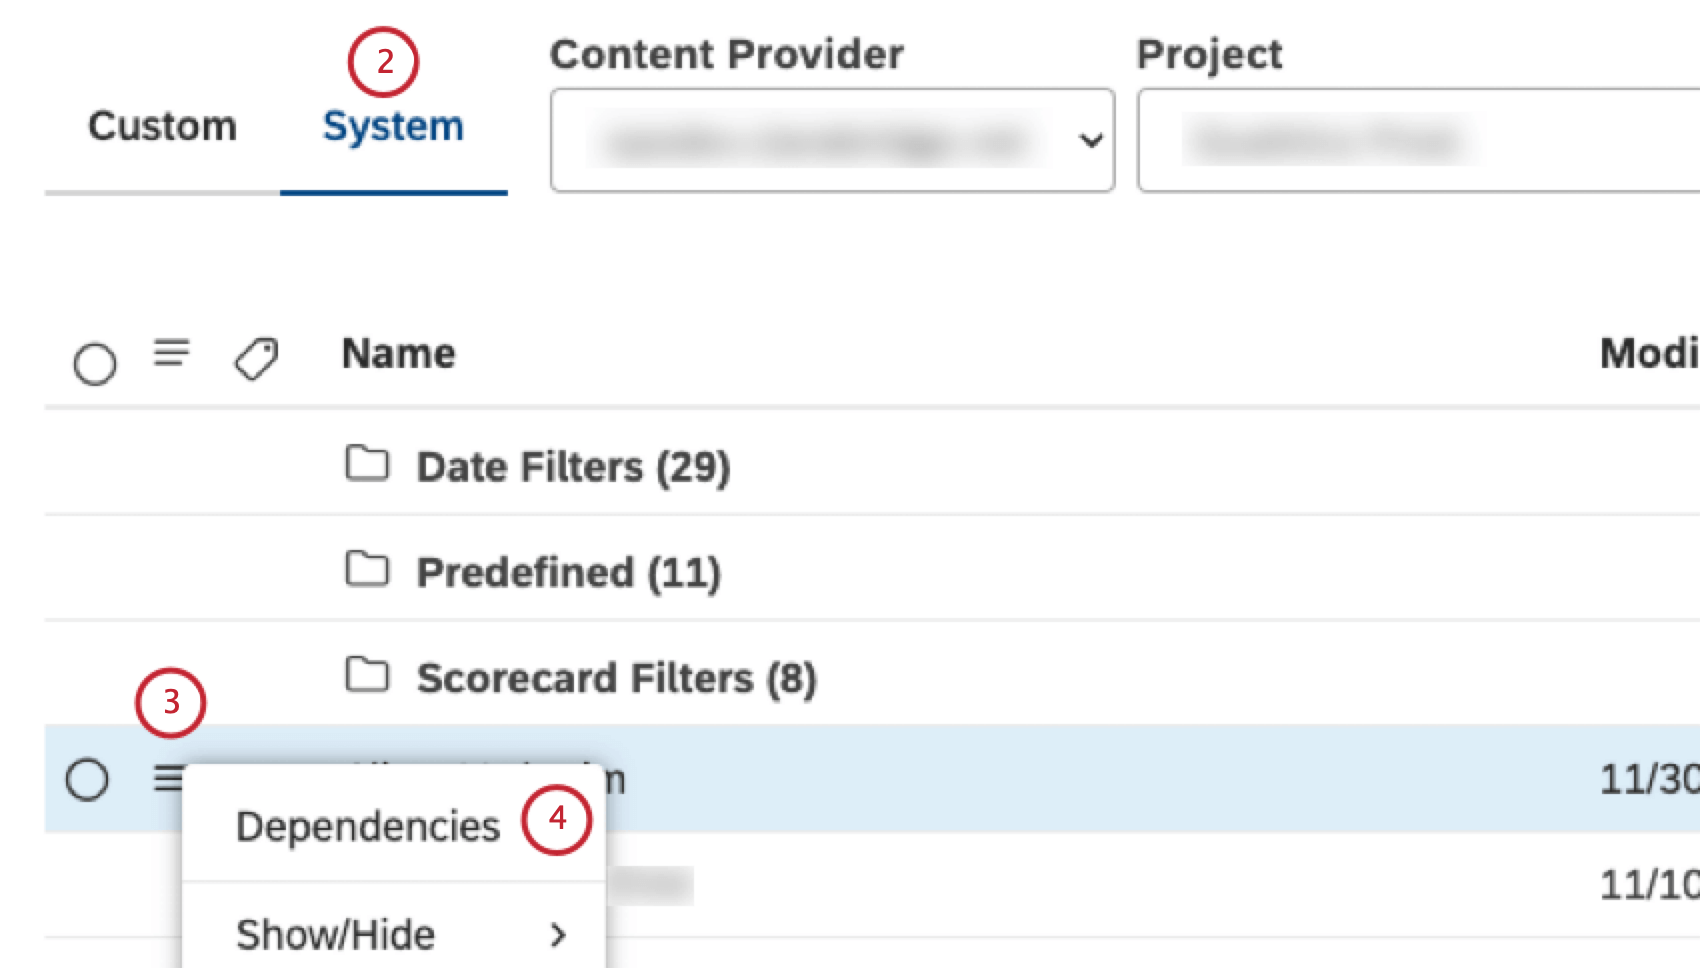
Qtip: For Designer filters, dashboard dependencies are the only available option.
Qtip: This option is only available for Studio filters.
- Metric: The name of the metric.
- Owner: The user who owns the metric.
- Calculation Type: The type of the metric.
- Status: The status of the metric (Private, Shared, or Public).
Labeling Filters
Qtip: This action requires editor-level access to a filter.
You can add labels to filters to provide additional context into their purpose and enhance their findability. Add labels when creating a filter or when editing existing filters. The following limitations apply to labels:
- Each filter can have up to 3 labels.
- Each label can be up to 20 characters long.
Adding Labels to a Single Filter
Use this method when you need to focus on just 1 filter or when a filter might already contain some labels.
Qtip: All custom date filters are stored in the Data Filters folder.
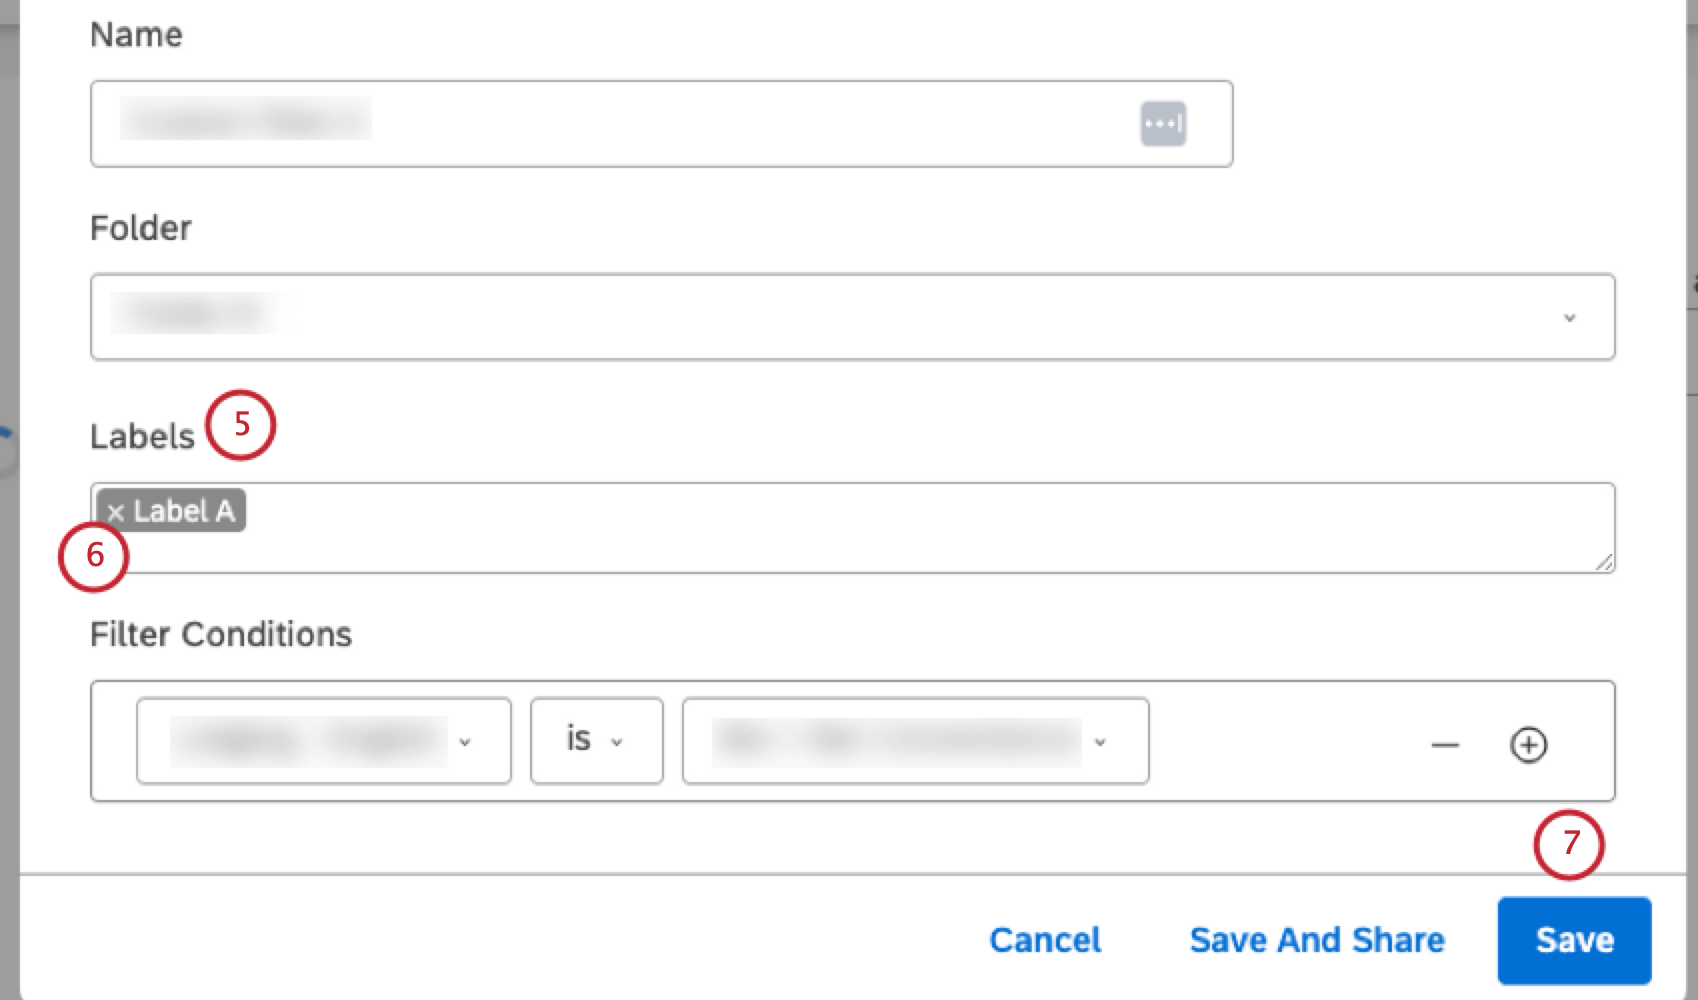
Qtip: As you start typing a label, similar labels that already exist in your Master Account are displayed as hints in a dropdown menu (up to 10 labels at a time). You can keep typing or select an existing label from the list.
Qtip: If a label turns red, it means that its length has exceeded 20 characters. In this case you need to make it shorter.
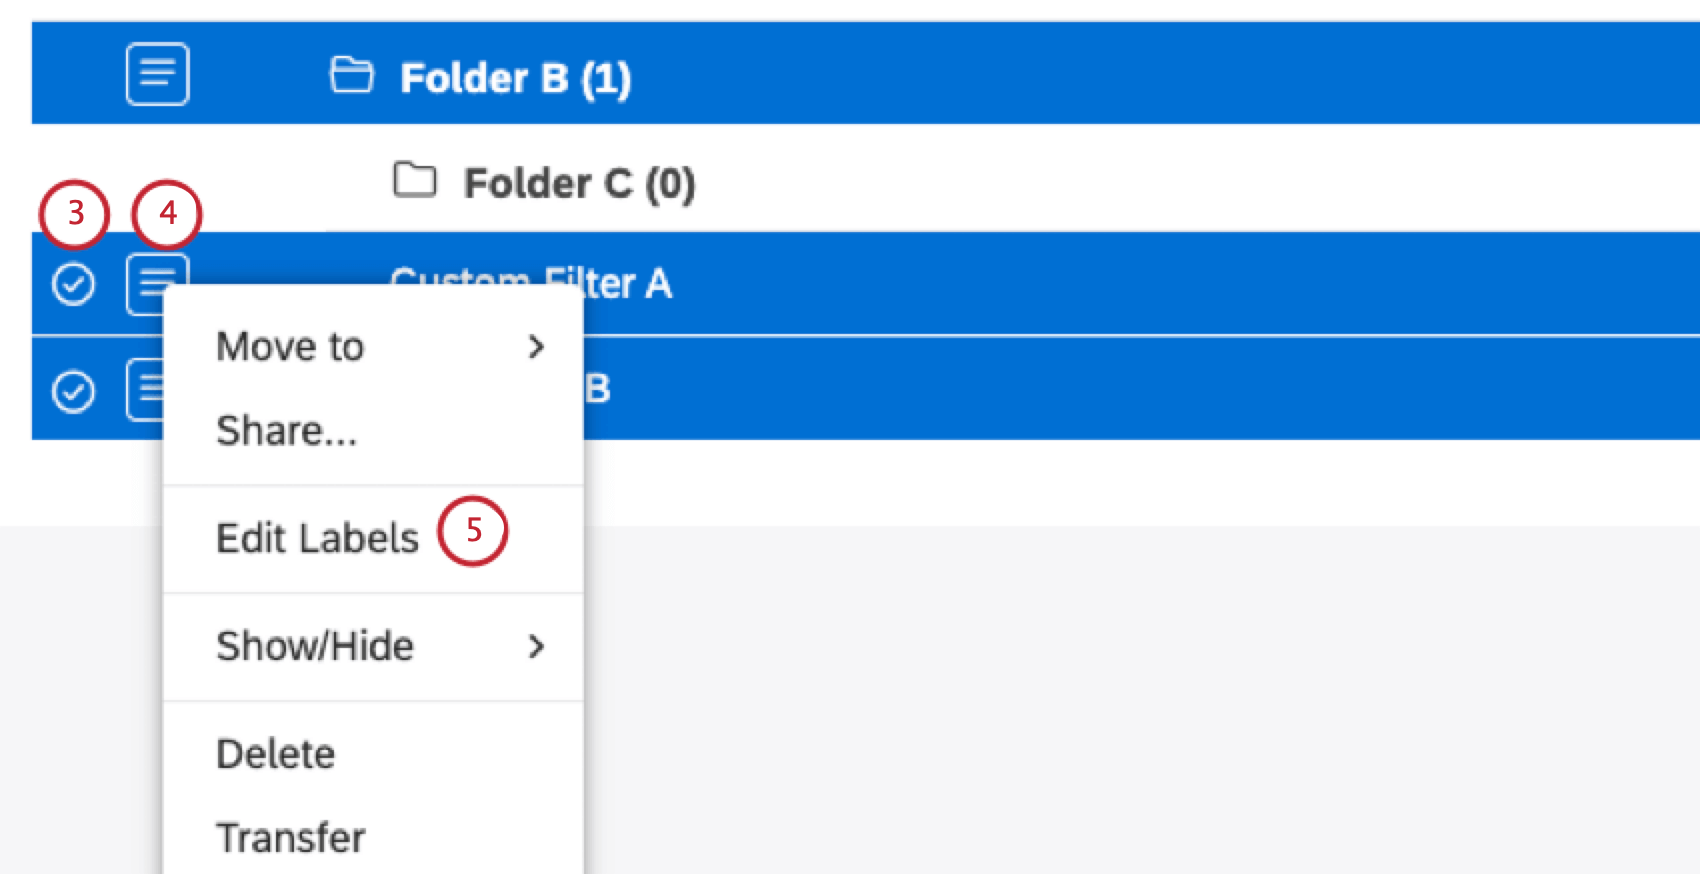
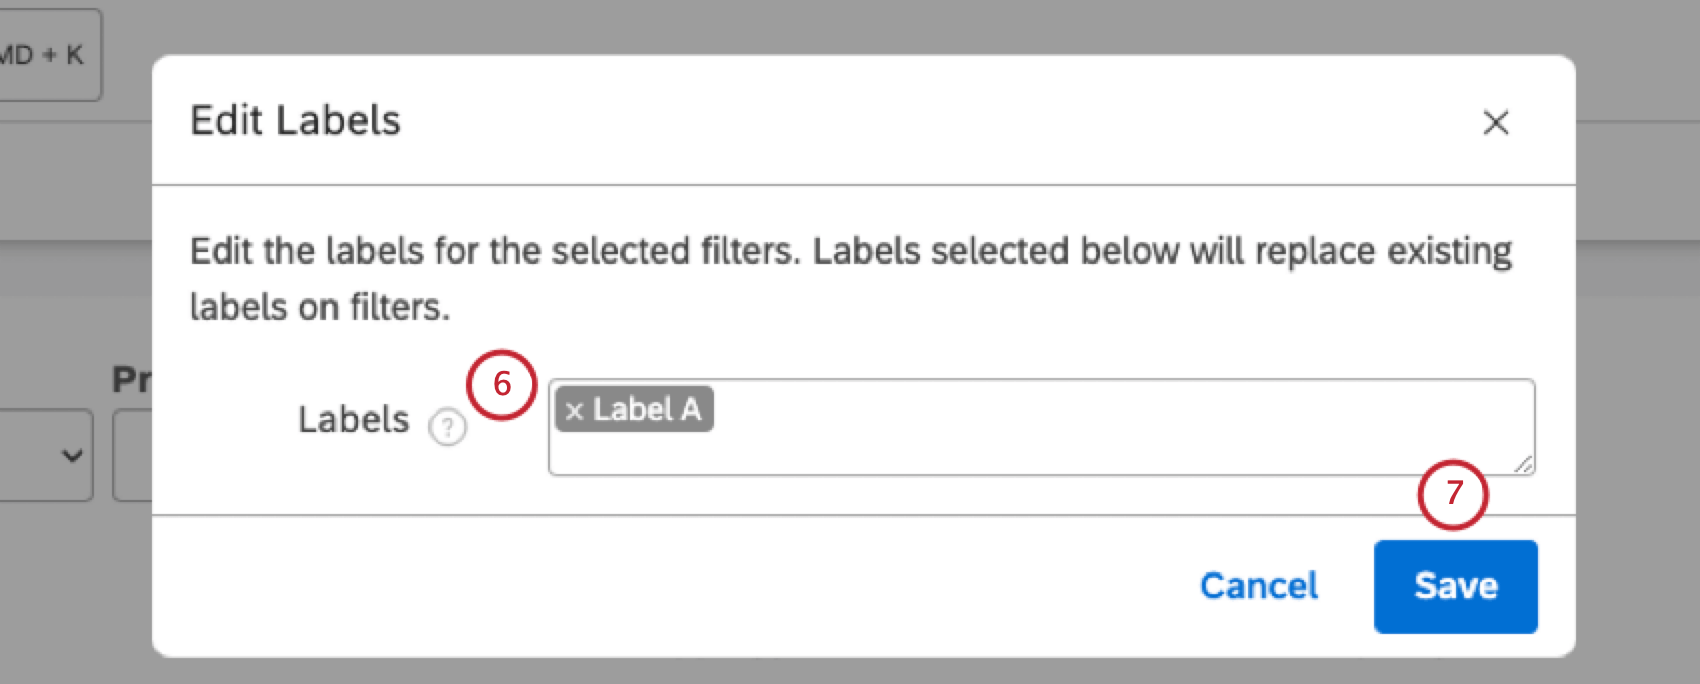
Adding Labels to Multiple Filters
Use this method when you need to label multiple filters at once, overwriting any existing labels.
Attention: Adding bulk labels overwrites all other labels a filter might have.
Qtip: All custom date filters are stored in the Data Filtersfolder.
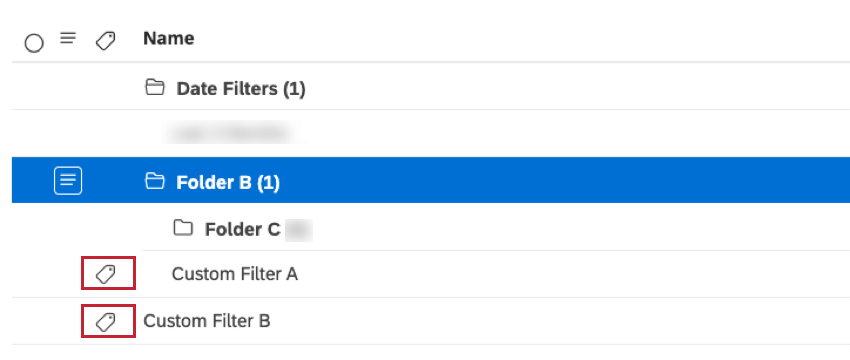
Once you add a label to a filter, a label icon appears next to it on the Filters page.

You can hover over the label icon to see the applied labels. Labels also enhance a filter’s findability via the filters search.
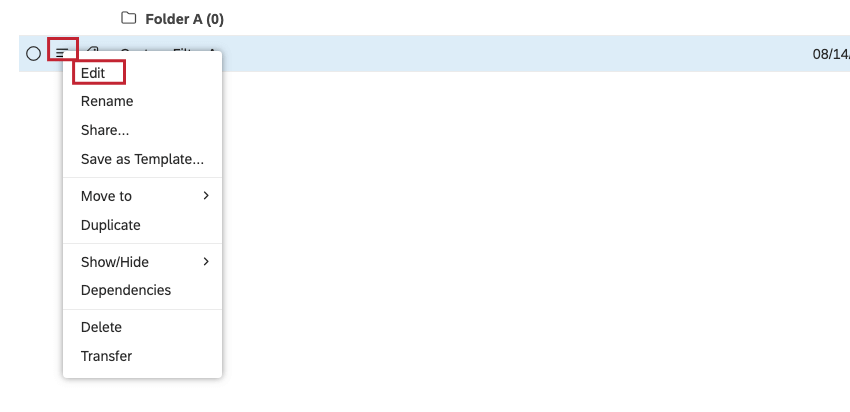
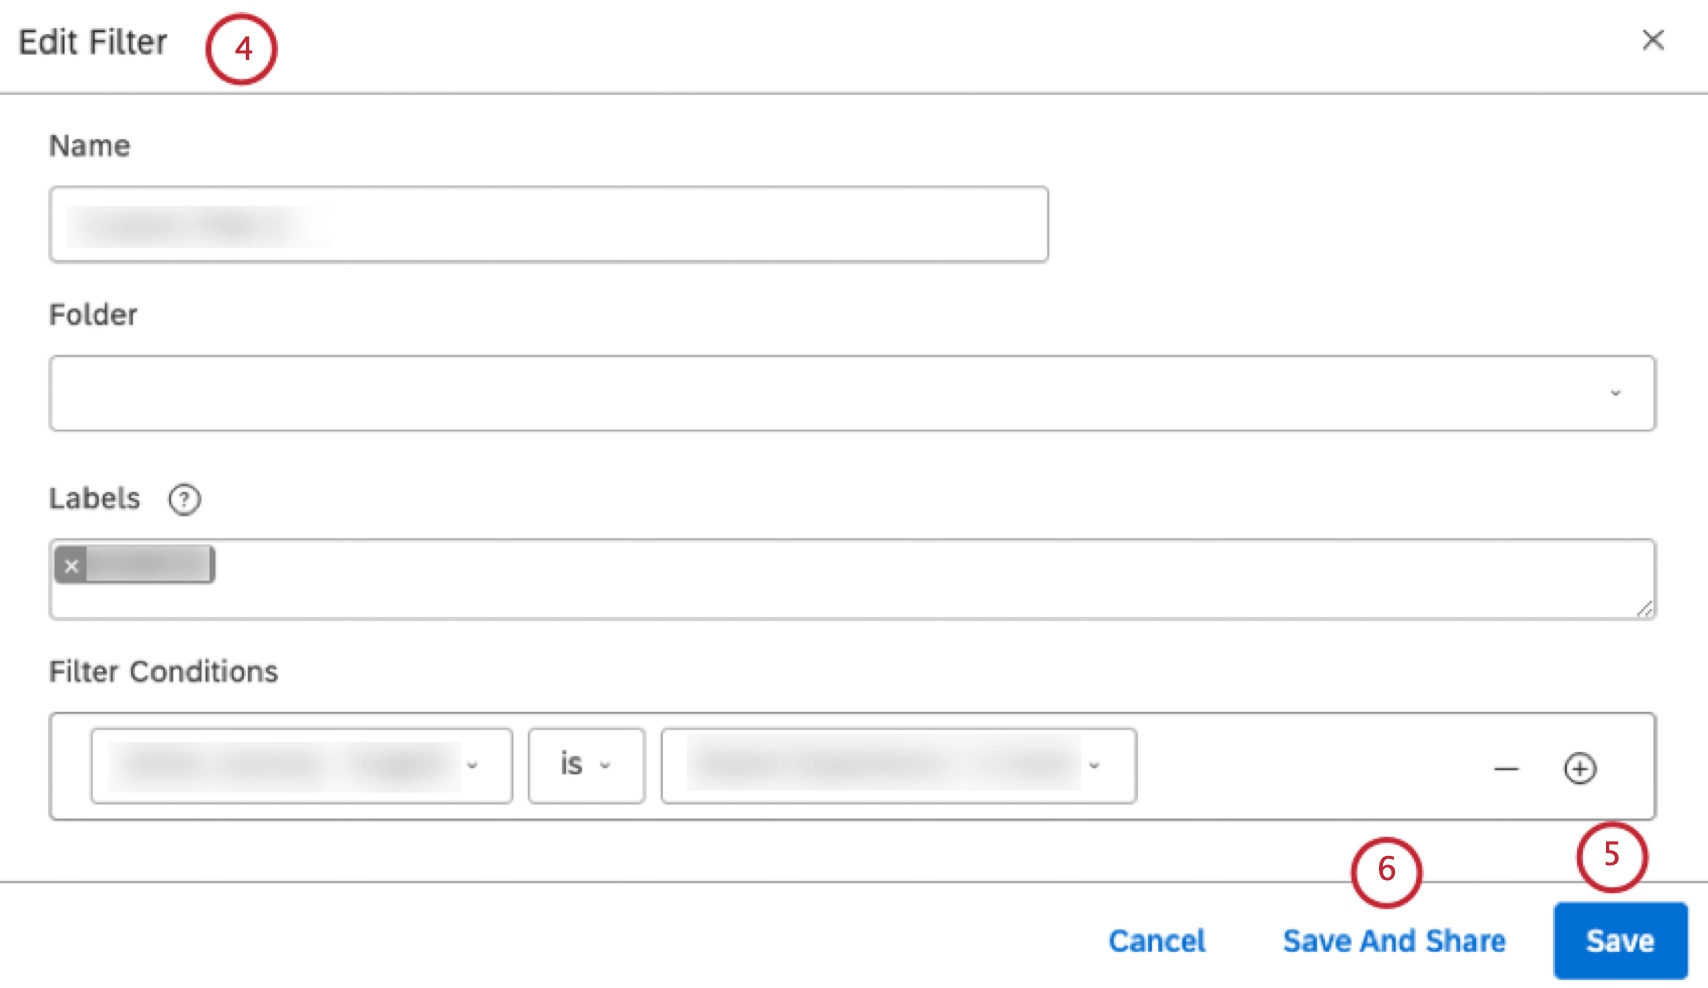
Editing a Filter
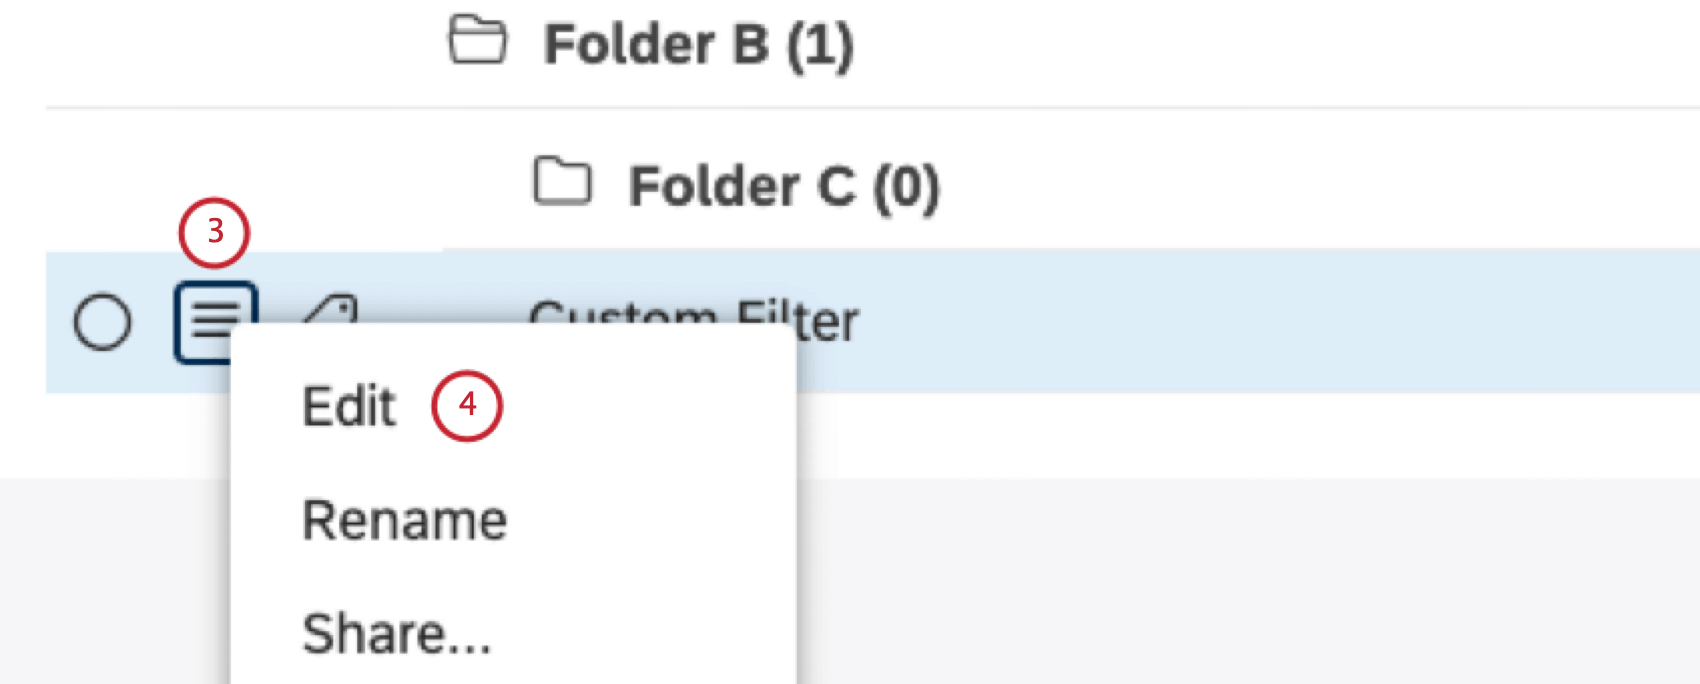
You can edit and rename the filters you created in Studio.
Qtip: Designer filters can be edited in Designer only.
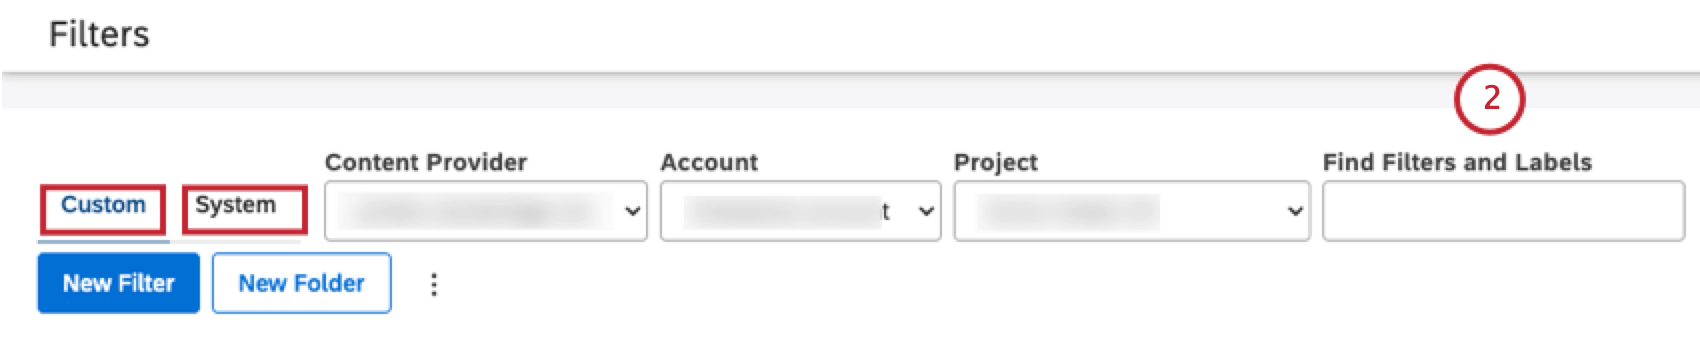
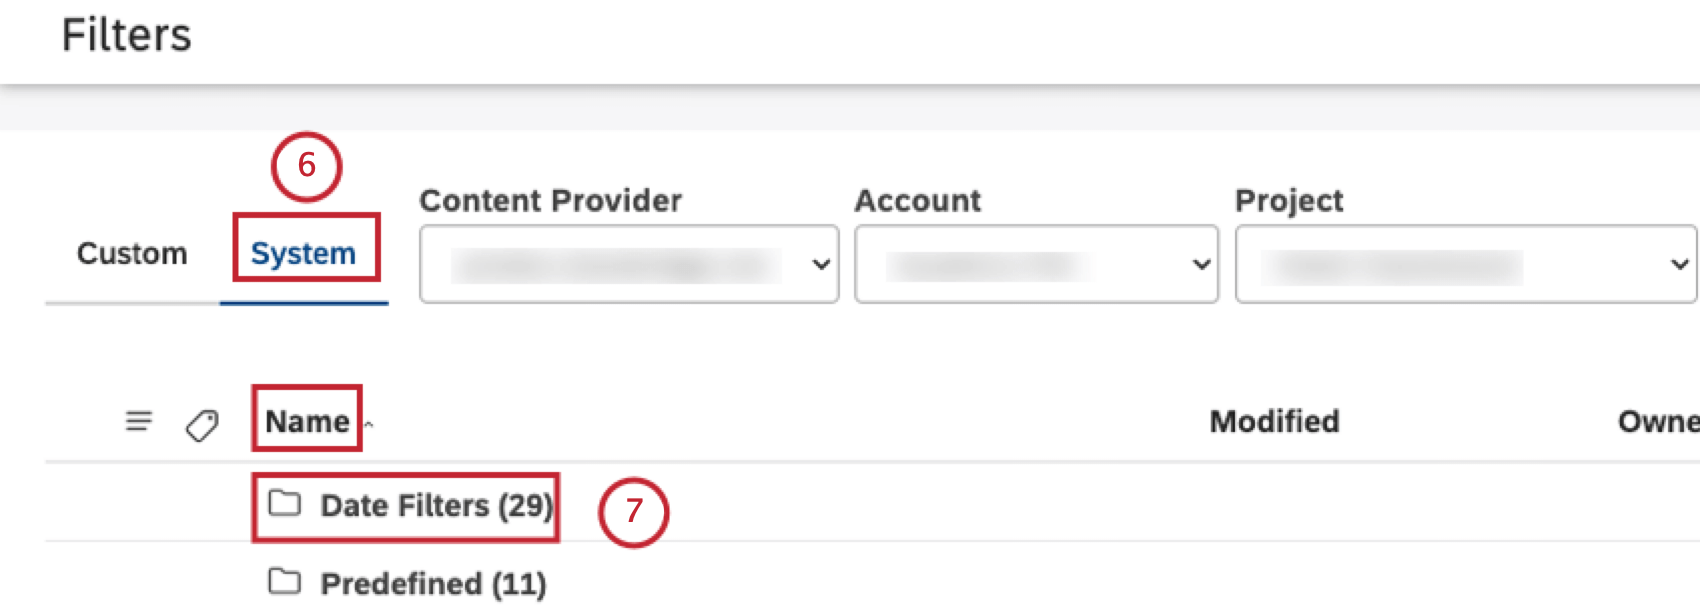
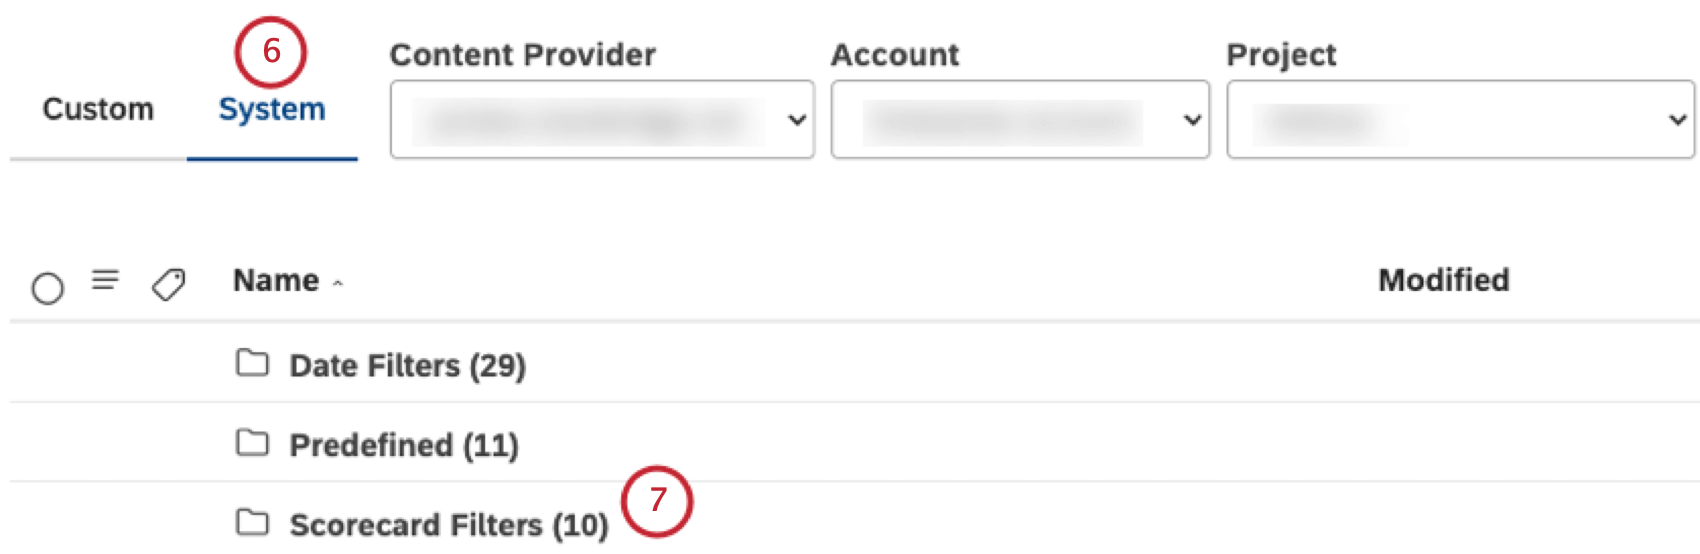
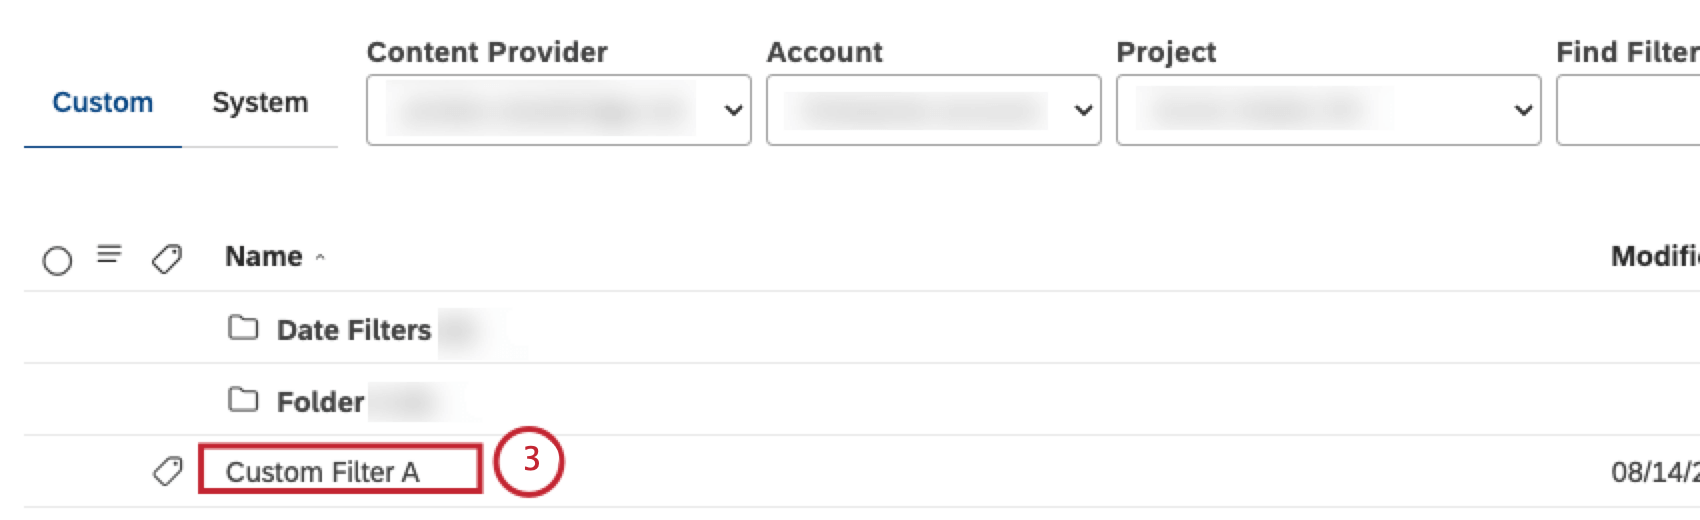
Qtip: You can view user-defined filters in the Custom taband out-of-the-box filters in the System tab.
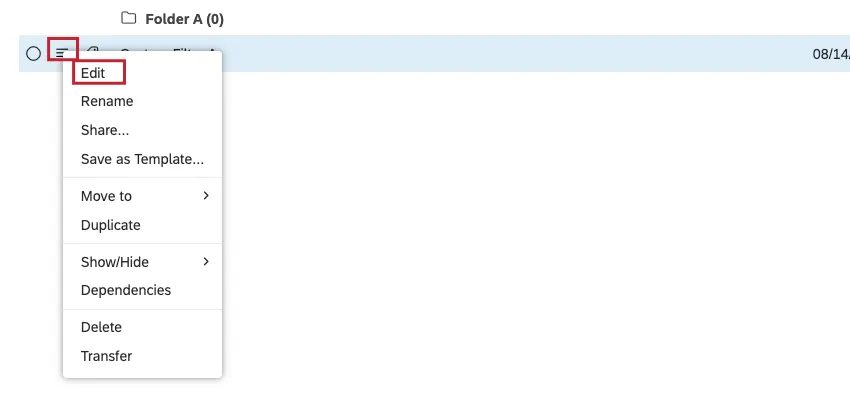
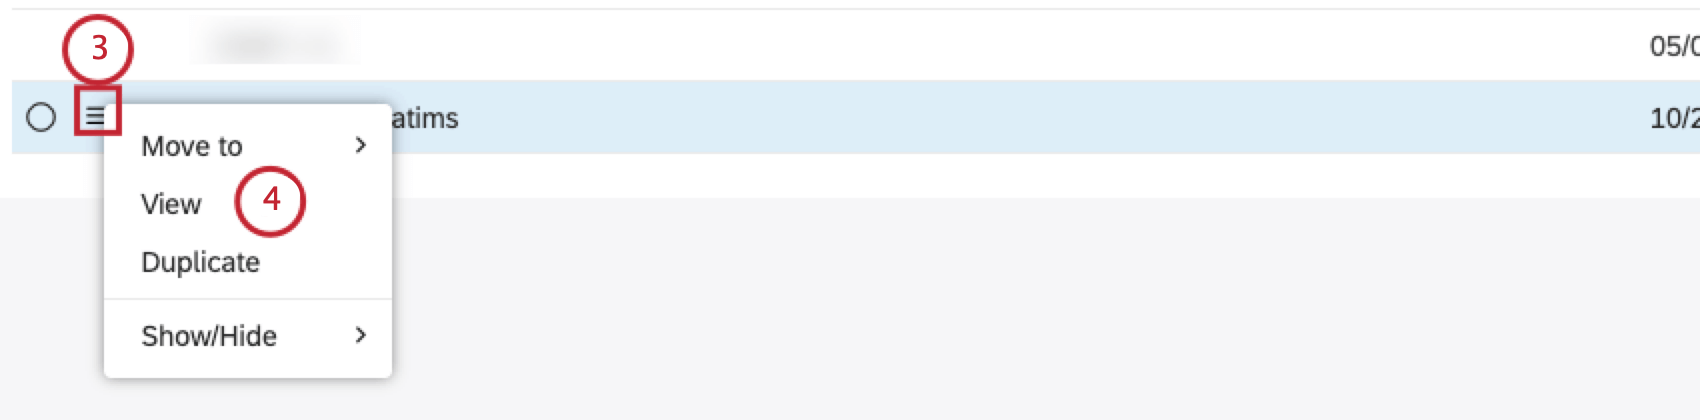
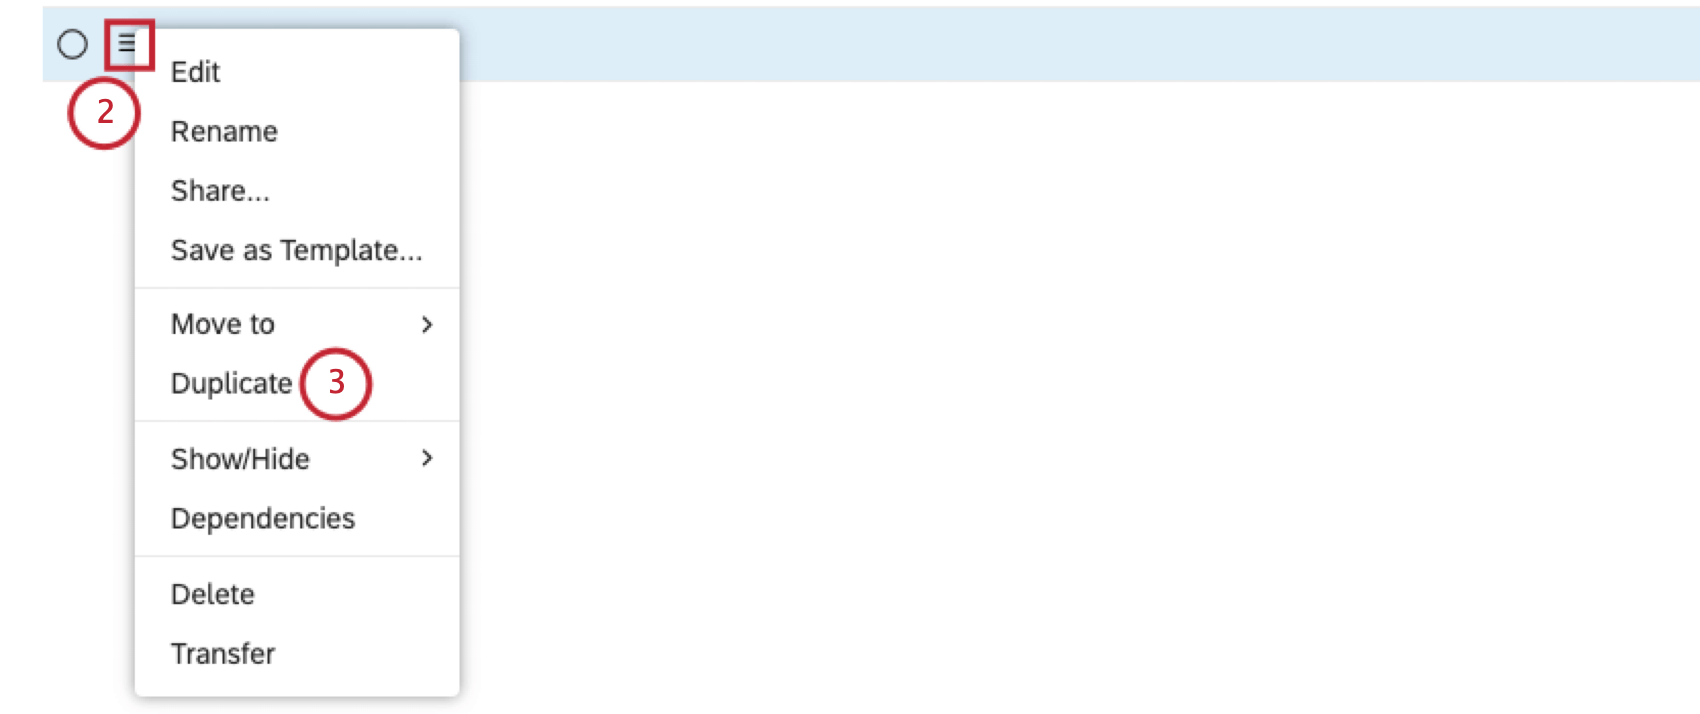
Qtip: Alternatively, expand the actions menu next to the filter and select Edit.
Renaming a Filter
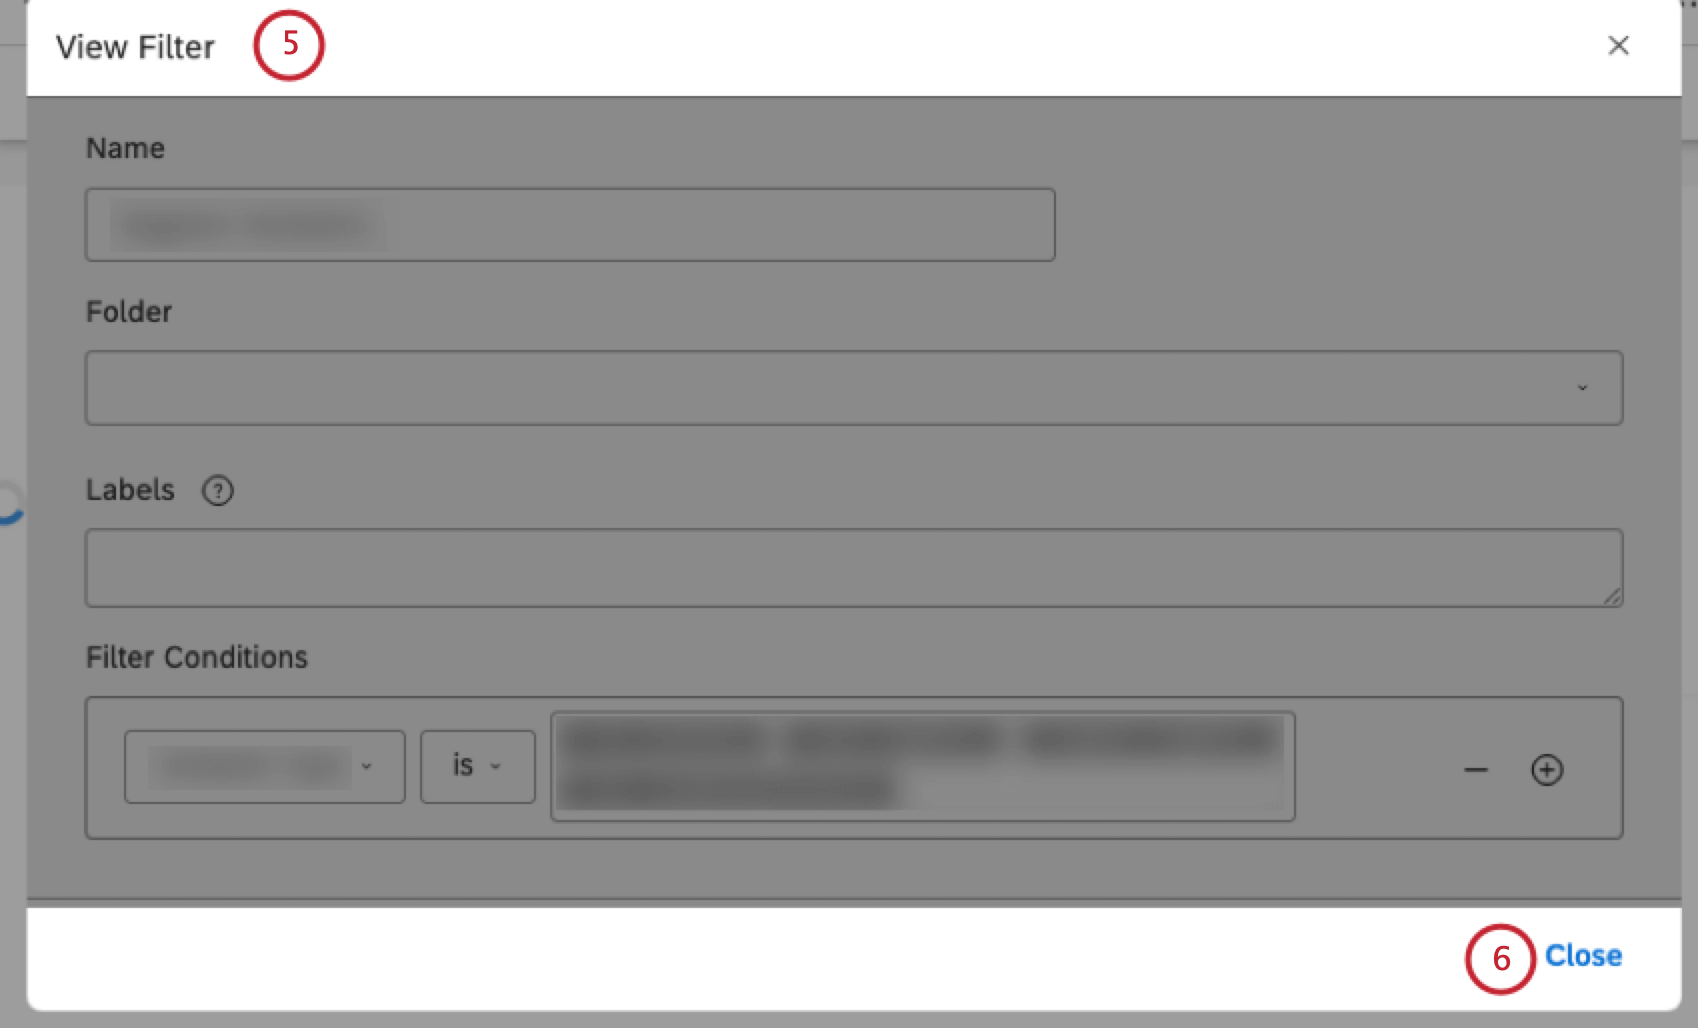
Viewing a Filter
You can view the definitions of Studio filters that are either shared with you or shared publicly, provided that you have the Create Filter permission. Filters cannot be edited during viewing.
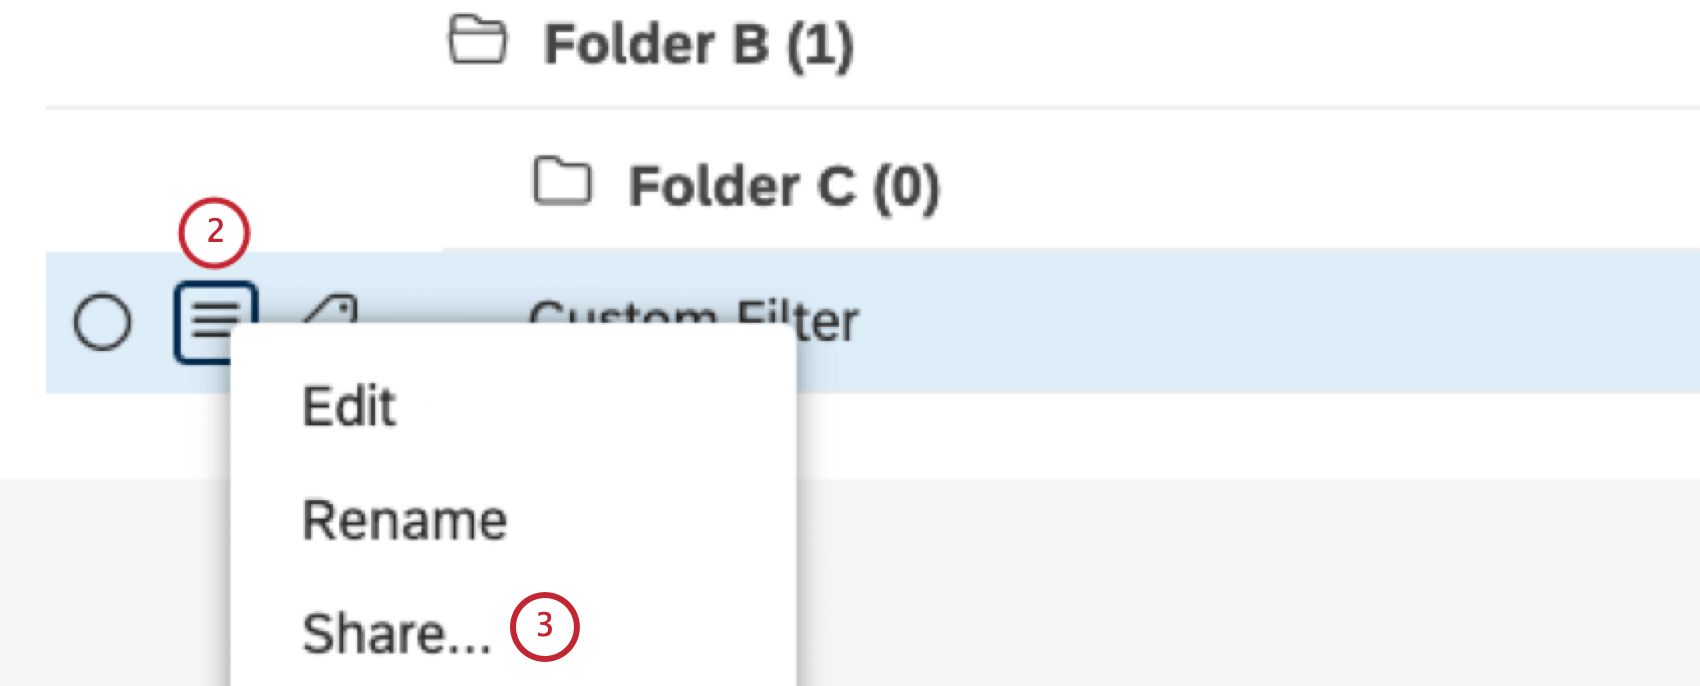
Sharing a Filter
Qtip: Only Studio filters can be shared with other users in Studio.
Qtip: A Share View Filter or Share Edit Filter permission is required to perform this action.
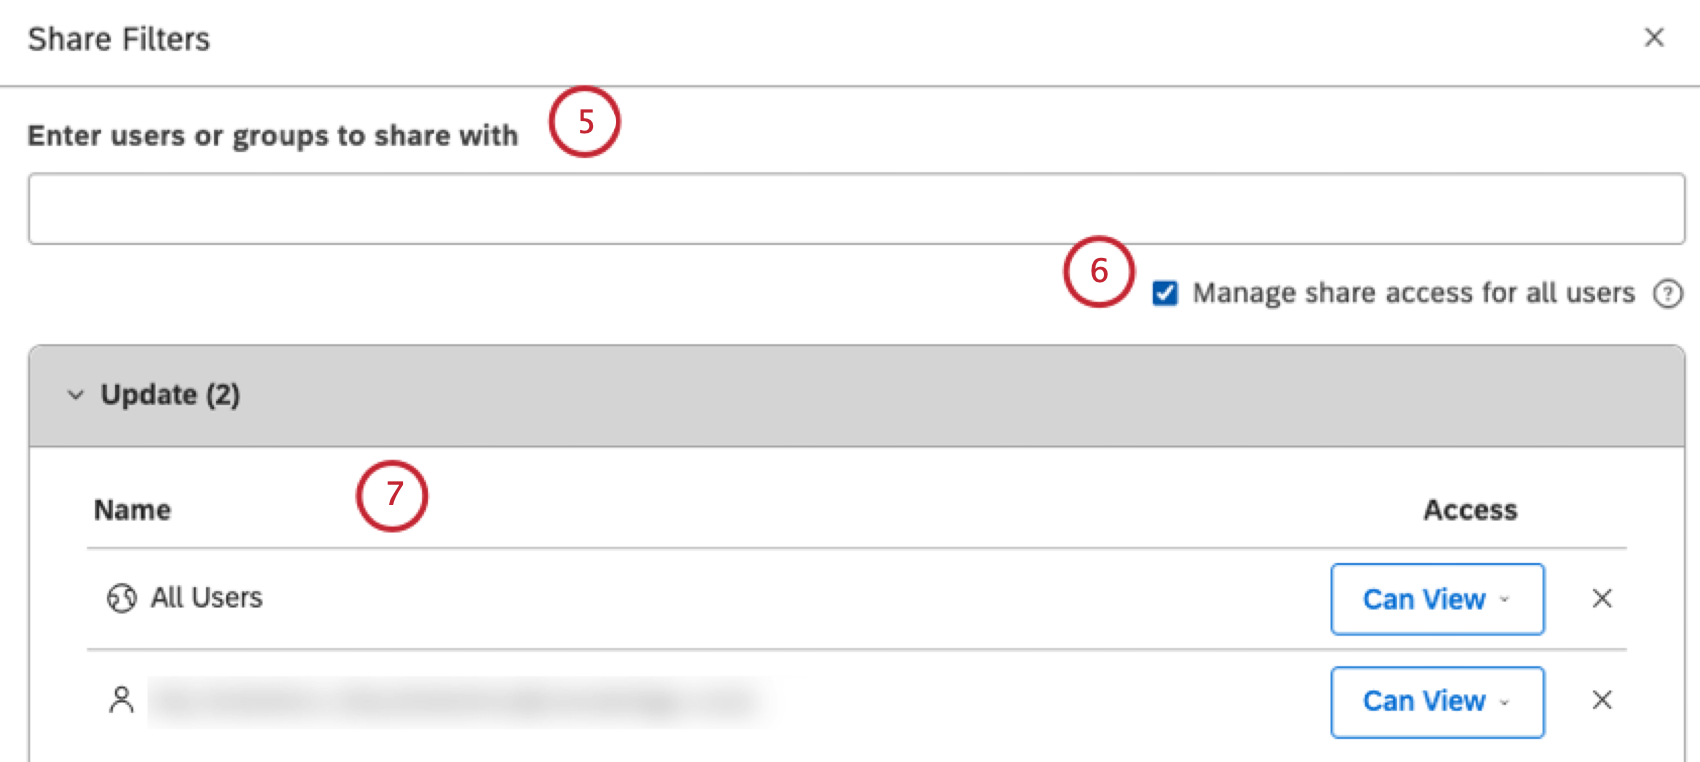
You can share your Studio filters with other users if you wish to let them use these filters in their reports. You can share a filter with individual users, groups, or everyone in your Master Account. When sharing, you can choose between viewer level access which requires a Can View permission or editor-level access which requires a Can Edit permission.
Qtip: You can also share a filter when creating or editing a filter by clicking the Save and Sharebutton, and share multiple filters at once.
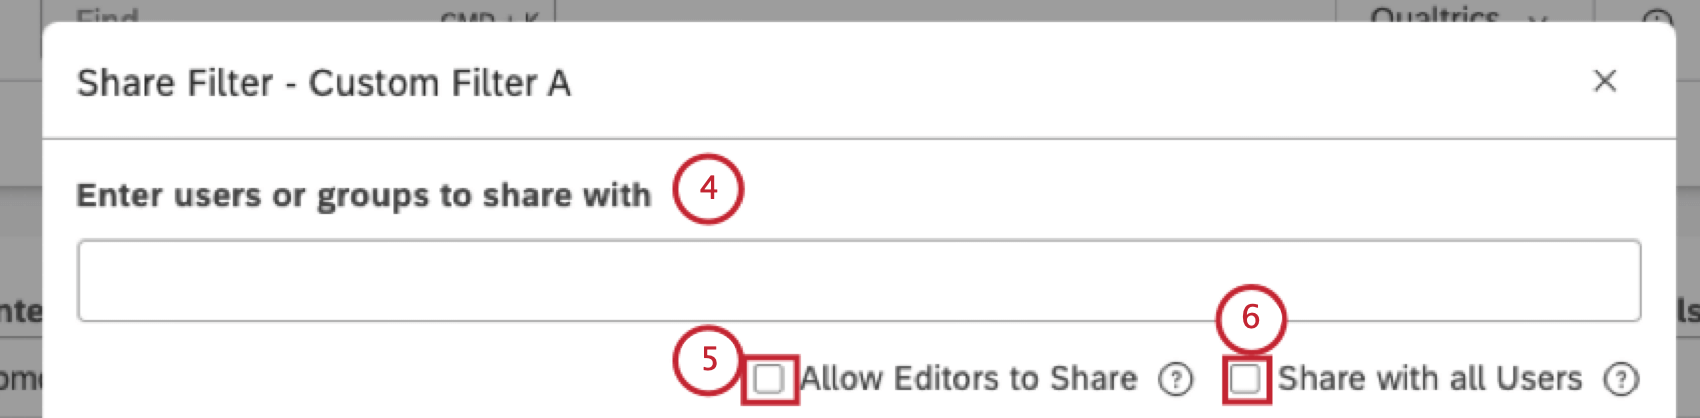
Qtip: By adding or removing people and groups from this list, you control who can work with the filter. When you share a filter with a group, all members of that group will be able to use your filter. Users who join the group after you have shared your filter will still get access to it. As soon as any user leaves the group, your filter will no longer be accessible to that user.
Qtip: This action requires a Share To All permission.
Qtip: A public filter will also be accessible by users who register after the filter is created.
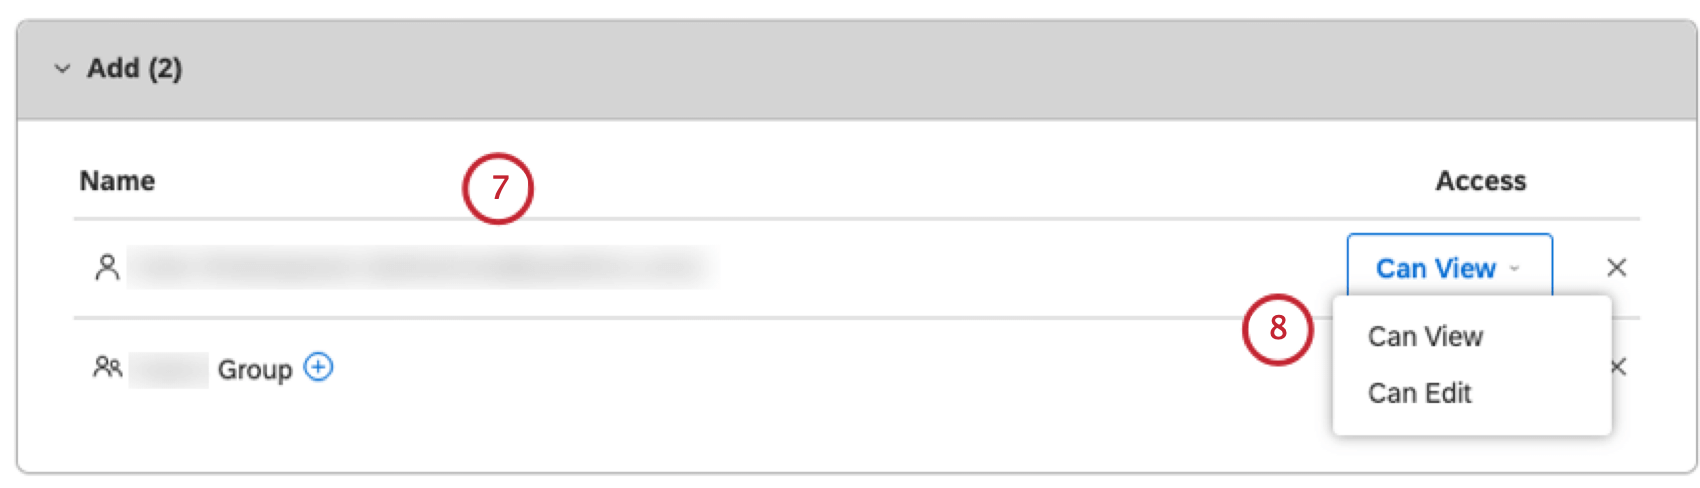
Qtip: Add as many users and groups to the Add section as you need.
Qtip: The Can Edit access can only be granted to users that have the Create Filter permission and at least read-only data access to the corresponding project. It’s not available when sharing a filter with all Studio users or unregistered users.
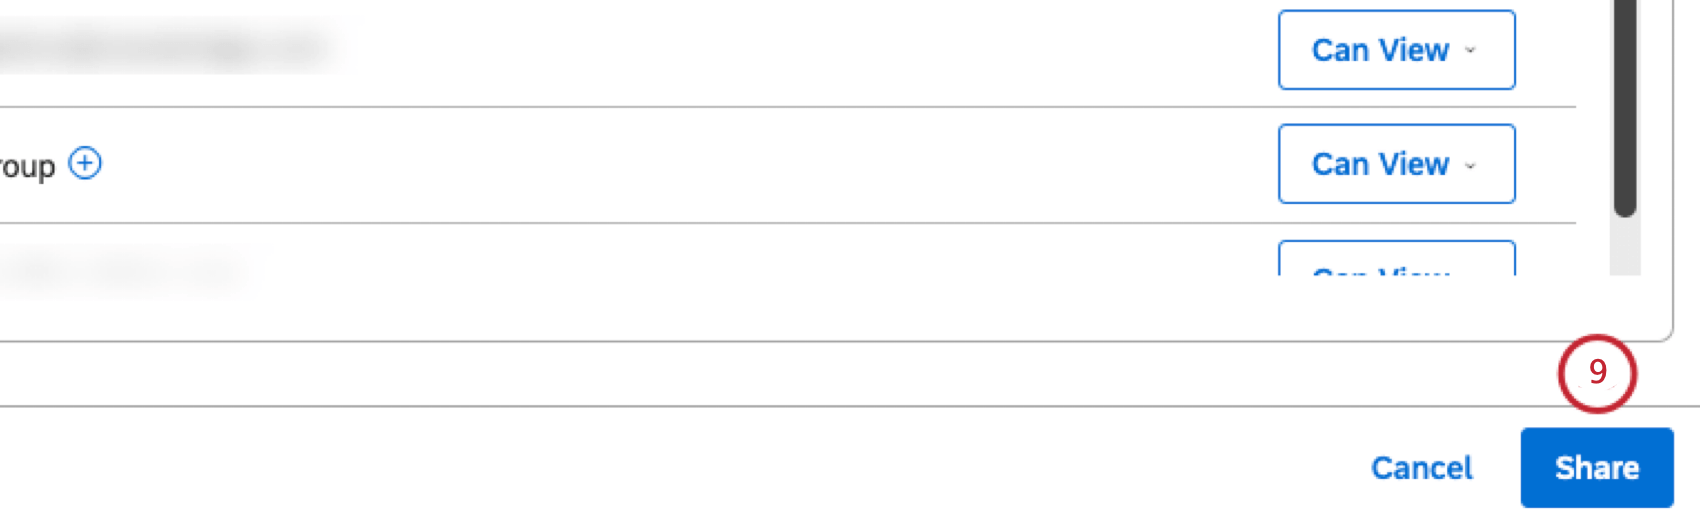
Qtip: Once you share a filter, its status changes from Private to Shared or Public (if you selected the Share with all Users checkbox). If a filter is shared with a user, a group or both, the users will receive a notification to let them know that the filter has been shared with them.
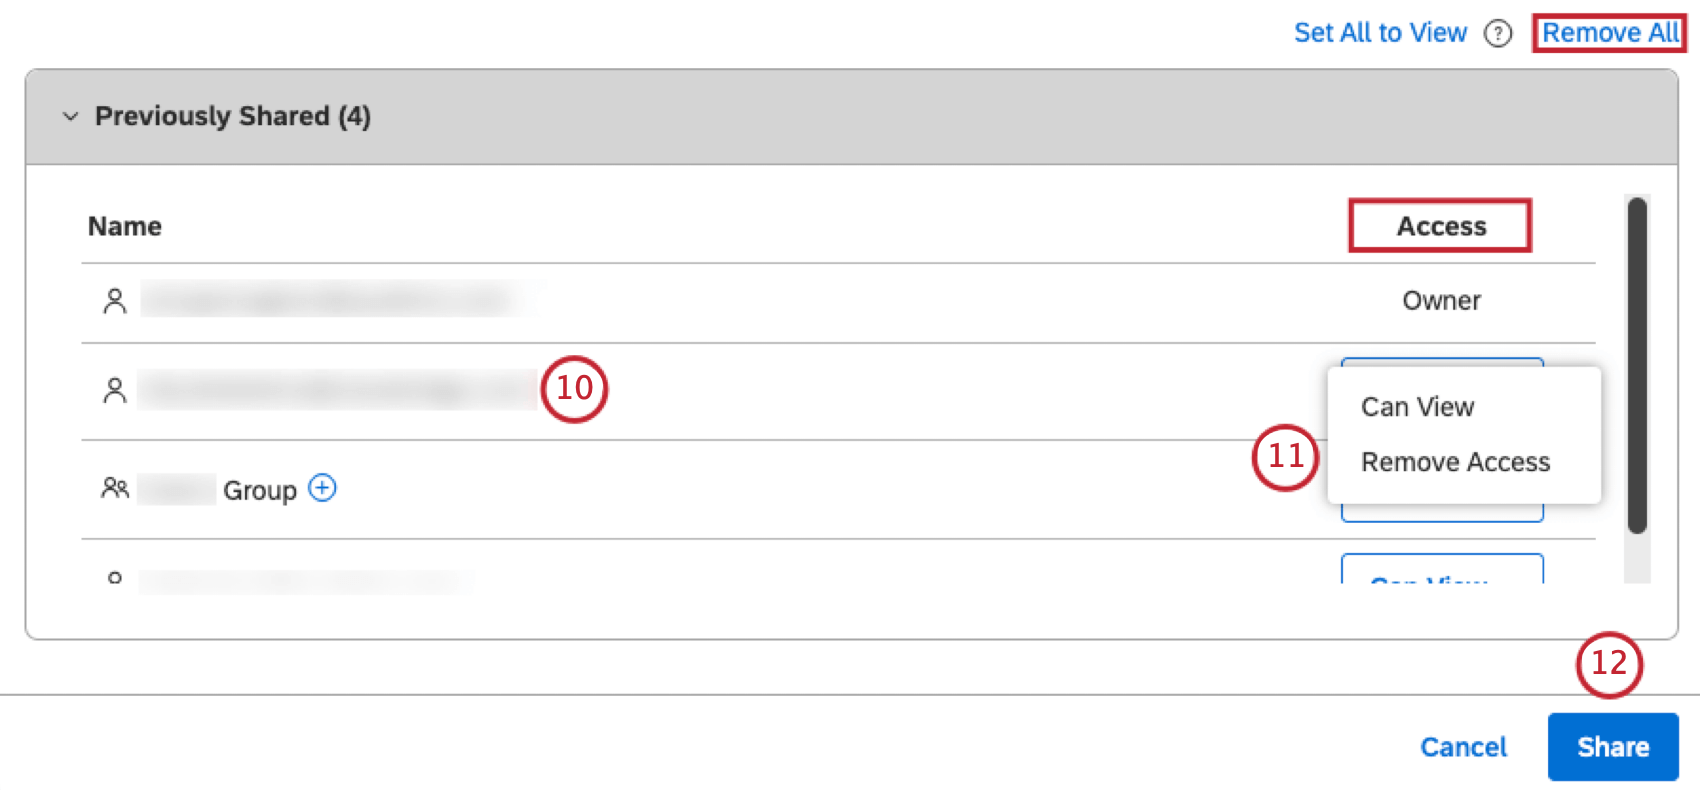
Qtip: When a filter is shared with a group, removing a user from that group will also make your filter inaccessible to that user.
Qtip: Alternatively, to stop sharing your filter with everyone, click Remove All.
Qtip: If the filter applied to a widget is unshared or deleted, the widget will display an error message without removing the filter automatically. To fix this, the widget owner needs to update either the widget or the filters.
Bulk Sharing Filters
Attention: Bulk sharing overwrites any previously shared permissions a user may have.
Qtip: Bulk sharing only works for filters you own. You can share several filters at once.
You can share multiple filters at once.

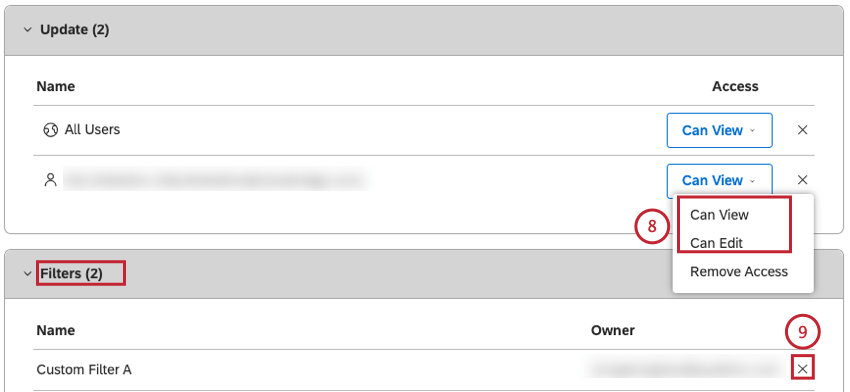
- Can View: Give viewer access.
- Can Edit: Give editor access.
Can View vs. Can Edit
The following table provides an overview of the permissions available for each access level when sharing a filter.
| Permission | Owner | Can Edit | Can View |
|---|---|---|---|
| Can view a filter | Yes | Yes | Yes |
| Can use a filter in reports | Yes | Yes | Yes |
| Can filter edit name and definition | Yes | Yes | No |
| Can share a filter | Yes | No (Unless the Allows Editors to Share checkbox is selected) | No |
| Can change filter owner | Yes | No | No |
| Can delete a filter | Yes | No | No |
Transferring Filters
Qtip: Once you transfer filter ownership to another user, you won’t be able to undo this action. Only the new owner will be able to change filter ownership. You can retain a Can Edit permission to the filter by selecting the Retain Share Edit Access option during the transfer.
Filter owners can transfer 1 or more filters to other users, making them the new owners. Filter ownership can only be transferred to users who satisfy the following conditions:
- All Filters: Have at least read-only access to the corresponding project in the Content Provider.
- Non-Date Filters: Have a Create Filter permission.
- Date Filters: Have a Manage Date Filter permission.
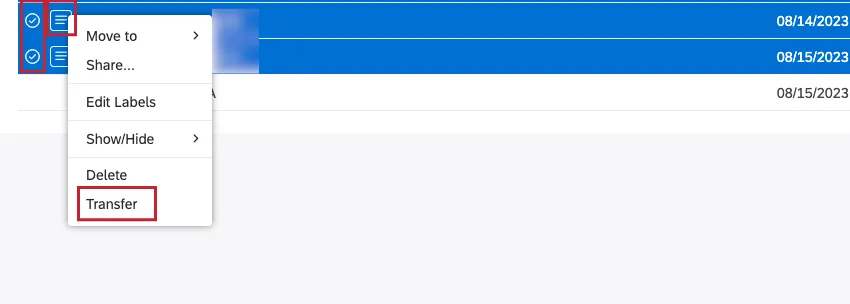
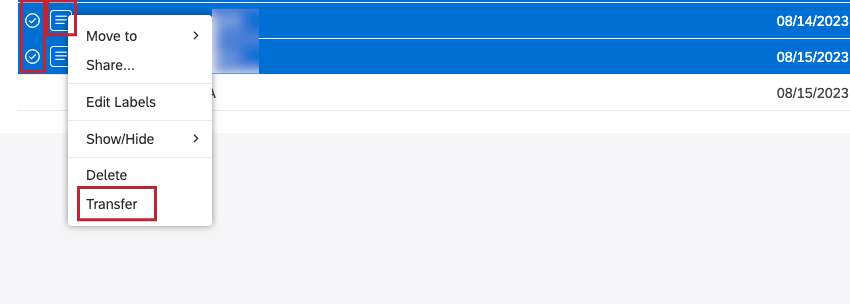
How to Transfer Filters
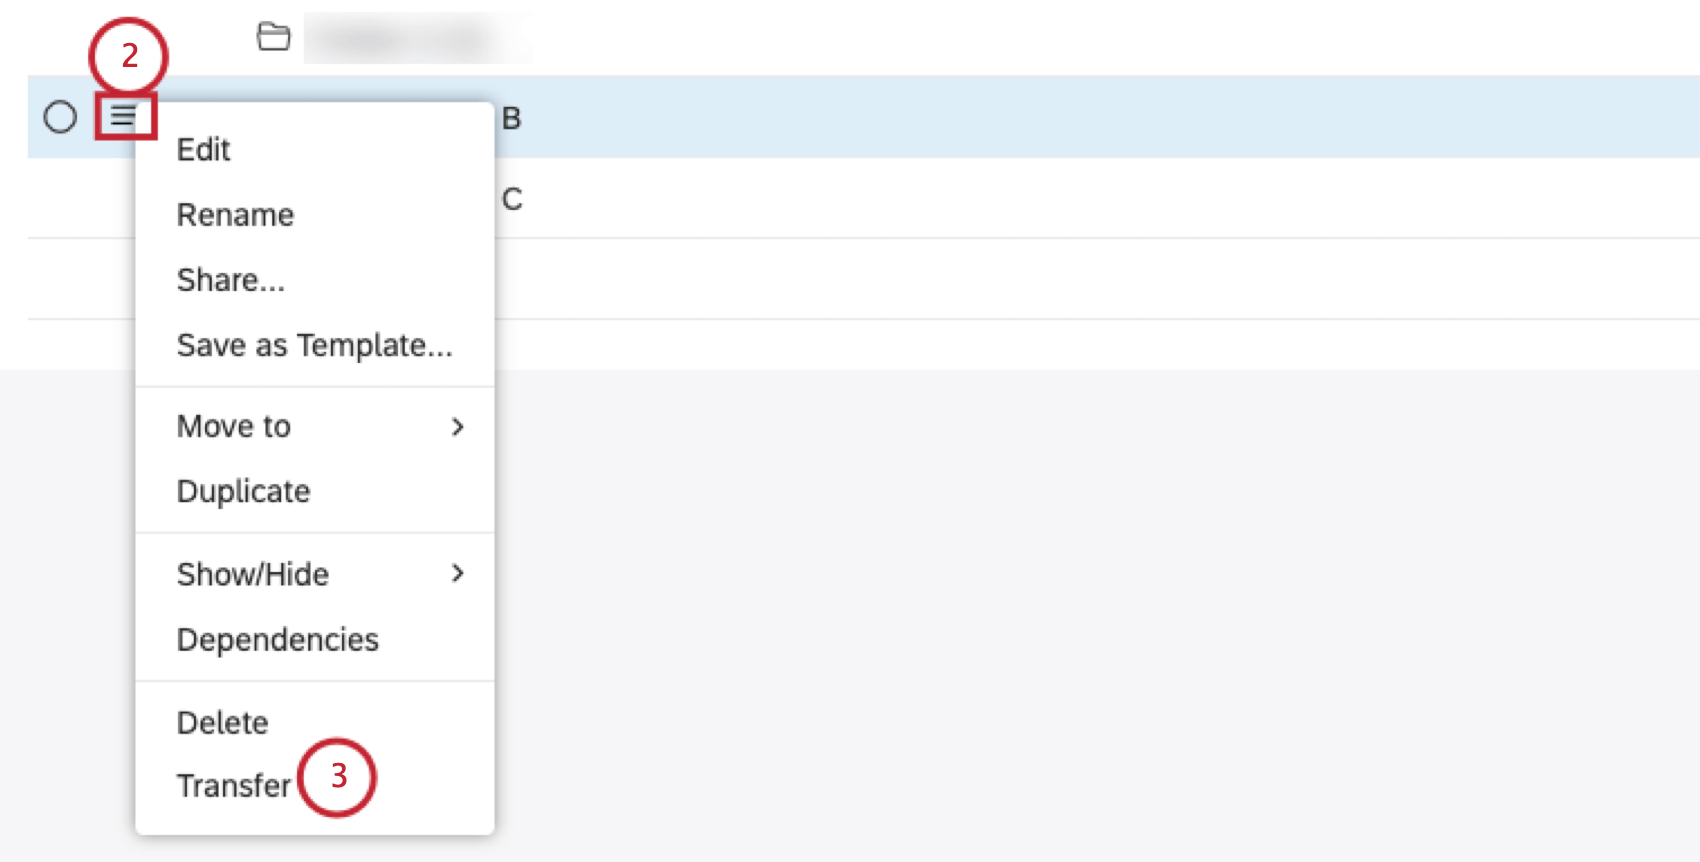
Qtip: To transfer several filters at once, select the checkbox next to each of the filters you wish to transfer, expand the actions menu next to 1 of the selected filters and select Transfer.
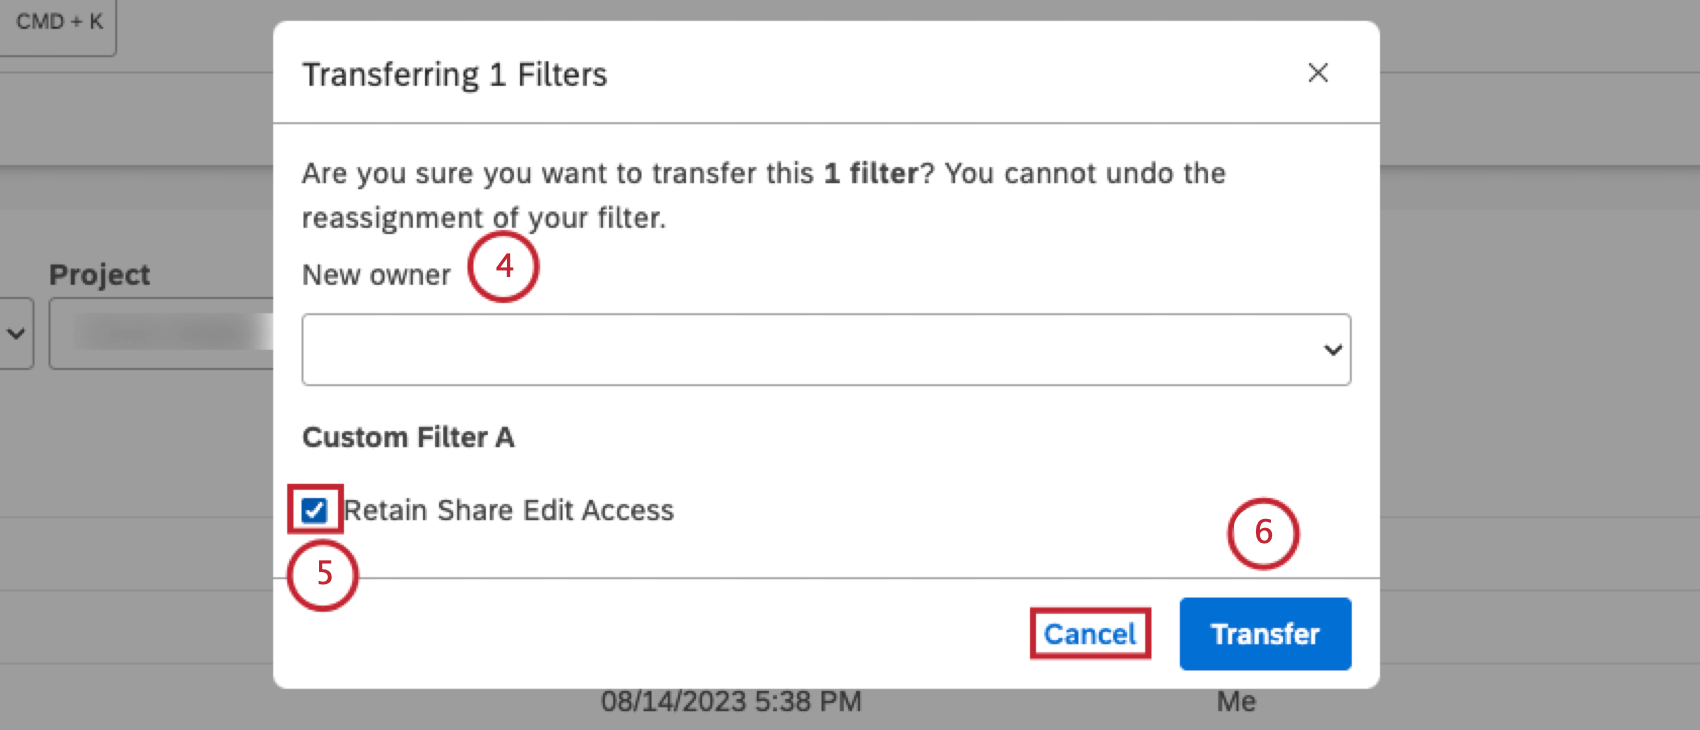
Qtip: Deselect the Retain Share Edit Access checkbox if you do not need to access the filters.
Qtip: To cancel the transfer, click Cancel.
After you click Transfer, the filter is transferred to the new owner, who will receive an in-app notification for each filter that is transferred.
Duplicating a Filter
In addition to creating a new filter, you can duplicate the filters you created previously.
Qtip: When you duplicate a hidden filter, its copy will not be hidden.
Qtip: You can edit and rename the duplicate filter.
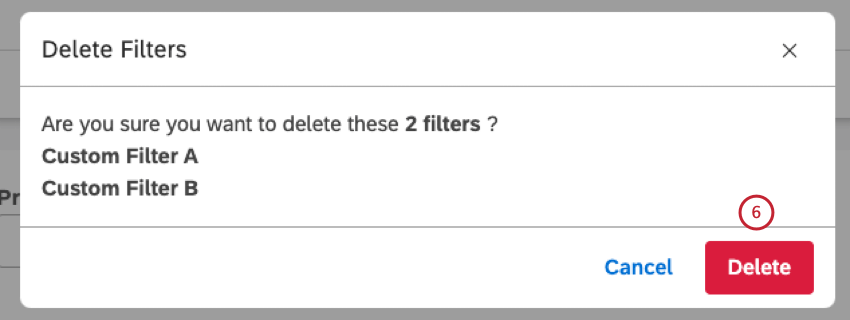
Deleting a Filter
You can delete filters if you no longer need them. You can only delete the filters you created. If another user shared a filter with you and you no longer need it, they can stop sharing it.
If you stop sharing or delete a filter that is applied to a widget, the widget will display an error message without removing the filter automatically. To fix this, the widget owner needs to update either the widget or the filters.
Deleting a filter puts it into the recycling bin, where it can be restored for a limited time.
Deleted objects remain in the recycling bin for 30 days. During this period you can restore a deleted object.

For information on restoring deleted objects, please see the Recycling Bin page.
That's great! Thank you for your feedback!
Thank you for your feedback!