

Uploading Historical Data (EE)
What's on this page
About Uploading Historical Data
There are times when you need to upload historical data for use in your employee dashboards. For example, you may want to compare the feedback provided by your employees this year with the feedback provided last year, to see if there are common themes or improvements. There are several steps to importing historical data into Qualtrics, including recreating the survey questions in Qualtrics, importing the participants, generating their hierarchy, mapping the old and new hierarchies together, and adding the historical source to your dashboard. This page will take you through all the processes involved.
Qtip: The steps on this page are tailored to Engagement projects. If you are working with Lifecycle or Ad Hoc Employee Research projects, there are no hierarchies, which means you can skip Steps 7 and 13-15.

Attention: If you do not have unique ID, you will need to make sure your file has an Email column instead of a Unique Identifier column, and you will need to use the Legacy importer.

Qtip: If you make changes to a historical data source, all you need to do to update all the dashboards connected to it is update all responses with new metadata.
Uploading Historical Data
These are high-level steps to help you import historical data. You will need to follow the links for a more detailed breakdown of each process.
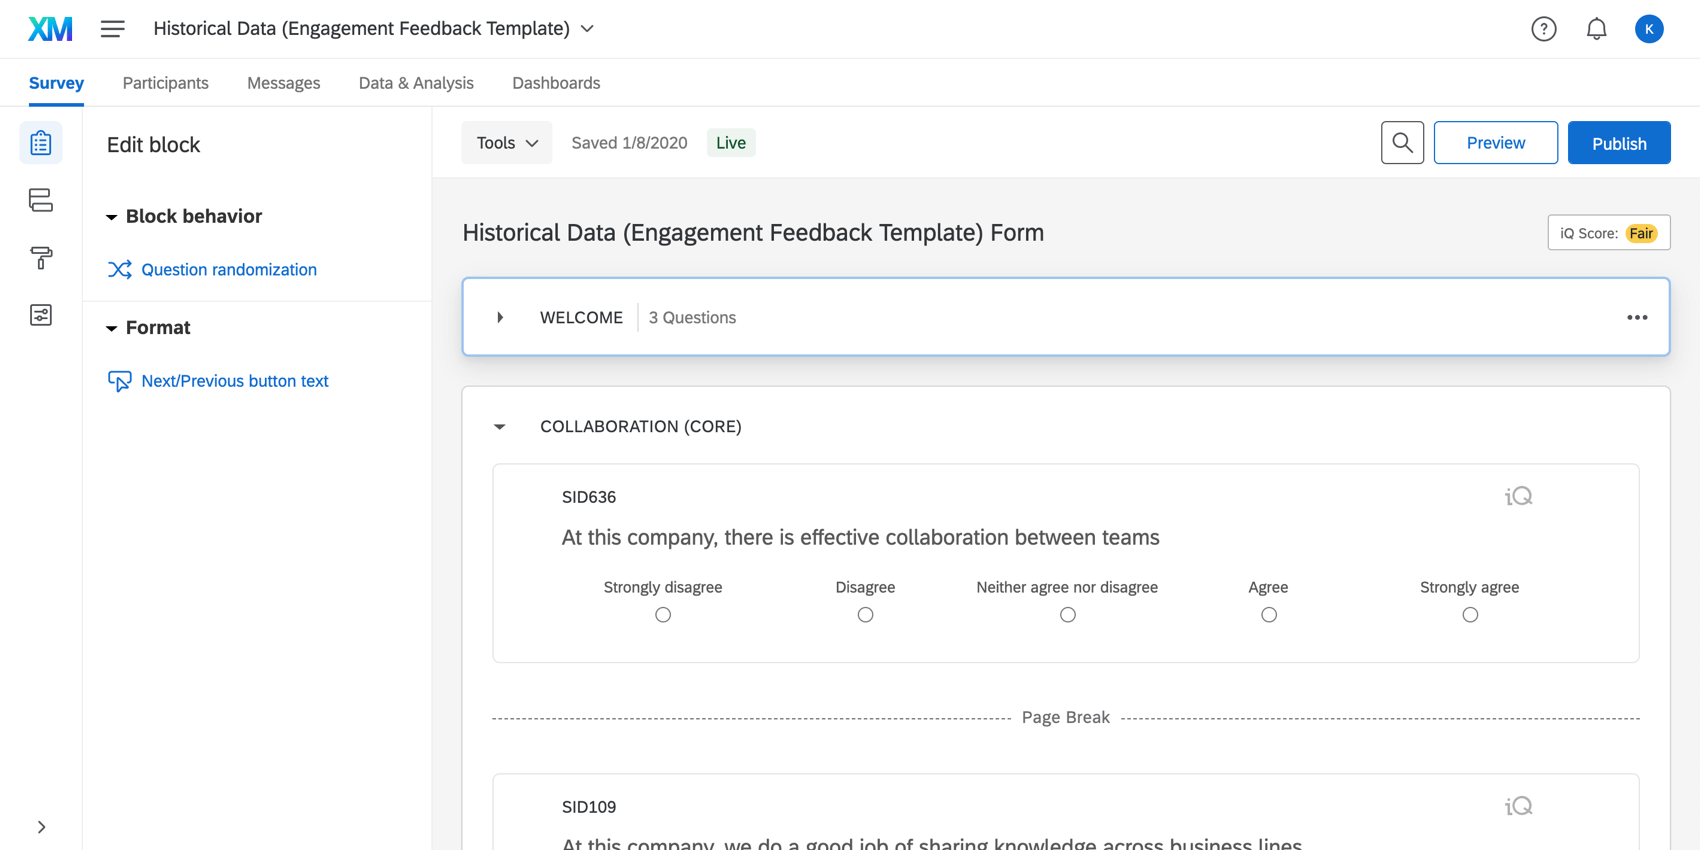
Qtip: See Creating & Editing Questions for a guide. If the questions are the same as another engagement project in your account, consider copying the old project instead of creating a new one.
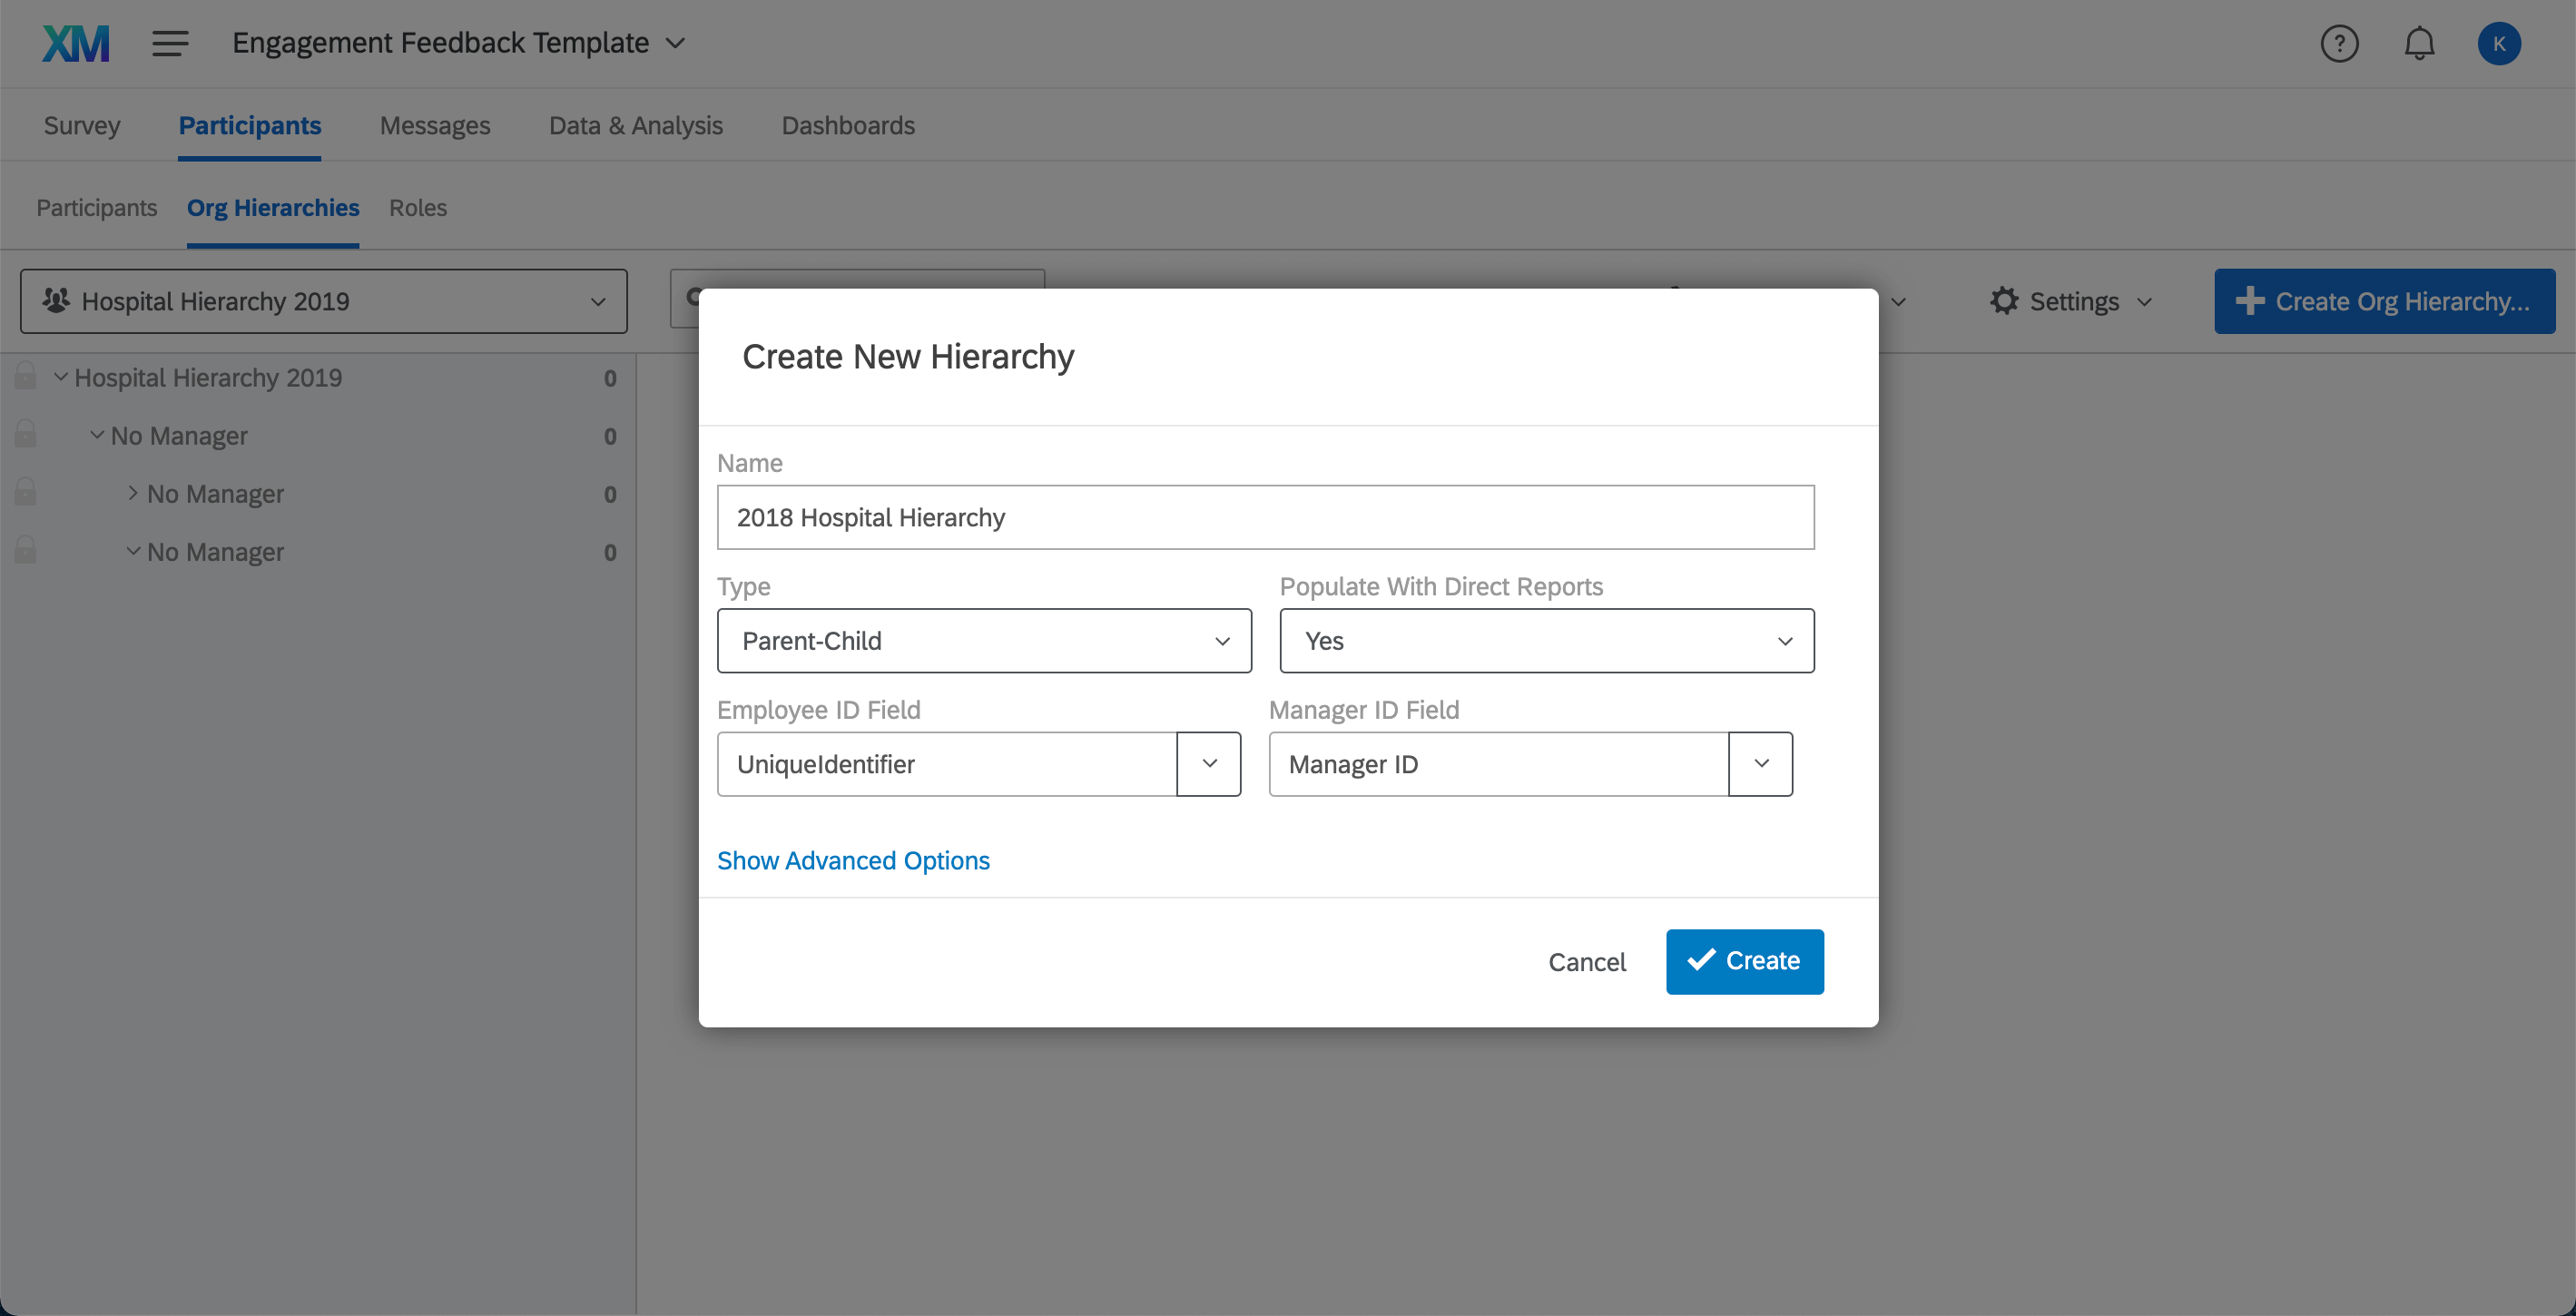
Qtip: Remember this must be the hierarchy that was in place when the historical data was collected. Do not upload the most recently updated employee hierarchy to the historical project.
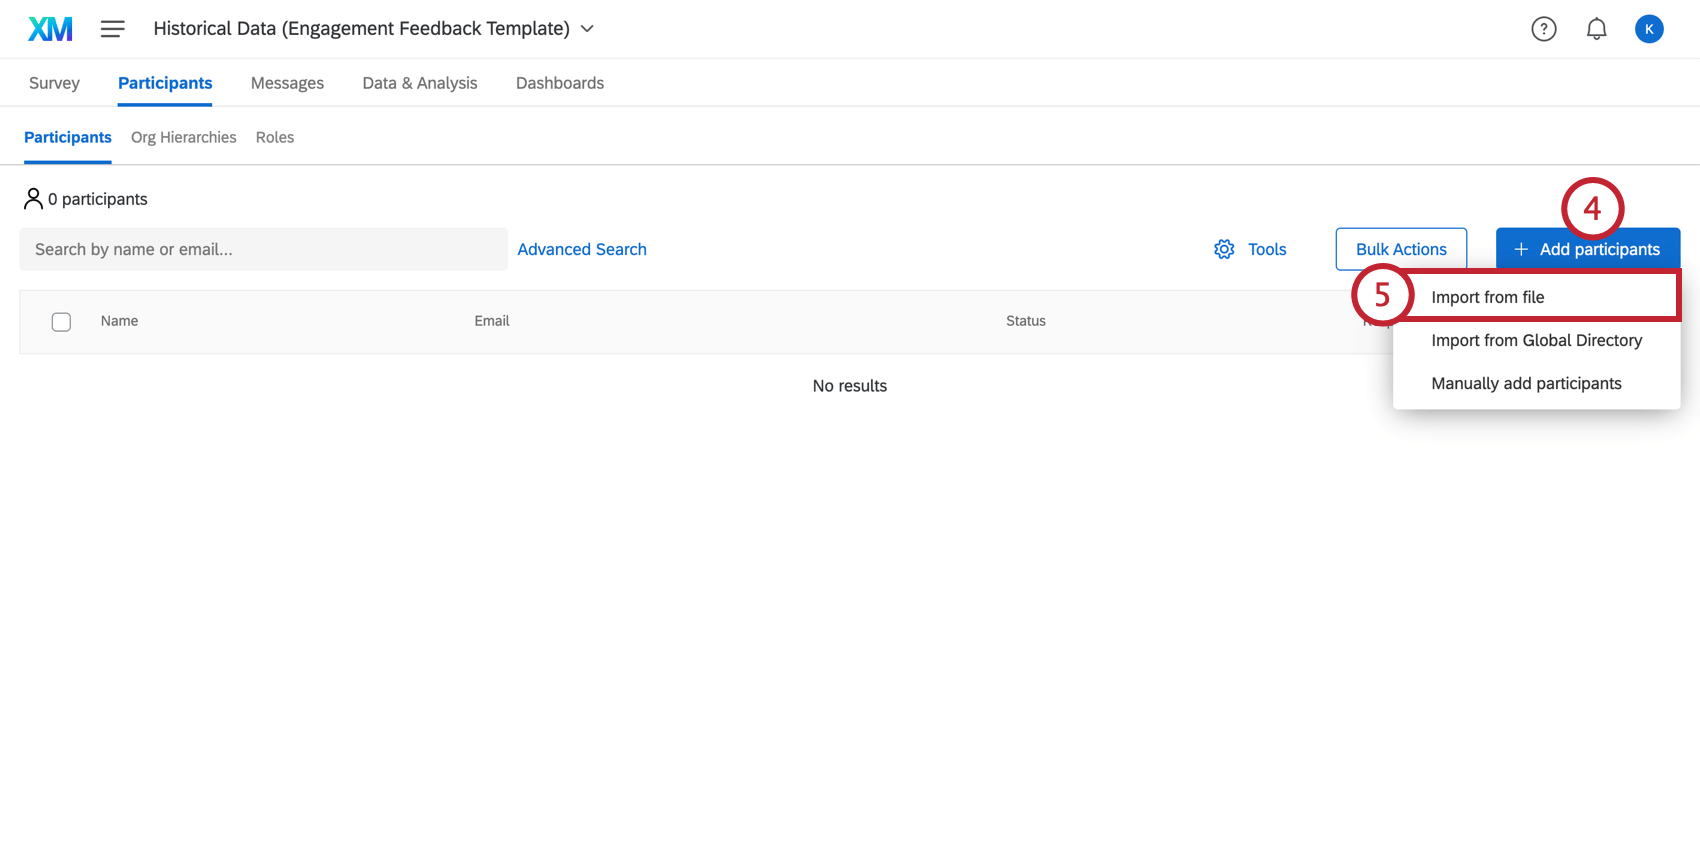
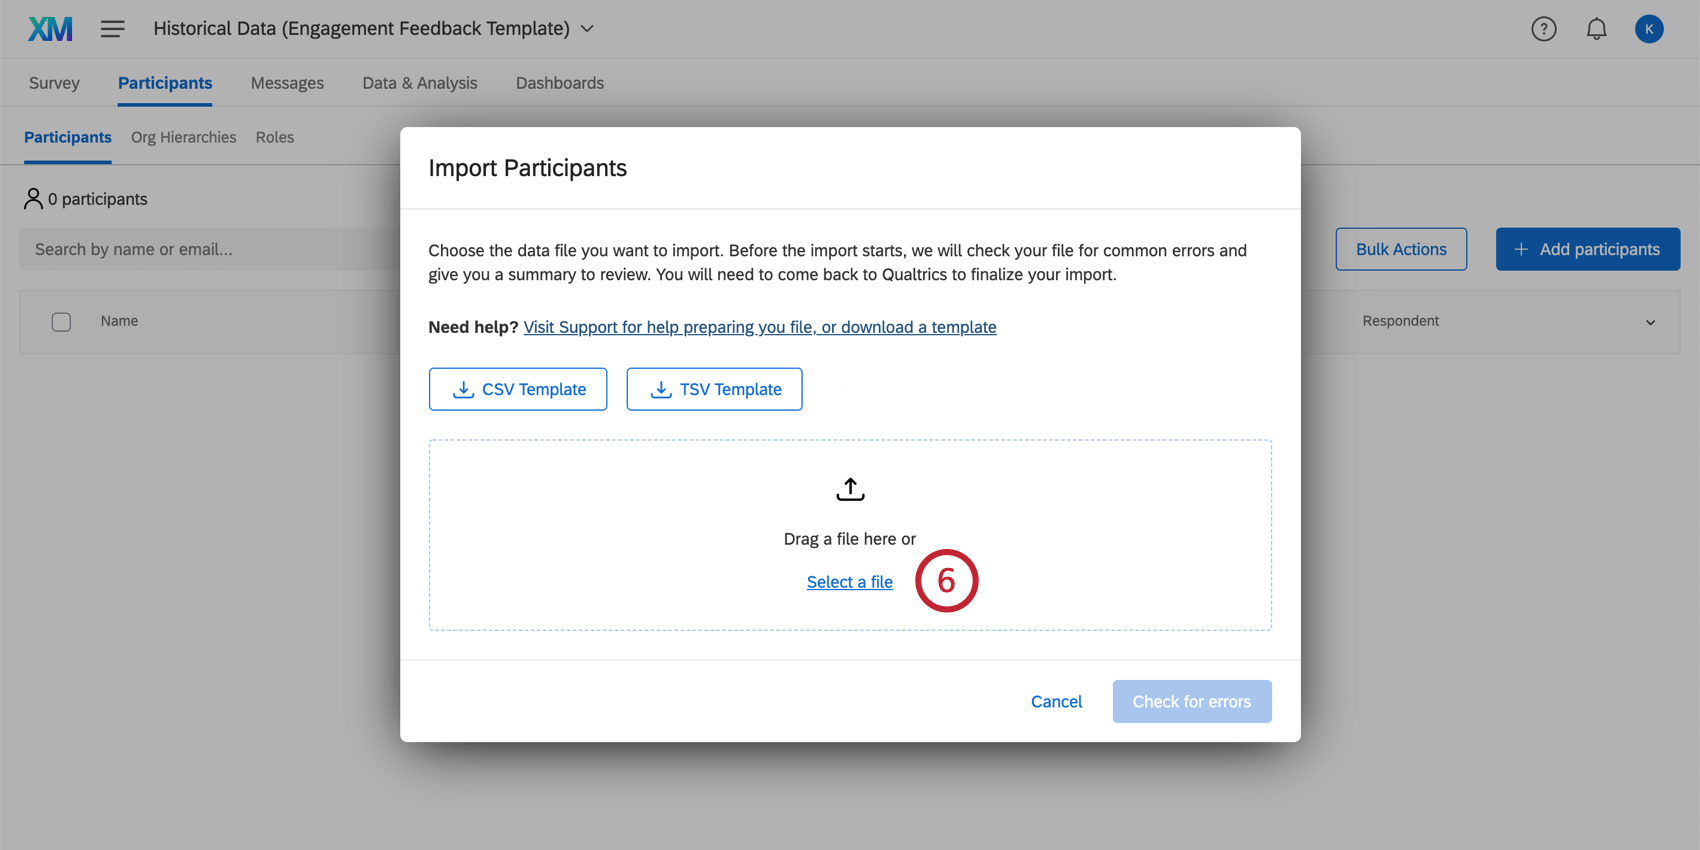
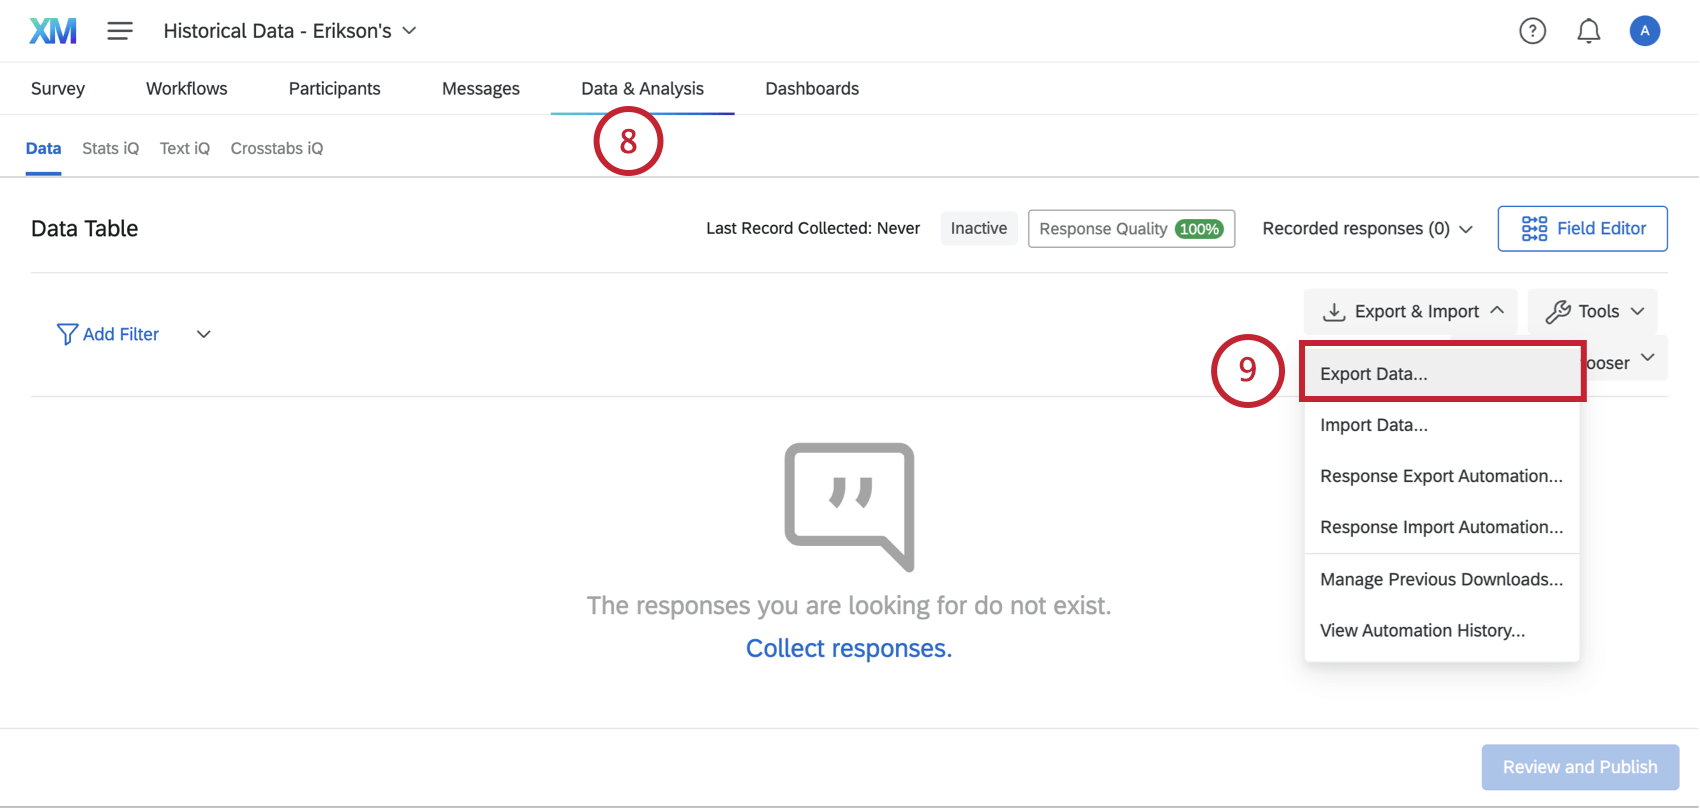
Qtip: You may exclude additional metadata columns, such as email, tenure, manager ID, levels, etc. The importer will ignore these columns because they are not needed to identify the respondent. You only need to include the Unique Identifier and survey answers.
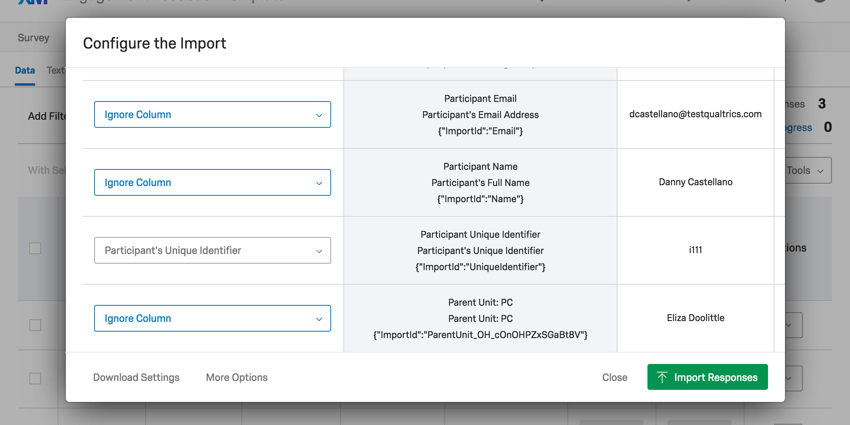
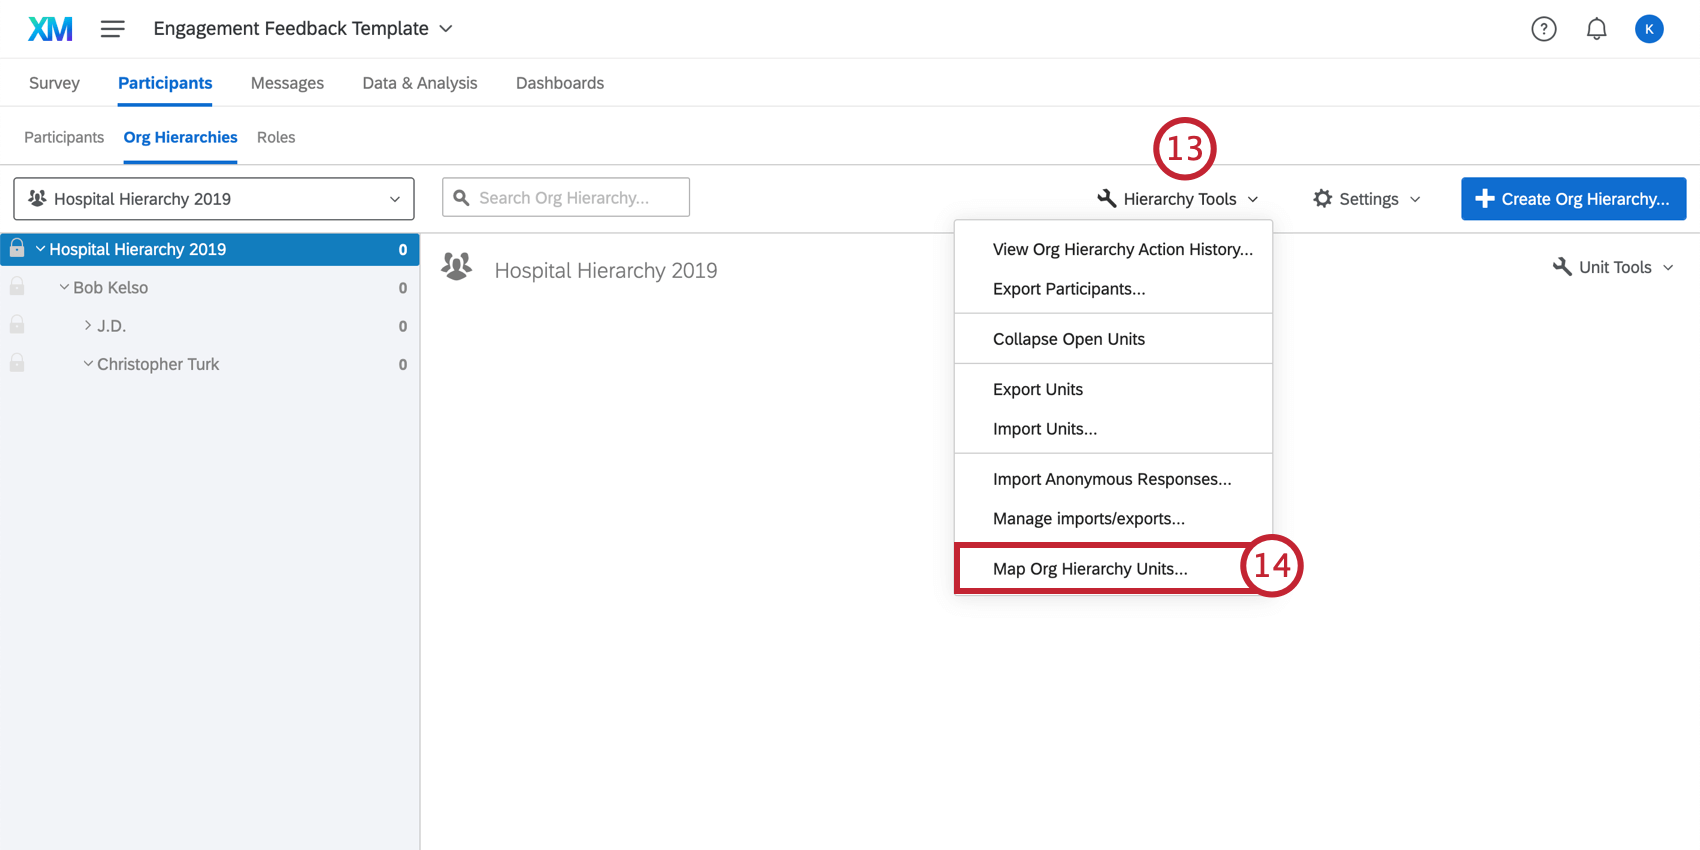
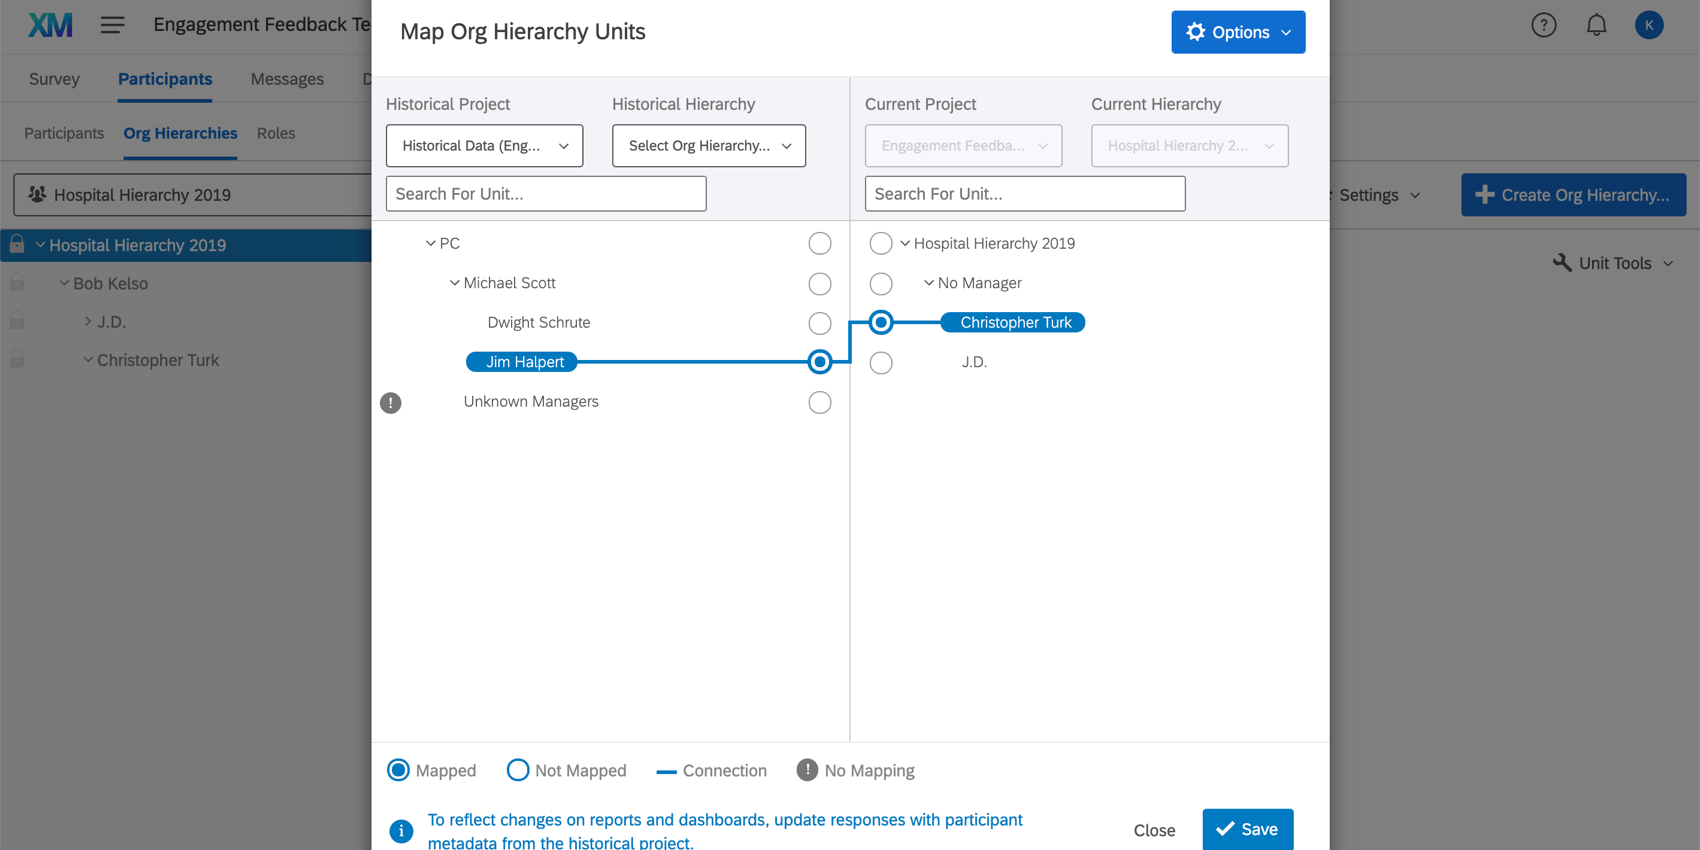
Qtip: Make sure all of your hierarchy units are mapped across both projects.
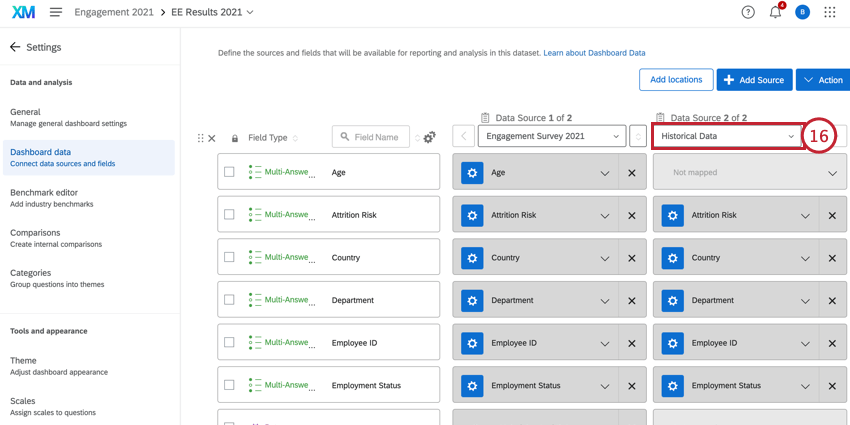
Qtip: If you have a historical dashboard you are trying to match a new dashboard’s data to, set up recode values for historical source and update the recode values to match the setup in the historical dashboard. If you are working with a Pulse project, you will also need to click the source and select Refresh.
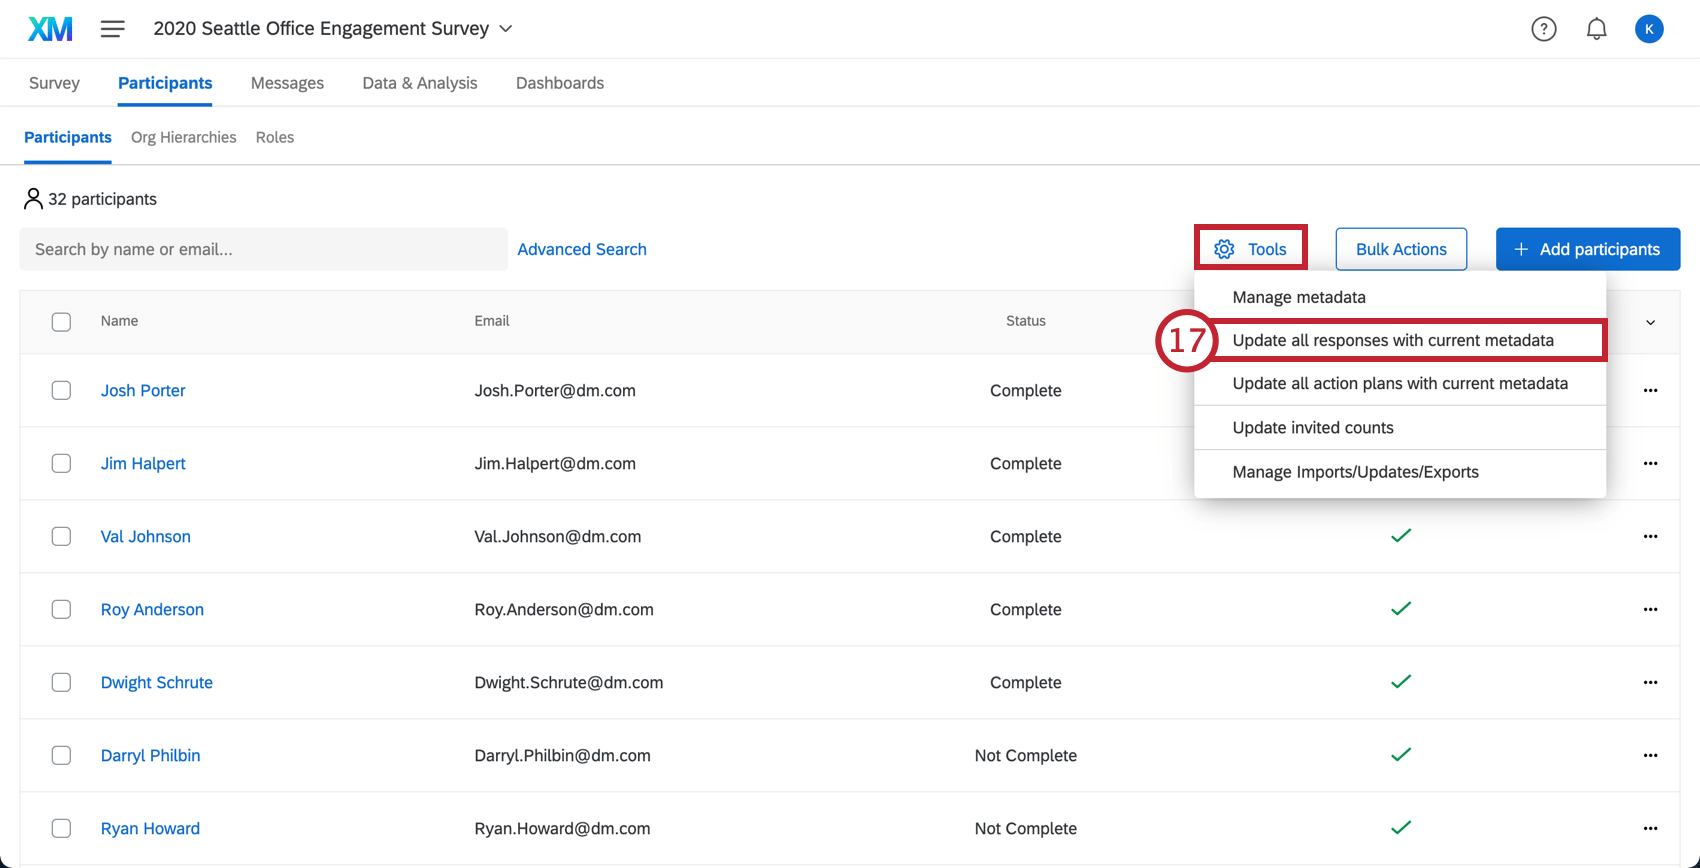
Qtip: If any new responses are uploaded to the historical project, you just need to update the new responses with current metadata. The exception is if you are using a Pulse project – then you should also refresh the dashboard source.
FAQs
I'm mapping historical data, and I have categories set up. What will happen if the categories don't have the same items in them?
I'm mapping historical data, and I have categories set up. What will happen if the categories don't have the same items in them?
That's great! Thank you for your feedback!
Thank you for your feedback!