
Collaborating on Projects (EX)
What's on this page
About Collaborating on Employee Experience Projects
Qtip: Collaborating on a project is the same as sharing a project.
Our collaboration feature allows you to give other Employee Experience users in your organization access to your projects when they log into their accounts. This way, you and a colleague can work on the same 360, Engagement, Ad Hoc Employee Research, or Lifecycle project without giving out your account information. You can even choose to restrict what type of access other users have to your project. For example, if you have translators working on your project, you can make sure they have editing privileges, but no access to the data you collect.
Qtip: You can only collaborate on projects with users in your license. If you need to share your survey with an external collaborator, you will either need to create an account for the person on your license, or share the preview, Word, or PDF version of your survey.
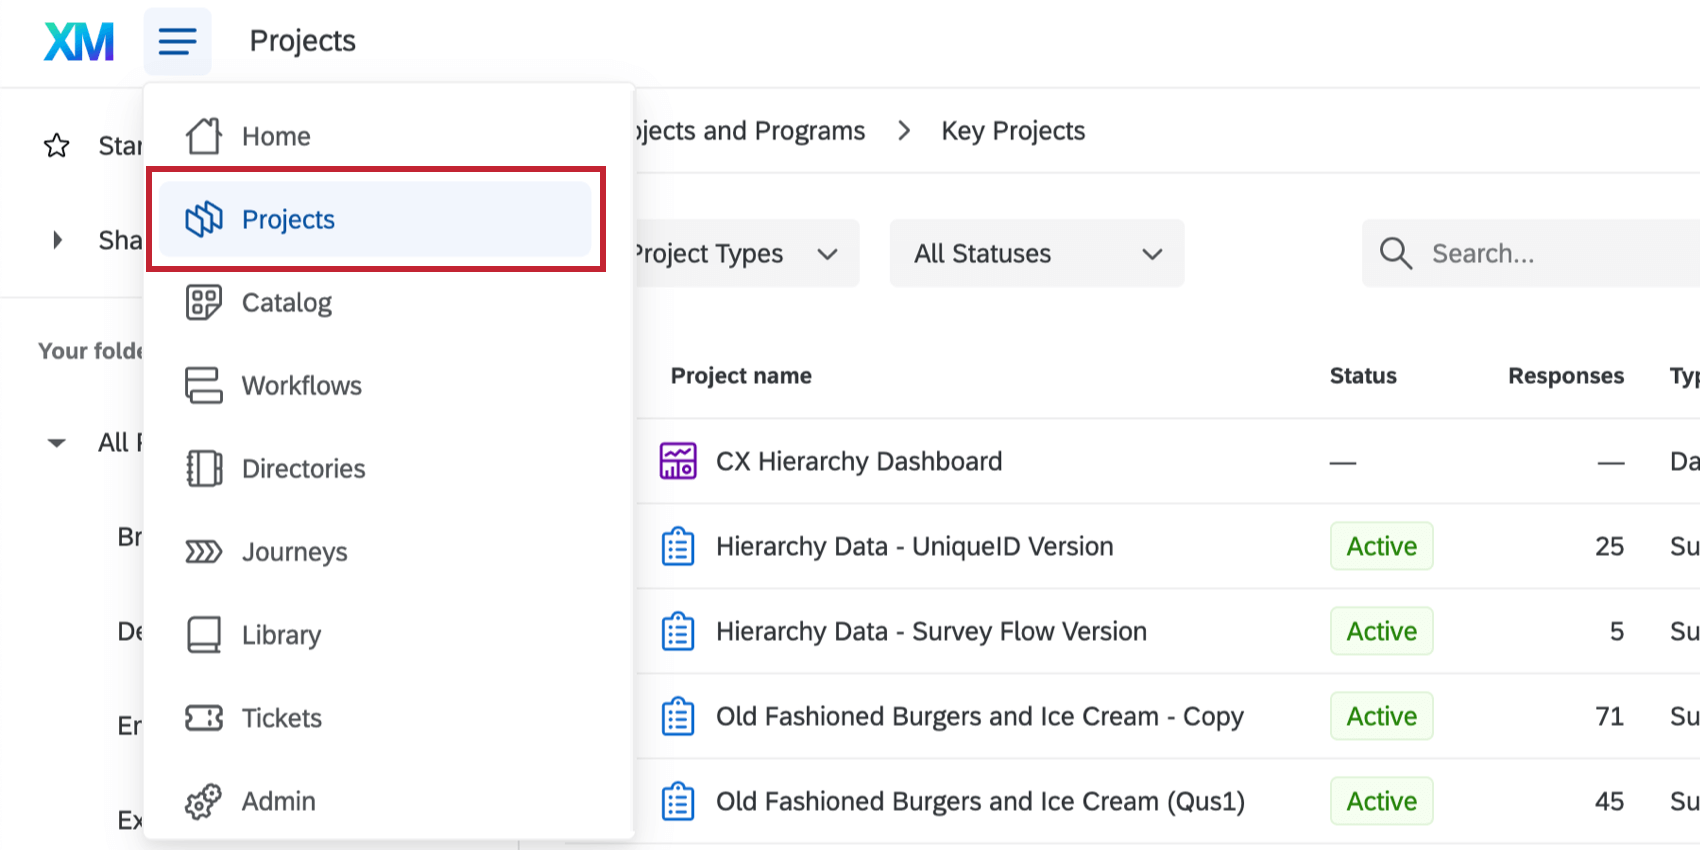
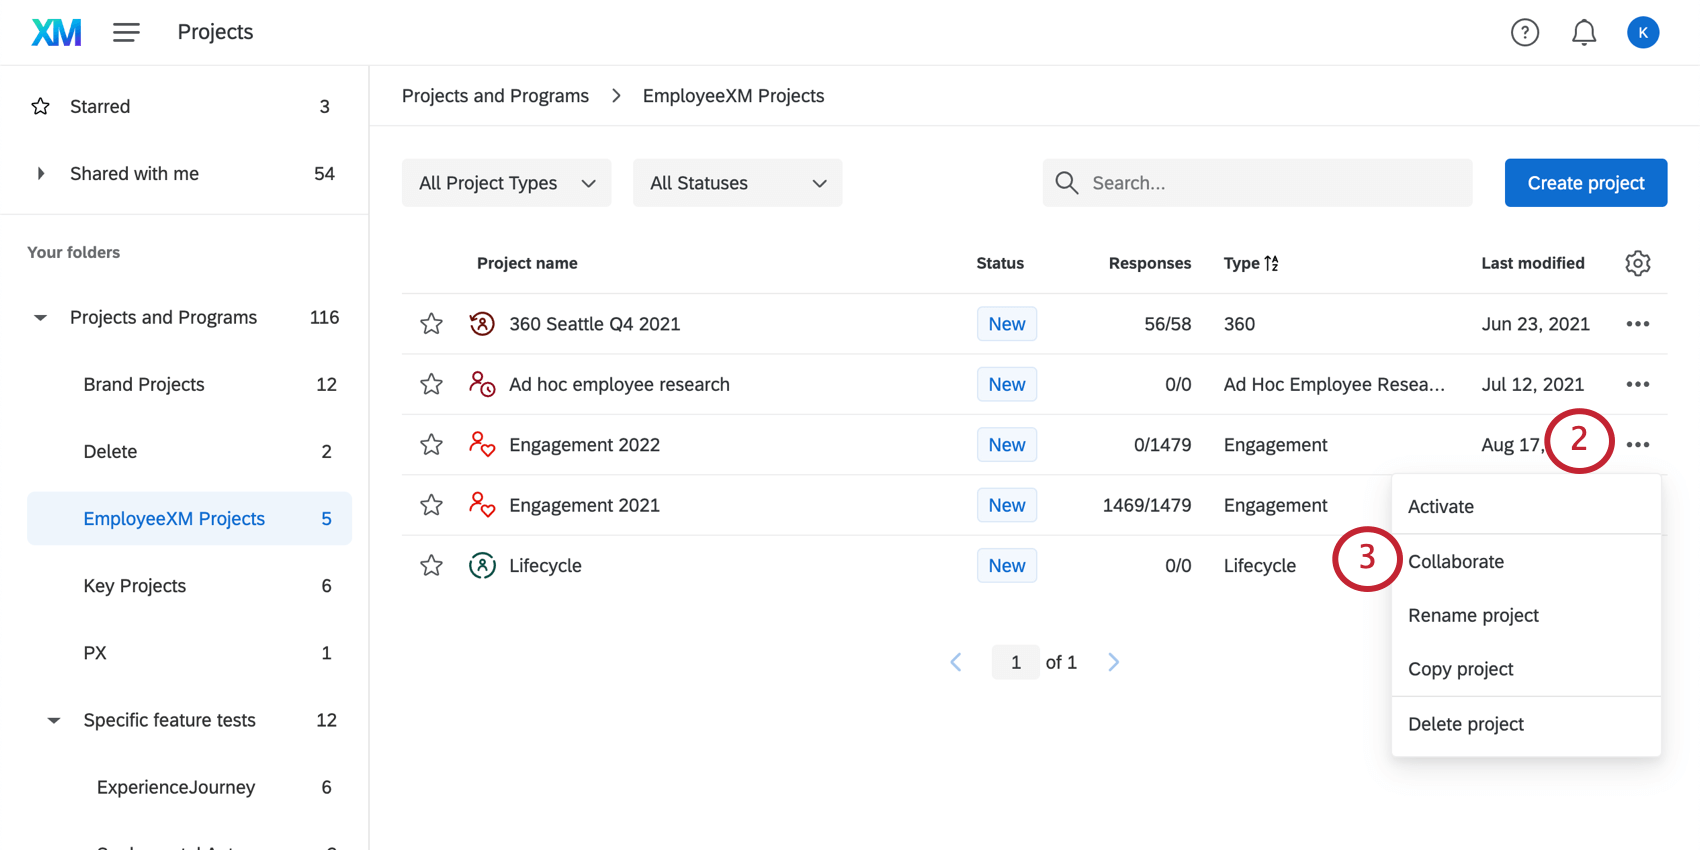
Collaborating on a Project
You can share projects with individual users and groups of people in your organization. If you want to create a group, contact the Brand Administrator within your organization who can create one for you, or, if you are a Brand Administrator yourself, head over to the Admin page to create a group.
Qtip: You can only collaborate projects that you own.
Qtip: Is your Collaborate button missing? There are two reasons this can happen. The first is if you are not the project owner, then you cannot share the project with other users. To give another user access to that project, you’ll have to contact its original creator. However, if you are the project’s owner, then chances are you’re missing the Collaborate Projectsuser permission. Contact your Brand Administrator to request this permission be turned on, or if you’re a Brand Administrator yourself, head over to your Admin page to enable collaboration.
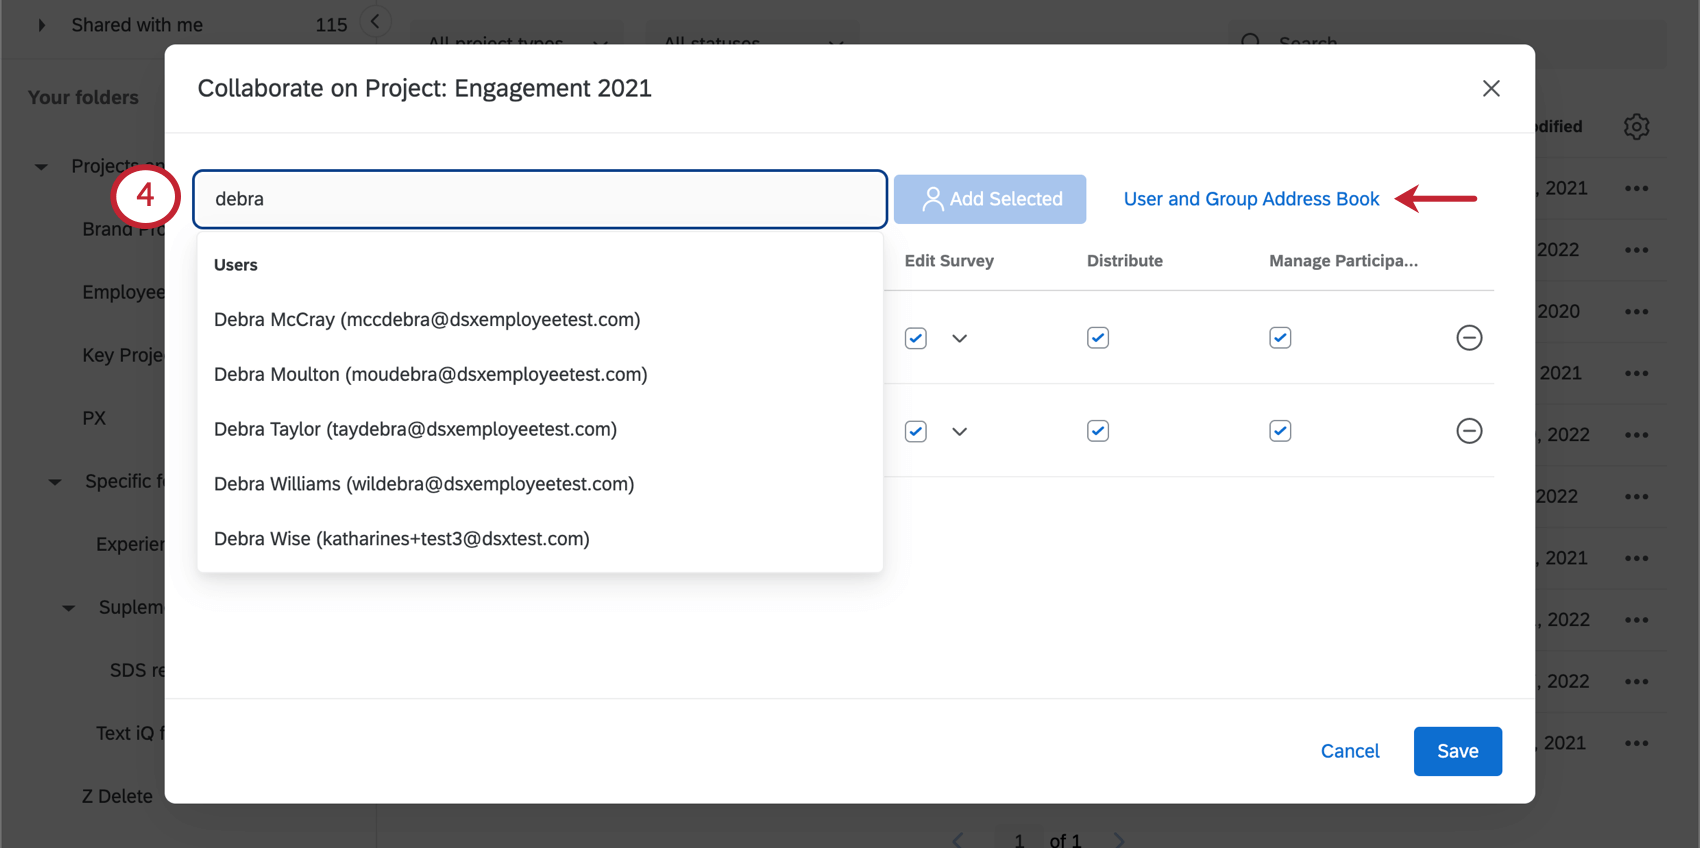
Qtip: You’ll only see groups that you belong to listed in the address book.
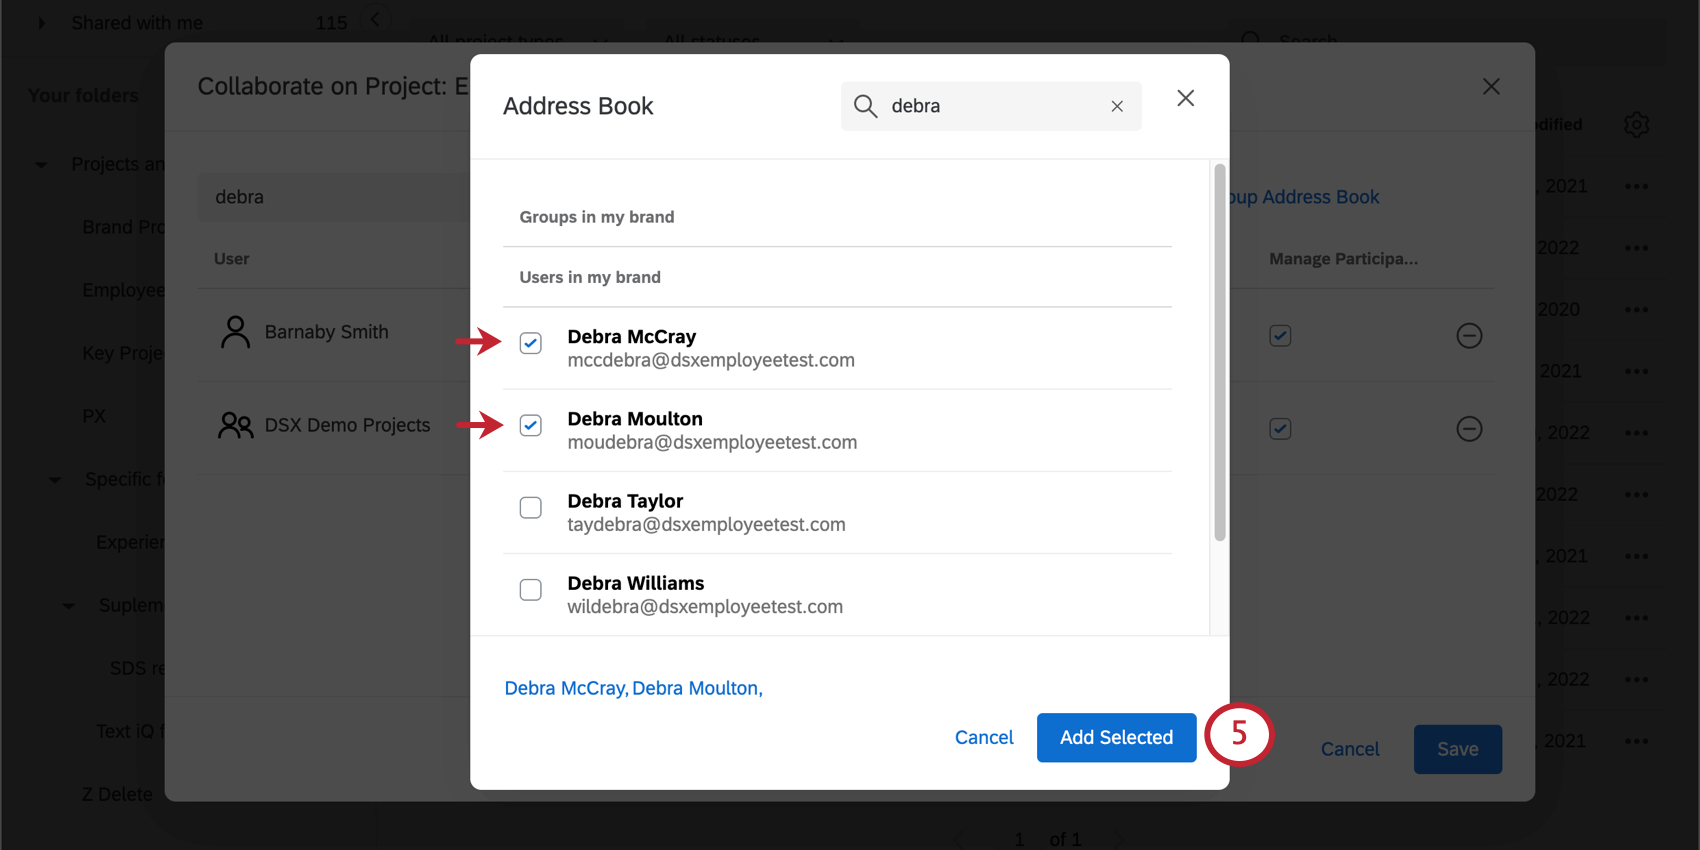
Qtip: Don’t see the person you’re looking for? Make sure they have a Qualtrics account within your same license. If their account is not in the same license as yours, then they won’t appear in your address book and you won’t be able to collaborate with them.
Qtip: If you share a project with another user, this will not automatically give the user dashboard editing access. For more details, see Sharing Dashboards.
Accessing Shared Projects
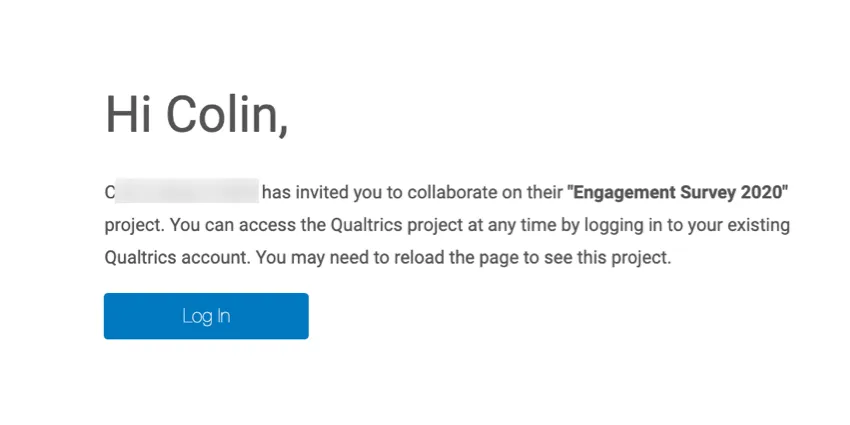
When a project has been shared with you, you will receive an email letting you know the project is available in your account. Click Log In in the email to be brought to the Qualtrics login screen.
Qtip: Does your email contain a collaboration code? If so, then a user on a different license has shared a regular survey project with you. See instructions on collaborating on projects with collaboration codes.
Once logged in, you will find the project in your Shared with me folder on the Projects page. For more information on accessing and managing your shared projects, see Accessing Shared Surveys. Note that Employee Experience projects do not have collaboration codes since you can only share them with users within your organization.
Qtip: You need at least one project in your account before seeing the Shared with me folder. If you do not see any folders on the left hand side of your account, then create a project and the folder will appear.
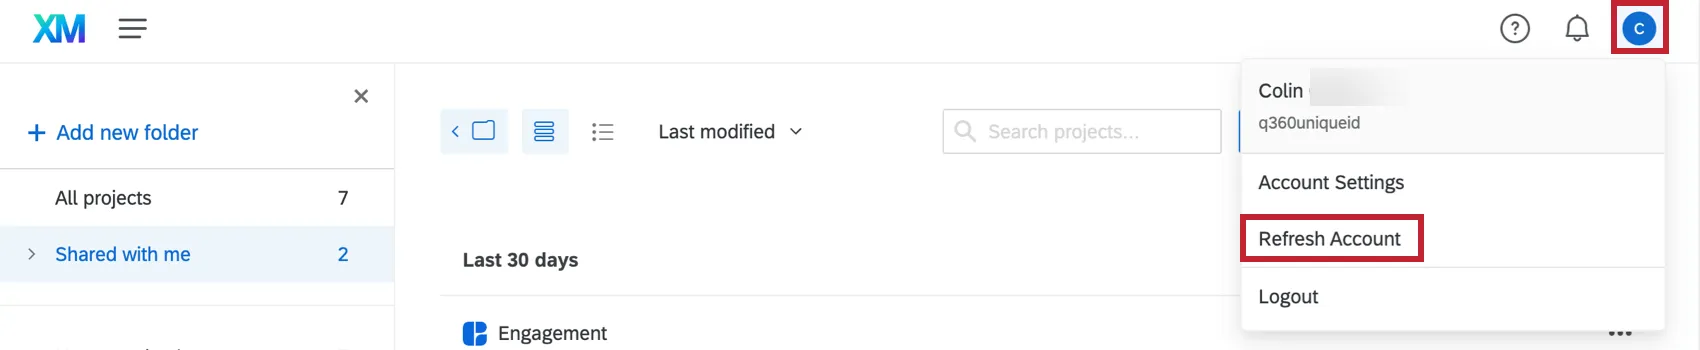
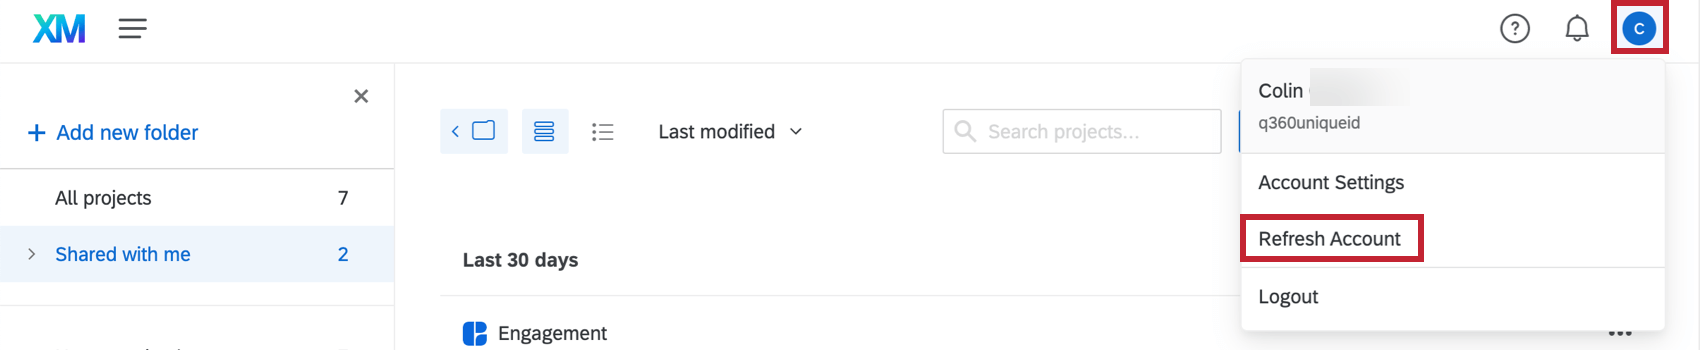
Qtip: If you don’t see the project in your Shared with me folder, try refreshing your account by clicking the account settings icon in the top right corner and then Refresh Account.
Collaboration Permissions
Attention: Collaboration permissions set on a shared project will override individual user permissions for the people the Employee Experience project is shared with.
User and Group Permissions
Not all users in the Employee Experience platform can invite others to collaborate on their projects. For example, while participants can participate in employee surveys, they cannot edit them, and so it would not make sense for them to be able to invite others to collaborate on their projects.
The two types of Employee Experience users capable of collaborating on projects are the Brand Administrator and the Employee Insights Administrator. Both users can work on projects and be participants/dashboard users, but only Brand Administrators have access to the Admin page.
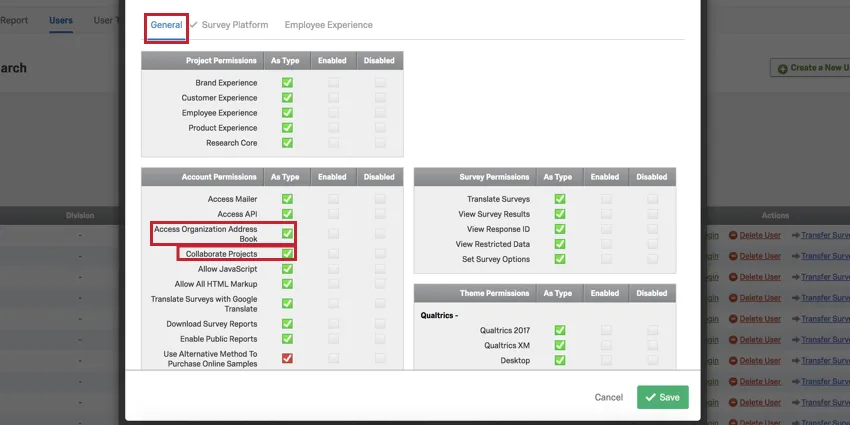
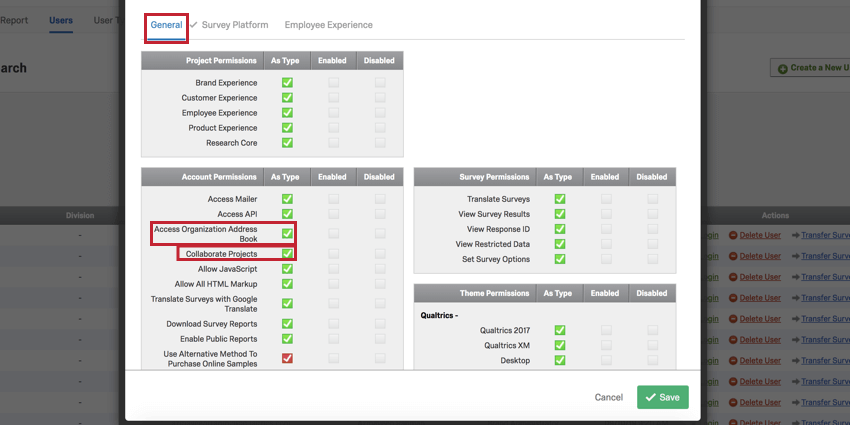
For any user you want to give collaboration permissions to, you will need to enable the Collaborate Projects and Access Organization Address Book General user permissions.
Collaborating with groups is convenient because it allows you to collaborate with many users at once. However, before you collaborate with groups, it’s important that they have the correct permissions turned on.
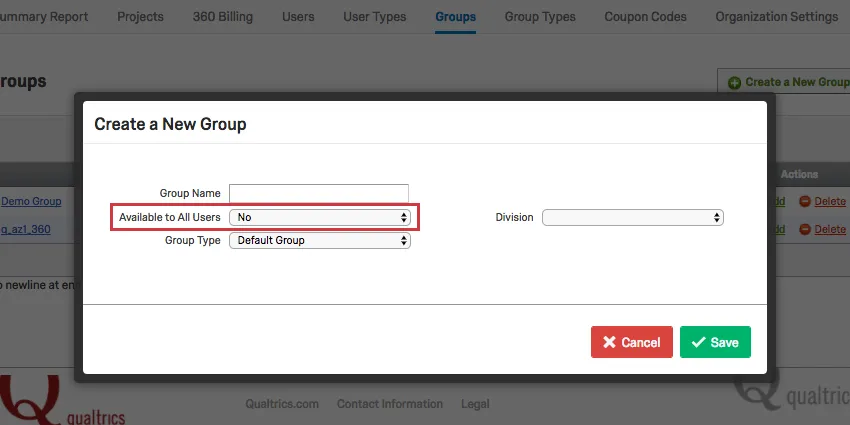
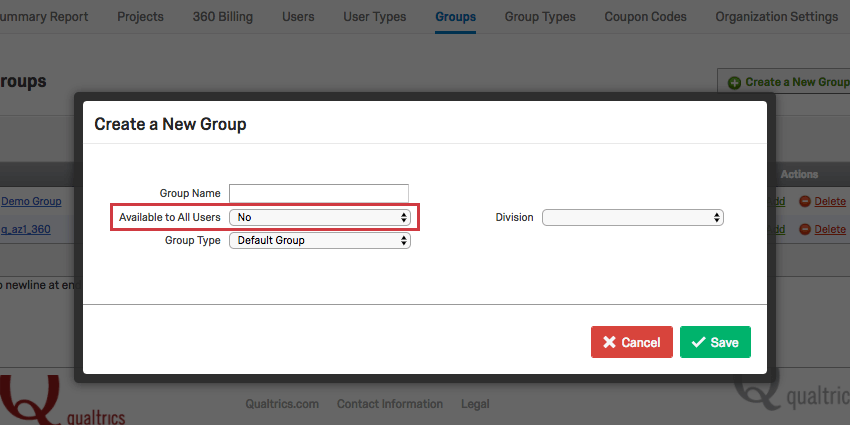
When you create a new group on the Admin page, the Available to All Users field has two options that affect collaboration:
- No: This means the group is exclusive to the members. Collaborating on projects with this group will only share the projects with those group members.
- For this brand: This means the group’s contents are available to everyone. Collaborating projects with this group will give every Brand and Employee Insights Administrator in your license the ability to access them.
Permissions for Collaborators
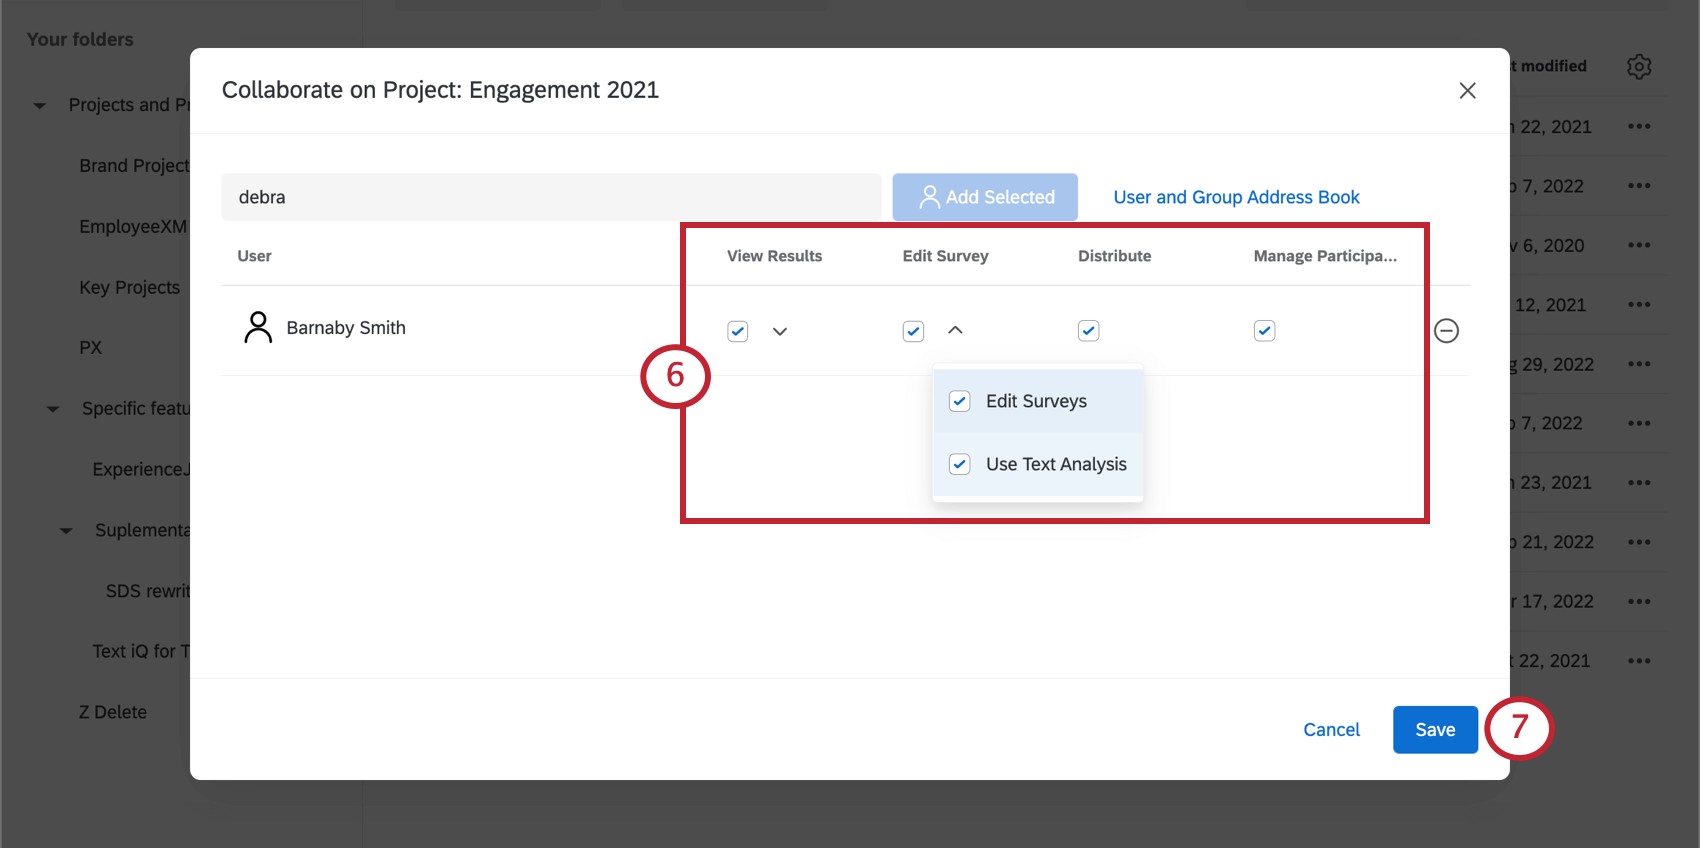
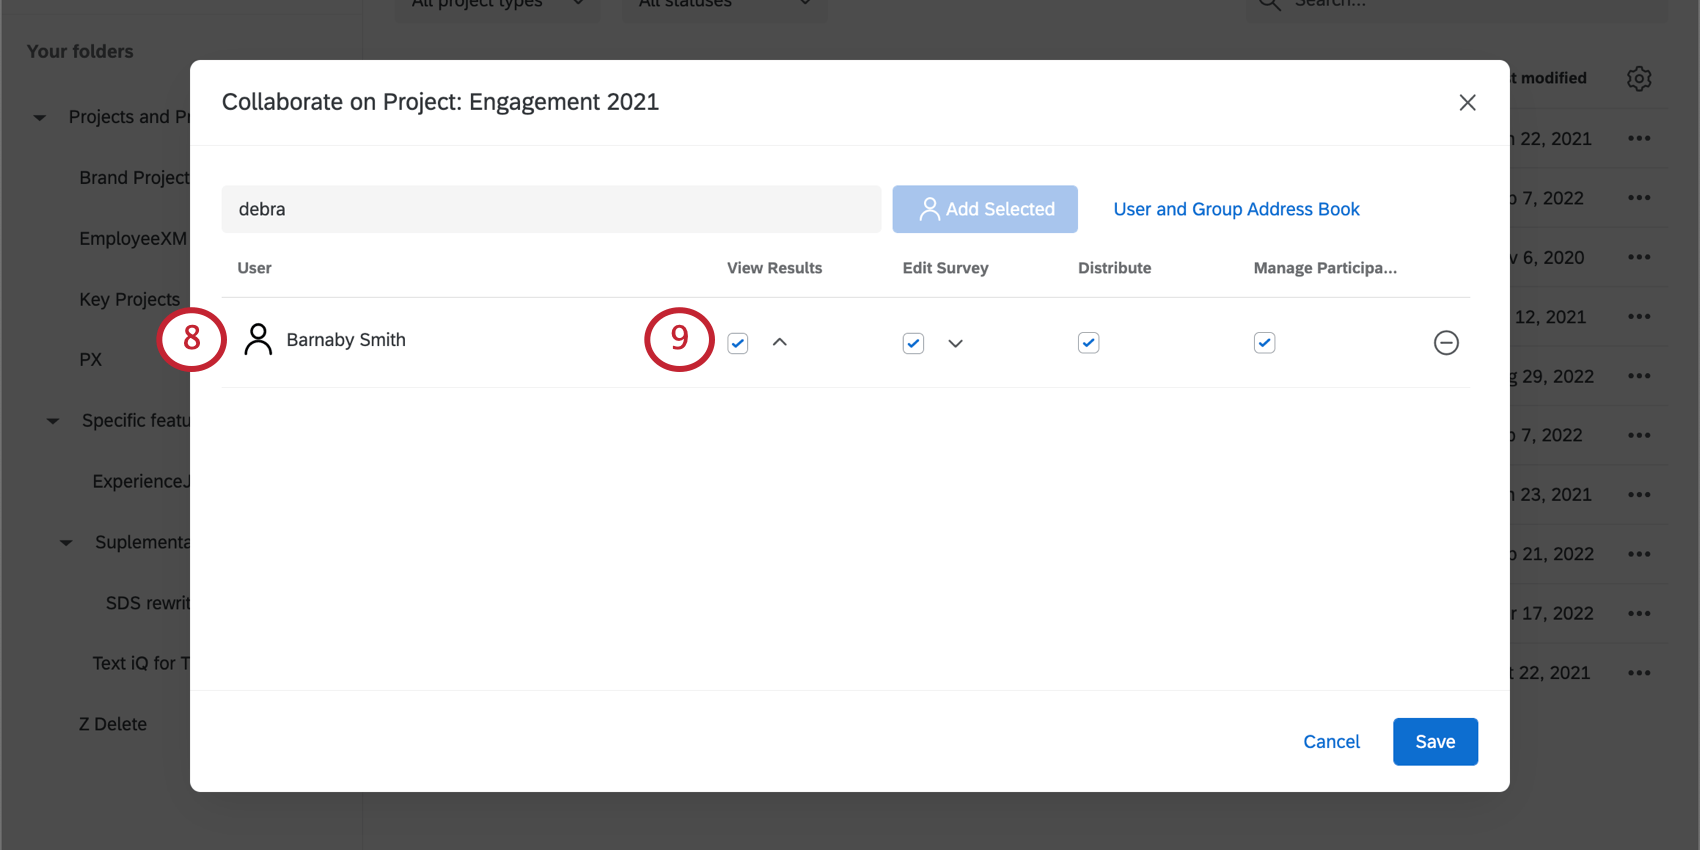
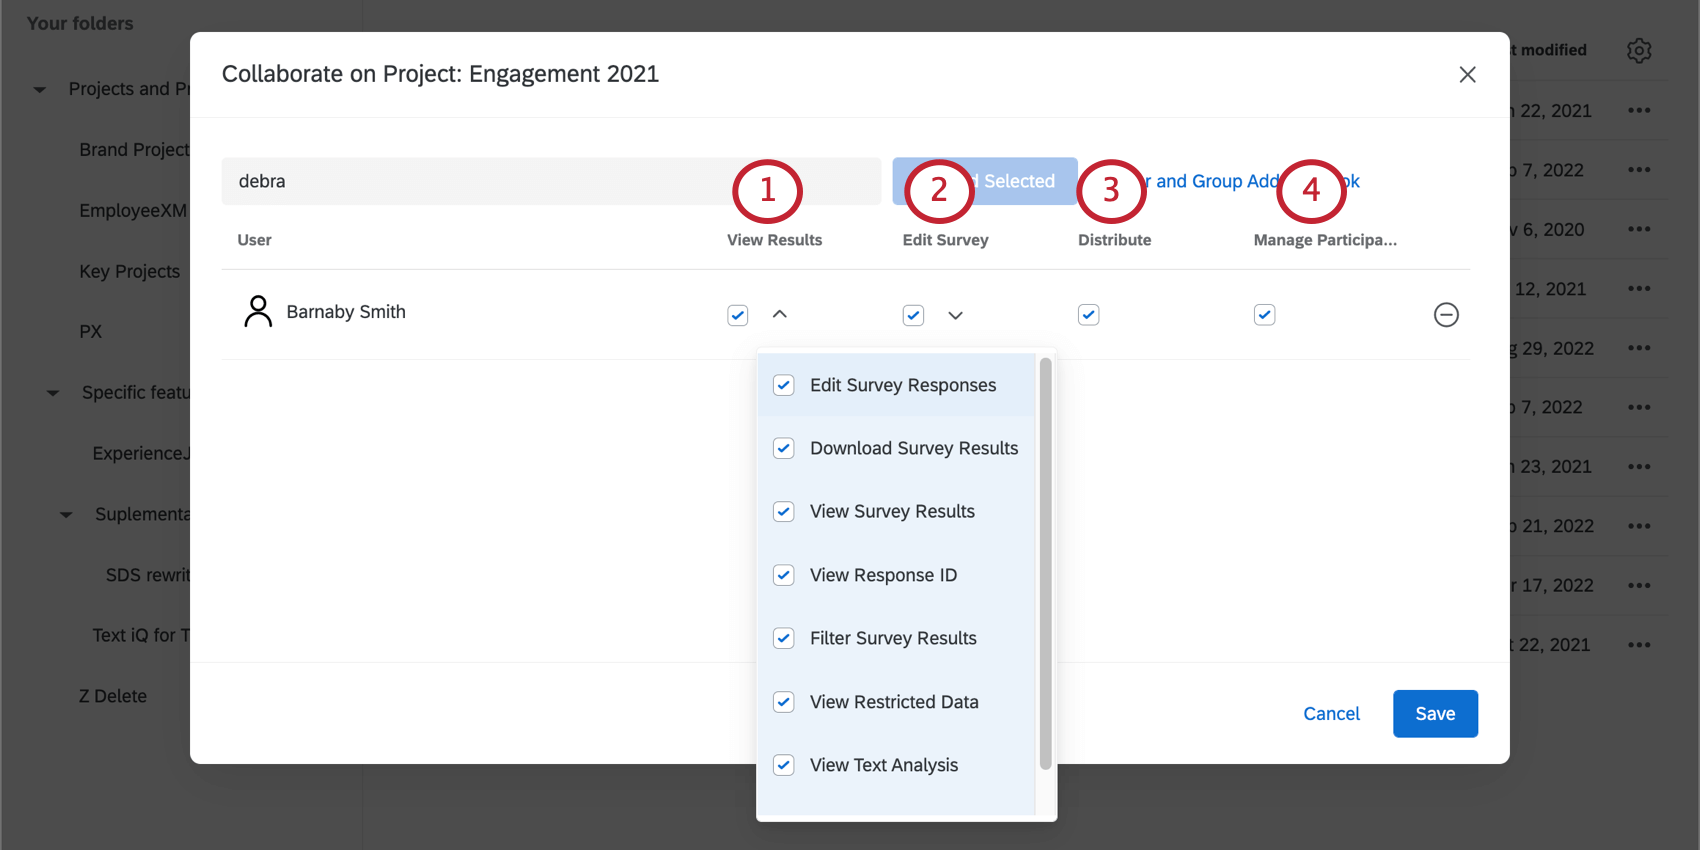
When you collaborate on a project with colleagues, you don’t have to give them full access. You can restrict what content they can view or edit right on the Collaborate on Project menu.
If you are seeing grayed out buttons or missing tabs in one of your projects, it may be due to the permissions given to you by the owner.

- Edit Survey Responses: Must be paired with View Survey Results. Allows the user to use the response editing feature and generate retake links.
- View Survey Results: Gives you access to the Data tab, excluding the ability to add filters, delete data, use response editing, export data, view response IDs, or generate retake links. You can still import data or arrange the columns on the page.
- Filter Survey Results: Must be paired with View Survey Results. Allows the user to filter the collected responses.
- View Text Analysis: Allows the user to view text responses in Text iQ. The user will not be able to edit any aspects of the text analysis.
- Download Survey Results: Must be paired with View Survey Results. Allows the user to export responses from the Data tab.
- View Response ID: Must be paired with View Survey Results. Allows the user to view the response ID, a unique ID assigned to every individual response.
- View Restricted Data: In the Data tab, disabling this permission censors the IP Address, Location Latitude, and Location Longitude information in the data export. When enabled and combined with Manage Participants, this permission allows your collaborator to also see who is finished and who is not. Otherwise, all participants display as “Not Completed.”

Attention: If you invite someone to collaborate on a survey, and give access to “View Restricted Data,” the collaborator must also have the “View Restricted Data” user permission enabled. If not, the user won’t be able to view the survey’s restricted data. Users can reach out to a Brand Administrator to get their permissions changed. Below, you’ll see a table describing how the collaboration permission and the user permission interact.
Collaboration permission User Permission Result Disabled Disabled User cannot view the collaborated survey’s restricted data. Enabled Enabled User can view the collaborated survey’s restricted data. Enabled Disabled User cannot view the collaborated survey’s restricted data. Disabled Enabled User cannot view the collaborated survey’s restricted data. - Use Triggers: Allows the user to use the update person trigger.
- Edit Surveys: Allows the user to edit the survey via the Survey tab. This includes access to the survey flow, survey options, and survey tools.
- Use Text Analysis: Allows the user to analyze text responses in Text iQ.
If you ever need to edit these settings, navigate to the Collaborate on Project menu as normal, make your changes, and click Save.
Qtip: Permissions you set when inviting someone to collaborate on a project override the permissions you set on a participant level in a specific project. If you’ve given someone permission to view a dashboard under their participant permissions, but don’t enable View Results when you invite them to collaborate, this person will not be able to access the project’s dashboards properly. If you’d like to restrict someone’s dashboard editing permissions, try adjusting their participant permissions or their role instead.
Sharing Dashboards
This section describes how to share a dashboard with a colleague so they can edit it.
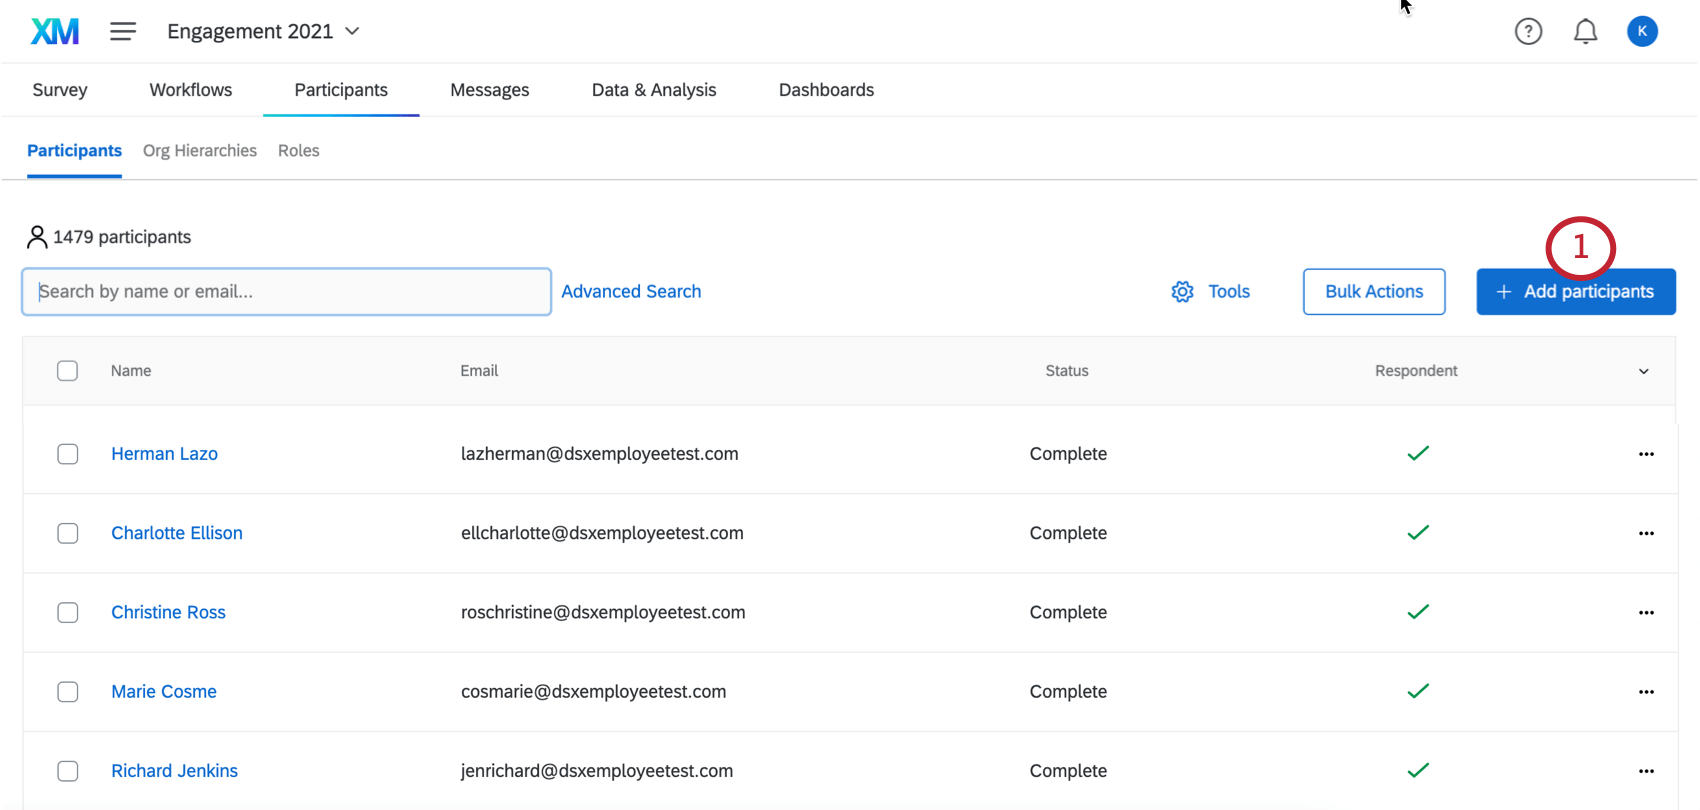
Qtip: If this person should not be a respondent and is only a dashboard editor, include the column Respondent and set this equal to 0 (zero). You can also change whether someone’s a respondent after uploading them.
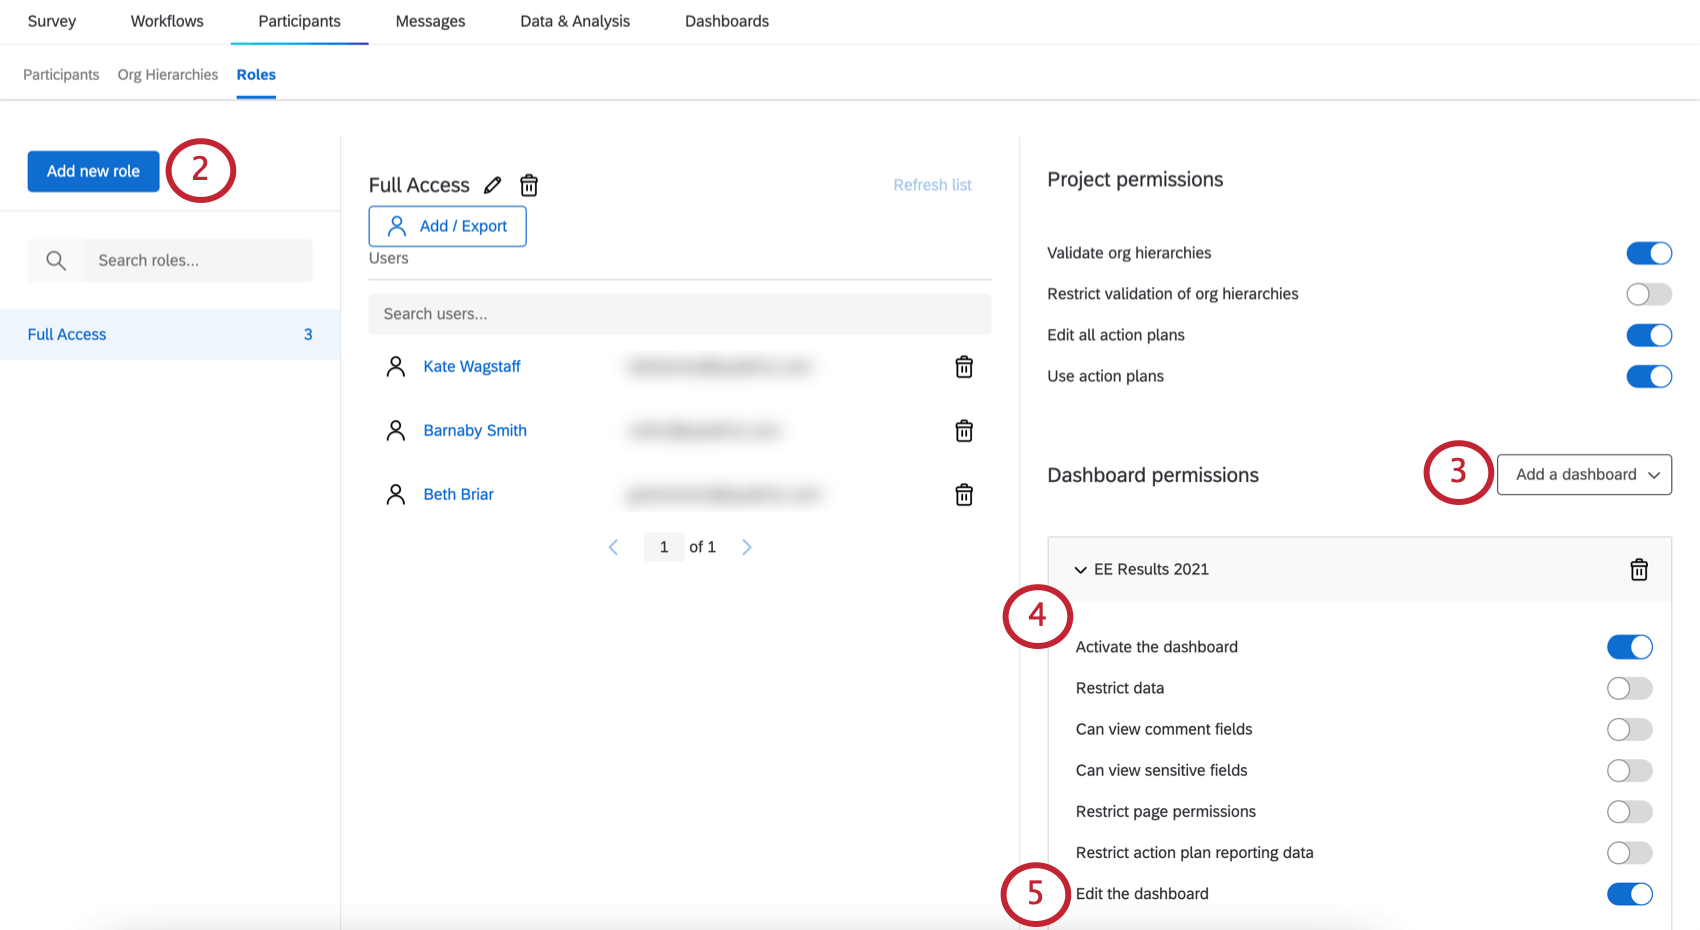
Qtip: You can also edit the individual user’s permissions, but roles are more useful if you need to give multiple users the same access.
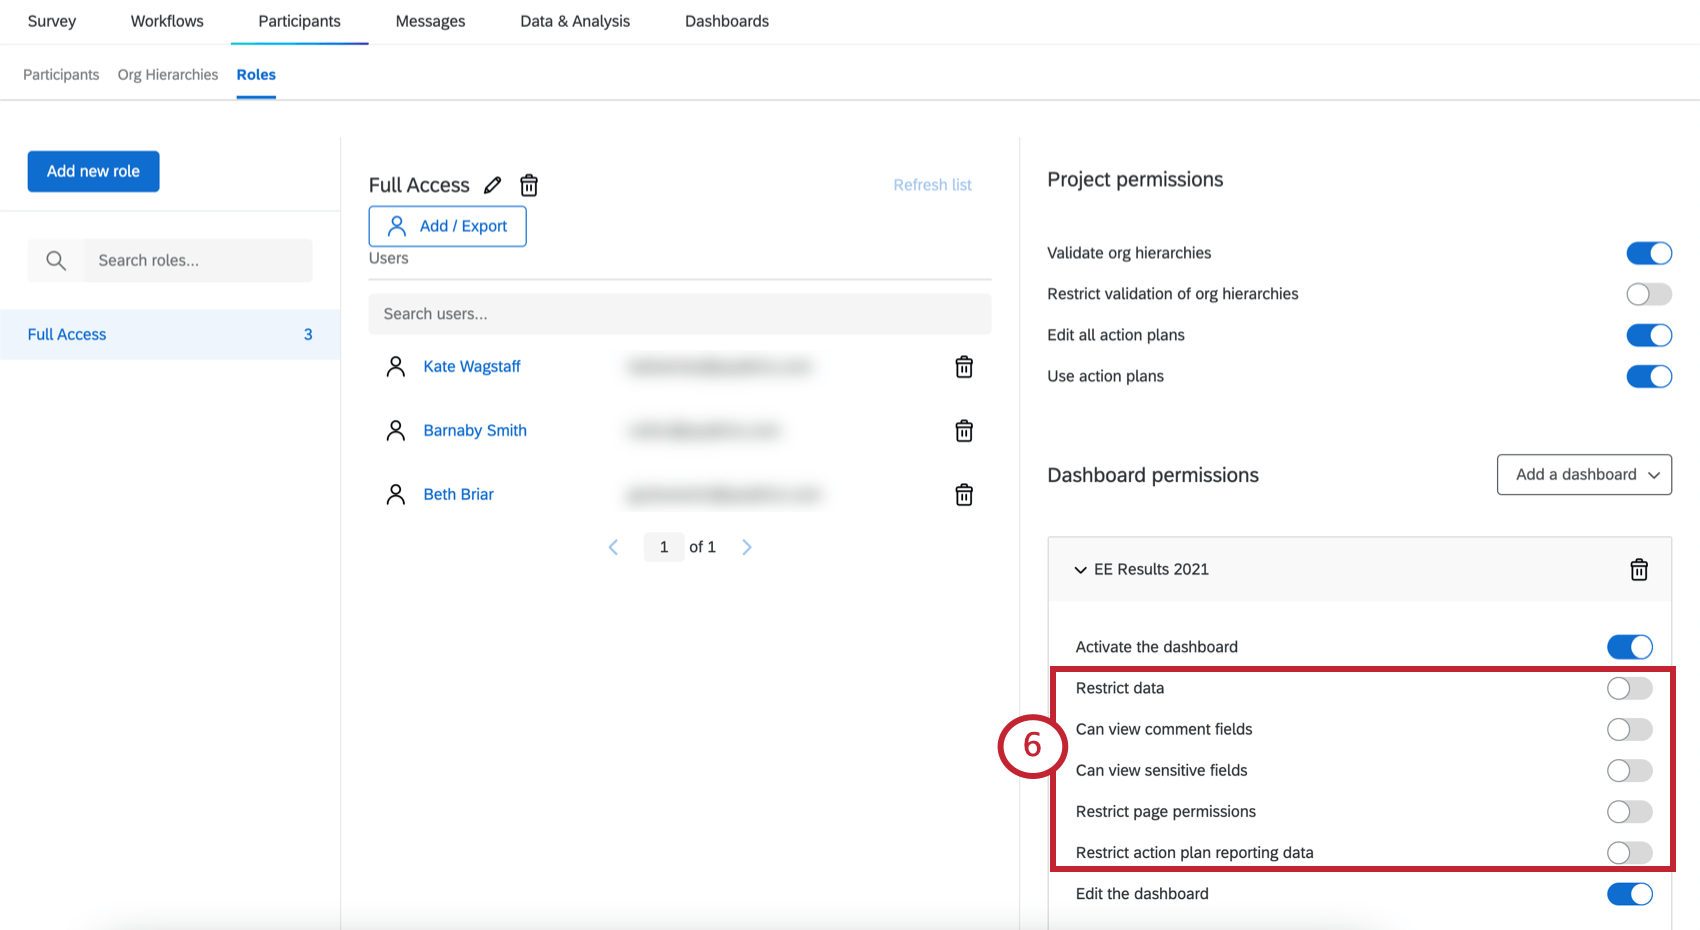
Qtip: If you do not restrict data access, then the user will be able to view all employee data in the dashboard.
Qtip: You must have View Results and all permissions beneath it enabled. To limit what data the user can see, make sure the role has the restrictive dashboard permissions you need.
Qtip: You can also share dashboards with users so they can see their data without making dashboard edits (view-only access). To do this, adjust the dashboard user’s permissions or create a role and add them to it. You do not need to share the entire project with a user to give them view-only access to the dashboard.
Troubleshooting Collaboration
See this support page for help troubleshooting collaboration issues. Common issues and their resolutions include:
- Trouble accessing a survey when you have multiple Qualtrics accounts.
- Cannot find or did not receive the collaboration email.
- Project is not appearing in your account.
In addition to solving these common issues, the linked page provides alternatives to project collaboration. These alternatives can help you share project information through other means.
FAQs
Should I be using divisions or groups for sharing in 360?
Should I be using divisions or groups for sharing in 360?
You can also collaborate with individual users.
I don’t see an Employee Experience project that I have been invited to collaborate on. Where is it?
I don’t see an Employee Experience project that I have been invited to collaborate on. Where is it?
- You may be looking at the incorrect folder on your Projects page. Be sure to check in your Shared with Me folder.
- One of the users does not have the correct collaboration permissions turned on. A Brand Administrator can make sure you have the correct user types - either Brand Administrator, EX Administrator, or Employee Insights Admin.
- Try refreshing your account. Open your Account Settings menu in the top-right of the page and select Refresh Account.
I’m missing some editing options when I open an EX project I'm collaborating on. Why?
I’m missing some editing options when I open an EX project I'm collaborating on. Why?
Is the collaboration window accessible?
Is the collaboration window accessible?
That's great! Thank you for your feedback!
Thank you for your feedback!