Exporting Dashboards (QSC)
About Exporting Dashboards
You can export any dashboards you’ve created in Social Connect. When exporting a dashboard, you can choose your export format. You can also set up recurring export emails to automatically send dashboard exports to the recipients of your choice.
Exporting a Dashboard
- Navigate to the dashboard you want to export.
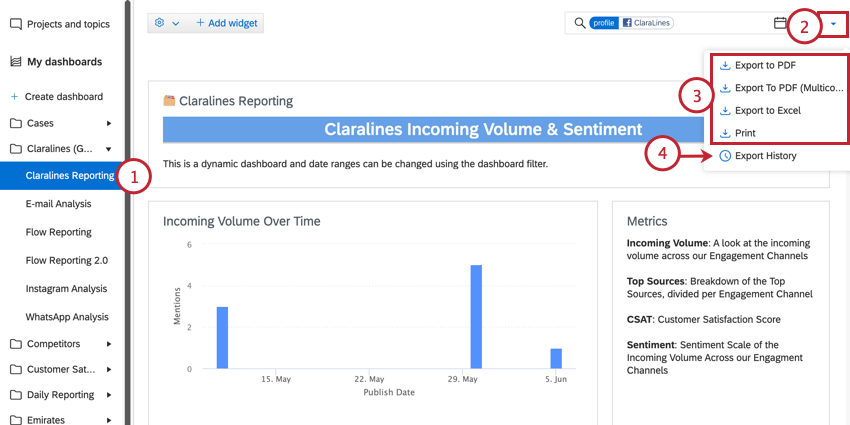
- Click the dropdown menu in the top right corner.
- Choose your export format:
- PDF: Exports the dashboard as a PDF. Each widget will be expanded to fit the entire page.
- PDF (Multicolumn): Exports the dashboard in a PDF with the exact same layout as your dashboard. Widget sizes will not be automatically adjusted.
- Excel: Exports the dashboard to Excel format.
- Print: Opens the dashboard in a new tab for you to print the page.
- If you’d like to view past exports, click Export History.
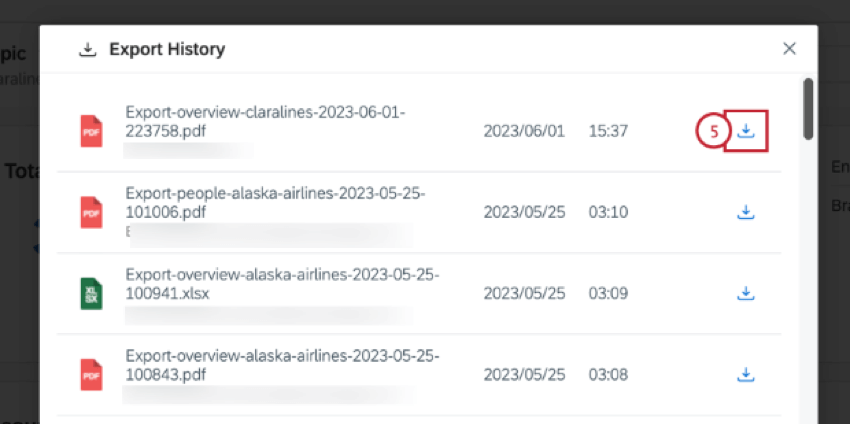
- You can download a past export by clicking the download button next to the file.
Setting up Recurring Dashboard Exports
You can set up automatically recurring dashboard export emails. You can send the export to a Social Connect user, or specify an email to send the export to.
- Navigate to the dashboard you want to export.
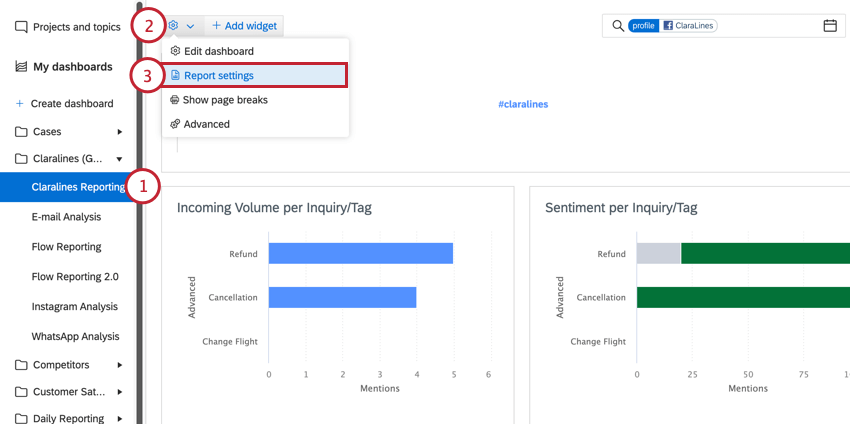
- Click the gear icon in the top left corner.
- Select Report settings.
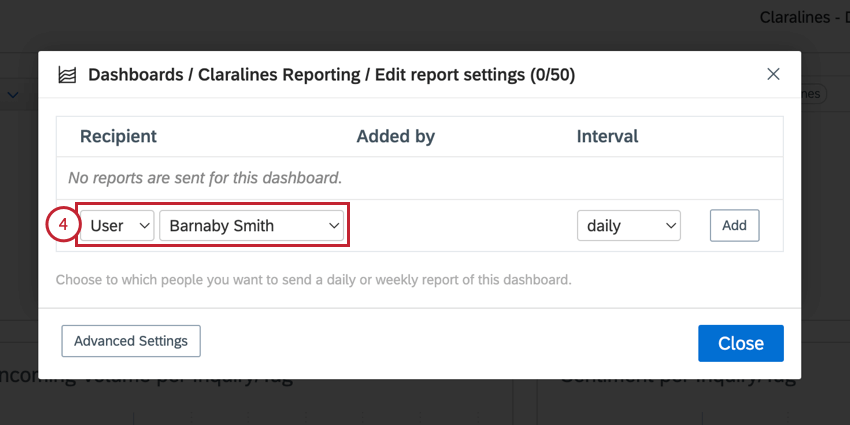
- To send the report to a user, choose User in the first dropdown menu, and then choose the specific user using the second dropdown.
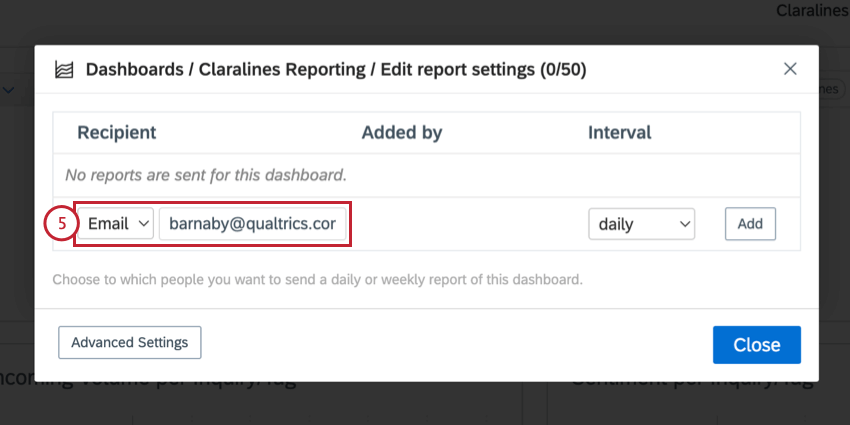
- To send the report to an email address, choose Email in the first dropdown menu, and then type the email address in the box that appears.
- Choose the Interval, which is how often the report is sent. Your options include:
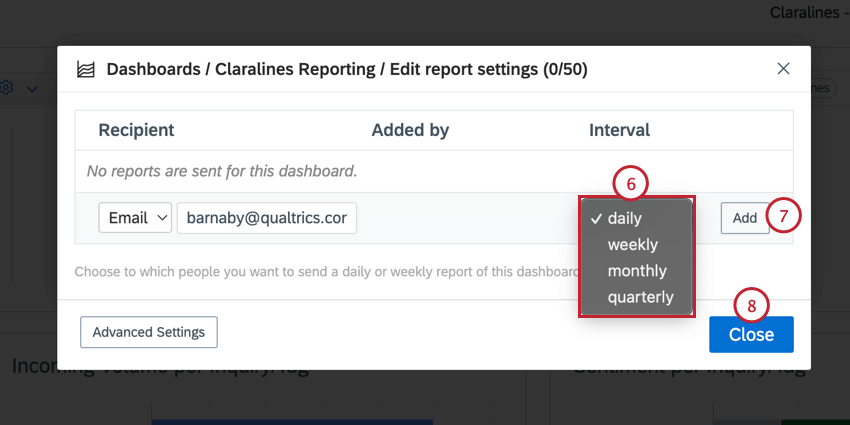
- Daily: Send an email each day.
- Weekly: Send an email once a week at the beginning of the week.
- Monthly: Send an email once a month on the first of the month.
- Quarterly: Send an email once a quarter, on the first day of the quarter.
- Click Add. A new row will appear for you to add additional recipients for the export.
Qtip: Click the trash can icon next to a recipient to remove them from the export.
- Click Close when finished.
Attention: If you limit access to your Social Connect account by IP address, then only recipients who match your restrictions will be able to see the report. You can manage your allowed IP addresses in the security section of account settings.
