
XM Discover Event
What's on this page
About the XM Discover Event
The XM Discover event in workflows helps you trigger an assortment of actions in Qualtrics based on verbatim alerts or scorecard alerts sent in XM Discover.
Linking XM Discover to Qualtrics
You need to link your XM Discover account to Qualtrics before you can use the XM Discover event.
For more details, see the Linking XM User Accounts page.
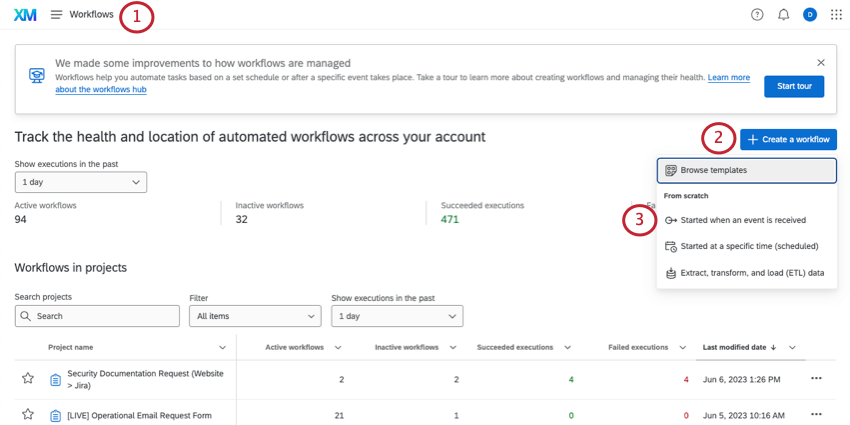
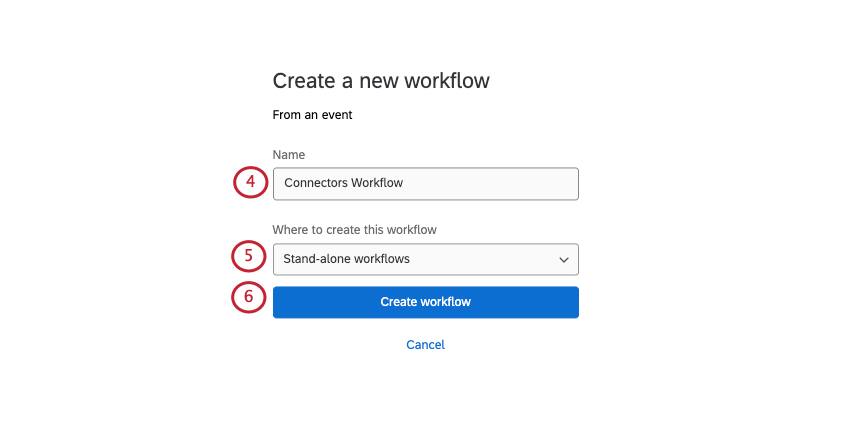
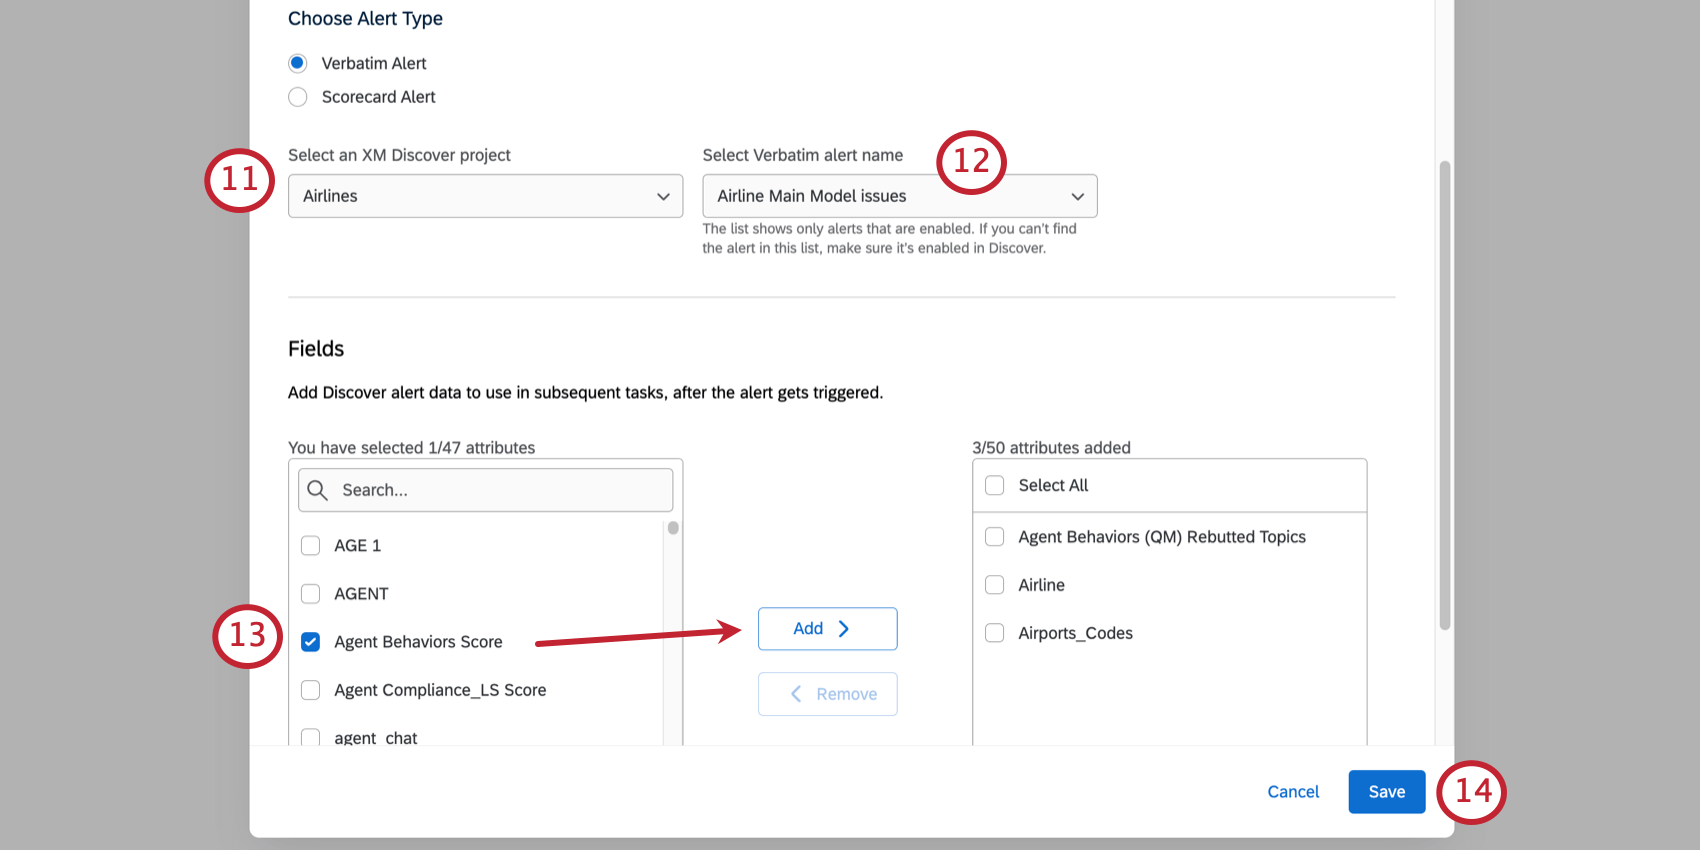
Creating an XM Discover Event
Qtip: You can also associate this workflow with a specific Qualtrics survey, if you prefer.

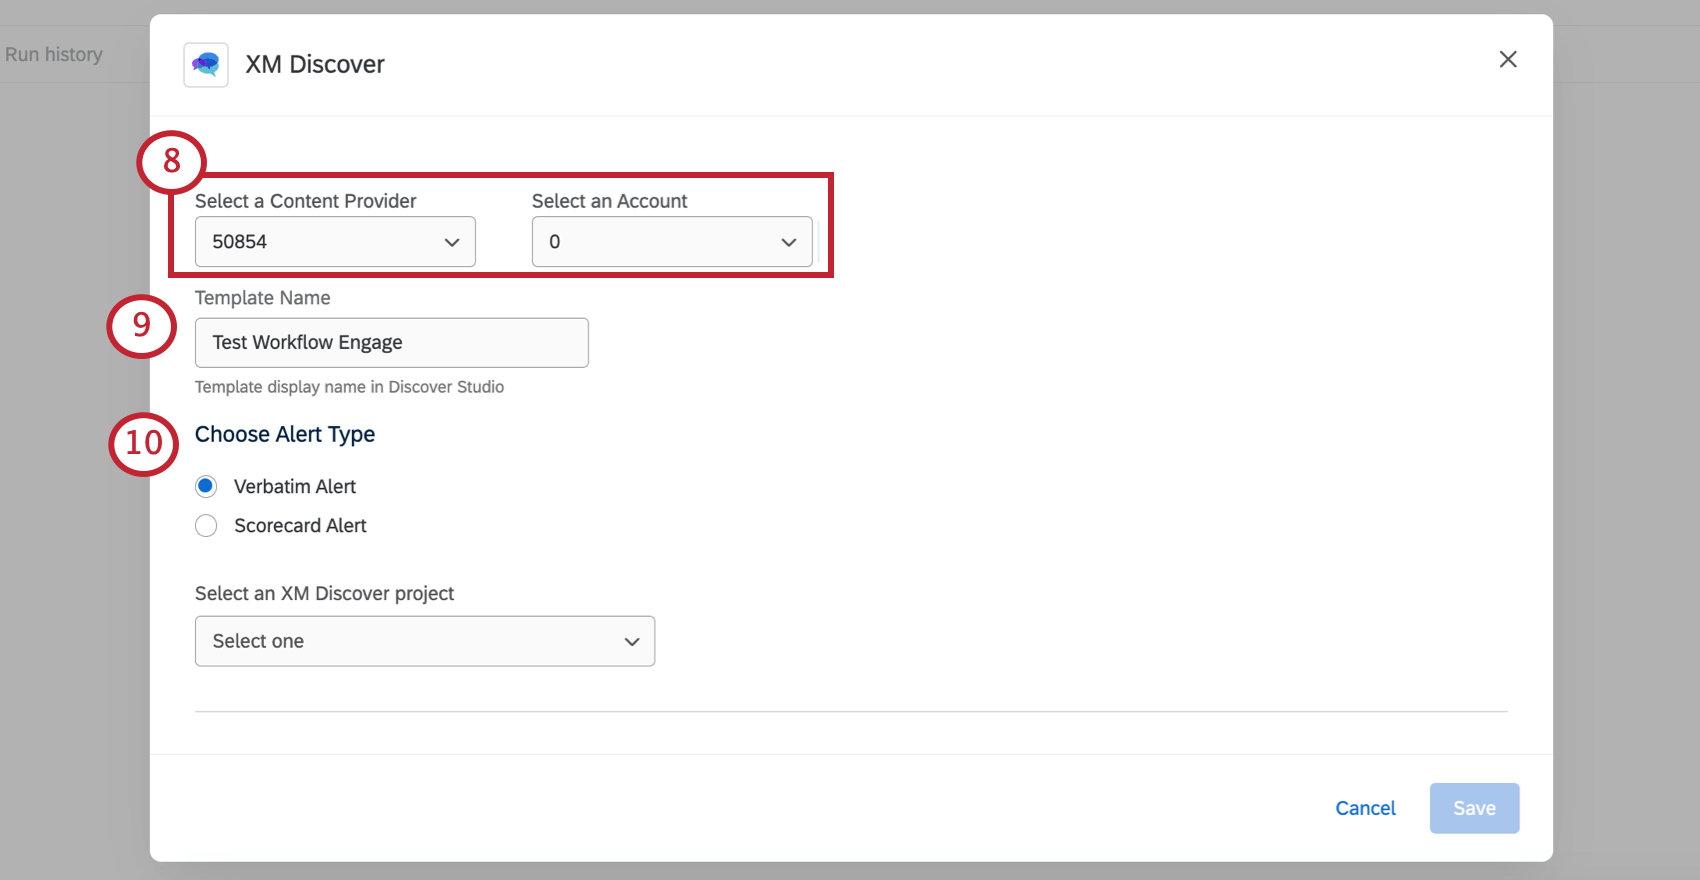
Qtip: For more details, see our documentation on content providers and accounts.
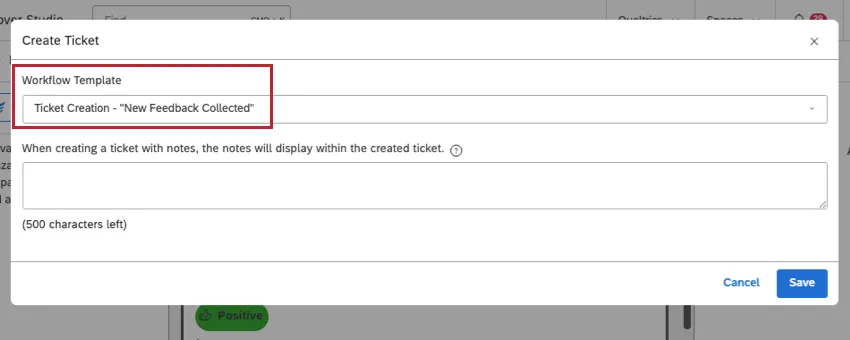
Qtip: When you manually create a ticket from a document in Discover, you will see these templates as an option under Workflow Template. You will not see these on your Inbox Templates page, however.

- Verbatim alert: This option lets you start workflows in Qualtrics based on Discover verbatim alerts.
- Scorecard alert: This option lets you start workflows in Qualtrics based on Discover scorecard alerts. The scorecard alert you want to use must be enabled in your Discover account. Qtip: Read more about intelligent scoring in Discover.

Creating Conditions Based On Alert Fields
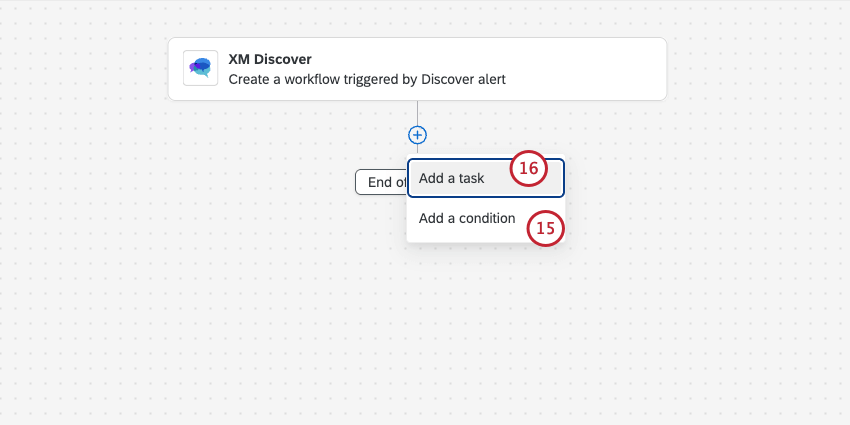
Once you’ve created an alert event, you can add conditions and tasks to your workflow. If these tasks let you add piped text ( {a} ), you’ll be able to include certain information from XM Discover. You can also create workflow conditions from these fields.

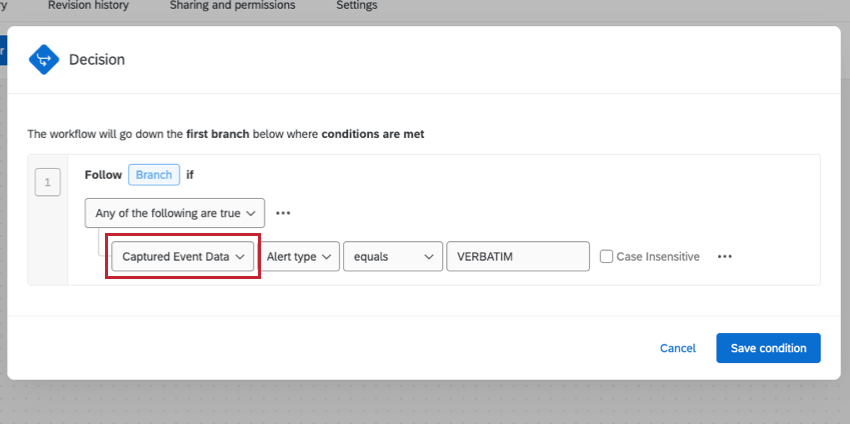
Qtip: To create conditions based on these fields, first select Captured Event Data.
- Alert type: Whether the alert is a verbatim, scorecard, or metric alert. These values are stylized in all capitals:
- VERBATIM
- SCORECARD
- METRIC
- Created type: How the alert was created. Metric alerts can be created manually or with a subscription. All other types can be created by subscription. These values are stylized in all capitals:
- SUBSCRIPTION
- MANUAL
- Data fields from XM Discover: Any attributes you chose to carry over from XM Discover to Qualtrics.
- Discover Document Explorer URL: A link to the verbatims in document explorer. This link requires you to log into an XM Discover account before you can view the data.
- Verbatims: Sentences from the verbatim that are relevant to the alert.
- notes: Base conditions off the notes you add during manual ticket creation.
Tickets
One of the most common ways to use the XM Discover event is to automatically create tickets in Qualtrics whenever an alert is triggered in Discover.
Once your XM Discover Event is created, you can add a tickets task to your workflow. You can even use the attributes you added from XM Discover as ticket data, information displayed on the ticket.
For more details on creating tickets, see the Tickets Task support page. For more details on how to use tickets in Qualtrics, see our tickets documentation.
That's great! Thank you for your feedback!
Thank you for your feedback!