
Pseudonymization Policy (EX)
What's on this page
About Pseudonymization Policy
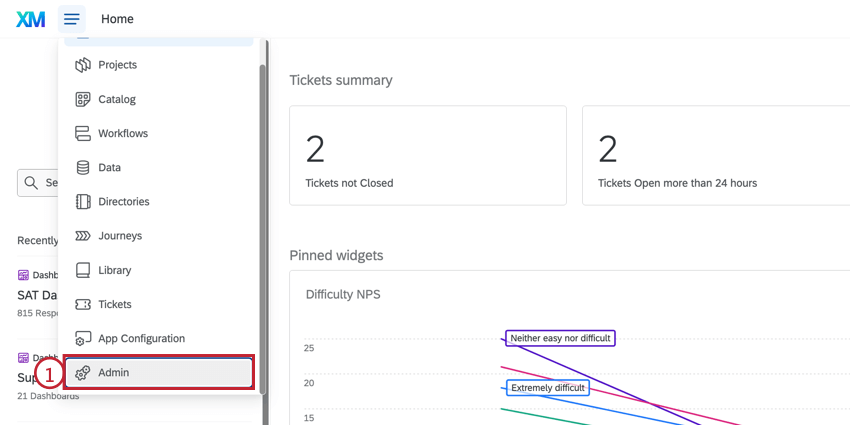
The EX Pseudonymization tab allows you to enable default pseudonymization policy for the entire brand. A pseudonymization policy allows you to obfuscate personal identifying data from EX responses in real time, such that survey responses can no longer be attributed to a specific employee within the platform.
Attention: This is a feature only available to Brand Administrators, and is not included in every license. Please contact Account Services for access.
Attention: The purpose of the EX Pseudonymization feature is to enable an organization to pseudonymize data. In limited circumstances, it may be necessary for an organization to re-identify the individuals from whom data is collected. If you want to re-identify pseudonymized data, your Brand Administrator must contact the Qualtrics Support team.
Qtip: This feature is only available for Employee Engagement, Employee Lifecycle, Ad Hoc Employee Research, and Pulse projects. 360 is not supported.
Setting Up Pseudonymization Policy
Attention: When you turn on the pseudonymization policy, only projects activated afterward will be affected. See Pseudonymization for Existing Projects to learn more.
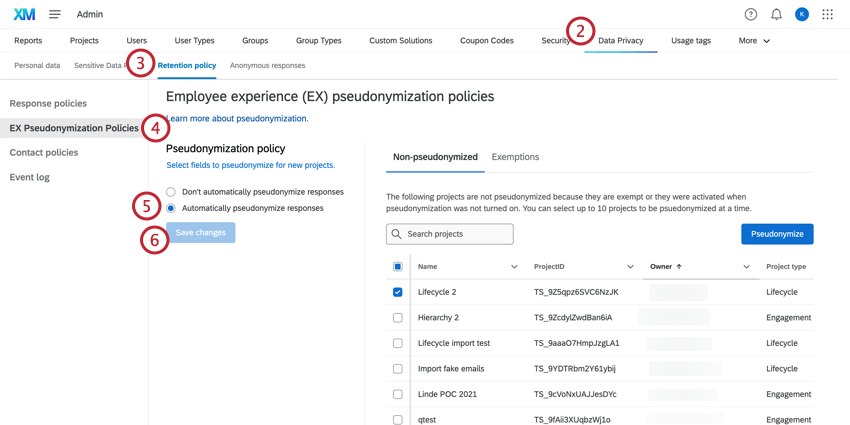
Attention: After enabling this setting, data from the default fields will be removed from survey responses by default. Additionally, you can select fields to pseudonymize. Default fields cannot be de-selected. Pseudonymized data will no longer be available, therefore it cannot be aggregated and viewed dashboards.
Attention: Pseudonymization of fields does not affect the participants tab, including org hierarchies, or messages tab.
With pseudonymization enabled, users will not be able to see the data for the following fields by default:
- Unique Identifier
- Participant’s First Name
- Participant’s Last Name
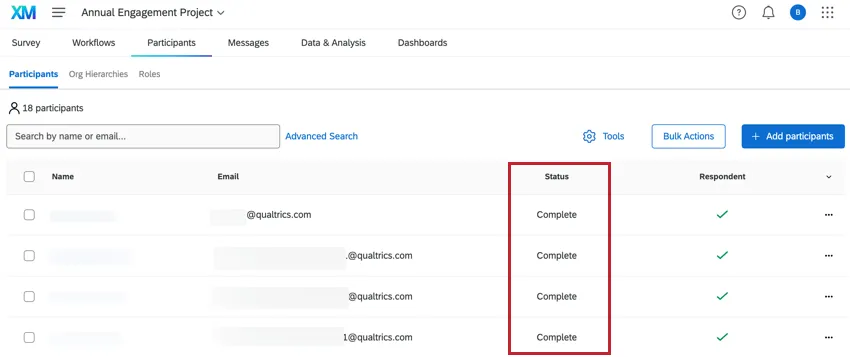
Qtip: To know whether participants have completed the survey with pseudonymization turned on, use the Statuscolumn in the Participants tab.
Pseudonymization for Existing Projects
When you turn on the pseudonymization policy, only projects activated afterward will be affected. Projects activated before enabling the policy will not be pseudonymized automatically. Also, projects that were activated then deactivated before the policy was turned on will not be pseudonymized (even if they’re reactivated after the policy is enabled). Follow these steps to pseudonymize existing projects.
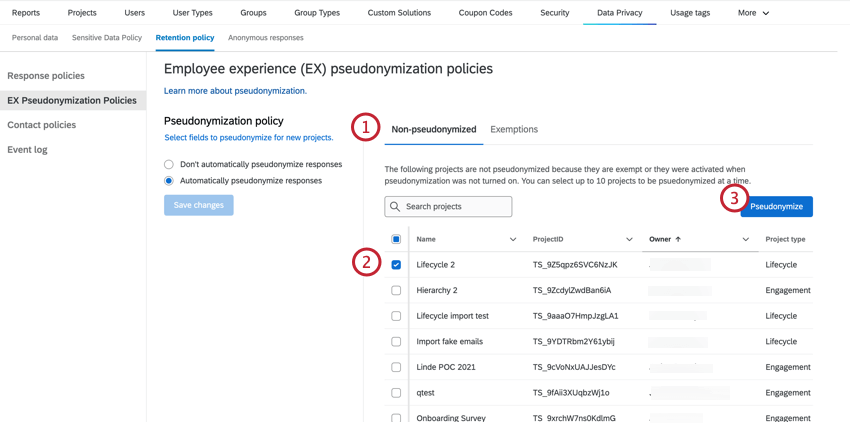
Qtip: You can select up to 10 projects to be pseudonymized at one time.
Select Additional Fields to Pseudonymize
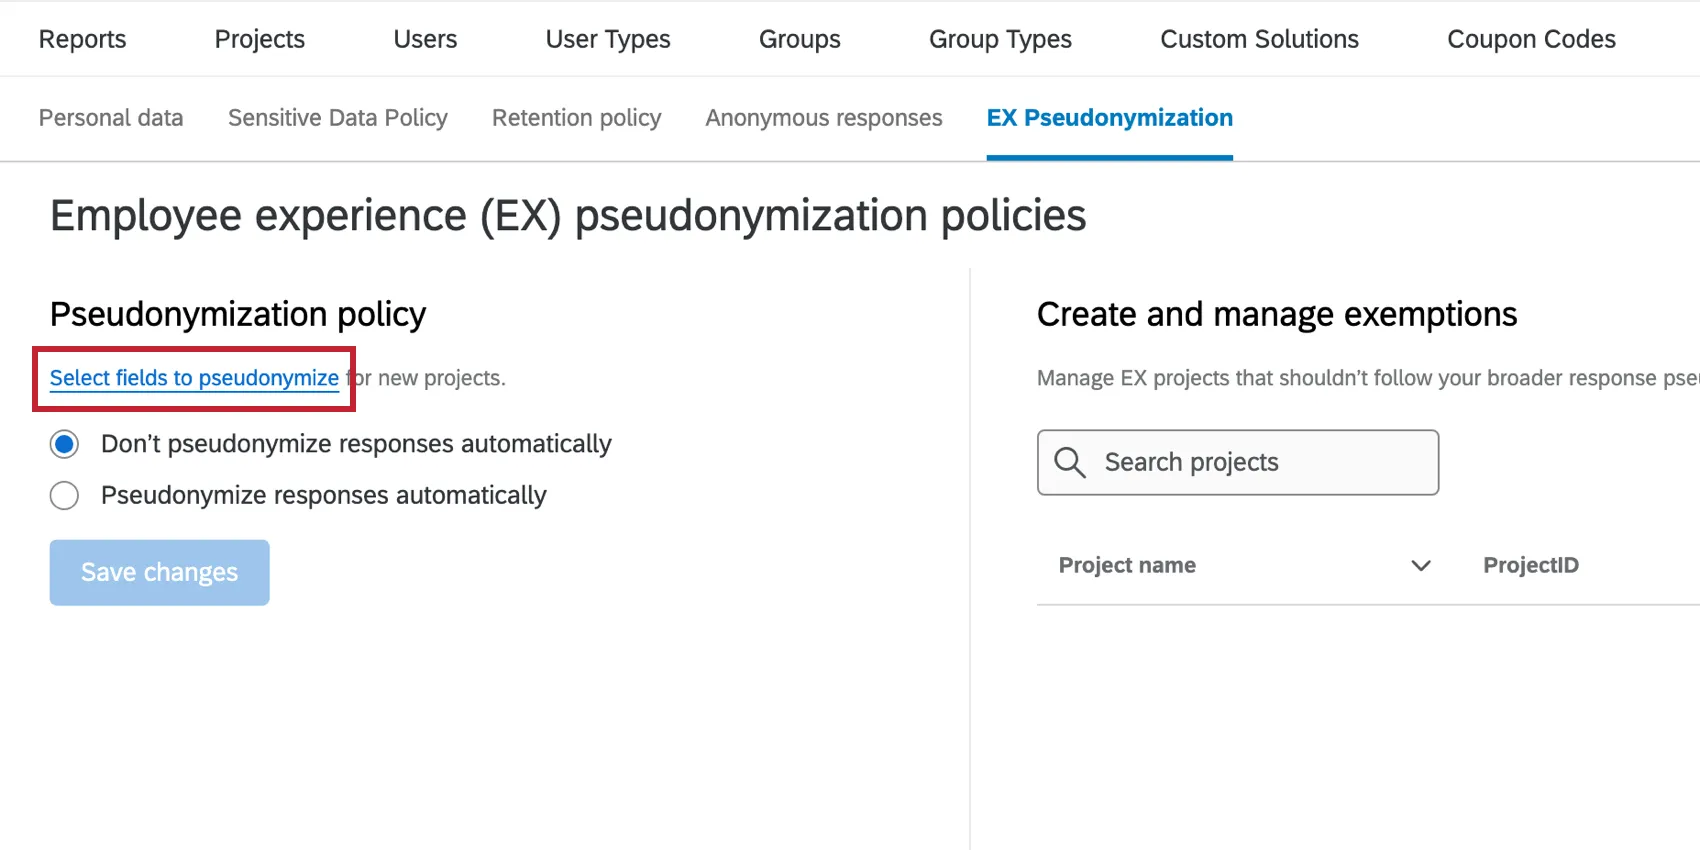
Once the pseudonymization policy is enabled, data from the default fields will be removed automatically. To pseudonymize additional fields, click Select fields to pseudonymize.
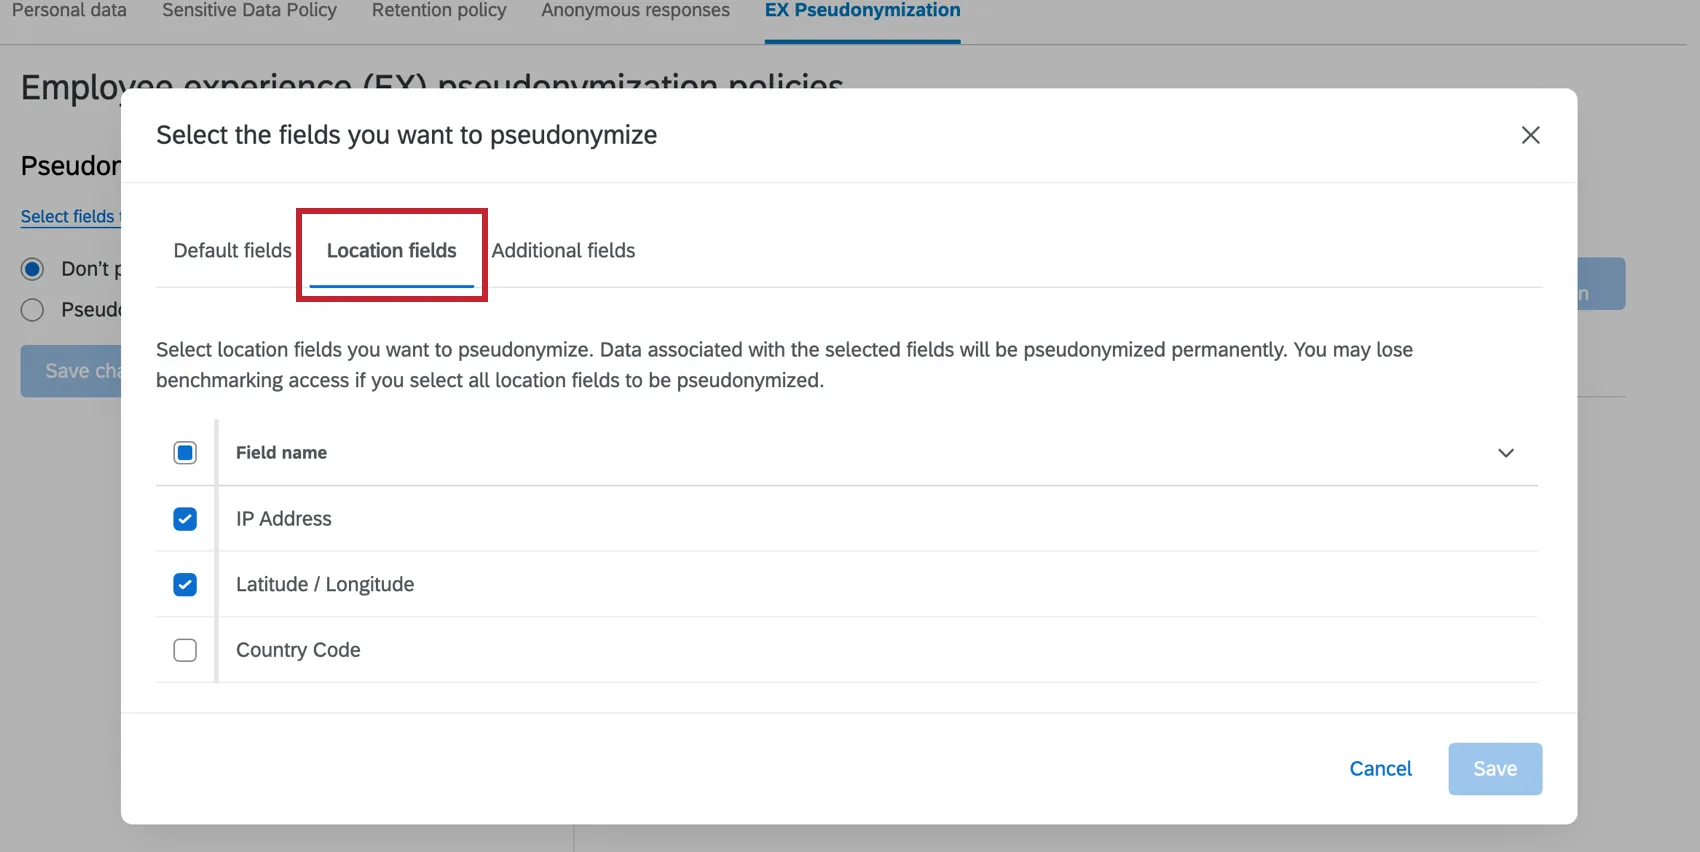
Select the Location Fields tab to pseudonymize location data. Be sure to keep at least one location field unselected in order to access benchmarking data.
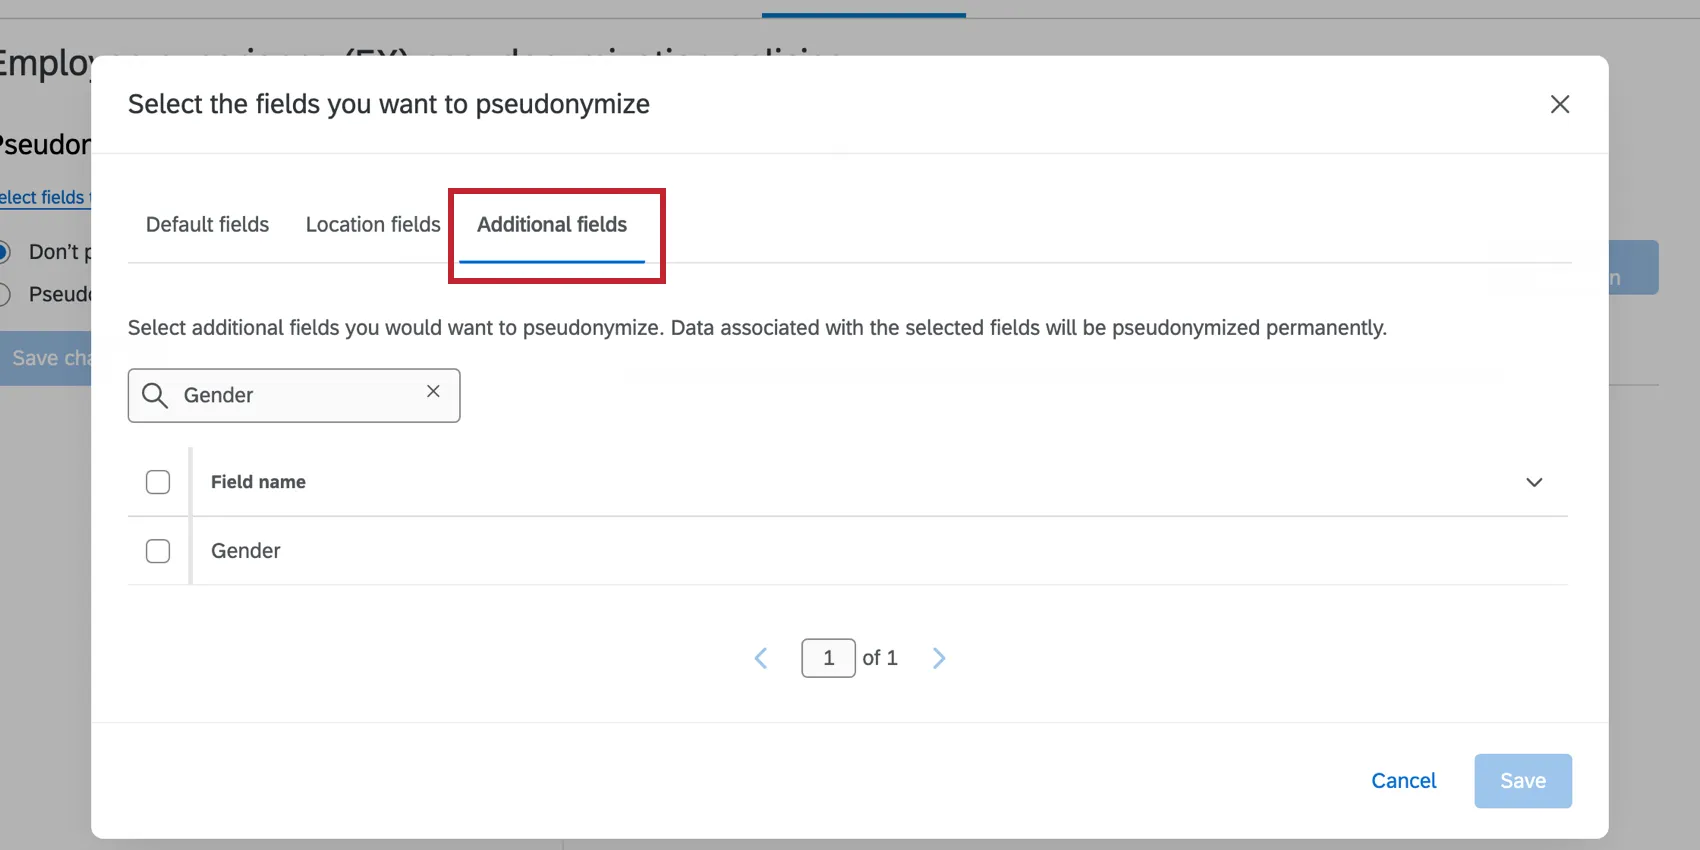
Select the Additional fields tab to select other fields to pseudonymize. Use the search bar to search for any participant metadata fields present in the employee directory.
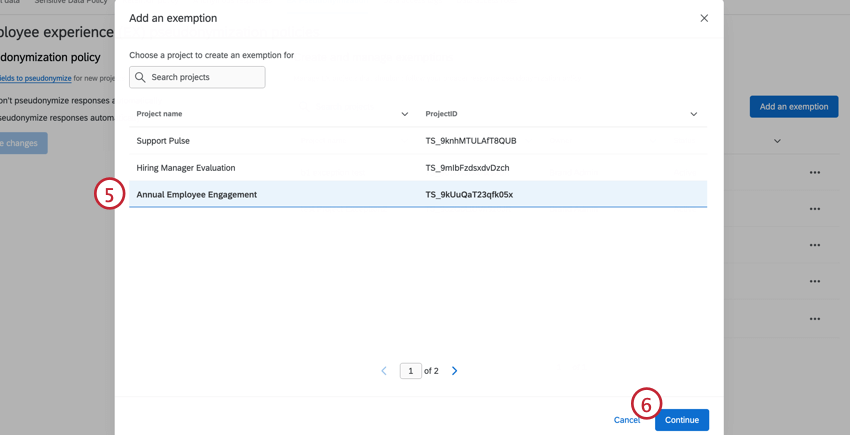
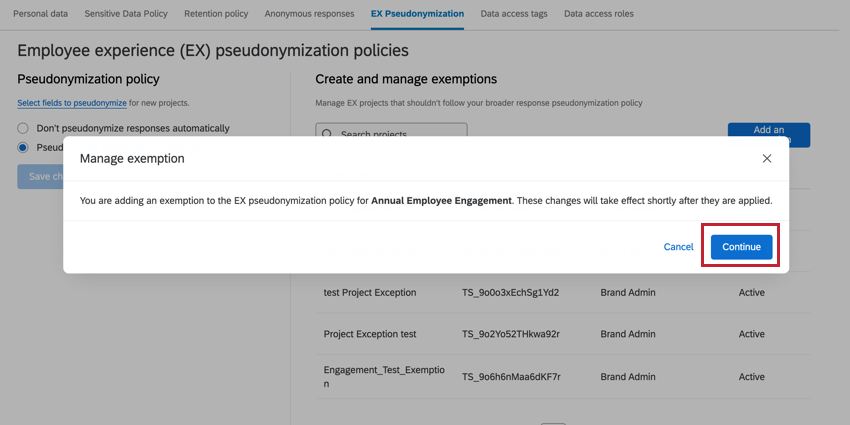
Exempting Projects from Pseudonymization Policy
Attention: These steps must be completed before activating the project. If a project has been activated, it cannot be added to the exemption list. To add an activated project to the exemption list, you will need to create a copy of the project and add it to the exemption list before activating it.
Attention: Pulse programs cannot be added to the exemption list.
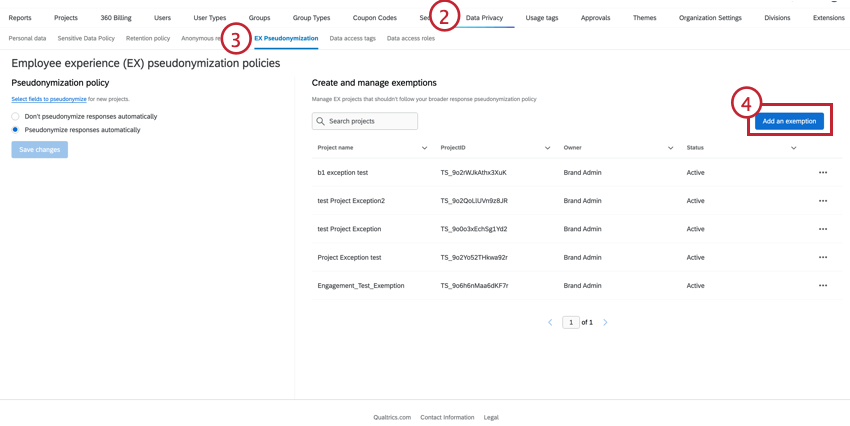
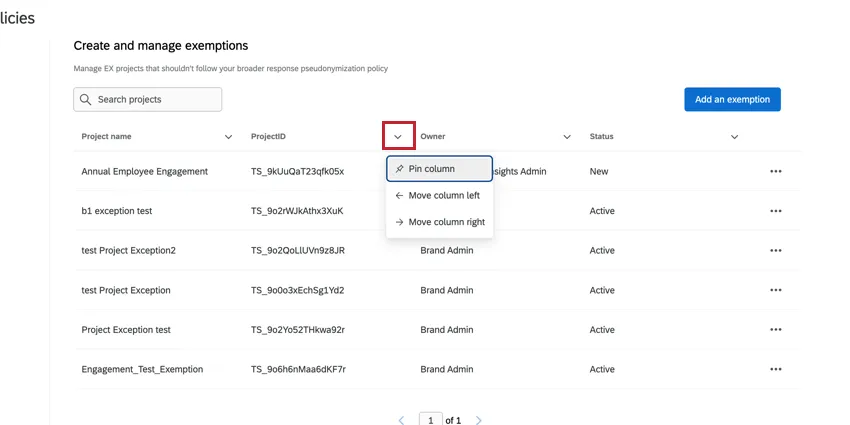
All exemptions are in the Create and manage exemptions table. To remove an exemption, click the three dot menu to the right of the project.
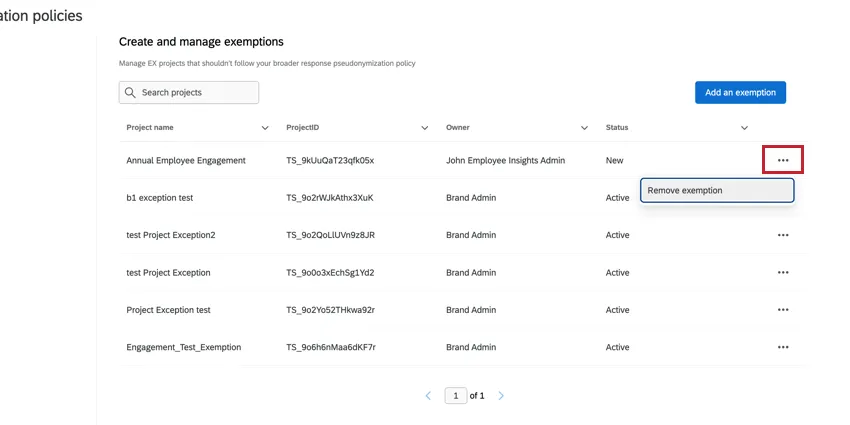
Attention: Exemptions cannot be removed for projects with an Active status.
EDITING THE EXEMPTIONS LIST
To edit the columns in the exemptions list, click the arrow to the right of the column title.
FAQs
What does pseudonymization of responses mean?
What does pseudonymization of responses mean?
Who within Qualtrics has access to mapping pseudonymized data to an individual employee?
Who within Qualtrics has access to mapping pseudonymized data to an individual employee?
That's great! Thank you for your feedback!
Thank you for your feedback!